| |
 08-31-2020, 06:18 AM
| #61 |
| Go Buckeyes!   Join Date: Jun 2017 Location: Mid-Ohio
Posts: 4,134
|
Here is a sneak peak! I got the body and weathering finished up yesterday. Just need to finish up the the grill and headlight lenses. I'm hoping to get some outdoor shots of it today or tomorrow.  |

|  |
| Sponsored Links | |
| | |
|
08-31-2020, 07:17 AM
| #62 |
| Quarry Creeper Join Date: Jul 2020 Location: Lincoln
Posts: 334
|
That looks really good. If I didnt already know, I wouldnt think that is a trail walker body. Sent from my iPhone using Tapatalk |
|
| |
|
08-31-2020, 07:40 AM
| #63 |
| Gold Star Baby!  Join Date: Dec 2017 Location: Las Vegas
Posts: 2,554
|
Wow looks awesome! Love the bow tie on the grill. Solid detail as always.
|
|
| |
|
08-31-2020, 10:57 AM
| #64 |
| I wanna be Dave Join Date: Aug 2016 Location: Orange County, CA
Posts: 3,643
|
This looks fantastic! So good that I don't know if I'd run it! LOL.
|
|
| |
|
08-31-2020, 01:46 PM
| #65 | |||
| Go Buckeyes! Join Date: Jun 2017 Location: Mid-Ohio
Posts: 4,134
| Quote:
 These bodies can be made to look great! Quote:
Yeah, I'm really happy with how the grill turned out! The Bowtie changed the whole look of it! Quote:
Yeah, that seems to happen with all the bodies I paint! I spend to much time on them and have a hard time putting the first scratch on them! | |||
|
| |
|
08-31-2020, 10:16 PM
| #66 | |
| Quarry Creeper Join Date: Jul 2019 Location: Torrance, CA
Posts: 211
| Quote:
O-H! Sent from my iPad using Tapatalk | |
|
| |
|
09-01-2020, 06:20 AM
| #67 | |
| Go Buckeyes! Join Date: Jun 2017 Location: Mid-Ohio
Posts: 4,134
| Quote:
| |
|
| |
|
09-01-2020, 03:07 PM
| #68 |
| Quarry Creeper Join Date: Aug 2009 Location: orange county
Posts: 313
|
WOW just Wow. I like love it. you want to sell it lmao I would totally run it. No shelf queens in my garage. lol
|
|
| |
|
09-01-2020, 05:49 PM
| #69 |
| RCC Addict Join Date: May 2009 Location: In the warmth!
Posts: 1,163
|
Looks fantastic!!
|
|
| |
|
09-02-2020, 06:26 AM
| #70 | ||
| Go Buckeyes! Join Date: Jun 2017 Location: Mid-Ohio
Posts: 4,134
| Quote:
No shelf queens here either! I build them to wheel, but as of late the "wheeling" has happened very often!I wish I lived closer to you and soze. I'd be out at CDM all the time! Love watching the vids you guys post up! Quote:
| ||
|
| |
|
09-02-2020, 10:19 AM
| #71 |
| Quarry Creeper Join Date: Aug 2009 Location: orange county
Posts: 313
|
Thanks! yeah It is a really fun place to run as well as ELMO. Where did you get the Grill if you don't mind me asking.
|
|
| |
|
09-02-2020, 01:51 PM
| #72 | |
| Go Buckeyes! Join Date: Jun 2017 Location: Mid-Ohio
Posts: 4,134
| Quote:
The Chevy Bowtie I 3D printed. I found a file on Thingiverse. It was much bigger, so I shrunk it down so that it would fit the Sendero grill. I then painted it metallic silver and then added Tamiya X-24 Clear Yellow in the center. I put the clear yellow on thick and let it flow in so that it would be thick when it dried. The clear yellow gave it that somewhat transparent look like the 1:1 emblem. It is held on with E6000. The Bowtie feels like it is on there pretty solid, so I'm hoping that it doesn't fall off! If it does, I'll just print another one! | |
|
| |
|
09-06-2020, 08:24 AM
| #73 |
| Go Buckeyes! Join Date: Jun 2017 Location: Mid-Ohio
Posts: 4,134
|
I finally had a chance yesterday to pull the Trailwalker out of the garage and get some outdoor pics. This was my very first time at weathering a body and it was fun learning the different processes of weathering. I didn't go crazy on the sanding because I really wasn't sure how much paint I wanted to remove, so I ended up lightly sanding to give it a lightly weathered look. I added a little bit of rust streaks on certain parts of the body also. So in the end, I'm happy with how it turned out. I wanted to try and re-create the Chevy truck I used to own and I think it looks pretty good for being a generic looking truck body. It's not perfect, but as it gets more trail and rock time, it should get some natural weathering added to it. It was hard to get good pics of the weathering, so be warned this post will be pic heavy as I took a lot pics to try and show off the weathering.      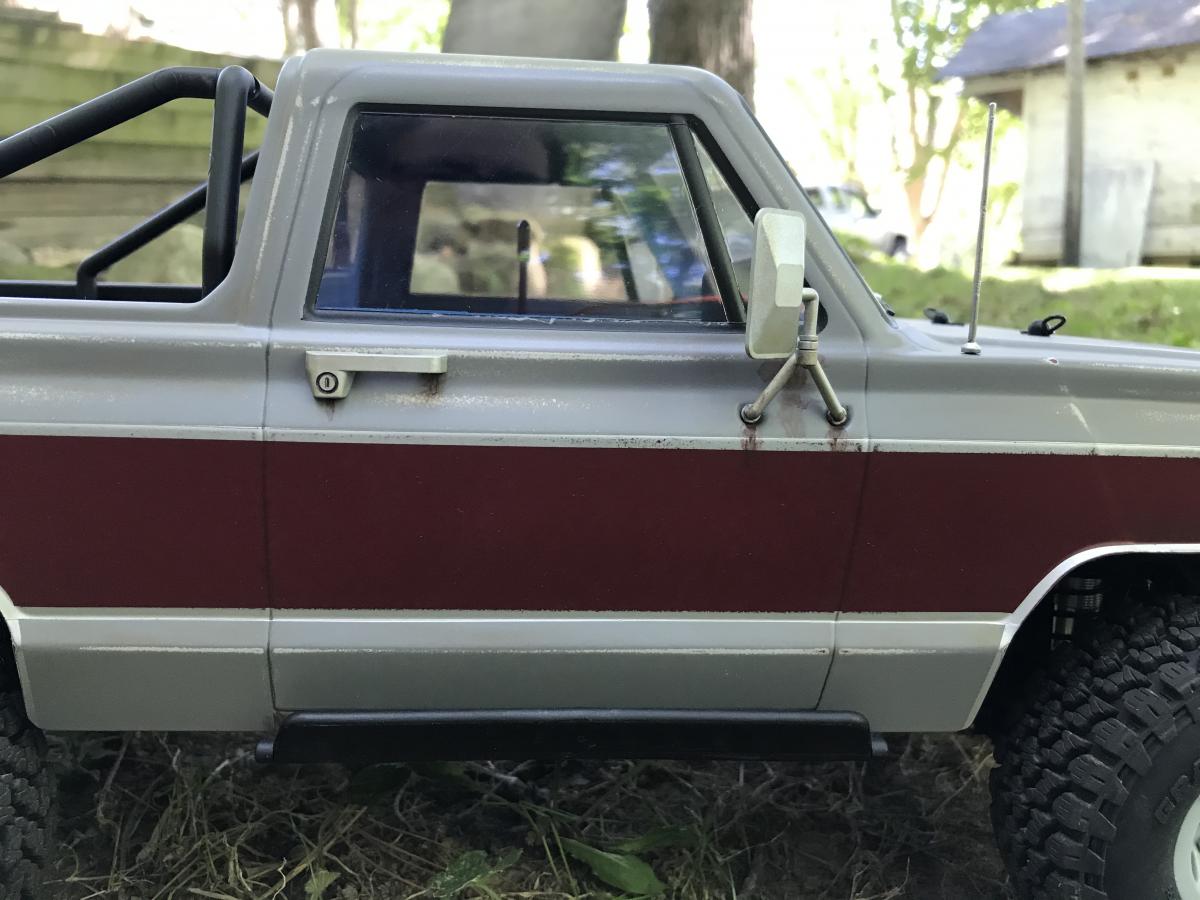   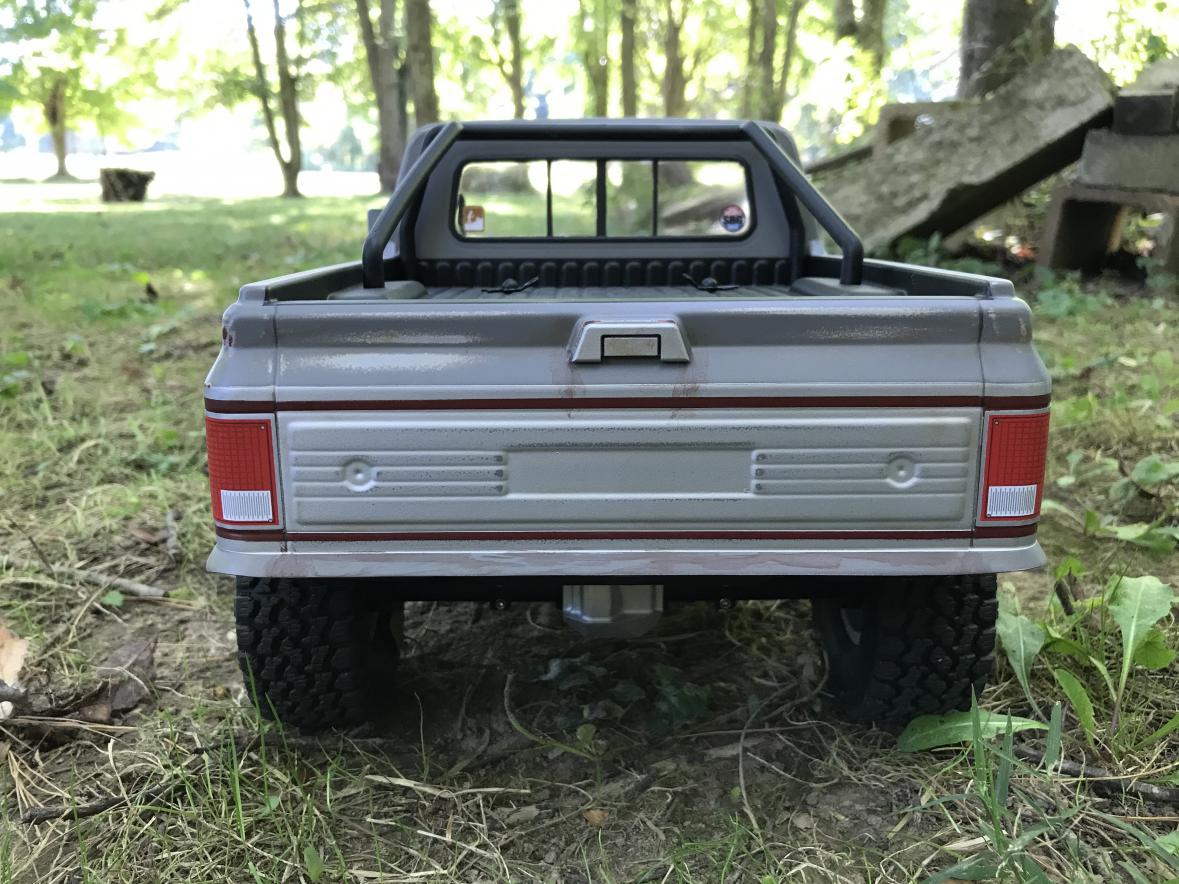  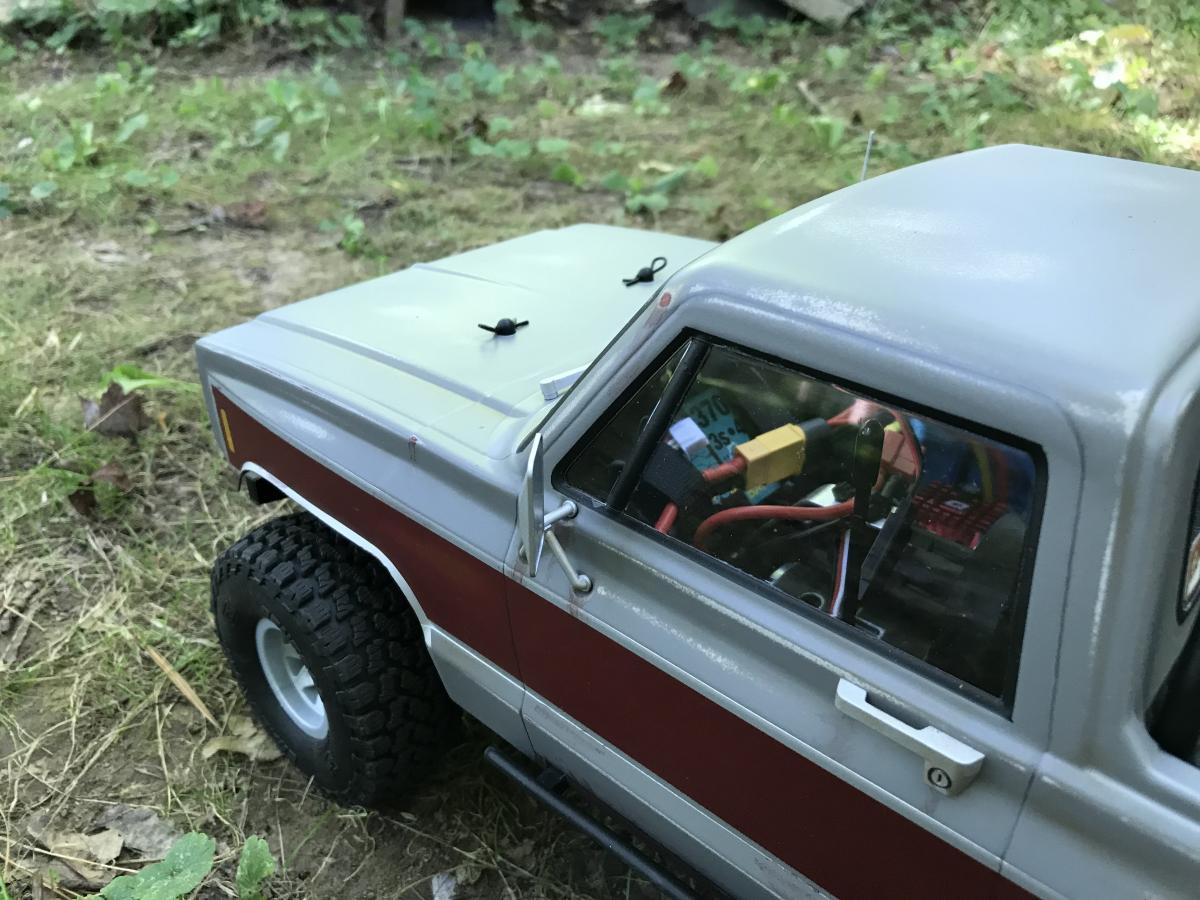      I still need to come up with a Chevrolet badge for the tailgate. I'm not sure if I want some kind of decal or try to design a 3D printed badge. Also, not sure if I want to keep the wheels or swap them out for a set of alum beadlocks. I kinda like the look of the stock wheels and thought about just painting them. Oh and I need to come up with some kind of interior too! |
|
| |
|
09-08-2020, 07:47 PM
| #74 |
| Go Buckeyes! Join Date: Jun 2017 Location: Mid-Ohio
Posts: 4,134
|
I picked up a set of Club5 Racing "Husky Link" rear links made for the Trailrunner. These are nice beefy stainless steel links with the same type of rod ends that the Axial Capra uses.  I decided to install the links with the bend near the skid plate like Club5 recommends. Normally the bend would go towards the axle, but I didn't like how the driveshaft was exposed in this configuration. I did try to mount the links with the bend towards the rear axle, but since most of the driveshaft was exposed, I couldn't see how this would help with clearance and didn't want the driveshaft catching on the rocks and possibly getting damaged. With the bend installed towards the skid it helps protect the driveshaft and still gives more clearance than the stock straight links.   Since the top links are bent up into the chassis more than the stock links, I had to remove the 3D printed chassis brace that I had mounted to stiffen up the chassis. I will be adding another chassis brace in the future once I decide on a different style brace that will allow the top links to fully compress without hitting the brace.  I also added a piece of fuel tubing to the front and rear shock shafts. I did this to keep the tires from rubbing the body when the suspension gets fully compressed. I did not want to cut any more of the fenders out as I am happy with how the fenders currently look. I added a 7mm piece to the front shocks and a 8mm piece to the rear shocks.  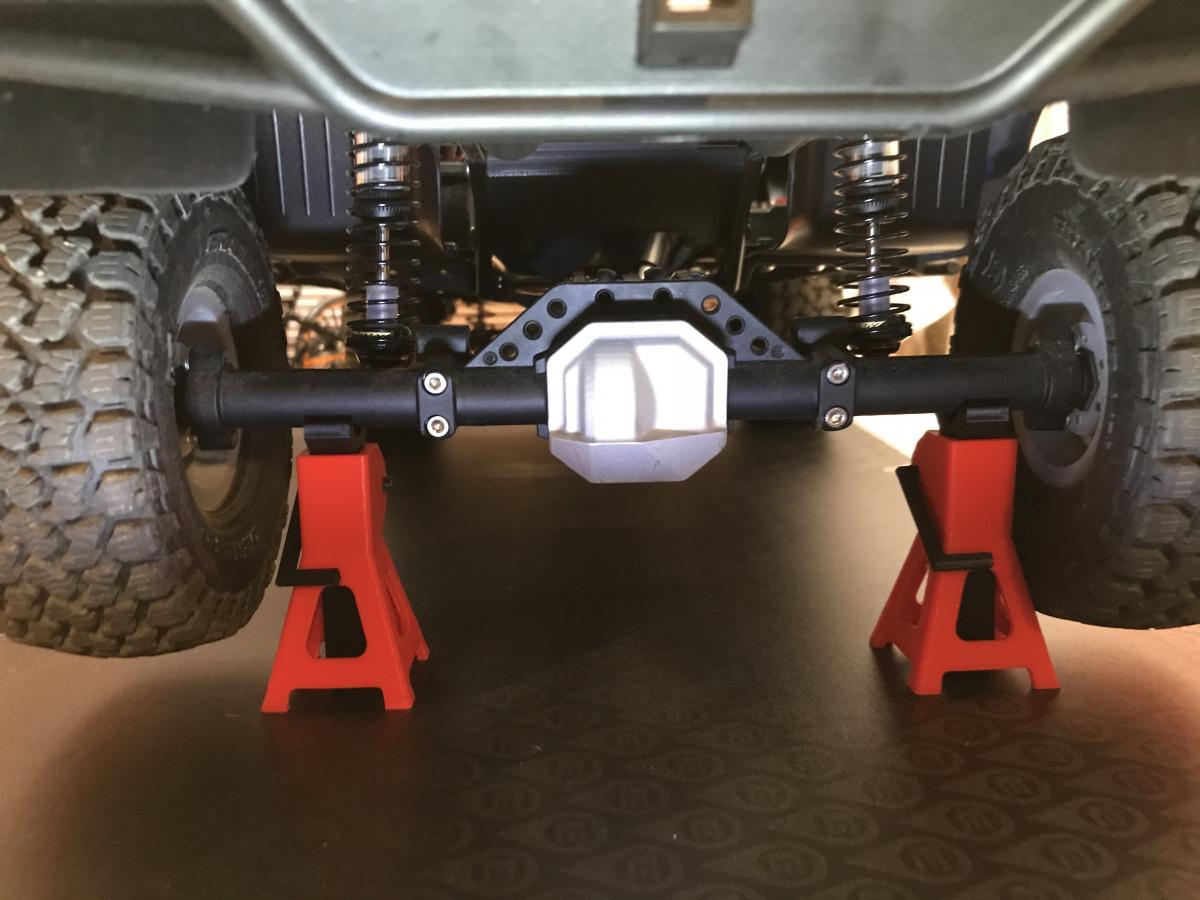 Here is a look with the suspension fully compressed. The tires just clear the fenders and still give plenty of flex. Too much flex is never a good thing!   Took it out on my test rocks to check the suspension flex. It seemed to have plenty of suspension travel and felt really stable. It was nice to NOT hear the tires rubbing on the body!    |
|
| |
|
09-08-2020, 07:55 PM
| #75 |
| I wanna be Dave Join Date: Aug 2016 Location: Orange County, CA
Posts: 3,643
|
Hey Brian, I'll give you my file for the mid-chassis brace.
|
|
| |
|
09-08-2020, 08:09 PM
| #76 | |
| Go Buckeyes! Join Date: Jun 2017 Location: Mid-Ohio
Posts: 4,134
| Quote:
I wasn't sure if the one you designed worked out for you. I checked on Thingiverse but didn't see it. I've been struggling to find time to get better at Fusion 360! I really need to sit down and get good at it so I can start making my own parts! Oh yeah, definitely agree with you on the links. The bend works out better near the skid. There was way too much driveshaft exposed! | |
|
| |
|
09-08-2020, 08:11 PM
| #77 | |
| I wanna be Dave Join Date: Aug 2016 Location: Orange County, CA
Posts: 3,643
| Quote:
Here's what I found out. If your shocks are in stock position then the bend at the skid works out good. If your shocks are leaned and allows your axle to be compressed more than the stock setup does, then the bend works better at the axle. | |
|
| |
|
09-08-2020, 08:14 PM
| #78 |
| Quarry Creeper Join Date: Jul 2020 Location: Lincoln
Posts: 334
|
Another option for a brace near that area is a battery tray mount. It bolts right in. Hey Snoze, how about when the shocks are mounted to the lower link location? Sent from my iPhone using Tapatalk Last edited by Phyro; 09-08-2020 at 08:17 PM. |
|
| |
|
09-08-2020, 08:18 PM
| #79 | |
| I wanna be Dave Join Date: Aug 2016 Location: Orange County, CA
Posts: 3,643
| Quote:
My IFS Trailwalker runs with the shocks moutned at the lower link location. The bend still clears in this setup. When you allow the axle move up higher you will start to see the bend contact each other when you compress 1 side at a time. | |
|
| |
|
09-08-2020, 08:26 PM
| #80 |
| I wanna be Dave  Join Date: Dec 2005 Location: Happiness is a warm AK.
Posts: 12,563
|
Holy crap B!😲 Its hard to believe thats the stock Trailwalker body! Nice work! Looks a 100 times better in this configuration! |
|
| |
 |
 B-MOW's IFS Trailwalker - Similar Threads
 | ||||
| Thread | Thread Starter | Forum | Replies | Last Post |
| B-MOW's Enduro Journey! | B-MOW71 | Element RC 1/10 Enduro Trail Truck Sendero | 243 | 04-08-2024 08:22 AM |
| B-MOW's VS4-10 Origin Limited | B-MOW71 | Vanquish Products VS4-10 Origin | 40 | 09-15-2023 06:18 AM |
| Ebbet's Trailwalker | ebbet | Element RC 1/10 Enduro Trail Truck Sendero | 27 | 09-16-2020 10:13 AM |
| Element Trailwalker | jeeptec | General Crawlers | 7 | 12-26-2019 07:00 AM |
| Thread Tools | |
| Display Modes | |
| |


 Linear Mode


