| |
| |||||||
 |
| | LinkBack | Thread Tools | Display Modes |
 01-14-2021, 09:30 AM
| #1 |
| Newbie Join Date: Jun 2020 Location: rc van down by the river
Posts: 36
|
Hey guys, I figured I'll share a few pics and stuff about my 1st crawler build. I've scoured a bunch of content here for info but have a few direct questions I'd like to ask as well: Bought the Gatekeeper aluminum panhard mount. https://www.amainhobbies.com/element...42255/p1271189 - I believe I'll need a different set of shock mounts to accommodate this? Any recommendations? Kind of surprised how much play is in the the upper shock mount/balls. I've a set of the steel shock ball mounts coming. Other than that, great build. (Though I think some of the manual could use improving.) https://www.instagram.com/p/CKAi8IdsT4L/ |

|  |
| Sponsored Links | |
| | |
|
01-14-2021, 10:41 AM
| #2 |
| RCC Addict Join Date: Aug 2020 Location: Jacksonville
Posts: 1,315
|
I've beat the tar out of mine and haven't had any problems with the plastic balls yet. I'm seeing how far I can go before I break something. Looking forward to your build, Enduros are neato.
|
|
| |
|
01-15-2021, 03:59 AM
| #3 | |
| Pebble Pounder Join Date: Jan 2017 Location: @scaleobsession on instagram
Posts: 155
| Quote:
| |
|
| |
|
01-15-2021, 10:14 AM
| #4 |
| Slow is the new Fast   Join Date: Nov 2013 Location: Winterpeg
Posts: 2,898
|
I havent tried mounting the Gatekeeper panhard mount with my Enduro as I have upgraded the original design to aluminum. Can you not just cut the plastic panhard mount off of the plastic shock tower and sand it to fit ? I imagine that in a short time Element will release a newer shock tower for the Enduro to mate with the Gatekeeper panhard. It should become the standard issue. Welcome to RCC Bad Andy! Enduros rule!  |
|
| |
|
01-15-2021, 11:46 AM
| #5 | |
| Newbie Join Date: Jun 2020 Location: rc van down by the river
Posts: 36
| Quote:
The upper shock ball looseness I refer to is more a tolerance thing. I get the need for the shock the pivot up there but the balls are too small and quite loose already. We'll see how the steel ones feel soon. | |
|
| |
|
01-15-2021, 04:06 PM
| #6 |
| RCC Addict Join Date: May 2009 Location: In the warmth!
Posts: 1,163
|
I screwed the mount, (back screw) with a longer screw to the front shock mount hole. Then drilled a hole through the chassis rail for the front screw. You can use a spacer (same thickness as shock tower mount) between the mount and the rail so it's even. Works and hasn't been a problem. Or........ you could just drill two holes in the rail for the panhard mount on either side of the front shock mount. Or........ GPM makes these......  Last edited by Robotboy; 01-15-2021 at 04:18 PM. |
|
| |
|
01-19-2021, 10:45 AM
| #7 |
| Newbie Join Date: Jun 2020 Location: rc van down by the river
Posts: 36
|
Still waiting for usps to finish handling my shiny new balls. In the meantime, I'm working up a custom grill. It seems there's some overall contention as per the general likeability of the TrailWalker grill, right? So I'm flipping, and chopping and came up with: https://www.instagram.com/p/CKL-rmKMqvr/ So the Kyosho Outlaw grill fits almost perfectly for height & depth... using some spares and busted bits - I think it's got merit. 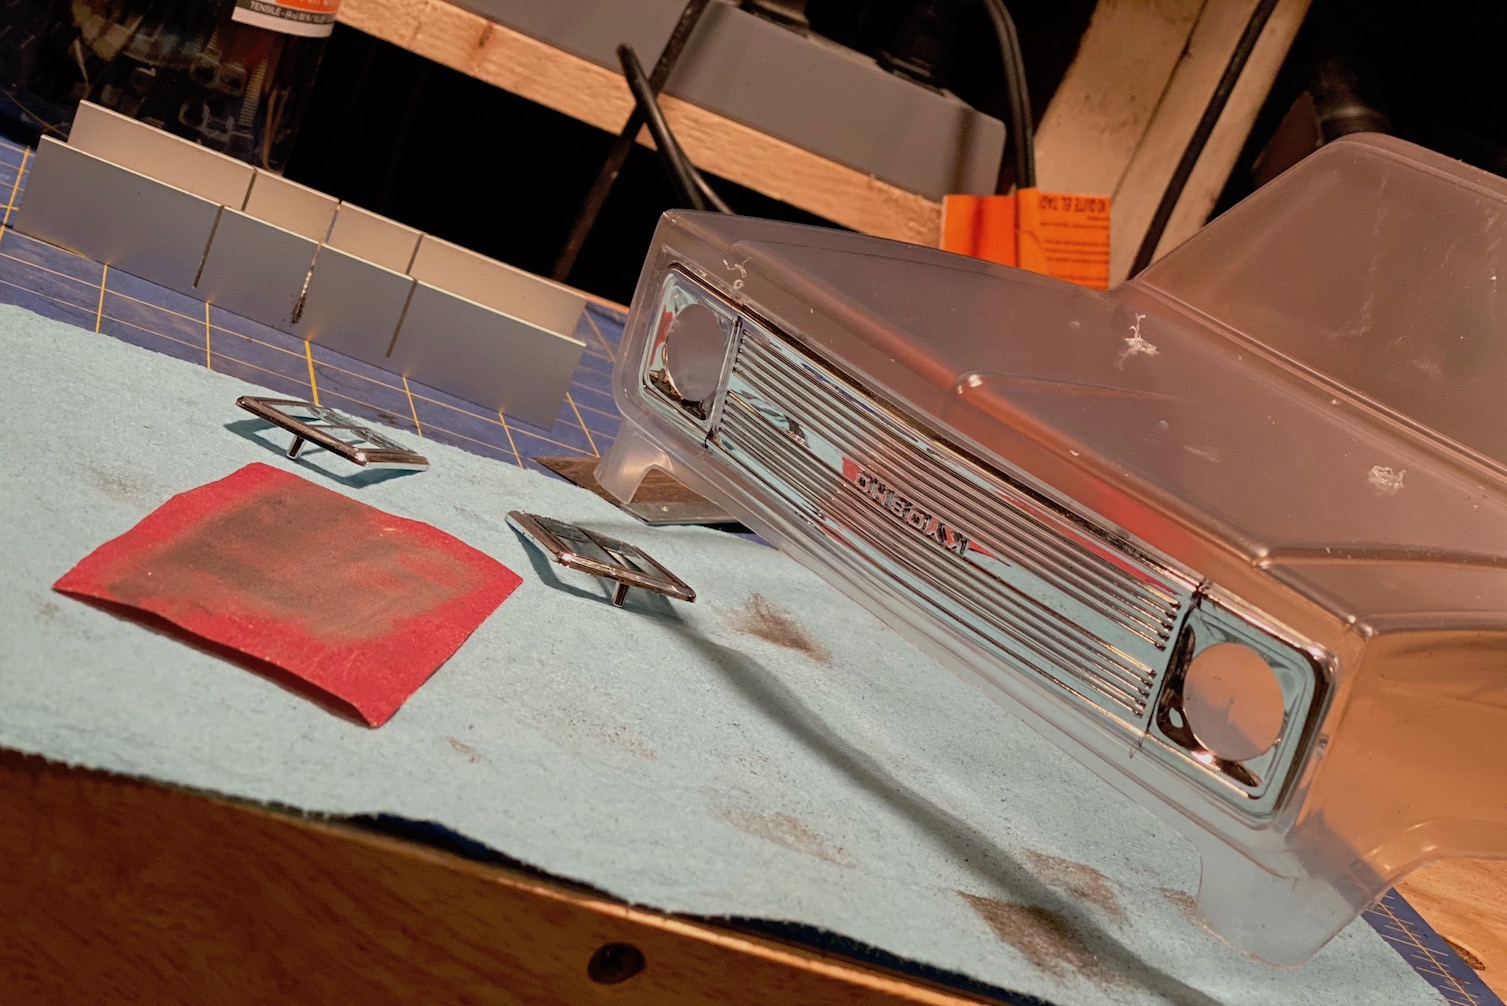 more pics at my BARC IG! Last edited by bad andy; 01-20-2021 at 08:40 AM. |
|
| |
|
01-20-2021, 09:08 AM
| #8 |
| Newbie Join Date: Jun 2020 Location: rc van down by the river
Posts: 36
|
So moving along... I've added the club5racing 8-high clearance links : "Husky Link" Hi-Clearance Suspension 8 Links Setup for Enduro Sendero - Club 5 Racing These don't come with any instructions, only a few pics on the site to refer to. I'm utterly confused and have one extra link remaining, lol. There are no pics of the front setup on the site, the "(2) front upper links" is confusing. - the enduro kit only uses one front upper link, and a panhard link. So I've installed one front upper link and I've got an extra apparently, that I can't seem to determine where it should go. Any ideas? The extra front upper link is 123mm long w/rod ends installed. It's one of the 2 shortest on the right here, starting at 100mm unbuilt. 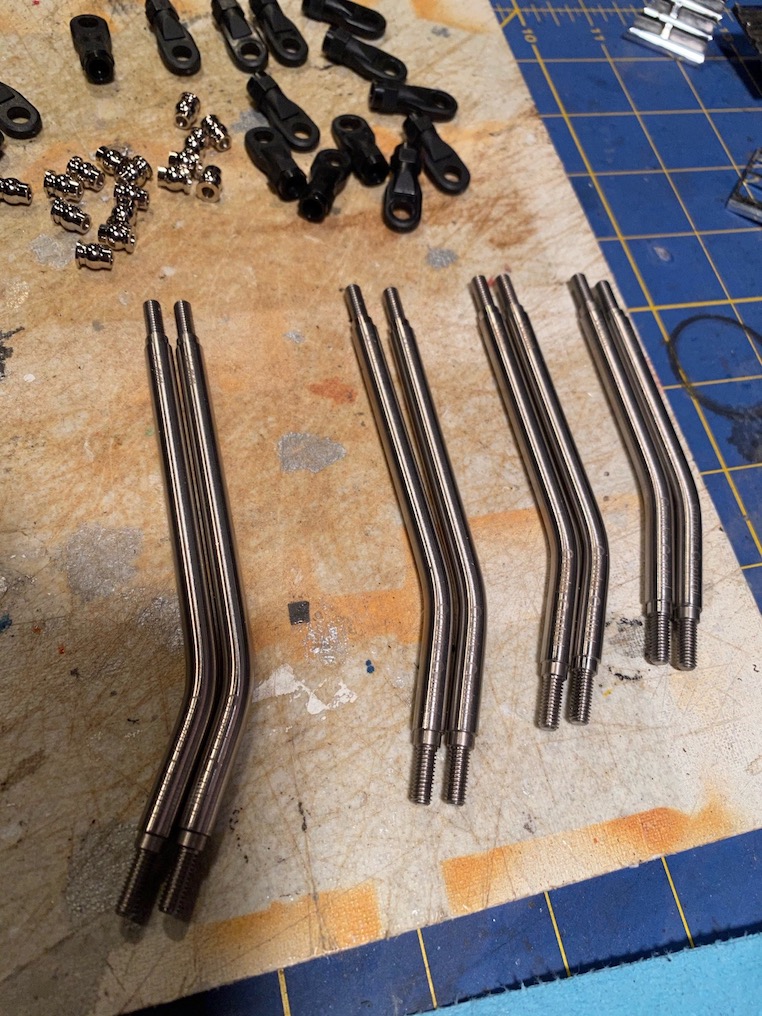 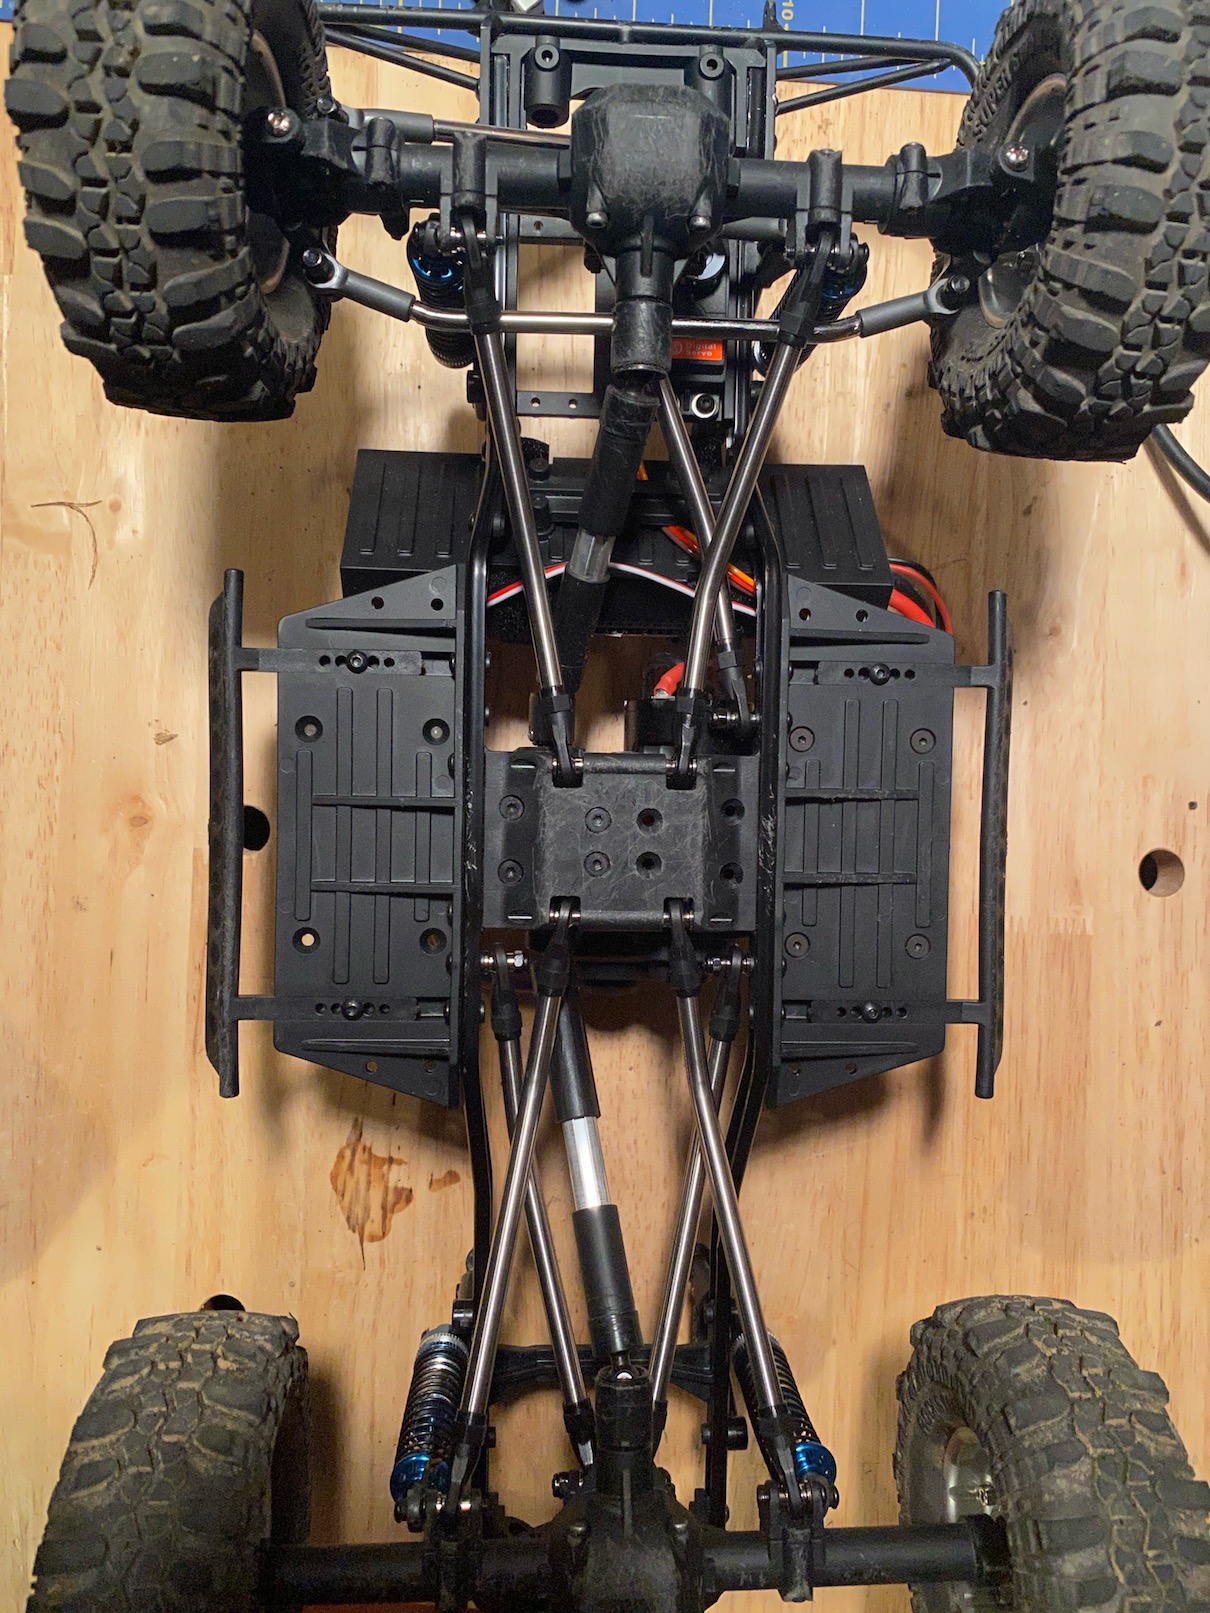 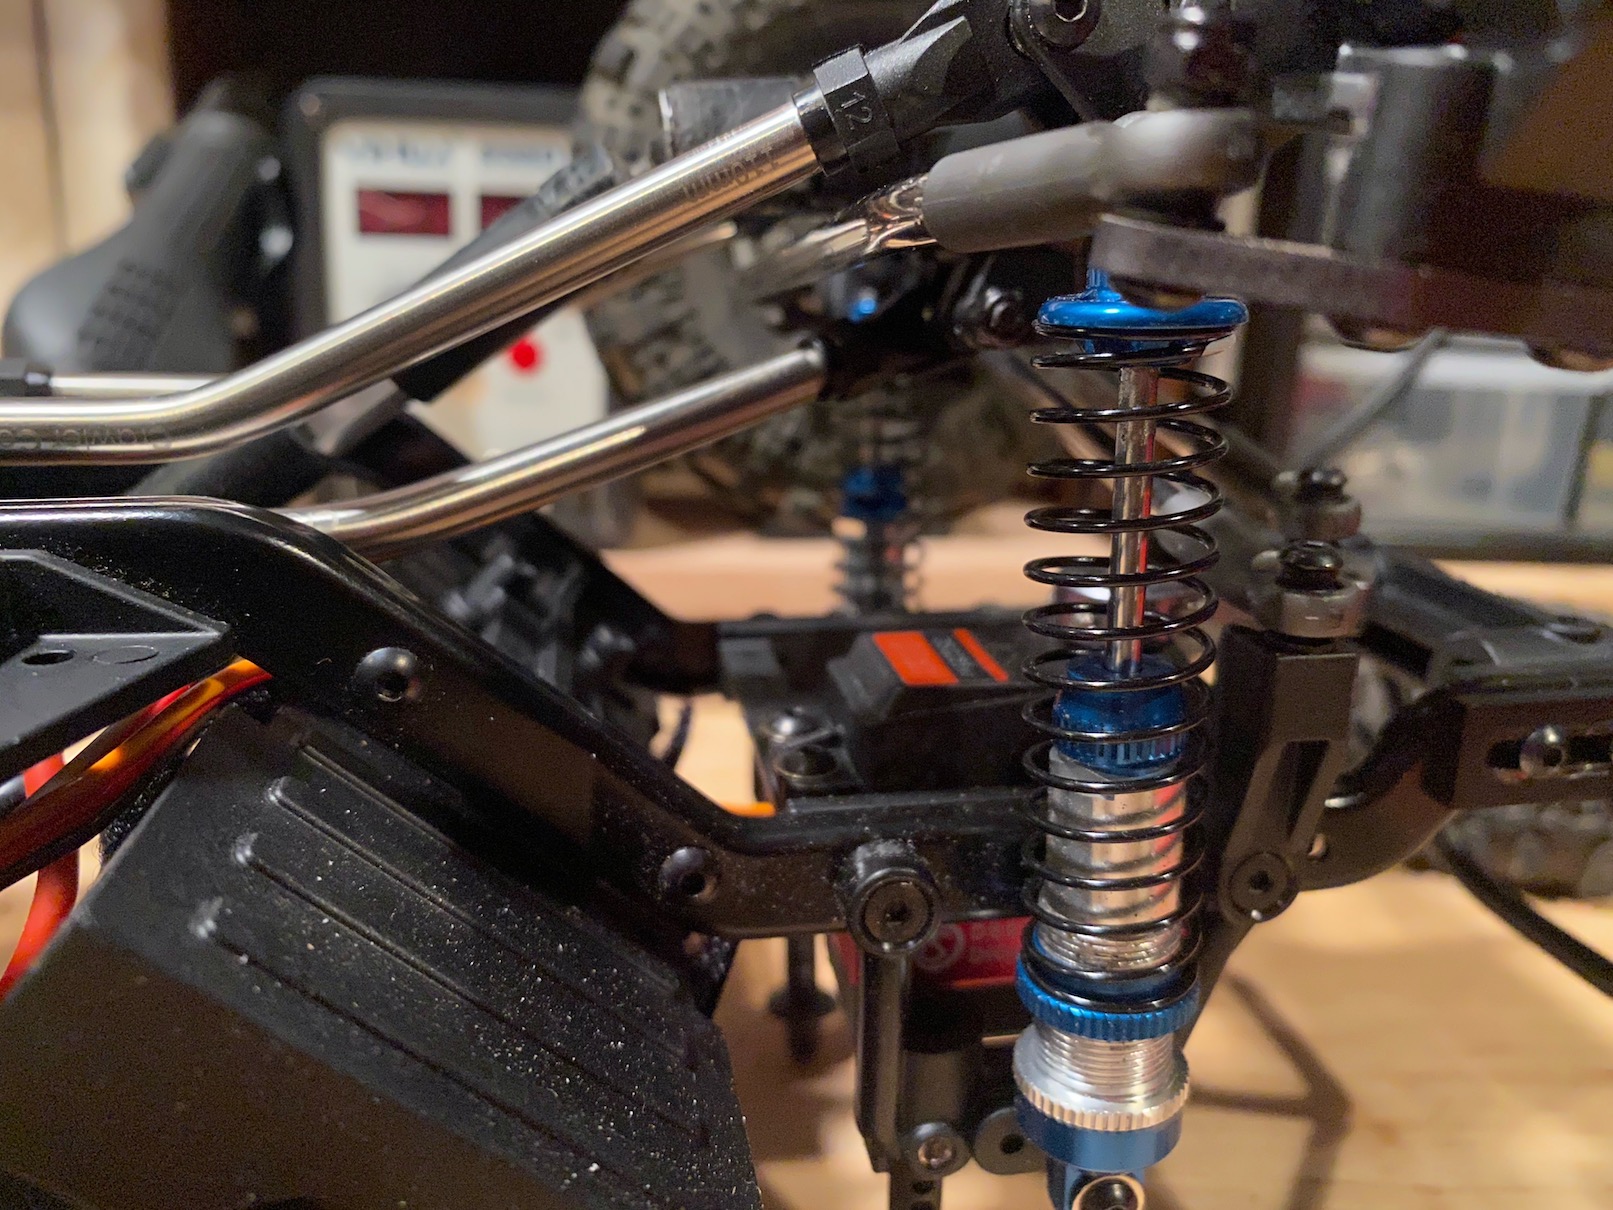 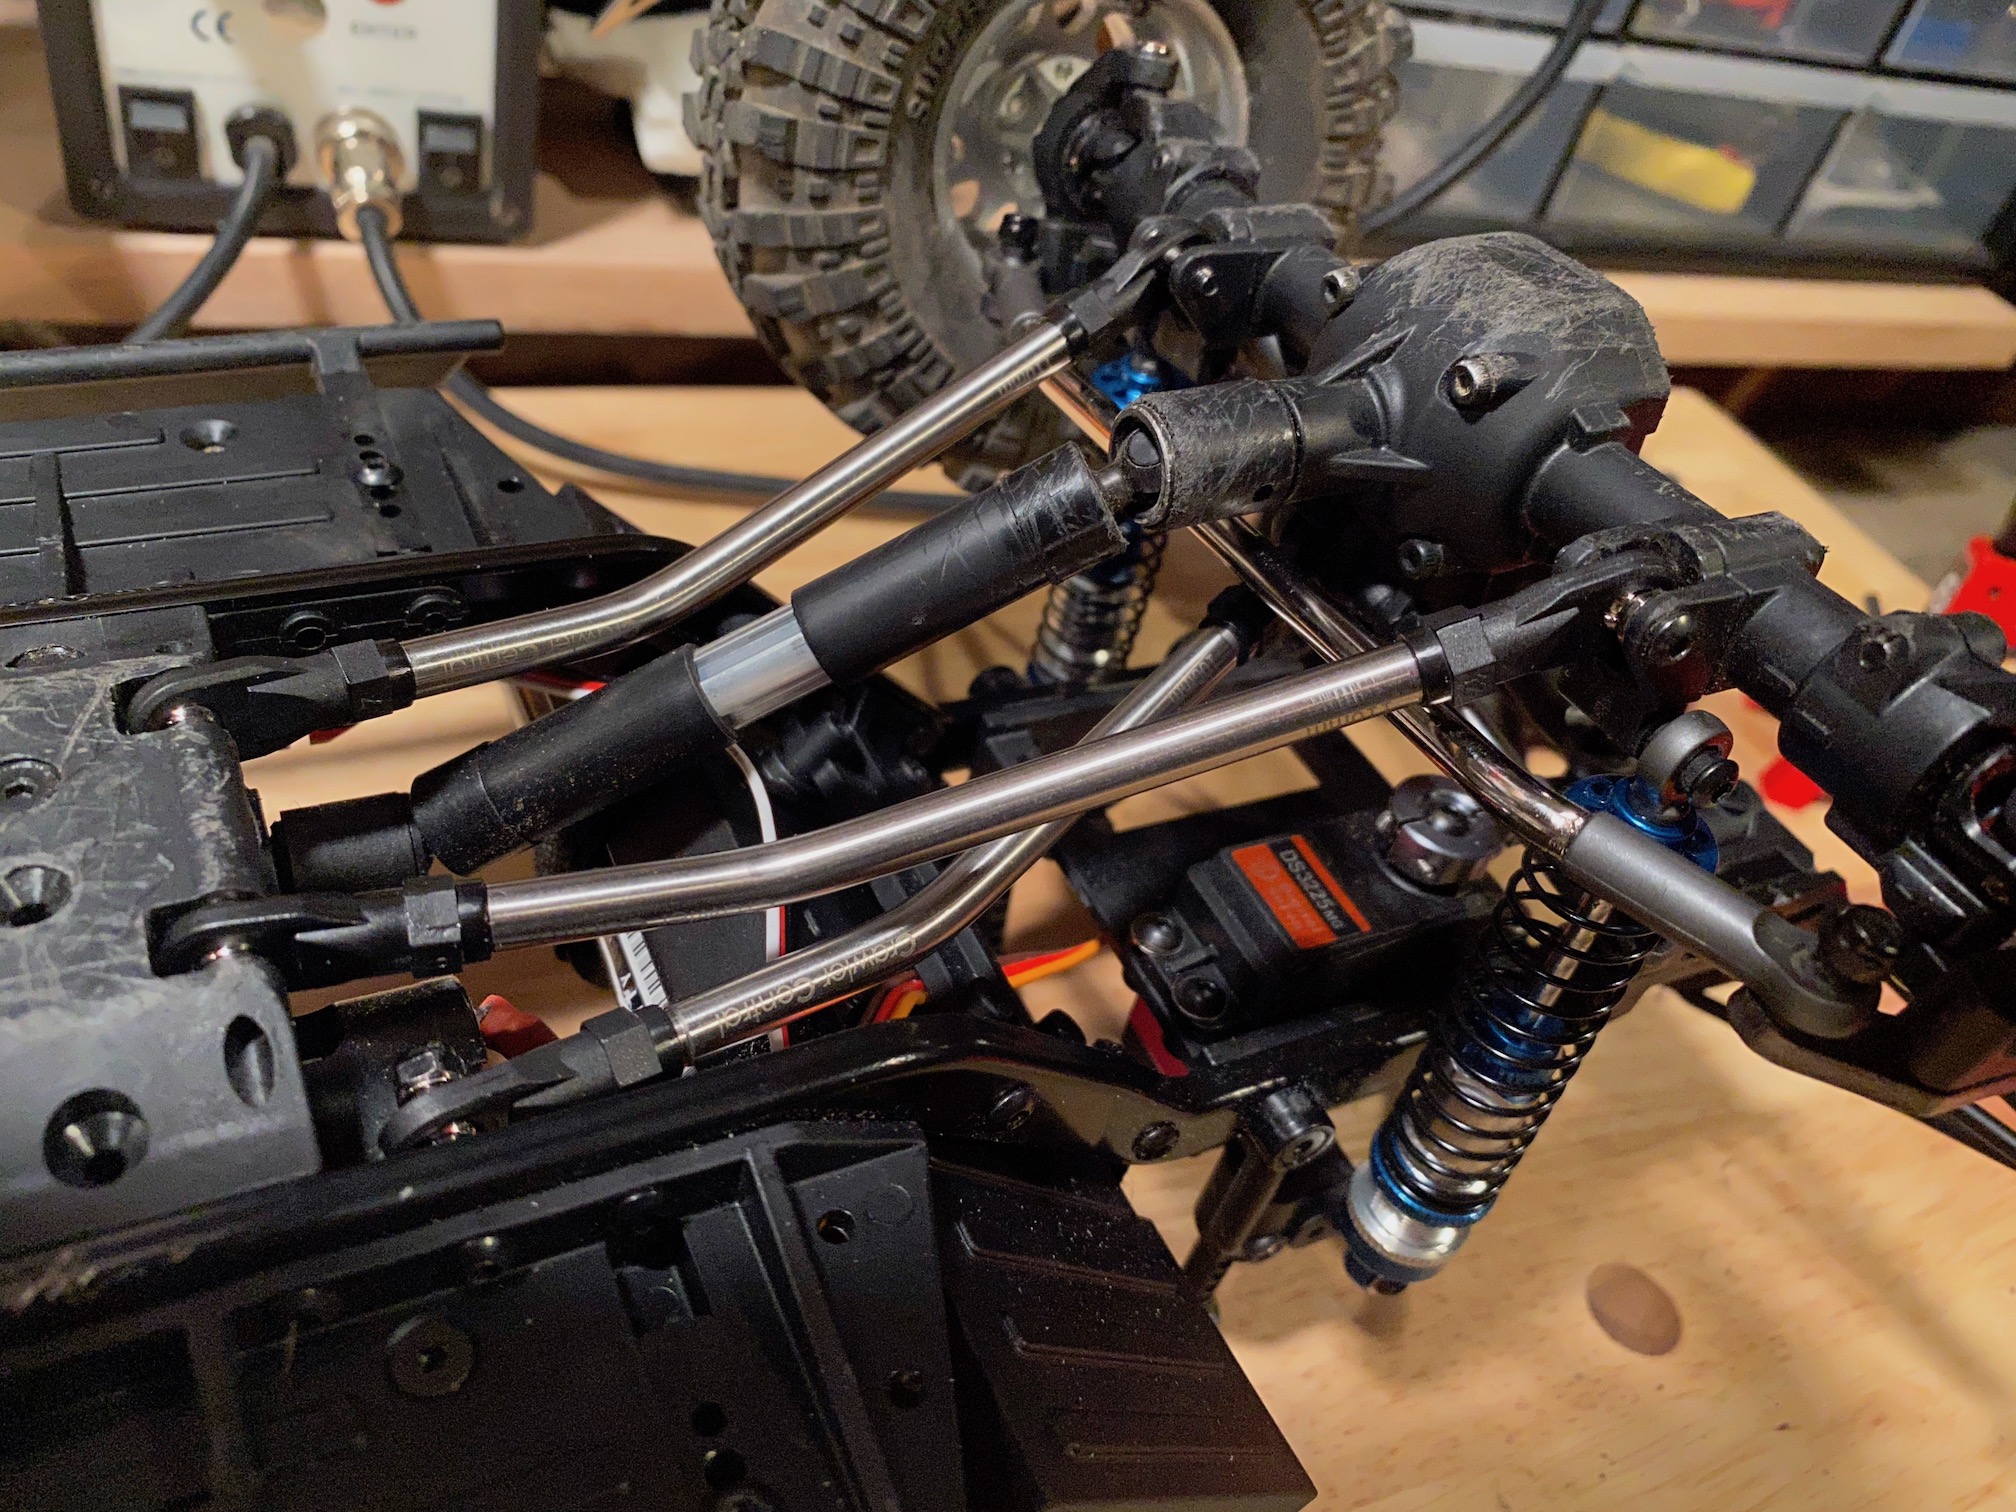 |
|
| |
|
01-20-2021, 09:43 AM
| #9 |
| RCC Addict Join Date: May 2009 Location: In the warmth!
Posts: 1,163
|
Coming along nicely Good choice grabbing those links. |
|
| |
|
01-20-2021, 08:00 PM
| #10 |
| RCC Addict Join Date: Jan 2019 Location: Corvallis, OR
Posts: 1,560
|
The panhard mount bolts on either side of the front hole on the front shock tower. You can just cut the stock panhard mount off the shock tower, or get a rear shock tower and use it on the front (upgrade to hard plastic shock towers maybe?). It requires two holes to be drilled into the frame, as well as some trimming of the servo mount. See pictures below. Also, I believe the short end of the bent links mounts to the axle side.   |
|
| |
|
01-21-2021, 04:11 PM
| #11 |
| Newbie Join Date: Jun 2020 Location: rc van down by the river
Posts: 36
|
Thanks guys. I haven't worked on the panhard mount yet, but will get to it. Santamazon dropped by today with some winch supplies, shackles, light bar. Concerning the club5 links, I've seen some contention over which way to mount them. I've gone with the way shown on the site, which is taller portions closer to the center of the vehicle. In my mind this seems good, as it creates a larger area of clearance directly under the car. Mounting this way also still provides protection for the driveshafts as the links angles follow a similar path. Also I dunno, it looked right to me.
|
|
| |
|
01-24-2021, 09:03 AM
| #12 |
| Newbie Join Date: Jun 2020 Location: rc van down by the river
Posts: 36
|
I'll post some content later but I've made some cool progress: - gatekeeper alu panhard installed - metal shock mount balls installed - servo converted/servo winch installed (so cool) - light bar mount figured out - new rims and tires ...let me ask about foams. My truck is just under 6lbs without body at the moment. Some trucks are much much heavier. I got a set of axial BFG km2 tires and the foams with those are pretty hard so my truck isn't flexing them much, if at all. Compared to the foams inside my amazon super swamper knockoffs, and also the foams inside a set of duratrax 1.9 approach tires seem a much better fit for my truck's weight. So... is there some guidance per foams/products and truck weight out there? Possibly a handy dandy chart of some kind? I can see how foams can be a crucial selection per terrain and style of driving (much like PSI is to 1:1 tires) With the above mostly sorted, I'm able to focus back on the body/cosmetics a bit more. Paint always takes me forever. Last edited by bad andy; 01-24-2021 at 12:04 PM. |
|
| |
|
01-25-2021, 08:49 AM
| #13 |
| Newbie Join Date: Jun 2020 Location: rc van down by the river
Posts: 36
|
added pics: Found a light bar with the look I wanted, and a width that would work within the scalerfab rear bars I'm adding. Knowing the included metal light mount tabs wouldn't work out I devised pretty slick mount. Some m3 bolts, some spare metal flanged bushings, some aluminum tube cut to fit, and 2 pieces of nitro fuel tubing, and 2 spare shock ends. The fuel tubing applies pressure and holds the light bar angle pretty well. 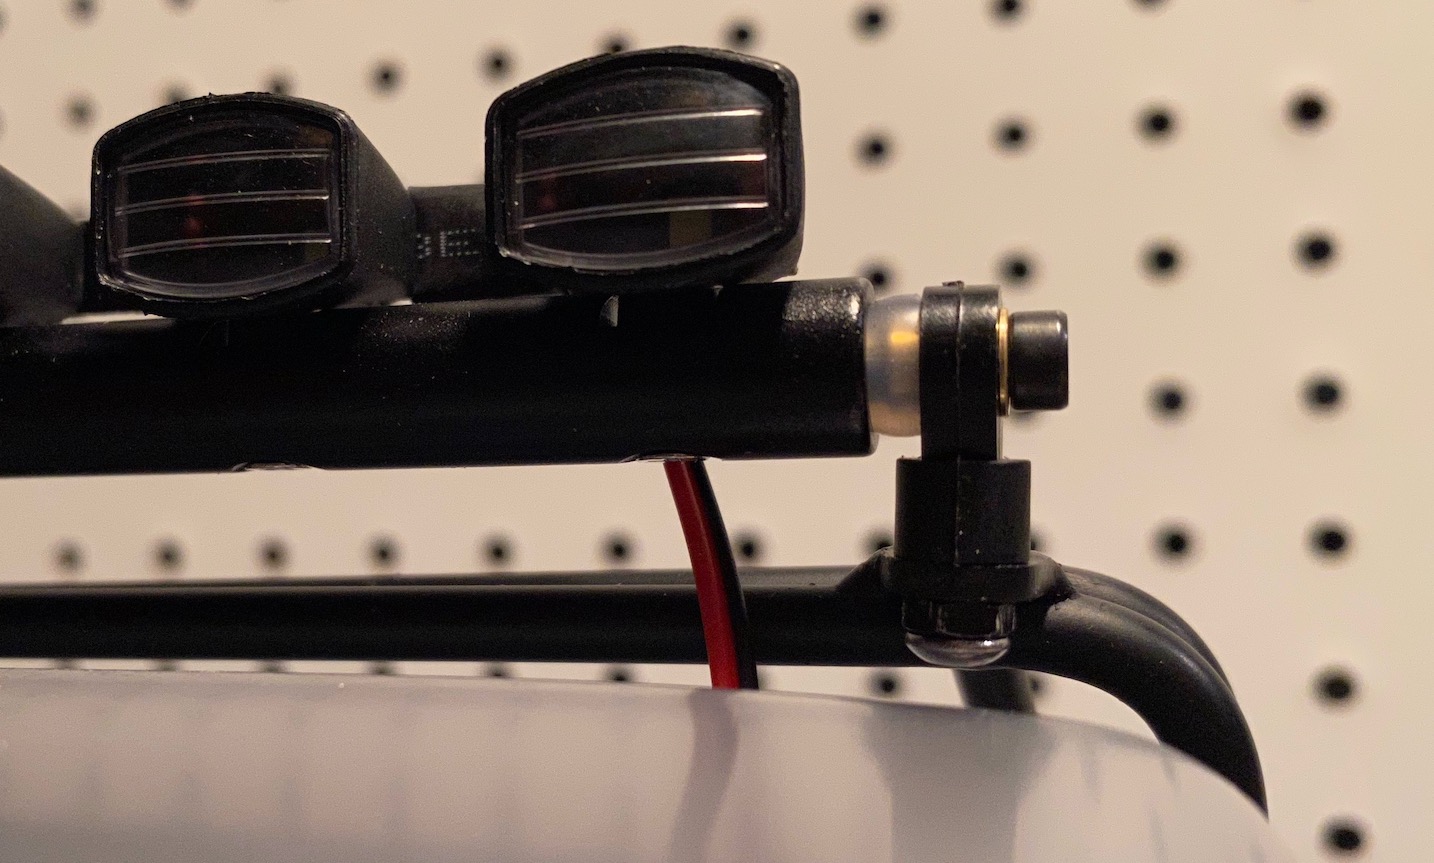 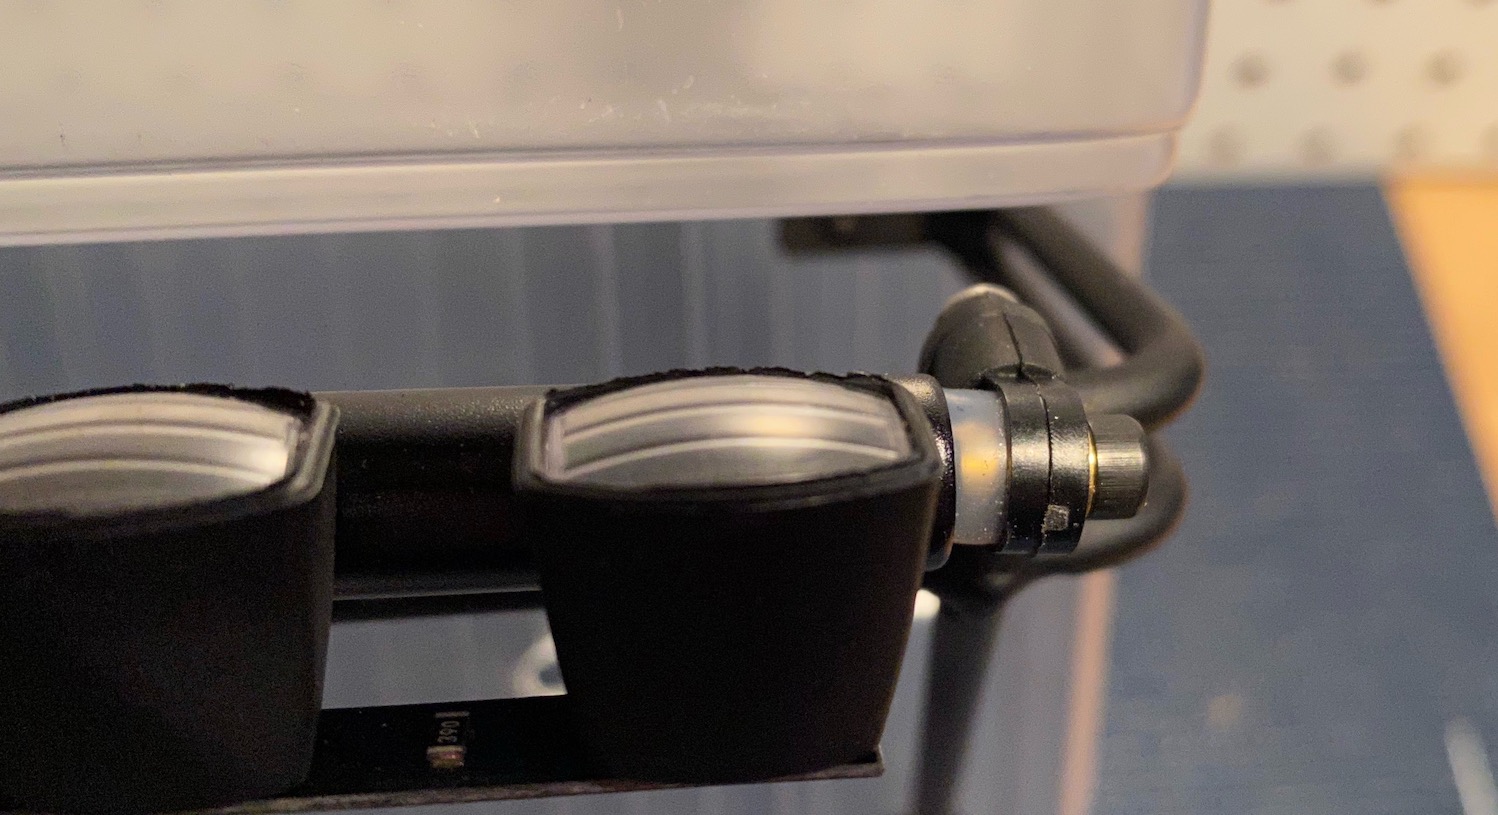 I utilized a knockoff tower pro mg995 servo to convert into a servo winch. This was very cool and seems to have worked out pretty well. The winch will fully support the weight of the truck, at least as tested so far. I order to make sure the spool wouldn't interfere with linkage travel I mounted the servo from the topside. No biggie, plenty of clearance underneath, the spool is where it should be. All good. 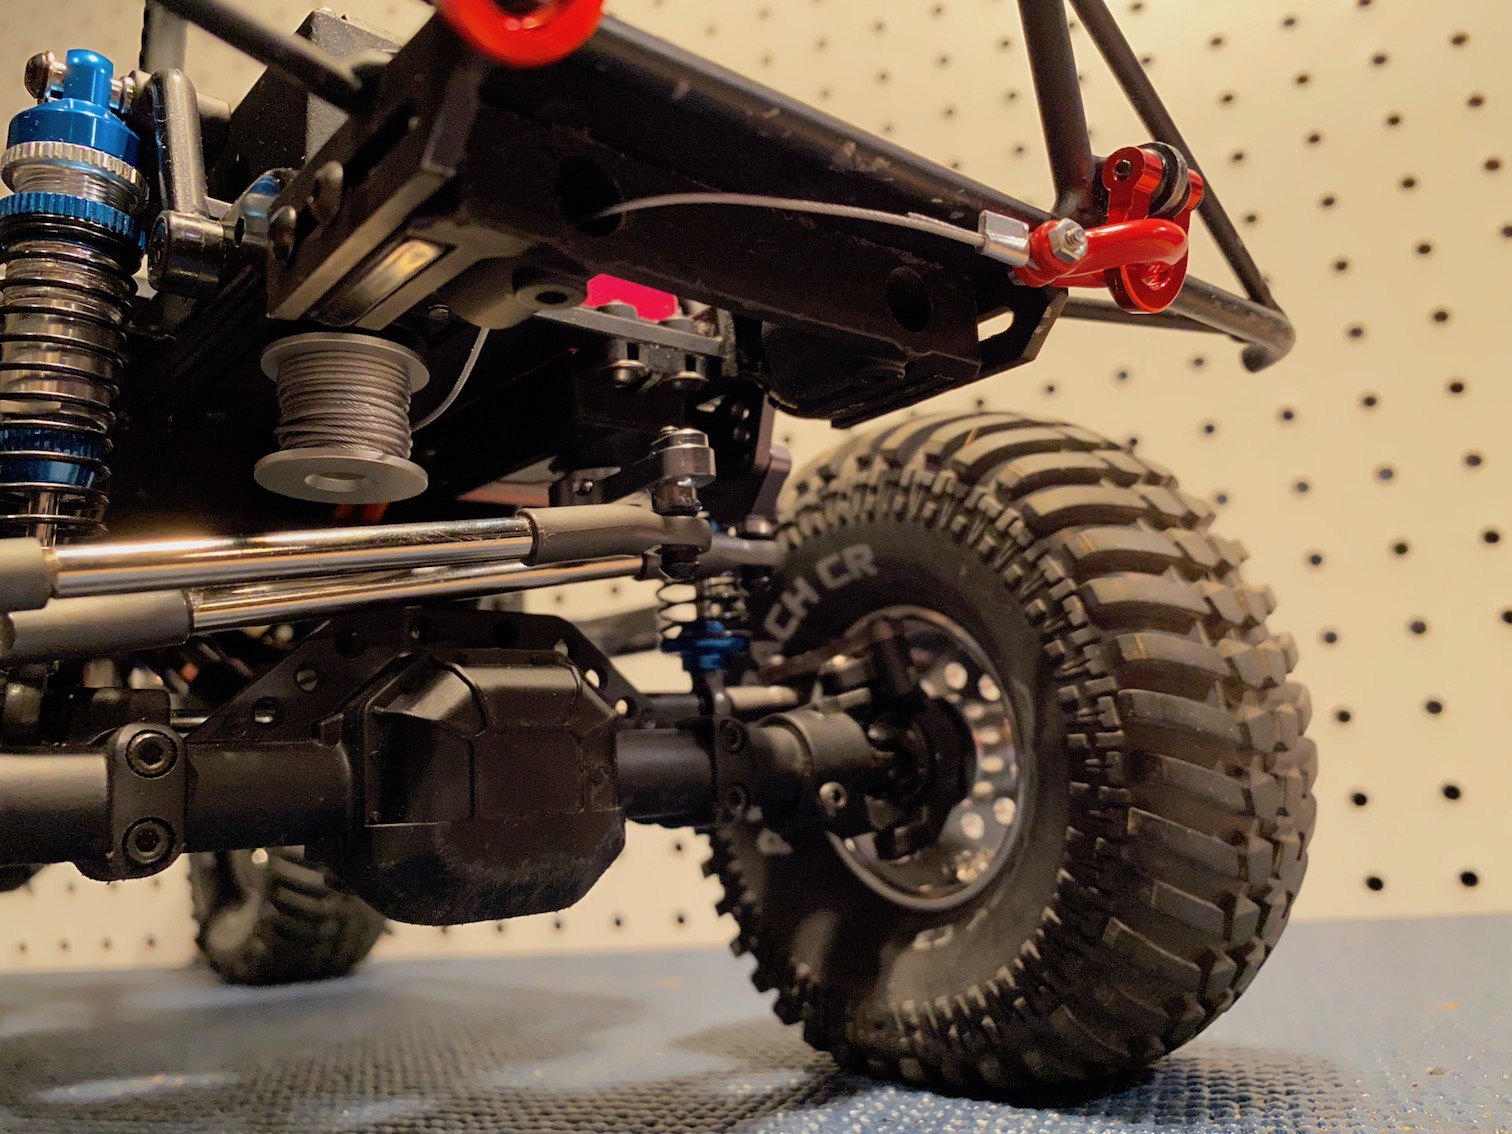 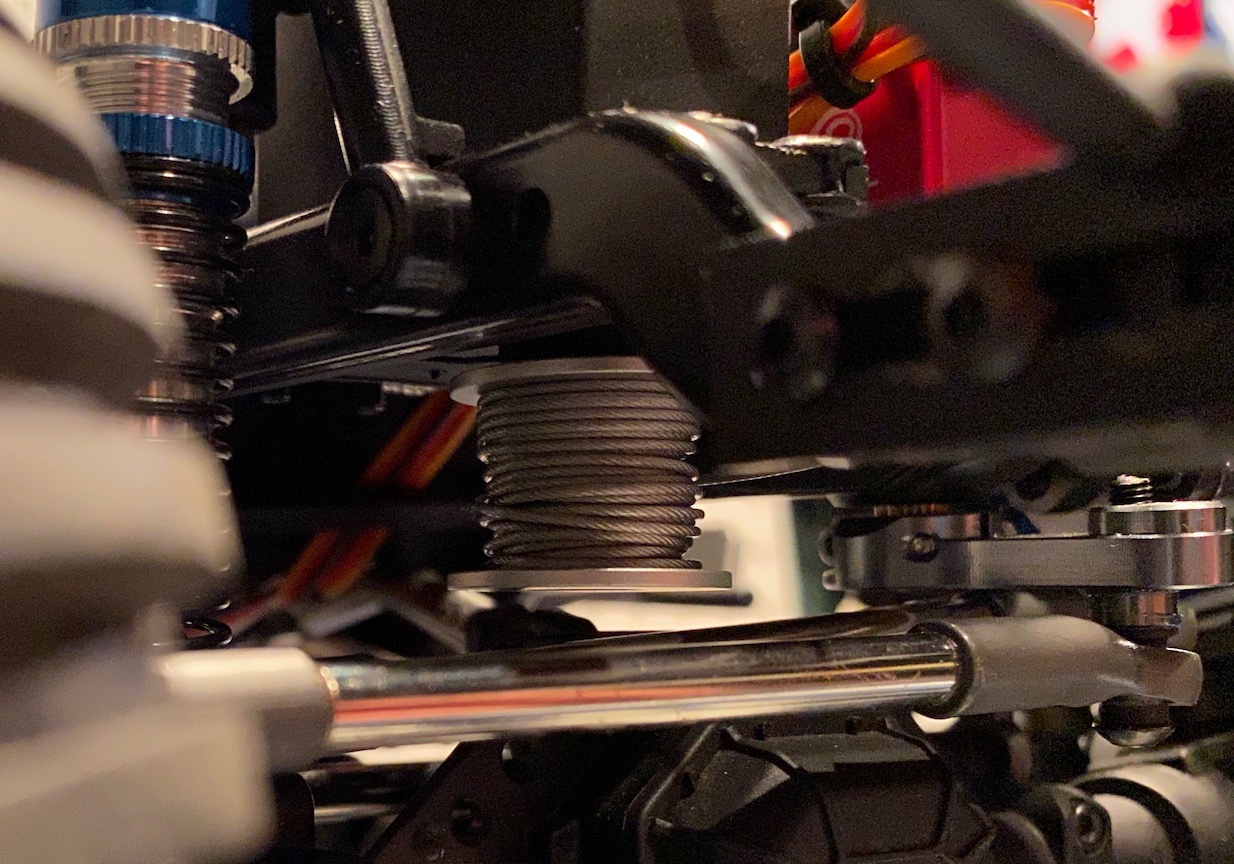 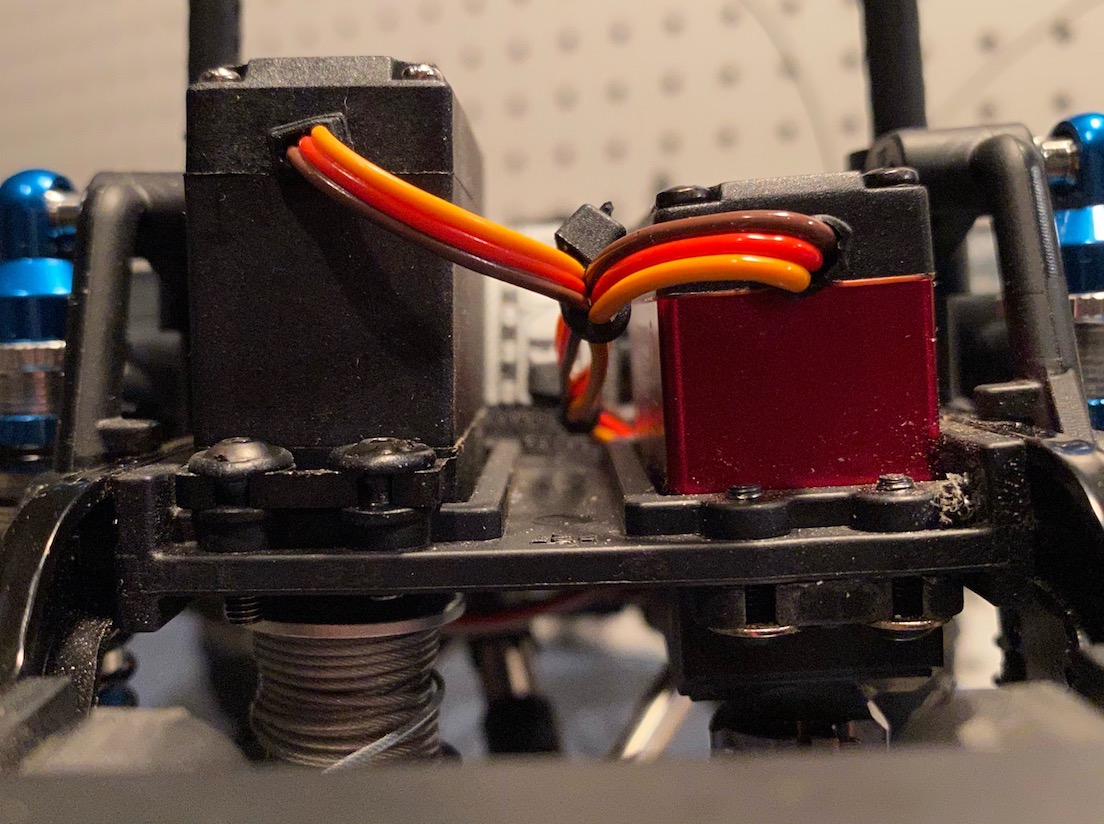 The gatekeeper panhard went on pretty well. I dremeled the shock mount's plastic panhard off to make space. The chassis rails were already drilled, I tapped the plastic servo mount behind to screw into. Seems sturdy enough, but if it proves faulty I'll investigate shoring it up differently. I also had to add a thick washer/standoff at the link end, to even out the link and ensure clearance upon full compression. 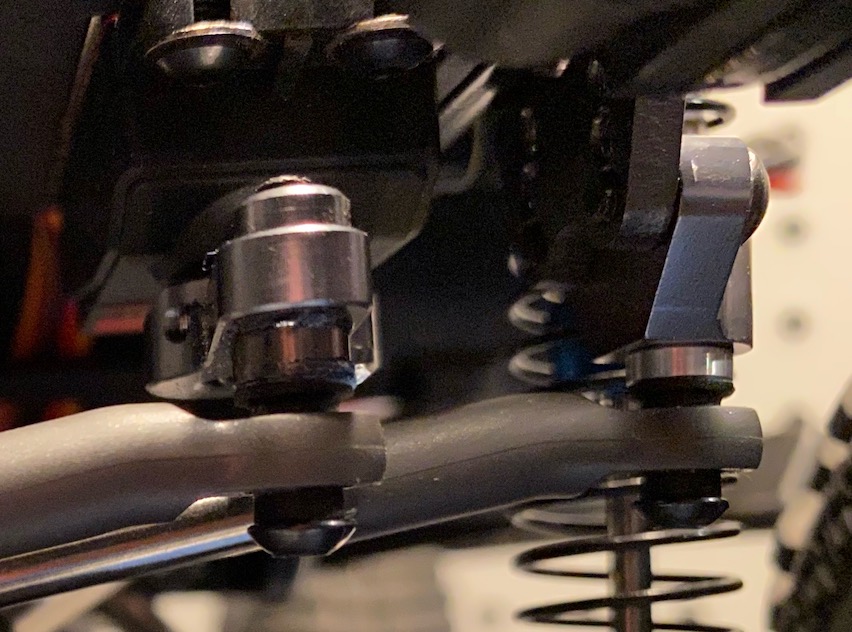 |
|
| |
|
01-25-2021, 10:16 AM
| #14 |
| Slow is the new Fast Join Date: Nov 2013 Location: Winterpeg
Posts: 2,898
|
Its coming together nicely Andy. Would love to see a pic of your light bar setup that includes the whole truck. Foam choice requires some personal preference/intended use decisions. Being an Enduro, I would assume you will be mostly trail running and crawling. The most popular setup here on RCC is likely a dual stage foam set up. Crawler Innovations makes nice quality foam inserts. Dual stage usually uses a closed cell inner and an open cell outer. The idea is to retain overall tire stiffness while allowing tire conformity on the surface. Ideally this will prevent tire folding and provide ridgidity for side-hilling. Personally, I like to play in water on occasion so I stick to a single stage closed cell foam. They are less prone to degeneration, especially if they get wet. Open cell foams wont last too long once they get wet. The single stage foams might be a slight compromise on certain surfaces, but sized correctly, still allow the tire to conform somewhat. I have found Crawler Innovations single stage foams to be excellent. If you contact Crawler Innovations with your tire selection, rig specs and intended use they will even give you a recommendation or two. They are super helpful. I typically use proline foams if I am running a Proline tire. It is also not uncommon for me to run stock foams for a period of time to decide whether I actually need to replace them. They best way to learn foams is to experience the differences between them. |
|
| |
|
01-25-2021, 10:21 AM
| #15 |
| RCC Addict Join Date: Aug 2020 Location: Jacksonville
Posts: 1,315
|
I'll add that some foams change over time...I have several 'generic' sets that were ridiculously stiff at first that are finally softening up to the point that I probably won't replace them until they completely wear out. My enduro is on the heavy side though.
|
|
| |
|
01-25-2021, 10:41 AM
| #16 |
| Newbie Join Date: Jun 2020 Location: rc van down by the river
Posts: 36
|
Thanks guys. She's coming together, normally I don't consider my rigs done until they've completed paint and I've taken some nice 'new' pics. I couldn't wait with this chassis, and I've quite a few 'shakedown' hours already and many parts already show that. lol. I've got a great rock wall on my property that I've refurbished a bit for rc. Hopefully this week she sees paint. I've still got some lights/light buckets/front grill to sort out as well.
|
|
| |
|
01-29-2021, 07:40 AM
| #17 |
| Newbie Join Date: Jun 2020 Location: rc van down by the river
Posts: 36
|
Cosmetic update, working on the frankengrill. No more Kyosho lettering! I use a set of needle/jeweler's files (I inherited from grandma decades ago, and yes, I still play with toy cars, grandma ;) ) 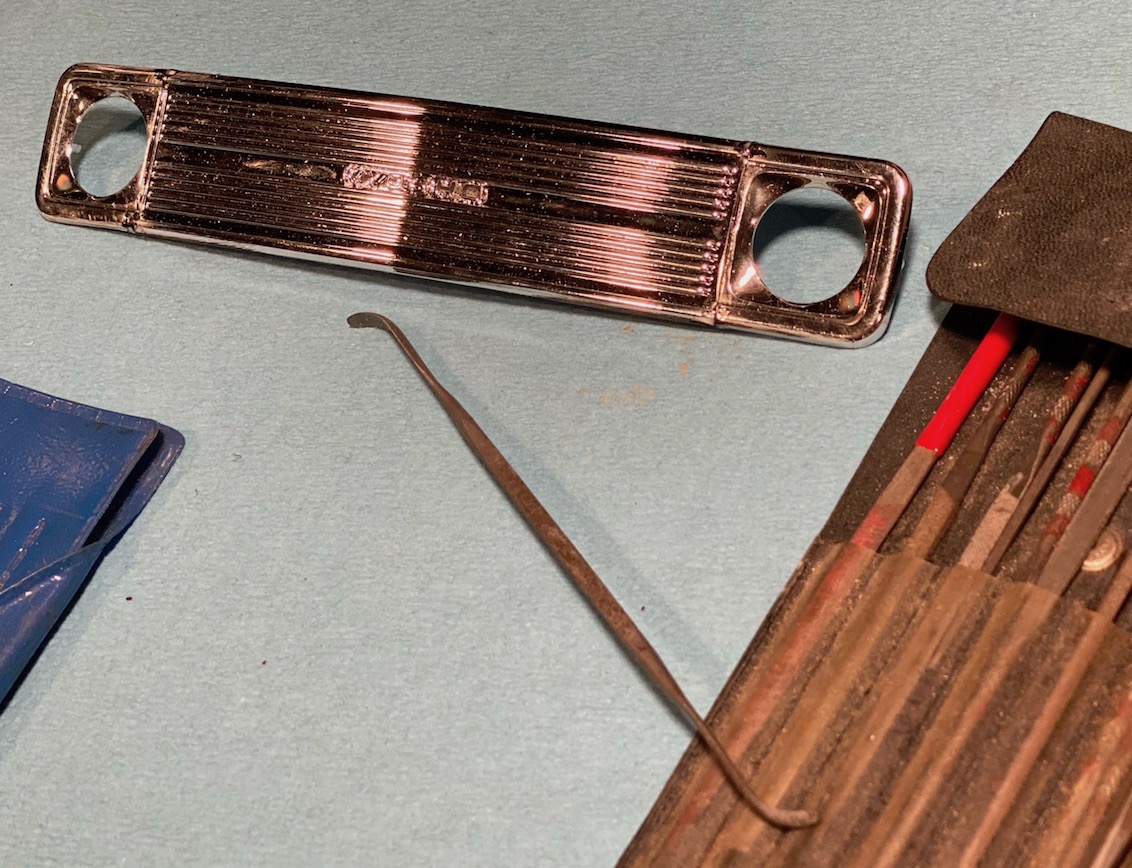 Kyosho lettering removal progress... 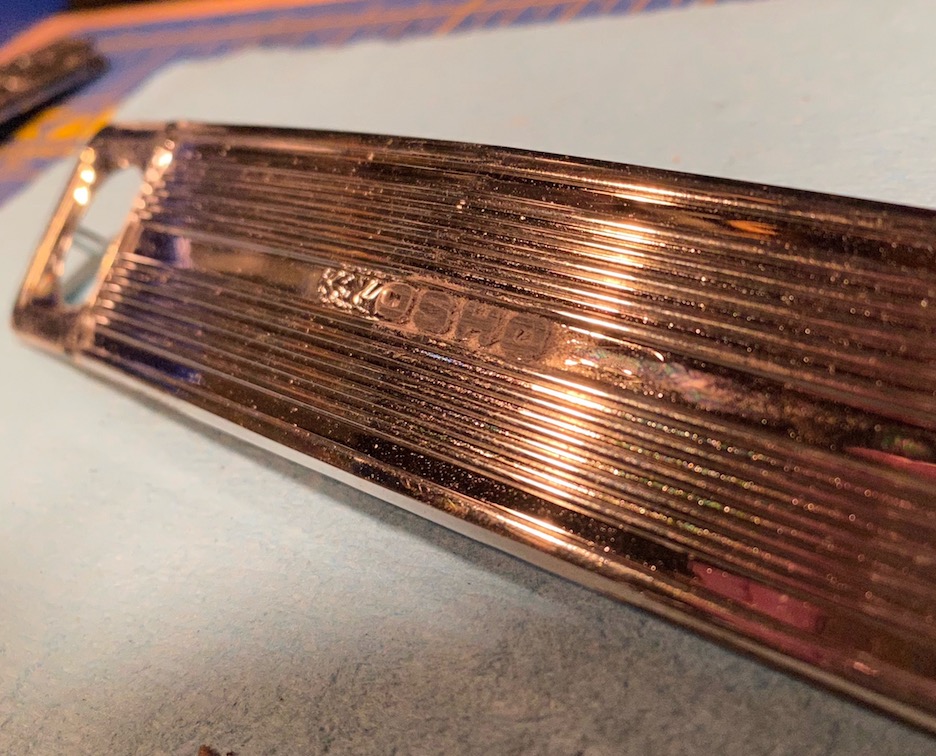 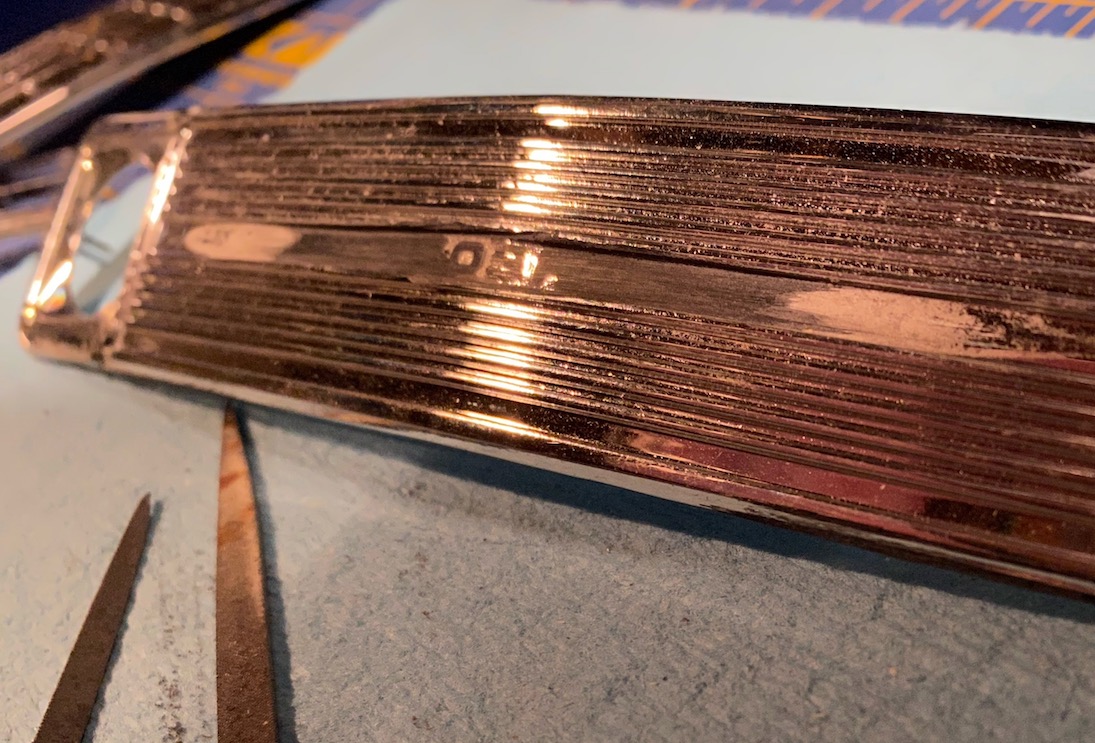 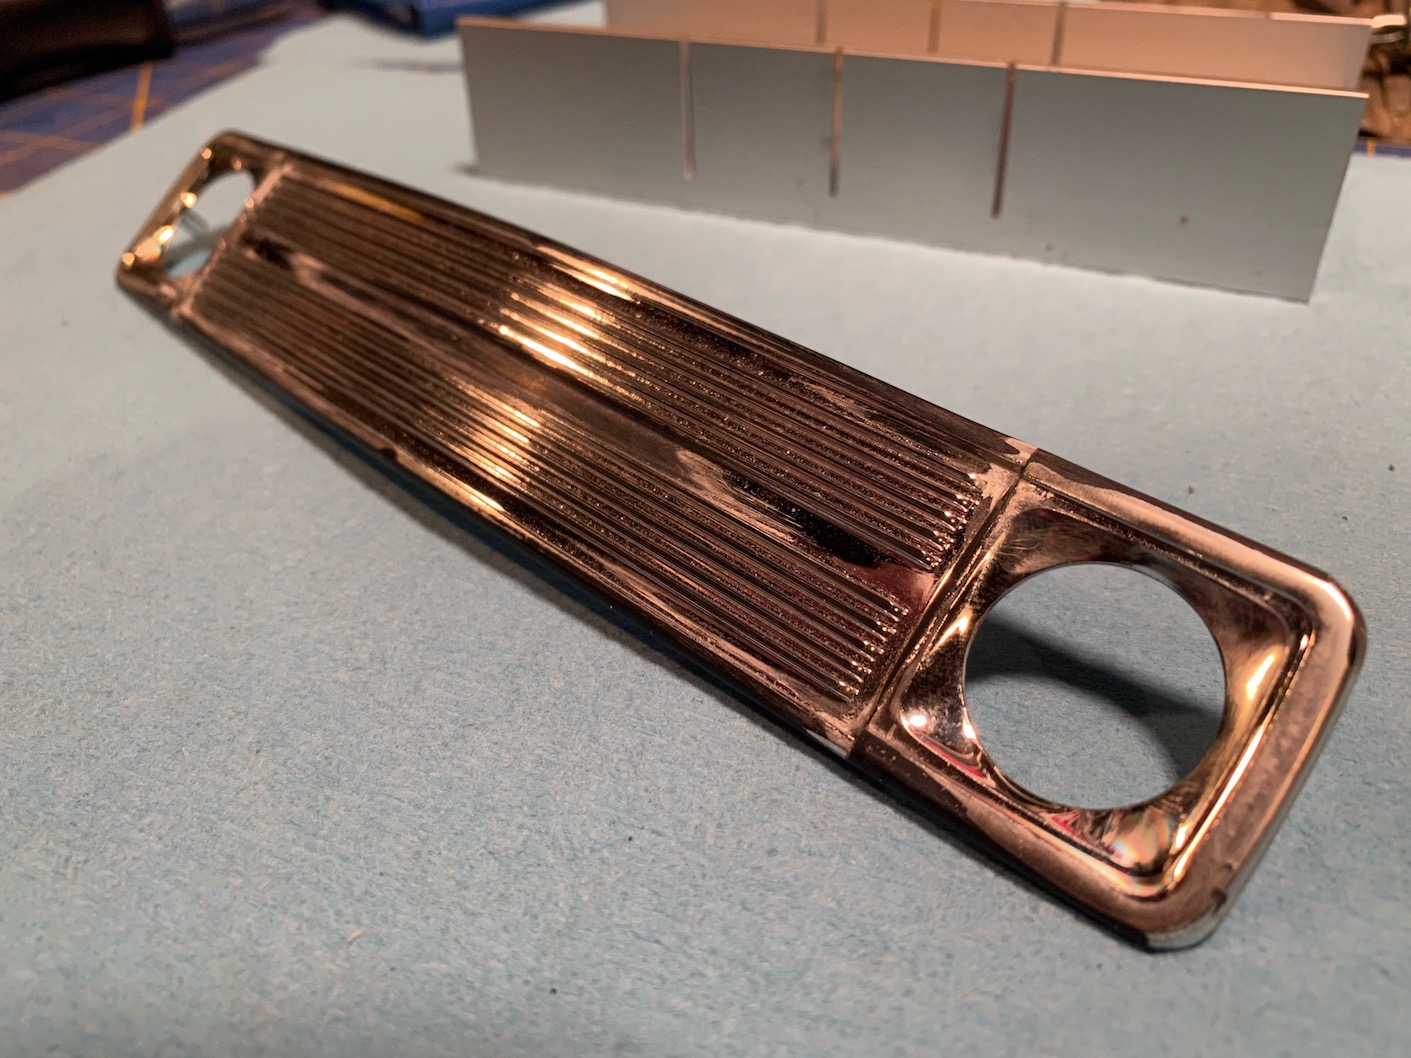 After shortening the grill, I had to also shorten the light buckets to fit. 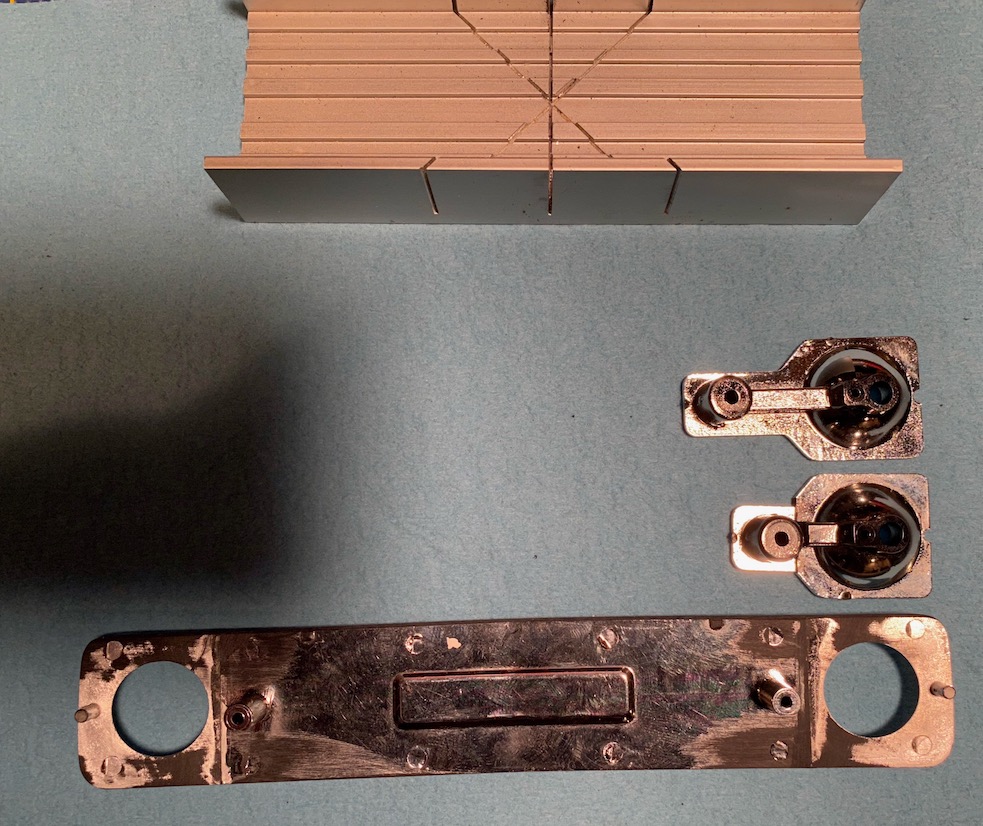 |
|
| |
|
02-10-2021, 12:03 PM
| #18 |
| Newbie Join Date: Jun 2020 Location: rc van down by the river
Posts: 36
|
I've got a few updates to post. Here's one.... I made a Chevy emblem with styrene. 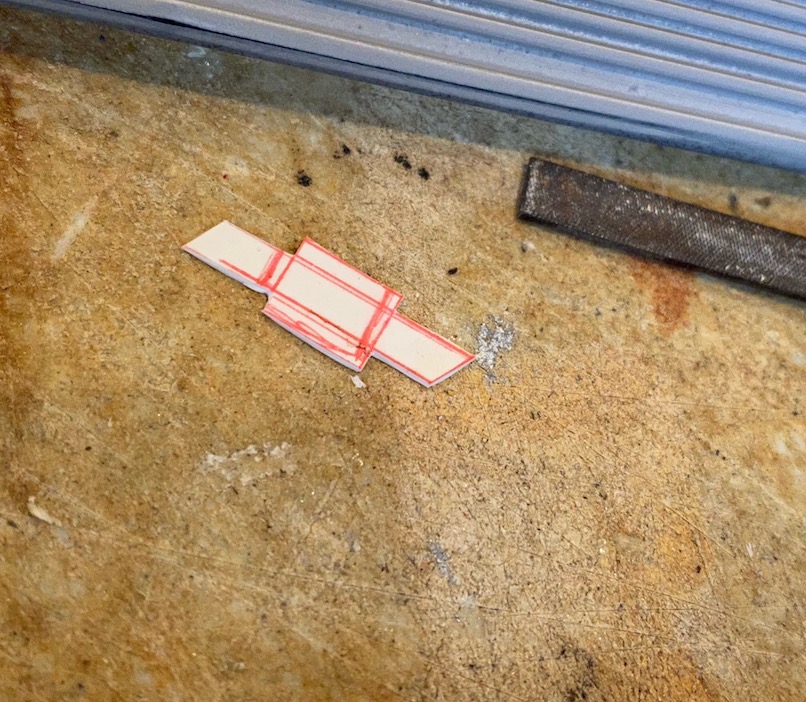 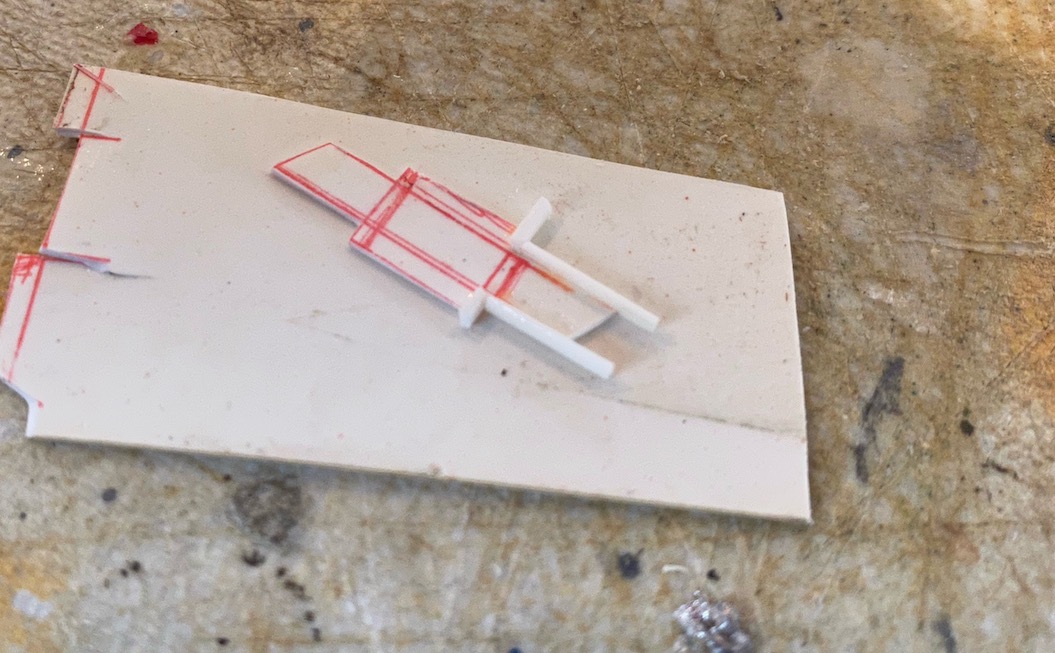 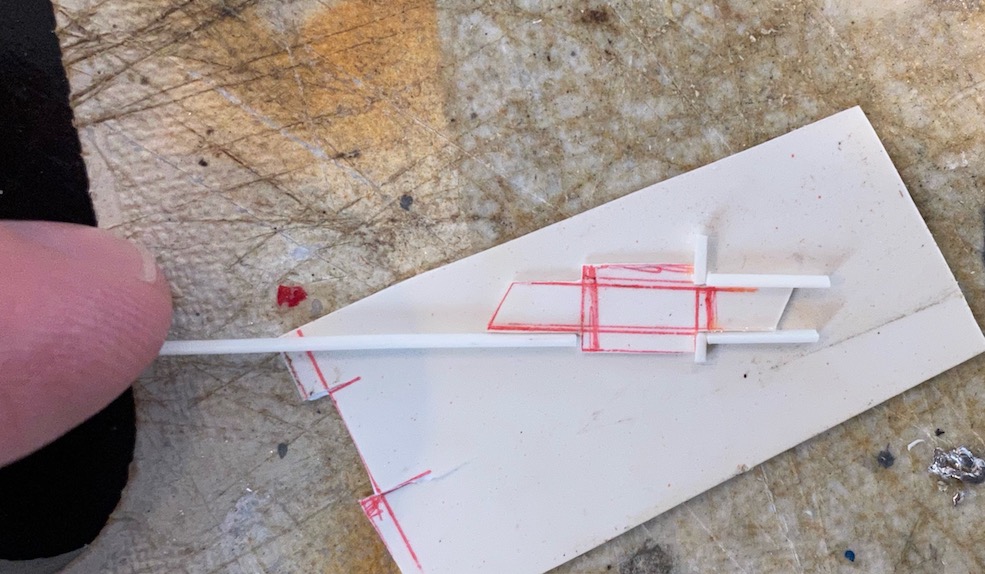 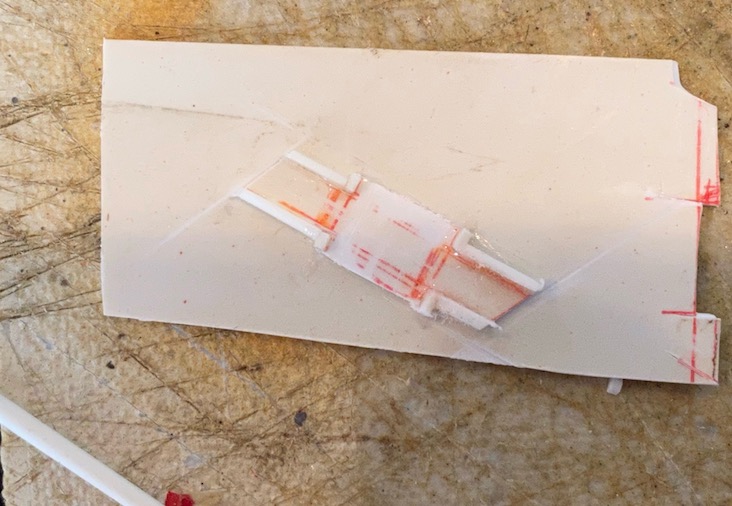  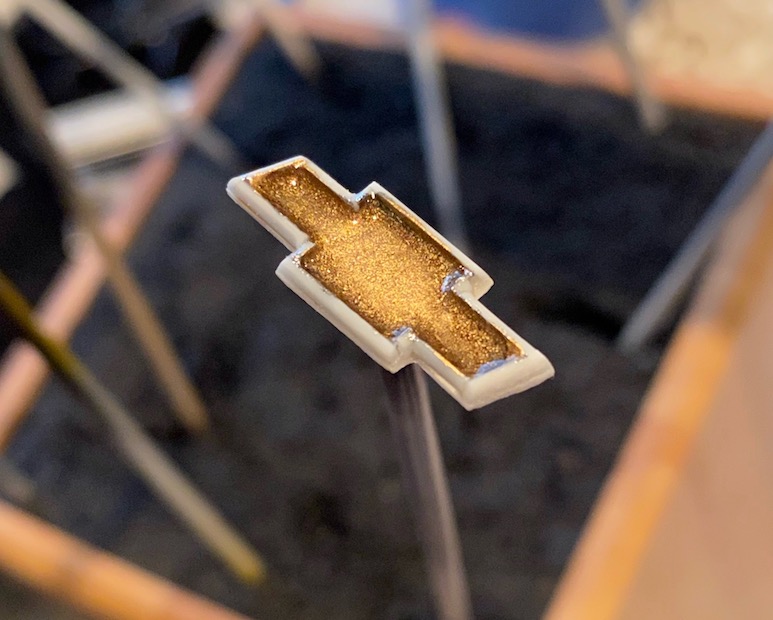 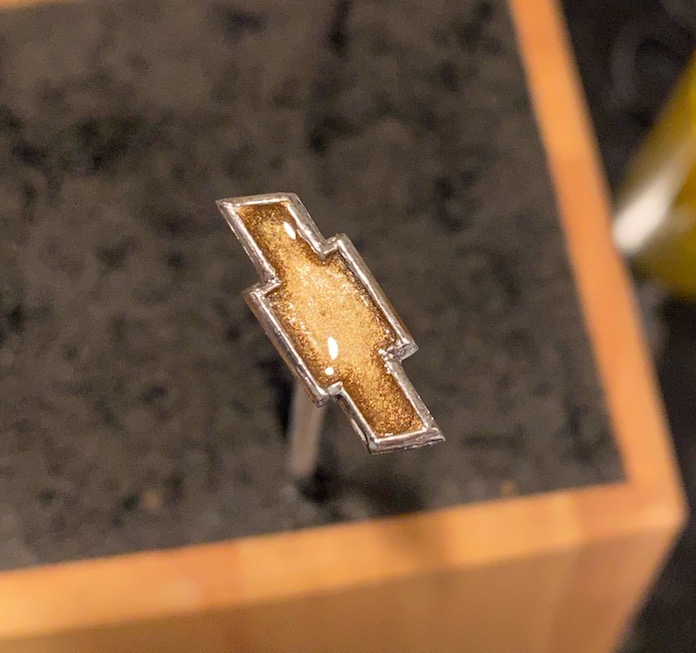 |
|
| |
|
02-10-2021, 04:05 PM
| #19 |
| Slow is the new Fast Join Date: Nov 2013 Location: Winterpeg
Posts: 2,898
|
Nice attention to detail. I like the little things that set a rig apart. I made a styrene emblem for my Tundra buiid a while back, it was a fun process. Really enjoying your thread here. Look forward to more.  |
|
| |
|
02-10-2021, 07:52 PM
| #20 | |
| I wanna be Dave Join Date: Jun 2017 Location: Humboldt county
Posts: 4,481
| Quote:
Not saying your wrong to try it the other way but all other high clearance links put the short side on the axle side. Up front if you reverse this you wont notice it as much but in the rear you will get hung up on steps easier. I'd recommend flipping the rears at least. Just imagine a squared off step as you drive and it approaches the rear tires. Nice work on the emblem Last edited by HumboldtEF; 02-10-2021 at 08:06 PM. | |
|
| |
|
 BA's Enduro Somethinguro build - Similar Threads
 | ||||
| Thread | Thread Starter | Forum | Replies | Last Post |
| Soze's Element Enduro Gatekeeper build | soze | Element RC 1/10 Enduro Trail Truck Sendero | 29 | 09-27-2021 02:51 PM |
| Elements: An Enduro kit build by SVT | svt923 | Element RC 1/10 Enduro Trail Truck Sendero | 66 | 01-26-2021 08:02 AM |
| Enduro based build pictures please. | Oh How Original | 1.9 Scale Rigs | 5 | 11-03-2020 06:14 AM |
| Here's my Enduro build (Dredge chassis rails) | garyk | Element RC 1/10 Enduro Trail Truck Sendero | 3 | 07-04-2020 04:20 AM |
| Machete Enduro Build | 802coma | Element RC 1/10 Enduro Trail Truck Sendero | 4 | 06-12-2020 01:33 PM |
| Thread Tools | |
| Display Modes | |
| |


 Linear Mode


