| |
| |||||||
 |
| | LinkBack | Thread Tools | Display Modes |
| Sponsored Links | |
| | |
 09-19-2018, 07:54 PM
| #2 |
| I wanna be Dave Join Date: Sep 2012 Location: Victoria, BC
Posts: 2,257
|
Kool...sub'd. Enjoy the build.
|

|  |
|
09-19-2018, 08:20 PM
| #3 |
| I wanna be Dave Join Date: Aug 2016 Location: Orange County, CA
Posts: 3,643
| Steps 1-13: Axles Let's begin 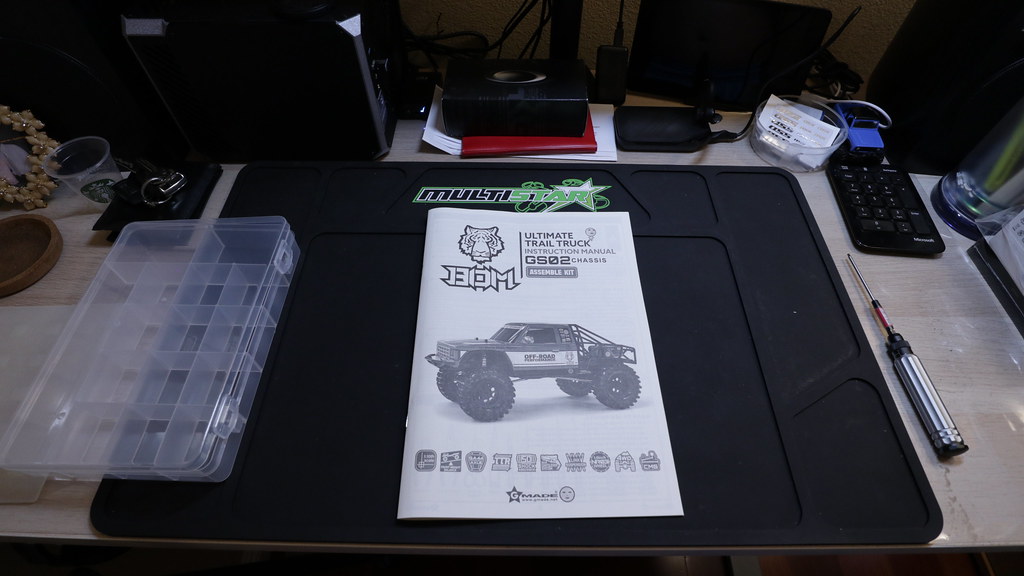 Parts needed for this step 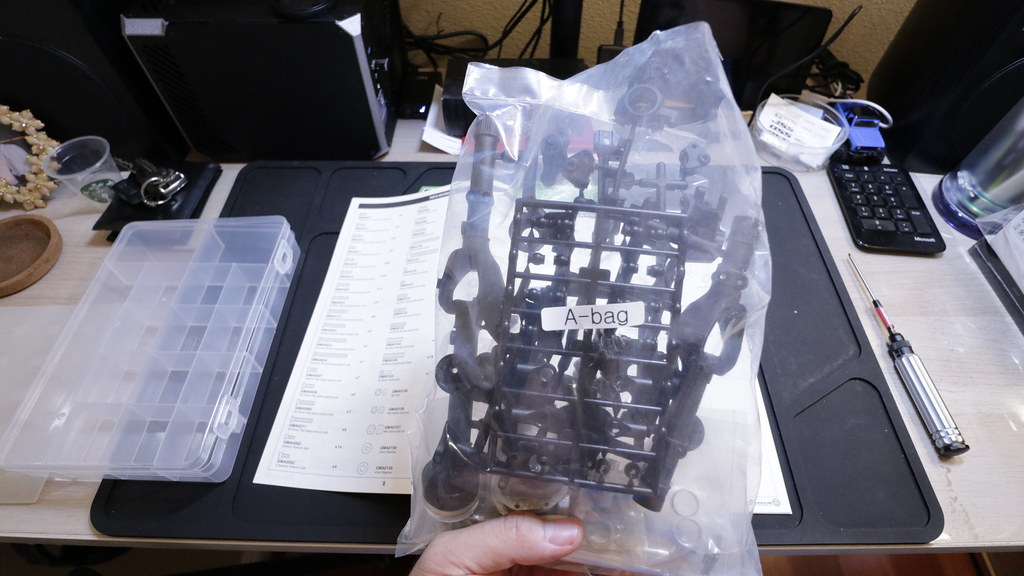 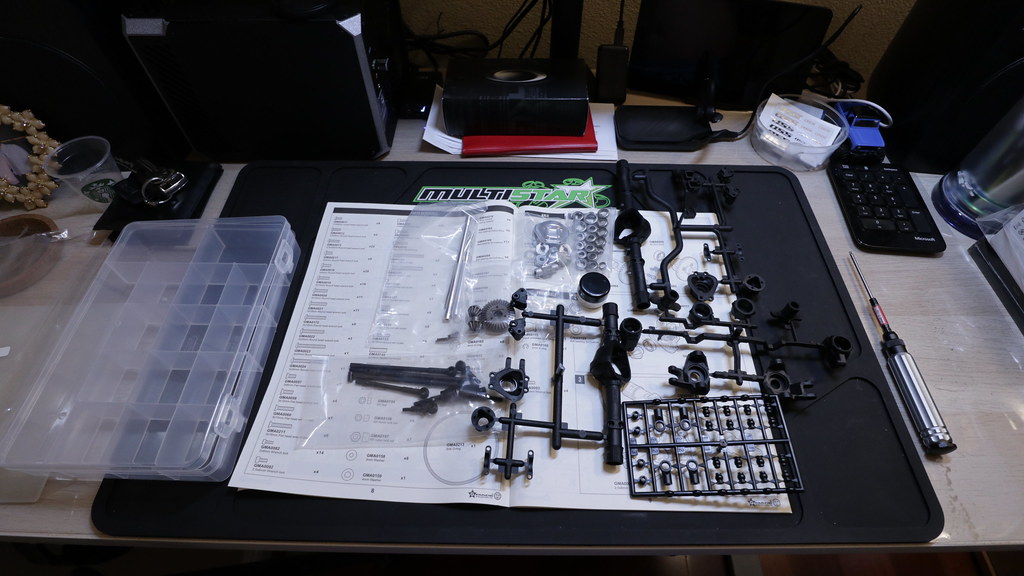 Metal balls given to the first batch of BOMs 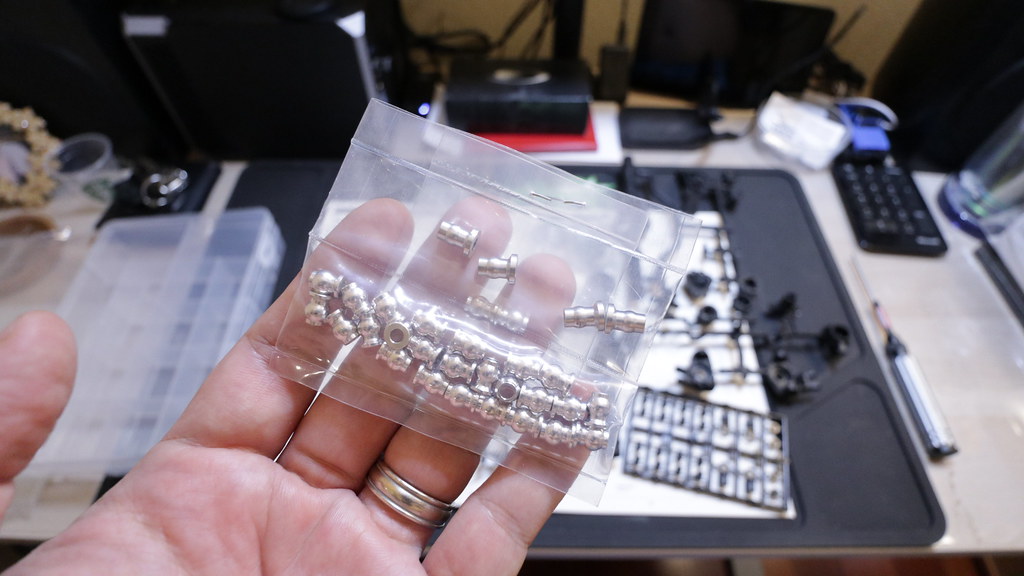 The well labeled hardware bags. Wish they would've went a step further and grouped the hardware by steps as well. 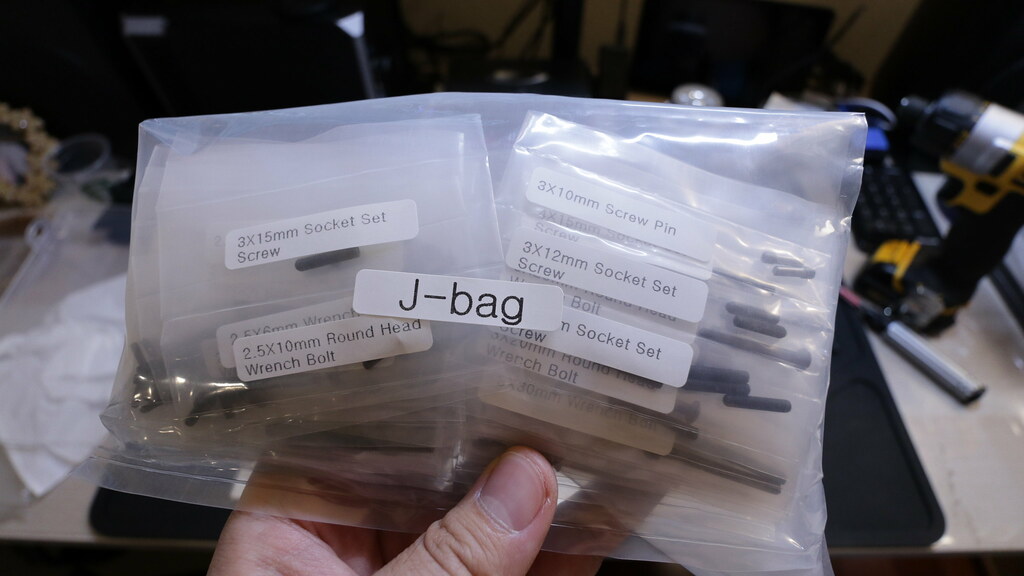 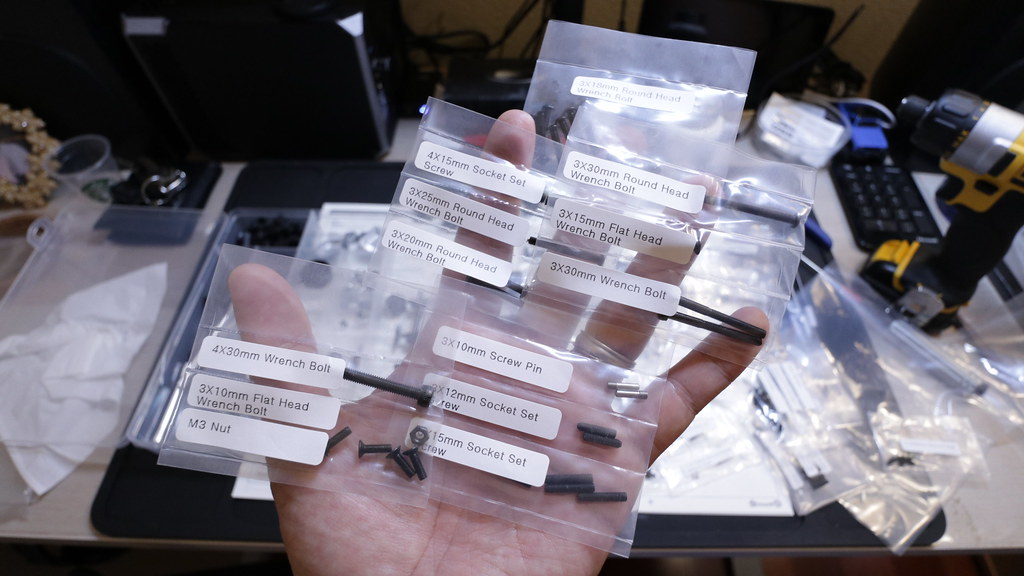 Ready to begin 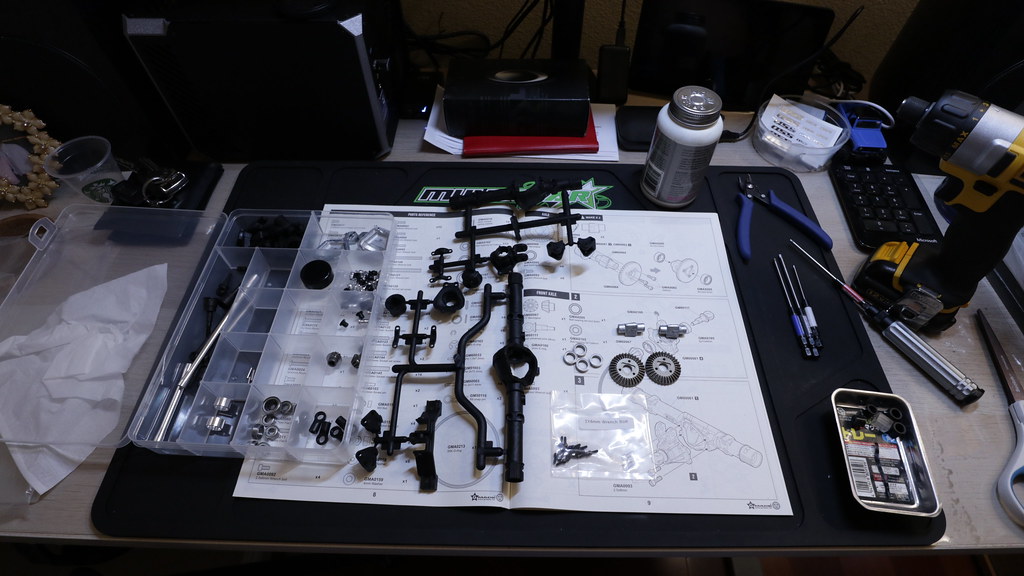 Diff gears finished 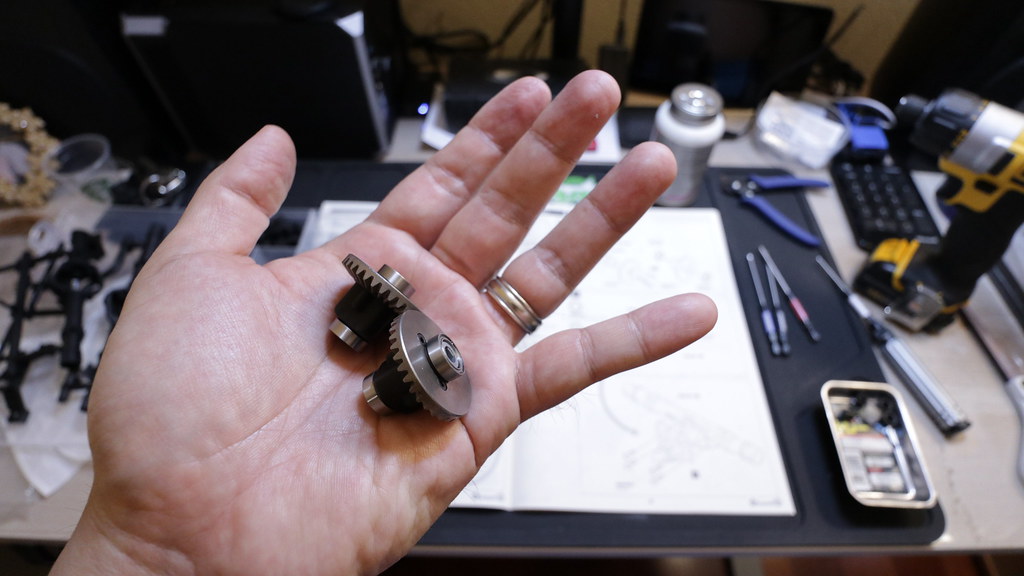 Pinion Gear side of the axle 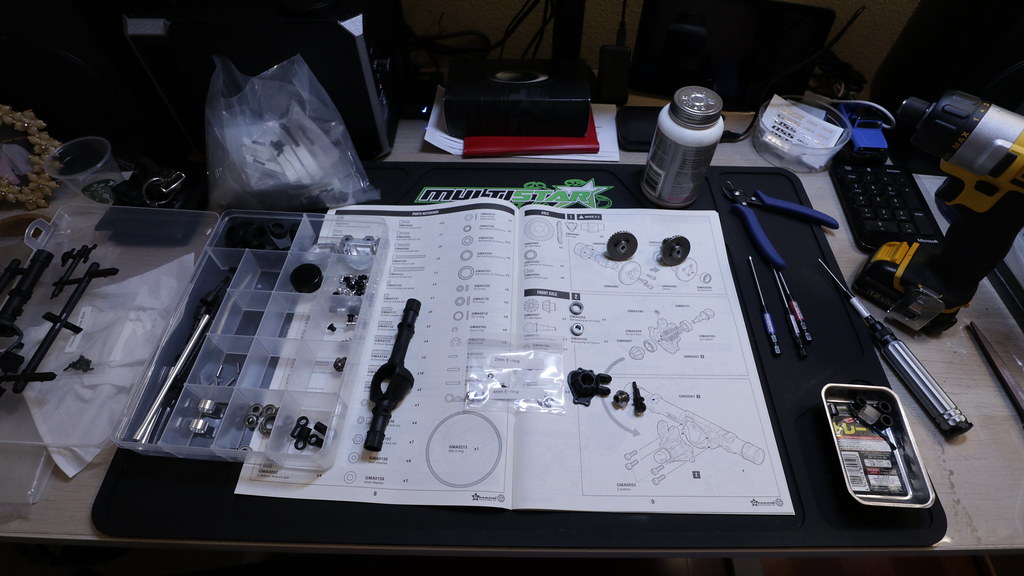 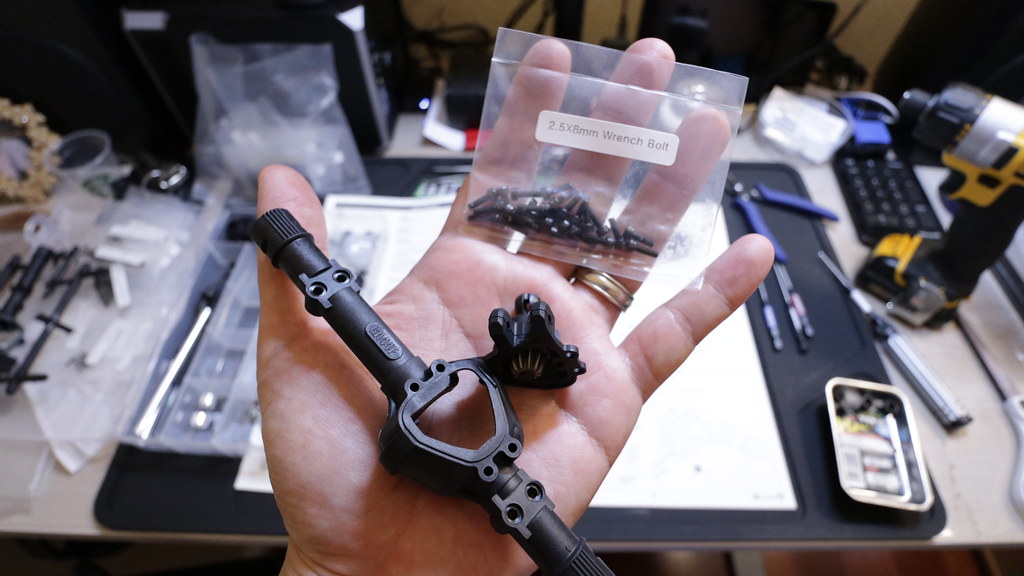 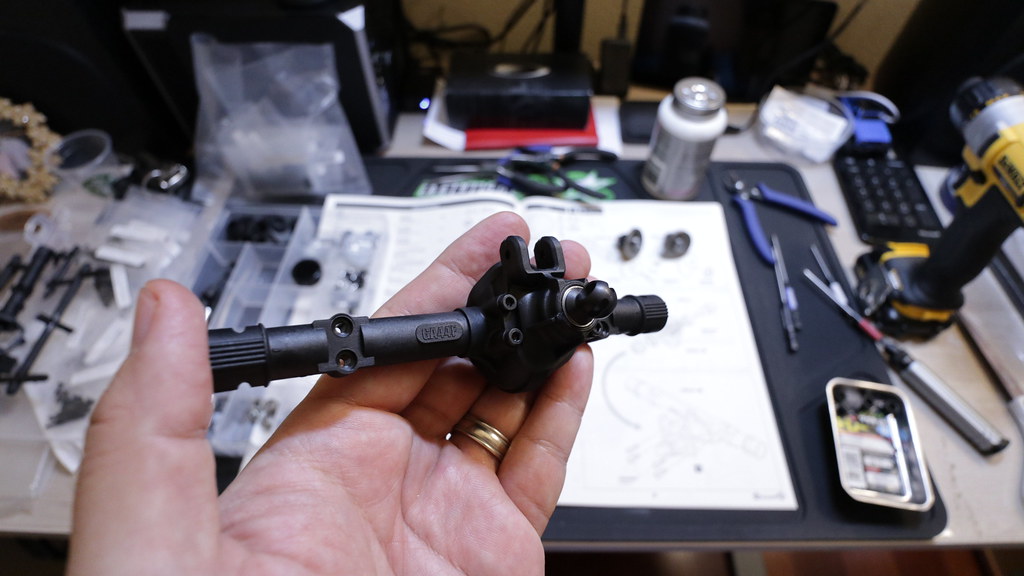 The other side of the axle 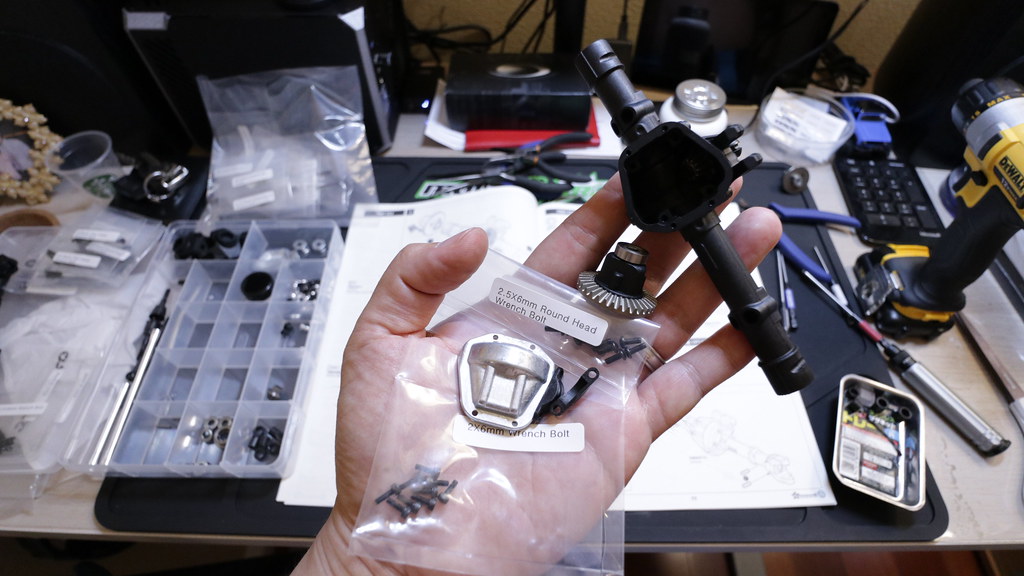 All greased up 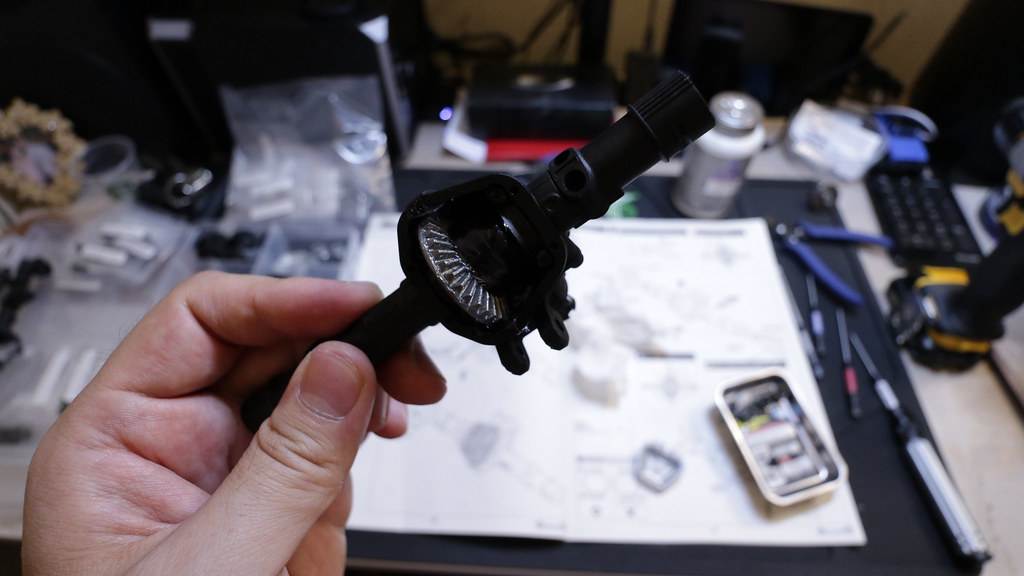 C-Hubs going on 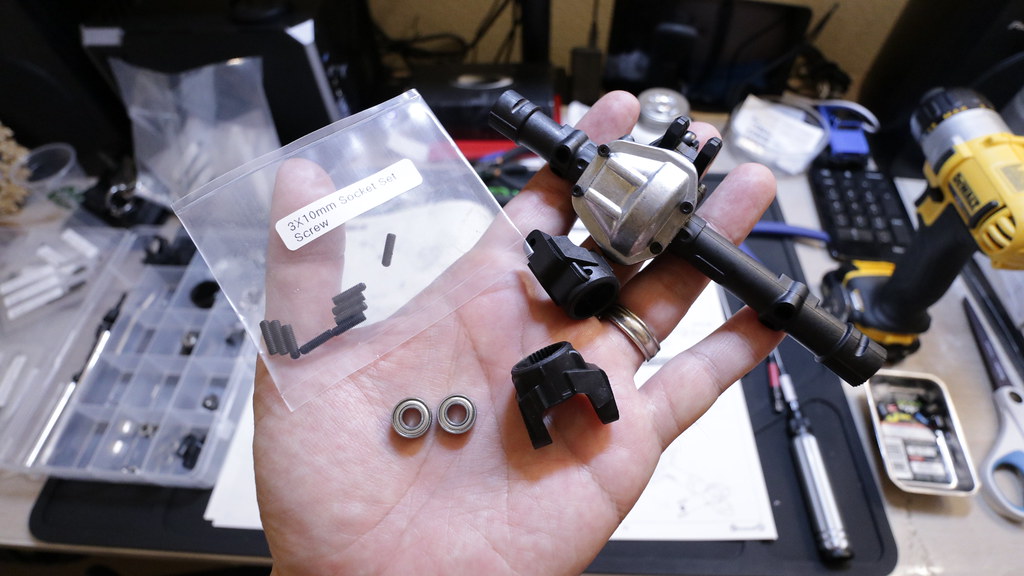 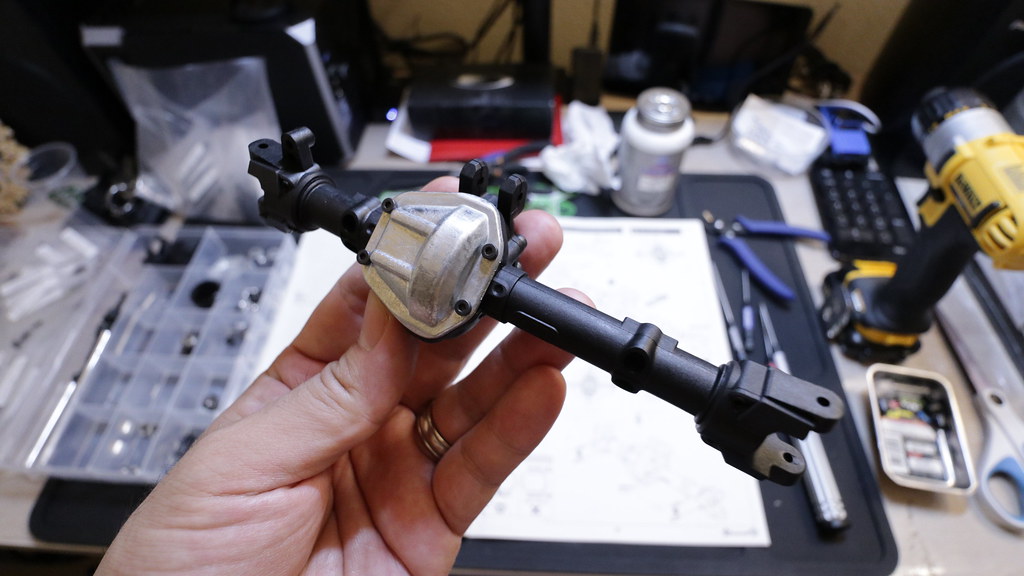 Front CVDs 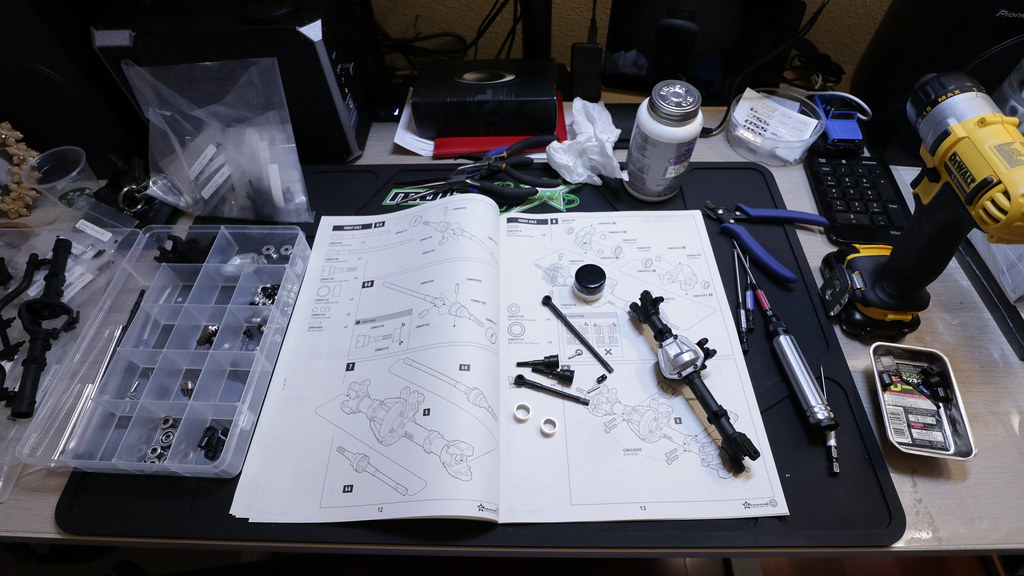 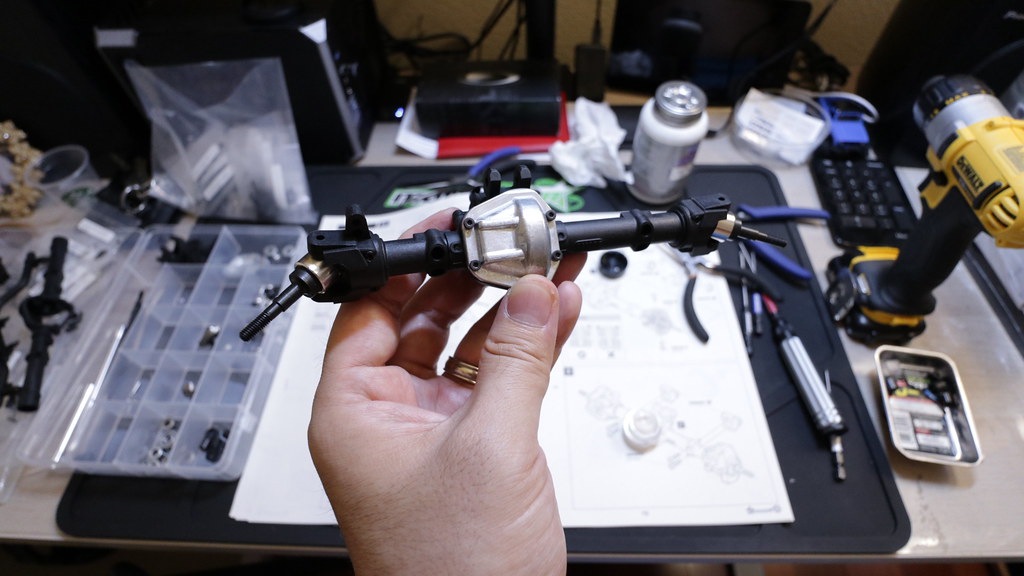 Knuckles 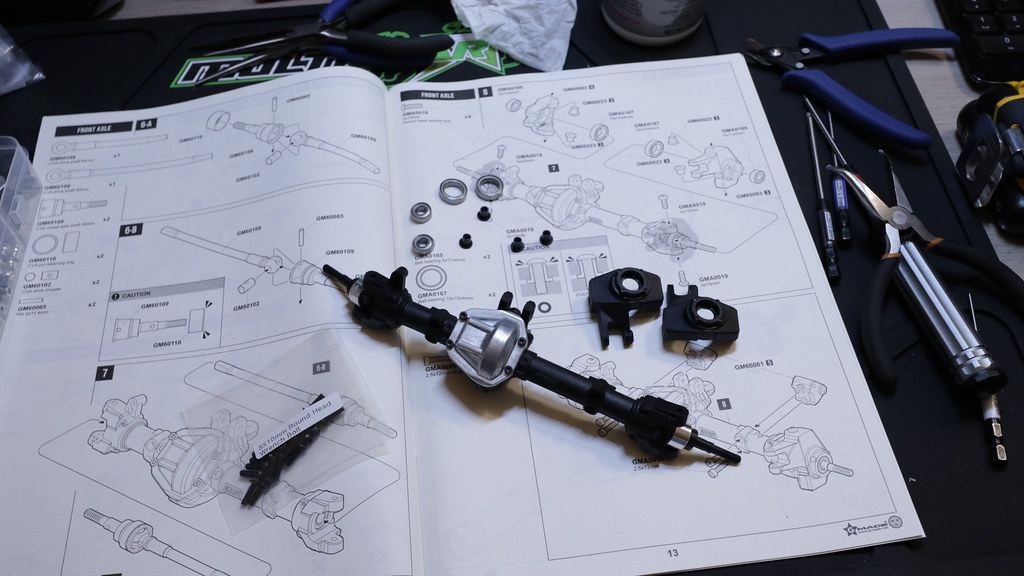 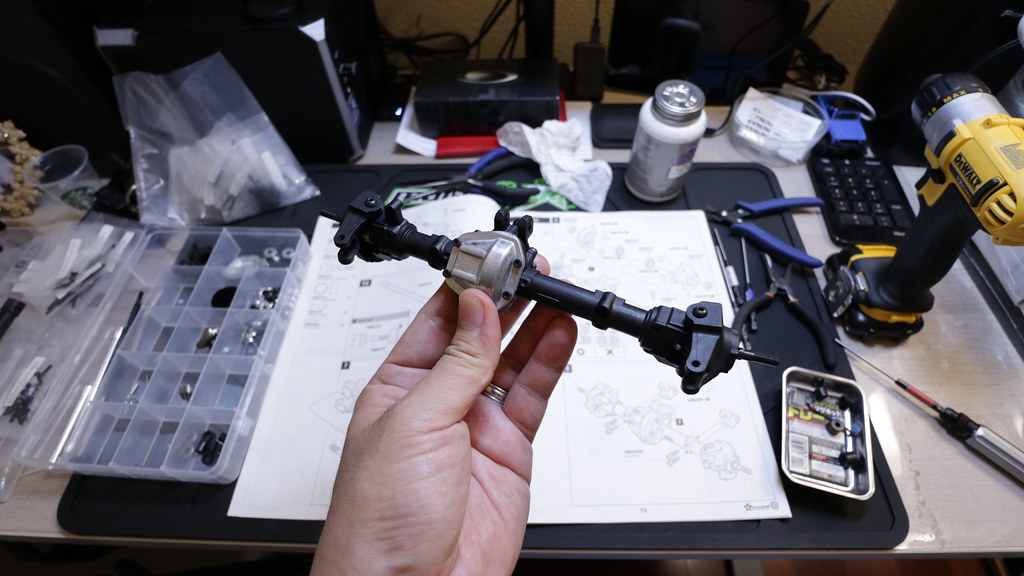 Link mounts 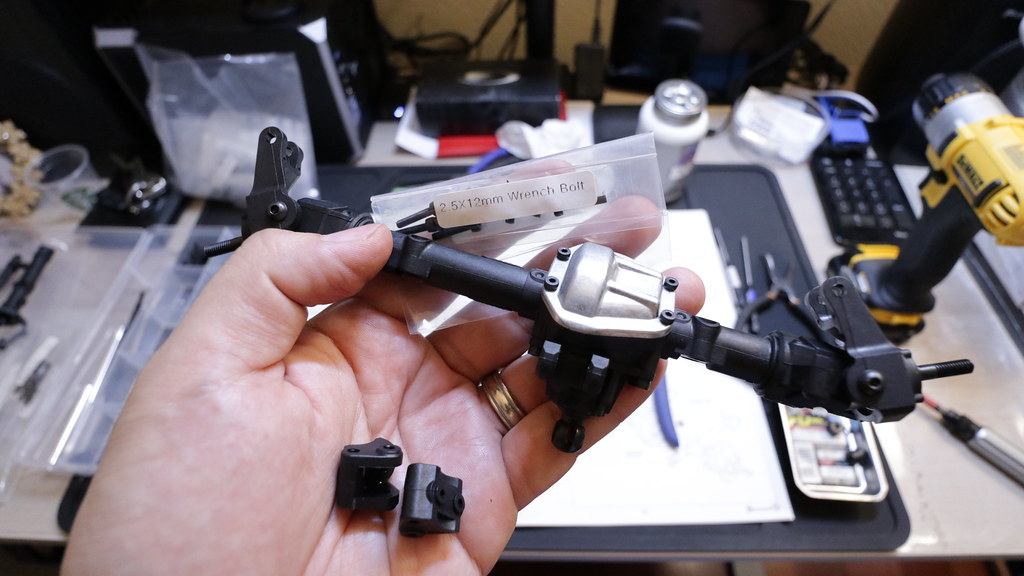  Time for the rear axle 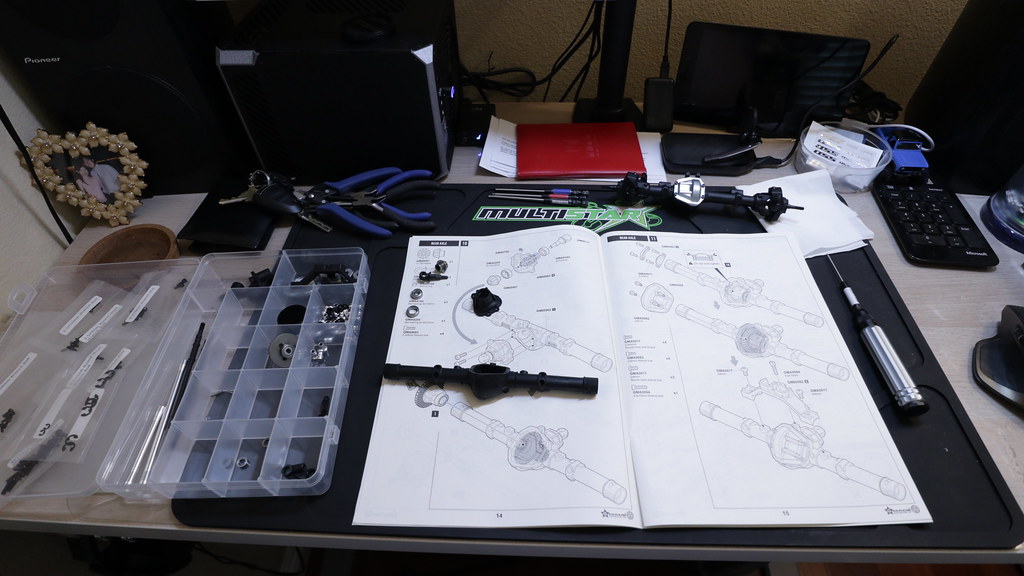 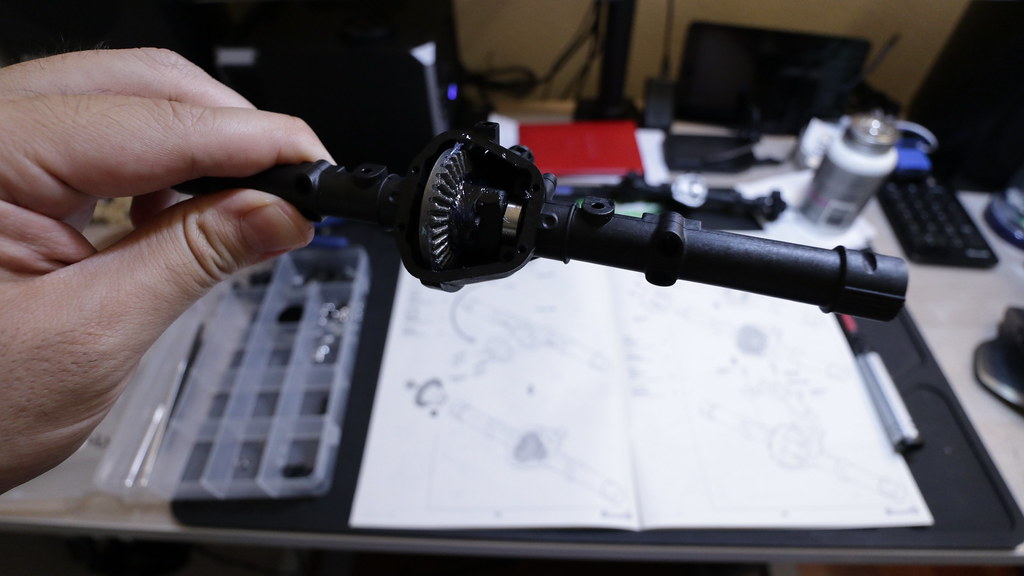 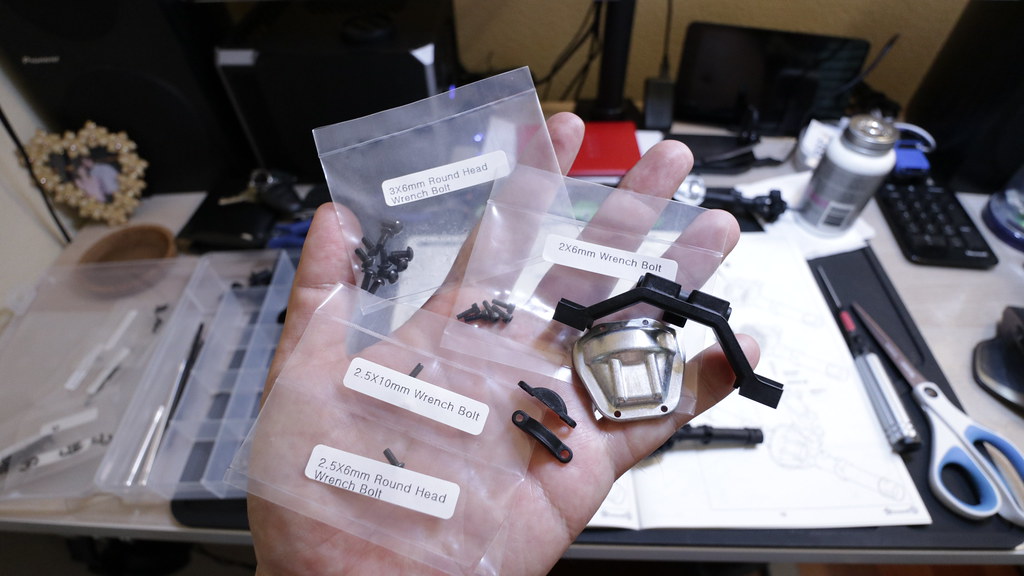 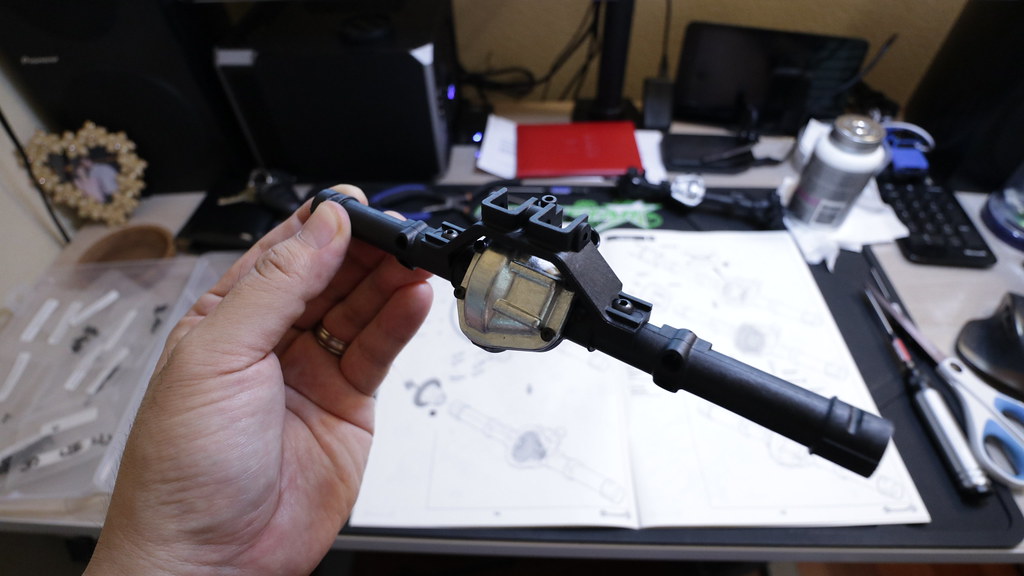 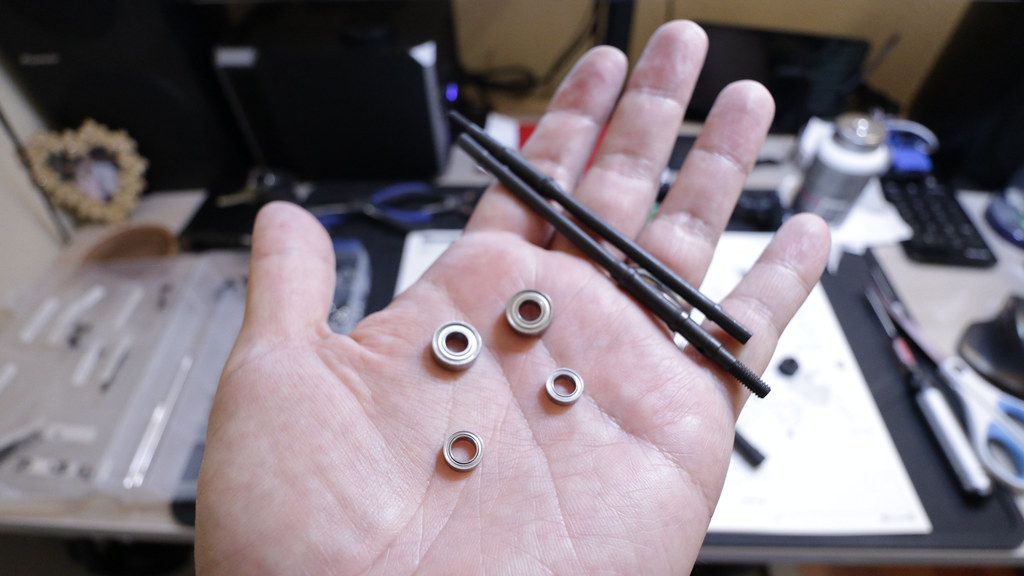 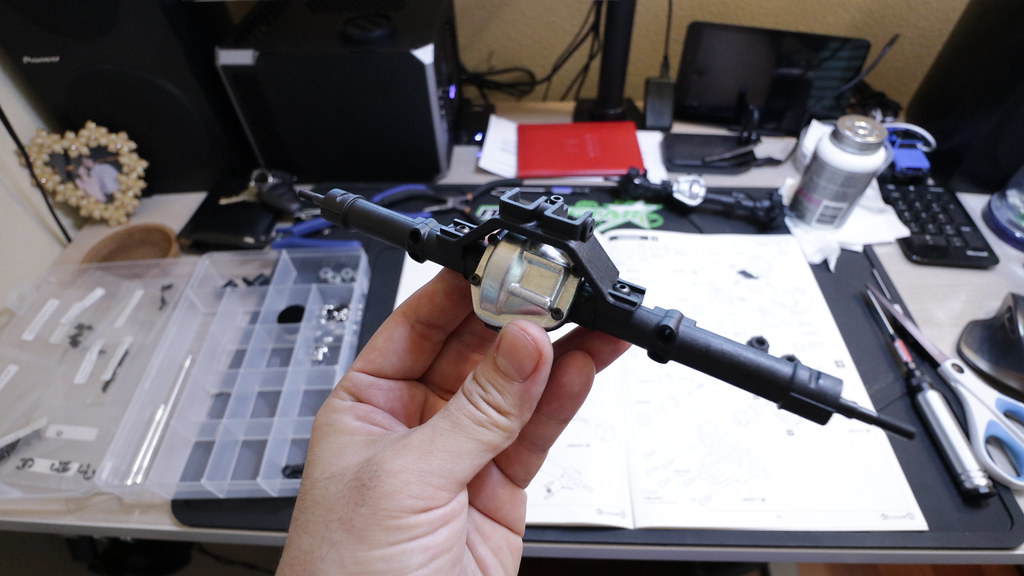 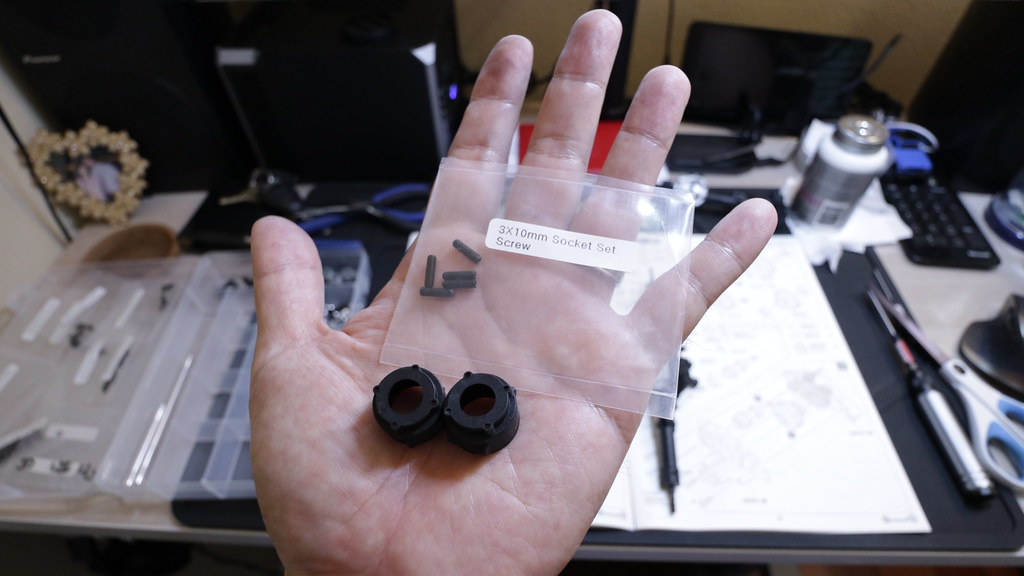 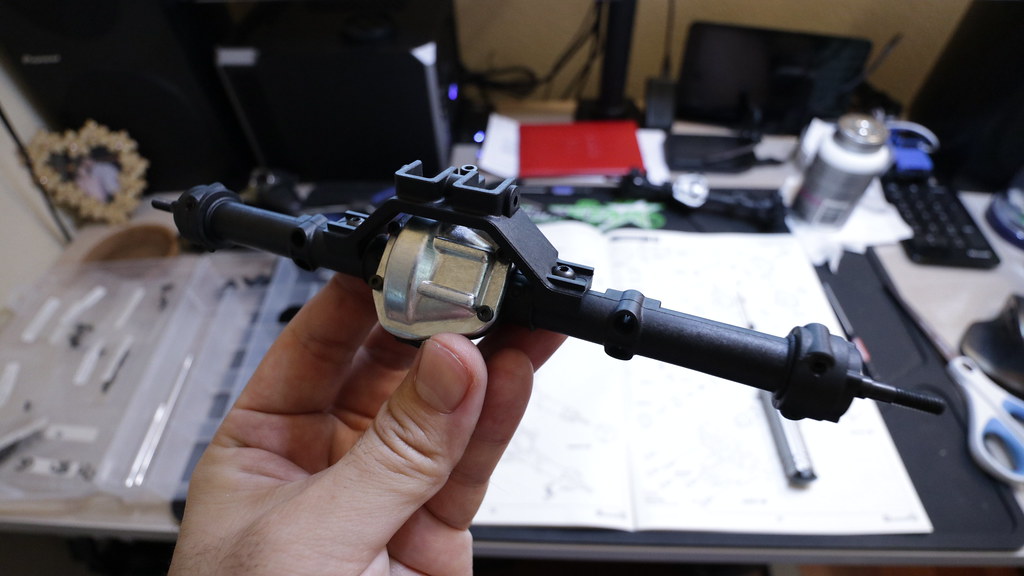 Front and rear axles all done  |

| |
|
09-20-2018, 06:46 AM
| #4 |
| I wanna be Dave Join Date: Sep 2011 Location: Douglassville, PA
Posts: 4,224
|
Welcome to the BOM club! You have much more patience for pics than I do. How are your axles? Any crunch going on there? Just curious. |
|
| |
|
09-20-2018, 07:57 AM
| #5 | |
| I wanna be Dave Join Date: Aug 2016 Location: Orange County, CA
Posts: 3,643
| Quote:
Due to the crunch only happening in one section of a rotation, I'm inclined to think it's the assembling of the diff gear. Either I didn't put together that assembly evenly (which I did double-check), or the plastic housing on the diff assembly is molded unevenly. I wonder if the upgraded diff locker would help with the crunch. | |
|
| |
|
09-20-2018, 08:20 AM
| #6 |
| Moderator   Join Date: Sep 2008 Location: PA
Posts: 13,935
|
I know some of the parts are compatible with Axial SCX10 II parts and the gears look similar to the OG SCX10 so...do Axial gears drop into these axles? That might narrow down the crunching.
|
|
| |
|
09-20-2018, 09:09 AM
| #7 | |
| I wanna be Dave Join Date: Aug 2016 Location: Orange County, CA
Posts: 3,643
| Quote:
| |
|
| |
|
09-20-2018, 09:12 AM
| #8 |
| I wanna be Dave Join Date: Aug 2016 Location: Orange County, CA
Posts: 3,643
| Steps 14-19 + 25: Transmission We start with the B-bag. 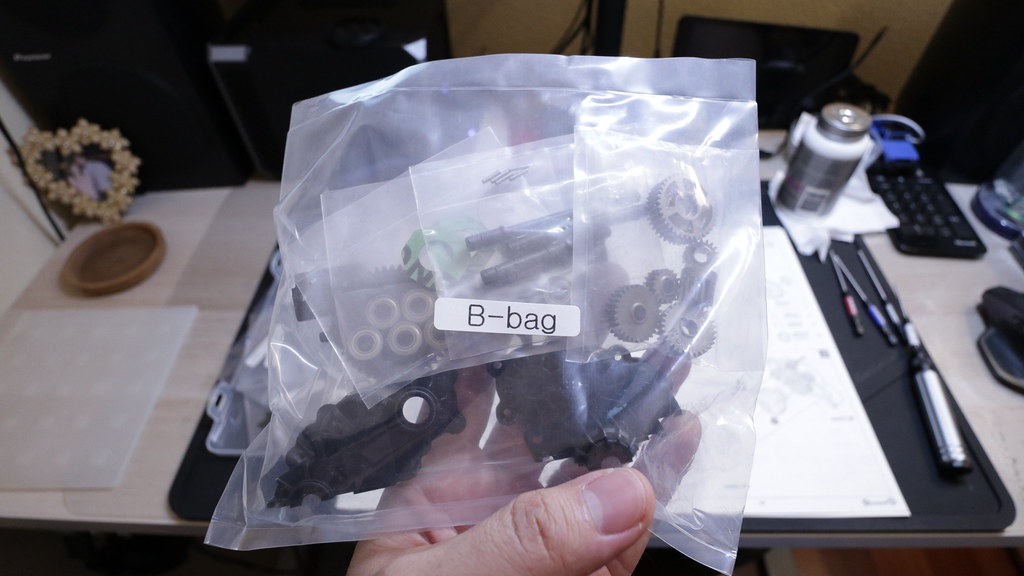 Step 14 parts 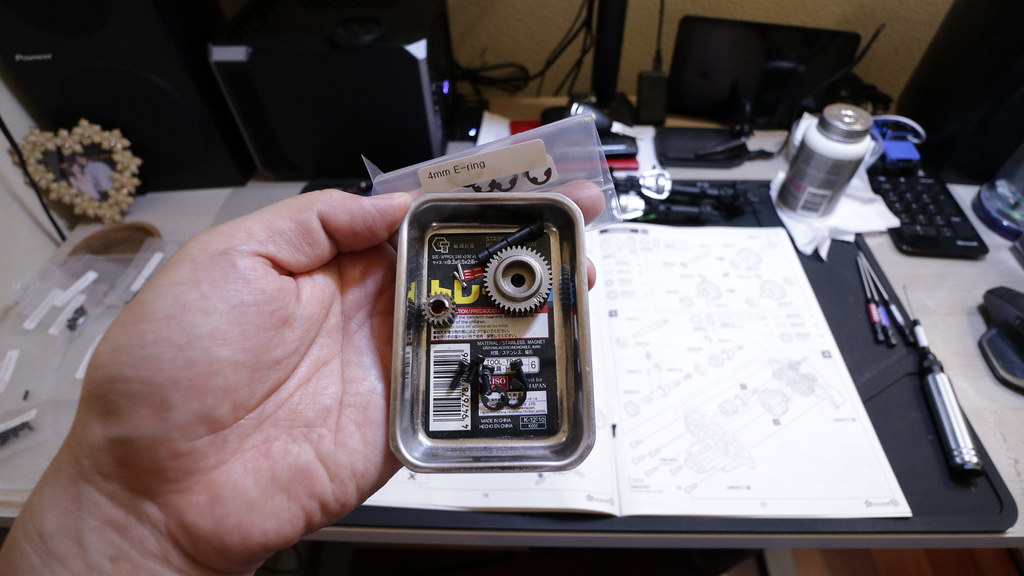 Assembled gears 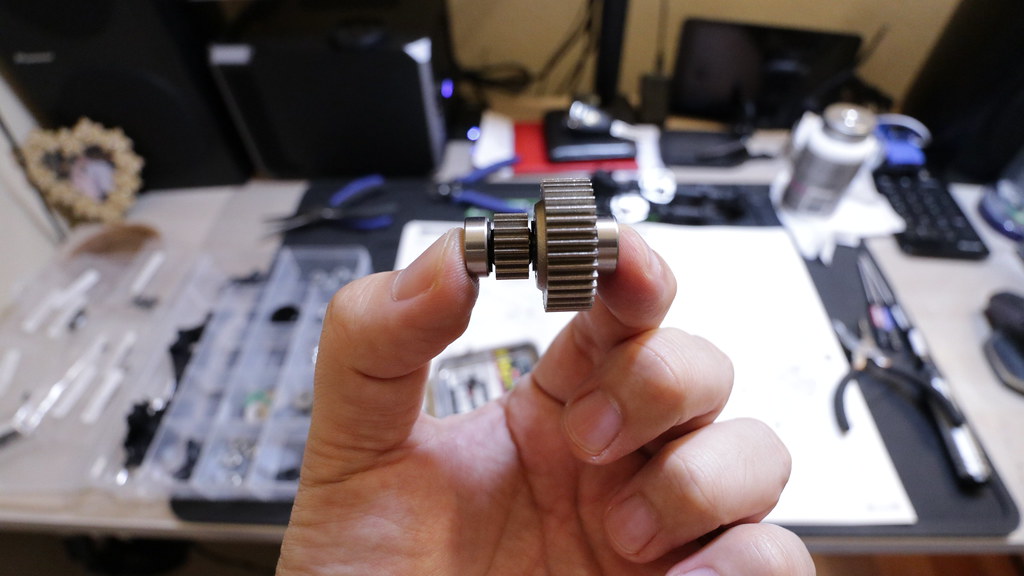 Parts for the next steps 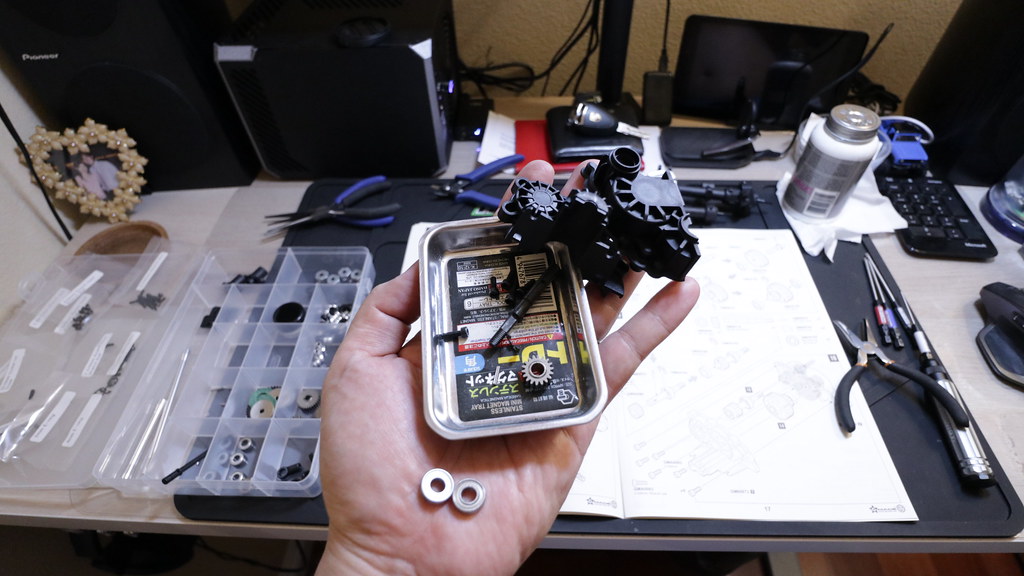 Assembled and greased up 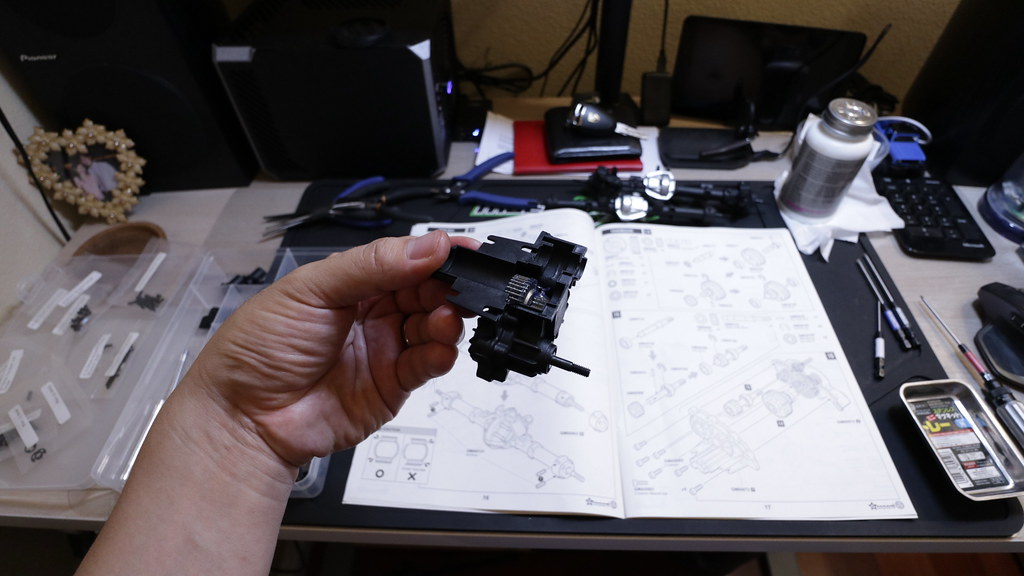 Spur gear goes on. They use stacked conical washers instead of a spring for the slipper. Directions say to fully tighten the lock nut, and then loosen by about a quarter turn. Here's how it looks. 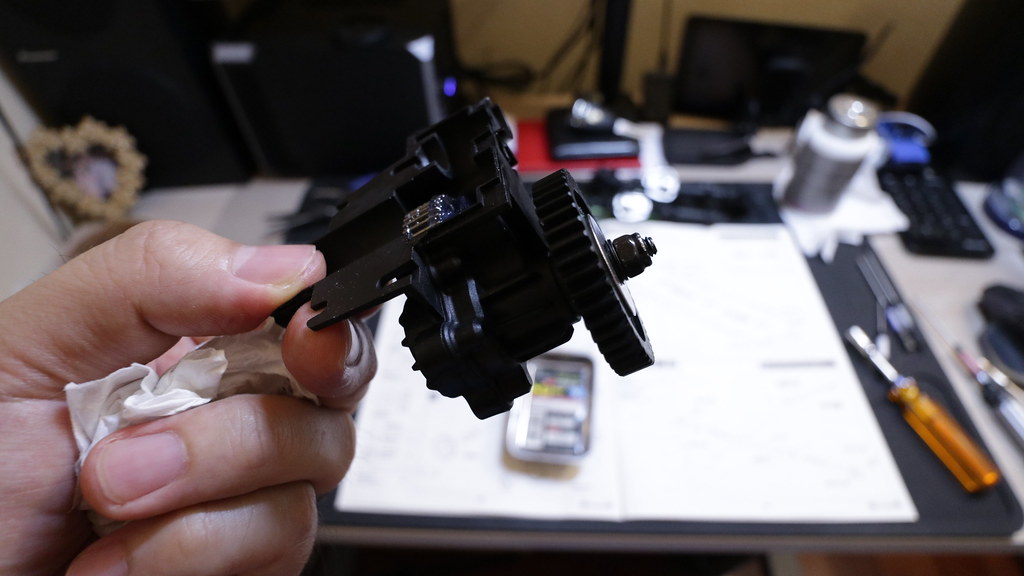 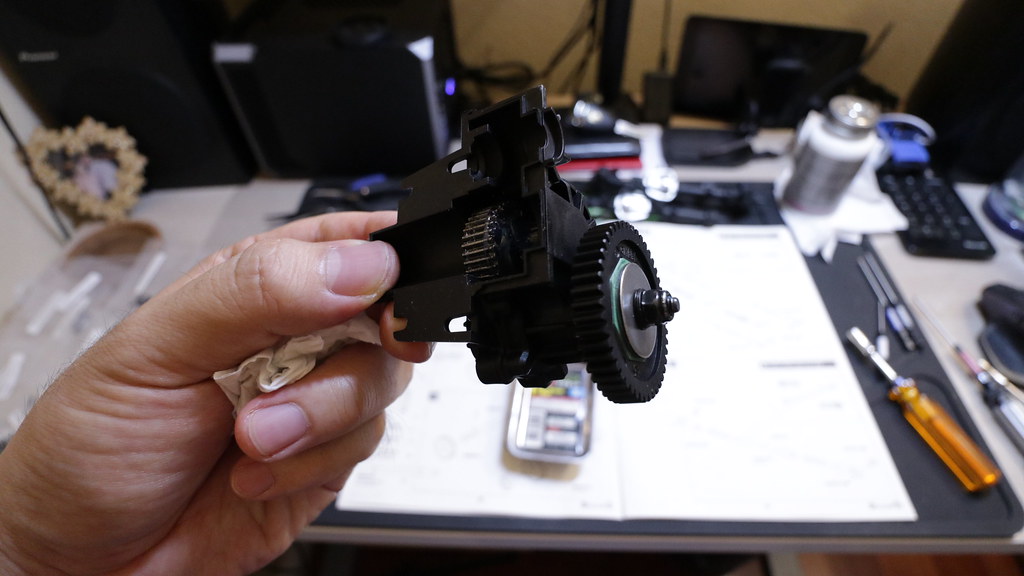 Parts for the next step.. More e-clips yay... 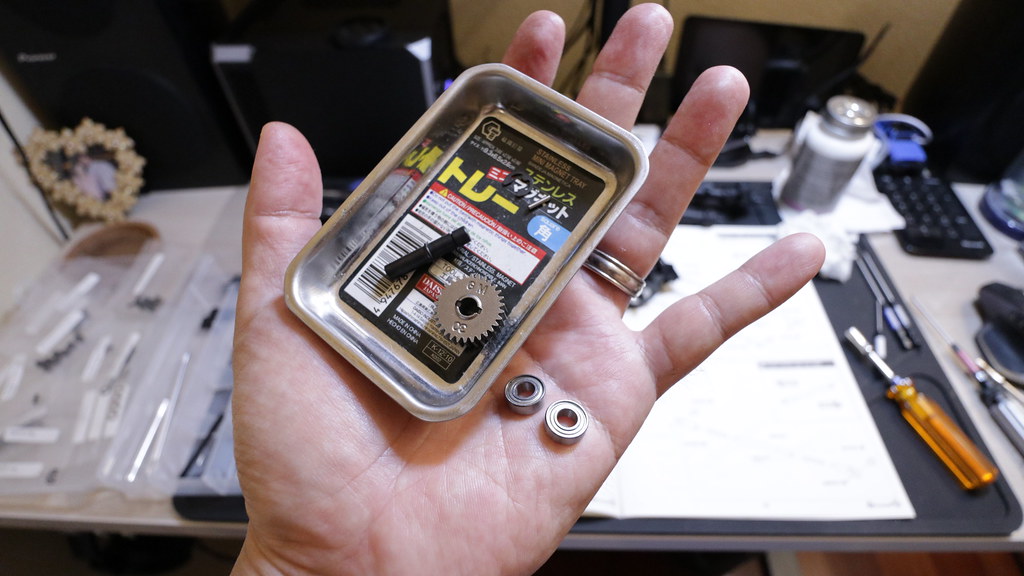 Assembled gears... 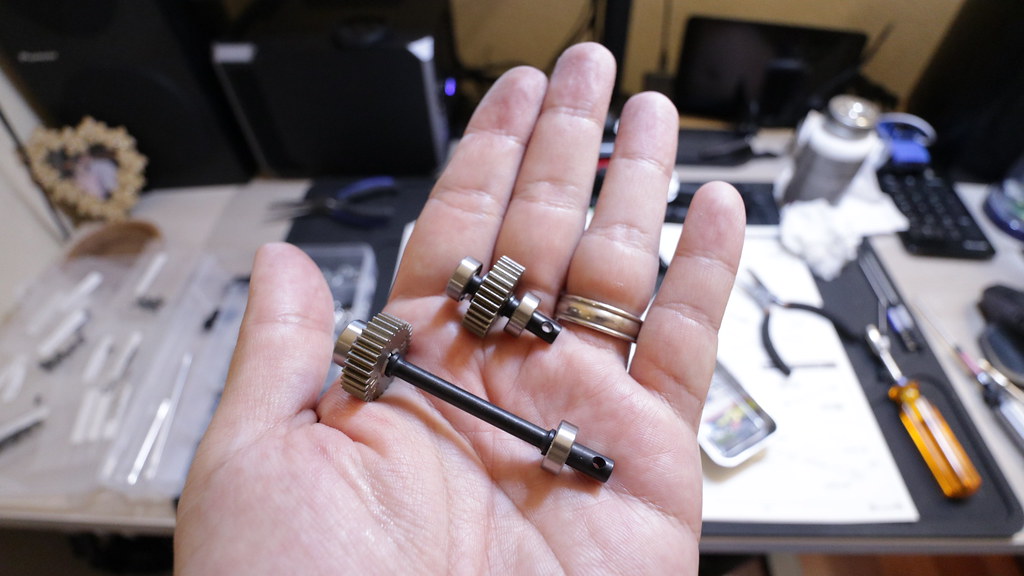 Skipping to step 25 like new2rocks did.  Greased up. I wonder how the 2-speed option setup would look in this spot. That empty space has to be for something. 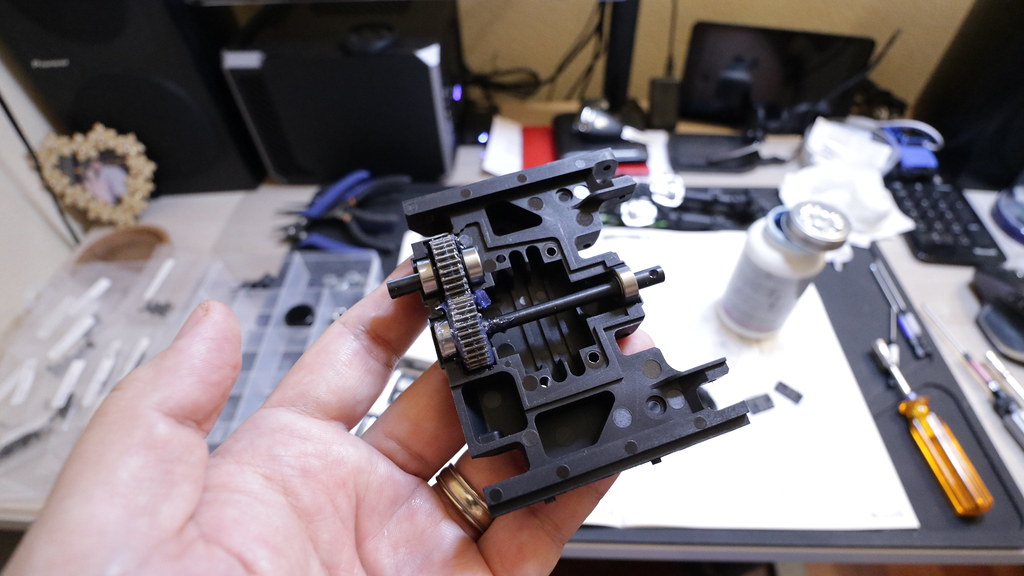 Transmission complete. 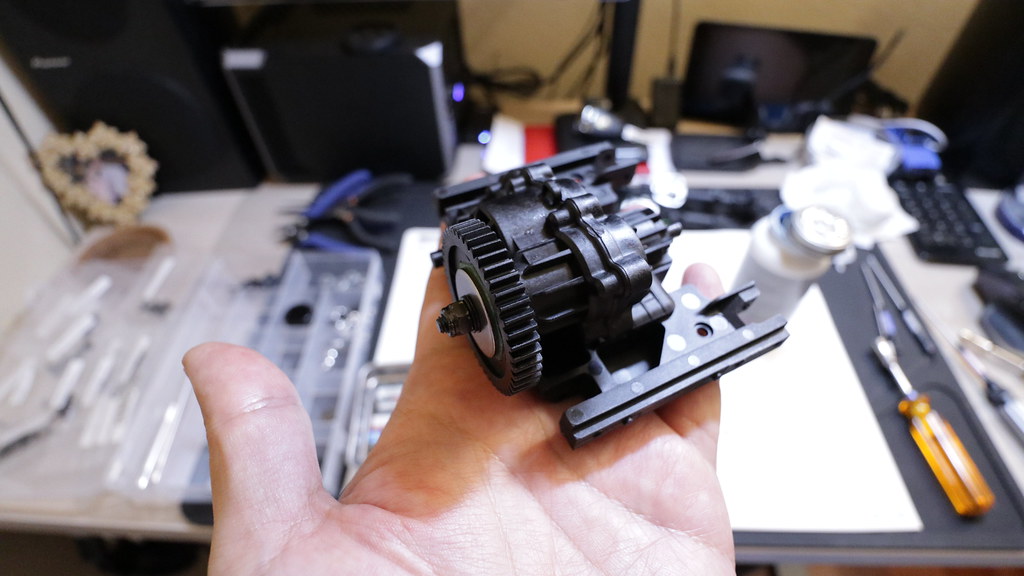 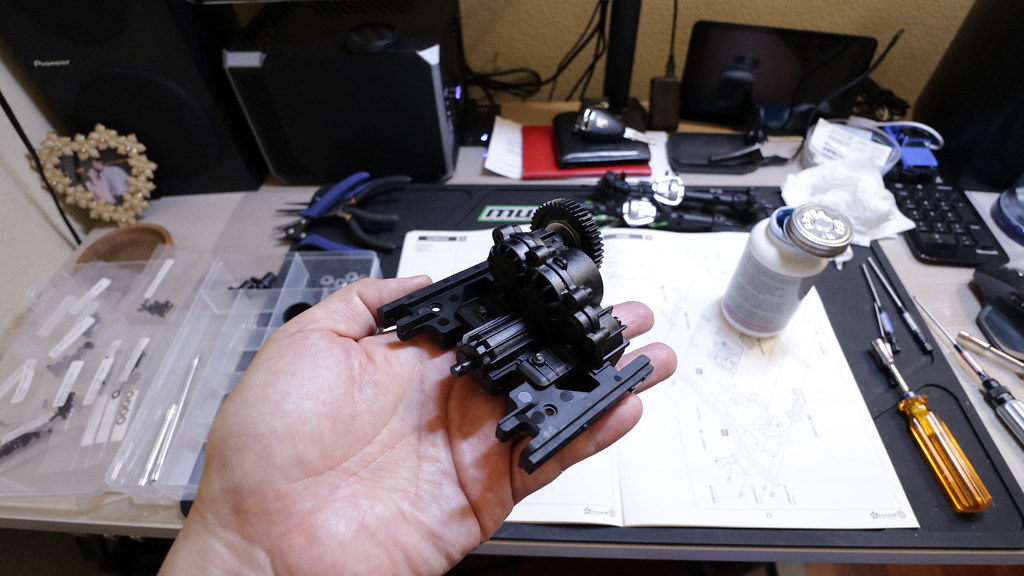 Last edited by soze; 09-20-2018 at 09:52 AM. |
|
| |
|
09-20-2018, 09:47 AM
| #9 | |
| RCC Addict Join Date: Feb 2016 Location: Princeton, North Carolina, USA
Posts: 1,499
| Quote:
| |
|
| |
|
09-20-2018, 09:57 AM
| #10 | |
| I wanna be Dave Join Date: Aug 2016 Location: Orange County, CA
Posts: 3,643
| Quote:
| |
|
| |
|
09-20-2018, 10:00 AM
| #11 | |
| RCC Addict Join Date: Feb 2016 Location: Princeton, North Carolina, USA
Posts: 1,499
| Quote:
I have a link the perfect size for mounting between the front shock towers for stability, but I hate to restrict my battery capacity that much.... | |
|
| |
|
09-20-2018, 10:05 AM
| #12 | |
| I wanna be Dave Join Date: Aug 2016 Location: Orange County, CA
Posts: 3,643
| Quote:
| |
|
| |
|
09-20-2018, 10:28 AM
| #13 | |
| RCC Addict Join Date: Feb 2016 Location: Princeton, North Carolina, USA
Posts: 1,499
| Quote:
| |
|
| |
|
09-21-2018, 12:02 AM
| #14 |
| I wanna be Dave Join Date: Aug 2016 Location: Orange County, CA
Posts: 3,643
| Steps 20-23: Links This is going to be a pretty short step/post. Bag of parts for these steps  Starting the front lower links 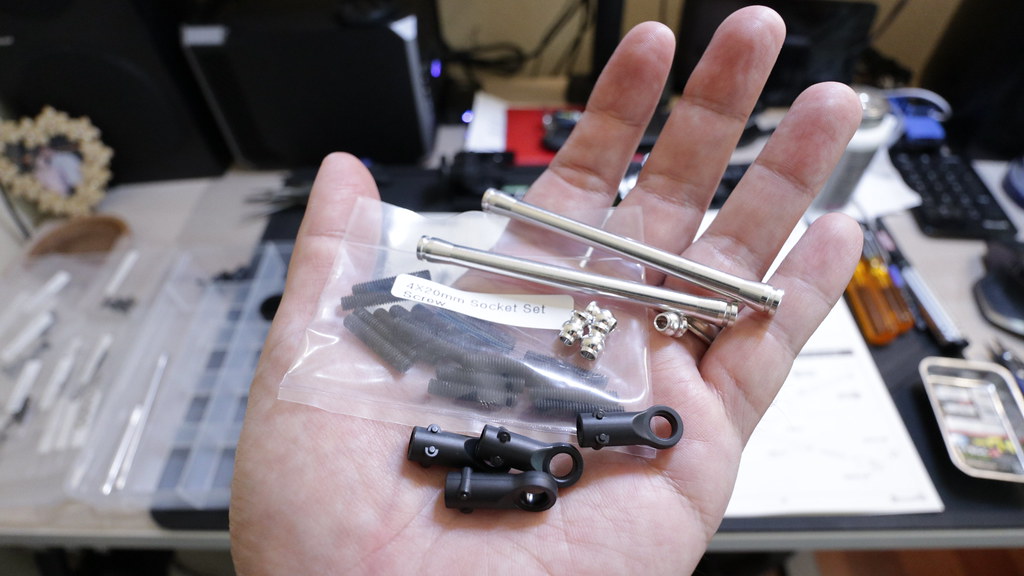 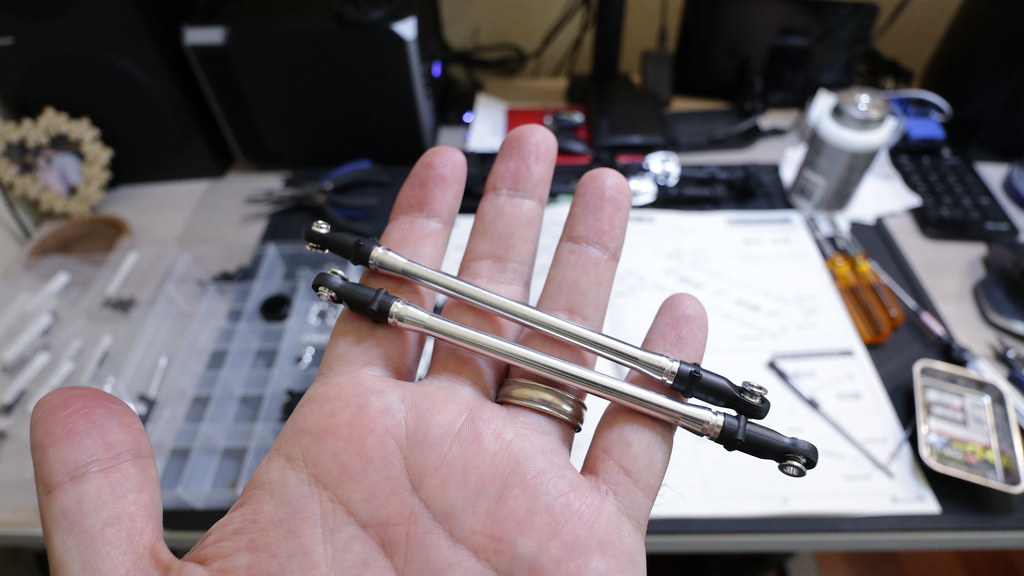 Front upper link 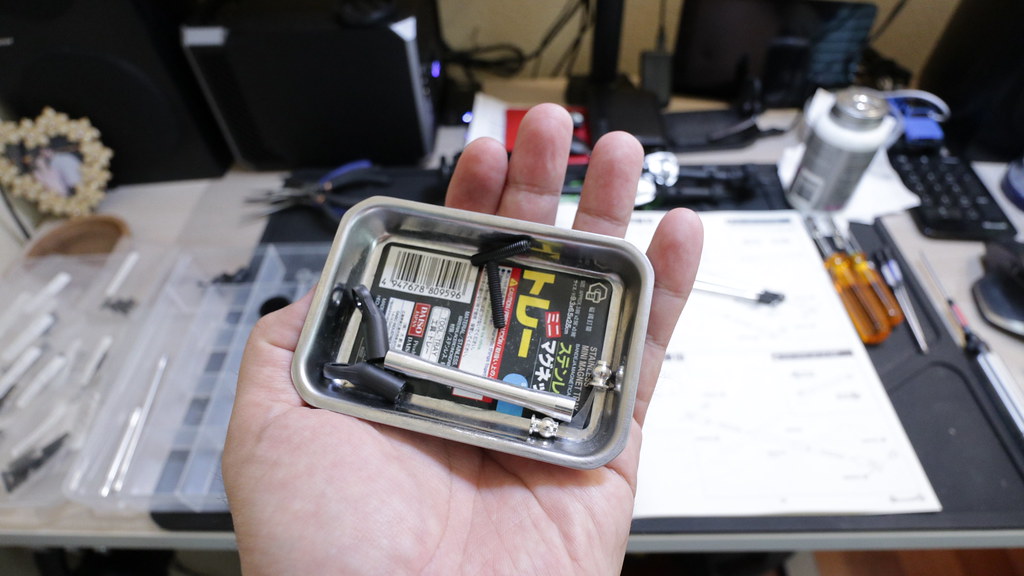 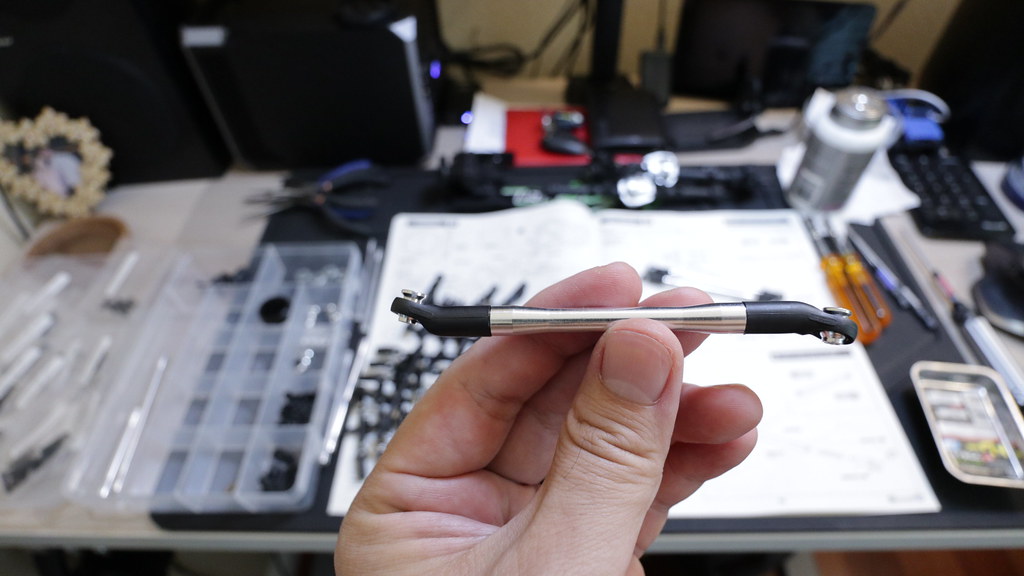 Rear lower links 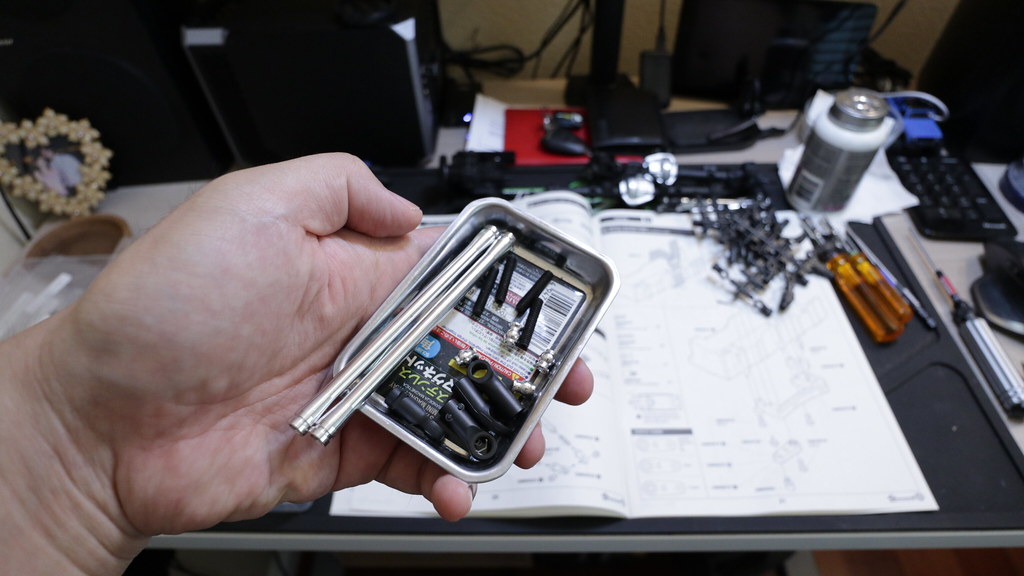 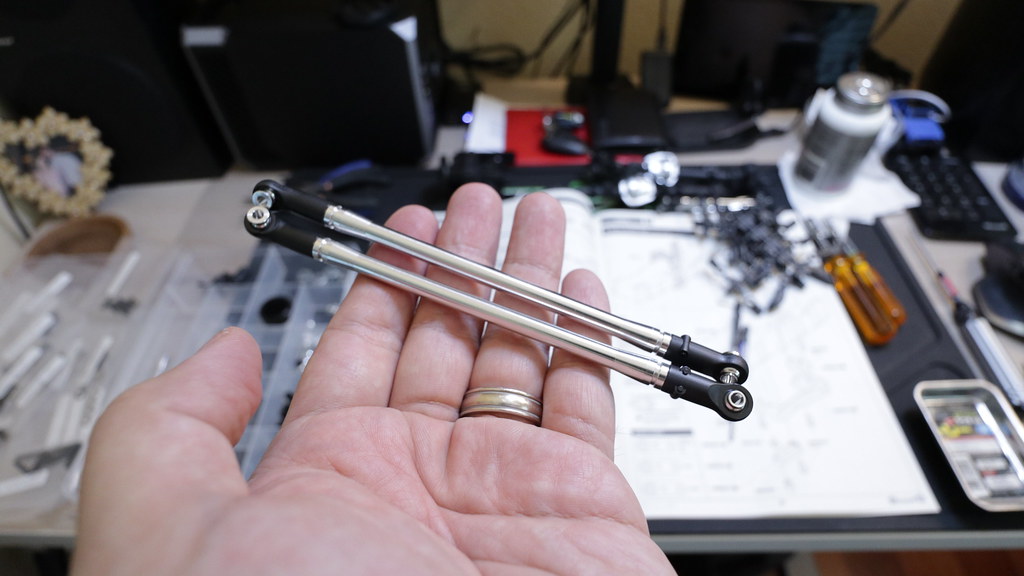 Rear upper links 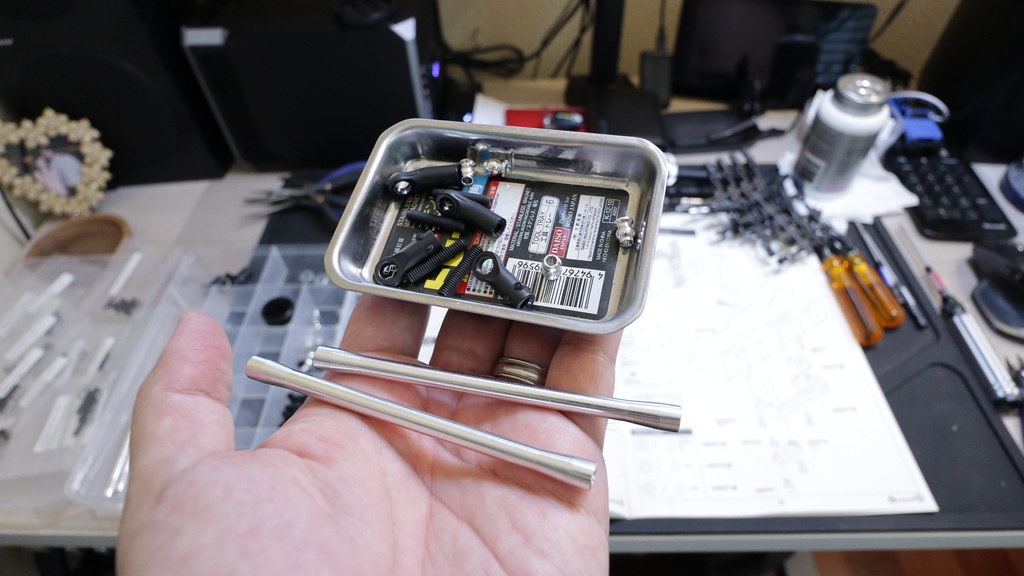 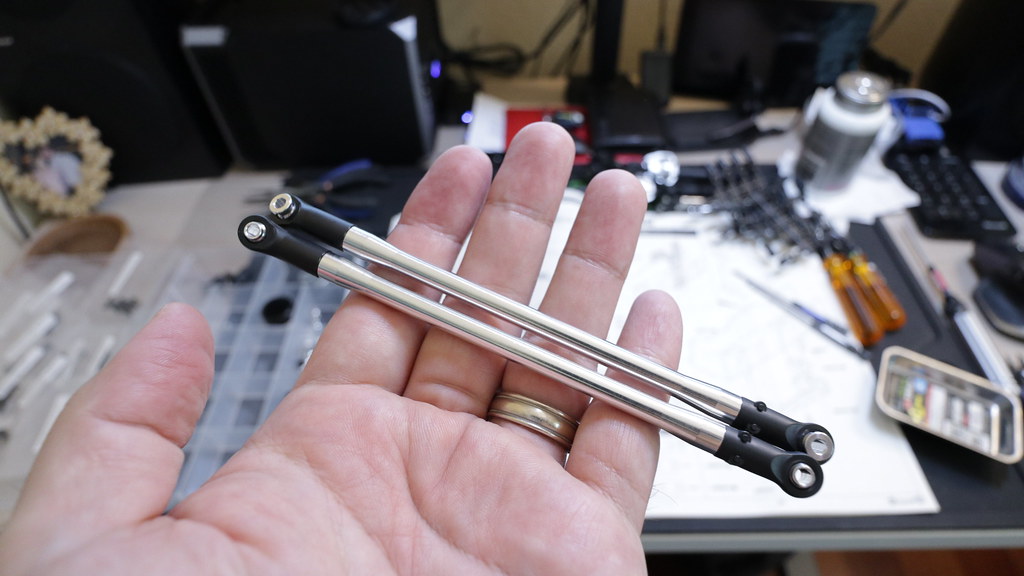 |
|
| |
|
09-23-2018, 11:55 PM
| #15 |
| I wanna be Dave Join Date: Aug 2016 Location: Orange County, CA
Posts: 3,643
| Steps 24 + 26-29: Chassis Time to move onto the chassis. For this step, I also used the following non-kit items... Turnigy MG959 V2 Servo (available on eBay) Yeah Racing Hackmoto 550 35T Brushed Motor (available on eBay) Yeah Racing Aluminum 540 Motor Spacer Heatsink (available on eBay) Boom Racing 25T Alloy Servo Horn These are the parts needed for the battery tray  I'll be using the Turnigy MG959 V2 Servo and a Boom Racing 25T Servo Horn 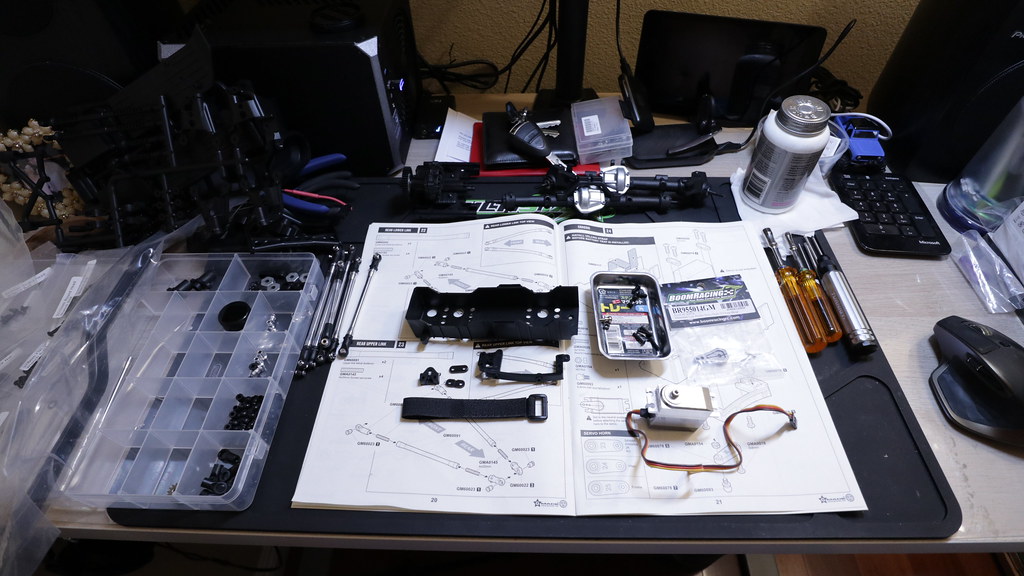 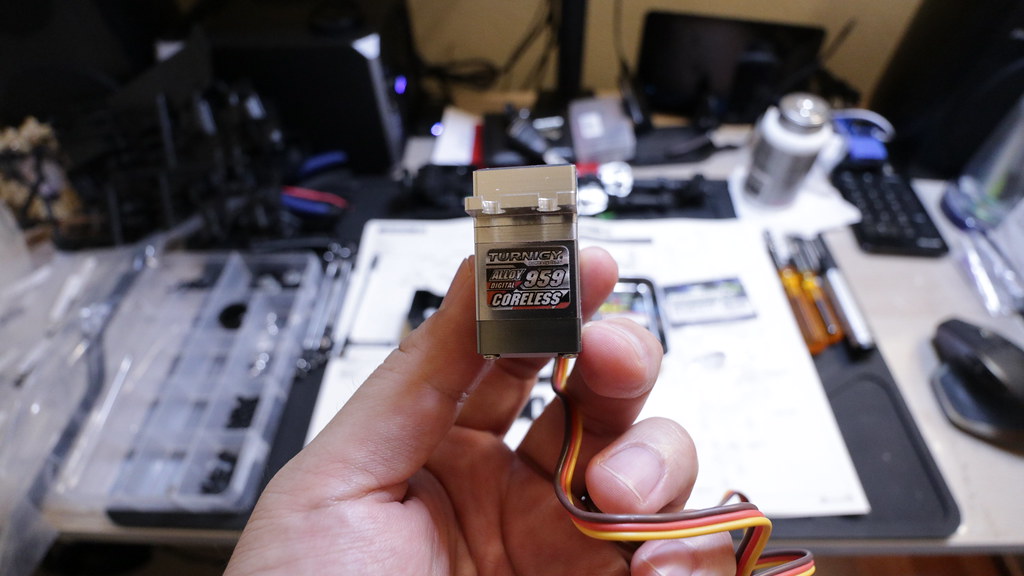 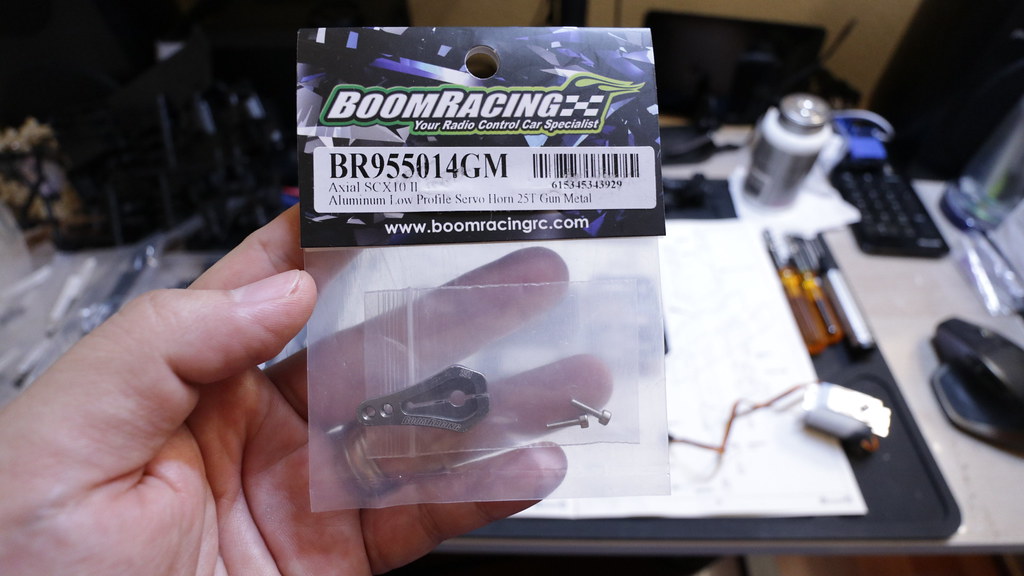 Servo mounted onto the battery tray/servo mount assembly 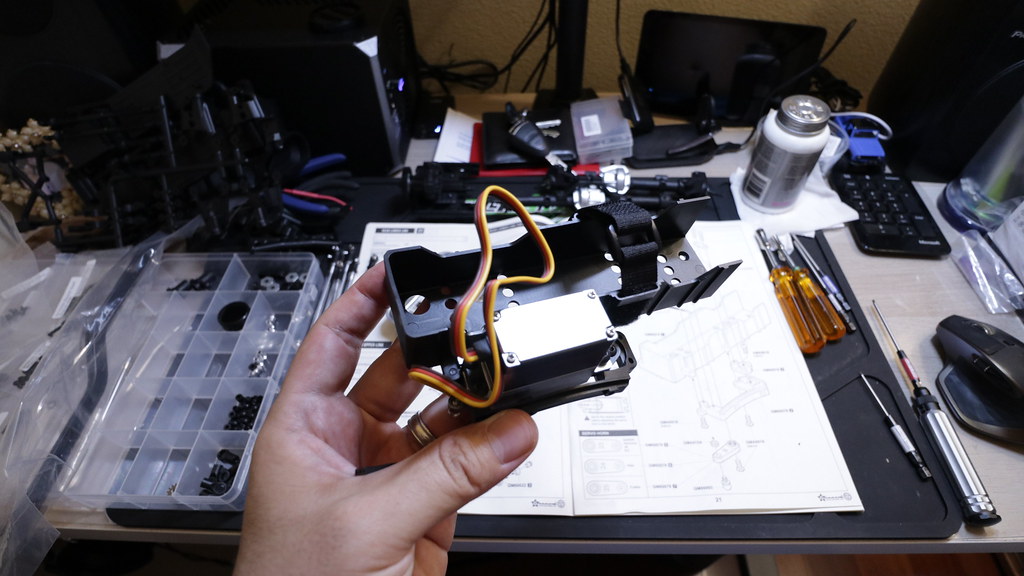 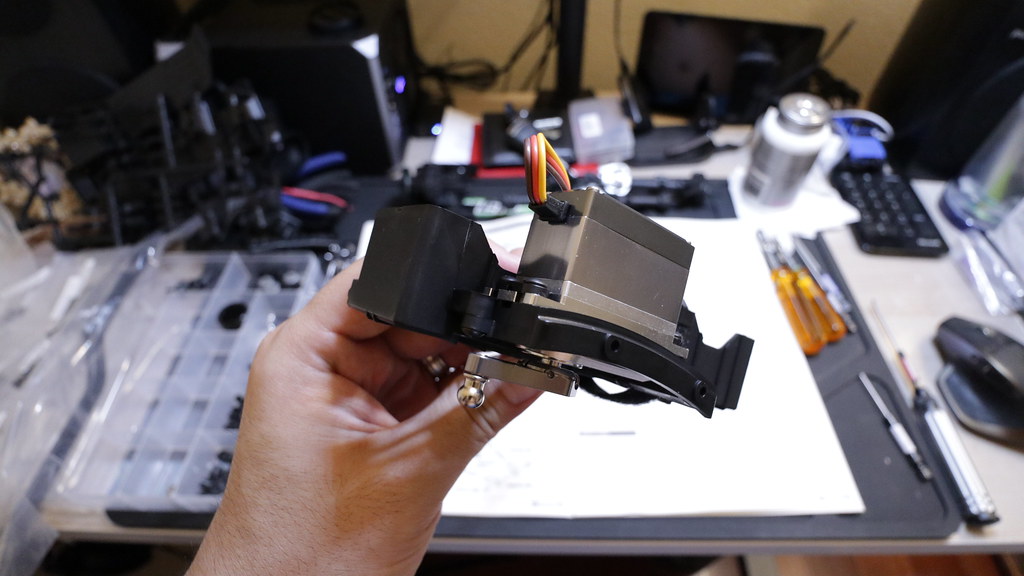 These are the parts needed to start putting the frame rails together 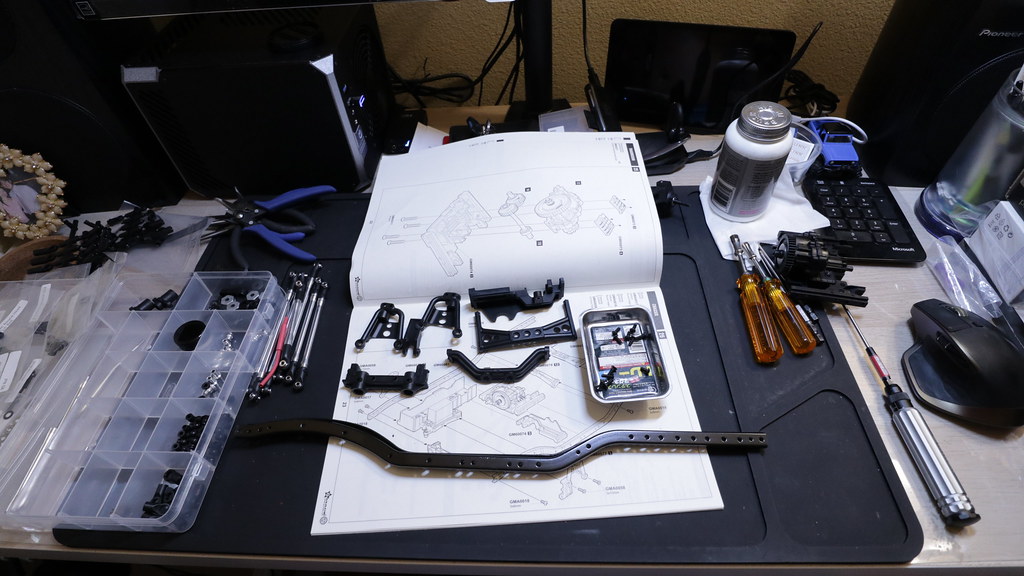 It's starting to look like a chassis! 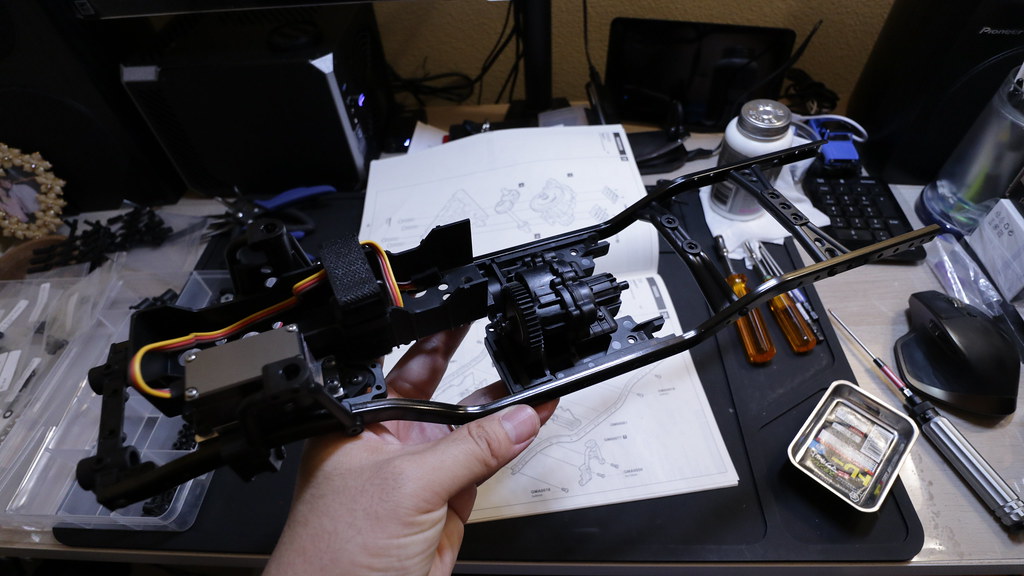 That under-frame receiver box that everybody has been putting weights in... I might do the same. 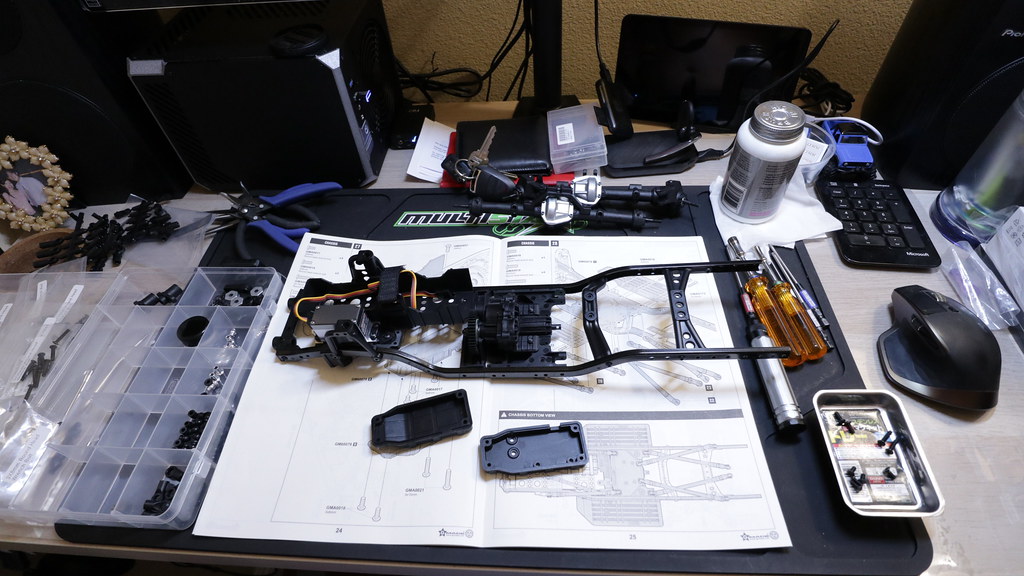 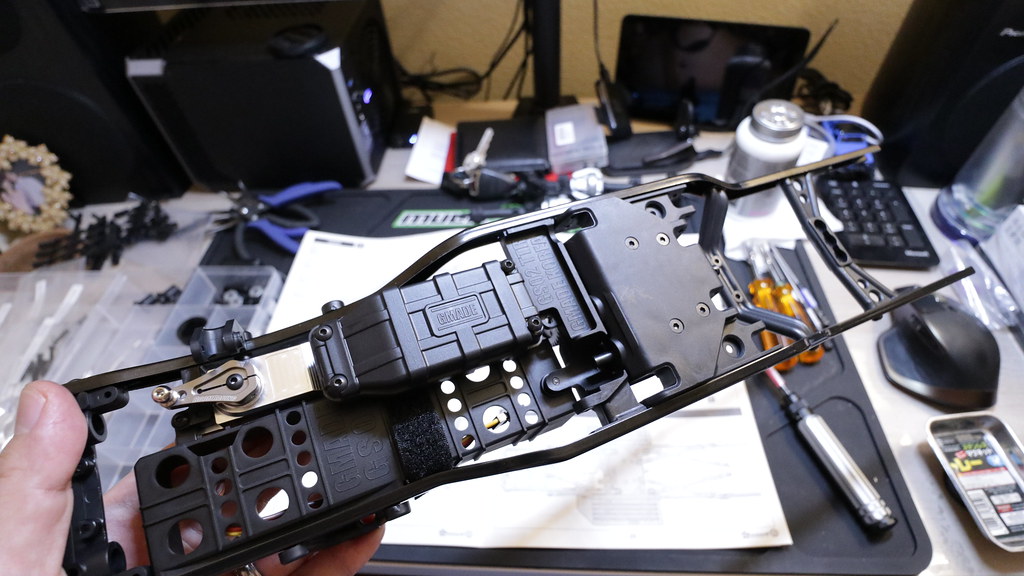 Time to get those links on 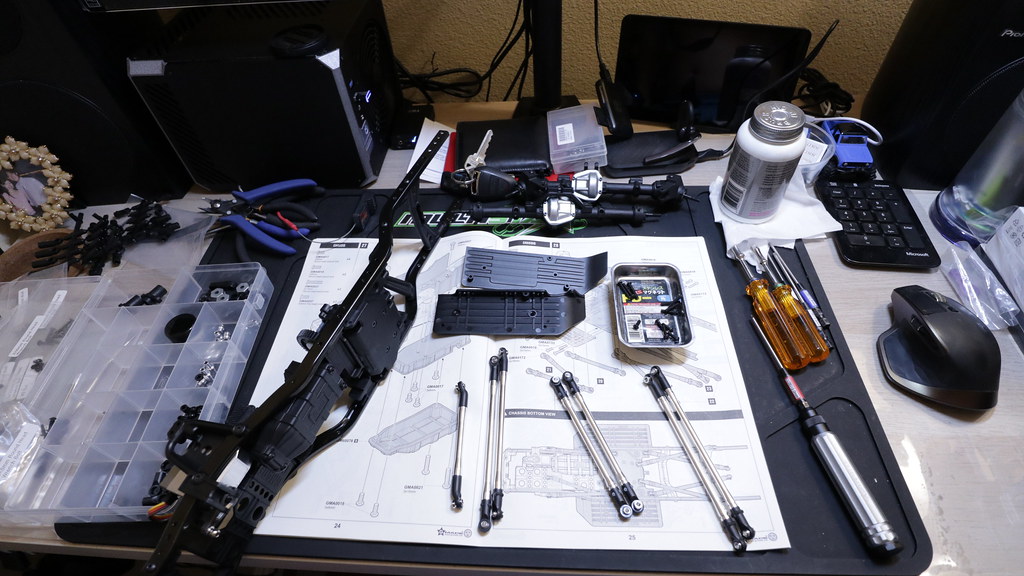 Links mounted 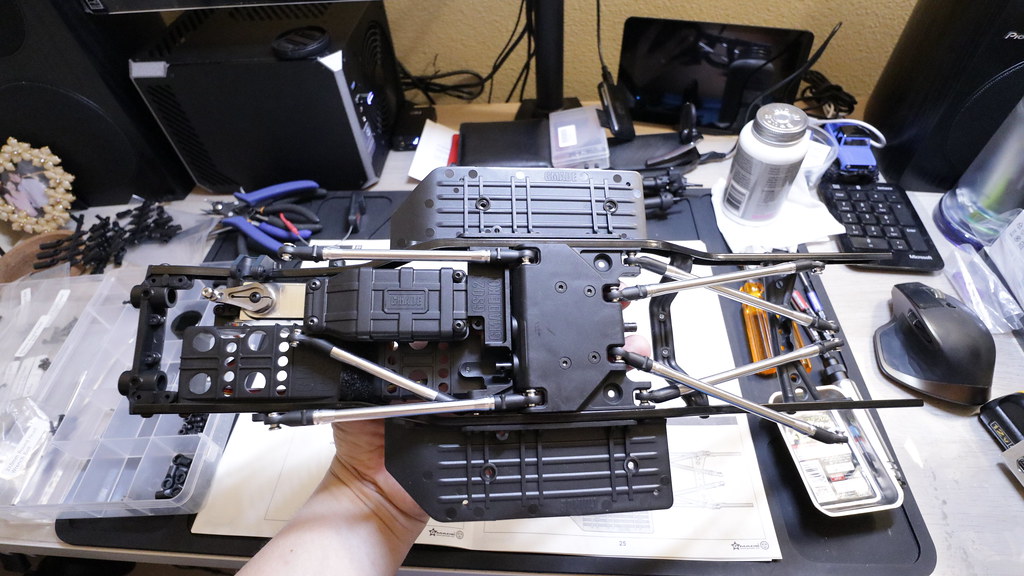 Parts for mounting the motor 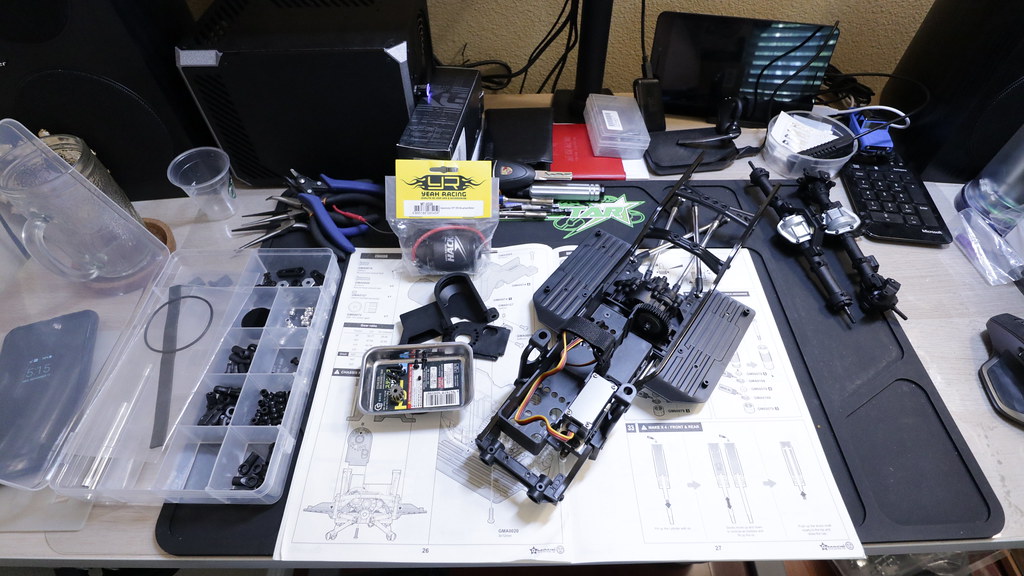 I'll be using a Yeah Racing Hackmoto 550 35T Brushed Motor 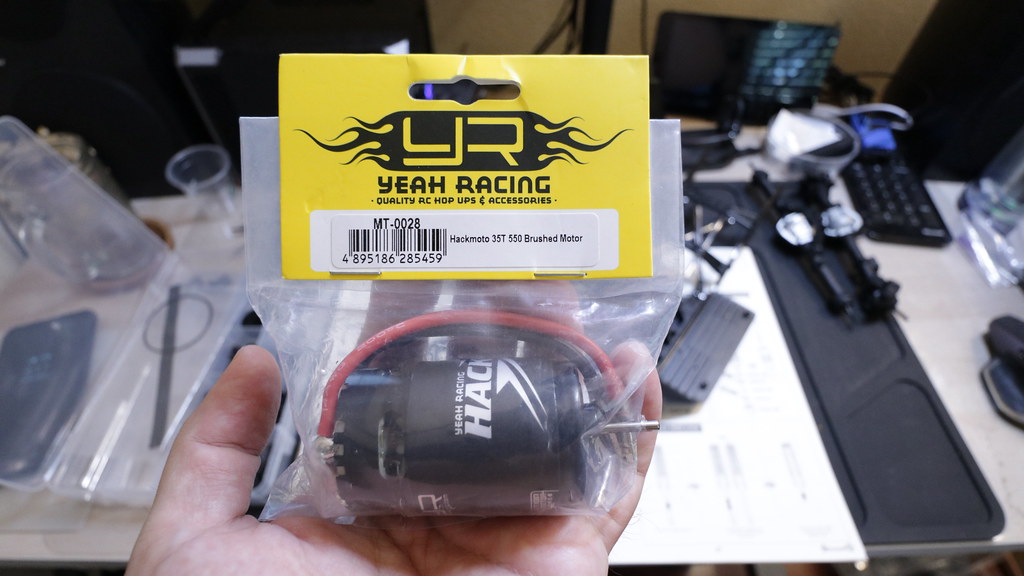 So... I ran into a snag with this motor. The motor shaft is longer than normal, and I couldn't put the transmission cover on without hitting the motor shaft. So I had to get Yeah Racing Aluminum 540 Motor Spacer Heatsink 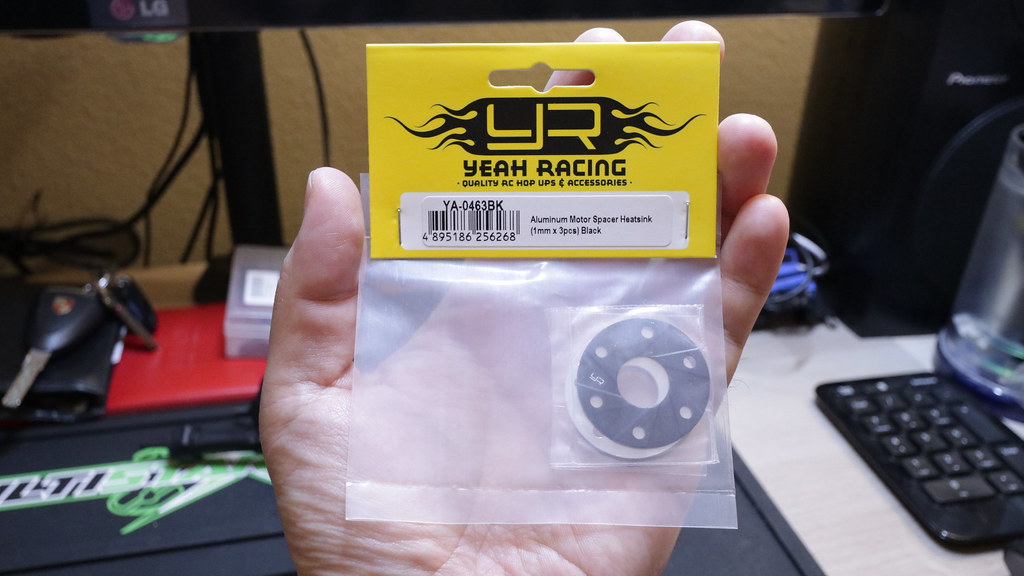 With the spacer installed, I was now able to have the motor shaft clear. 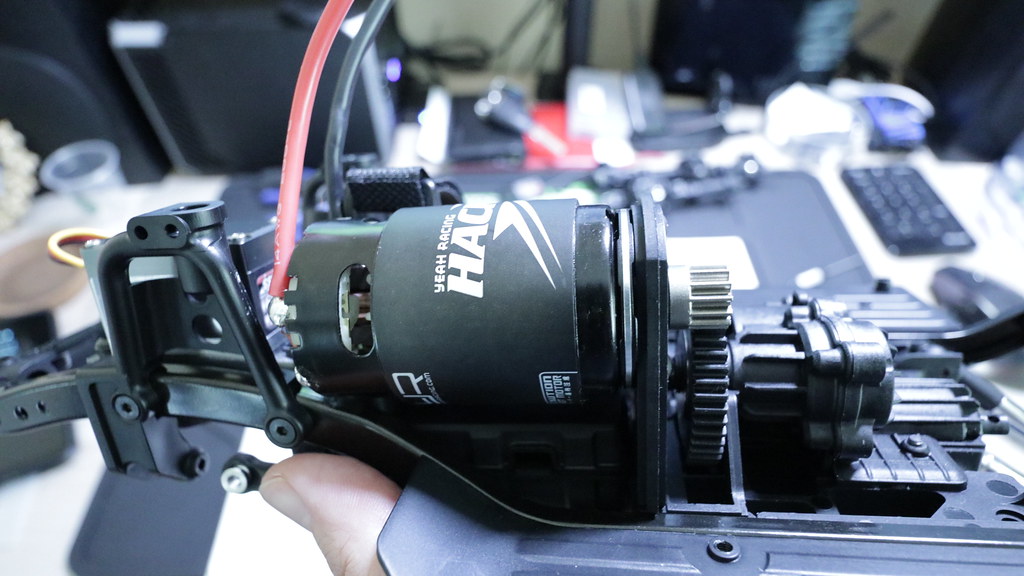 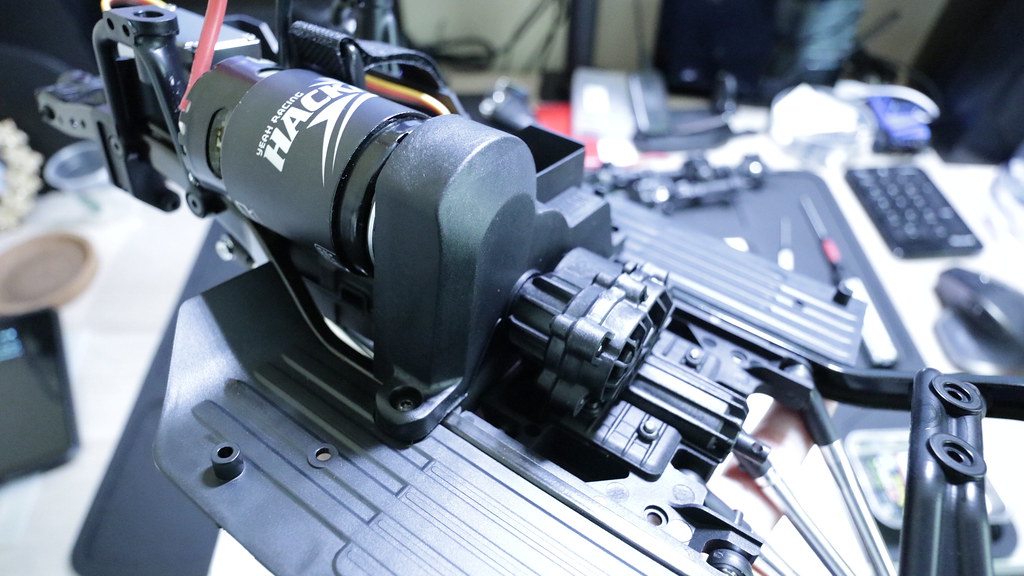 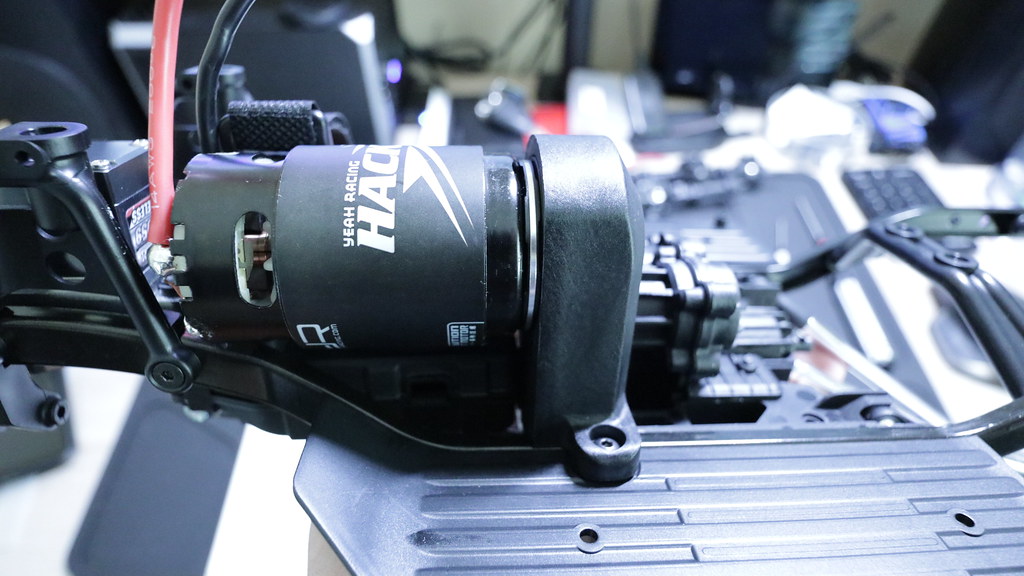 One thing I am concerned about is the pinion/spur mesh. It's tighter than I would like, and since the motor mount uses pre-set mounting holes, there's really no fine adjustment available. I will revisit this area later after I complete my build to see if there is a way I can make the pinion/spur mesh more to my liking. Last edited by soze; 01-07-2020 at 12:06 AM. |
|
| |
|
09-24-2018, 04:04 AM
| #16 |
| Quarry Creeper Join Date: Apr 2011 Location: Germany
Posts: 320
|
Nice write up, especially for the parts you are using in your build. I am interested in how you like the Hackmoto 35T. Keep the good work going  |
|
| |
|
09-24-2018, 06:42 AM
| #17 |
| RCC Addict Join Date: Feb 2016 Location: Princeton, North Carolina, USA
Posts: 1,499
|
Cruising right along there, soze! Strangely, my pinion/spur mesh was almost exactly where I would've put it had there been more adjustment possible. It does seem sort of a strange arrangement as it doesn't take manufacturing tolerances of gears/spurs into account or allow for variance compensation. Not a big fan. Great pics & write-up. Last edited by 2mtech; 09-24-2018 at 07:40 AM. |
|
| |
|
09-24-2018, 07:38 AM
| #18 |
| Moderator Join Date: Sep 2008 Location: PA
Posts: 13,935
|
I like that the battery tray is really low, but there seems to be a lot of extra stuff on the bottom of this truck to get snagged out in the woods. It'll be interesting to see how that plays out.
|
|
| |
|
10-05-2018, 01:46 PM
| #19 |
| RCC Addict Join Date: Feb 2016 Location: Princeton, North Carolina, USA
Posts: 1,499
|
Dude...GMADE GS02 BOM Build Series - Part 5 - Shocks...1:19...I heard "Team Associated penis slime", and now that's all I can hear.  |
|
| |
|
10-05-2018, 02:44 PM
| #20 | |
| I wanna be Dave Join Date: Aug 2016 Location: Orange County, CA
Posts: 3,643
| Quote:
| |
|
| |
|
 Soze's GMADE GS02 BOM Build - Similar Threads
 | ||||
| Thread | Thread Starter | Forum | Replies | Last Post |
| bilinvic's Gmade GS02 BOM | bilinvic | G-Made Crawlers | 152 | 01-02-2022 05:32 PM |
| Soze's GMADE GOM GR01 Build | soze | G-Made Crawlers | 69 | 08-20-2021 12:45 AM |
| GS02 Bom | Old n ratty | G-Made Crawlers | 89 | 11-17-2018 01:53 AM |
| Now In Stock the NEW Gmade Korea GS02 BOM 1/10 4WD Ultimate Trail Truck Kit! | RPP Hobby | RPP Hobby | 0 | 08-24-2018 02:49 PM |
| Pre-Order Now The NEW Gmade Korea GS02 BOM 1/10 4WD Ultimate Trail Truck Kit! | RPP Hobby | RPP Hobby | 0 | 07-31-2018 12:54 PM |
| |


 Linear Mode


