| | #21 |
| RCC Addict Join Date: Feb 2016 Location: Santa Maria, CA
Posts: 1,751
|
I've had the parts for awhile, but I finally put the Holmes Hobbies hv500v1 gears/pins in my 46kg JX servo, so that will be bolted to the Sawback's front axle when it's ready for electronics. After much deliberation, I decided to make the belly skid from stainless steel instead of aluminum. I scored a big scrap of 3/32" stainless plate (I think it was 316, I scotch-brited off the markings before I traced my pattern) and started cutting with a jigsaw. 5 blades later I said heck with it and finished with a thin cutoff wheel on the die grinder. I then used my makeshift brake (which looks an awful lot like my vice, a block of uhmw, and a 2lb hammer) to put the 4 bends in the plate... holy crap those short outer bends put up a fight! On the plus side, I'm not at all worried about its durability, my kids can stand on it without the plate deforming and a hard swing with a sledge won't dent it! Next up I mounted the cab mounts upside down, inboard of the frame rails as my new skid plate mounts. I used some spacers off of the parts trees to go inside of the c-channel frame which pushed the cab mounts in far enough to drop down flush with the bottom of the frame rails. With the motor mounted as far out as it can go in its slots, it clears the new skid mounts with room to spare and it only gets better if the motor moves inward. I'm 100% mounting the transmission with the motor on the front too. So that's all mounted with button head screws, I need to get a different counter-sink bit since apparently there are a few different "standard" angles... and I've been using the wrong one for metric hardware all along! Next up will probably be body mounts, I sure wish that the Vaterra K5 body hadn't been pre-drilled, I may look into adapting the stock Ascender rear mount. |
| |  |
| Sponsored Links | |
| | #22 |
| RCC Addict Join Date: Feb 2016 Location: Santa Maria, CA
Posts: 1,751
|
After perusing through more build threads, I've got some new ideas. Being that I recently yanked the interior out of my Wraith, I feel it would be the right thing to do to put a full interior in this car. Obviously, Dinky RC's purpose built Vaterra K5 interior influenced that decision, and the Wraith seats will fit nicely in there. Going with the full interior will require a little creativity to get the transmission out of the way, but I think I've finally found the solution with MST's front motor kit (converts the CMX to a CFX.) I've seen the Sawback trans mounted up front along with a divorced transfer case, but while it looked to have got the job done, it just didn't have that "looks like it came from the factory" look. I really wanted to fall in love with SSD's scale SCX10 transmission, but the front driveshaft being on the driver's/left side is a deal breaker for my square body Chevy. GCM's transfer case could be assembled with the output on either side, but I started experiencing a little sticker shock considering that it's not a bolt-in solution, so I continued exploring my options. An RC4WD single speed R3 trans and Hammer t-case could certainly be made to work, but for whatever reason, I just wasn't feeling it. When I came across OSRC's Sawback axle'd CFX, the lightbulb finally turned on for me (I sure do get a lot of inspiration from you OS!) OS was kind enough to check some dimensions for me, confirming that the CFX and Sawback chassis' are the same width where it counts, so I think I can take it from there! The divorced t-case will allow me to position the motor/trans and t-case in their most ideal locations and just build an intermediate shaft to suit. Of course the front output is on the passenger/right side too, the t-case *should* be low enough to clear the Dinky interior, and the price seems very reasonable at about $75. Being this late in the year, I'll probably put those 2 items (MST transmission and Dinky interior) on my Christmas wish list, but there's a good chance I'll throw the trans on my order (with my son's Christmas present: Gmade BOM kit) the next time Ebay has a 15% off coupon. I'm pretty excited to see mixed & matched parts start playing together in a manner that looks like it was meant to be! |
| |  |
| | #23 |
| Moderator  Join Date: Sep 2008 Location: PA
Posts: 13,935
|
Still no photos? I'm anxious to see this build...even the parts you have gathered!
|
| |  |
| | #24 |
| RCC Addict Join Date: Feb 2016 Location: Santa Maria, CA
Posts: 1,751
|
Since my 1:1 has 16" Fox triple bypass shocks, I've been on the hunt for something fitting for this build. Scale bypass shocks aren't really a common/readily available item, so I wasn't sure what I was going to do. I couldn't believe my eyes when I saw a set of 4) 100mm RC4WD King shocks with 3d printed quadruple bypass sleeves for sale right here on RCC! Those will work! Now, I'm a Fox man through & through, but beggars can't be choosers here. I know the RC4WD shocks leak like a sieve, but I'll throw some x-rings in them and just enough oil to keep things sliding, and that'll be good enough for this car. Those familiar with the stock Sawback shocks know that they don't provide much travel (about 15mm) so the 100mm Kings will double that, while still bolting right in place of the stockers. Depending on how much travel the leafs are capable of RELIABLY cycling, and where it sits in its travel, I may move the stock shock towers up a little bit. Mrs. Clause missed Dinky RC's black Friday 50% off sale by a couple minutes (didn't notice the difference in time zone) but they were awesome enough to honor it anyway! Full interior should be on its way soon! The MST front motor kit already arrived from RCMart... but I'm not supposed to know about that either |
| |  |
| | #25 |
| Quarry Creeper Join Date: May 2017 Location: UK
Posts: 230
|
Pics man! |
| |  |
| | #26 |
| RCC Addict Join Date: Feb 2016 Location: Santa Maria, CA
Posts: 1,751
| |
| |  |
| | #27 |
| RCC Addict Join Date: Feb 2016 Location: Santa Maria, CA
Posts: 1,751
|
Here's my 1:1 (the last time it was actually sitting on its wheels, right before it got mothballed) that I'll be attempting to replicate: 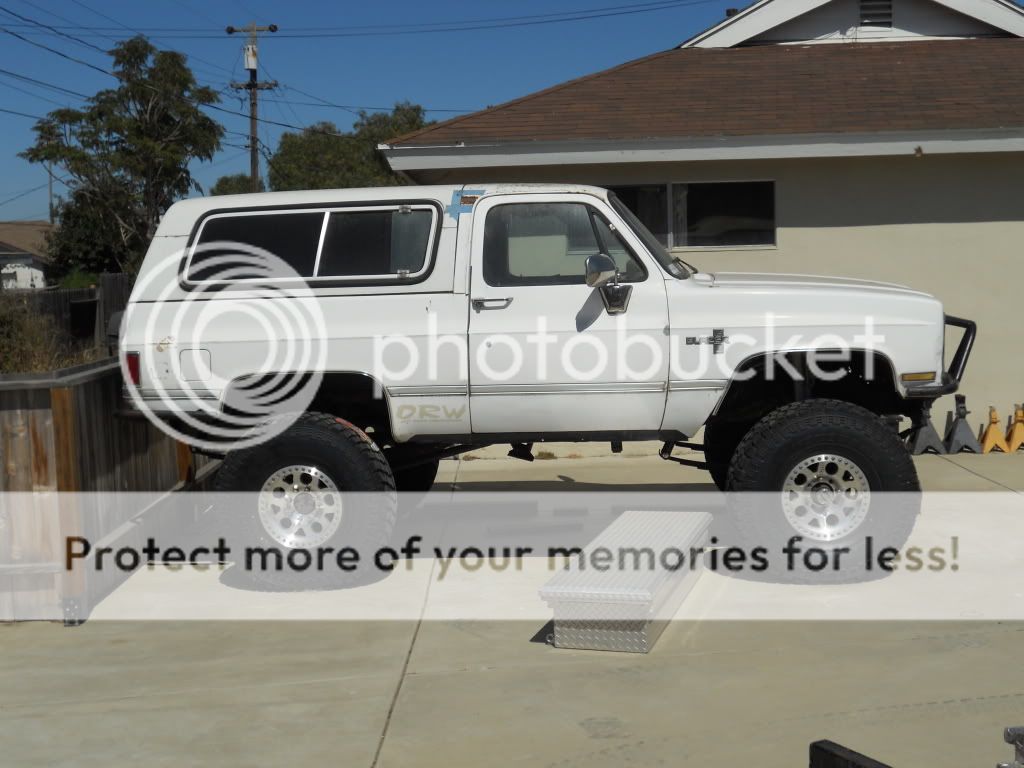 Seeing how I'm having some luck with my photo's, I'll try to update as things progress from here. I know my build isn't terribly exciting, but if there's anything you'd like to see closer, let me know and I'll try my best to get a picture.  |
| |  |
| | #28 |
| RCC Addict Join Date: Feb 2016 Location: Santa Maria, CA
Posts: 1,751
|
I took a break from all of my projects to supervise my 8 year old son while he built his first ever kit, Gmade BOM GS02: 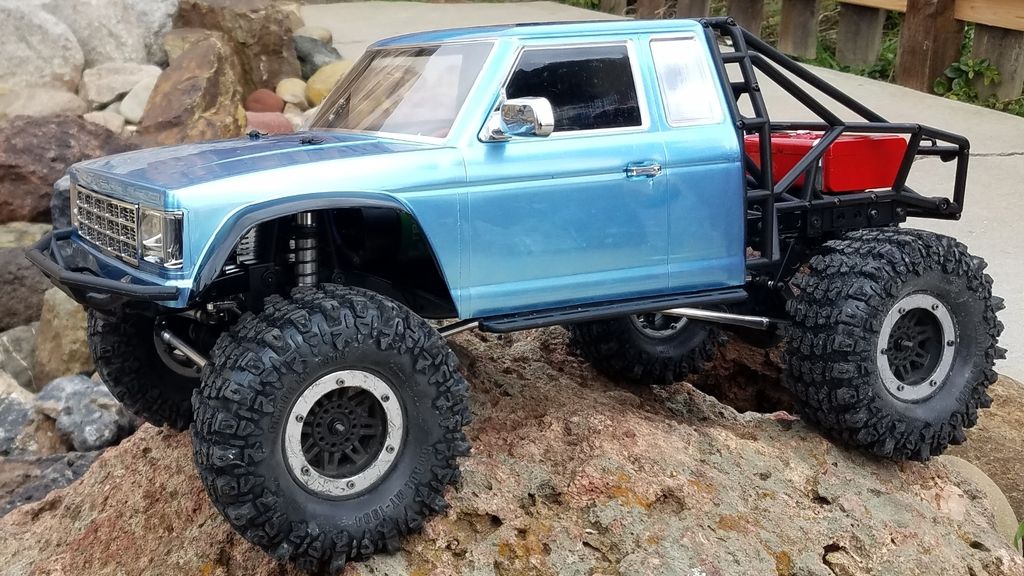 With that off of my workbench, I built the MST front motor kit tranny and started playing around with placement. The 540 motor is just for mockup, but I think I'm getting in the ballpark of placement, but I'll need to make a new front mount to get everything to sit as low/far forward as I want, without the axle mounted servo colliding with the slipper clutch nut. 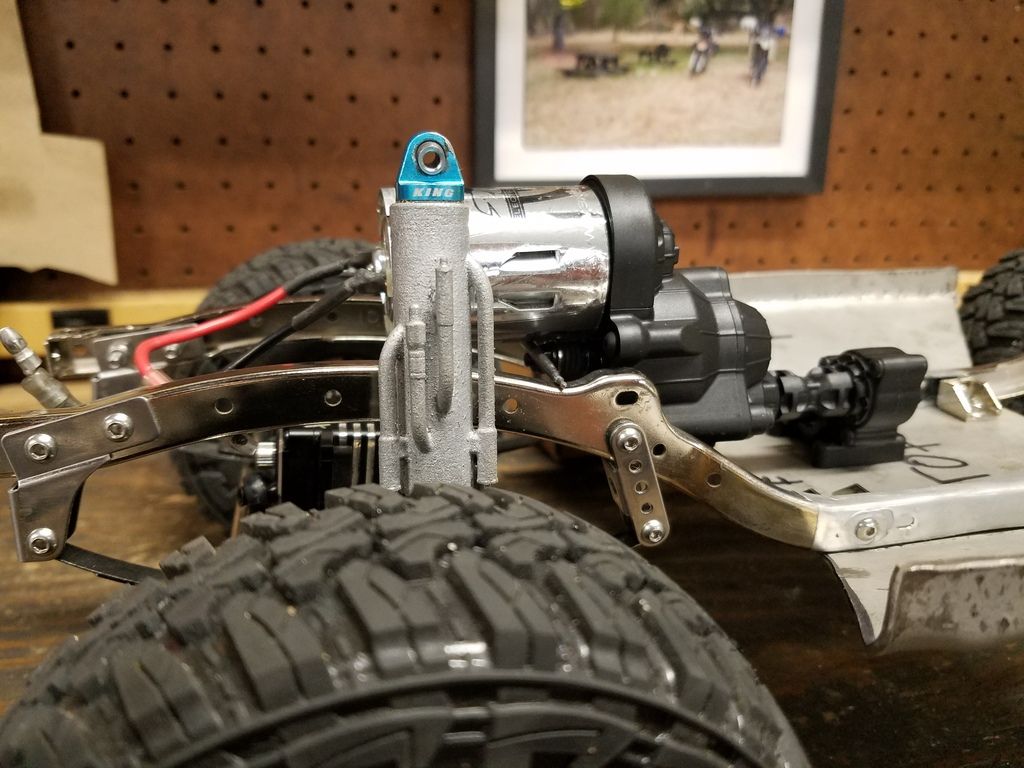 In the above picture, you can also see the Bruiser front spring hanger and shackle providing a clean shackle reversal. I think that just required drilling 1 new hole and making a couple spacers. Also visible is one of the quadruple bypass shocks, and the upside down cab mounts being used to mount the skid plate. For the sake of playing catch up, here's a before and after of the frame rails: 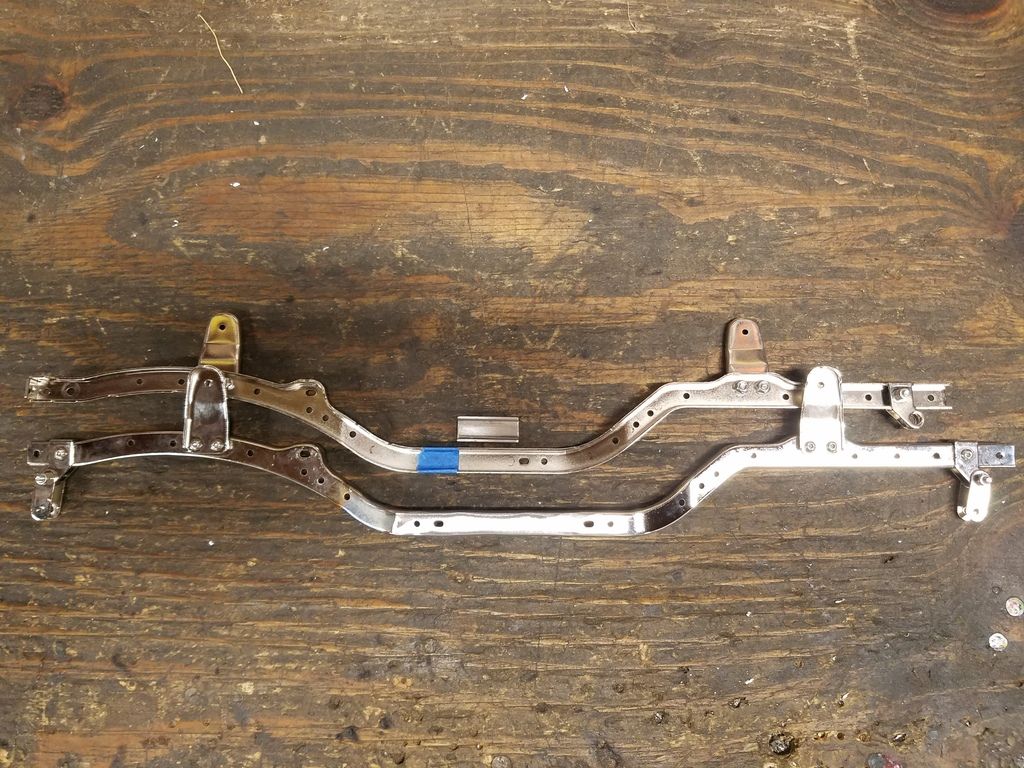 ...and the Sawback body found a good home on my 5 year old son's Redcat Gen7: 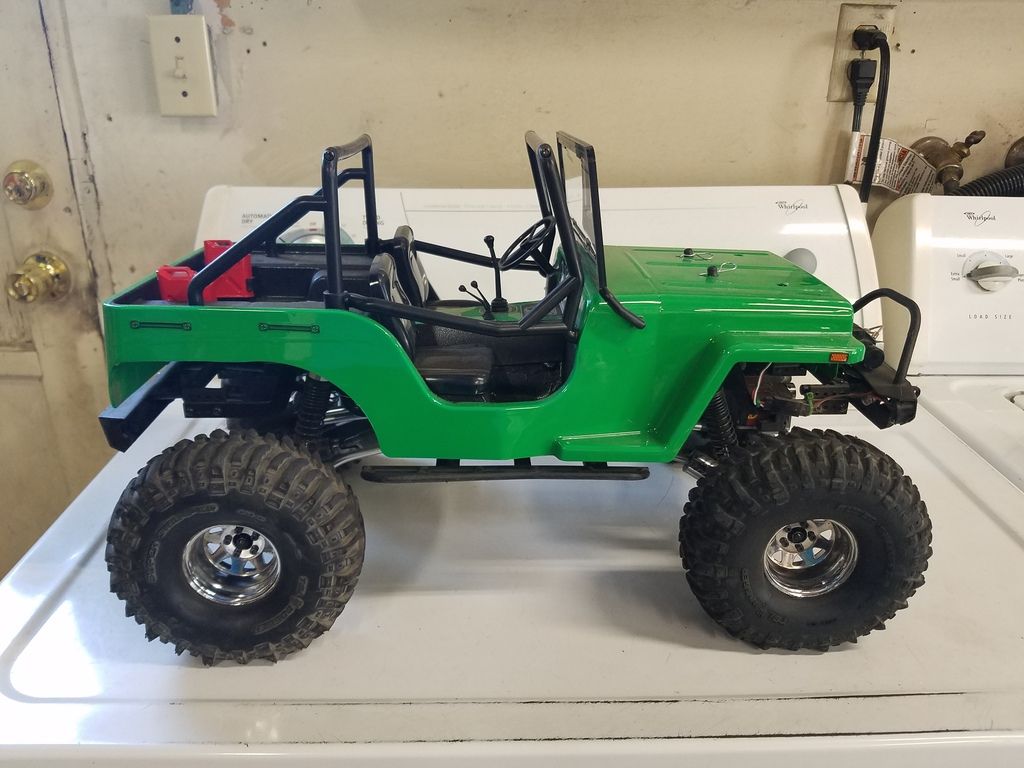 That just about catches up with my progress to this point. |
| |  |
| | #29 |
| I wanna be Dave Join Date: Aug 2016 Location: Orange County, CA
Posts: 3,643
|
Man, doing good work with the Sawback platform! I've gotta dig mine out and mess with it now!
|
| |  |
| | #30 |
| RCC Addict Join Date: Feb 2016 Location: Santa Maria, CA
Posts: 1,751
|
I finally commited to motor/trans position and after staring at it way too long I figured out how to execute the mount. I started with a piece of 2"x2"x1/8" angle aluminum and came up with this: 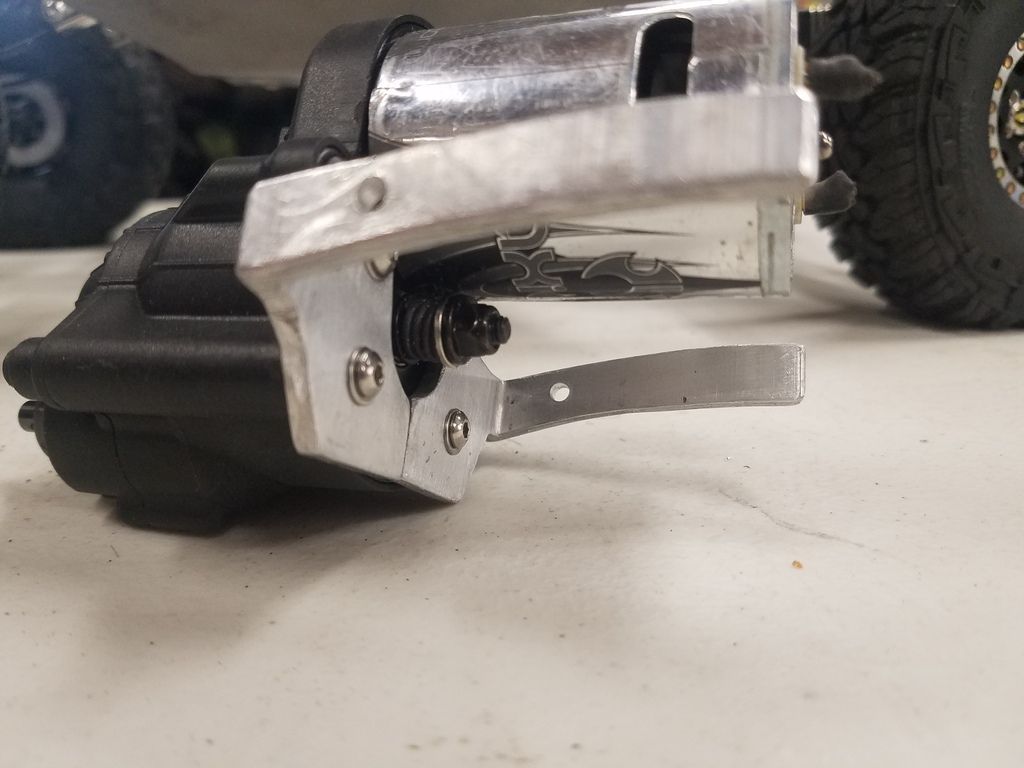 The slots for fine height adjustment aren't as clean as I'd hoped for, but they do what they need to: 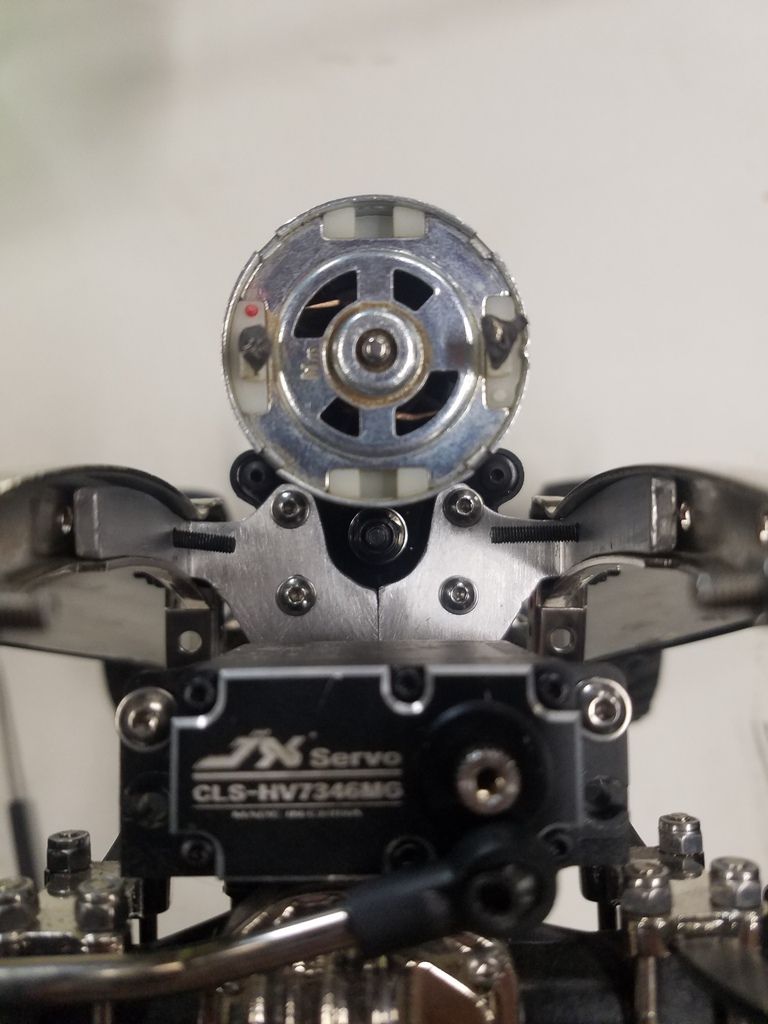 Of the 2 included intermediate shafts, the longer one fit better, mostly due to allowing similar length driveshafts/less angle on the front. I can either just run it this way, or really get it perfectly positioned to allow identical front/rear driveshafts (would need to move rearwards about 1/8"-1/4") which will require a new intermediate shaft (likely just go to telescopic with u-joints at that point.) 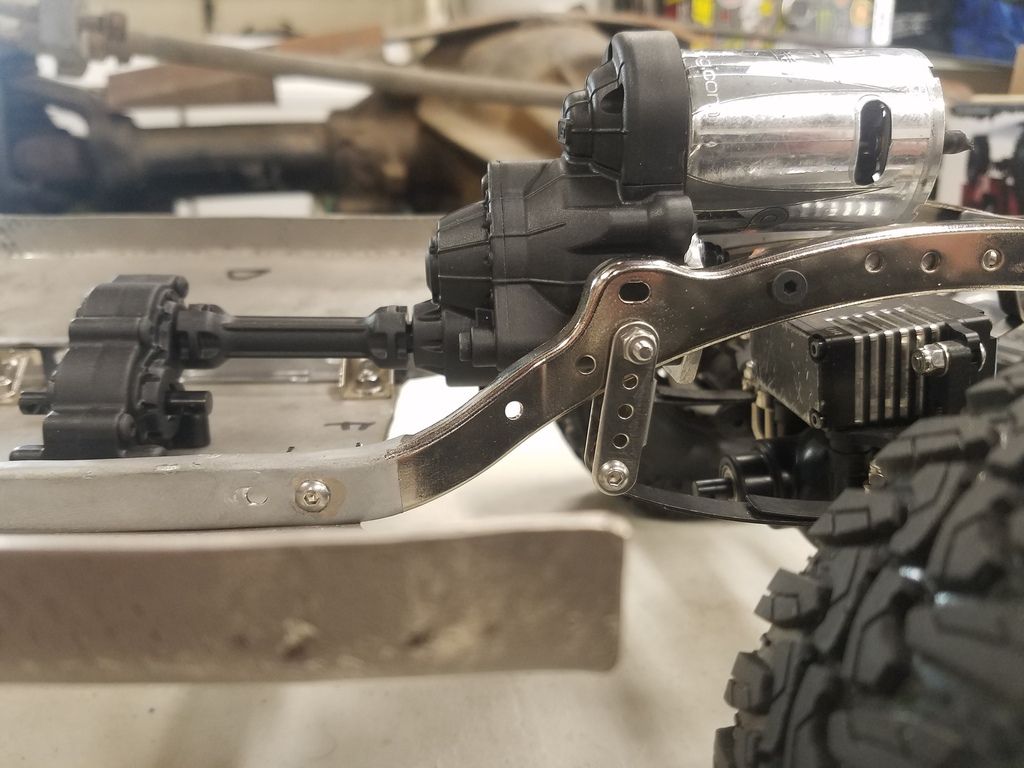 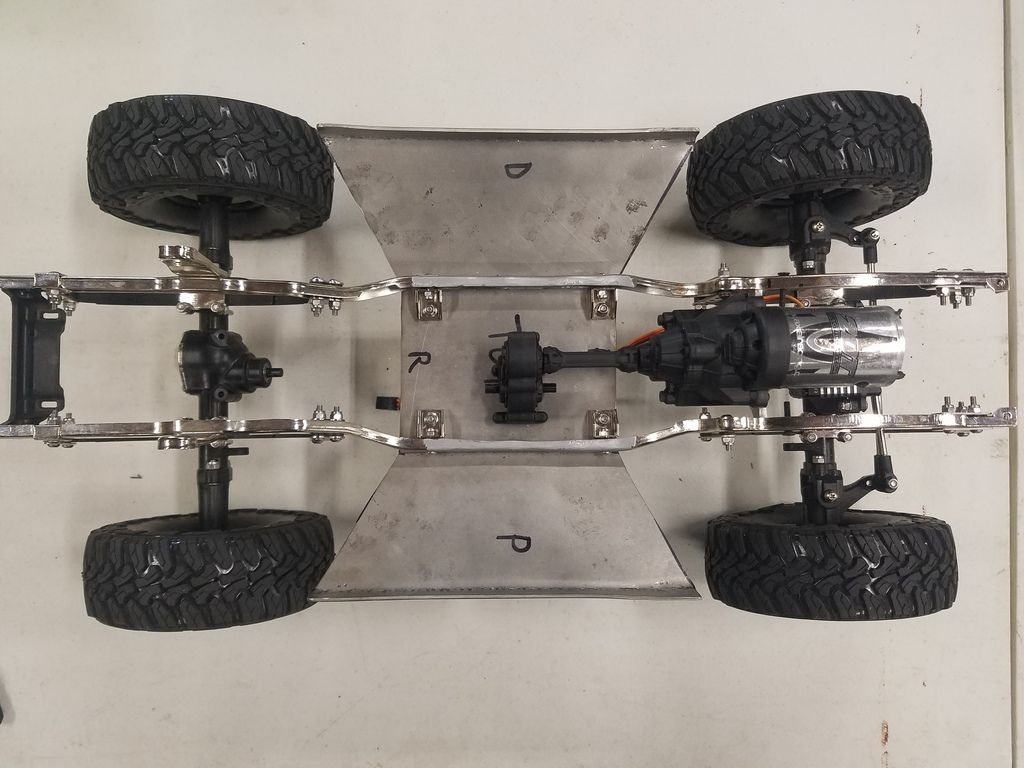 With the motor mounted between the framerails, instead of above, the axle mounted servo contacts the motor almost 1/2" before the springs max out their compression travel. I know it's unlikely that the truck will bottom out both sides at the same time, under its own weight, but I can't say it's impossible. I never intended to chassis mount the servo, since it will cause jacking of the suspension, bumpsteer, and some wasted throw as it shifts the chassis side to side on the leafs (assuming no track bar with this setup) but now I'm considering it. If I make a bracket to mount the servo side to side between the front spring hangers, everything should play nice together, with plenty of room for a 550 can. Now I just have to stare at it some more while I think about my options. |
| |  |
| | #31 |
| RCC Addict Join Date: Feb 2016 Location: Santa Maria, CA
Posts: 1,751
|
I went ahead and assembled the stock Sawback driveshafts so I could work on notching the skid plate for driveshaft clearance. I don't plan on running these shafts long term due to the goofy external e-clips, and their large diameter, but the length works, so I'll leave 'em in for now. 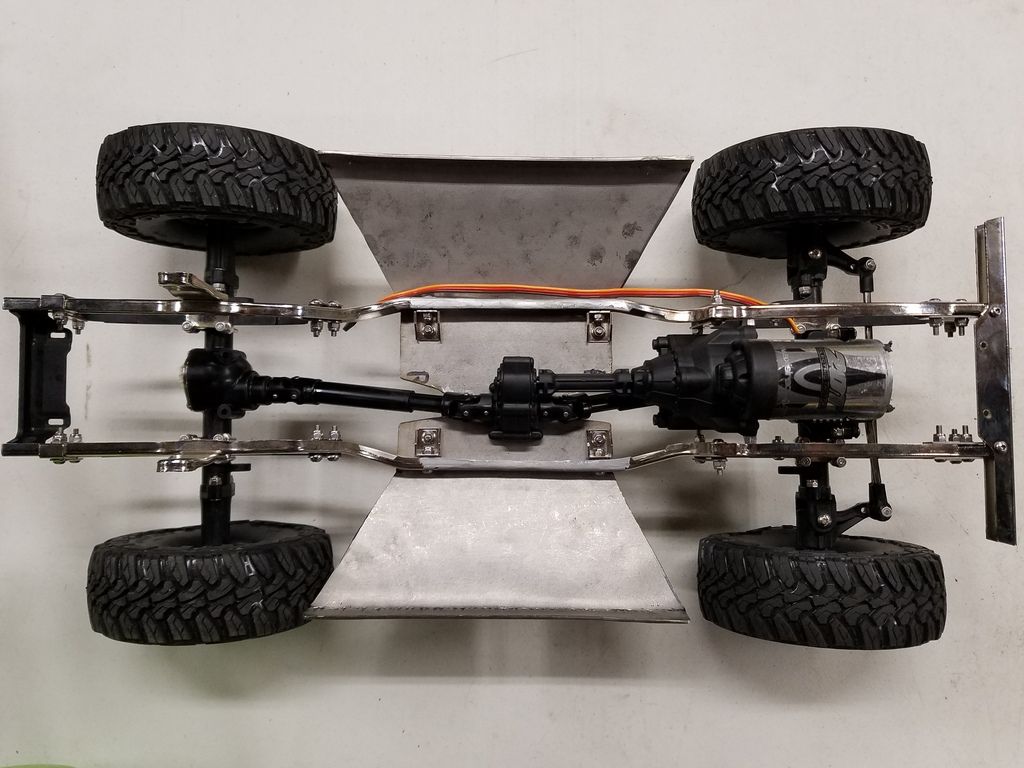 While I was messing with the skid, I went ahead and countersunk all the holes... much better! 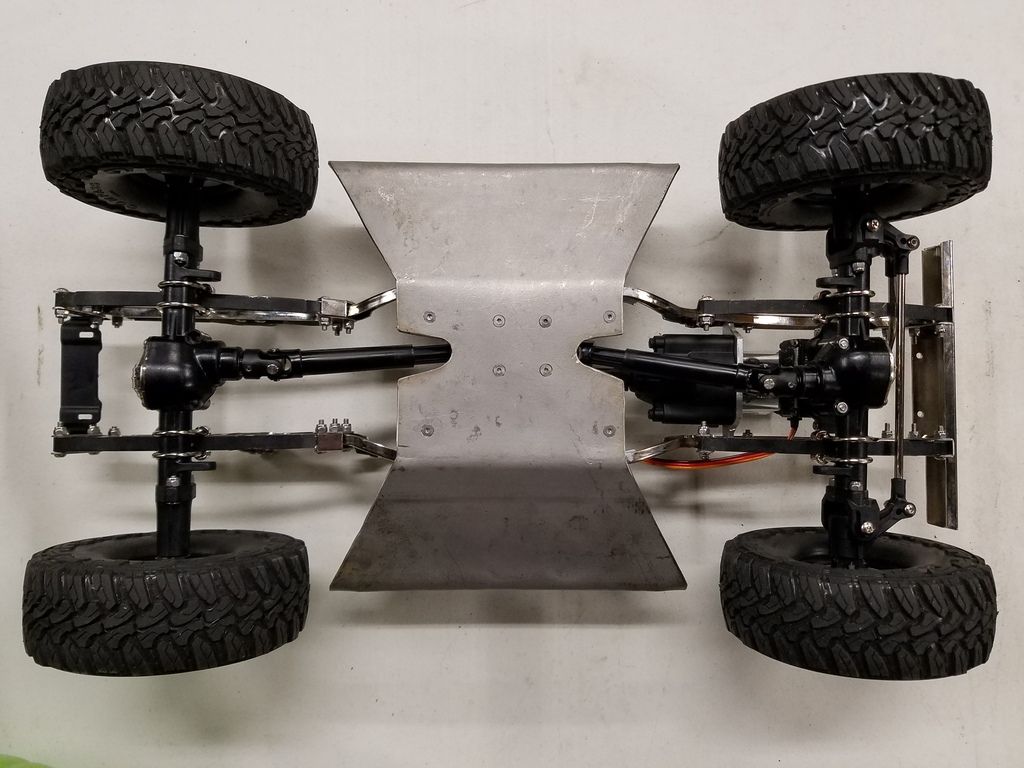 The motor to servo clearance is now looking like a smaller issue since the front driveshaft will hit the bottom of the transmission about 2mm later anyway. If only the front diff was offset to the passenger side just a fraction of an inch, the driveshaft would have tons of clearance! A pair of K44's would solve that issue (and look awesome!) but I'm not ready to abandon the Sawback axles, and after the luck I've had with my son's Yota2 axles, I don't know how much I'd trust any of RC4WD's offerings. I think a small diameter driveshaft might ad just enough clearance to get the job done? I'll keep playing with that idea. Now I've got to figure out a low-profile way of mounting a shackle to the top side of the skid for my rear anti-wrap bar. Last edited by TheLetterJ; 02-17-2019 at 10:14 PM. |
| |  |
| | #32 |
| RCC Addict Join Date: Feb 2016 Location: Santa Maria, CA
Posts: 1,751
|
Hey! I finally found a good use for the stock Sawback shocks! 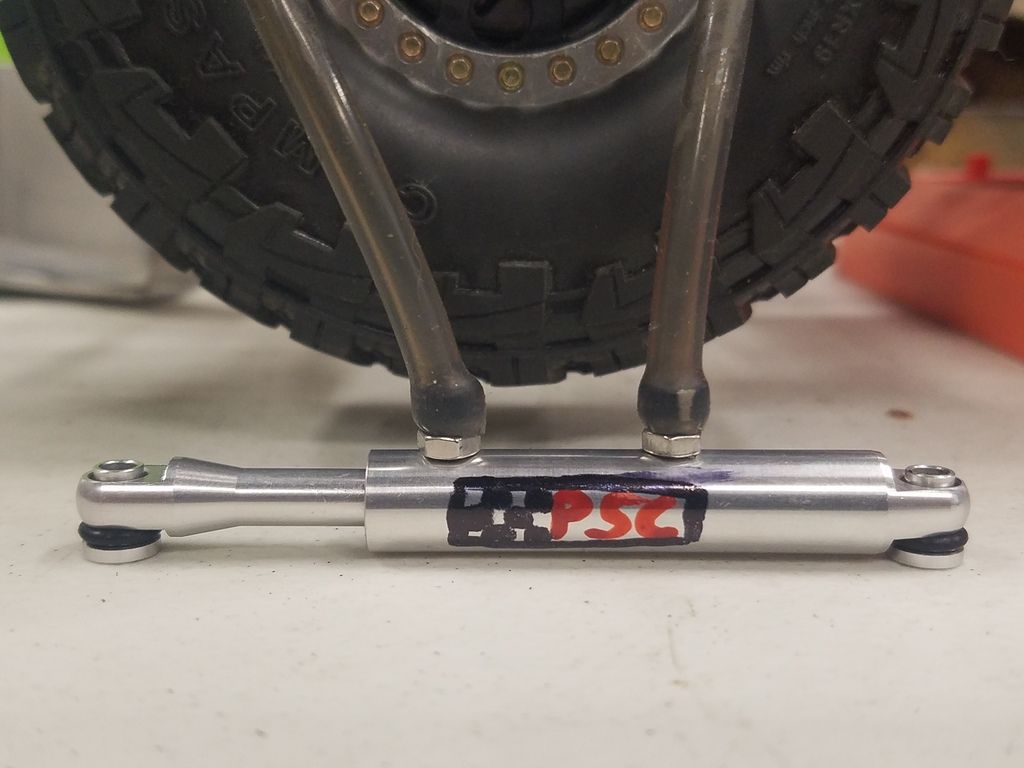 This one will be used as the draglink on my Wraith, but it makes a fairly convincing hydraulic assist steering ram. I just put a spacer inside to set the desired length, then drilled and tapped to M3 through the body AND shaft to lock it in place. Some M3x12(?) SHCS's with jamb nuts to act as "hydraulic fittings" and some nitro fuel tubing pushed over the socket heads (set screws would keep the diameter smaller.) I know the right hand hose is too close to center, but it wouldn't thread into the shock shaft had I moved it any closer to the top of the shock body, and I feel better about having 2 screws vs 1 since it'll be pushed/pulled by a 2290. I was originally trying to make an internal servo saver with clutch springs (or the like) but kept striking out when trying to make something fit on the machined shaft. I might make another for this truck once the steering system is dialed in. |
| |  |
| | #33 |
| RCC Addict Join Date: Feb 2016 Location: Santa Maria, CA
Posts: 1,751
|
I made a pair of mounts out of 1/2" angle aluminum (trimmed down, of course) that put the servo right between the front spring hangers. It's a tight fit for all the hardware (servo horn screw intentionally left out until I can power up the servo to find center) but it all fit! 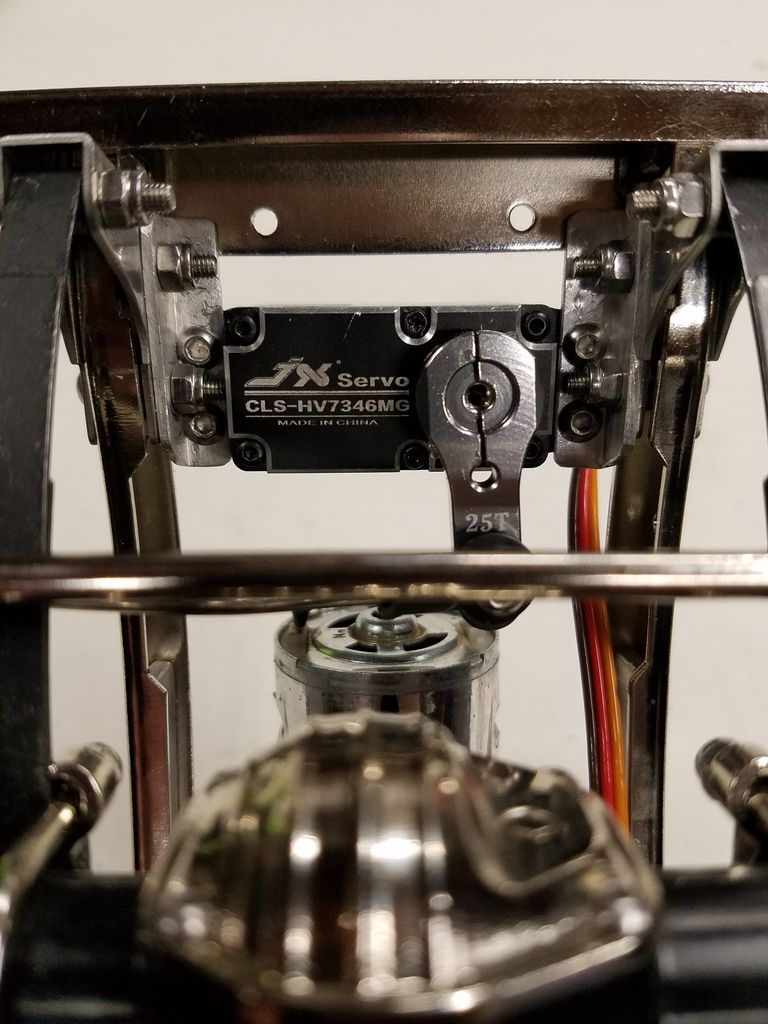 There's plenty of space for the motor wires (my 550 is now mounted, not pictured) and I mounted the servo at a slight angle so that the servo horn can just barely swing under the driver's side frame rail, allowing maximum room for compression. I have also added a 3 or 4mm spacer above the tierod to space the draglink up, so the rod end does not catch on the passenger side leaf while steering left. 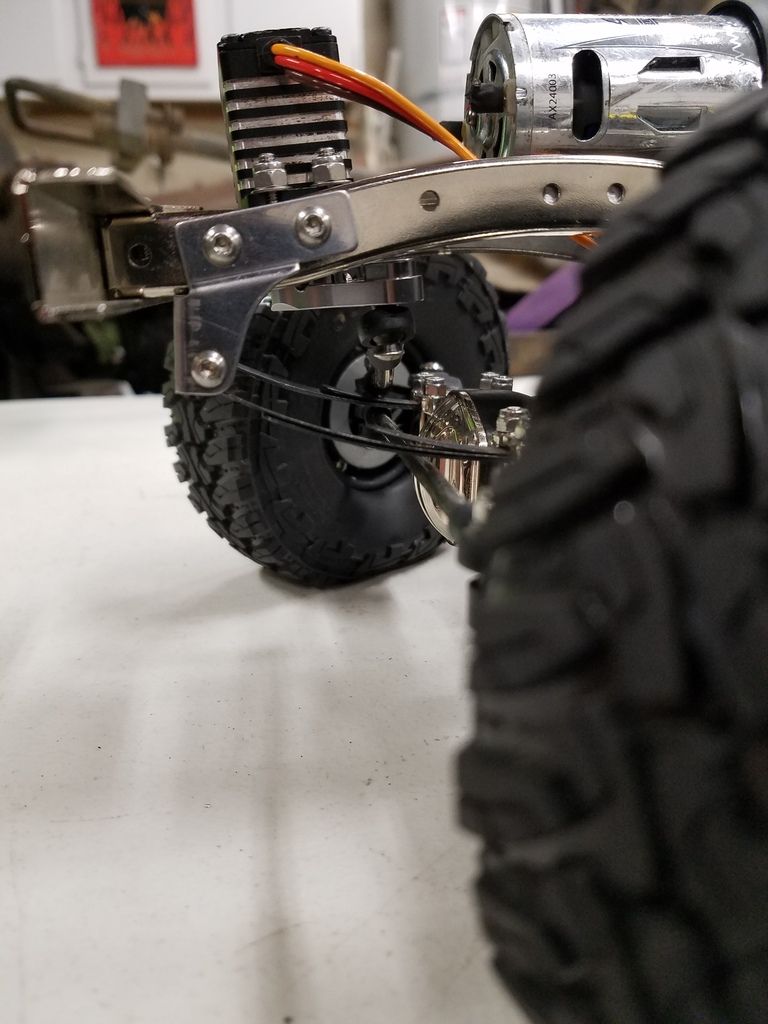 I'm still a little bummed that I had to go CMS since now I've created visible bump steer, but at least it will look cooler while sitting on the shelf(?) There are ways of making a panhard bar work with leafs, but I'm not so sure I'll be able to package it all together at this scale. That's something I may revisit in the future. I have a 6ch rx coming in the mail for my Wraith, so the Sawback should be inheriting the old 4ch once that arrives, that will complete the electronics. Though it's FAR from being done, I hope to take this car for a spin around my garage this weekend! |
| |  |
| | #34 |
| RCC Addict Join Date: Feb 2016 Location: Santa Maria, CA
Posts: 1,751
|
I was playing with front shock mounting tonight and I think I've stumbled across an important discovery that could prove useful for other Sawback owners! With my 100mm shocks, I was going to need to move the upper mounts up by 10-12mm to get the shocks sitting in the correct spot in their travel. I paused to think about the cleanest, most effective way to accomplish that. While letting that idea marinade, I was cleaning up some messes from my workbench which included putting the 2 spare swaybars from my son's GS02 back in his kit box... There I found, still on a parts tree, 2 (rear) shock hoops! I clipped one off the sprue and held it up to my chassis and, get this, it lined up with existing holes and sat 10mm higher!!! Now, being a rear shock hoop, the legs are equal in length, so that made it cant rearward following the curvature of the Sawback's frame, so I looked at the fronts on his BOM to see that the rear leg of his front hoops was slightly longer to compensate for this curvature, but the center to center hole spacing remained the same ~35mm, so they should bolt right up! Knowing from bilinvic's thread that the BOM and SCX10.2 hoops can be interchanged means that I can now shop for aluminum 10.2 hoops and they *should* bolt right on. Side bonuses are that the 10.2 hoops will give me an easy base to work off of for building body mounts, and they have a built in panhard mount (most of them do anyway, I'm not sure how I feel about the removeable versions) so I may dig into correcting that bumpsteer that the CMS introduced, sooner rather than later. The front 10.2 hoops look like they'll also line up with existing holes on the rear of the chassis, if you switch them left to right, and that should raise the upper mounting point by roughly the same 10mm. I'll just have to shop around for a style that I like, that isn't going too break the bank. I'd prefer something that appears tubular (SSD and Vanquish look this way) and simple (SSD is winning so far there) but the TFL ones are looking pretty sweet otherwise. I'm tempted to just buy some stock take-offs or some cheap Chinesium as a proof of concept first, though I guess if it doesn't end up working out for me, I could just give them to my son for his BOM. Either way, I'll try to get something coming this weekend! |
| |  |
| | #35 |
| RCC Addict Join Date: Feb 2016 Location: Santa Maria, CA
Posts: 1,751
|
I realize these are essentially the same as the stock 10.2 hoops, just made of aluminum, but is that so bad? The price is right, and they look clean enough. What's the catch, are they cast and prone to snapping or something? for Axial SCX10 II #XS-SCX230061BK, ,(XS-SCX230061BK) by Xtra Speed Alloy Front Adjustable Shock Mount 1 pair Black |
| |  |
| | #36 |
| RCC Addict Join Date: Feb 2016 Location: Santa Maria, CA
Posts: 1,751
|
10.2 shock hoops are a go! I had to elongate one of the holes in the frame ever so slightly, otherwise they accomplished everything I needed them to. 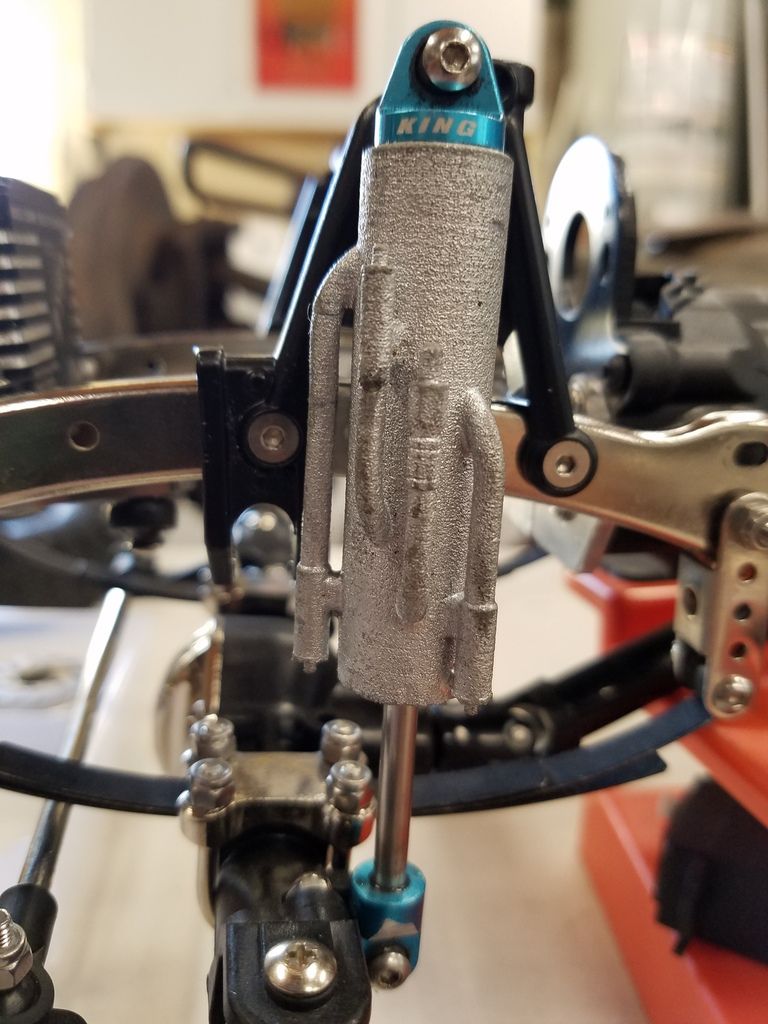 They cradled the frame perfectly: 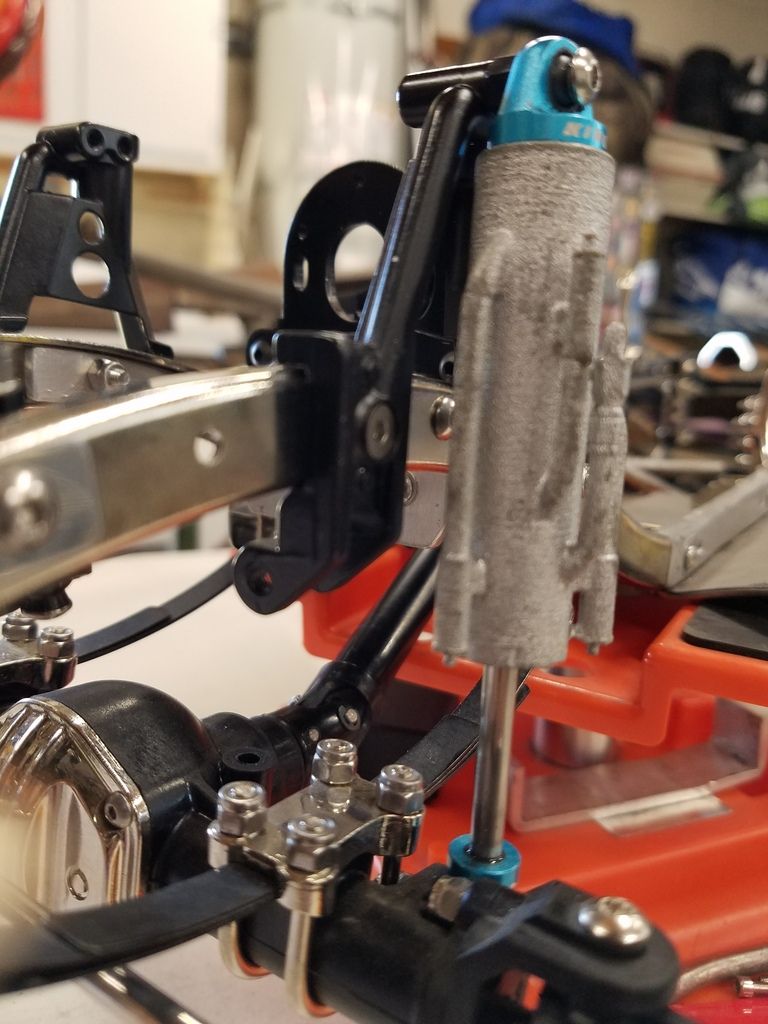 Here you can see the panhard mount in relation to the servo horn, that won't be coming into play yet (I'll need to figure out a "looser" shackle bushing to allow the springs to more freely swing side to side first), but it should be easy enough to fabricate the axle side bracket when the time comes. 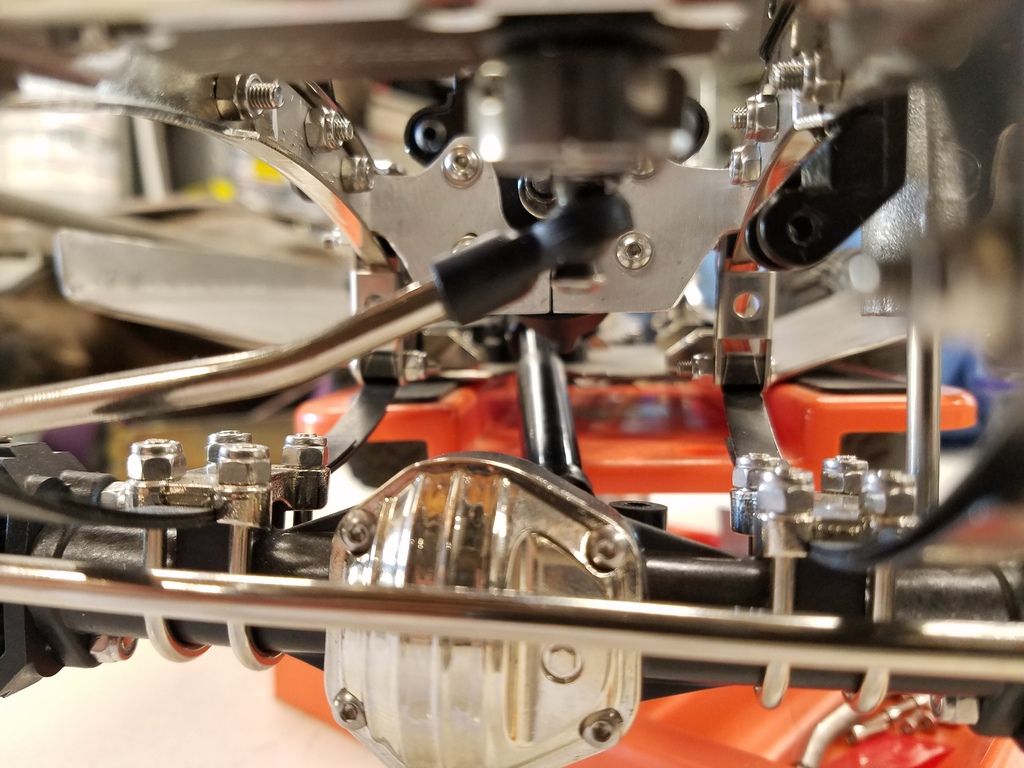 |
| |  |
| | #37 |
| RCC Addict Join Date: Feb 2016 Location: Santa Maria, CA
Posts: 1,751
|
I've been working on getting the DinkyRC interior trimmed to fit and I think I've finally got it situated where I want it. The floor sits directly on the chassis at the rear, and just hovers over the transmission at the front. The "engine compartment" will need a section removed to clear the CMS, and another small piece removed to clear the back of the spur cover. Those two holes will be hidden under the dash and hood anyway, so this seems like a perfect place to make my first attempt at building something out of styrene to cover the holes up. I'll need to start researching to figure out what the heck I'm doing, but I'll make something happen! Here's the floor, side panels, and tailgate panel in place, all the electronics, 2200mah 3s, and transfer case hidden comfortably below the floor: 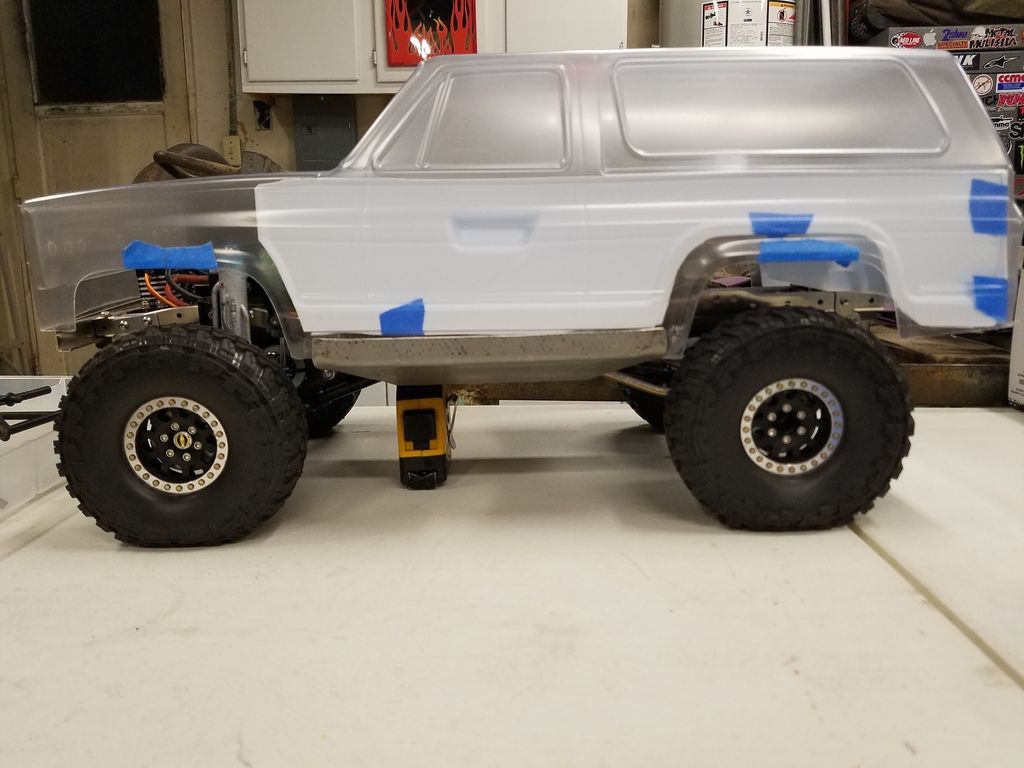 The front body mounts should now be pretty straight forward using some Axial offset posts (I think I found some in white even) but I'm trying to figure out a way to mount the rear of the body without having those unsightly posts passing through the interior. The wheels are turning, but this will probably require a few days/weeks/years? of late night pondering. 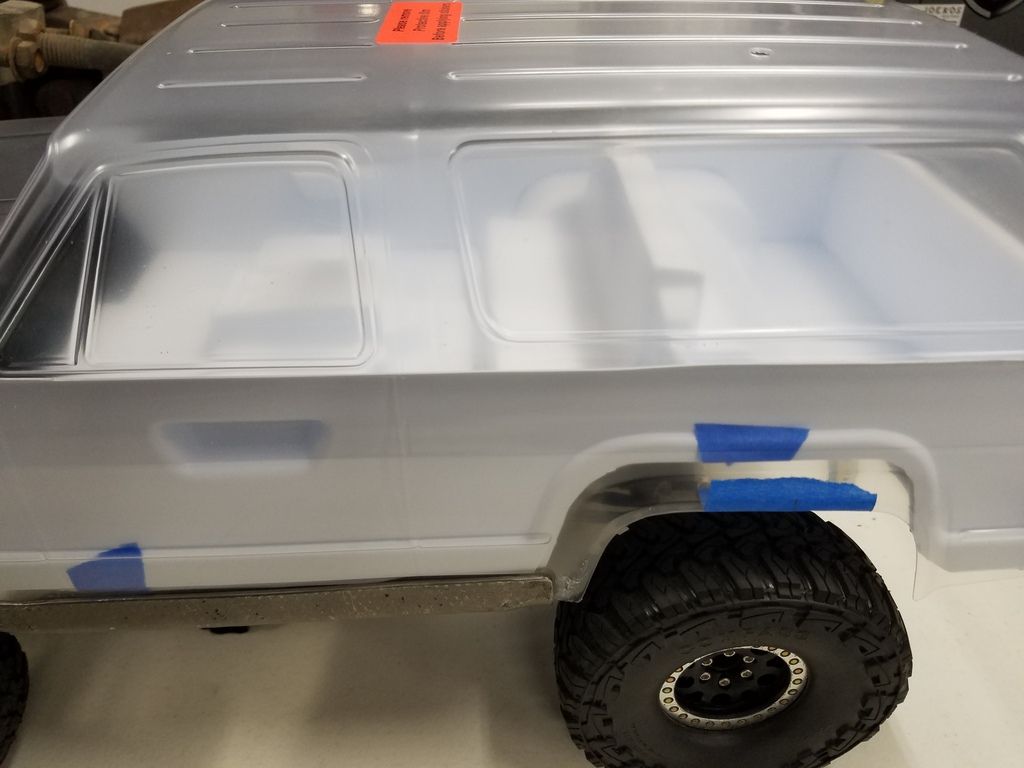 Even though I have 4 of these 100mm bypass shocks, I'm starting to think I'll only use them on the front. My 1:1 only has (triple) bypasses on the front, the rear has smooth body remote reservoirs that run through the floor directly behind the back seat. Dinky left quite a bit of room for shocks in the rear, so I'd rather not punch them through the floor on this little guy. An Ascender rear shock tower fits in the void (no surprise since that's what this interior was designed around) but I'm still not sure if that's the route I want to go. A 90mm reservoir shock mounted to the stock Sawback shock tower might be the way to go here. Ascender rear shock tower mounting holes are about 1mm off from existing holes in the chassis (so, no biggy making that happen) but the body mount location is too far forward to line up with the (Ascender) K5 body, go figure. 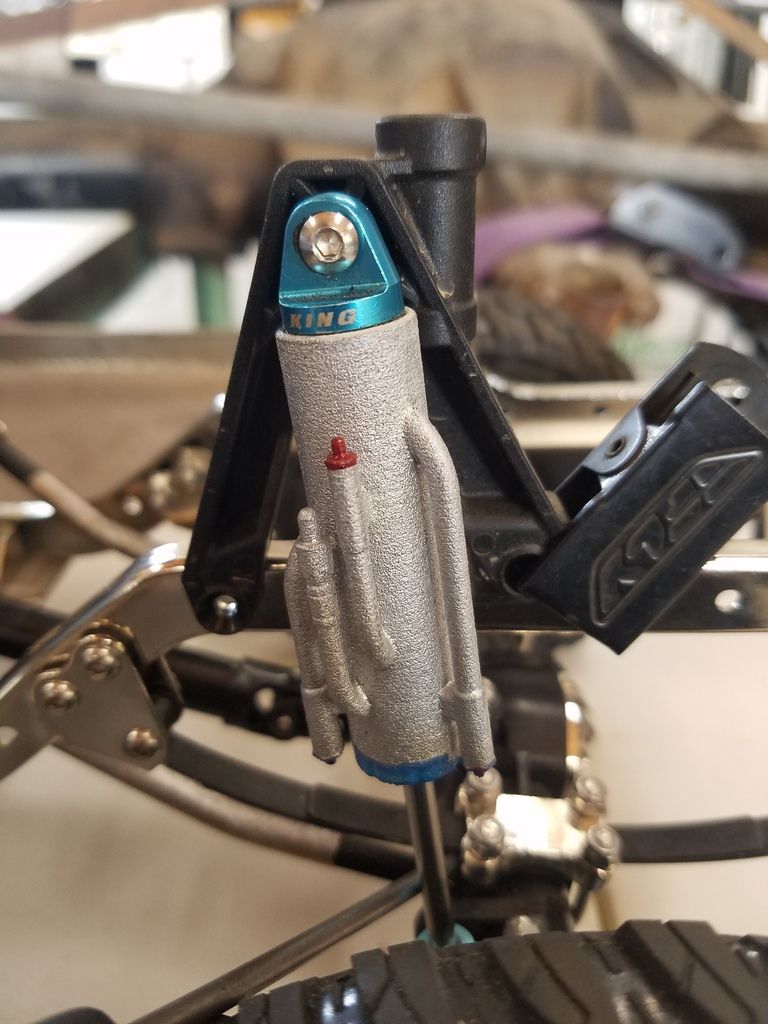 That's all for now. |
| |  |
| | #38 |
| I wanna be Dave Join Date: Aug 2016 Location: Orange County, CA
Posts: 3,643
|
Build is looking pretty cool. I like it!
|
| |  |
| | #39 |
| RCC Addict Join Date: Feb 2016 Location: Santa Maria, CA
Posts: 1,751
|
One look at the latest TRX-4 Blazer, and I knew I had to have those door handles! Bonus that the traxxas 8132 parts tree also includes the Blazer/Suburban specific tailgate handle, and a couple windshield wipers. I also ordered traxxas 8135 which are spot on replicas of the 73-87(91) C/k tail lights, with buckets. 8135 also includes front sidemarker/parking lights, but they are the 70's style, not the smaller/sharper edged 80's style... I may try to trim them a little and see what they look like when mounted horizontally. I've also got the year-correct metal emblems coming from RCmodelex in the Czech Republic. I believe the only body accessory I'm still lacking is a pair of mirrors, RC4WD Z-B0106 for their hard bodied Blazer look good to me, but I wonder if they're gonna be obviously small on the ginormous Vaterra body? Side note: a friend stopped by this evening and dropped off some parts that he machined for my 1:1 K5. Believe it or not, tinkering with the 1/10 has inspired at least a little motivation/progress for the 1:1! |
| |  |
| | #40 |
| RCC Addict Join Date: Feb 2016 Location: Santa Maria, CA
Posts: 1,751
|
Ermagerd! Spot on, perfect match... the little ones look nicer than the 32 year old big ones:  The size is perfect too, unfortunately the Vaterra K5 body is a little too square in the rear corners vs the Traxxas lights which have the proper contour/radius. I'll have to figure out how to make this square hole a bit more round:  The door and tailgate handles are spot on as well, but I'm quite a ways from mounting that stuff. |
| |  |
 |
 Sawback time! - Similar Threads
 | ||||
| Thread | Thread Starter | Forum | Replies | Last Post |
| Things to upgrade/watch out for Sawback 4LS & Sawback Sport | soze | G-Made Sawback | 2 | 02-28-2017 12:46 AM |
| Sawback vs. Sawback Sports | scaled | G-Made Sawback | 6 | 04-01-2015 09:04 PM |
| Wild Willy On A Sawback [Sawback Solo Run] | ifulg | G-Made Sawback | 1 | 12-24-2013 08:06 PM |
| maybe now ill spend less time on the lid and more time on the rubber | evan03 | Axial Wraith | 2 | 02-18-2013 08:08 PM |
| Its motor time!!And esc time as well,,,,ADVICE PLZ | Speed Metal Army | RC4WD Bully | 11 | 03-15-2010 10:23 PM |
| Thread Tools | |
| Display Modes | |
| |