| |
 02-02-2011, 10:27 PM
| #1 |
| Rock Crawler Join Date: Dec 2010 Location: Beaumont Tx!
Posts: 508
|
Been trollin through the course builds on here heavily and some gay ass paper mache websites along with a few landscaping design sites. Coming up with a good course design proves to be one of the more difficult things I have ever done. Anyways I have a 30'x30' shop at my house and will eventually wrap the course all the way around the edges up and down the work benches, rafters blah blah blah. Heres what I got so far. The pics do not do it justice IMO. Started with 3 pieces of wood 96" long and 52" wide and made a 3 legged pyramid against a wall. 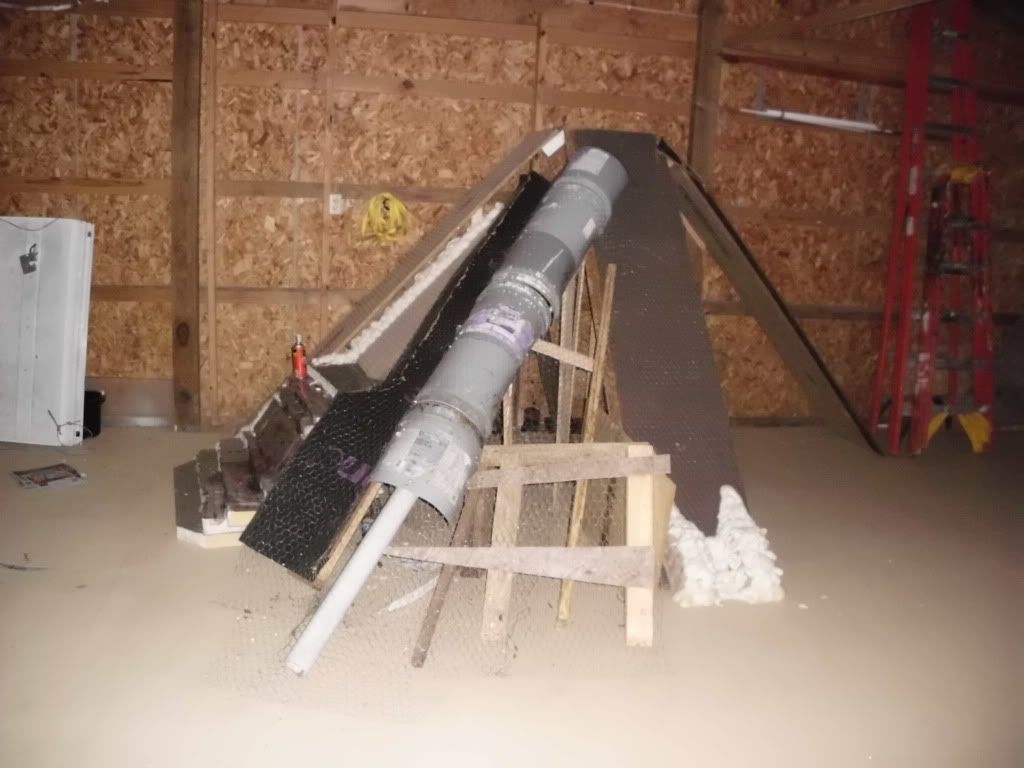 Heres the first climb it set at a 55* angle I just have mesh on it now, I have a few things to finish the I will pour concrete over the entire thing. I will be going saturday to the local stone place to get some flagstone and several pounds of whatever is available. I am still thinking of ideas for this climb so it is not just a straight shot. Any ideas I have great stuff and many other supplies just no ideas. In this shot you can also see the foam stair set. It is about 3' tall and 3'wide I am in the process of paper mache'ing this and will probably spray it with bedliner as I am afraid concrete with make it too easy. I will paint the angled piece with gloss paint so it stays slick. 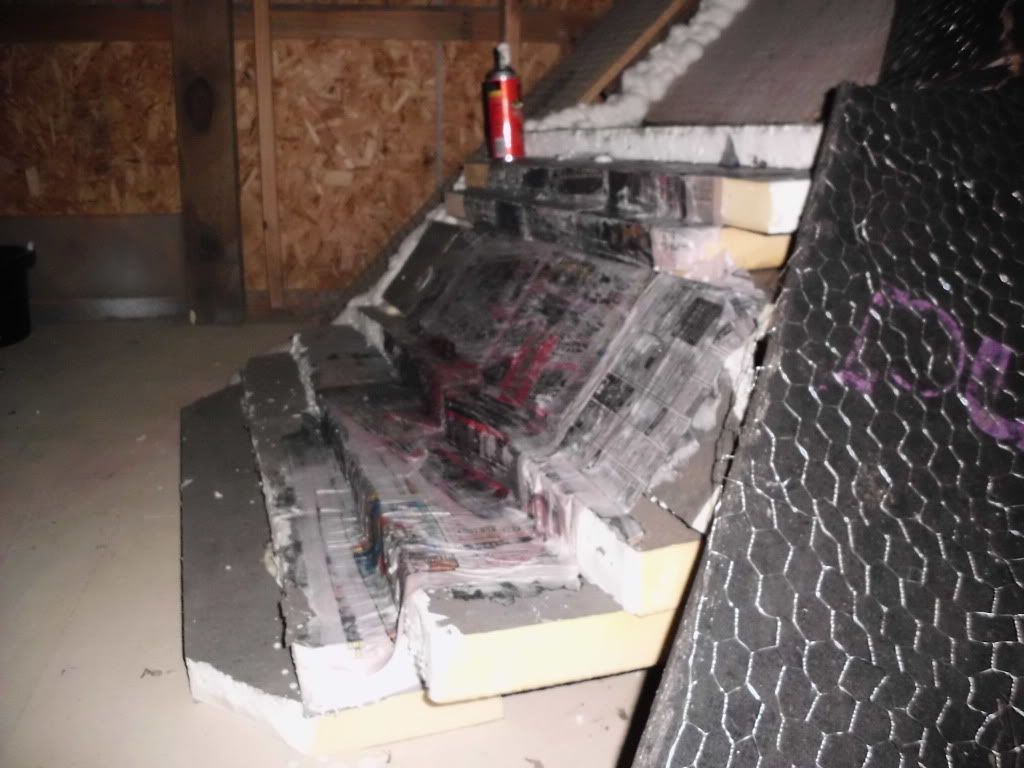 The camera always makes obstacles look weak. In 1:1 and R/C apparently lol. Right to the right of the stair set is a crevice that runs up at a 50* and steeper angle. My favorite part so far is the rolling side of the crevice made from cut up buckets. It is a really smooth transition to the left and right side out of the crevice. 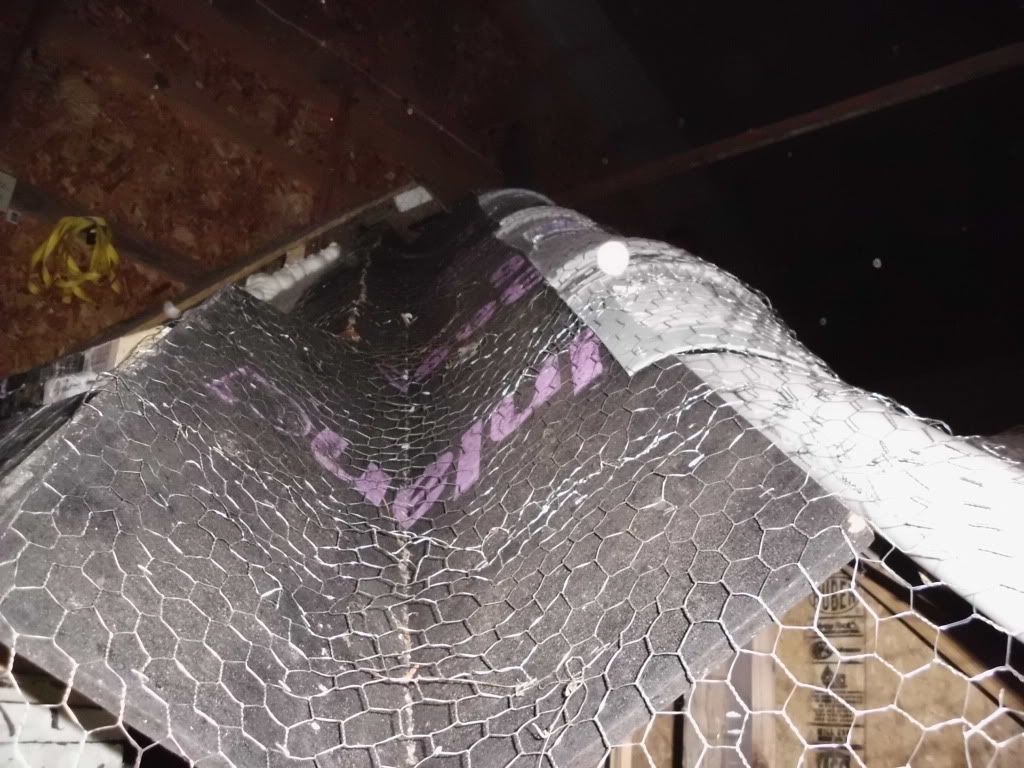 This a little ledge the I made to the right of the crevice. It merges with the bucket breakover in a nasty steep off camber kind of way. It should ride really nice and look tits with crete poured on. I will also mache the crevice so the crete will not run through the wire. 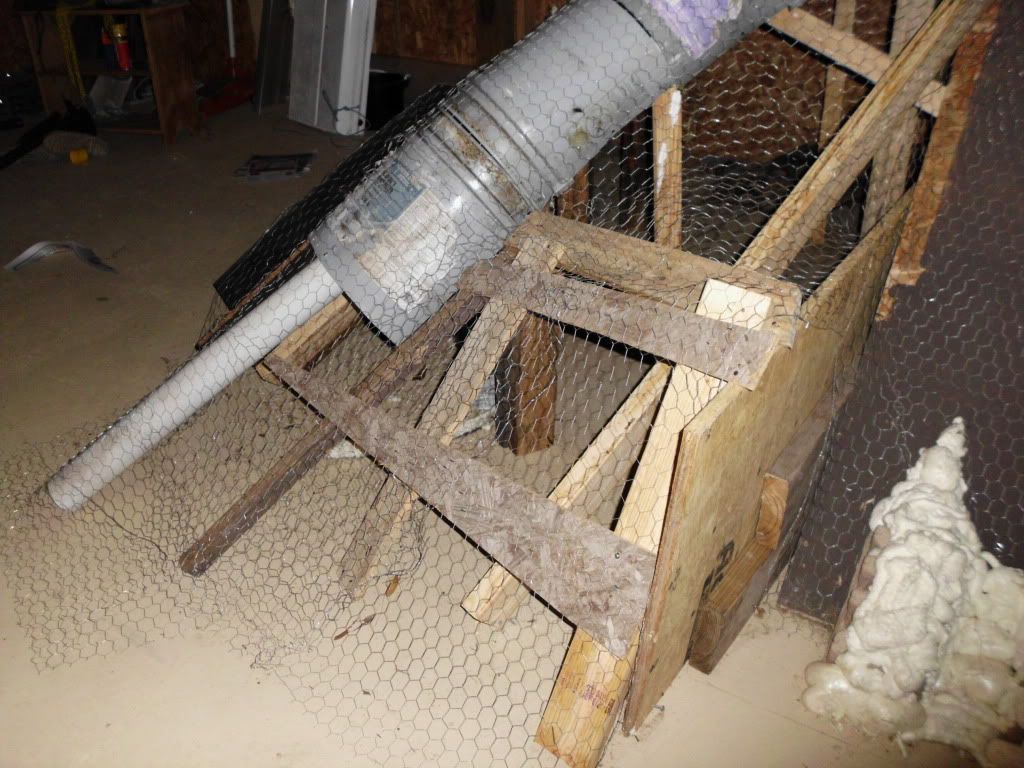 Two little mounds from great stuff. I dunno. 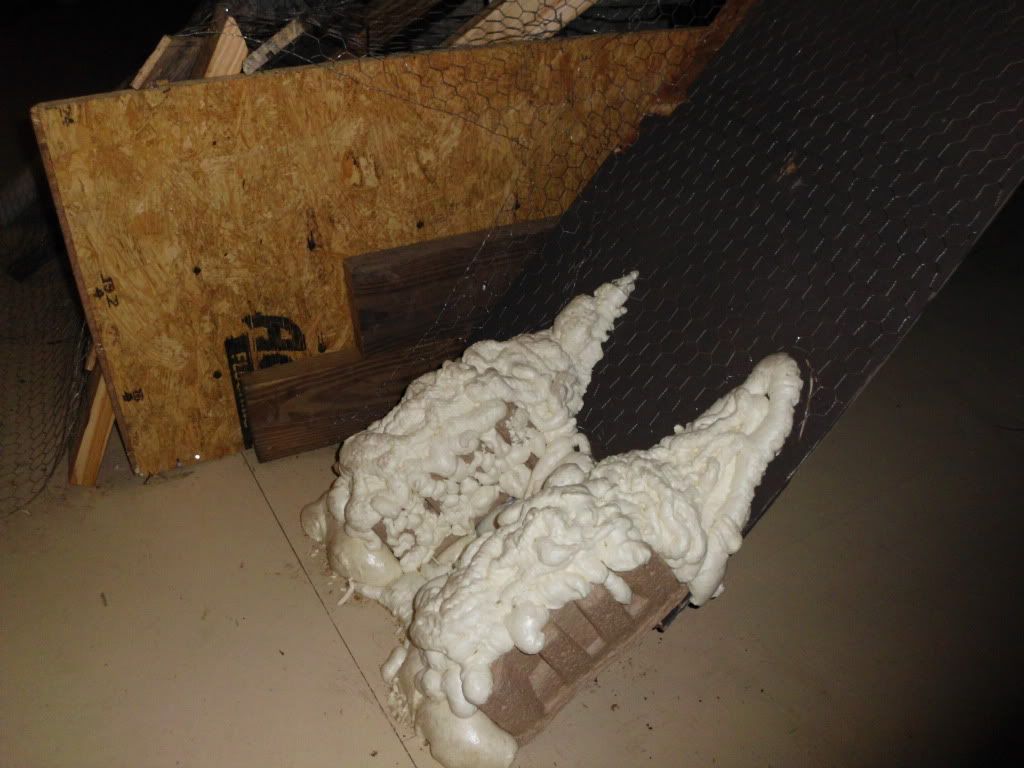 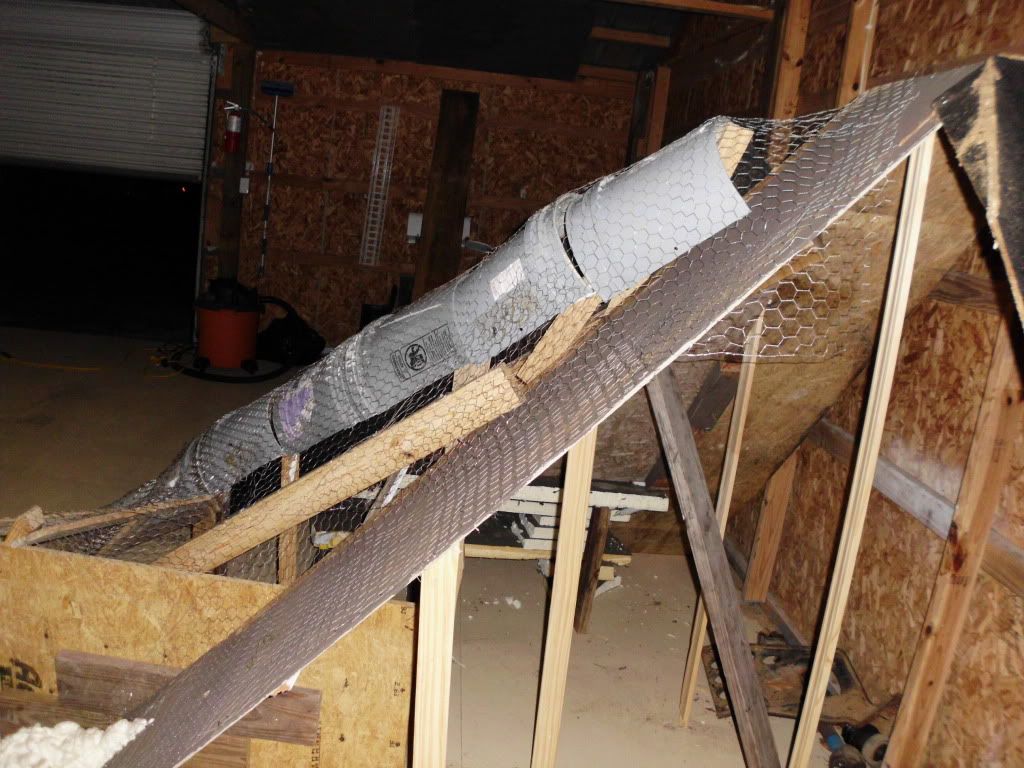 This whole open area will be scabbed up with random planks and creted over with flagstone and random rocks inlayed. After the hill is done I will be running a rope bridge off the top and a large rock pile will to the right of this mountain in the corner. The pile is about 7' tall and is already a blast to drive on it should be pretty slick with crete poured on. Open to suggestions guys. -Steven |

|  |
| Sponsored Links | |
| | |
|
02-02-2011, 10:46 PM
| #2 |
| Quarry Creeper Join Date: Jan 2011 Location: Michigan
Posts: 237
|
Wow this course is gonna be wicked! I cannot wait to see how it all comes together. In the small amount of courses I have run, I found that REAL rocks and their arrangement made the course...more so than the foundation layout. Real rocks of varied size and shape allow a never ending variation that solid construction cannot. That said, I have never seen one myself that started out this high and steep...so it should be ultra challenging no matter how its done. My suggestion would be, since you stated your wrapping it through out the shop. Perhaps a corner triangle wood box type layout with plywood runners with lats across for rock support..i guess imagine like kids blocks stacked in layers larger at the bottom and getting smaller and taller as they stack, then making partial plywood ramps connecting each cube...i dunno if i am explaining this well, but that is just for visuals of the idea anyway...then you lay down the various size/shape rocks on top in different configs, and when the current set-up gets boring, just move some rocks around... This rock set-up could lead directly to or from your tower for maximizing the difficulty and adding to the fun... I don't know if this helped, but maybe it sparks an idea or something for you anyway!  |
|
| |
|
02-02-2011, 10:54 PM
| #3 |
| Quarry Creeper Join Date: Oct 2010 Location: sulphur
Posts: 256
|
i cant tell from the pics but if that is 1x1 chicken wire your using the qwik crete will fall thru it fast, i use this stuff http://www.lowes.com/pd_45441-55-300...een%26page%3D4, the qwik crete holds to it like glue
|
|
| |
|
02-03-2011, 10:22 AM
| #4 |
| Rock Crawler Join Date: Dec 2010 Location: Beaumont Tx!
Posts: 508
|
I have the wire double and trile layered in most places and paper mache will cover it. I am hoping for the best. That roll of black fiber screen looks perfect except its 76$ maybe nexxt time.
|
|
| |
|
02-03-2011, 10:23 AM
| #5 | |
| Rock Crawler Join Date: Dec 2010 Location: Beaumont Tx!
Posts: 508
| Quote:
| |
|
| |
|
02-03-2011, 10:33 AM
| #6 |
| RCC Addict Join Date: Nov 2005 Location: Saving for Nationals!!
Posts: 1,696
|
If you've been looking at builds on here, than I am sure you saw the our club did for iHobby. I suggest using wet burlap over the chicken wire. we have tries it all, and it works best, and honcho is right, the crete will go right through the wire if left uncovered. Check out: The Full Build  Last edited by PaloAltoK5; 02-03-2011 at 10:50 AM. |
|
| |
|
02-03-2011, 10:38 AM
| #7 |
| Quarry Creeper Join Date: Nov 2010 Location: weeki Wachee
Posts: 370
|
i used the same stuff that is used for mortar and sheet rock. worked pretty good and wasnt too expensive. and you can bend it and shape it. try to stay away from slick surfaces, once the tires start collecting dust an fine dirt from the rocks there will be no grip at all, like a big slip n slide. looks good so far, keep it up!
|
|
| |
|
02-03-2011, 05:55 PM
| #8 |
| Rock Crawler Join Date: Dec 2010 Location: Beaumont Tx!
Posts: 508
|
Balls. I wish I would have seen the burlap idea sooner. Oh well gotta rock whatta I got so here goes. No worries about the crete falling through because of all the paper mache I did today. The hills and whatnot have mache on them and the rest of the area is directy on wood so it and the mesh should be able to hold the crete nicely. Cold as a mother #$%$#% today. Heres the progress. 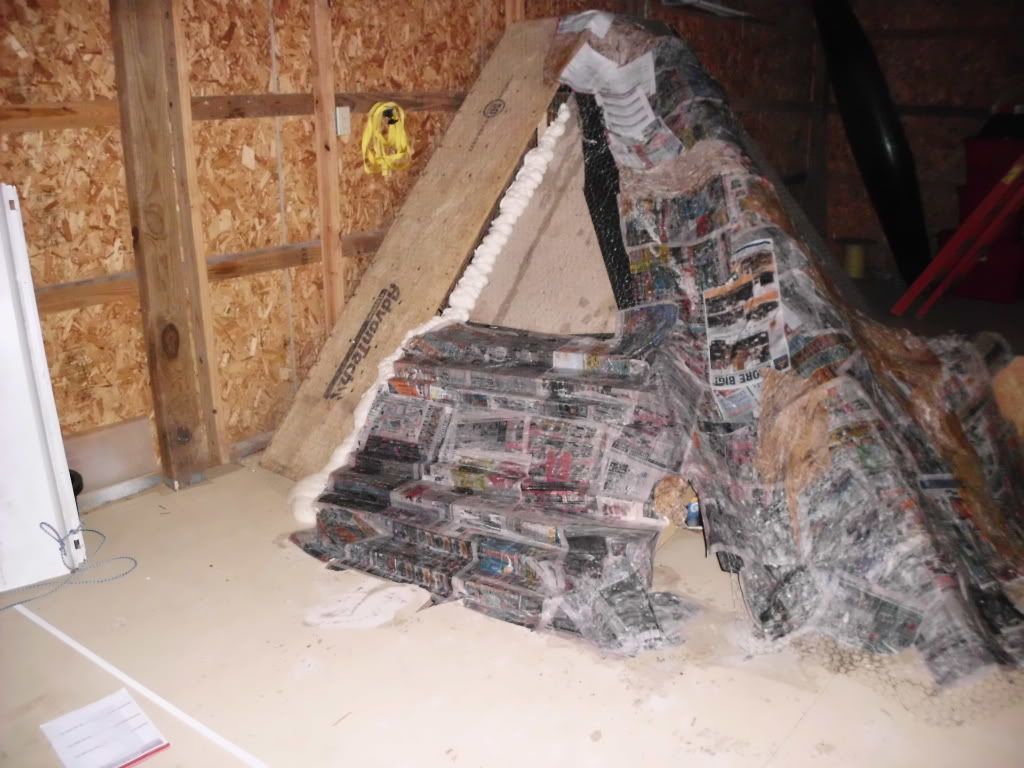 Going to spray on bedliner the stairs. 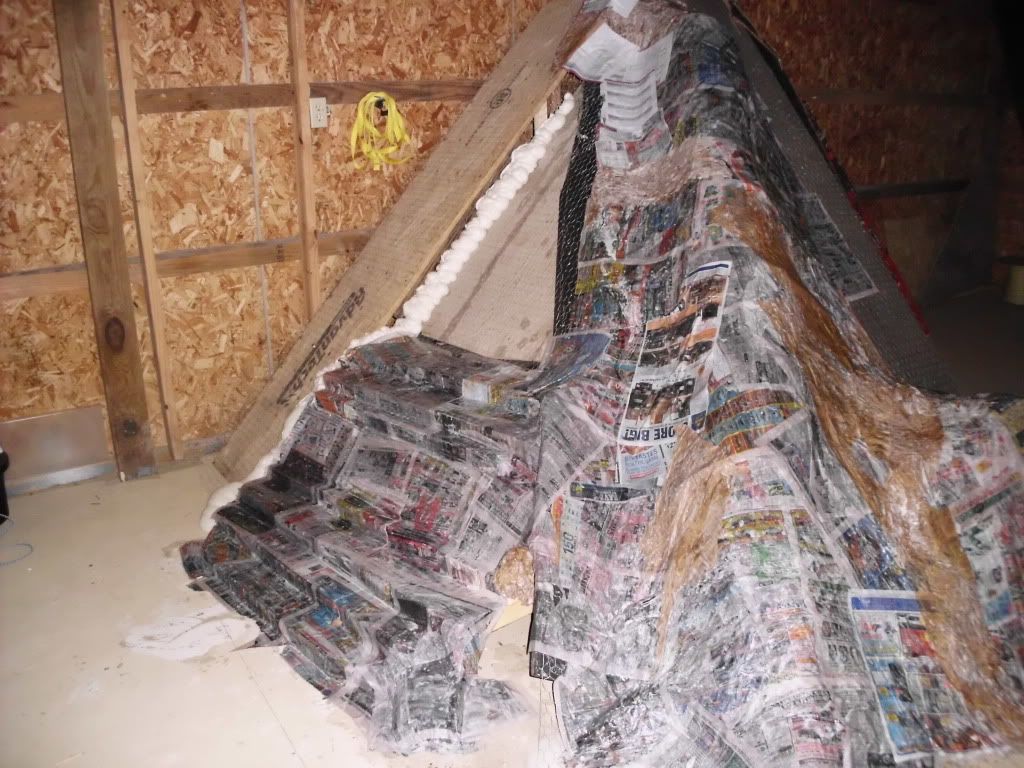 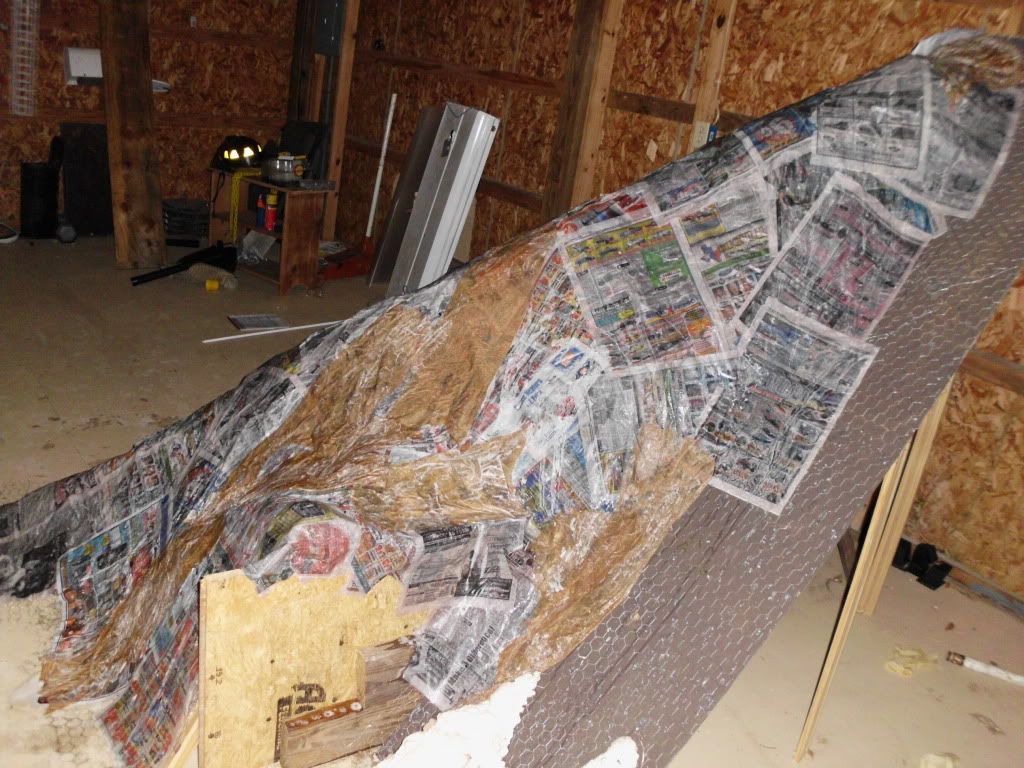 Bucket hill and the beaver slit (previously the crevice)  Gonna do another layer tommmorow I think. |
|
| |
|
02-03-2011, 05:56 PM
| #9 | |
| Rock Crawler Join Date: Dec 2010 Location: Beaumont Tx!
Posts: 508
| Quote:
| |
|
| |
|
02-03-2011, 05:58 PM
| #10 | |
| Quarry Creeper Join Date: Oct 2010 Location: sulphur
Posts: 256
| Quote:
i got a 25ft roll at lowes for 17 bucks, i know my dad bought a 100ft roll and it cost him around 70 bucks | |
|
| |
|
02-03-2011, 06:16 PM
| #11 | |
| Rock Crawler Join Date: Dec 2010 Location: Beaumont Tx!
Posts: 508
| Quote:
| |
|
| |
|
02-03-2011, 06:29 PM
| #12 |
| Rock Stacker Join Date: Oct 2010 Location: glendale
Posts: 92
|
Love the use if sherwin williams bucket course look awesome |
|
| |
|
02-03-2011, 06:48 PM
| #13 | |
| Quarry Creeper Join Date: Nov 2010 Location: weeki Wachee
Posts: 370
| Quote:
| |
|
| |
|
02-03-2011, 07:58 PM
| #14 | |
| Rock Crawler Join Date: Dec 2010 Location: Beaumont Tx!
Posts: 508
| Quote:
| |
|
| |
|
02-04-2011, 12:11 AM
| #15 | |
| RCC Addict Join Date: Nov 2005 Location: Saving for Nationals!!
Posts: 1,696
| Quote:
It can be seen in the bottom part of this photo, on the folded up access ramps on the edges, and on the display stands in the following photo.   | |
|
| |
|
02-04-2011, 06:31 AM
| #16 |
| Rock Stacker Join Date: Nov 2010 Location: Albemarle,NC/Camp Creek,WV
Posts: 15
|
Looks like a great start to your course. It's nice to see more people not afraid of the work that it takes to build rocks. Bedliner; Don't bother. too slick and fake. Deckrestore; I haven't tried it yet. I may try it on my bedlined sections. Blackfibre screen and/or burlap; I'll try these on my next rock build. Thanks for the ideals everybody. Be aware that you may need to reach your rig while at the top of a formation, making you step or lean on the rocks. Try not to make the crete/cement too thin where it meets the floor. It will breakaway because it'll get walked on unless there's a bit of a ledge. Hope this helps, I'll be following along. Mike |
|
| |
|
02-04-2011, 09:37 AM
| #17 |
| Rock Crawler Join Date: Dec 2010 Location: Beaumont Tx!
Posts: 508
|
Thanks PaloAlto and Mike Bike for the advice. I will check into the deck restore finish today. Thats the only bad thing about a hill this big is if you flip at the top its along way to fall. Iv'e already snapped off two lower control arm bolts inside the chassis just from test runs.
|
|
| |
|
02-04-2011, 01:43 PM
| #18 | |
| RCC Addict Join Date: Nov 2005 Location: Saving for Nationals!!
Posts: 1,696
| Quote:
Now to raz you a little, the best way to avoid broken parts is to drive better!! | |
|
| |
|
02-06-2011, 11:04 AM
| #19 |
| Rock Crawler Join Date: Dec 2010 Location: Beaumont Tx!
Posts: 508
|
Haha yea that would be the easiest way not to crash. Sometimes I forget that mo throttle = traction and backflip in R/C world.
|
|
| |
|
02-09-2011, 09:20 PM
| #20 |
| Rock Crawler Join Date: Dec 2010 Location: Beaumont Tx!
Posts: 508
|
Got some more done on mt. pain in ass. Starting pouring crete on the easier areas...well more like doing a half a scoop at a time. It was slow going getting the crete to stick to the paper mache. next time I'm doing burlap for sho. I think it's going to work out fine because it's drying really hard. I kinda just got to let it dry in the wheelbarrel and get pretty thick before I put it one the steeper areas. It stuck to metal on top of wood like glue. 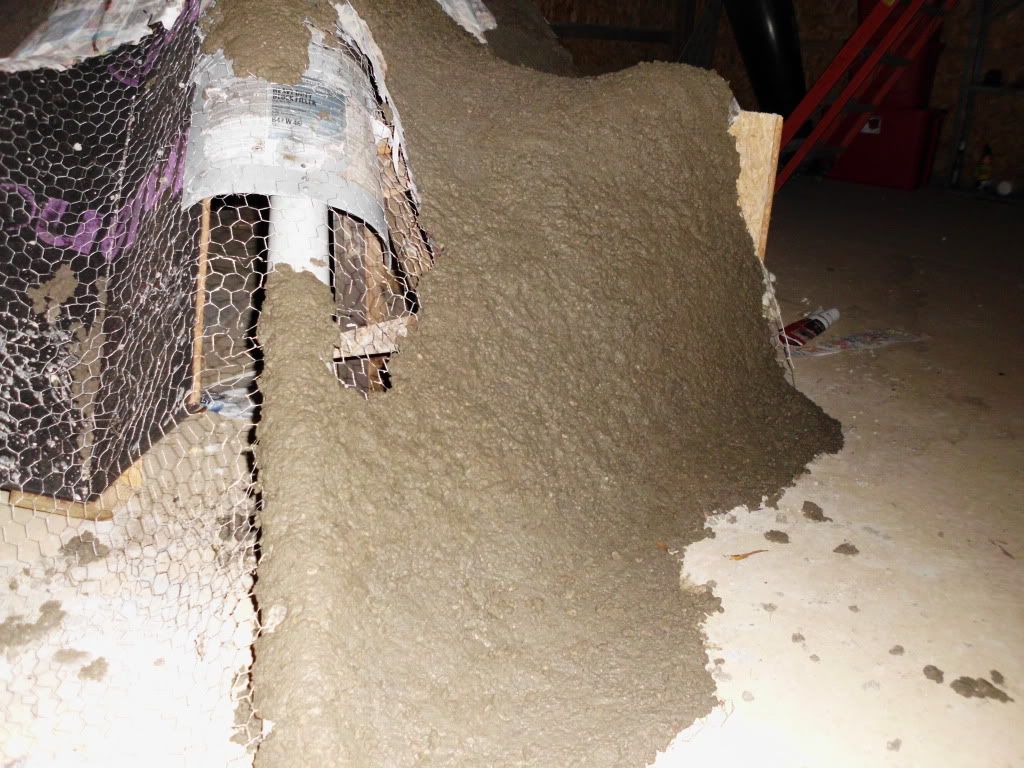 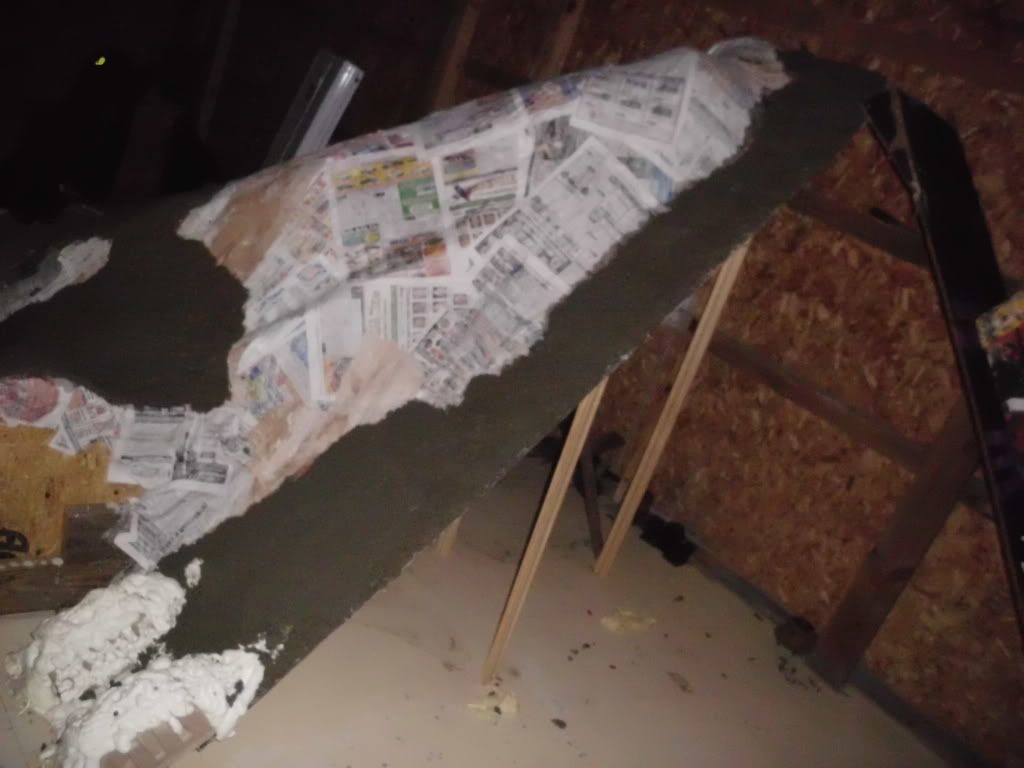 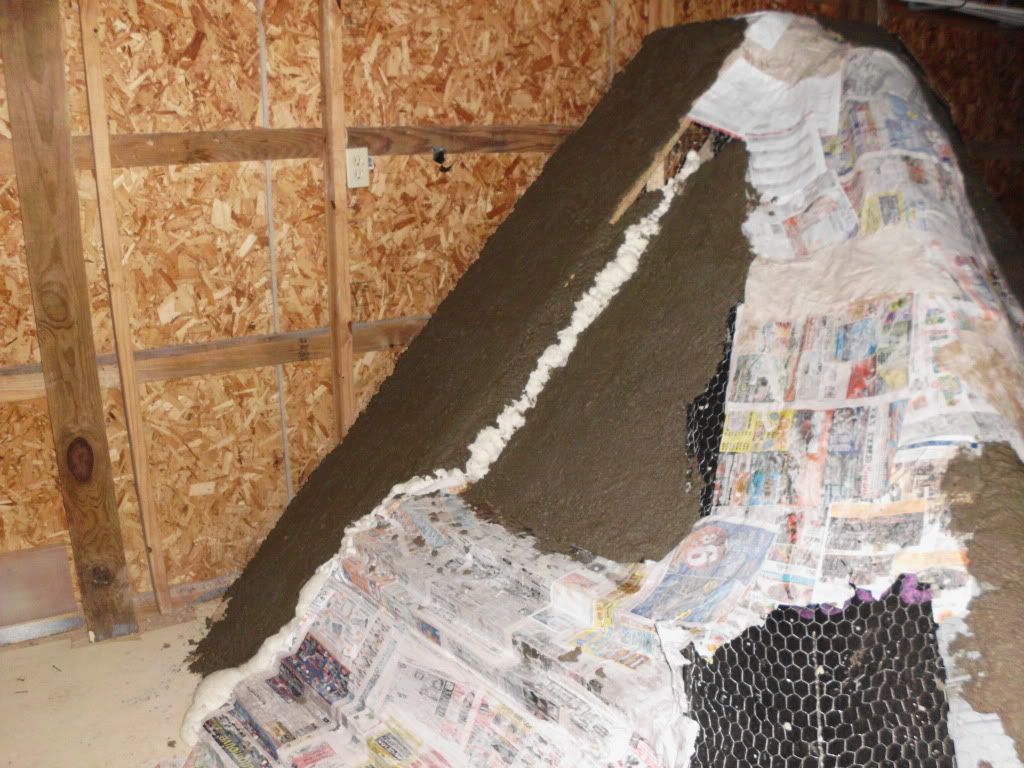 My hands are raw and it's like 19* and raining so I might let it dry for a day. Whatchall think? |
|
| |
 |
| Thread Tools | |
| Display Modes | |
| |


 Linear Mode


