| |||||||
Loading
 |
| | LinkBack | Thread Tools | Display Modes |
| |||||||
 |
| | LinkBack | Thread Tools | Display Modes |
| | #1 |
| Quarry Creeper Join Date: Jul 2015 Location: Hanover
Posts: 209
|
Well, Here I go. This is kinda uncharted territory for me. I've built many things from this "styrene' like material. i'ts called Palight. Some kind of "foamed PVC" rigid board. I've made battery trays, body mounts, interiors...but never a whole truck. so we'll see how far I get before I chuck it into the ol' wood burner. I started out doing some (a lot of) research, to find the exact year and model. And I think I found a winner. Not too difficult, but also the correct wheelbase, without having to do any weird adjustments. So I printed a side profile of the truck, and used a glue stick to "paste" that to the Palight. Then I traced all the lines with a razor blade. I did the profile of the truck as well as the character lines along the bottom. 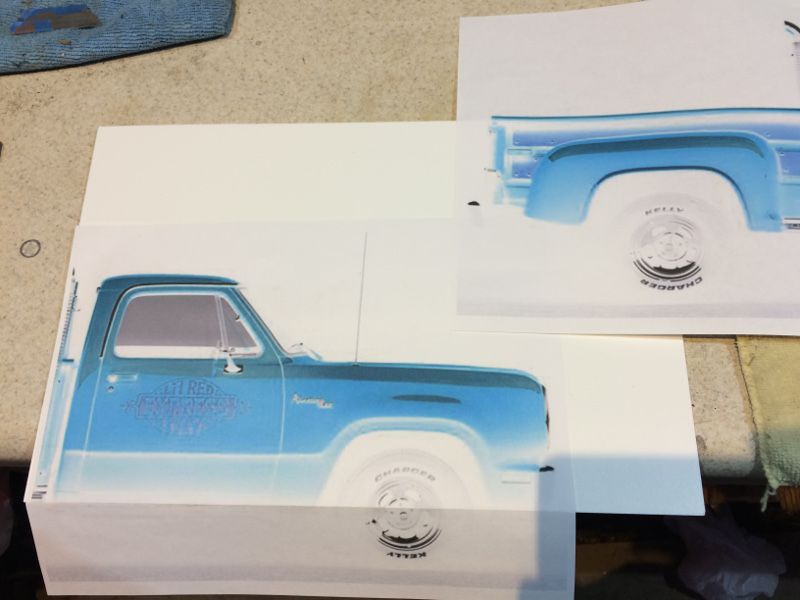 Then I traced those lines with a pencil (so I could see them) and cut that part out of the piece of Palight. Then I secured the cutout to the first piece with some 2 sided "carpet" tape. ...Back to the band saw... 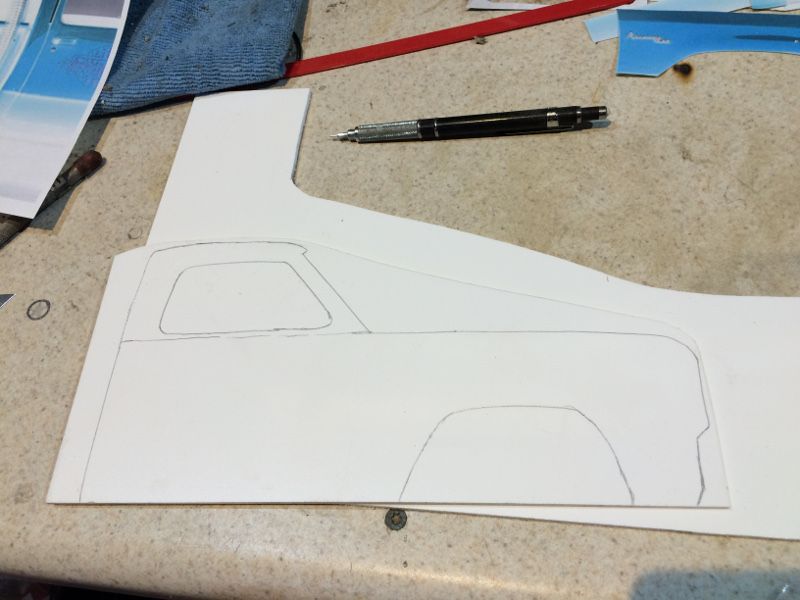 Quick and dirty way to make both sides at once...Right? 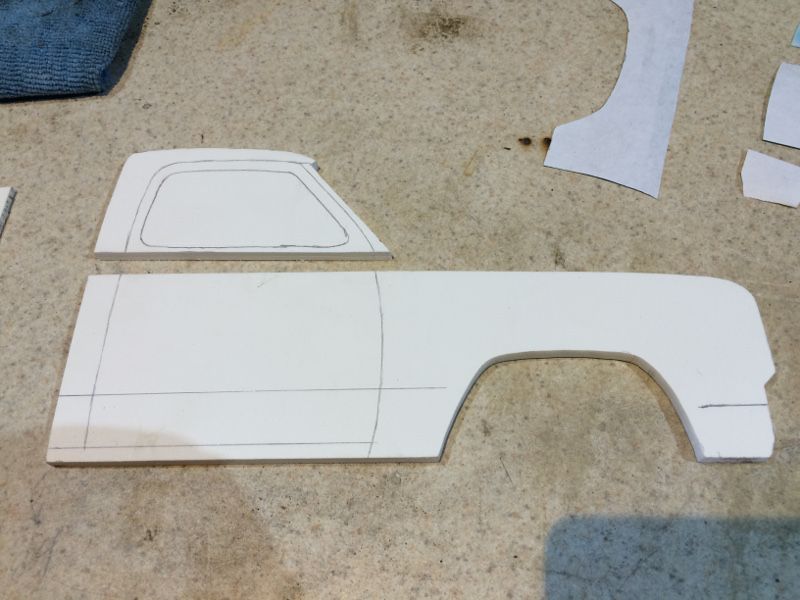 After much sanding, I pried all the pieces apart. After much quality time with my heat gun, I decided to cut some temporary spars so I could see my progress. (and boost my confidence) 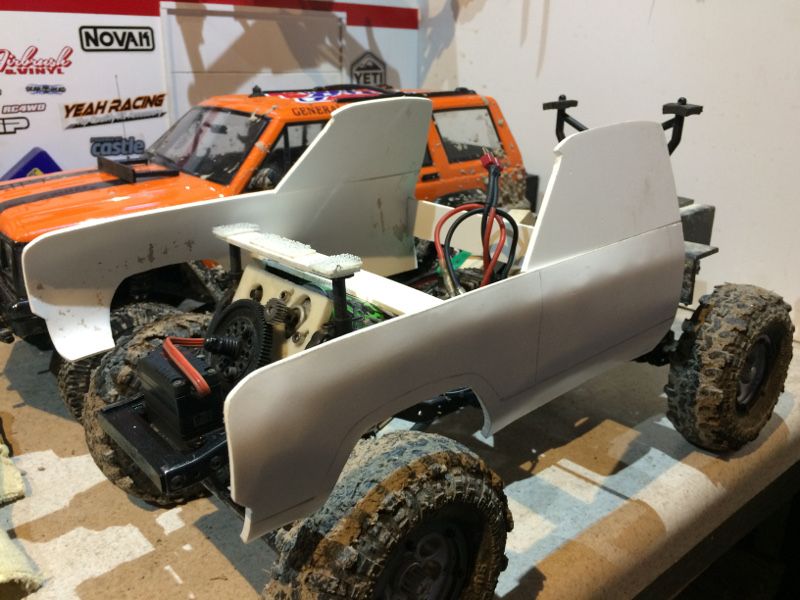 ok, there may be hope. Let's tackle that hood. After a bit more heat gun action, I came up with this. 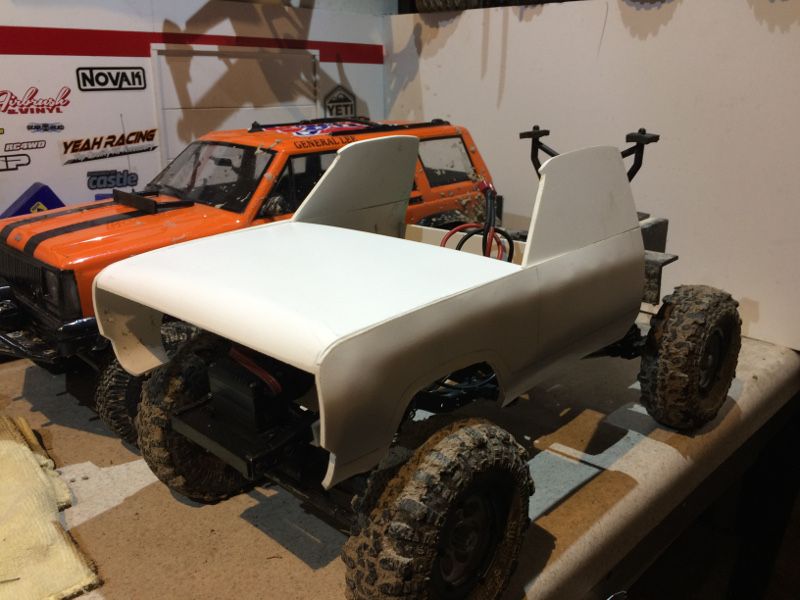 I wasn't that excited about it, so I started the roof... 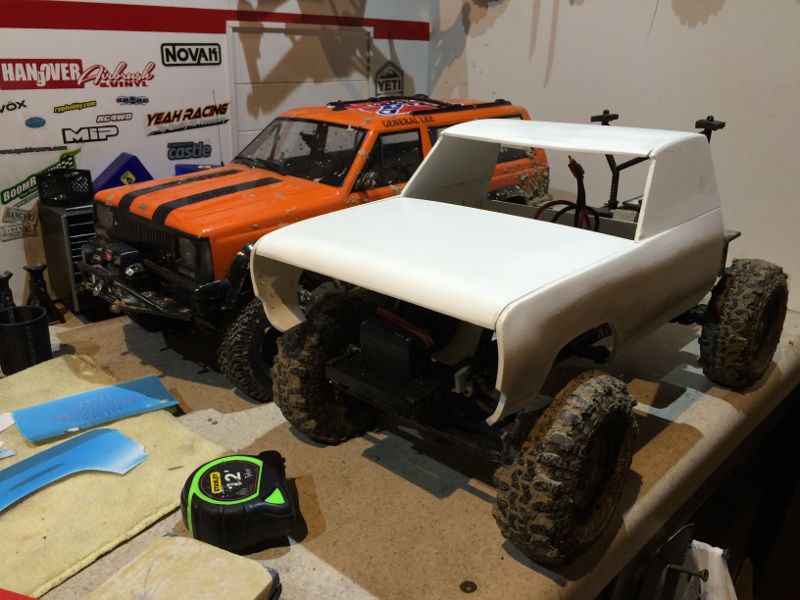 Ok. Still needs some "fine tuning" but day one is over. It's really cold outside, and it's getting cold here in the shed.... |
| |  |
| Sponsored Links | |
| | #2 |
| Quarry Creeper Join Date: Jul 2015 Location: Hanover
Posts: 209
|
OK. The Coors Light Goggles must have been thick last night, cuz this thing looks like "butt" today. One of these things is going in the wood burner tonite, and as of right now, I'm kinda thinking I'd rather keep a board with "MOPAR" painted on the side. 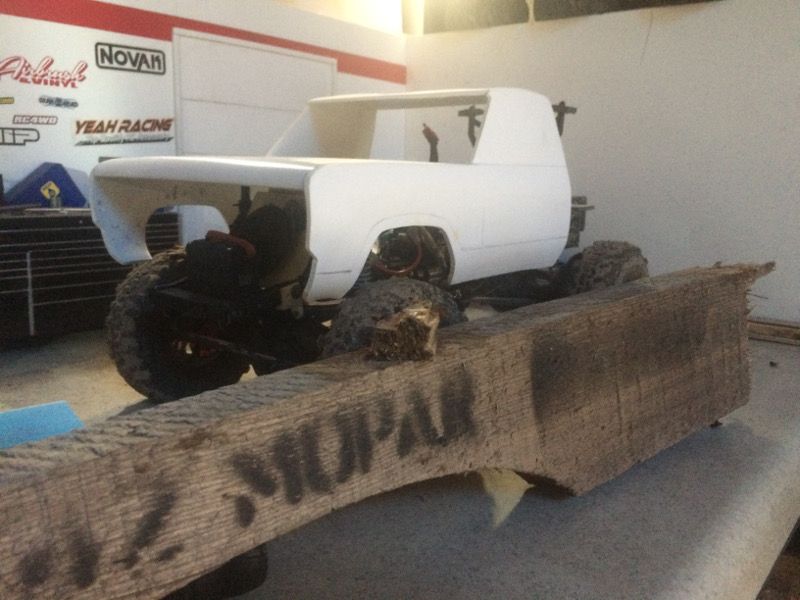 So after some tweaking with the heat gun, adding the rear window frame, core support, and working on the hood's middle section, (I need a power sander!!) I got to where I hated the truck less. But still not content with it. I started to spread out some glazing putty. Does this stuff freeze? Crap. After a bit of sanding, I put some primer on the hood, to make it one color again. 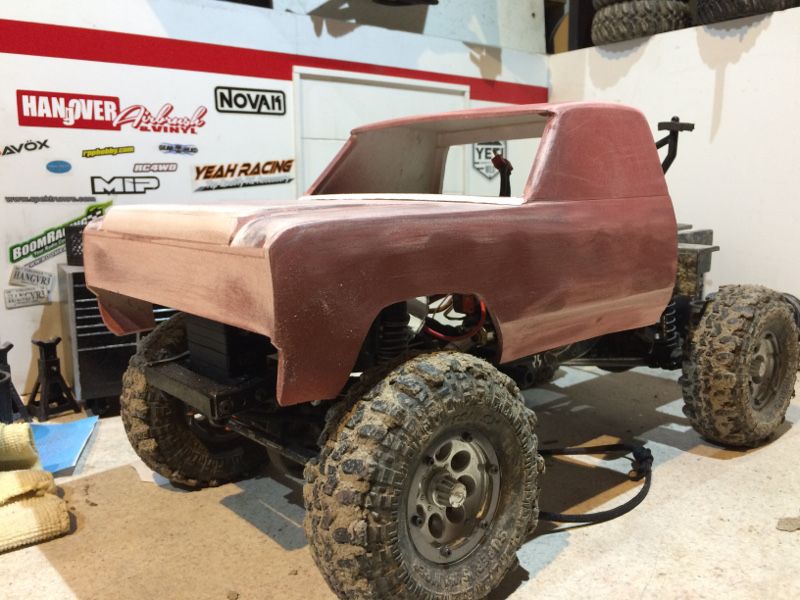 That will most likely come back to bite me in the butt, but I need everything to be one color so that I could "see" what's going on. (I said "butt but...") So I hate it even less now, so I chucked that "MOPAR" palette chunk in the 'burner. I really want to cut out the side windows, but I'm leaving that for later because I'm sanding so heavily on the roof. Decided to sand on those body side character lines for a bit. Once again, I can't compete with mother nature, and it's cold in the shed. So here's where I've left off... 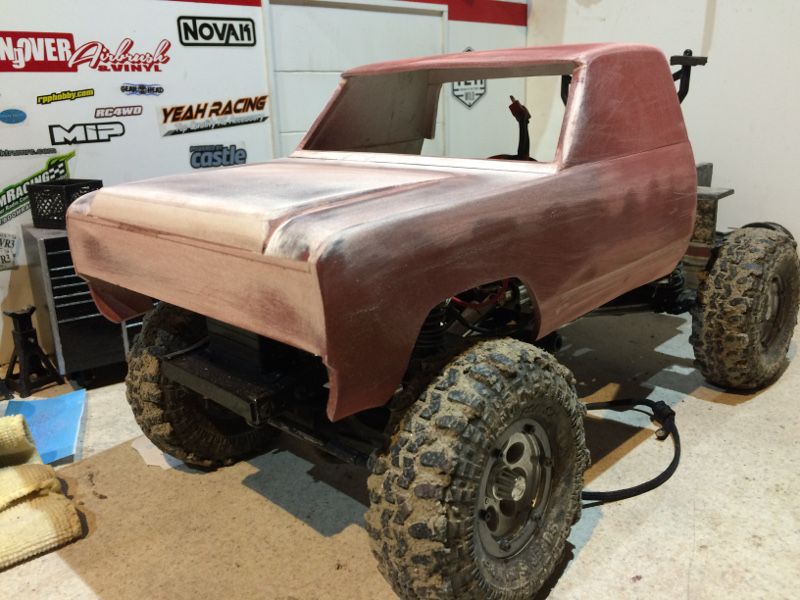 Still got a long way to go, but I should get some real good quality time with it over the weekend, if this blizzard hits. Which reminds me, I should stock up on beer and super-glue....I'd hate to run out... |
| |  |
| | #3 |
| I wanna be Dave Join Date: Dec 2009 Location: .
Posts: 7,967
|
Looking great, your quite the body builder. Need to get some heat in that shed so you can keep at it! |
| |  |
| | #4 |
| Quarry Creeper Join Date: Jul 2015 Location: Hanover
Posts: 209
| |
| |  |
| | #5 |
| I wanna be Dave Join Date: Dec 2009 Location: .
Posts: 7,967
| |
| |  |
| | #6 |
| I wanna be Dave  Join Date: Apr 2013 Location: Streamwood, IL
Posts: 2,442
|
I wonder if that Palight is like the Sintra?, which is also a foamboard. Good job on the Dodge!  |
| |  |
| | #7 |
| Rock Crawler Join Date: Aug 2011 Location: Baton Rouge
Posts: 965
| |
| |  |
| | #8 |
| Quarry Creeper Join Date: Jul 2015 Location: Hanover
Posts: 209
|
sintra? Never heard of it. But in all fairness, I never heard of Palight until a fellow crawler dropped it off... Mike, thanks for the flowers.... Rowdy, if we get half the snow they are calling for, I'll never find my beverages under that white blanket of cruelty. Unless I follow my own footsteps.... Today's progress... Well, now it's too big to fit into the wood burner, so I decided to continue the project. I built a cab rear, and added a bunch of stuffs to the front end. I carved out the lower body character lines with the help of some tools provided by Mrs Hangover. (be sure and thank her too!) 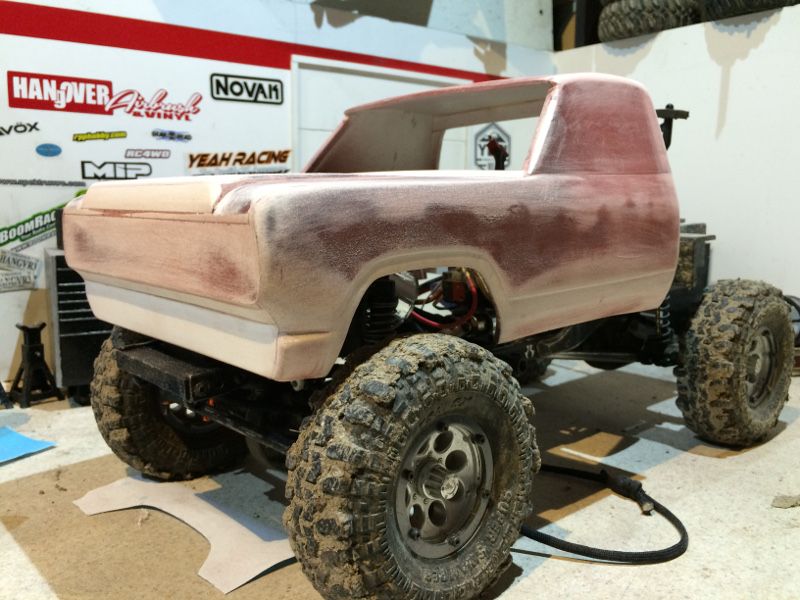 Somehow I just couldn't resist wasting more red primer. Then, after sniffing paint fumes for a while, I thought it's be a good idea to cut in the hood lines... 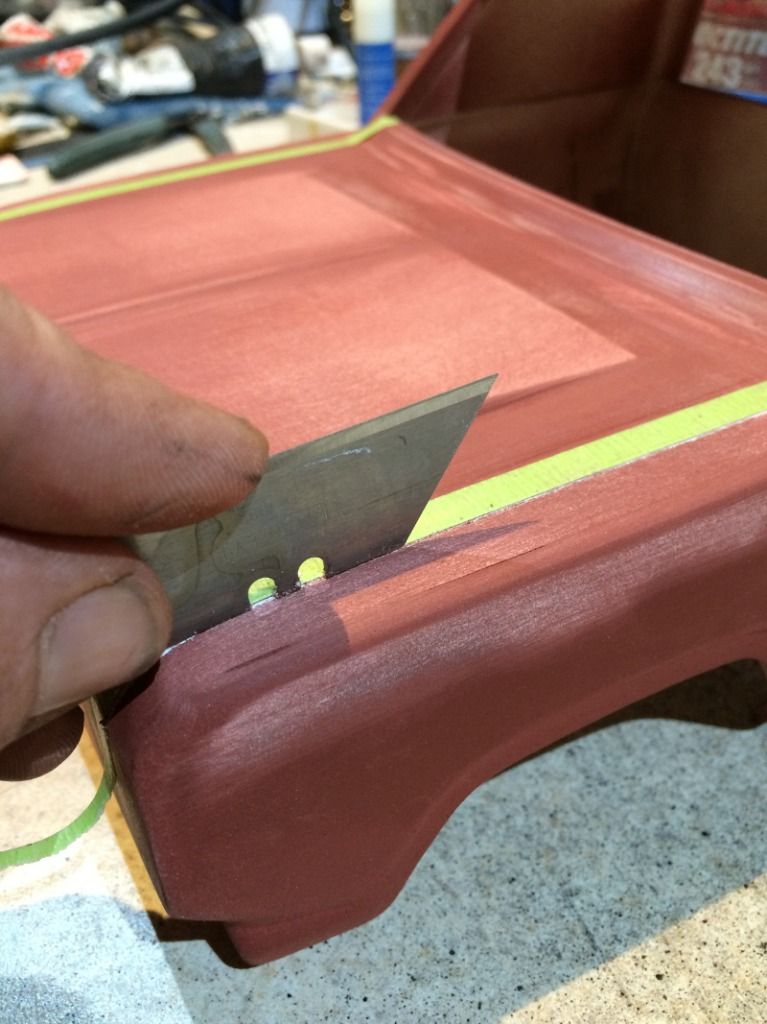 I couldn't come up with a better idea....like I said, "paint fumes" Whatever, it worked.... Must have been a mix between beer and paint fumes, but I decided to cut out the side windows. I just used a Dremel with a rasp, and kept my distance. Then I crept up to the lines made earlier with the rotary file Mrs Hangover gave me, sanded some more, and I got something close enough for now. 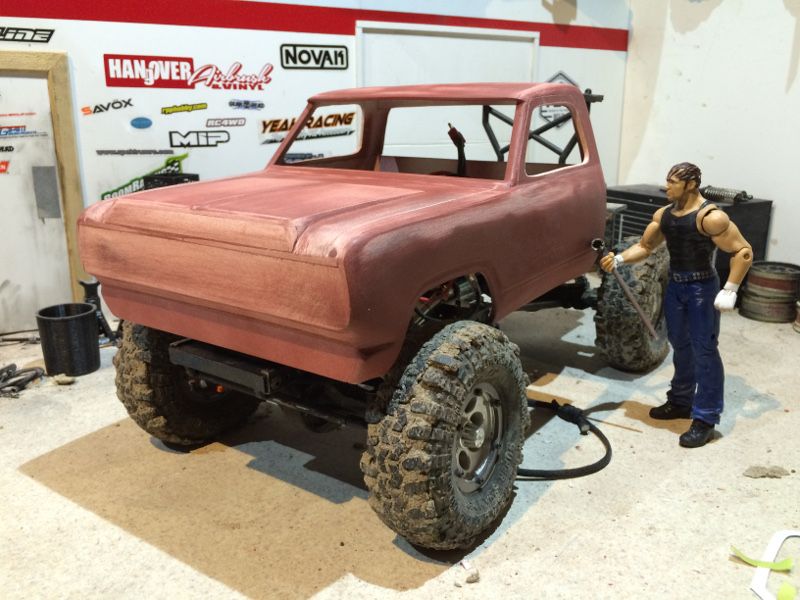 Next step, might be the interior, but I'd like to put that off until this sits on the proper chassis. After all, those old Dodge's were leaf'd...right??? |
| |  |
| | #9 |
| Quarry Creeper Join Date: Feb 2009 Location: Rocky Mountains
Posts: 241
|
Looking great so far! Very nice work.
|
| |  |
| | #10 |
| I wanna be Dave  Join Date: Apr 2013 Location: Streamwood, IL
Posts: 2,442
|
Ya on the leaf springs.
|
| |  |
| | #11 |
| Pebble Pounder Join Date: Dec 2011 Location: Wherever you are not
Posts: 194
|
This thing is looking fantastic! nicely done sir. It makes me want to possibly take my project and toss it in the wood burner.
|
| |  |
| | #12 |
| Quarry Creeper Join Date: Jul 2015 Location: Hanover
Posts: 209
|
Thanks for all the compliments guys... Last night's progress wasn't all that paramount. I made some strengthening "spars" for inside the rear of the cab. They are just thin pieces that I heat formed and glued in. Then I sanded a little fillet down the profile to make it look like the inside of the cab. Then I thought I'd tackle that grill. I traced the profile of the truck onto a piece of styrene, and cut that out. Sanded until I was kinda happy with the shape. Then I got the idea to use a compass to draw the inner lines. 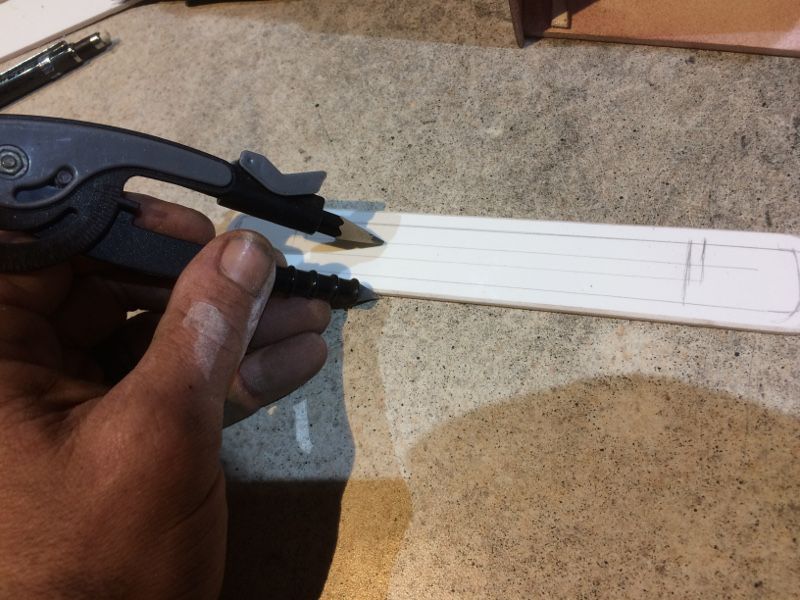 Wish I had a better compass, this thing has PlaySkool written all over it, but I made it work. After coming to terms with what looked like the correct dimensions, I traced the pencil lines with a razor. Using light pressure, and MULTIPLE passes, I eventually cut through the styrene, except for the corners. 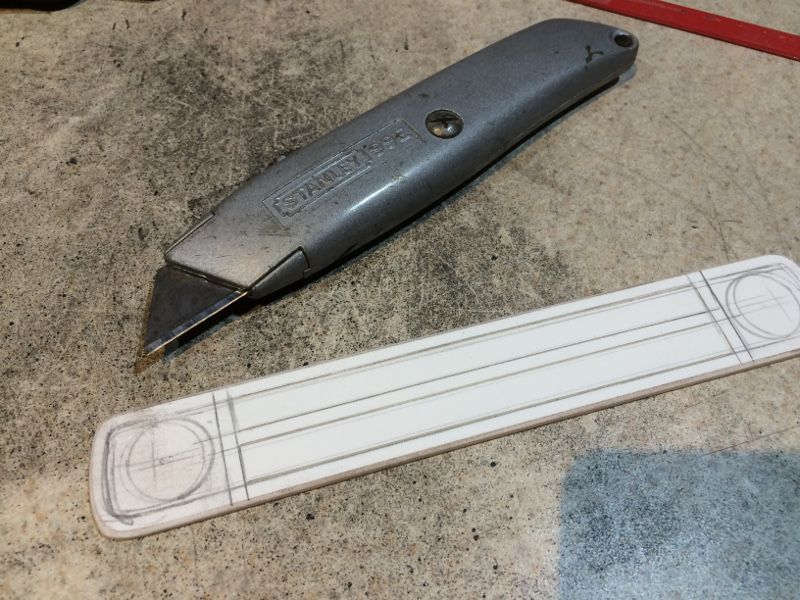 Finally found a use for those Lexan scissors... 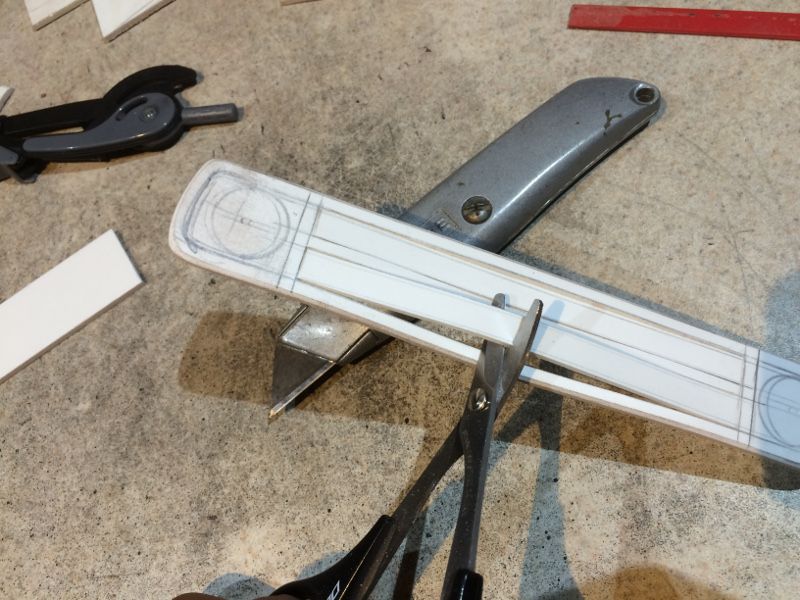 Mounted the grill to the truck so I could transfer the head light holes, and the radiator opening. 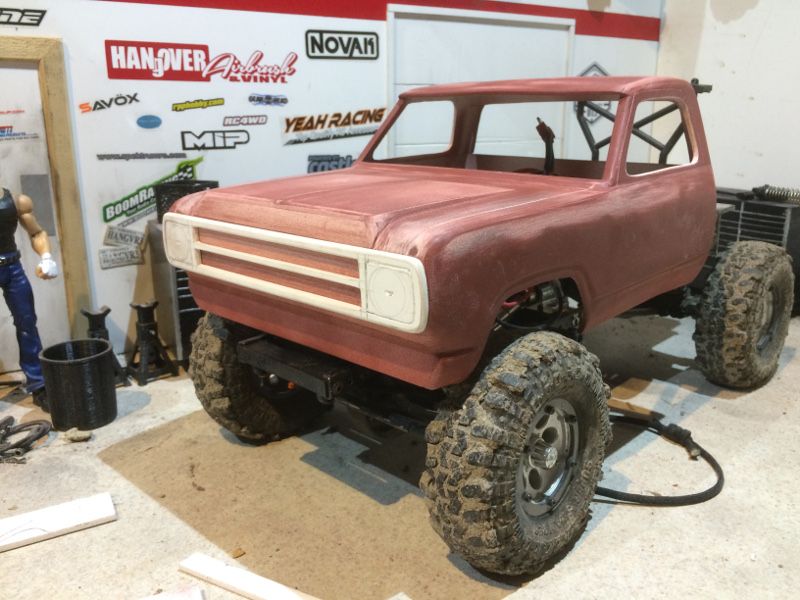 I can't help but think it looks more like an old C-10 than a Dodge. That's not good... Drilled out the headlights anyway, and in doing so, I managed to break the grill. Should have used the drill press. Glued the thing back together, straightened some, and mocked it up again. 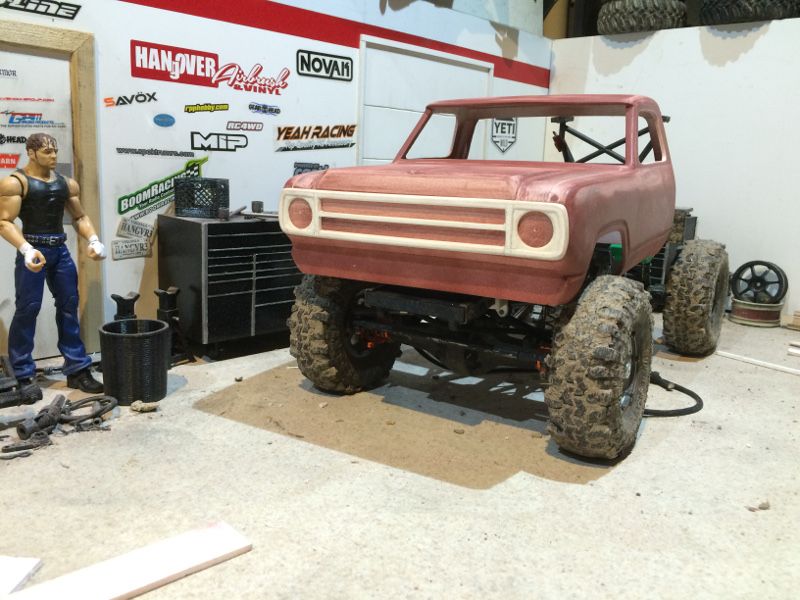 OK. All is not lost. Some more sanding... And here's where I left off. More sanding will be performed, but for now, it's looking more like a Dodge. 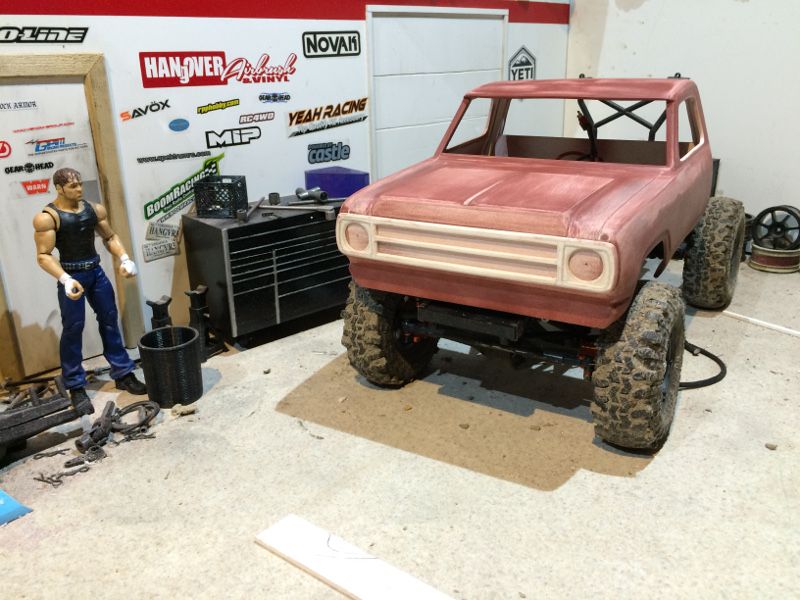 I might add that middle vertical grill spar...even though the '80 Power Wagon didn't have it, I just think that's the signature "Dodge" plus sign, and it looks silly without it. Time will tell... |
| |  |
| | #13 |
| Quarry Creeper Join Date: Jul 2015 Location: Hanover
Posts: 209
|
...and yet another installment... I was kinda bored with making stuff for the truck, well, not really. But I knew the bed needed to be built. So, up from a pile of styrene....For your viewing pleasure... A box. 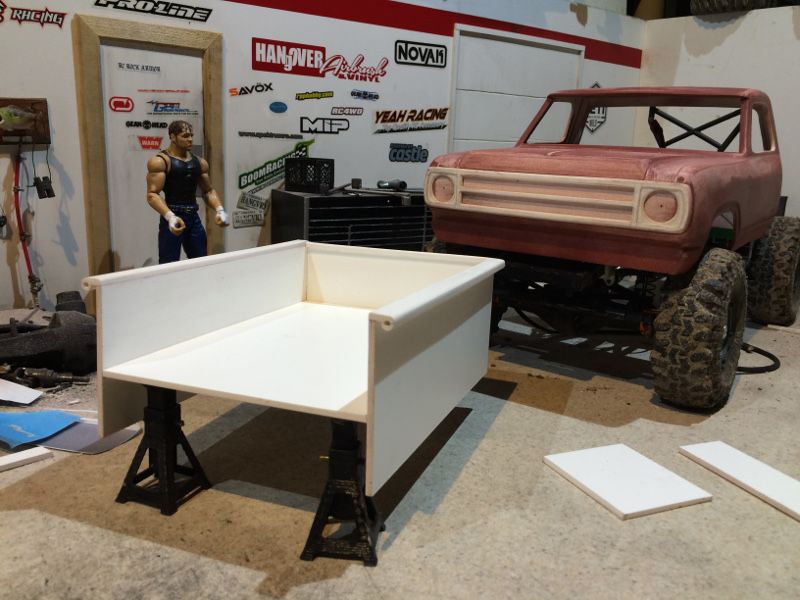 I tried several different methods to make the bed rails, until I settled on this one. Simple is sometimes better. Then to the profile of the fenders... I just "traced" the profile after heating the styrene with the trusty ol' heat gun.... Easy Peasy.... 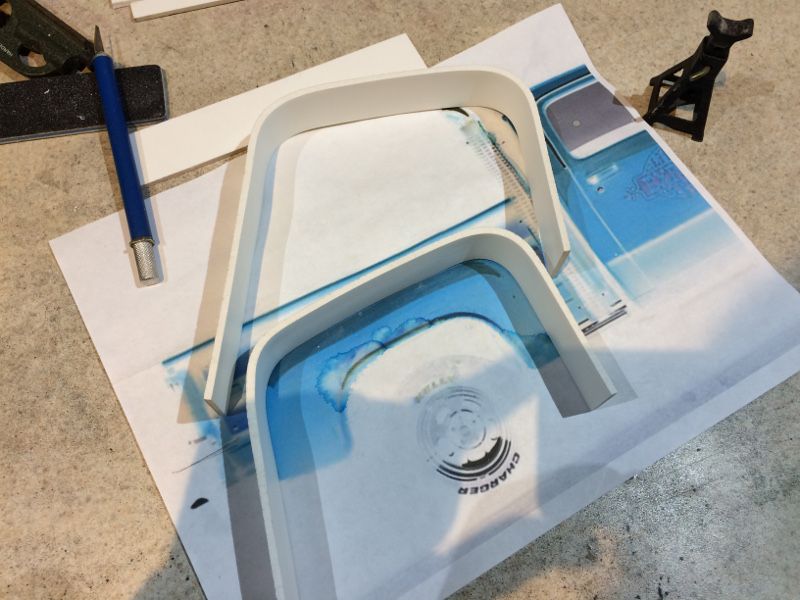 Dont ever do this....ever. Dont waste your time trying to get both sides to match.. Just get them close. You can only see one side of the truck at a time, right? Twenty plus minutes lost to my OCD.... 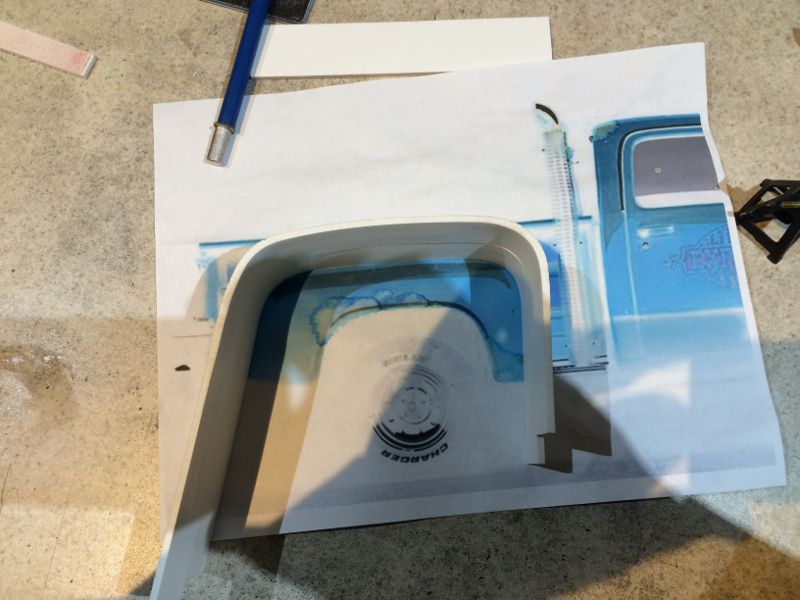 After gluing the fenders on backwards, I realized it was prolly time to quit. So I pried them off, and after a few choice words, cleaned up the glue, and put them on....the correct way. Geez... 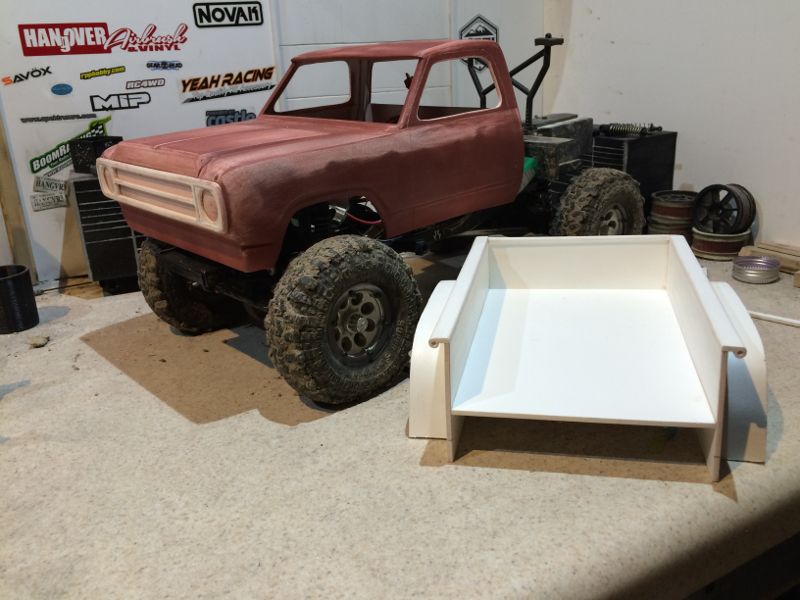 Well, that's it for tonite. Running low on wood, and the snow is deep. I prolly got to bust some more skids tomorrow for firewood... Here's where I left off.... 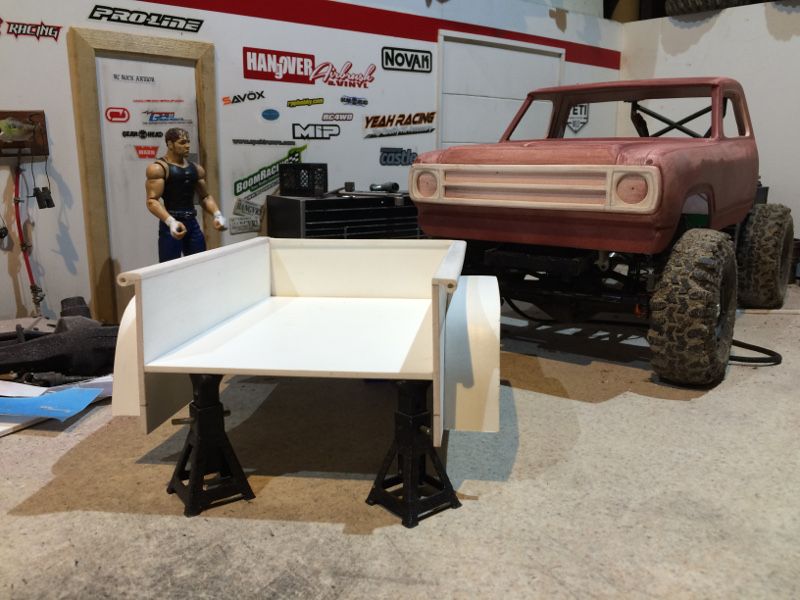 cheers.... Last edited by HANgOVER Airbrush RC; 01-23-2016 at 06:48 PM. Reason: spelling, grammar |
| |  |
| | #14 |
| Quarry Creeper Join Date: Jul 2015 Location: Hanover
Posts: 209
|
ah. Last night's progress was short due to the lack of firewood. I just didn't feel like trudging through 14" of snow, to get the palettes, and the snow if front of the door is easily 24" deep. So I burned what I already had in the shop. I focused mainly on the bed. Made the sides for the fenders. No real magic here, I traced the profile onto a piece, stacked four pieces together with 2-sided tape, and off to the band saw. I glued one piece on either side, planning to use all four to get the profile I wanted. 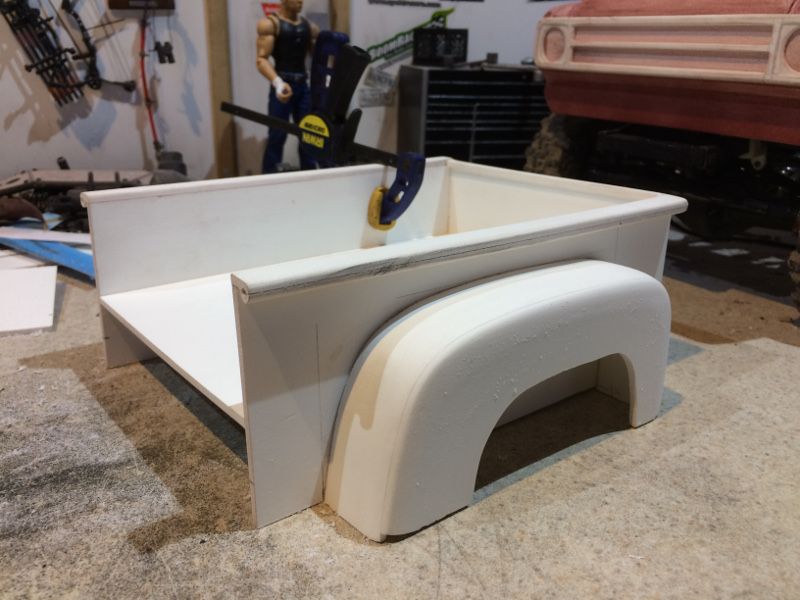 Sprayed some primer (yeah, you know me) and decided that I didn't need the two other parts. Ok, I line everything up, and.... Crap. the bed's too narrow. Two ways to fix this. 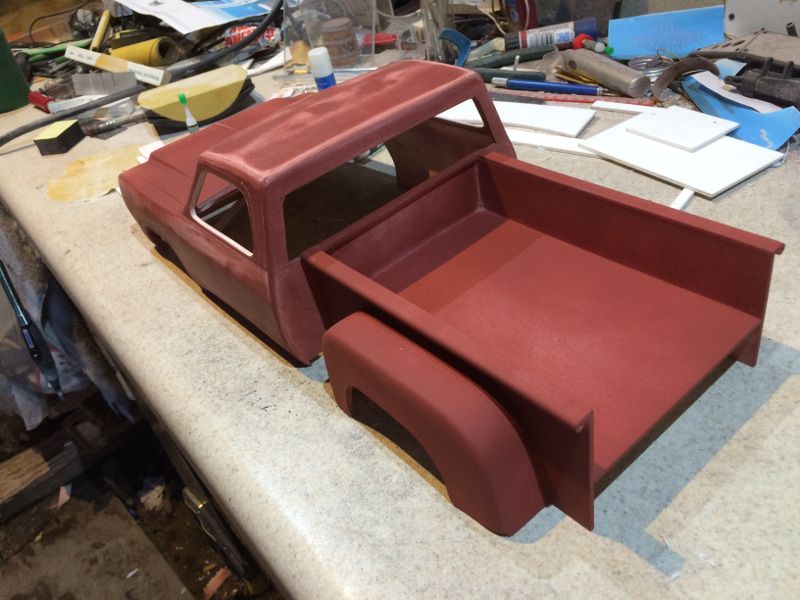 I'm choosing the quick way. TO THE BANDSAW!!! 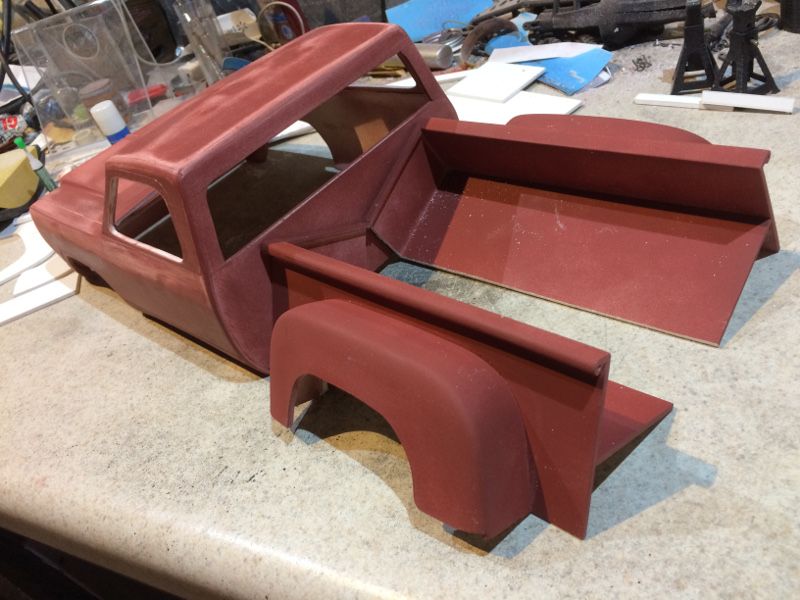 So now there are two parts.... 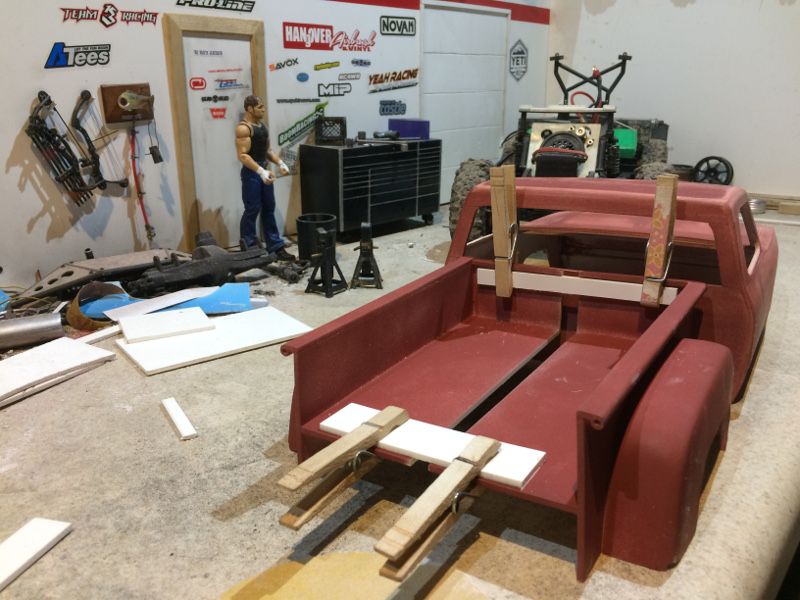 Mocked up for proper width, and I can get a measurement. A lot of times, I don't go by what things look like in real life, I look through my camera, and judge it that way. Two reasons, If it looks on camera, it'll look good on camera. Second, the camera is more like a "scale eye." So I figure if everything jives there....Maybe it's that whole binocular vision + depth perception? I'll even throw in some parallax error in for good measure... Doesn't make sense, I know....I digress... There are easier ways to make "racing stripes" 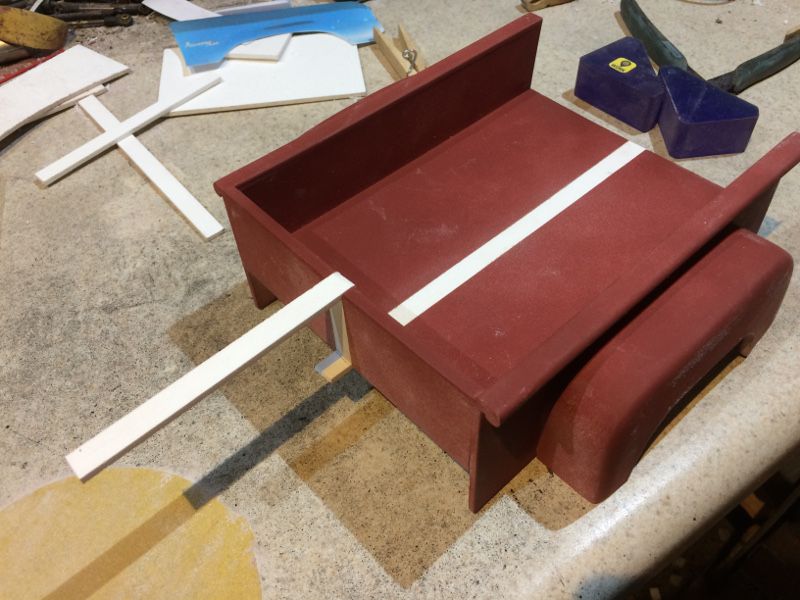 Add some more primer.... And sand. Sand some more... Added the steps in front of the fenders, and the rear bed reinforcement "things." Here's where I left off, I put down some more glazing putty in some areas that were bothering me. Hopefully, those areas will have cured by this morning, and I can continue. 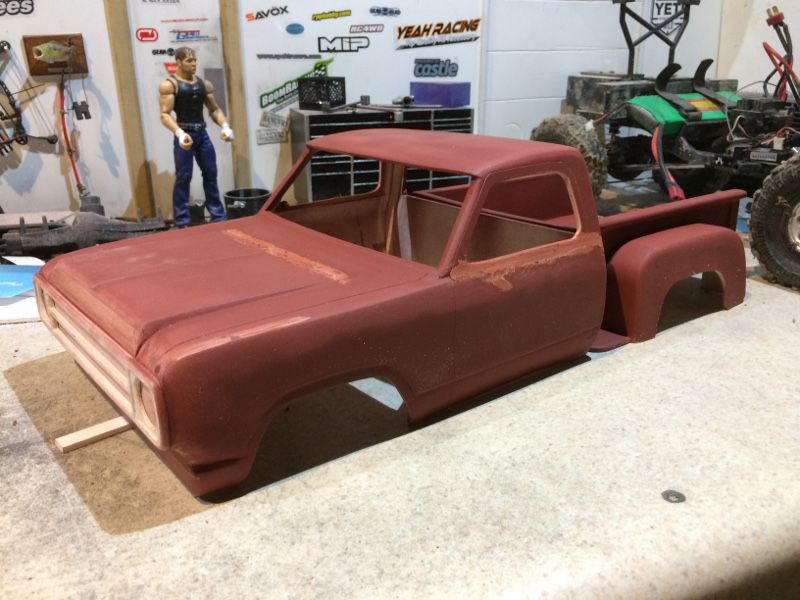 |
| |  |
| | #15 |
| I wanna be Dave  Join Date: Nov 2014 Location: West Texas
Posts: 2,654
|
Very nice job. I've used komacel for a few build and it looks similar
|
| |  |
| | #16 |
| Quarry Creeper Join Date: Jul 2015 Location: Hanover
Posts: 209
|
I'm glad everyone is telling me that this Palight is like this or the other....I was (am) nervous about using it because it's not at all like Plastruct. That stuff is WAY more dense than Palight. What is everyone using for glue? I've been using Krazy-Glue, but I'm sure there is something better? More user friendly? I also have a Super-Glue stuff that is a thick gel, they claim it remains flexible... Reminds me of ShooGoo? maybe? (Based on other's description-I've never used ShooGoo) Haven't tried the thick stuff on the Palight yet, but it worked wonders on my boots the other day... |
| |  |
| | #17 |
| I wanna be Dave  Join Date: Nov 2014 Location: West Texas
Posts: 2,654
|
I use Bob smith medium thick glue super gold and activator.
|
| |  |
| | #18 |
| Quarry Creeper Join Date: Jul 2015 Location: Hanover
Posts: 209
|
Bob Smith medium thick...I'll look into that... Last Night's "progress," well... there wasn't much at all. For those who thought I was exaggerating about the snow... 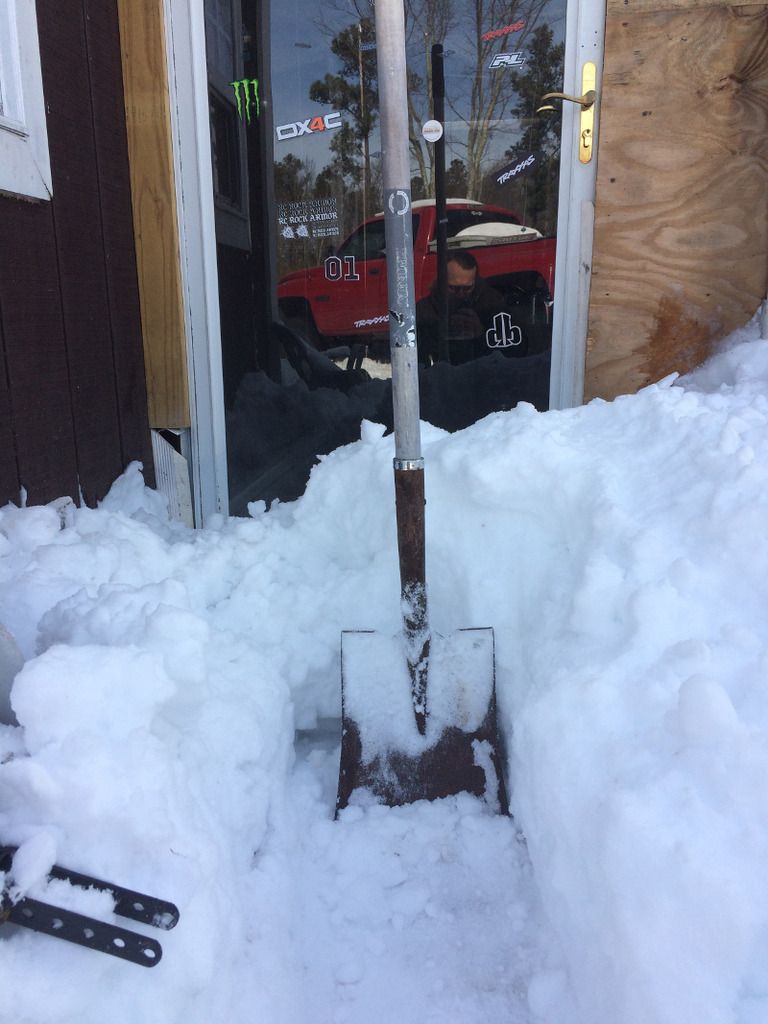 Anyway, I worked on shaping the grill, and decided to just go ahead and glue it down. So I lined it up where I wanted, and put some tape on it. The idea was to make a hinge so I could put some glue on it, and not have to line it back up. It worked Ok, I guess. 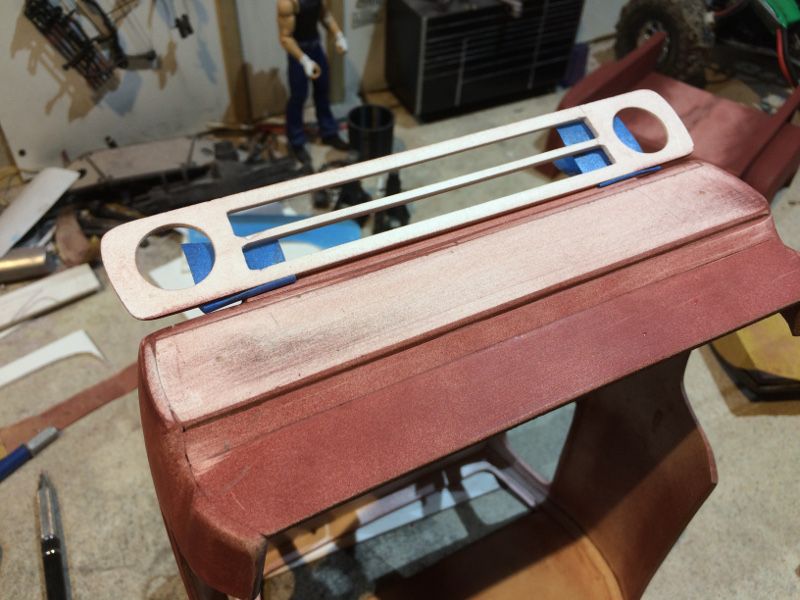 After that, I made a piece that the windshield will eventually mount to. Then I sanded. And sanded some more.... 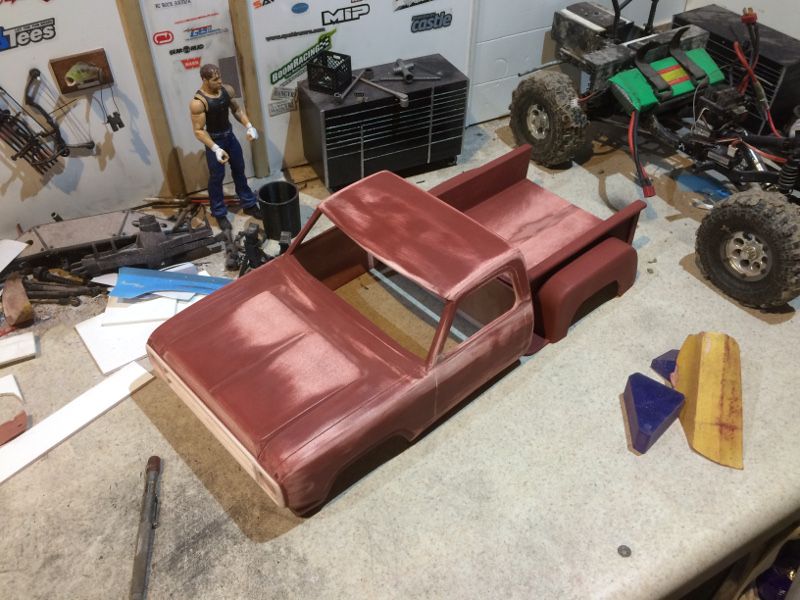 Hopefully, if all goes well, I'll get a chassis for this thing today... But, work is already calling, so the chances are diminishing rapidly.... |
| |  |
| | #19 |
| Quarry Creeper Join Date: Jul 2015 Location: Hanover
Posts: 209
|
well, today's progress wasn't built. In fact, I don't even remember touching the truck... until I got back home. With a chassis to go underneath the Dodge. After a ride half-way across the short side of the state, to the land of Crooks, Thieves, and Liars... Admittedly, traffic could've been much worse...and usually is, in that district. But we returned back to the shop with my Eleanor... 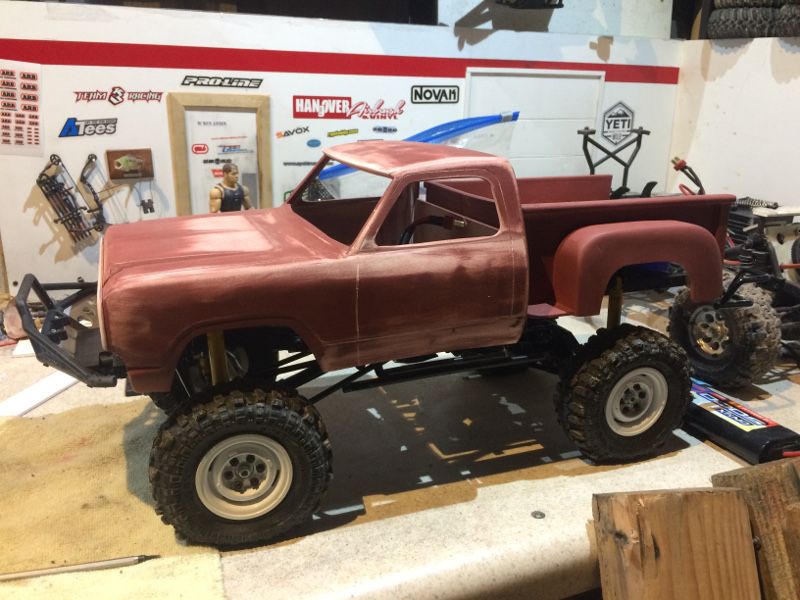 Naturally, there will be some alignment that needs to happen... And I need to put the leafs back on... Maybe make the bed a "touch" longer... Smaller tires, different wheels...(like wagons?) Different bumper... you get the idea... But, the 'Wagon has a home... |
| |  |
| | #20 |
| Rock Crawler  Join Date: Apr 2014 Location: Portland
Posts: 835
|
Awesome!!!!!! Scratch built Dodge PowerWagon.. Ya can't beat that.. As far as I know for Glue.. MEK: methyl ethyl ketone. Could be used. it will melt and bond Plastics. Also Really Really harmful if Breathed.. I used Ambroid Pro-Weld on a plastic bumper i built using the same materiel. http://i290.photobucket.com/albums/l...psa7cabef7.jpg |
| |  |
 |
| Tags |
| dodge, dudge, power wagon, scratch build, styrene |
 Another Rookie Scratch Build - Similar Threads
 | ||||
| Thread | Thread Starter | Forum | Replies | Last Post |
| Rookie Spawn Build | TheBigRigger122 | Axial Wraith | 48 | 04-09-2016 11:23 AM |
| Rookie - First Scale Build - LJ | ski29mike | 1.9 Scale Rigs | 27 | 03-16-2015 11:17 PM |
| A rookie builds his first "from scratch" styrene body | Mud Puppy | General Scale Talk | 62 | 01-29-2015 09:12 AM |
| My Rookie Build | Rokcrler | Axial AX-10 Scorpion | 7 | 05-29-2011 08:24 PM |
| |