| |
 06-15-2007, 11:16 AM
| #1 |
| Rock Crawler Join Date: Feb 2007 Location: Lorain
Posts: 598
|
Making a tutorial on howto turn a stock wheelyking into a 12.5 wheelbase crawling machine. Parts needed. Traxxas #5139. 118mm. (For lowers) (2) Traxxas #5138. 102mm. (For Uppers) (2) Tamiya #9804179 Upper/lower suspension stays (1) Traxxas #4951x Halfshafts (1) Integy Lathe motor. (Personal choice. I prefer the 55t) Jb weld (To lock the diffs and internal slipper in the trans.) Start by disasembling the stock Suspension. Upper link, Lower link's, and shocks. (No pics, self explainitory) Now that you have the axle's and chassis seprate, it's time to get started. I switched the axles on my rig so the battery would be up front, but thats optional. Start with the rear axle. Mount your suspension stay onto the stock 3-link mount like so. 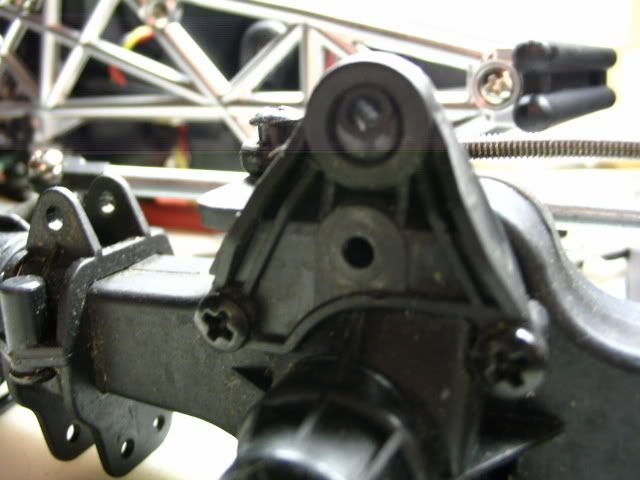 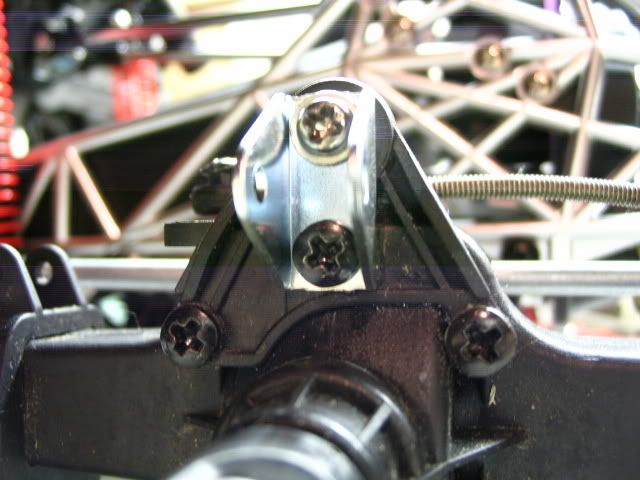 No your going to have to rotate the stock lower link mount 1/4 turn up as seen below. 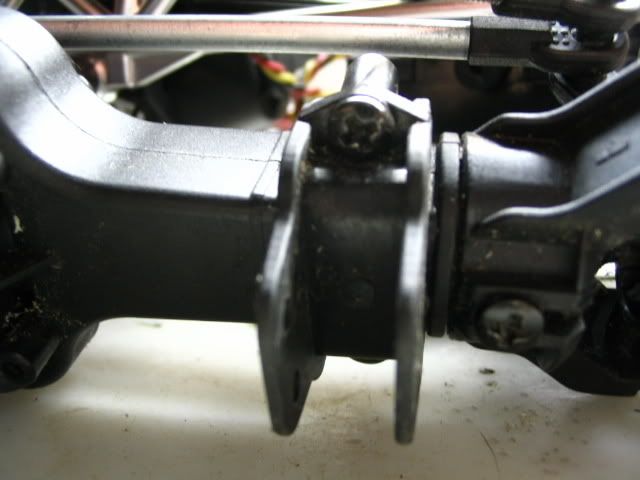 Mount your Upper links to the suspension stay on top of the axle. (#5138 ) 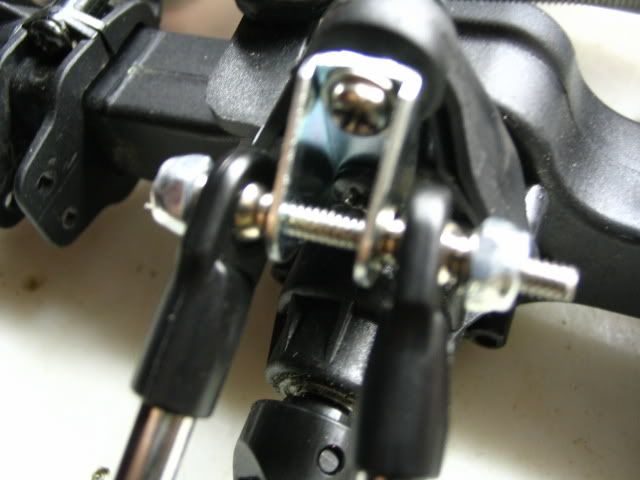 Mount your lower links to the stock lower suspension mounts on the bottom (after they became turned) 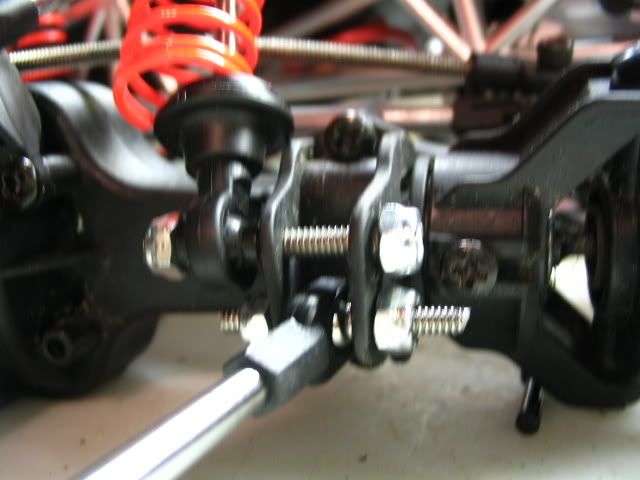 Mount your shocks above the lower link's (See above) Take your stock driveshafts off the axle, and ake your longer T-maxx driveshafts and mount them to the stock yokes. 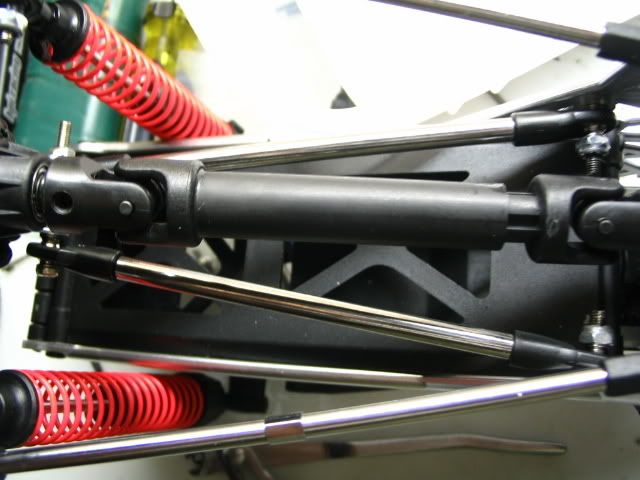 Then mount your links to the stock link locations. 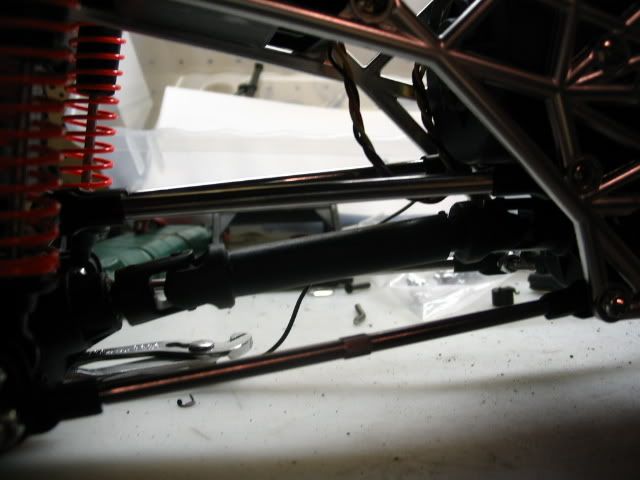 The fronts going to be a little tricky if you switched axles. You can flip the stock steering to the left side of the chassis by removing the trans, but thats a little complicated. I just made up a bracket to mount the servo on the axle. Steering is much better now. 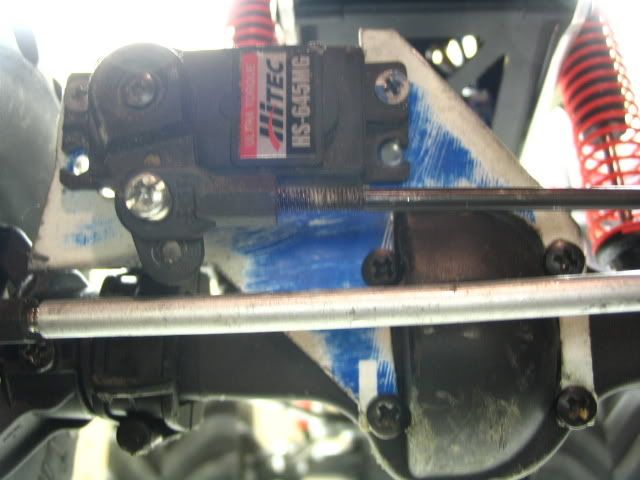 For the front links just repeat what you did to the rear. Locking the diffs is another tut. So stay tuned. I cut up the stock body for a crawler body until my Jeep's painted. Now go out and enjoy it. 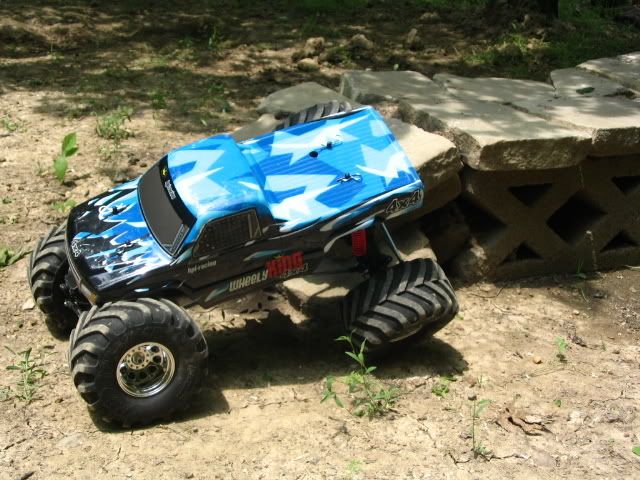 This whole conversion's cost me 65.75. If you want a new body, add that to the price. This price also includes a motor. So pick up one of the new integy crawlers. I've ran both the Lathe and now the crawler, and the crawler offers better performance. Last edited by Grizzly4x4; 06-15-2007 at 11:38 AM. |

|  |
| Sponsored Links | |
| | |
|
06-15-2007, 12:01 PM
| #2 |
| Rock Crawler Join Date: Apr 2007 Location: St. John's
Posts: 548
|
In your third and fourth pictures you could cut small pieces of brakeline or some other similar tubing as spacers so that you can really tighten up the bolts. It worked great for me. Hope you don't mind the suggestion. Sean |
|
| |
|
06-15-2007, 12:35 PM
| #3 | |
| Rock Crawler Join Date: Feb 2007 Location: Lorain
Posts: 598
| Quote:
| |
|
| |
|
06-15-2007, 01:09 PM
| #4 |
| Quarry Creeper Join Date: Apr 2005 Location: South Jersey (Cherry Hill area)
Posts: 240
|
I used nylon spacers from lowes... my 2¢  |
|
| |
|
06-17-2007, 03:04 AM
| #5 |
| Pebble Pounder Join Date: Jun 2007 Location: Juneau, AK
Posts: 153
|
Is there another part I can use for the Tamiya #9804179 they seem to be out of stock everywhere.
|
|
| |
|
06-17-2007, 08:06 AM
| #6 | |
| Rock Crawler Join Date: Feb 2007 Location: Lorain
Posts: 598
| Quote:
| |
|
| |
|
06-20-2007, 01:58 PM
| #7 |
| Pebble Pounder Join Date: Jun 2007 Location: Juneau, AK
Posts: 153
|
What did you use to upgrade the steering linkage when you added the axle mounted servo?
Last edited by wshipley; 06-21-2007 at 05:43 PM. |
|
| |
|
06-20-2007, 03:44 PM
| #8 | |
| Quarry Creeper Join Date: Oct 2006 Location: Japan
Posts: 385
| Quote:
| |
|
| |
|
06-21-2007, 09:56 AM
| #9 |
| Newbie Join Date: Jun 2007 Location: Frisco
Posts: 3
|
What does the WB come out to on this? Also, any suggestions on the steering? Thanks |
|
| |
|
06-21-2007, 01:27 PM
| #10 |
| RCC Addict Join Date: Dec 2005 Location: Beaver Falls
Posts: 1,166
|
Did you have to change the gearing or pinion gear with your new motor? Or ddi you use the stock pinion/gears?
|
|
| |
|
06-22-2007, 08:26 AM
| #11 | |
| Rock Crawler Join Date: Feb 2007 Location: Lorain
Posts: 598
| Quote:
This is brings the wheelbase to 12.5in. At first I didnt change the gearing and it worked fine. My spur stripped under load (Take it off and flex it a bit), so I changed the Gearing to TLT-1 90t spur, and 16t pinion. | |
|
| |
|
06-24-2007, 08:49 PM
| #12 |
| Newbie Join Date: Jun 2007 Location: LA
Posts: 35
|
Thanks for the instructions and pics.
|
|
| |
|
06-26-2007, 04:31 PM
| #13 | |
| Rock Crawler Join Date: Feb 2007 Location: Lorain
Posts: 598
| Quote:
In a week or so, my 4-link kit for the stock chassis will be up for sale so keep your eyes open. | |
|
| |
|
12-22-2007, 01:37 PM
| #14 |
| Pebble Pounder Join Date: Jun 2007 Location: in rc crawler land
Posts: 141
|
this is an outstanding guide
|
|
| |
|
12-26-2007, 08:31 PM
| #15 |
| Quarry Creeper Join Date: Aug 2007 Location: Lumberton
Posts: 463
|
Yeah it is a great guide and build.
|
|
| |
|
01-04-2008, 09:22 PM
| #16 |
| Rock Stacker Join Date: Dec 2007 Location: sebastian
Posts: 83
|
how does that servo work for you????
|
|
| |
 |
| |


 Linear Mode


