| |
 01-11-2010, 02:03 AM
| #41 | |
| Rock Stacker Join Date: Oct 2009 Location: usa
Posts: 65
| Quote:
its not the normal 1/8 scale mamba, its the 1717, castle is makeing a bigger one called the 2025 and it is as big as a soup can | |

|  |
| Sponsored Links | |
| | |
|
01-11-2010, 10:59 PM
| #42 |
| Newbie Join Date: Oct 2009 Location: Lowell
Posts: 32
|
love the build so far, there just arent enough pre-runner builds out there, and this is looking to be a good one. keep up the good work
|
|
| |
|
01-13-2010, 09:58 PM
| #43 |
| RCC Addict Join Date: Aug 2005 Location: Akron
Posts: 1,784
|
Little more progress. Brazed the front and rear of the frame rails together. 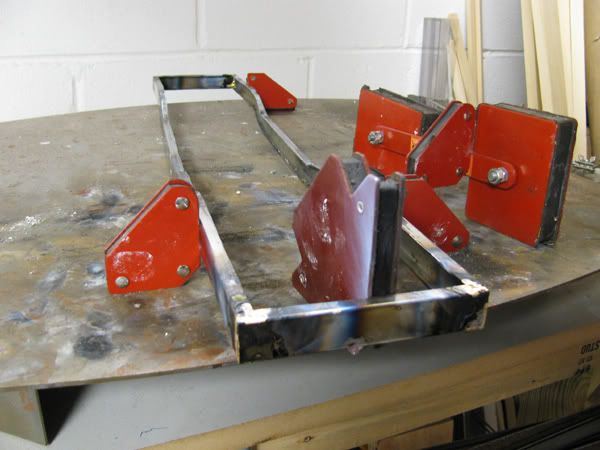 I think this is about where the front of the body would rest on the frame. Some is showing but there is normally a bumper there. 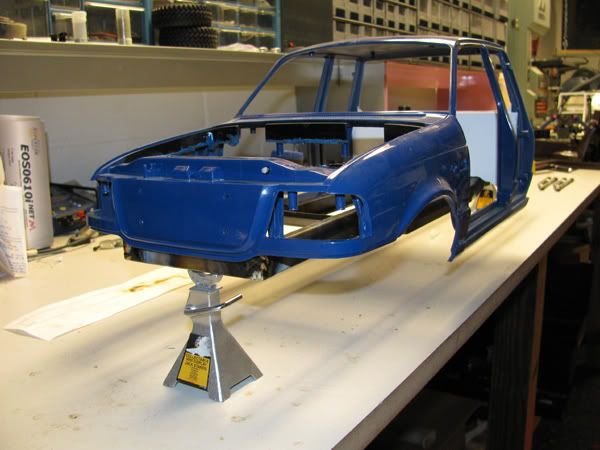 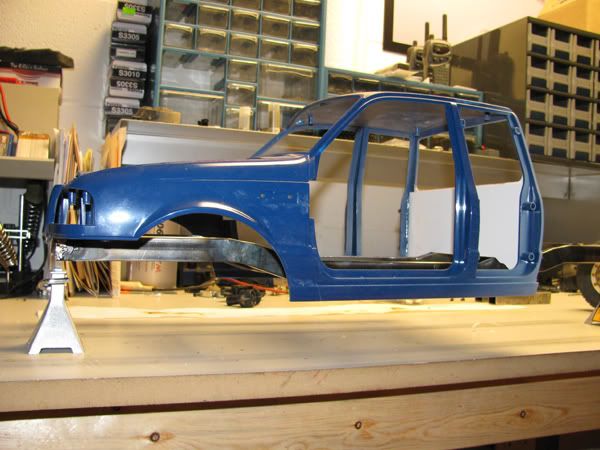 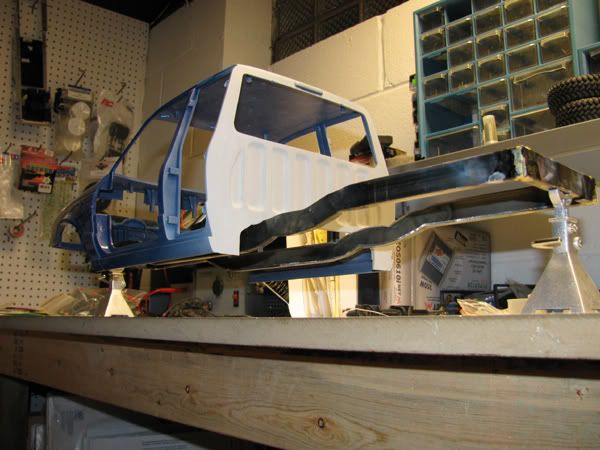 Set the interior back in to see how that is going to work out. It's surprisingly close actually. I'm going to have to cheat the floor boards a little and make room for the frame rails. 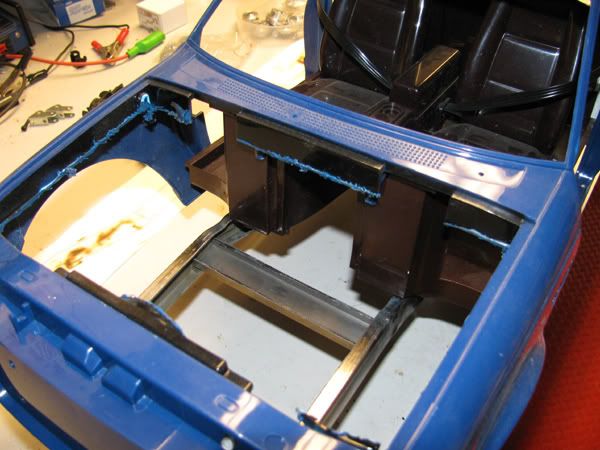 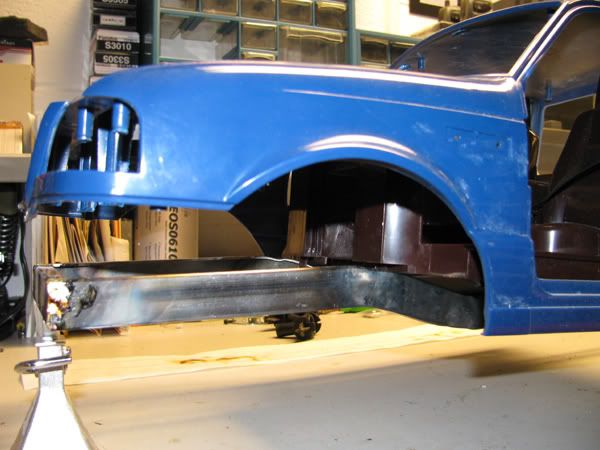 I was going to have the transmission mocked up in place with the motor mounted but found out that the 1717 uses 4mm hardware and not the normal 3mm. So it won't mount on the RCM motor mount without modification Crawln Coles did the tube work on the radius arms for me. They turned out sweet! Thanks Matt! 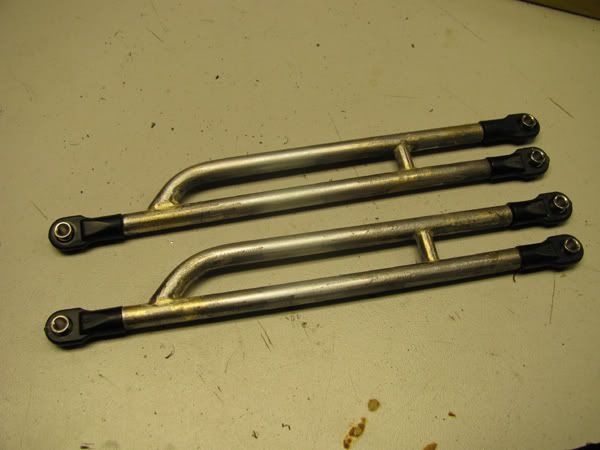 |
|
| |
|
01-13-2010, 11:18 PM
| #44 |
| Quarry Creeper Join Date: Jan 2008 Location: Antioch
Posts: 230
|
Awsome build so far. I can't wait to start my Ranger build, still waiting on some parts.
|
|
| |
|
01-14-2010, 09:17 AM
| #45 |
| Newbie Join Date: Dec 2009 Location: Scotts Mills
Posts: 11
|
that setup in the front will be killer
|
|
| |
|
01-14-2010, 11:55 AM
| #46 |
| RCC Addict Join Date: Jun 2004 Location: Bruiser Heaven!!!!
Posts: 1,463
|
this is going to be a sweet prerunner when done and i really like the links. Crawln Coles does awsome tube work, too.
|
|
| |
|
01-14-2010, 06:55 PM
| #47 |
| Newbie Join Date: Jan 2009 Location: El Paso
Posts: 16
|
where did you get that body
|
|
| |
|
01-15-2010, 08:56 AM
| #48 |
| RCC Addict Join Date: Feb 2007 Location: sweden
Posts: 1,007
|
Sweet! This is gonna be good, now get back on it! :nice:
|
|
| |
|
01-15-2010, 10:36 AM
| #49 |
| Pebble Pounder  Join Date: May 2008 Location: El Monte
Posts: 177
|
nice dude... keep it up |
|
| |
|
01-15-2010, 06:27 PM
| #50 |
| Rock Stacker Join Date: May 2007 Location: Vivaa Las Vegas!(Ringgold Ga. is home)
Posts: 70
|
frickin aye, hurry up! |
|
| |
|
01-16-2010, 08:41 PM
| #51 |
| RCC Addict Join Date: Aug 2005 Location: Akron
Posts: 1,784
|
First up was getting the Hyper 7 center diff locked. I only need one output so obviously if I left it the way it was all the power would be transferred to the output with the least load. Here's what I came up with. Tore it all apart and happened to have the output shaft from an E-maxx trans and the spool that's used for shifting. 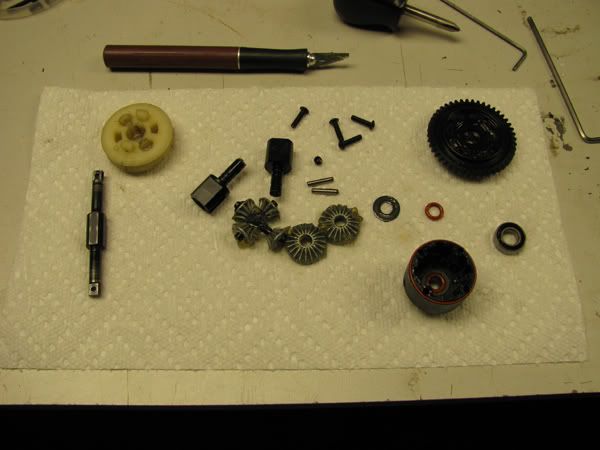 Then I just trimmed away at that spool with the dremel until it fit snuggly into the carrier. 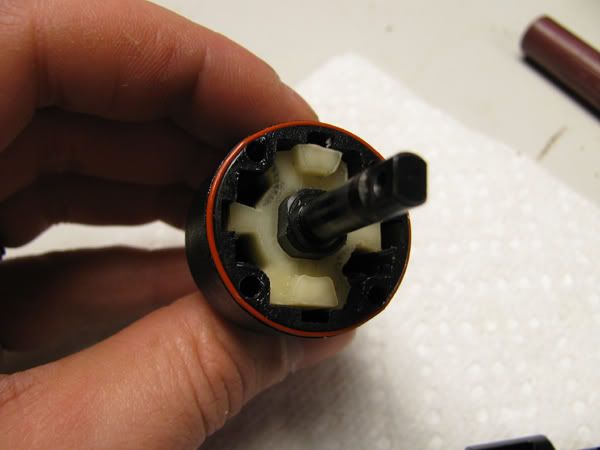 Assembled it back together and now it's completed locked and I have 6mm outputs ready for drive shafts. 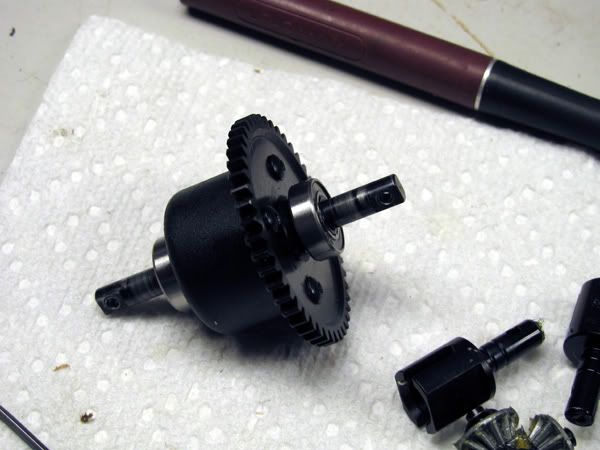 Had to trim more out of the interior than I thought but still not too bad. Won't be able to tell when it's all together. Bumper is a bit higher than previously mocked up but not still reasonable. 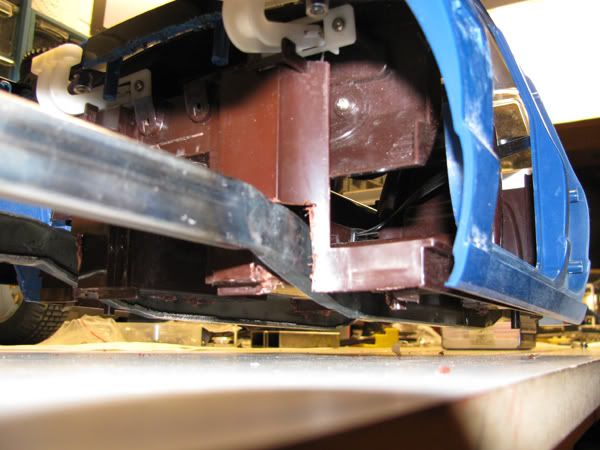 Used the dremel to open up the bolt hole slots in the motor mount to 4mm and also trimmed off the side so that it would fit flush on the cross member. Got the cross member together and made some mounts for the motor plate. They're still rough and will get cleaned up and braced. 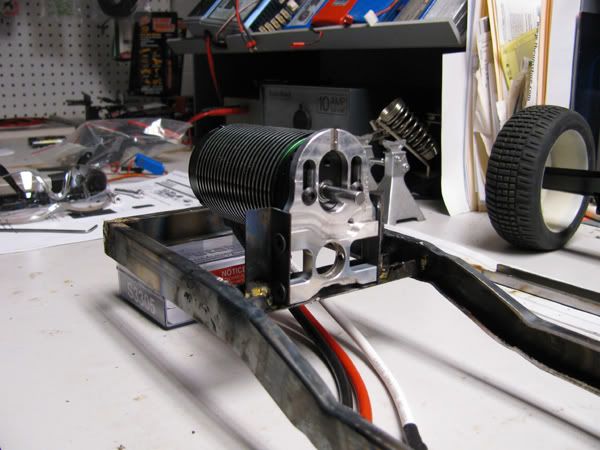 Here's the transmission in place. Just need to make another cross member for the other trans mount. 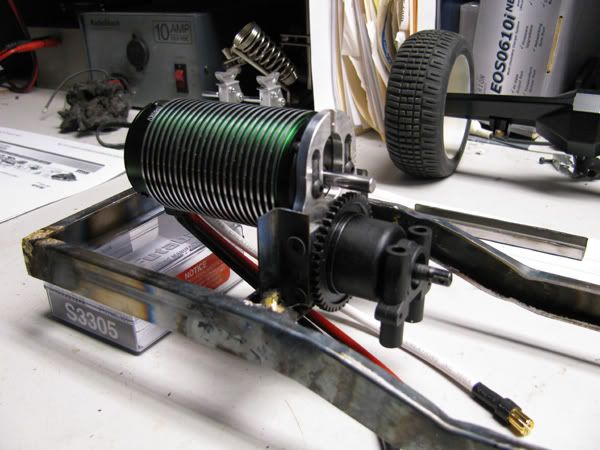 Interior in place  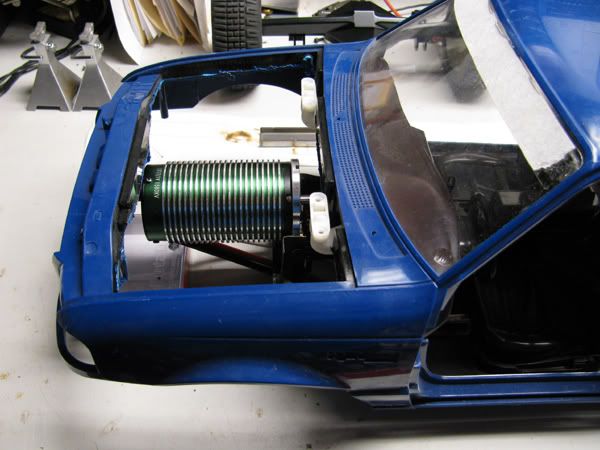 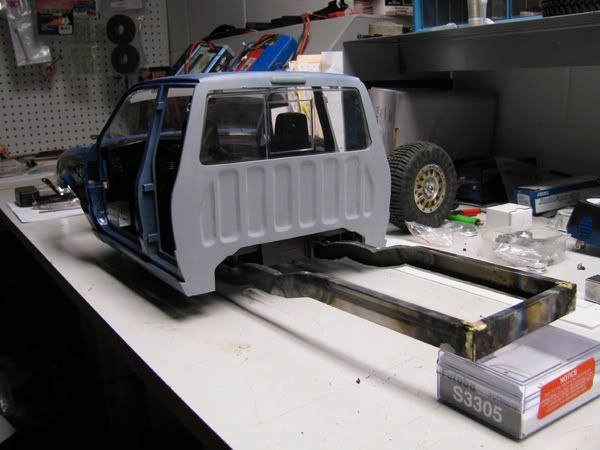 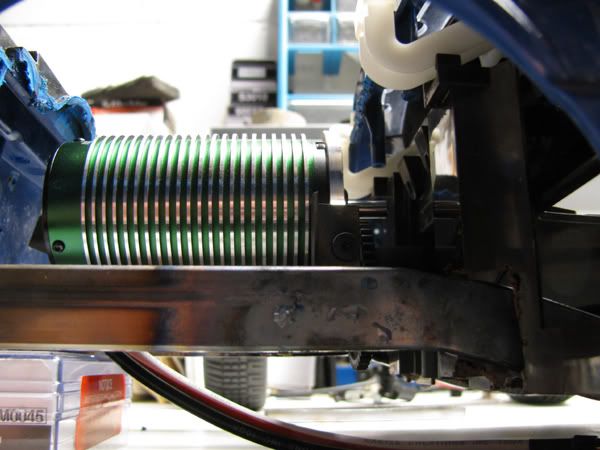 |
|
| |
|
01-18-2010, 12:05 PM
| #52 |
| RCC Addict Join Date: Aug 2005 Location: Akron
Posts: 1,784
|
Now for some real progress! I messed up and flipped the C-hubs the wrong way so the caster angle is wrong on them. I'll have to switch them back around but you get the idea. Everything went together great. Arms are just made from plastic for testing at this point. Worked out well because there are a few changes I need to make just to make assembly cleaner. 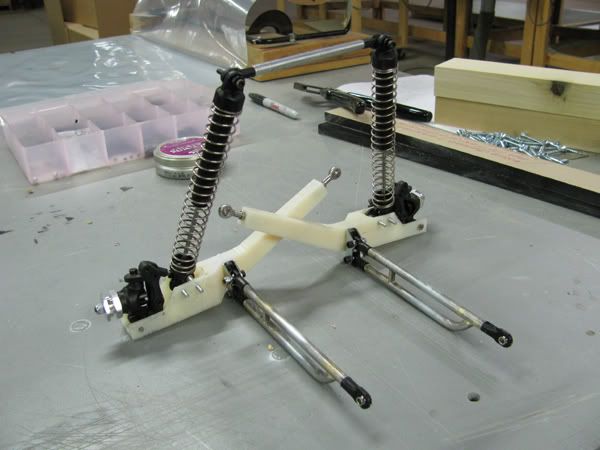 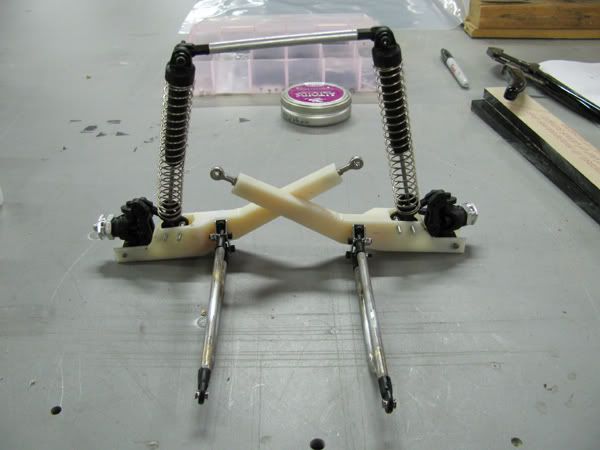 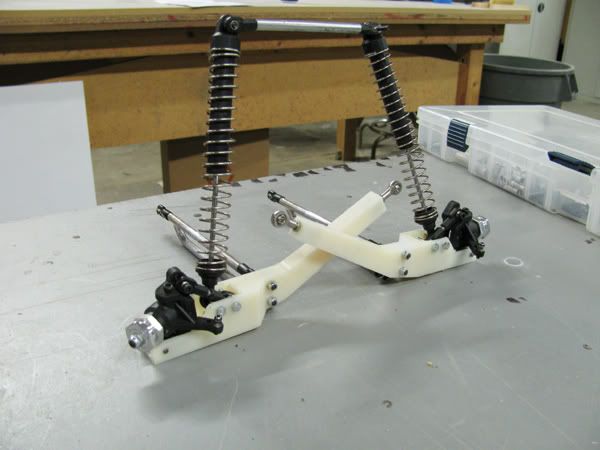 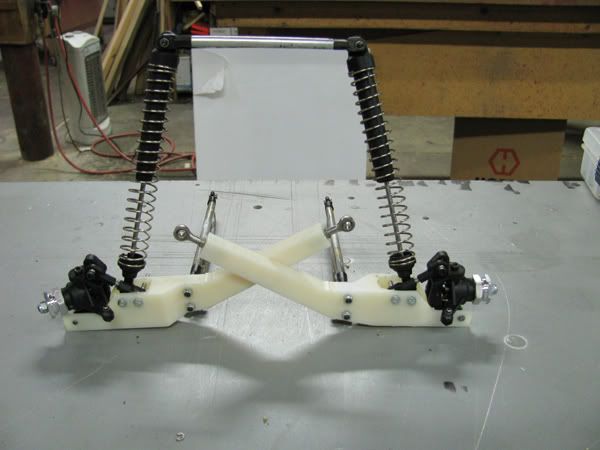 |
|
| |
|
01-18-2010, 12:10 PM
| #53 |
| Pebble Pounder Join Date: Dec 2009 Location: virginia beach
Posts: 172
|
looks awesome i like the motor in the front idea then you can stash your battery in the back should have a decent balance umm are you goingto use those wheels and tires??
|
|
| |
|
01-18-2010, 12:11 PM
| #54 |
| Hateraide  Join Date: Dec 2008 Location: Mission BC
Posts: 1,538
|
the arms look sick are you getting the final ones machined aluminum or you making them?
|
|
| |
|
01-18-2010, 12:16 PM
| #55 | ||
| RCC Addict Join Date: Aug 2005 Location: Akron
Posts: 1,784
| Quote:
Quote:
| ||
|
| |
|
01-18-2010, 01:07 PM
| #56 |
| RCC Addict Join Date: Jun 2004 Location: Bruiser Heaven!!!!
Posts: 1,463
|
those TTB arms are cool, can't wait to see it done, so hurry up. LOL !!!
|
|
| |
|
01-18-2010, 04:22 PM
| #57 |
| Quarry Creeper Join Date: Jan 2008 Location: Antioch
Posts: 230
|
WOW! I need a set for my Ranger build.
|
|
| |
|
01-20-2010, 07:01 AM
| #58 |
| RCC Addict Join Date: Aug 2005 Location: Akron
Posts: 1,784
|
Well this is just a teaser because I ran out of oxygen for the torch..... Frame mount attached for the beam.  Radius arm mount. Thinking about maybe attaching this on the side of the frame rail intsead so it's not hanging down to catch on things? What do you guys think? My only worry is that the radius arm will be at a pretty extreme angle at drop out which might pull the beam back towards the chassis. 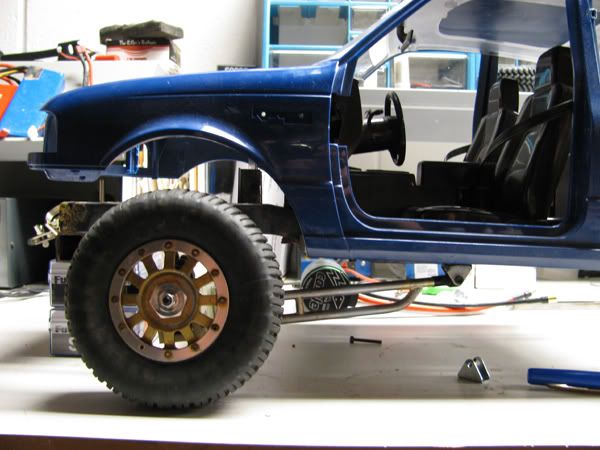 Definitely needs fender work now 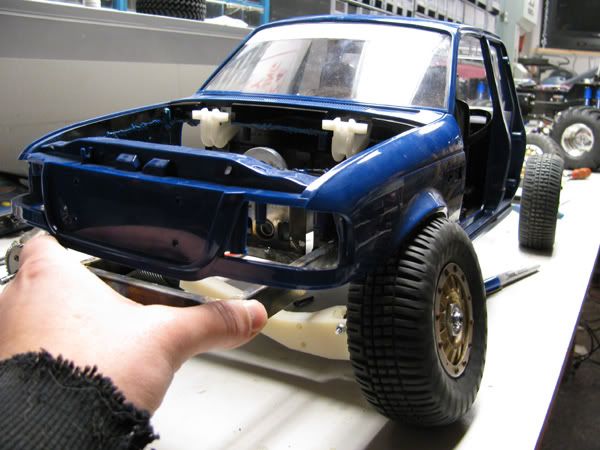 Some drop out action 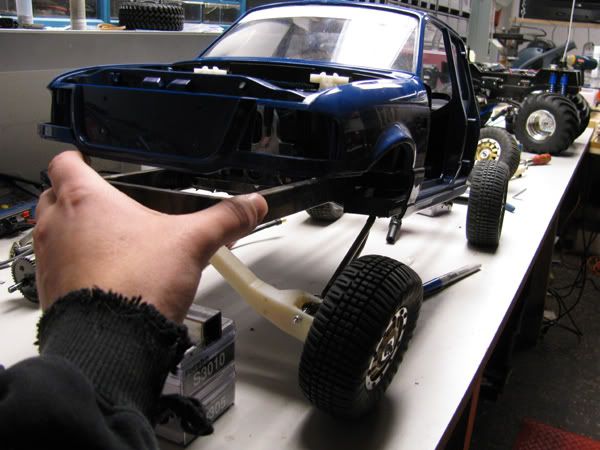 Going to have to tweak the radius arms some. They are causing the beam to have the wrong caster. If I just shorten the top rod end on the radius arm it should bring back the caster correctly. |
|
| |
|
01-20-2010, 07:48 AM
| #59 |
| Pebble Pounder Join Date: Jul 2009 Location: Calgary, Ab
Posts: 163
|
Caster's a continuously changing element in this design, obviously, but yeah... I think you're on the right track keeping the radius arm mount where you have it (especially if you move it up you'll REALLY screw up your caster). It may catch on things but it's not like it's sticking out to hang on anything: if it gets hung on a rock, as it moves forward the truck would be sitting on the radius arm first and then would drop onto the mount, and then drop again to the frame. Nothing really to hang up on. Looking fantastic! |
|
| |
|
01-20-2010, 08:37 AM
| #60 |
| RCC Addict Join Date: Aug 2005 Location: Akron
Posts: 1,784
|
Ok that sounds good. I knew the radius arm would be at a more extreme angle I raised the mount which would have put me in a more sever change in caster through out the motion of the beam so that works. I did some looking and this is actually how they are mounted on the real trucks anyway.
|
|
| |
 |
| |


 Linear Mode


