| |
 07-14-2010, 07:20 PM
| #1 |
| Newbie Join Date: Jul 2008 Location: Canada
Posts: 24
|
Hi! everyone, just to lets you know that after reading through somes of the threads on this issues by many of you, i decided to tackle a somehow ''willy it be '' project. This going to be my first big project of this kind and i am a little anxious to start bare hand but i like a good challenge so up we go and more to follow. As you see on the picture i will attempt to convert this somewhat ''Subzero '' monster into the newly dragon 1:6 willy. You are welcome to provide me somes inputs and expertise if you so desire . Thanks, JEANROCK 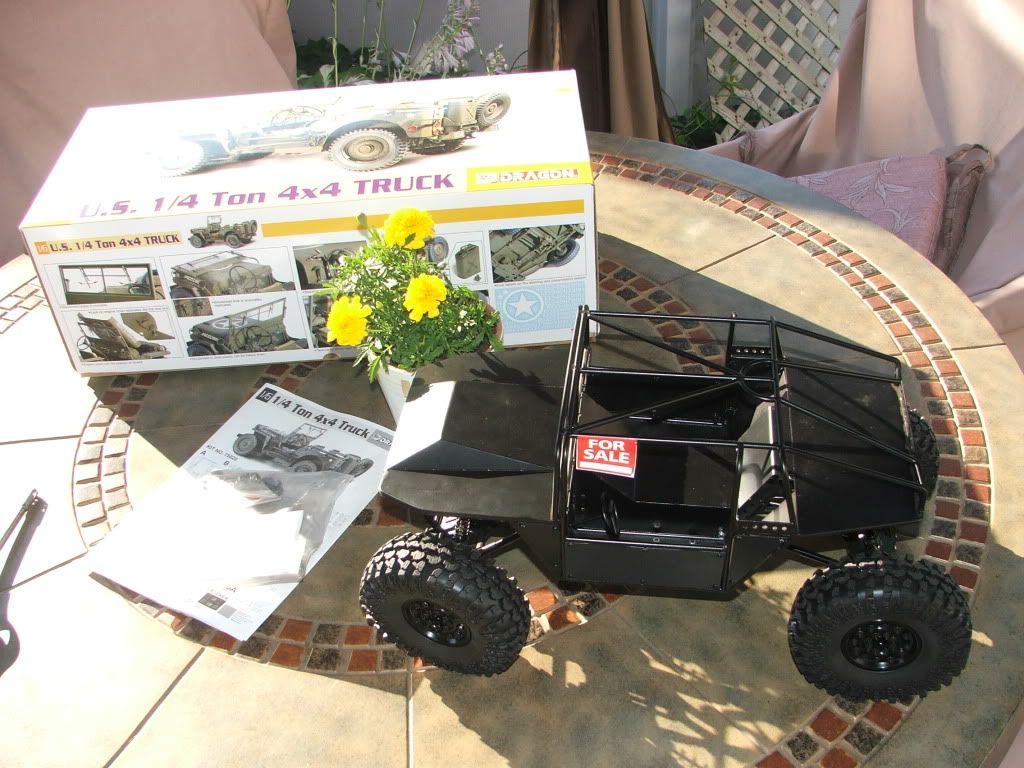 |

|  |
| Sponsored Links | |
| | |
|
07-14-2010, 08:01 PM
| #2 |
| RCC Addict Join Date: Jan 2009 Location: Crawlifornia
Posts: 1,941
|
Where did you find the model?
|
|
| |
|
07-14-2010, 08:21 PM
| #3 |
| Newbie Join Date: Jul 2008 Location: Canada
Posts: 24
|
Which one ? the scale 1:6 willy jeep i got from my local hobbystore for $ 99.95 CAD. The rig is a '' SUBZERO '' crawler from RC4WD. i got this one for a faver to someone and for very cheap.
|
|
| |
|
07-14-2010, 11:38 PM
| #4 |
| RCC Addict Join Date: Jan 2009 Location: Crawlifornia
Posts: 1,941
|
Ya i ment the Jeep. WHEW that must be one sick model. |
|
| |
|
09-10-2010, 12:16 PM
| #5 |
| Newbie Join Date: Jul 2008 Location: Canada
Posts: 24
|
Finally i started my willy jeep project after gathering all my parts i started with the frame and mounted the axles, i used T-Rex 60 front and back. i also use RC4WD spring mounts brackets. Since i want to keep this jeep as original as possible (army style) i went with leaf springs. 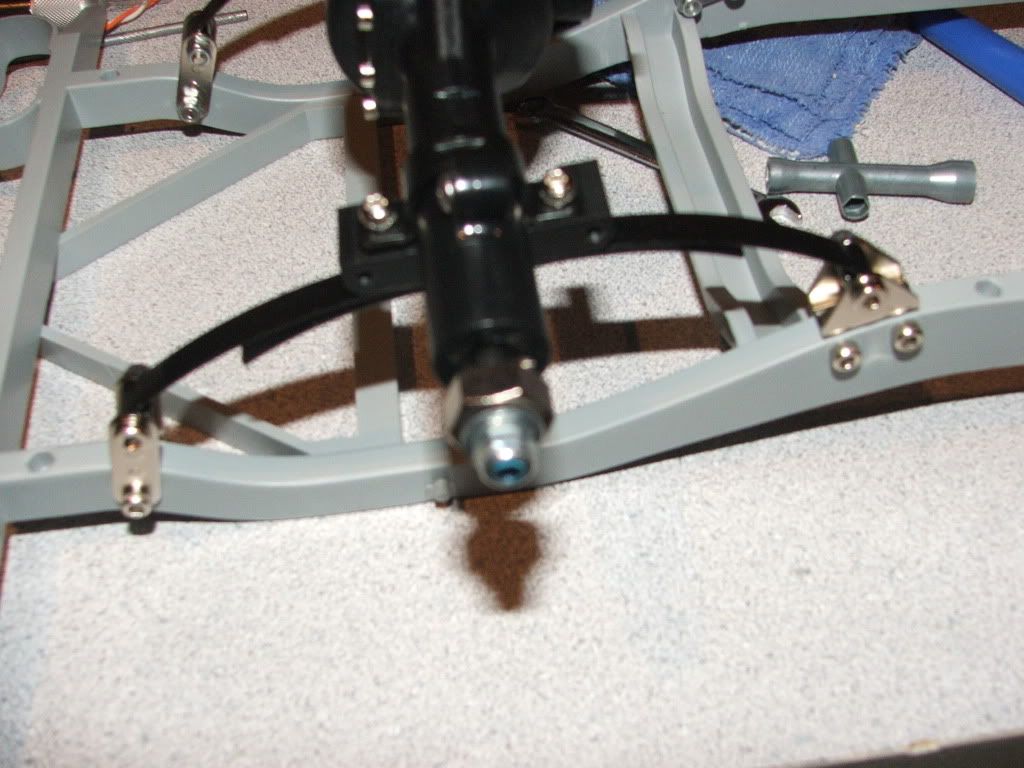 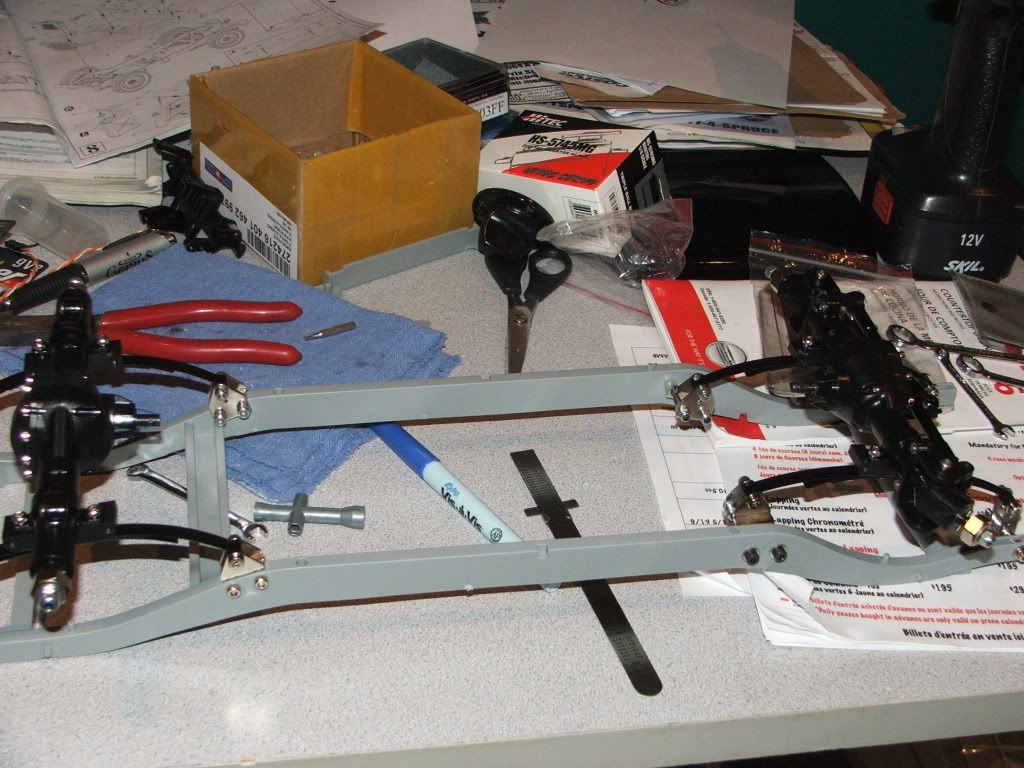 As for the transfer case, things went well , the case went on very smooth i only had to grind off some plastic to fit it in. 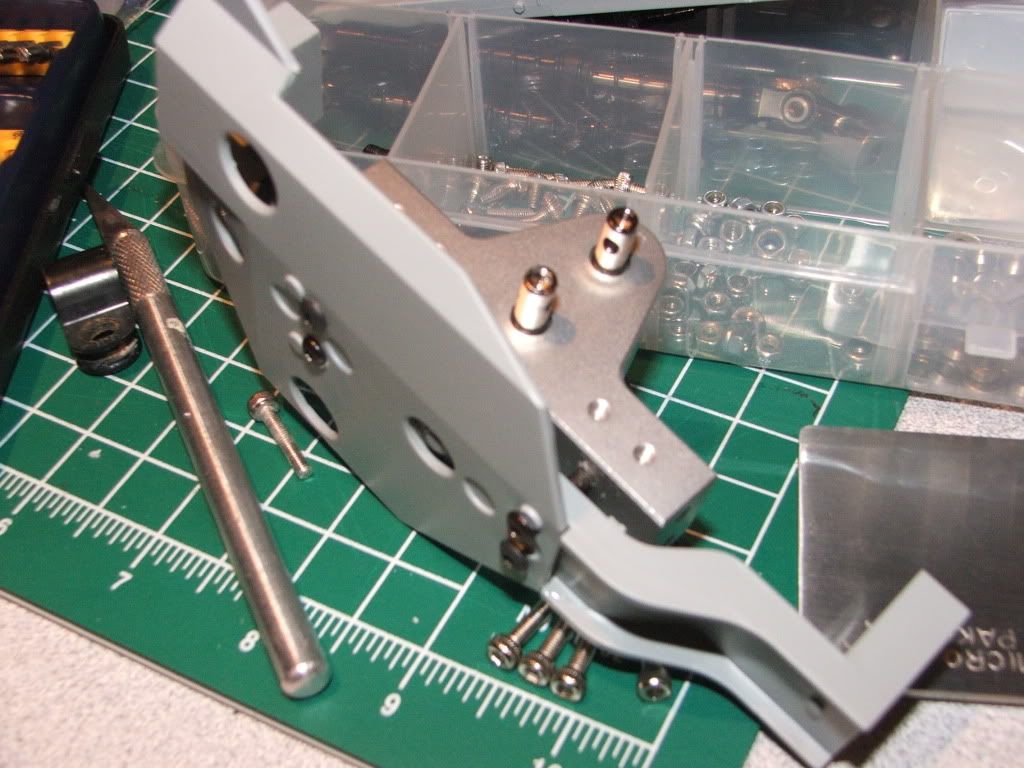 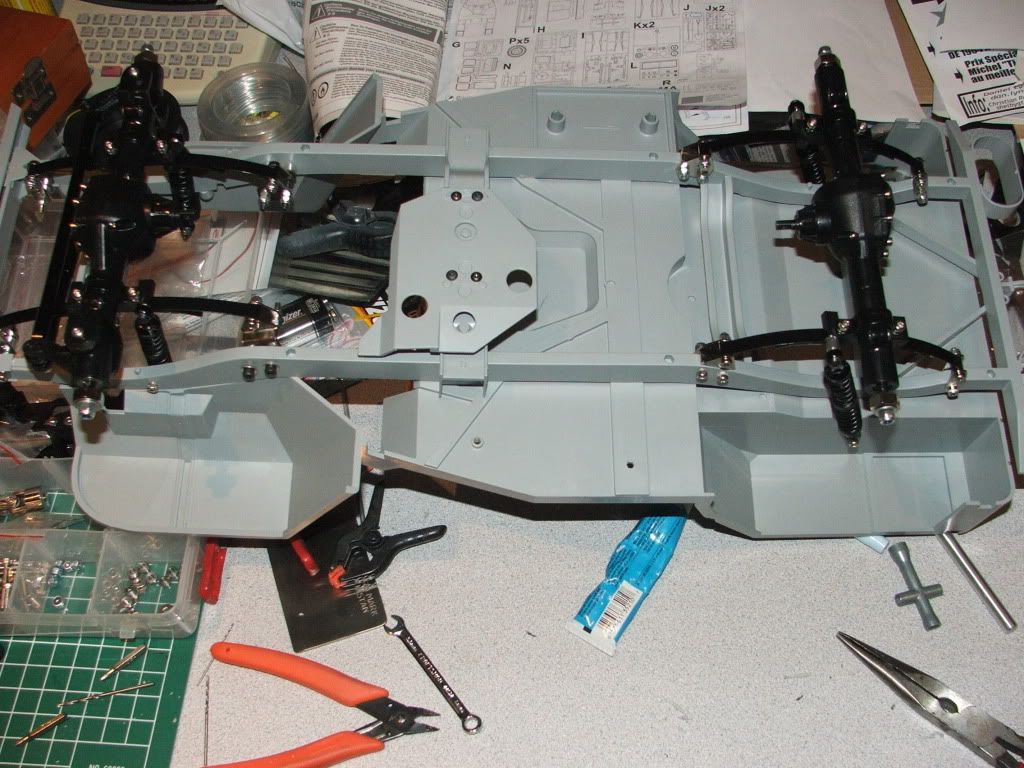 Here is more of the model being assemble , i am surprise how easy this goes together so easely. 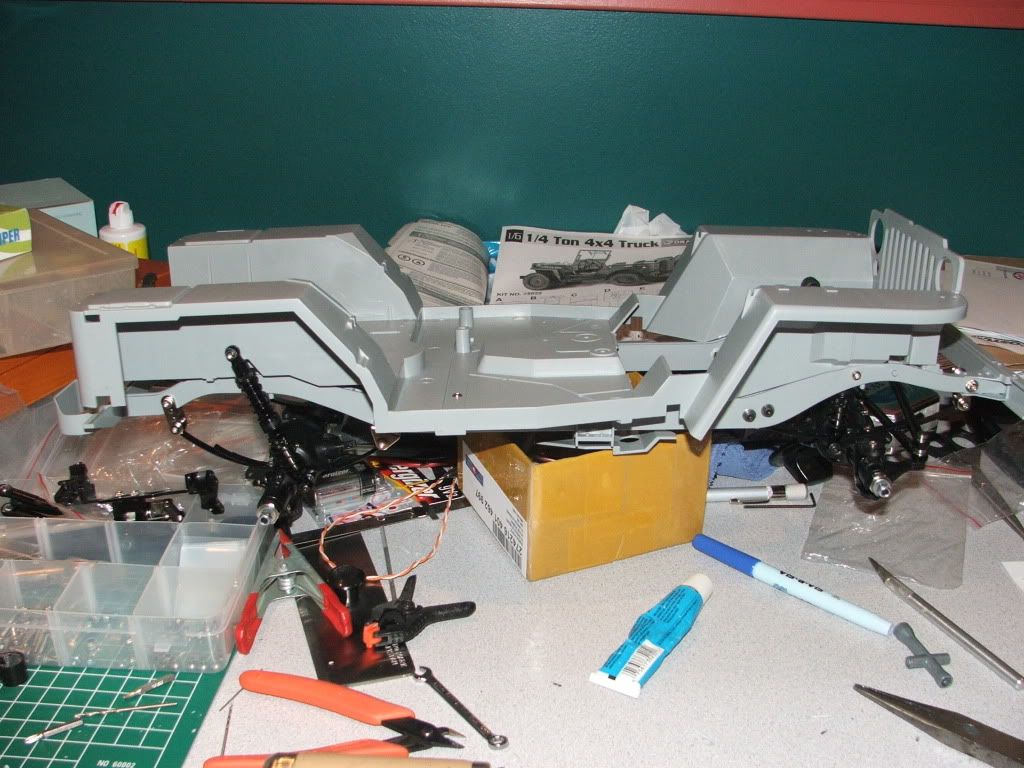 One of the option i entend to had to my willy project is to have the steering wheel turning with the front servo. I look at mounting a small rc servo diredtly to the steering colum, so far it work as plan, check the photo. 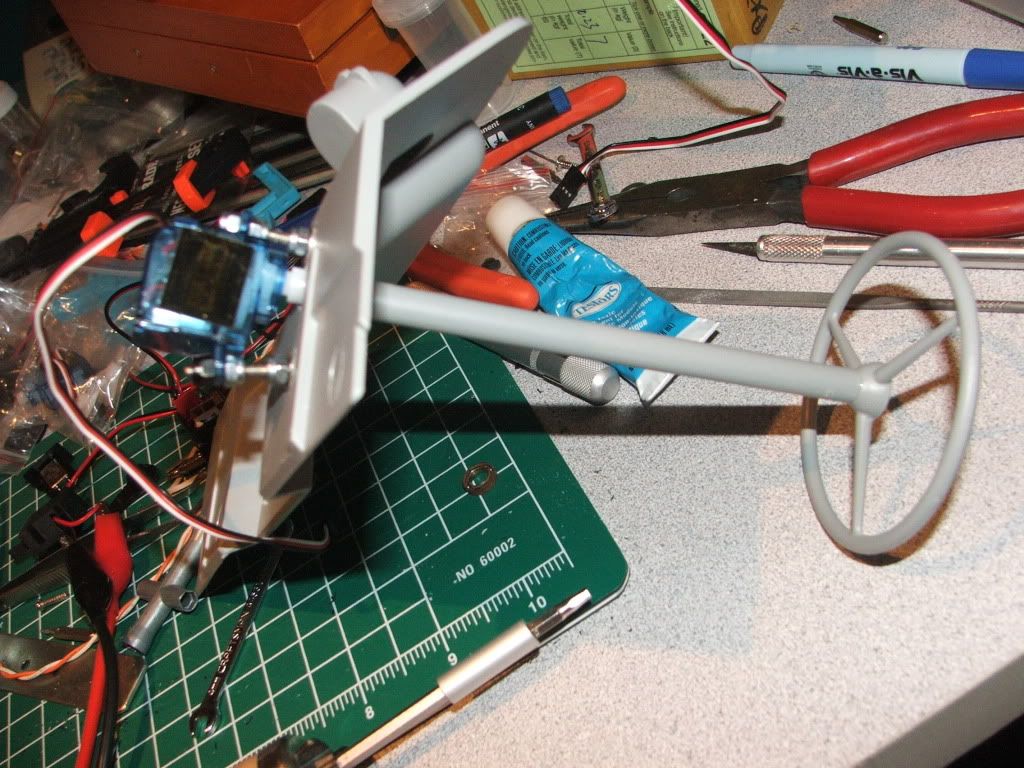 While doing this mod, i decided to have a turning head at the same time so i modified the interior of a 1:6 doll as propose by a fellow member of this forum who showed me a sketch that really impress me to make on my project. I simply installed a small servo in the doll chess and a servo horn in his neck, works great. 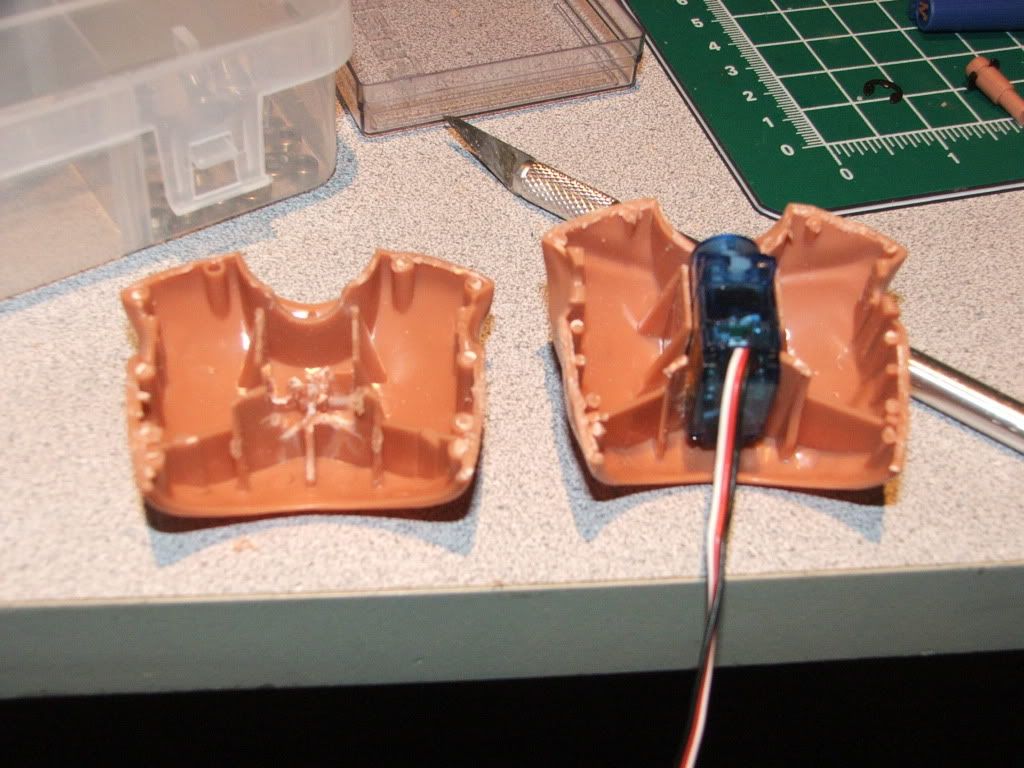 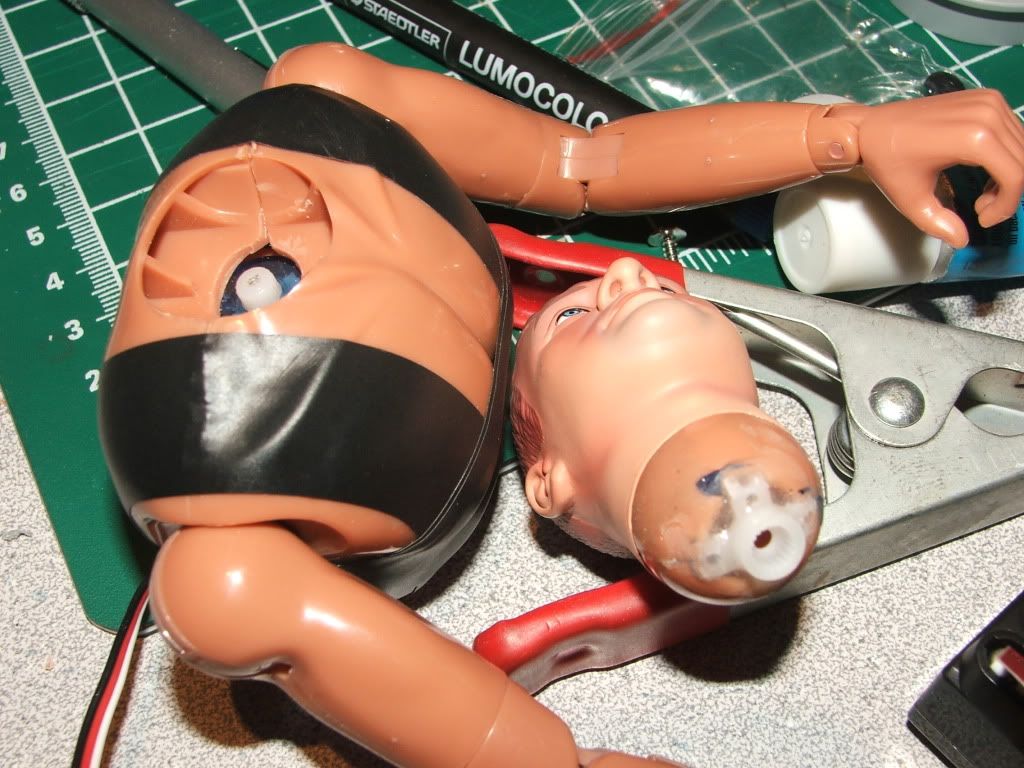 OK, back to the drawing board and more assembly, more to follow. |
|
| |
|
09-10-2010, 02:00 PM
| #6 |
| RCC Addict Join Date: Jan 2009 Location: Crawlifornia
Posts: 1,941
|
Sweet lookin rig man. Just one question. How are you going to tighten the servo horn that you already glued to his head to the servo. ?
|
|
| |
|
09-10-2010, 03:20 PM
| #7 |
| RCP CRAWLERS   Join Date: Nov 2007 Location: Upland CA
Posts: 1,541
|
Great Model....looks like you got it all worked out. Can you use the model's rims and tires? |
|
| |
|
09-11-2010, 08:00 AM
| #8 | |
| Newbie Join Date: Jul 2008 Location: Canada
Posts: 24
| Quote:
| |
|
| |
|
09-11-2010, 08:28 PM
| #9 | |
| Newbie Join Date: Jul 2008 Location: Canada
Posts: 24
| Quote:
You will notice that the kit wheel that the rubber portion does not come off so i have to tape them for painting. 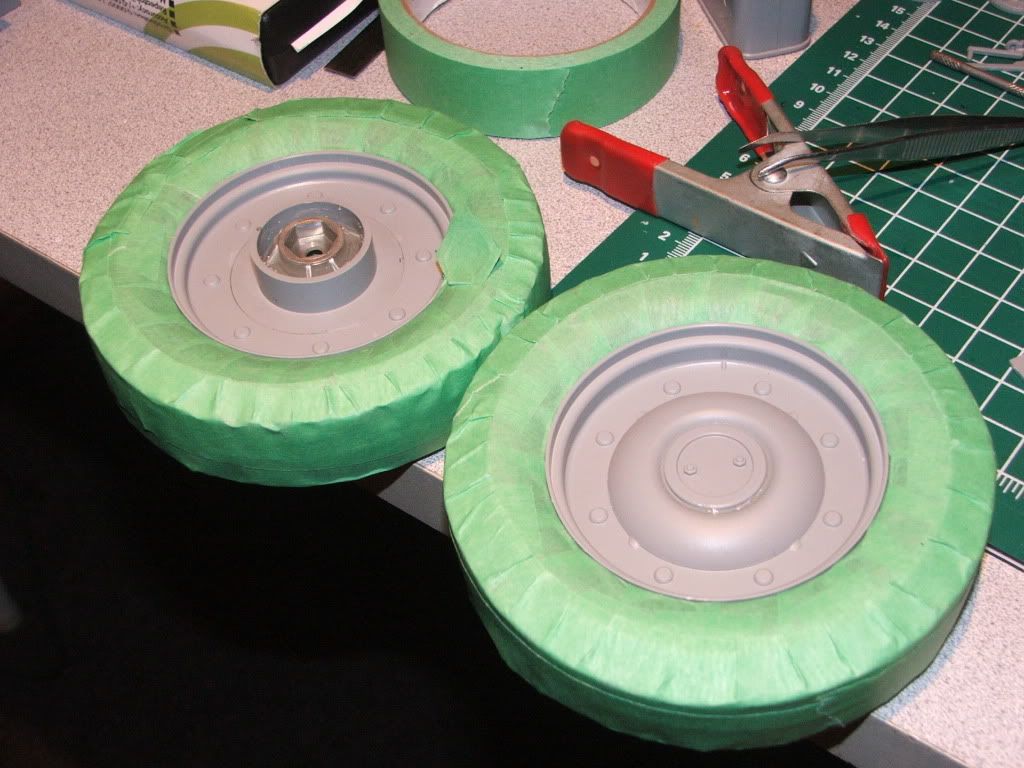 | |
|
| |
|
09-12-2010, 10:46 AM
| #10 |
| RCP CRAWLERS Join Date: Nov 2007 Location: Upland CA
Posts: 1,541
|
sweet... this is gonna be nice
|
|
| |
|
09-17-2010, 12:12 PM
| #11 |
| Quarry Creeper Join Date: Sep 2008 Location: everett
Posts: 347
|
Any updates, the rig looks sweet.
|
|
| |
|
09-18-2010, 07:17 PM
| #12 | |
| Newbie Join Date: Jul 2008 Location: Canada
Posts: 24
| Quote:
More to come.. | |
|
| |
|
09-21-2010, 09:27 PM
| #13 |
| Newbie Join Date: Jul 2008 Location: Canada
Posts: 24
|
Finally started to paint some of the assemblies starting with the chassis, wheels, and the main body. I choose olive drab from Tamiya great paint to apply and fast drying. I did not paint all of it green , kept some of the trani, axles, drive shaft ,etc.. , just to keep it more original. 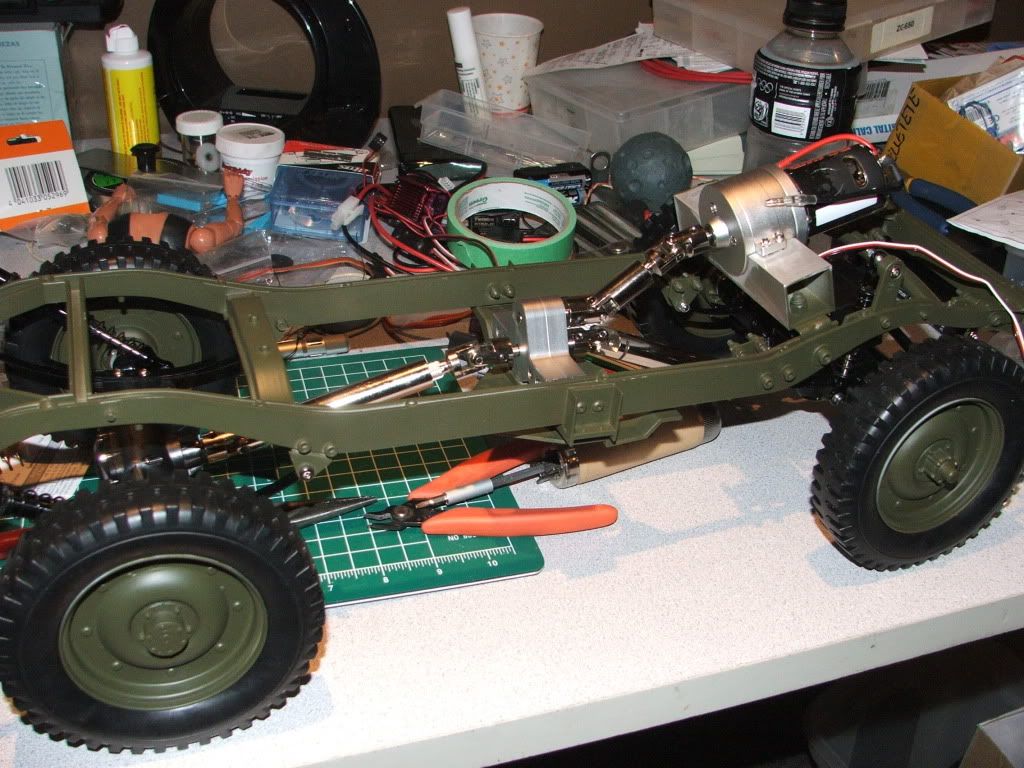 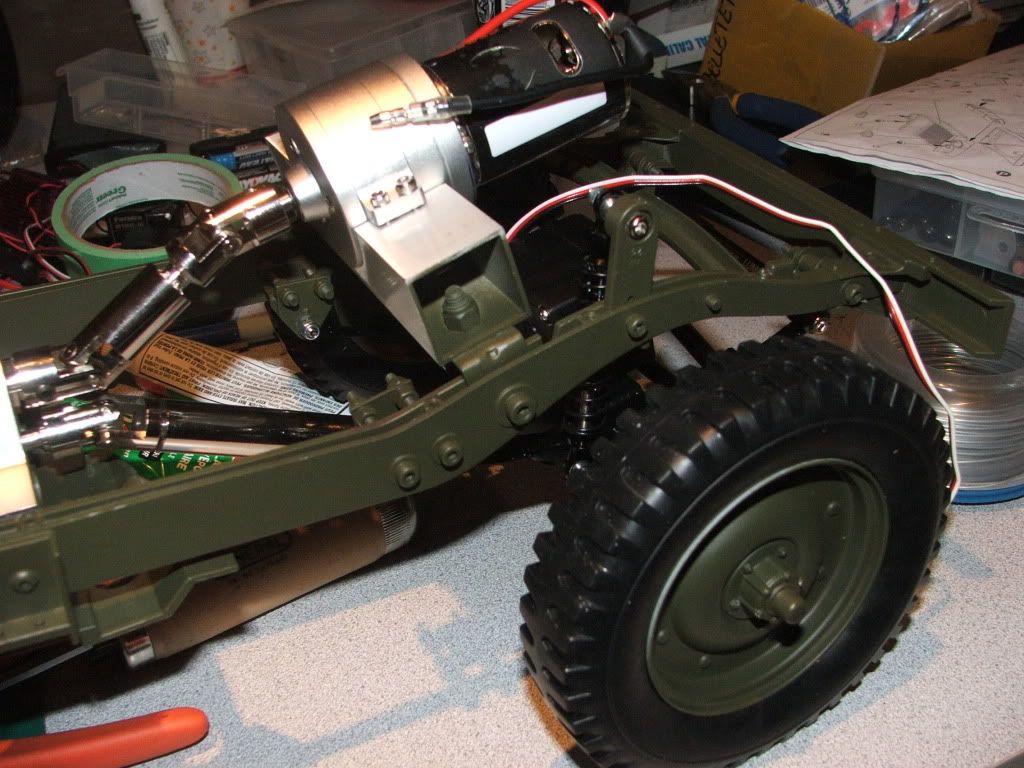 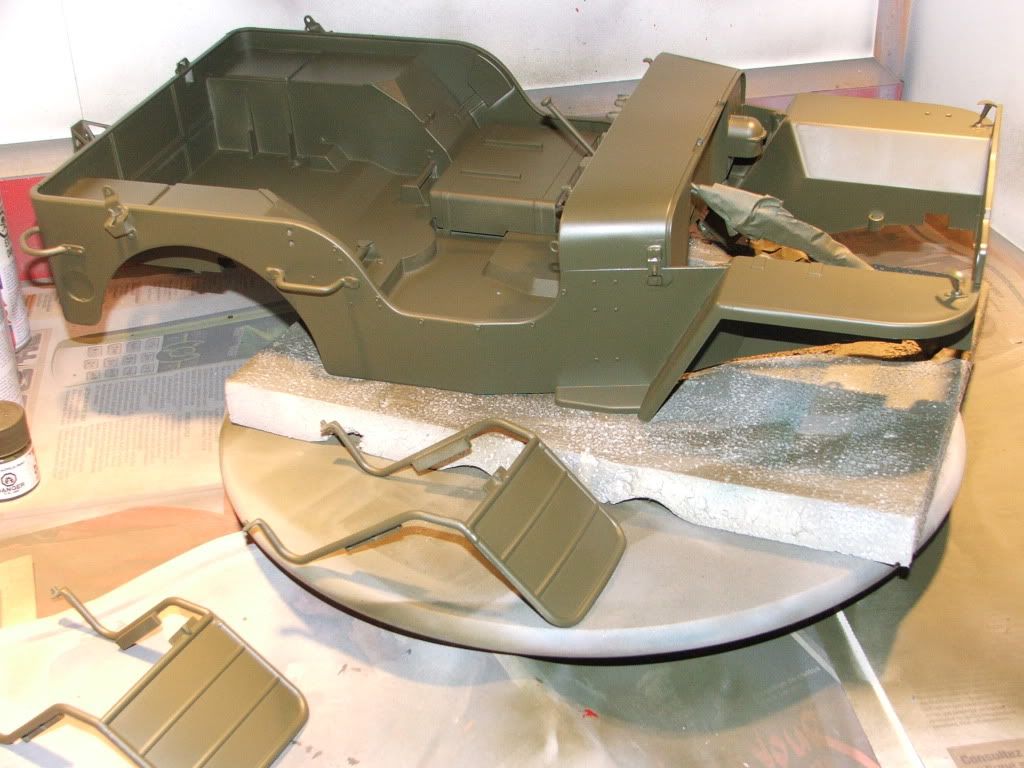 Now i am really in the re-assembly mode and things started to come together. More to come. |
|
| |
|
09-23-2010, 05:39 AM
| #14 |
| RCC Addict Join Date: Jun 2006 Location: Maryland
Posts: 1,255
|
Awesome work, even if you are from Canada. |
|
| |
|
09-30-2010, 06:51 PM
| #15 |
| Newbie Join Date: Jul 2008 Location: Canada
Posts: 24
|
Here is an update on my willy jeep project. I finally completed the painting portion of all my parts, i have started to re-assemble the jeep. Now i am in the electronic portion to arrange all the wiring, this include receiver, ESC, motor, flashing unit and all the lights etc.. 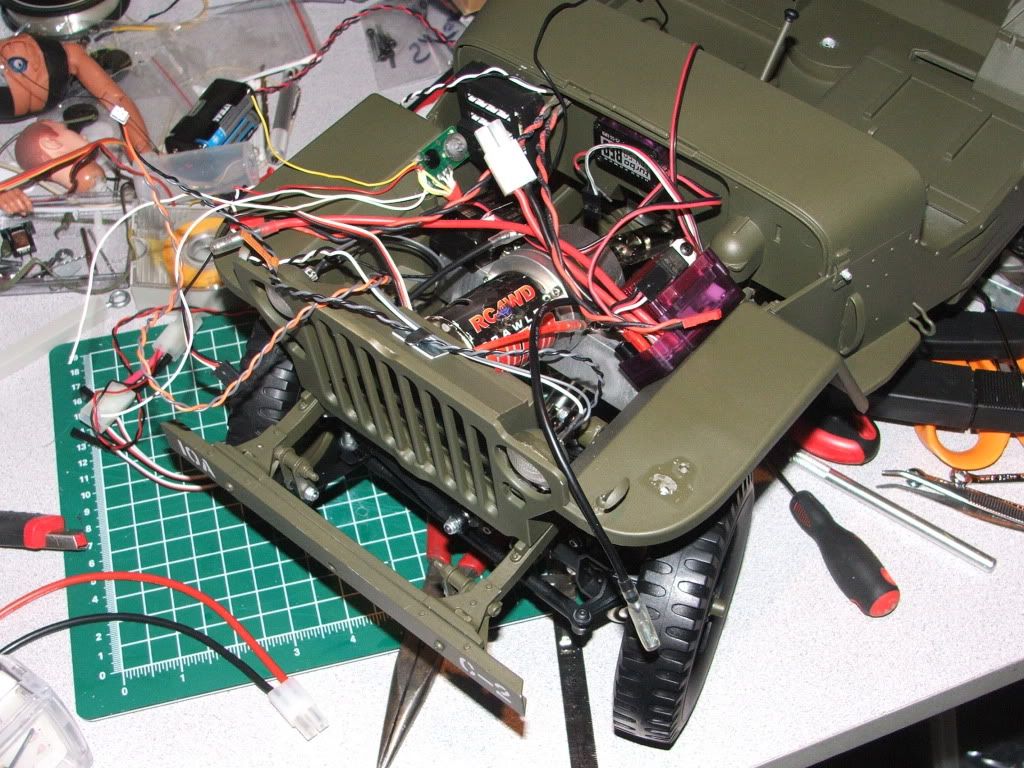 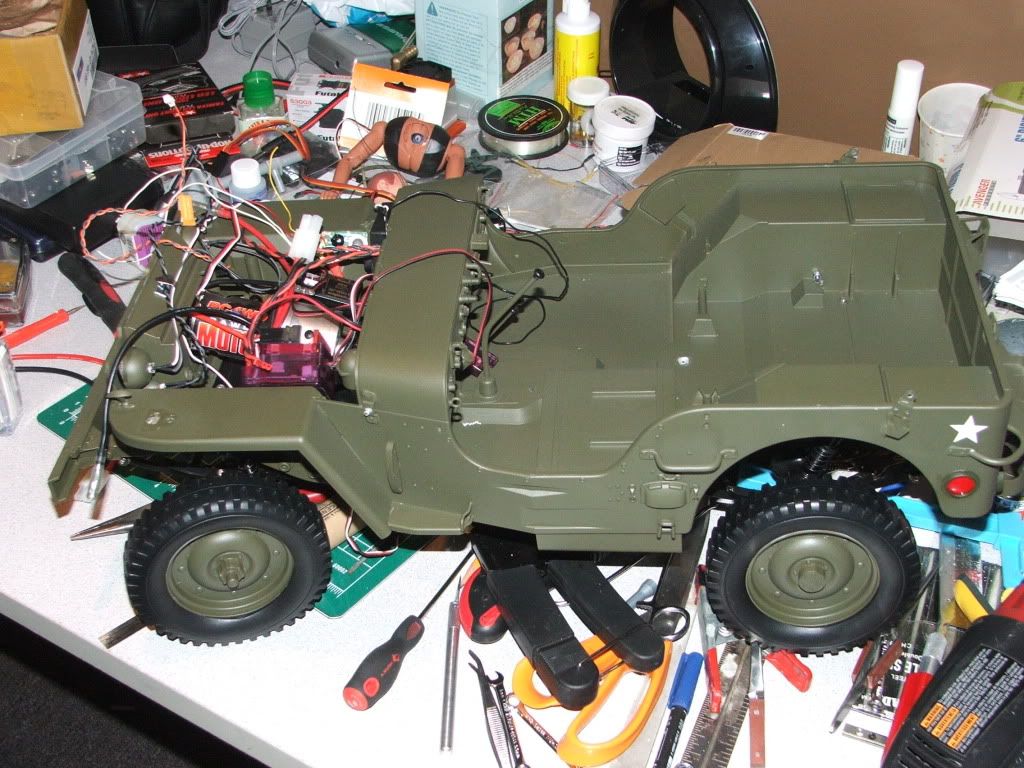 I have started to scratchbuilt a trailer for the willy. I could not find a built one so i decided to built it. Awaiting the suspension an spare wheels on order. 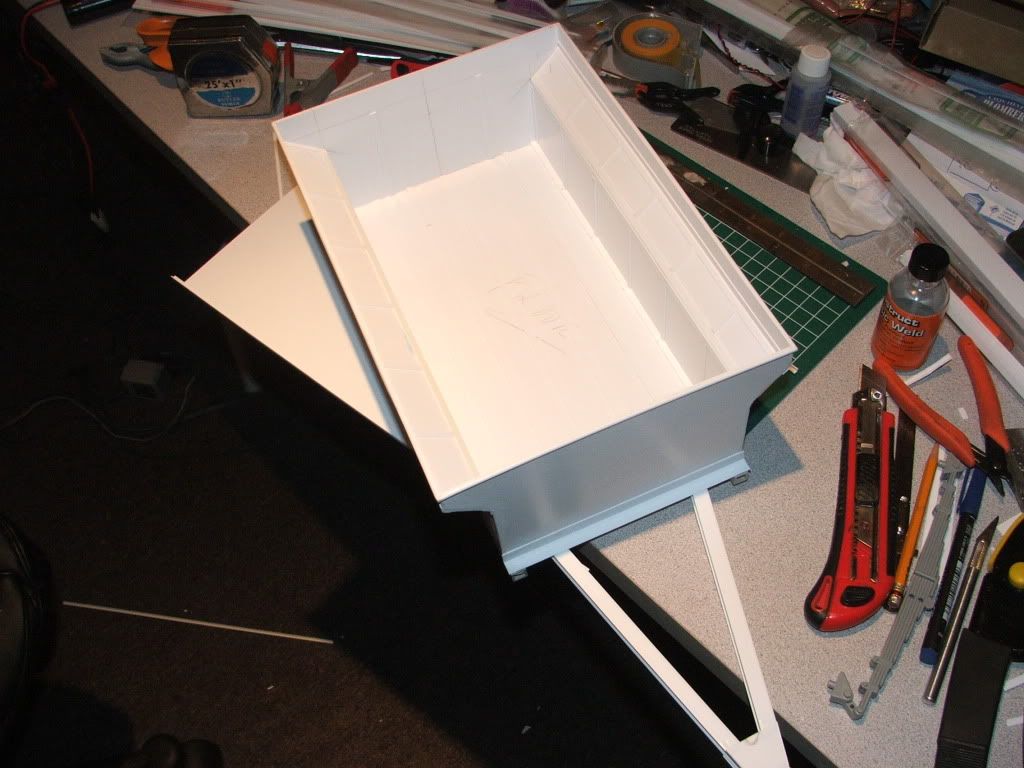 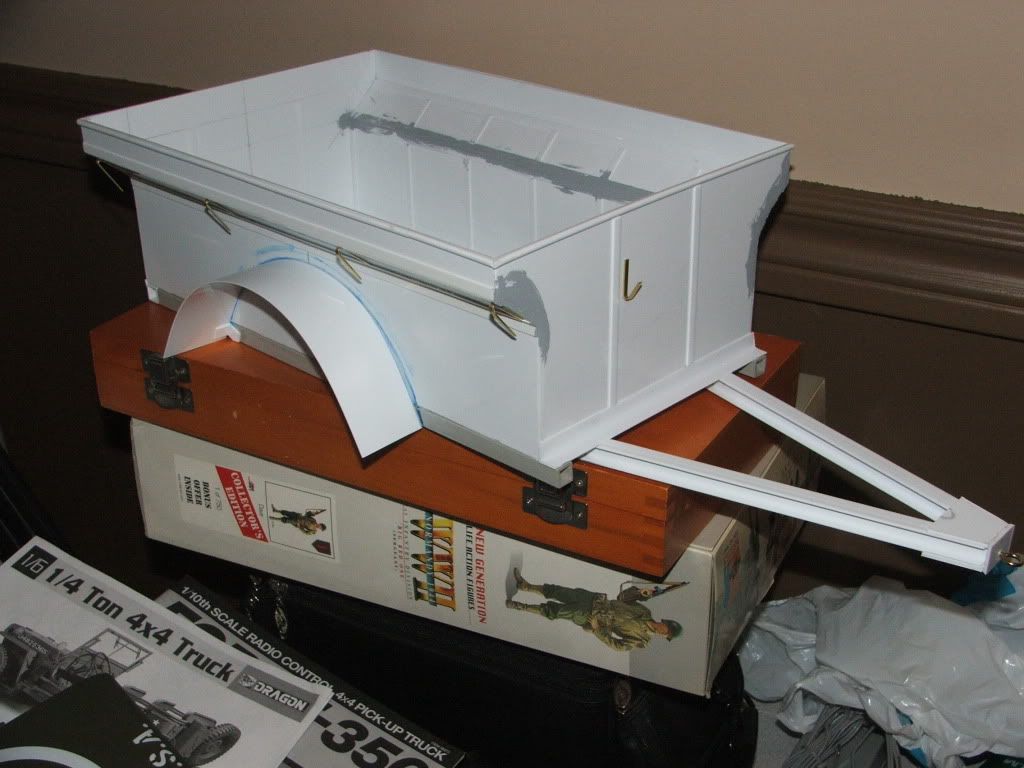 More to follow. |
|
| |
|
09-30-2010, 08:20 PM
| #16 |
| RCC Addict Join Date: Jan 2009 Location: Crawlifornia
Posts: 1,941
|
Very nice. This thing is coming together nicely. I like the stock wheels. Trailer is sick too.  |
|
| |
|
10-01-2010, 08:19 AM
| #17 | |
| Newbie Join Date: Jul 2008 Location: Canada
Posts: 24
| Quote:
| |
|
| |
|
10-01-2010, 01:55 PM
| #18 |
| RCC Addict Join Date: Apr 2007 Location: Murfreesboro
Posts: 1,537
|
Wow thats very cool! Pricey little model but it looks like its amazing detail wise. Please keep us updated, cant wait to see it up and runnin! Matt |
|
| |
|
10-01-2010, 05:14 PM
| #19 | |
| Newbie Join Date: Jul 2008 Location: Canada
Posts: 24
| Quote:
| |
|
| |
|
10-03-2010, 11:23 AM
| #20 |
| Rock Crawler Join Date: Feb 2010 Location: Hayesville
Posts: 699
|
Thats a great looking Jeep. Very good job! |
|
| |
 |
| |


 Linear Mode


