| |
 01-26-2013, 06:03 PM
| #61 |
| Quarry Creeper Join Date: Sep 2010 Location: where ever I layed my hat.
Posts: 225
|
I knew I was taking on a big project building the chassis from the ground up. But I almost feel like I am building a real Jeep with the amount of effort that is going into this. Here I give a report of substantial progress. Frame drilled, tapped, and attached.  This transfer case skid took way too much time. But I think it turned alright. Just ignore the extra set of drill holes and extra clearance for the transfer case. Measuring from the outside edge of the skid instead of the inside of the frame rail just made it lighter... 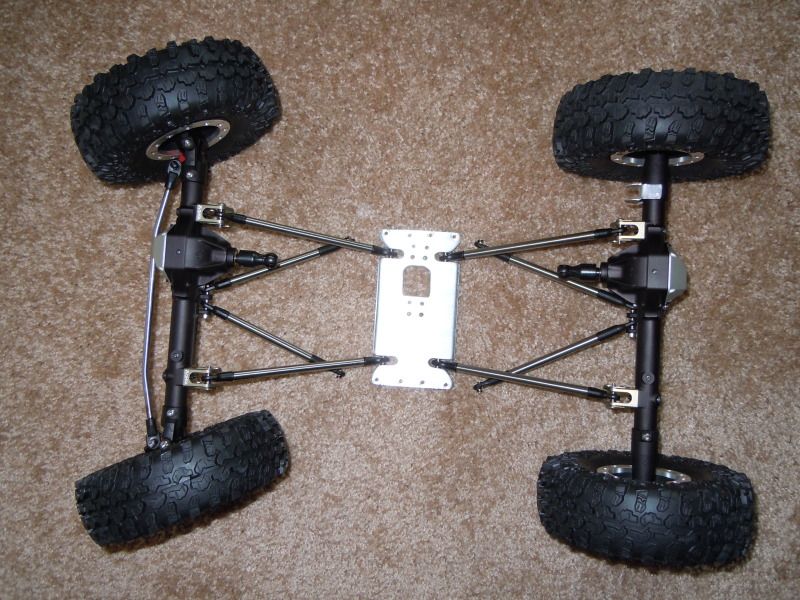 Well well well, what do you know... FINALLY! The axles are connected to some thing. As is the transfer case and the drive shafts. 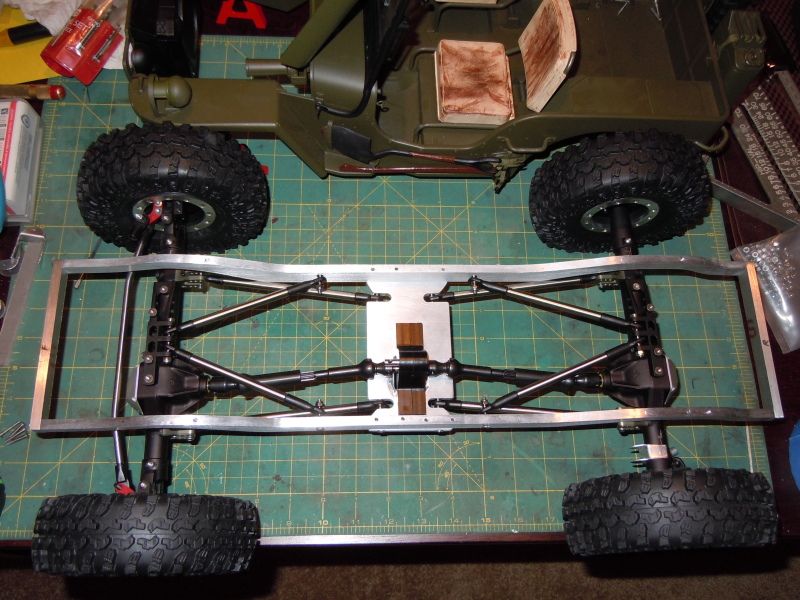 There was a slight clearance issue for the disrupter transfer case. Hope to put the shifter and floor section back in place with a little bit of spacing and repaint to have very little change to the interior. 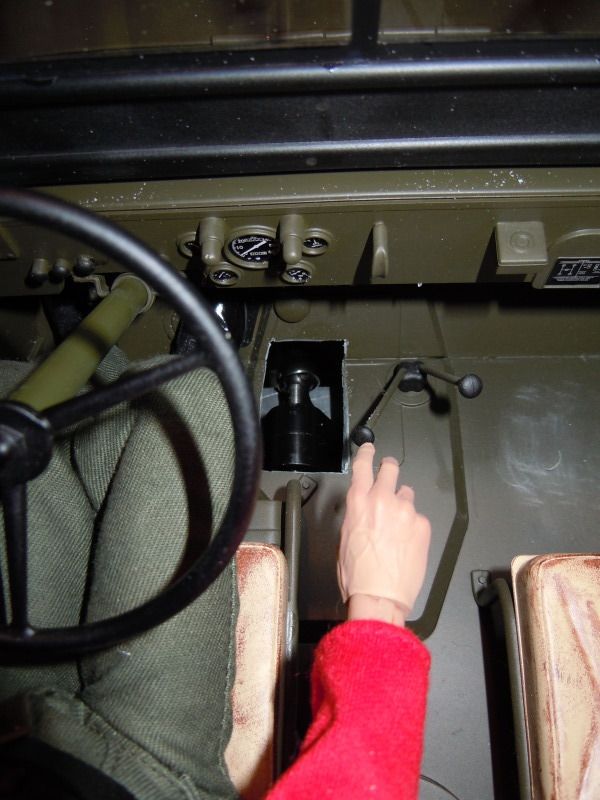 No shock mounts built yet, but I am sure there are some needy souls out there that have been waiting for these pics. 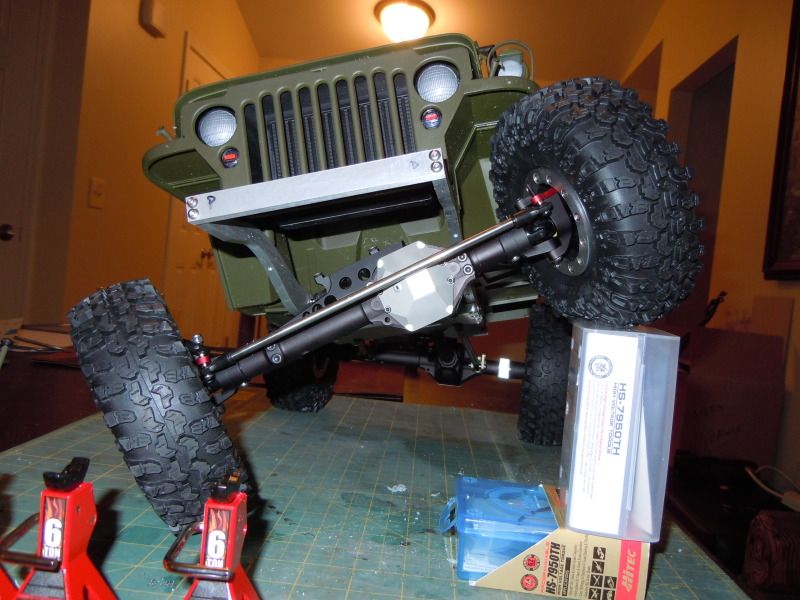 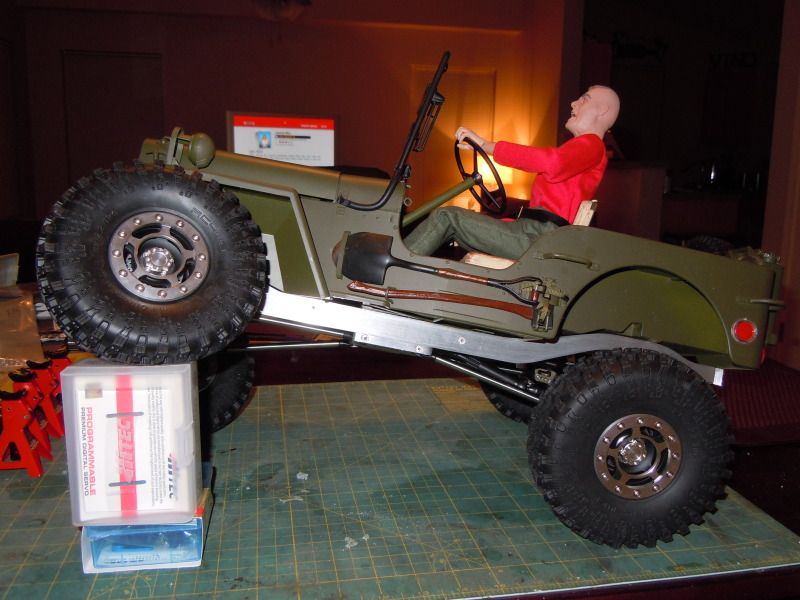  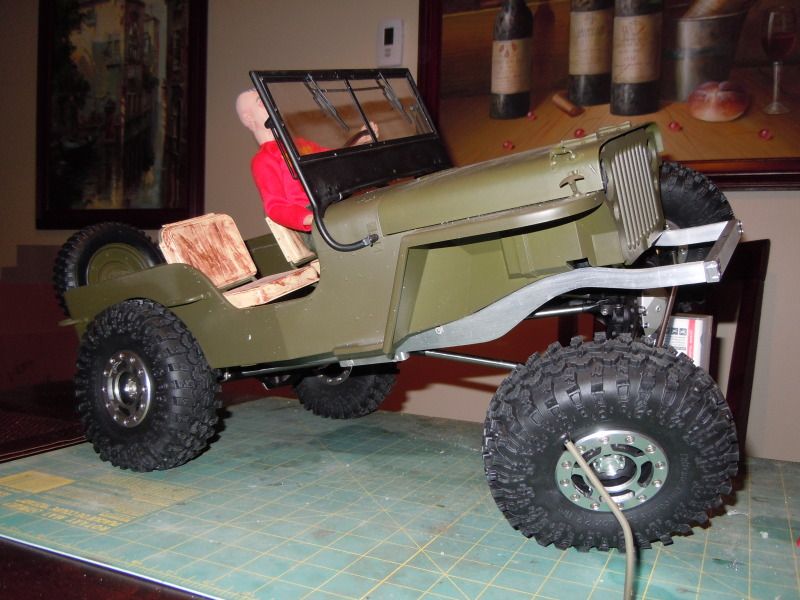 Here she be, low slung and shockless. Makes me think of a stock Willy's some one stuffed 35's under. 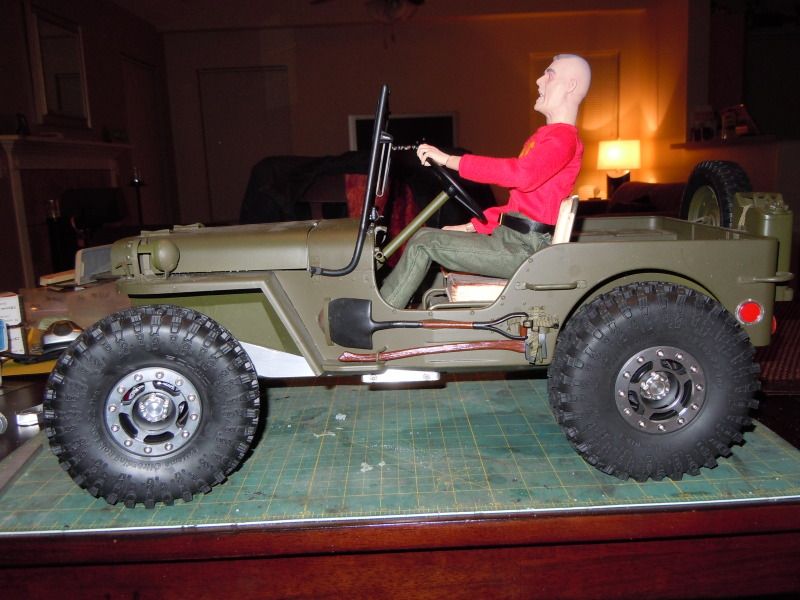 Last edited by snydercj7; 01-28-2013 at 11:47 AM. |

|  |
| Sponsored Links | |
| | |
|
01-26-2013, 06:21 PM
| #62 |
| Rock Crawler Join Date: Nov 2010 Location: roanoke
Posts: 865
|
nice!
|
|
| |
|
01-26-2013, 08:36 PM
| #63 |
| Rock Crawler  Join Date: Jan 2011 Location: Hartford City, Indiana
Posts: 531
|
Thanks for posting up more pics man! You do some fine work, and I'm looking forward to seeing what you come up with for shock mounts. I really like that frame!!!!!  |
|
| |
|
01-26-2013, 09:35 PM
| #64 |
| Quarry Creeper Join Date: Sep 2010 Location: where ever I layed my hat.
Posts: 225
|
Thanks guys. For the frame side shock mount I am toying with a hoop that will bolt into the frame so the body can come off and the chassis can stand alone. As for the axle side, I have made these up to bolt onto the lock outs and c-hubs. This should help keep my shocks vertical or tipped slightly inboard at the top of the shock. 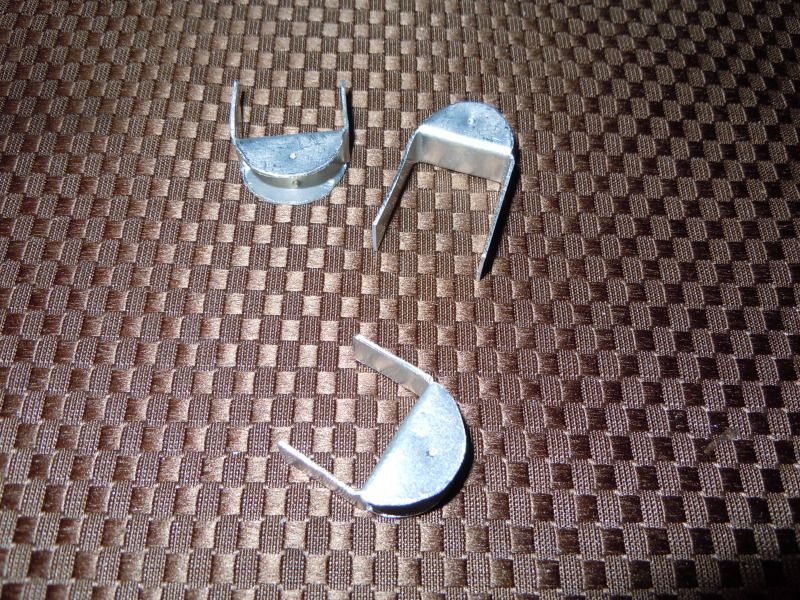 Could not resist a couple of other photos. With the help of a couple Hi-tech servo boxes the Jeep has a nice stance. About 3 3/8" clearance at the skid. 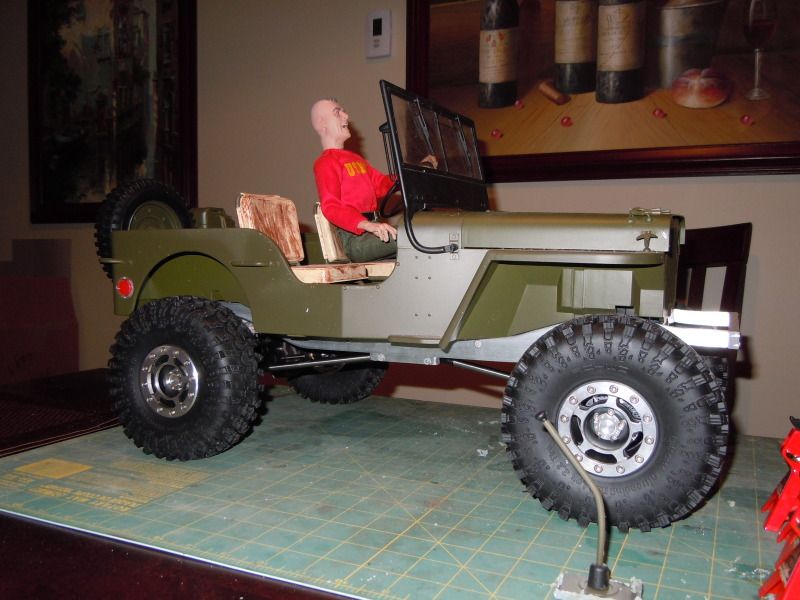 The non functioning original chassis. 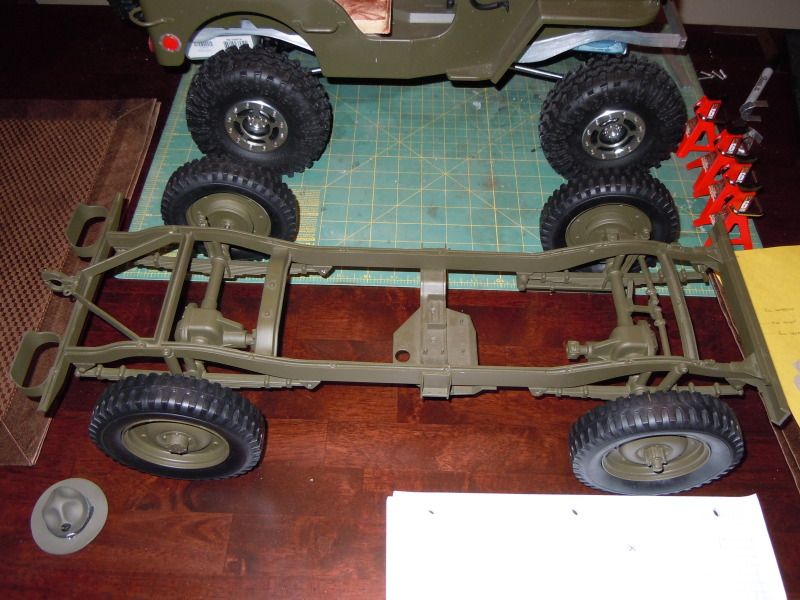 For fun, I always like to get down and see the under side of a Jeep. 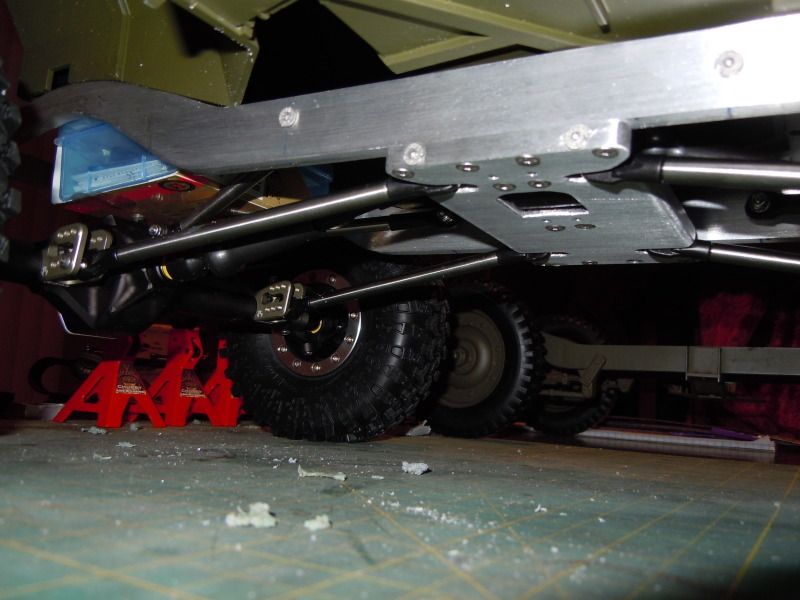 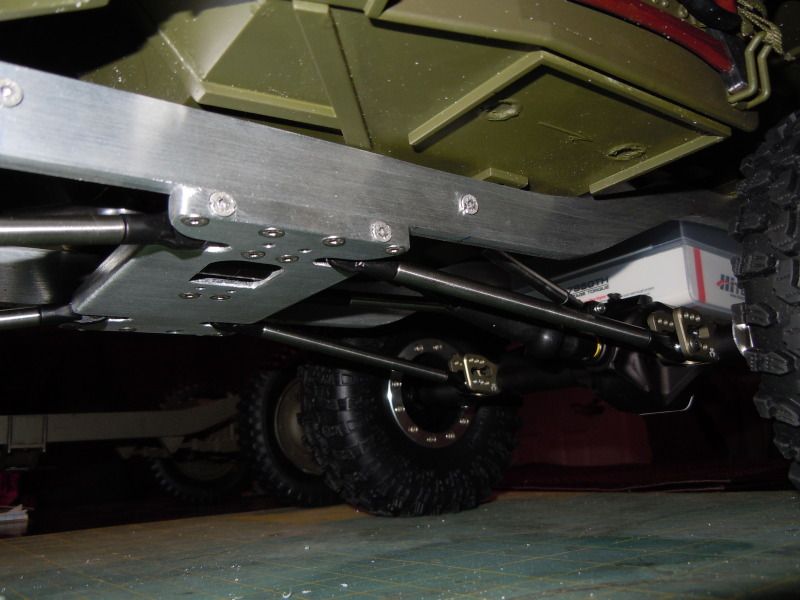 |
|
| |
|
01-29-2013, 11:34 PM
| #65 |
| Rock Crawler Join Date: Jan 2008 Location: Lincoln
Posts: 740
|
man, that skidplate looks great!
|
|
| |
|
01-30-2013, 04:59 PM
| #66 |
| Quarry Creeper Join Date: Sep 2010 Location: where ever I layed my hat.
Posts: 225
|
Well thank you. Lots of time into that silly little thing, of course I am preaching to the choir here. Wish my lower shock mounts looked as good, might need to go back to the drawing board on those.
|
|
| |
|
01-30-2013, 06:45 PM
| #67 |
| Pebble Pounder Join Date: Jan 2012 Location: London ON
Posts: 143
|
very nice wrok
|
|
| |
|
01-30-2013, 08:57 PM
| #68 |
| Pebble Pounder Join Date: Feb 2011 Location: .
Posts: 136
|
Nice and clean! |
|
| |
|
01-30-2013, 09:40 PM
| #69 |
| Quarry Creeper Join Date: Sep 2010 Location: where ever I layed my hat.
Posts: 225
|
Thanks guys I'm trying, it's my first build of this caliber.
|
|
| |
|
02-01-2013, 12:31 PM
| #70 |
| Quarry Creeper Join Date: Sep 2010 Location: where ever I layed my hat.
Posts: 225
|
So looking for some input. Just spent over an hour lying out and making a pattern for the front shock mounts. Trying to keep a some what realistic look with the Jeep and have the shocks in a more "normal" position. With the PL scaler shock I believe they have just under an inch of travel. I am thinking the Jeep will sit close to the height as it is on the jack stands. Just seems like it is hardly flexing, on a positive note the steering is not being effected by the front shock placement. So my question do I lay the shocks down a little in an effort to gain a little more droop but loose some steering? Or just run it like shown?  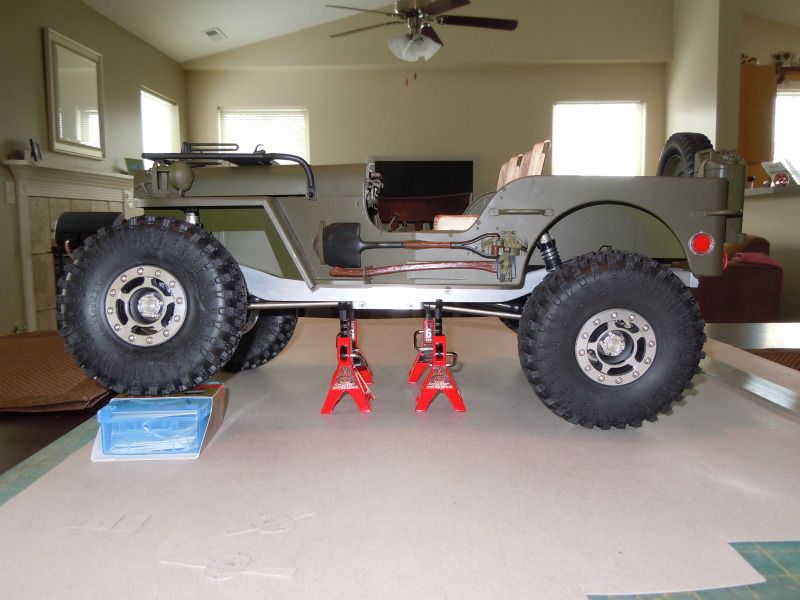 |
|
| |
|
02-01-2013, 02:33 PM
| #71 |
| Quarry Creeper Join Date: Jul 2011 Location: olympia
Posts: 435
|
id say put them down a lil lower to give yourself a lil more flex... ive also been thinking about cutting away the box that is in the way of the front shock in the first pic, or maybe just lossing the inner fender wells... either way its looking great and i hope to get working on mine again soon |
|
| |
|
02-01-2013, 03:48 PM
| #72 |
| Quarry Creeper Join Date: Sep 2010 Location: where ever I layed my hat.
Posts: 225
|
Thanks for some input Brandon. I was going thru looking to see what every one else has been doing. I see some are tipping the rear shocks inside the frame rails as another way to get flex. I have made up a boxed style shock tower for the front that will bolt onto the top of the frame rail and the inner fender will be cut away to make room. So that box will be out of the way to a point to allow the shock to sit in the same position as the drivers side. I did find I was able to tip the rear shock forward further and gain some pretty good flex. Not sure how this really looks.. But the rear flex is much improved. 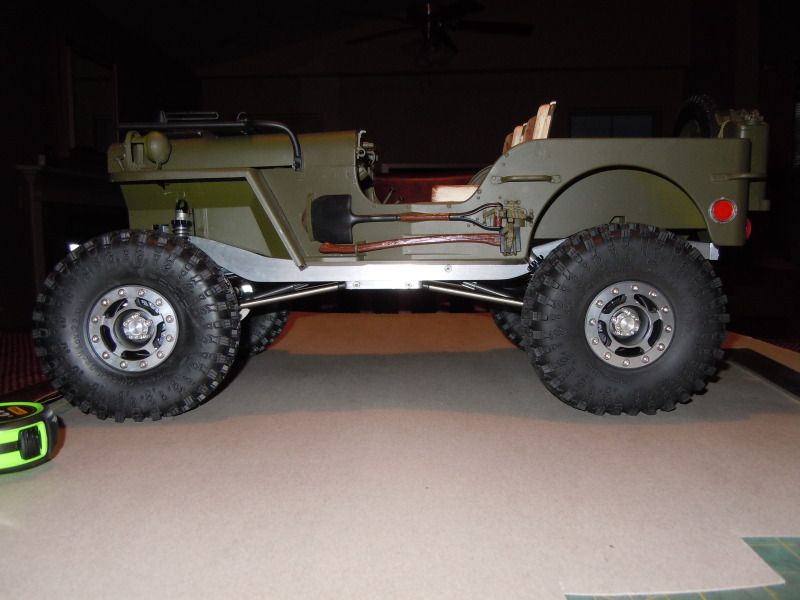  |
|
| |
|
02-03-2013, 10:36 AM
| #73 |
| Quarry Creeper Join Date: Sep 2010 Location: where ever I layed my hat.
Posts: 225
|
The good.... A little effort on the cage with the lower windshield bar. Notching turned out to be easier then I thought it would be and every thing seems to be nice and square. 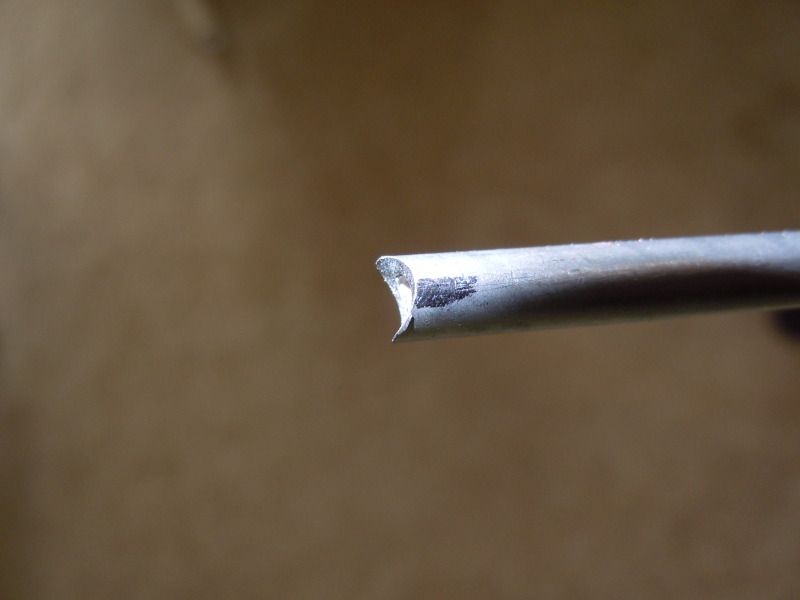 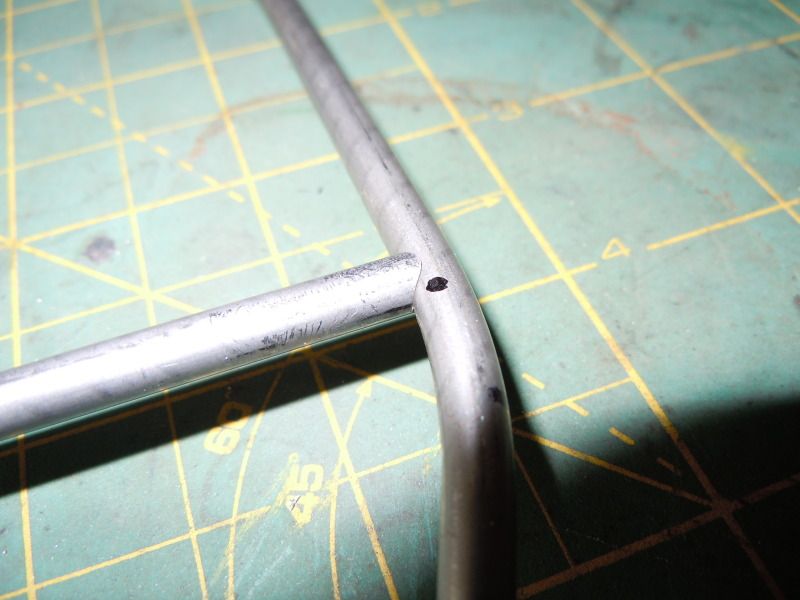 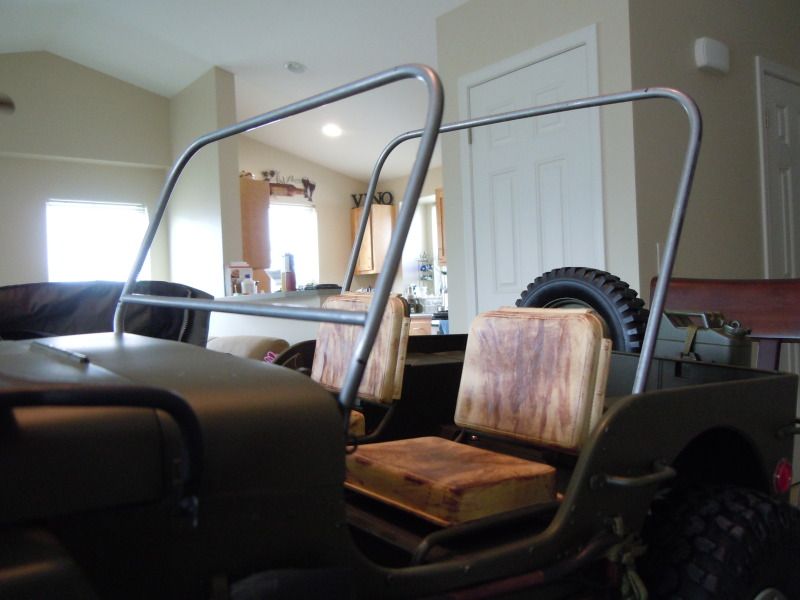 Now for the bad, and totally ugly! I have both of these giving the same results.  With this heat source. 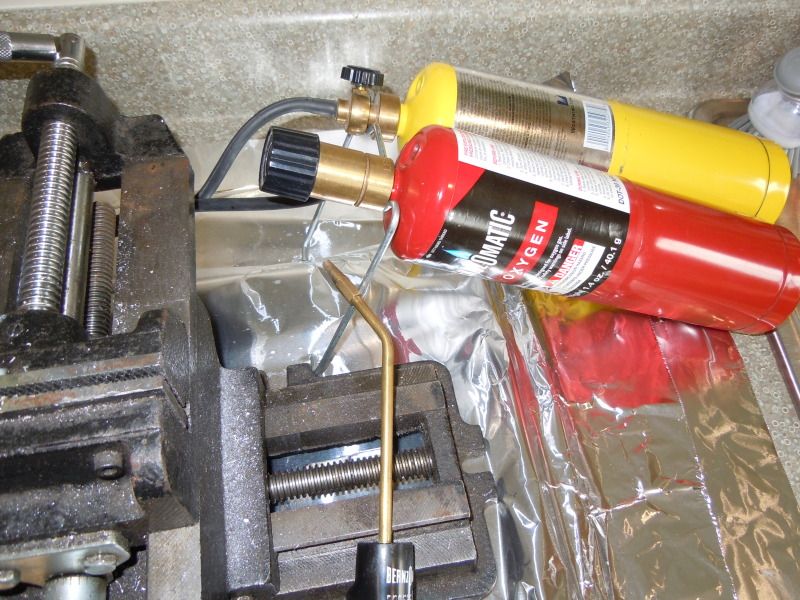 I really hate to post this mess, but desperate for some input from some of the frame building experts on here making me more then envious today. What in the h3ll am I doing wrong? The two parts start to glow and the only thing my solder does is ball up and roll off the material. 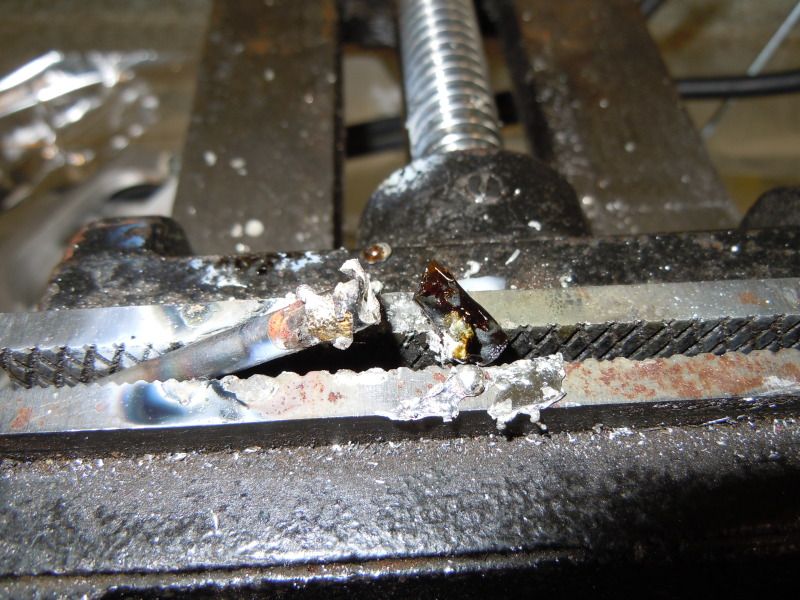 Maybe it is time to set this aside for a little while. Made a could of shock mounts designs that are less then acceptable. |
|
| |
|
02-03-2013, 10:51 AM
| #74 |
| RCC Addict Join Date: Jan 2007 Location: caldwell,idaho
Posts: 1,309
|
i don't have any experience with safety silver but i would try a flux coated solder rod i take my pliers and take about 80 percent of the coating and seems to work for me .i use oxy /ace but have used your set up before i actually still have it.
|
|
| |
|
02-03-2013, 11:23 AM
| #75 |
| Quarry Creeper Join Date: Sep 2010 Location: where ever I layed my hat.
Posts: 225
|
Thank you warriorismi. I had tried some flux coated solder rod a couple years back. Not sure if the rod was too thick or the coating was too thick or my technique just sucks, did not have any luck. Safety silver is not cheap trying to practice but not spend a $100 burning through this. So far it seems I have over heated the small part and should not put the solder in the flame. The heat on the part just did not seem to be softening the solder. Just watched a brazing video from the search option.... Go figure.... So maybe the mapp/ oxygen is too hot for this application. The video made it look way to easy. Maybe I will try just mapp but I might need a different torch because it does not give me a blue flame with the dual tank set up unless both are on. Also think I need to sand the parts more. Last edited by snydercj7; 02-03-2013 at 11:55 AM. |
|
| |
|
02-03-2013, 12:53 PM
| #76 |
| RCC Addict Join Date: Jan 2007 Location: caldwell,idaho
Posts: 1,309
|
keep us posted when you get the heat right then you will actually enjoy doing it.
|
|
| |
|
02-05-2013, 12:08 PM
| #77 | |
| Pebble Pounder Join Date: Feb 2009 Location: Augusta
Posts: 101
| Quote:
Excellent work on the rig, by the way. | |
|
| |
|
02-05-2013, 05:15 PM
| #78 |
| Rock Crawler Join Date: Jan 2011 Location: Hartford City, Indiana
Posts: 531
|
Your heat source type doesn't really matter, except it needs to be capable of getting hot enough to melt the rod or solder. Try making sure you have the joint portion of the pipe clean. It's just like a copper sweat fitting, steel wool the joint first, making sure you remove any coating that is on there, add flux, heat pipe by moving the flame on and off and on and off repeatedly untill the solder melts into the joint! Try it on a scrap piece of tubing first. You don't even have to make a joint to practice getting the solder to "take" to the tubing. Last edited by TJ Steve; 02-05-2013 at 05:19 PM. |
|
| |
|
02-05-2013, 05:34 PM
| #79 |
| Quarry Creeper Join Date: Sep 2010 Location: where ever I layed my hat.
Posts: 225
|
dadrab, Thank you Steve, I was thinking I might not have cleaned the tube enough. Lightly scuffed with emery cloth, will try the steel wool. I will try the heat on & off also to see what kind of results I get. Totally working on scrap before destroying the labor of the bent and notched tubes. Thank you sir. |
|
| |
|
02-08-2013, 10:35 PM
| #80 |
| Quarry Creeper Join Date: Sep 2010 Location: where ever I layed my hat.
Posts: 225
|
Busy watching KOH 2013 this week. This did come in the mail thanks to Mr. Holmes. 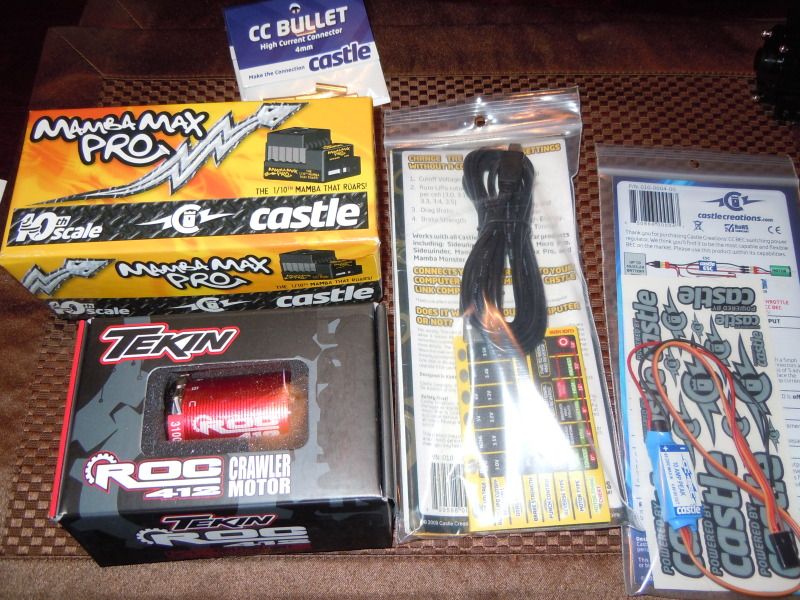 Also made up and fit a couple more pieces. Now I need to get down to my braze practice. 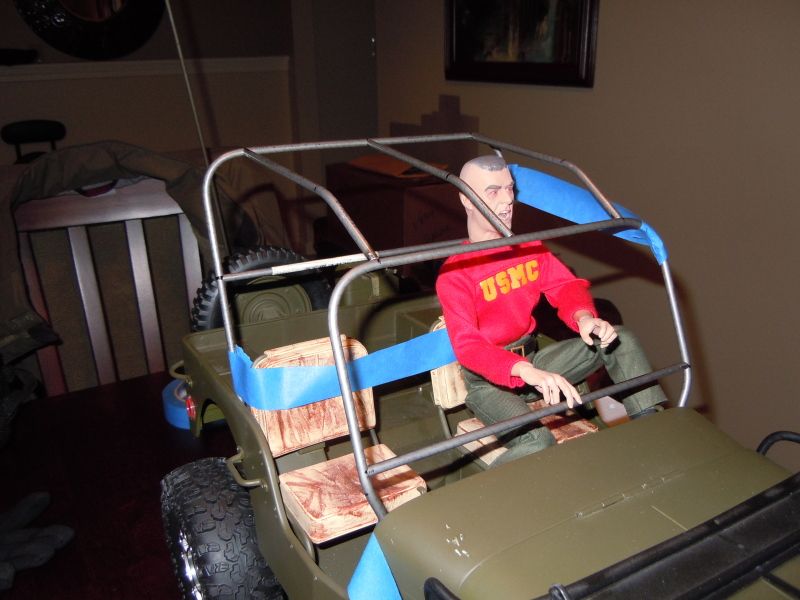 |
|
| |
 |
| |


 Linear Mode


