| |
| |||||||
 |
| | LinkBack | Thread Tools | Display Modes |
 02-20-2012, 02:10 PM
| #1 |
| Newbie Join Date: Nov 2010 Location: Houston
Posts: 15
|
Just got a Trail Trekker from my wife for Valentines. I have a ton of ideas for this yet but I'd like to think I have gotten a bit done so far. I will post some stuff I have done and add more later as this progresses. I actually got a lot of ideas from a project I found on Scale4X4. You can find the original here Losi Micro Crawler Hummer H1 - Scale 4x4 R/C Forums --Here are a few Pictures of my stock rig so you can get an idea how far I've progressed. 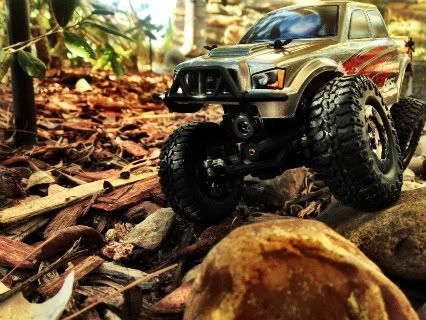 On the rocks. 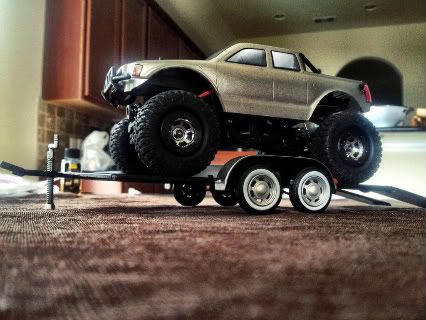 On the trailer I hope it will eventually tow. --I got a new Hummer body from a Revell snap together model. I saw a few other people who have also used this model as a base so it should look familiar. 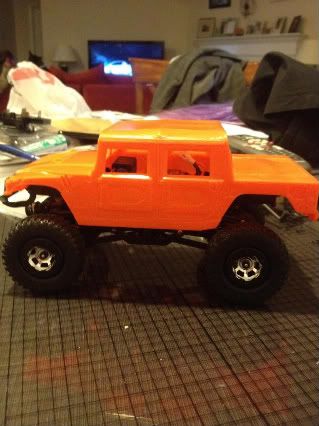 Here is my new body sitting on the stock chassis. --I wanted to make a little pickup bed so I used some Styrene Sheet and some green putty to fill the gaps. This is my first attempt at working with anything like this so be nice. 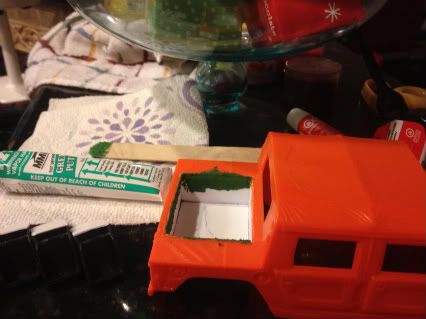 Last edited by Musik; 02-25-2012 at 09:12 PM. |

|  |
| Sponsored Links | |
| | |
|
02-20-2012, 02:20 PM
| #2 |
| Newbie Join Date: Nov 2010 Location: Houston
Posts: 15
|
I borrowed heavily from another build I read about for the next few steps, but after I get it running again I have a few ideas of my own to take this project a few steps further. --I ordered a micro crawler chassis as a base to connect my suspension links. I had to trim it a bit but it fits like a glove. 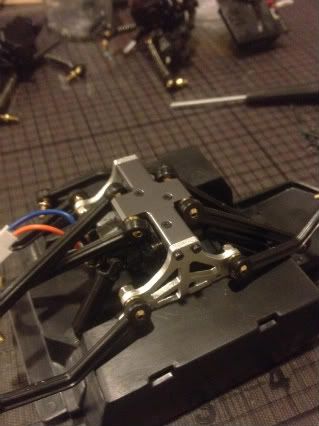 I haven't put the shocks on yet, and this isn't secured yet. 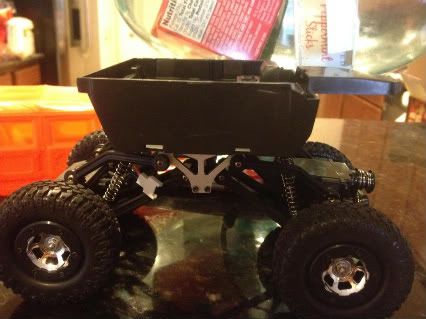 Here is sits with the shocks on the stock wheels and tires. I still haven't mounted electronics completely or secured the two pieces. 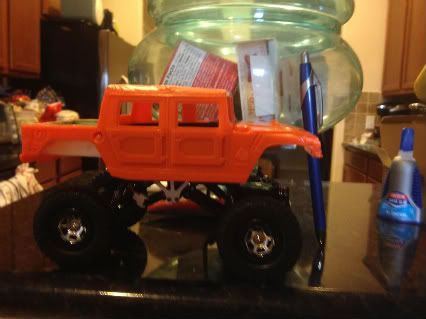 Here I put the body on top to see how it lines up. I put the pen there for scale. --At the same time I did the pickup bed I put some backs on the seats. I borrowed this idea too because I hated how the seats weren't complete. 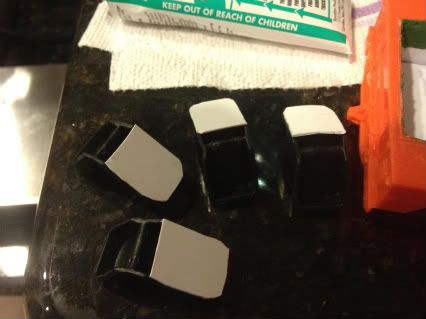 |
|
| |
|
02-20-2012, 02:21 PM
| #3 |
| Newbie Join Date: Apr 2011 Location: somewhere??
Posts: 23
|
Looks great keep us updated, I dig the white walls on the trailer reminesant of Back to the Future 3 Delorean haha.
|
|
| |
|
02-20-2012, 02:30 PM
| #4 |
| Newbie Join Date: Nov 2010 Location: Houston
Posts: 15
|
I got the electronics wired up and secured the crawler chassis to the model chassis. I switched the connectors to micro deans just for ease of use. 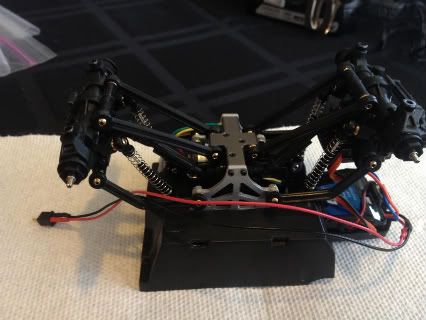 From the bottom. 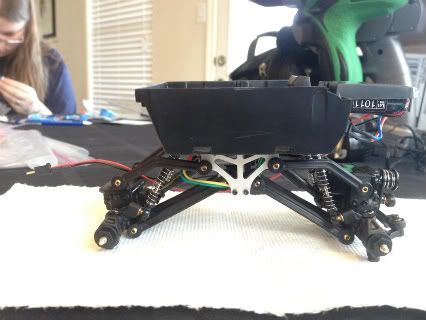 From the side. 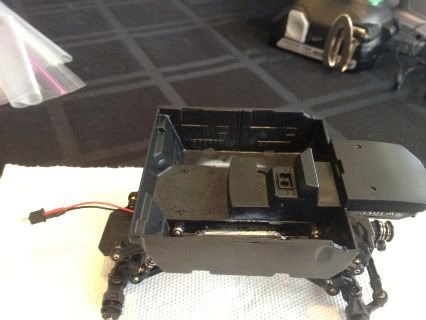 From the top. --I mounted the upper shock mount directly to the model chassis. The front section is a perfect fit for the ESC as well. I secured the two sections with a liberal application of Amazing Goop(AKA shoe goo). 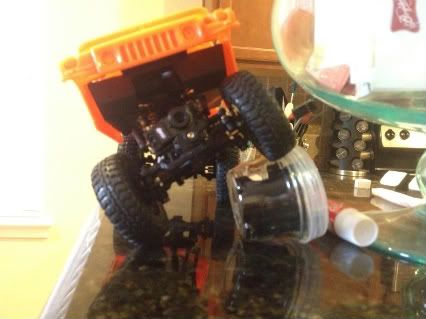 Here is a test articulation with the mounted and wired chassis. --The I started preparing the body. I drilled a hole in the pickup bed to run wires as I plan on putting the battery in there. I will probably make up a tonneau cover so they will be hidden. I also primed the body and seats. 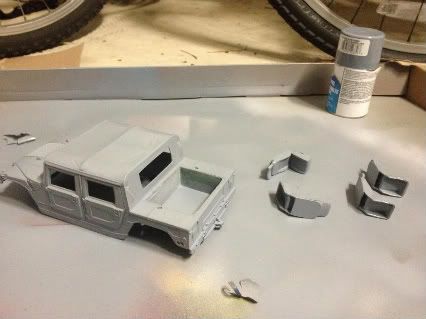 --During the preparation for the wheel weights I had some technical difficulties and now have no wheels or tires. I tried freezing to remove the glue, and then when that didn't suffice to break the glue I attempted to back them off. Well I guess I did it a little to hot because they melted. The wheels and tires are now piles of goop. So I ordered a new set of RC4WD aluminum beadlocks and Mickey Thompsons. |
|
| |
|
02-20-2012, 02:40 PM
| #5 |
| Newbie Join Date: Nov 2010 Location: Houston
Posts: 15
|
I started working on my lighting today, which brings me up to current with this build. I made a custom circuit with an on/off switch to run a set of headlights and taillights. I will run them from a very small 1s lipo I took from a micro heli I have. The circuitry and battery, as well as the Losi battery for the car will all be stored in the pickup bed. 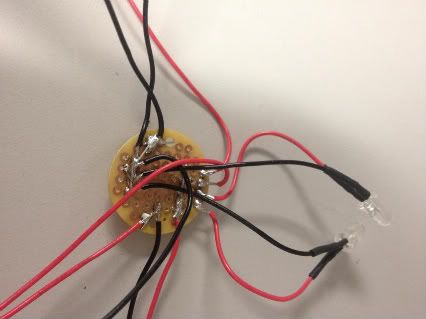 Here is my circuit. 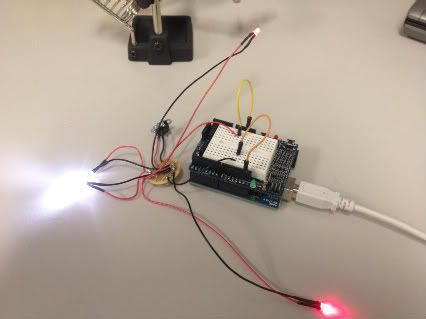 I was testing the circuit using an arduino as a power source. The finished one will use a 1s lipo. 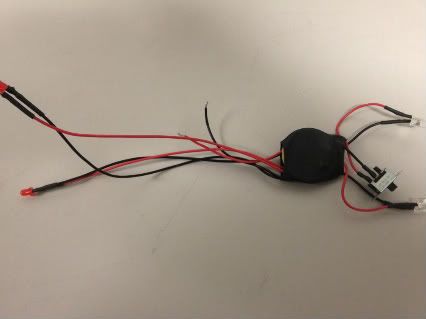 I wrapped it up nice to protect the circuit. I won't mount it until I can finish my light housings, but it's coming soon. I also ordered some threaded rod and the other pieces I need to extend the front out a bit. As it sits right now the front wheels are too far in even with the trekker links. |
|
| |
|
02-20-2012, 06:12 PM
| #6 |
| Newbie Join Date: Nov 2010 Location: Houston
Posts: 15
|
I think one of my posts got lost in limbo. I secured the crawler frame to the model using Amazing Goop(AKA shoe goo). I also got the electronics mounted and wired up, in the process I replaced all the losi connectors with micro deans. The bottom of the chassis to show how its mounted. How it looks from the side. Here is the top view. I tried some CA glue first which discolored the plastic a bit but ended up using some amazing goop. It's rock solid once it sits for a day. To show the articulation. --I also started prepping the body. A mishap trying to remove the tires from the wheels required me to order a new set, so I have some RC4WD aluminum beadlocks and some mickey thompsons coming. Primed up the body and the seats. |
|
| |
|
02-21-2012, 09:29 PM
| #7 |
| Newbie Join Date: Jan 2012 Location: Hunterdon County
Posts: 24
|
where did you get the trailer?
|
|
| |
|
02-21-2012, 10:32 PM
| #8 |
| Newbie  Join Date: Jan 2012 Location: jackson
Posts: 47
|
Nice Work, The trekk's are awesome, well except the motors-ha. U should drop one of those DDT's in there. A Performing Scaler- after all, its a Hummer!!
|
|
| |
|
02-22-2012, 06:52 AM
| #9 | ||
| Newbie Join Date: Nov 2010 Location: Houston
Posts: 15
| Quote:
Quote:
--I should be posting a bit of an update on the project this weekend. Waiting on a few parts still and getting the paint finished tonight. | ||
|
| |
|
02-25-2012, 06:26 AM
| #10 |
| Newbie Join Date: Nov 2010 Location: Houston
Posts: 15
|
Time for some well earned relaxation. I have put a ton of work into the micro this week and I am pretty much ready for a break. I will update y'all with where I have gotten so far. --I got the paint done first. 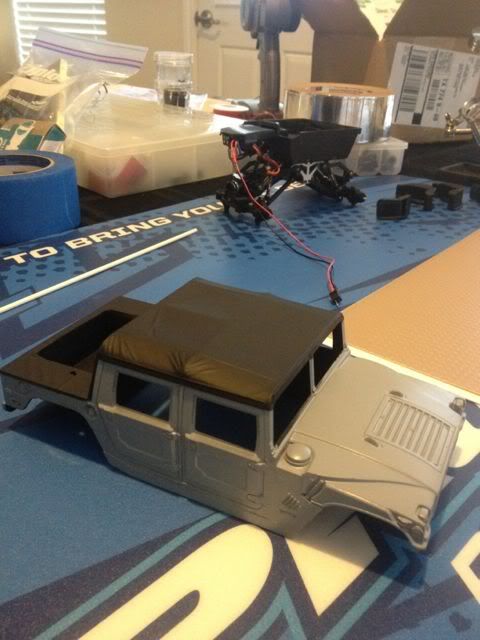 Black coat finished. 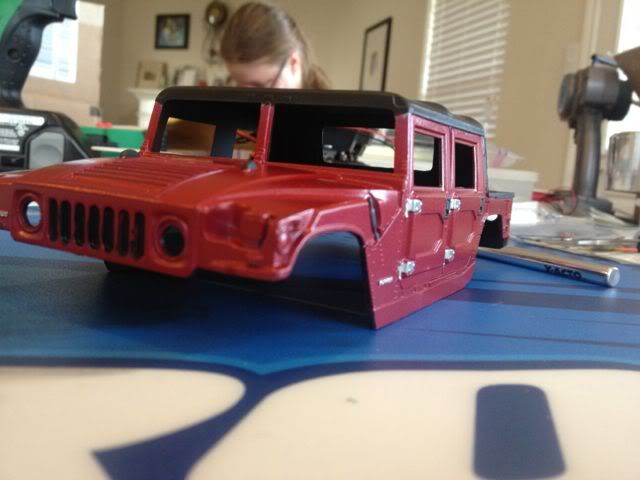 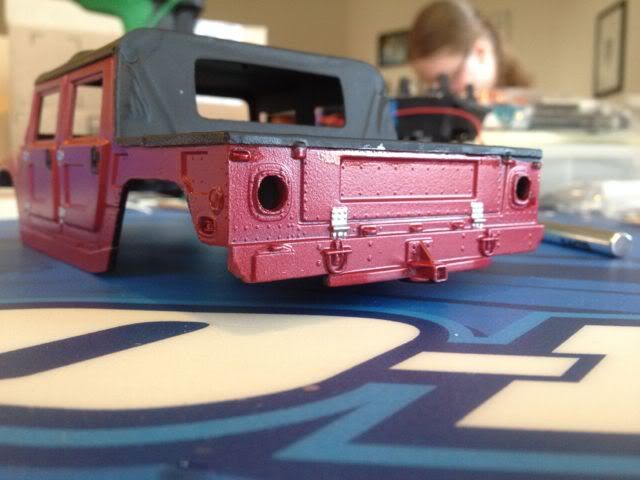 And the final red coat has gone down, as well as hand detailing with black and silver. Also I have drilled out the space the headlights. 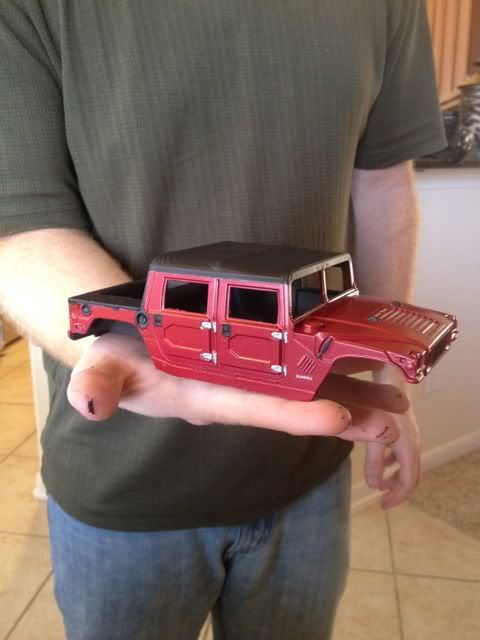 I like this pic because it shows the scale of the detailing I did. I think it turned out pretty good. |
|
| |
|
02-25-2012, 06:36 AM
| #11 |
| Newbie Join Date: Nov 2010 Location: Houston
Posts: 15
|
I did a little detailing on the interior. Nothing major, but I liked how it turned out. 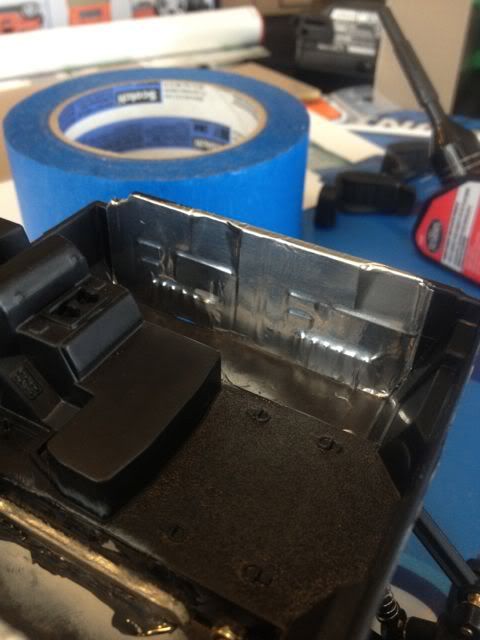 First I used a bit of foil tape to make up some metal doorpans. 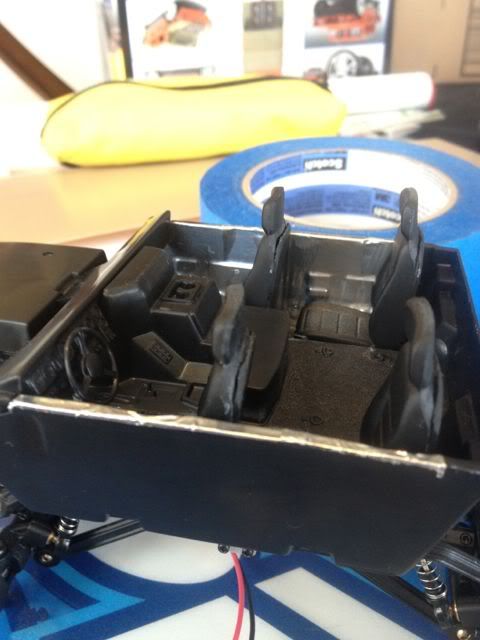 Now I've gotten the seats(which I had to trim to fit with the chassis bracket in there), the dash, and the steering wheel in. I also put the windshield in at this point which you will see in another pic. 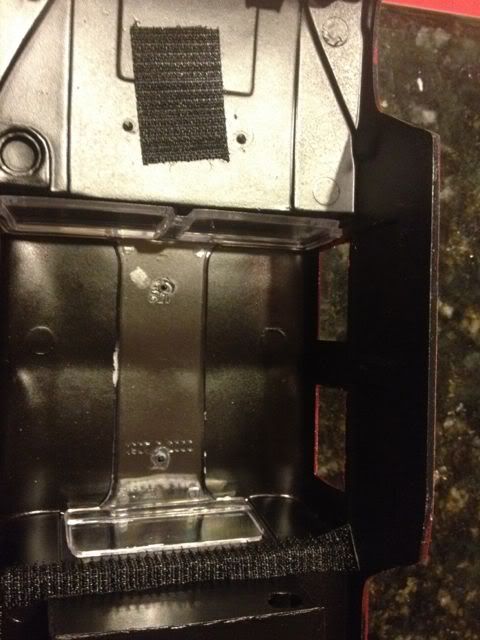  To mount the body I used a couple small strips of Velcro. -- I also got my new suspension links made up to stretch the front out a bit. 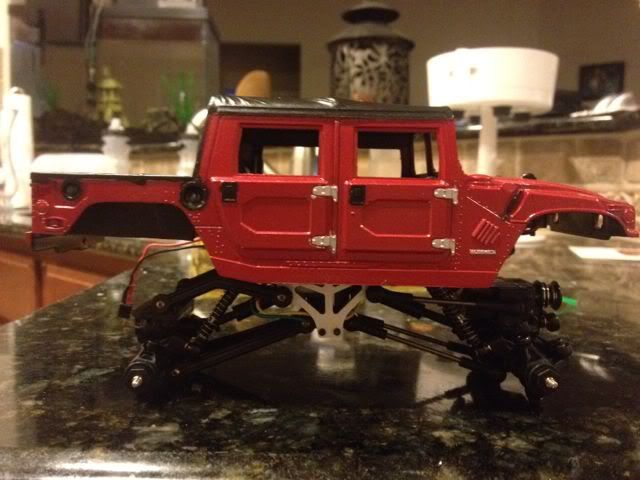 You can see that the front sits out far enough now. 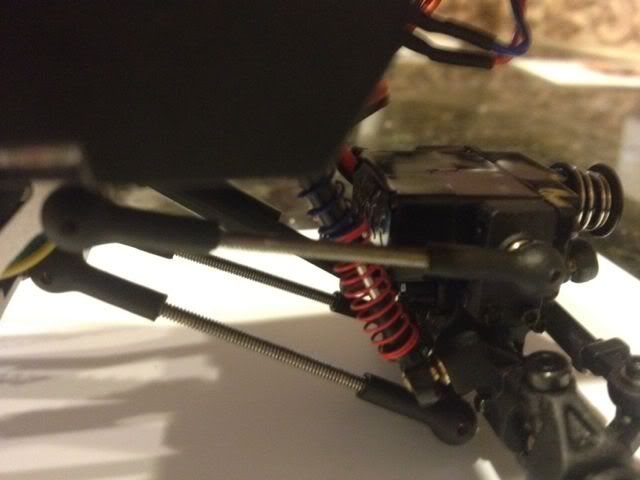 I also installed a dual rate spring setup using the blue and red springs from the first gen Xmods spring kit. I actually had one of these just sitting around. I had to beef up the springs because of the heavy upper body. |
|
| |
|
02-25-2012, 06:48 AM
| #12 |
| Newbie Join Date: Nov 2010 Location: Houston
Posts: 15
|
I put quite a bit of work into the lighting on this build. I wanted to keep the lights as scale looking as possible and also keep them hidden as well as I could. I have previously shown you the lighting harness I made for this build. I have now gotten it working using battery power. I reused a battery from a micro copter since it had enough juice for the bigger 5mm high output white LED's for the headlights. 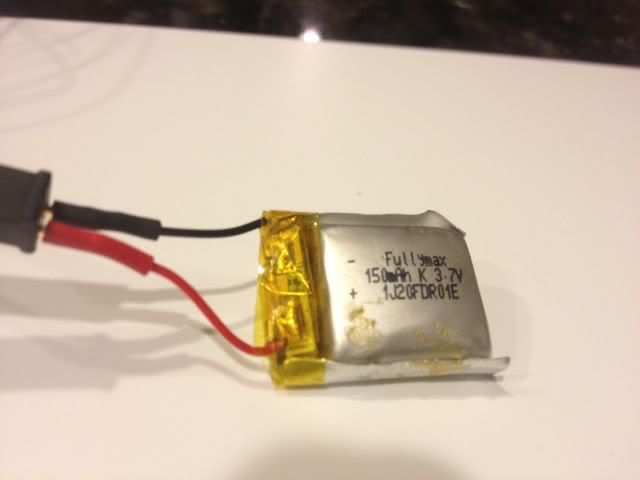 Here's a closeup of the battery I'm using. 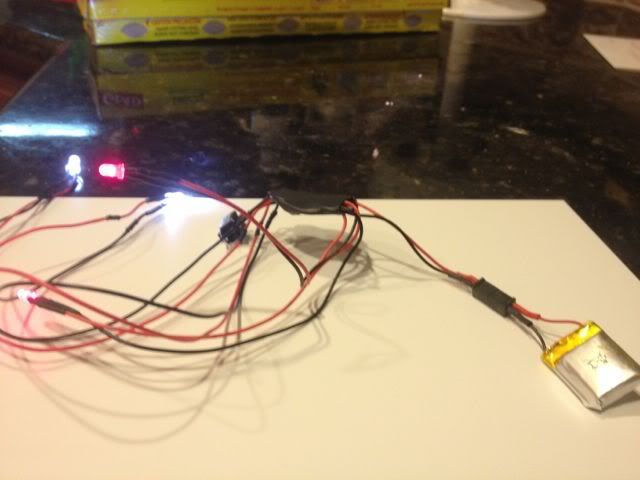 A picture to show it functioning with the battery. --Next I had to devise a method of attaching the lights, but at the same time I needed to make them scale looking. 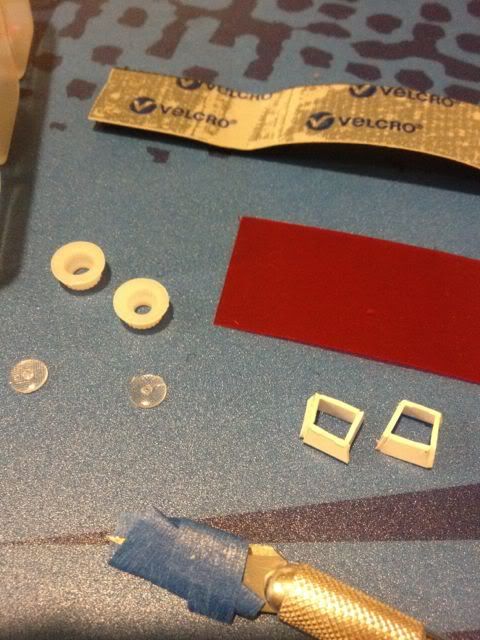 I used some .030" styrene to make a couple of front headlamp housings. In the picture you can also see the front headlamp lenses that I trimmed to use. For the rears I am using some servo horn adapters I found in my spare parts. 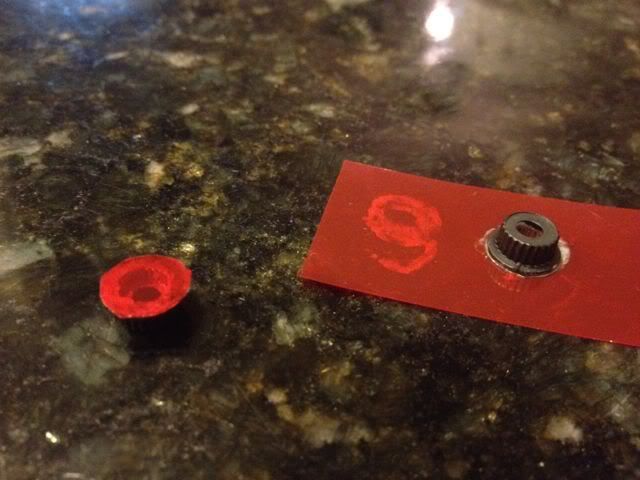 After painting them silver on the inside(for reflectivity) and black on the outside I glued the rear housing to a thin red transparency. After it had dried I was able to cut it free, thereby making a taillight lens. |
|
| |
|
02-25-2012, 06:57 AM
| #13 |
| Newbie Join Date: Nov 2010 Location: Houston
Posts: 15
|
Next I had to attach the housing for the lamps to the body of the vehicle. 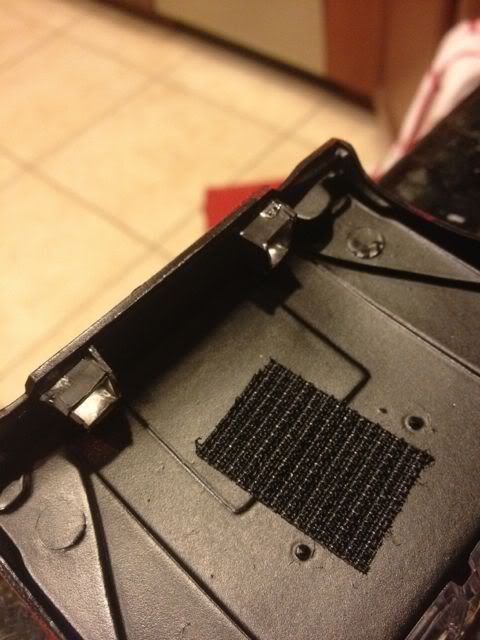 The fronts glued into their respective places. 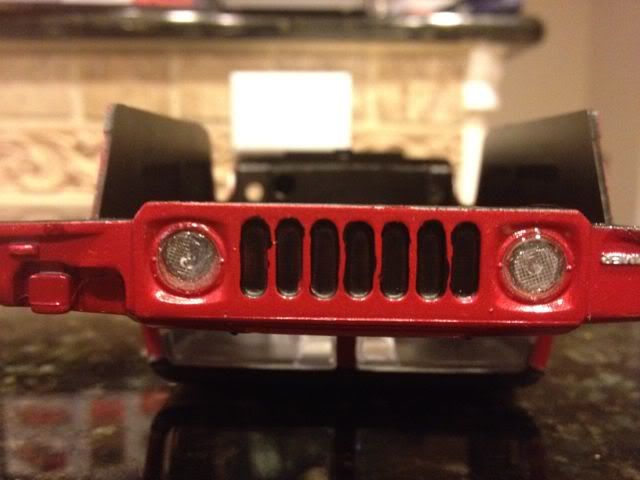 I've gotten the headlamp lenses attached. 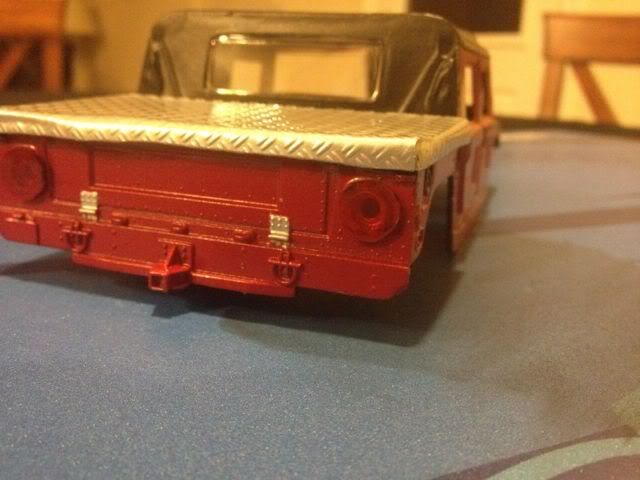 Here are the rears. I made the holes I drilled big enough to just set the housing right into them. They actually look very similar to the 1:1 now even though they are just a little more rounded. These turned out great in my opinion.(for the quick eyed of you I am sure you already spotted the fruition of another part of this project I haven't shown yet.)  Using my friend Amazing Goop(shoe goo), I have attached my front headlamps into the housings. 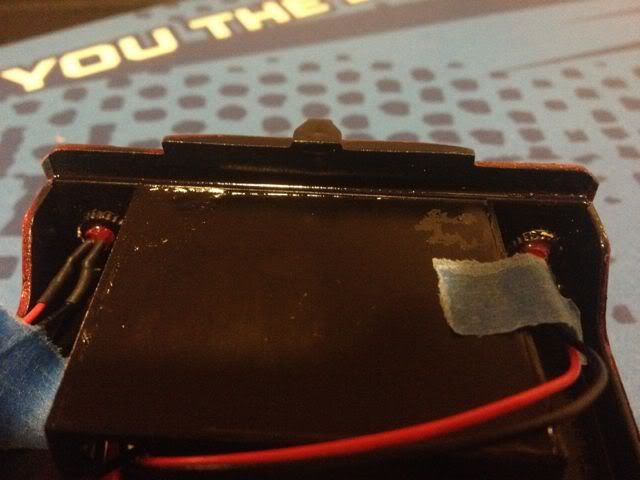 I did the same for the rears. The tape is just used to secure them in place while they are drying. --And now to see the fruits of my labor or this lighting project. 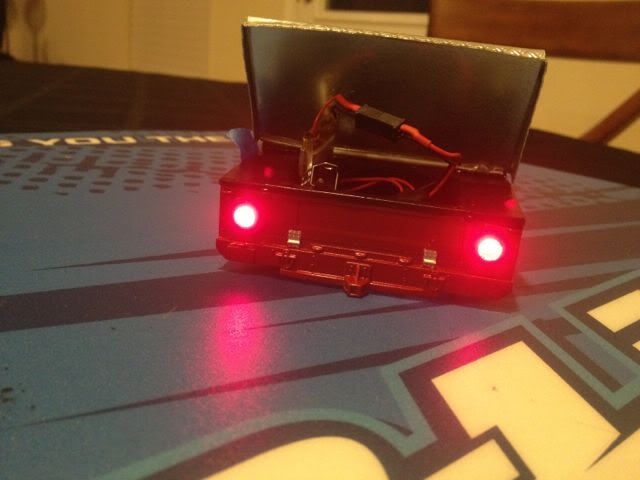 The rear lights. I will explain the bed cover in another post. 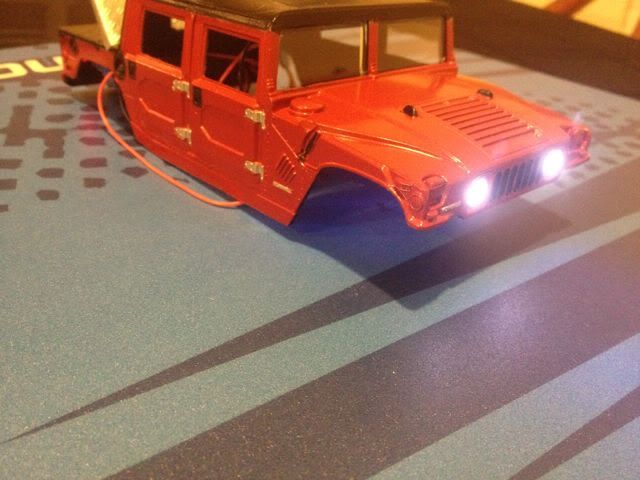 And the headlamps. I tried to take a picture from the front but they are so bright they introduce too much glare. 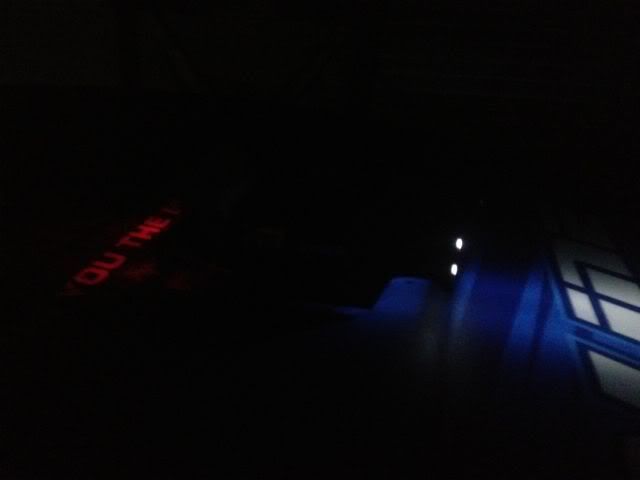 And a test in the dark. |
|
| |
|
02-25-2012, 07:10 AM
| #14 |
| Newbie Join Date: Nov 2010 Location: Houston
Posts: 15
|
I decided I wanted to store my light circuit and power source in the bed of the truck so as to keep it from view. I realized pretty quickly I needed a cover for said bed so I started brainstorming ways to fix that. My wife and I were browsing the Styrene selection at the LHS and she had the idea to use scale diamond plate as a cover, so I bought some and ran with that idea. 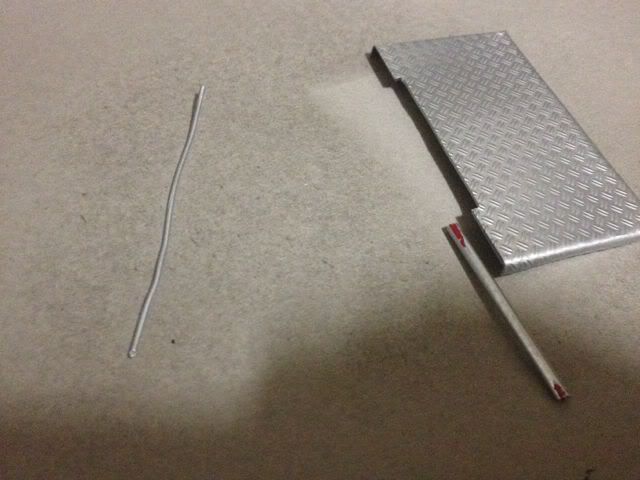 I devised a hinge mechanism to make it open and close. After measuring I added a little extra material onto each of the three bed sides. I used some heat to soften the styrene and bend it into shape to make some sides to slip over the bed sides. I used a bit of 24AWG solid core wire as the hingepin and some styrene tube as the other half of the hinge. Here you see I painted it using chrome rattle can paint(after using primer). 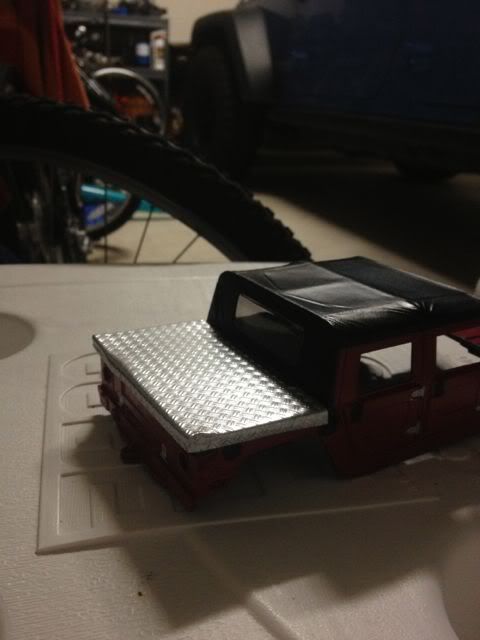 Here you can see how it fits when being mocked up. 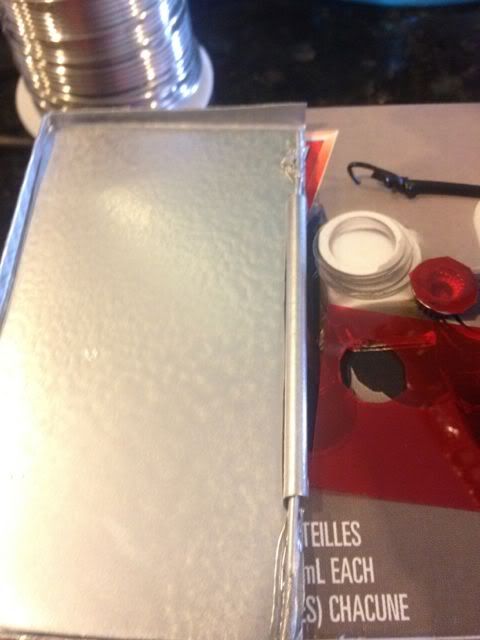 I used some amazing goop to secure the wire to the cover after slipping it through the styrene tube(which moves freely at this point). I used some thin(.030") styrene sheet to make a back on my cover. The diamond plate was pretty thin so I needed to strengthen it. 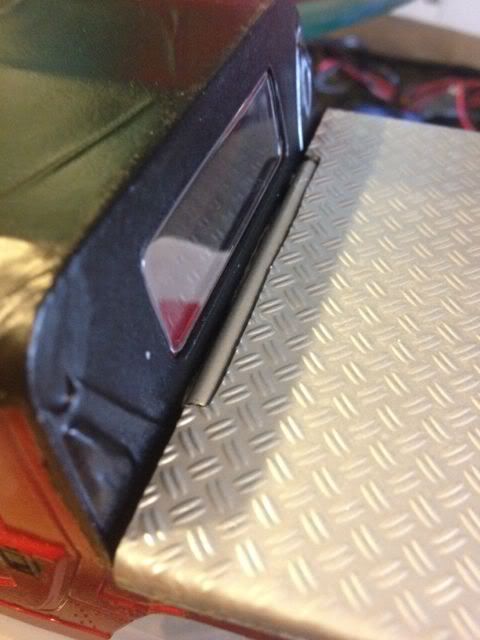 Here you can see how I mounted it. I glued the outer styrene tube to the base of the window using amazing goop(as you can tell I love this stuff for heavy use bonds). 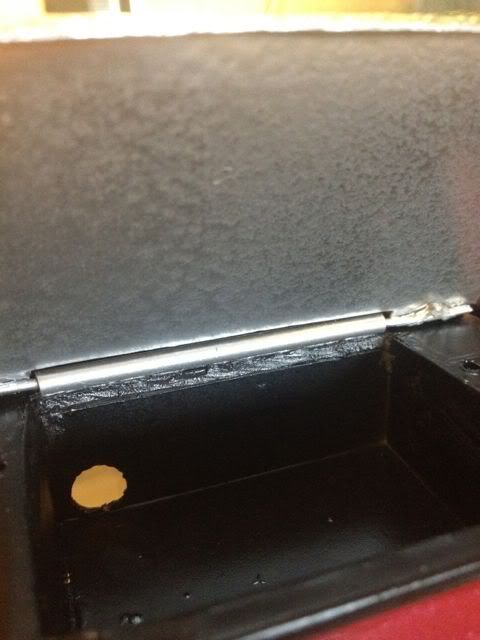 Here is a picture from the inside to see the workings of my hinge. Last edited by Musik; 02-25-2012 at 09:17 PM. |
|
| |
|
02-25-2012, 07:22 AM
| #15 |
| Newbie Join Date: Nov 2010 Location: Houston
Posts: 15
|
My wheels and tires finally made it here and I wasted no time in getting them on the crawler and testing em out  . .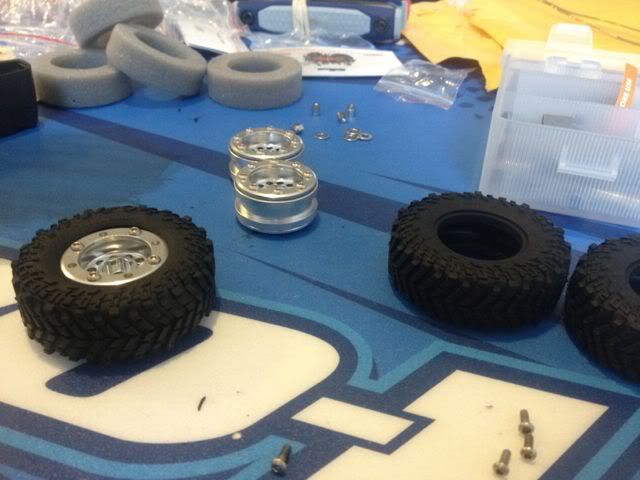 I took the foams out and used some solder to add weight. After assembly each wheel is about 32 grams. Not quite as much as some others I have seen but it's much better than stock(at 10 grams). I love that these are beadlocks and I don't have to mess with glue. Also, these tires are wicked looking. 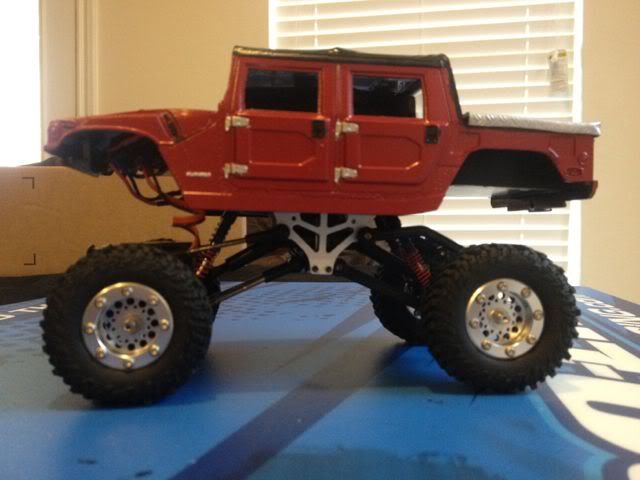 All mounted up. I know it seems a little tall but I actually don't have any tire rub with this setup. If you noticed the back is sitting a little low, this is because the car's battery is in the bed(i fixed that after the fact) and the springs still weren't up to snuff. 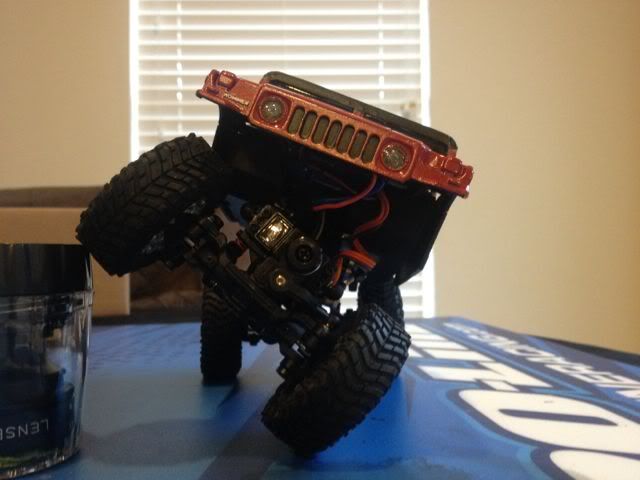 Shot showing articulation with the new suspension and tires and wheels. 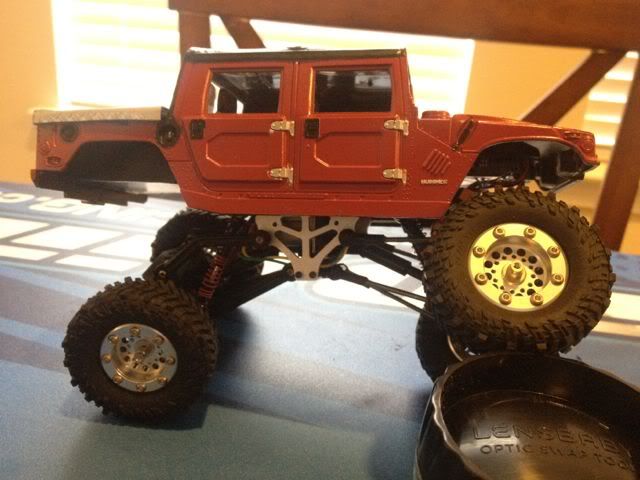 I took another shot from the side. 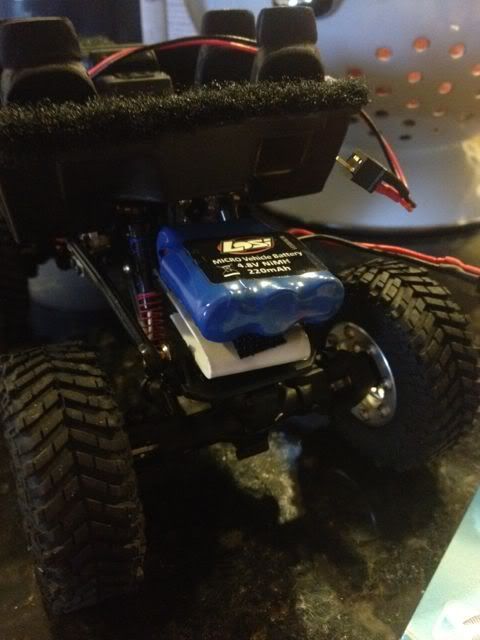 As I said the battery was too heavy, so I made a little removable bracket for the rear axle(this way it wont be there when I am displaying the truck). In this spot it crawls much better. Overall it crawls much better than stock now and I haven't even beefed up the drivetrain. 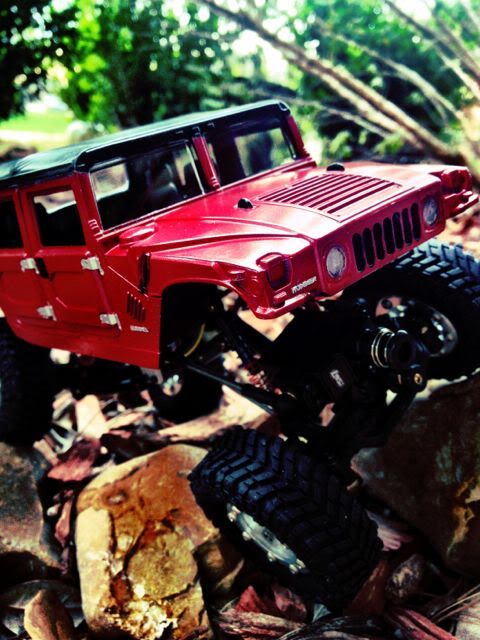 I had to put at least one pic of it on the rocks. --I will probably update again later with more final assembled pics(probably with lights on) and possibly some video. I will also take a few pics of my little "rock garden" where I have been crawling. Enjoy the updates |
|
| |
|
02-25-2012, 11:03 AM
| #16 |
| Newbie Join Date: Nov 2010 Location: Houston
Posts: 15
|
Still hard at work this morning... Got a video of it running. |
|
| |
|
02-25-2012, 01:03 PM
| #17 |
| Rock Crawler 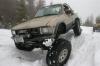 Join Date: Dec 2010 Location: Madison Co.,Ms.
Posts: 711
|
Looks good, but damn it's tall. Have you tried springless yet? My most capable rig low rides and I'll never look back.
|
|
| |
|
02-25-2012, 11:52 PM
| #18 |
| Newbie Join Date: Jan 2012 Location: jackson
Posts: 47
|
Man, Paint & detail are really good!! Nice work- H1's rule!!
|
|
| |
|
02-26-2012, 06:30 AM
| #19 |
| Newbie Join Date: Nov 2010 Location: Houston
Posts: 15
|
So as suggested I have taken the springs out. I left the little spacers on the shock shafts on there for now because I wasn't sure about removing them and if I cut them off I wont be able to put them back on. I have to agree though that it does drive great now, I only wish I had a better servo and motor(guess I won't be done spending money on this thing just yet). On to the pics... 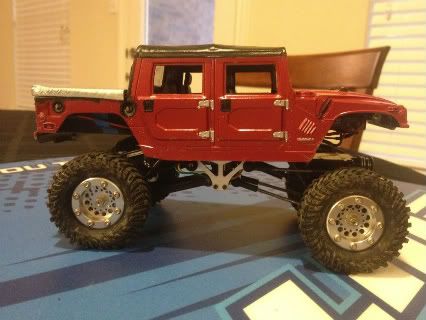 Here is how it sits now that I removed the springs. I had to move the battery back inside it since the truck bed was hitting it with the springs removed. --A couple of pics of it on the rocks. 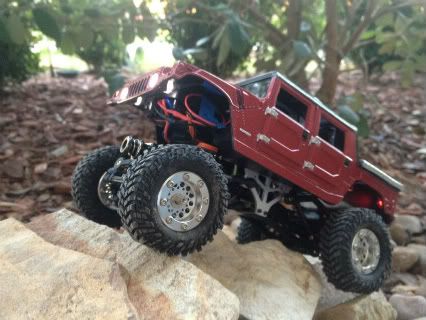 From the front. 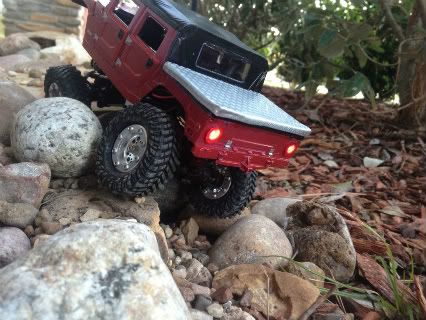 From the rear. --As a bonus I did promise some pics of the "Rock Garden," so here they are. 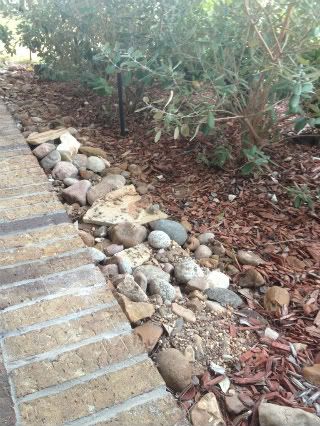 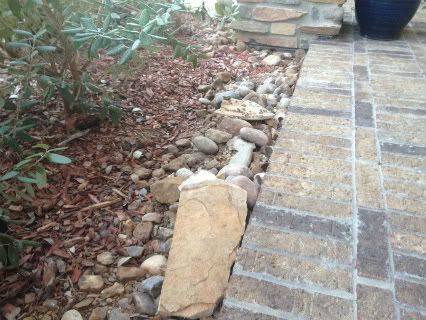 I plan on extending it a bit more, but I ran out of rocks. You would be surprised how hard they are to come by down here in Houston. I have some family gathering me a ton of granite from the Texas hill country(lots of granite) this weekend so hopefully I can get those from them soon. --As always enjoy .--Also would removing those little shock spacers have any detrimental effect or would it probably be the best thing to do in the droop setup(I am still a scaler noob). |
|
| |
|
02-26-2012, 10:03 AM
| #20 | |
| Rock Crawler Join Date: Dec 2010 Location: Madison Co.,Ms.
Posts: 711
| Quote:
Truck looks much better! Stability is a good thing. To remove the shock spacers requires complete shock dis-assembly. You have to remove the shock shaft from the body to get those buggers off. You can cut them off, they really serve no purpose other than limiting travel.
| |
|
| |
|
 *Updated 2-25-12* New to Micros/Scalers First Project Trail Trekker Hummer Build - Similar Threads
 | ||||
| Thread | Thread Starter | Forum | Replies | Last Post |
| Losi Micro Trail Trekker F250 scaler build | broncobeast79 | Losi Micro-Rock Crawler | 17 | 10-11-2013 11:21 PM |
| trail trekker Hummer H1 | cobrajet94 | Losi Micro-Rock Crawler | 0 | 12-19-2011 02:33 PM |
| New Trail Trekker Hummer | mwscooters | Losi Micro-Rock Crawler | 4 | 07-02-2011 04:20 PM |
| 2.2 Hummer H2 Trail Patrol Project | monkeyracer | 2.2 Scale Rigs | 21 | 09-16-2009 06:26 PM |
| Project - Hummer H2 Trail Patrol 1.9 Scaler | monkeyracer | 1.9 Scale Rigs | 9 | 04-12-2009 10:46 AM |
| |


 Linear Mode


