| |
| |||||||
 |
| | LinkBack | Thread Tools | Display Modes |
 12-30-2008, 02:07 PM
| #1 |
| Rock Crawler Join Date: Dec 2005 Location: North Vancouver
Posts: 524
|
Got one for Christmas from the wife. These are so fun, really makes all your old crawl spots totally new. First things first, out with the torque twist or at least minimize it. Drilled a new hole for lower separation at the chassis end to minimize twist. Used the stock bolts. 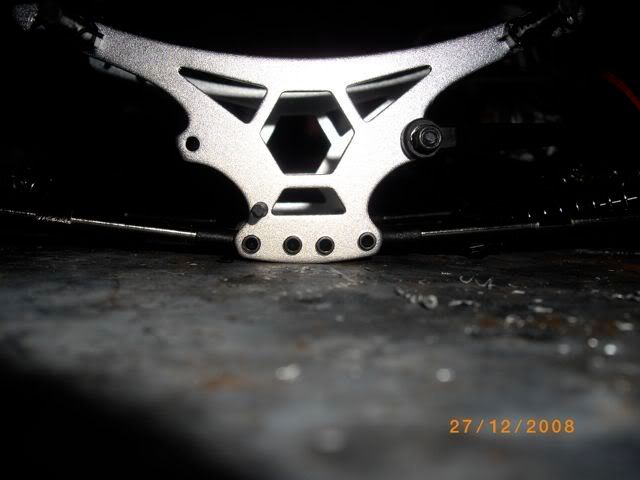 Just drilled the stock plate and used traxxas rod ends 3m threaded rod and breakline for the links. Sorry for the blurry pic. 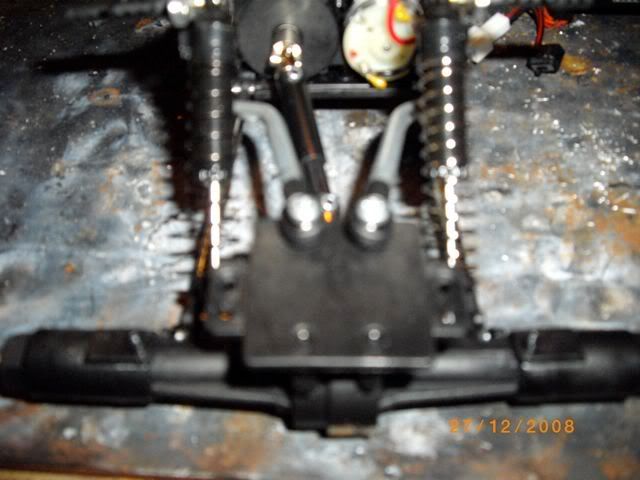 Then to lower it I took the shock balls and screwed those into the body posts. Dropped it to a perfect hight I think and looks clean. 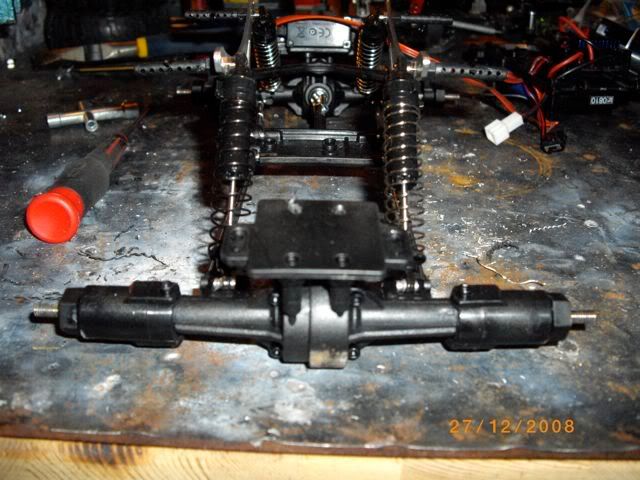 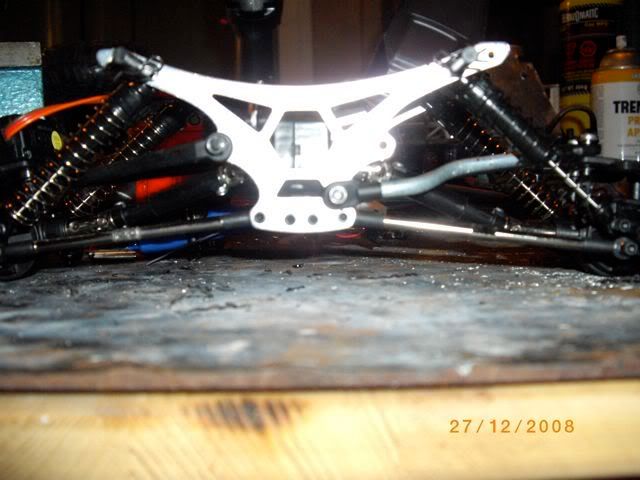 For the electronics tray I cut the battery section off flipped it and mounted it in the rear then strapped the battery on the servo to keep weight on the axle instead of the chassis. 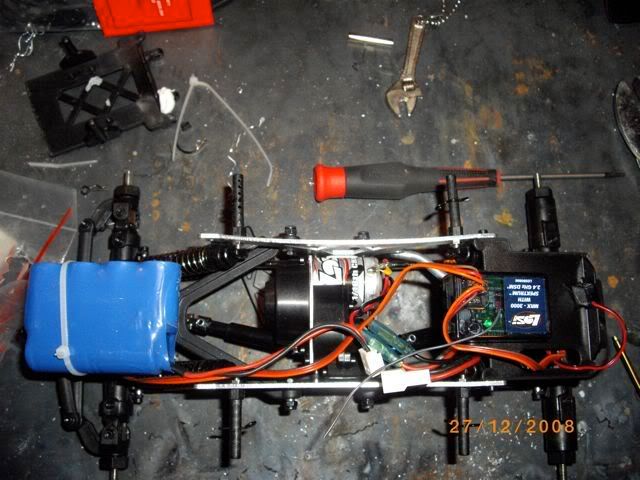 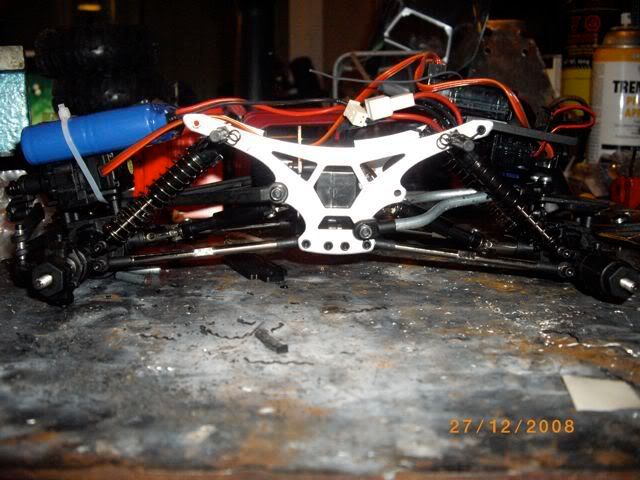 |

|  |
| Sponsored Links | |
| | |
|
12-30-2008, 02:08 PM
| #2 |
| Rock Crawler Join Date: Dec 2005 Location: North Vancouver
Posts: 524
|
I hope this will be useful. I know some other writeups don't have super clear pics to help people visualize how this mod works. Hopefully this clears some things up. I remember being a noob...and still lots of things I don't understand I used 2" gas pipe or something from home depot. I had to buy 6feet so if someone want a set of these pm me. Not sure if I'll get in trouble cause I don't have a star but I need to get rid of this stuff lol. I can't remember the exact name of it but anything with 2" id will work but be sure to bring your rim with you to the hardware store because the abs and pvc 2" id pipe was too small for my rim. I eyeballed the width for the plastic but it's just under 3/4" thick. Pull your stock tires and clean out the glue and tire pieces the best you can. I used pounded lead rope for weight. 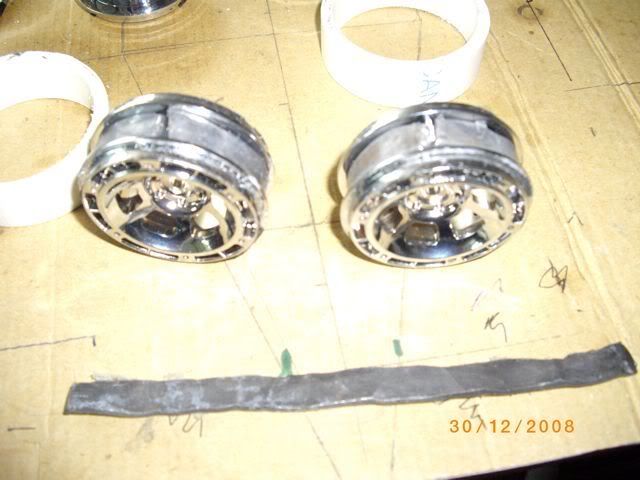 Put your rim rings around your rim and don't forget to also drill vent holes in these rings. Also do whatever you need to do to your foams at this point too. 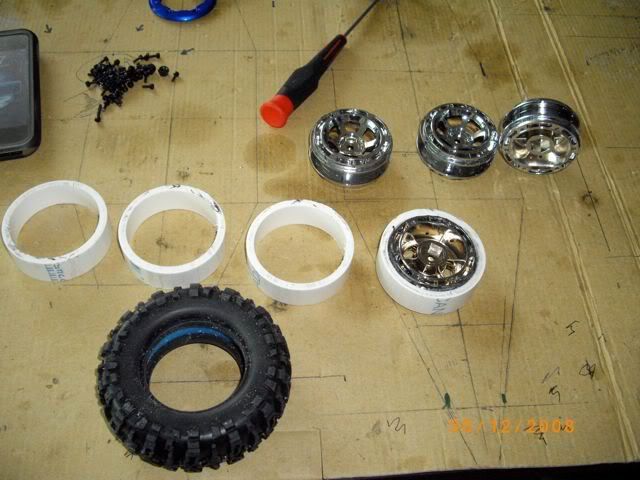 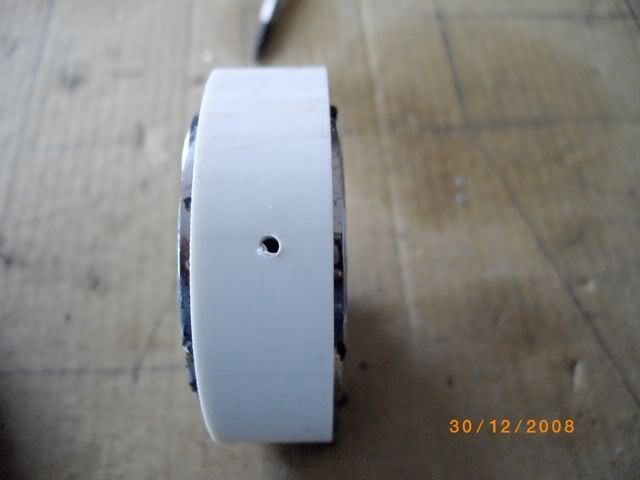 Now see where the screw is sitting, that is where your bead is going to sit. Then when you screw your faux beadlock rings in they will sandwich the bead and tire against the white plastic ring. 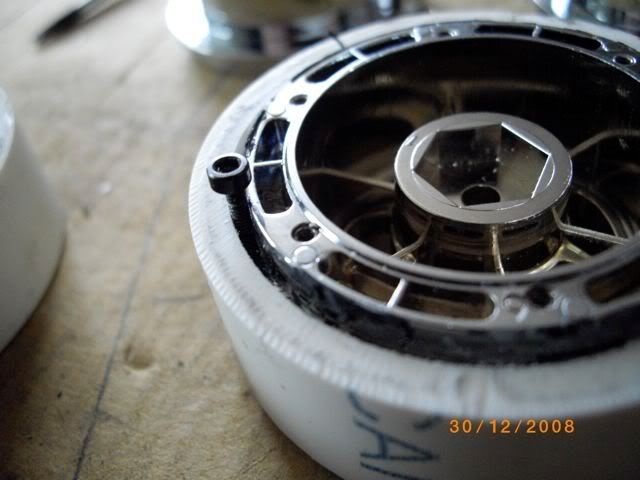 The bead of the tires sits between the beadlock ring bolt hole and the white plastic ring. Some people are beveling the inner lip of the white plastic beadlock ring to allow the bead to seat easier. I didn't you just had to squeeze the faux bead lock rings tight while you bolted them down. 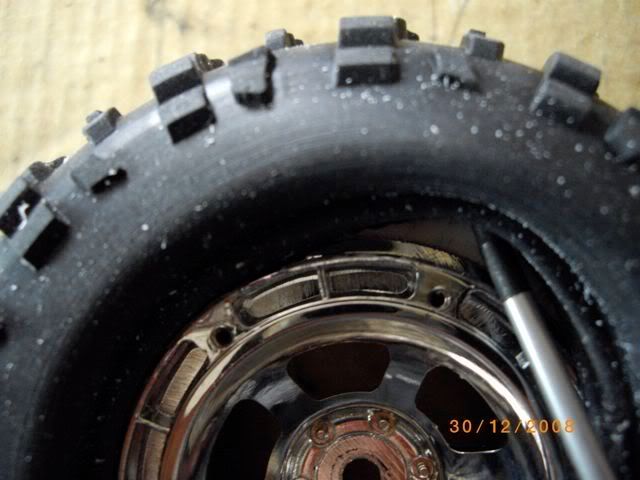 Then you have a tight holding beadlock for those losi claws. 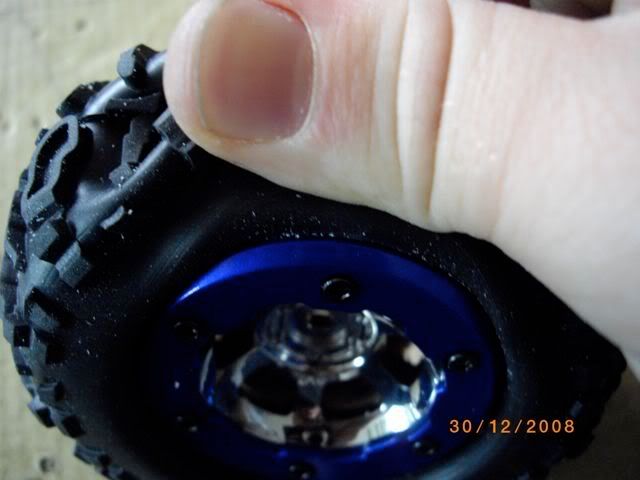 And done, time to go play with your sleeper. 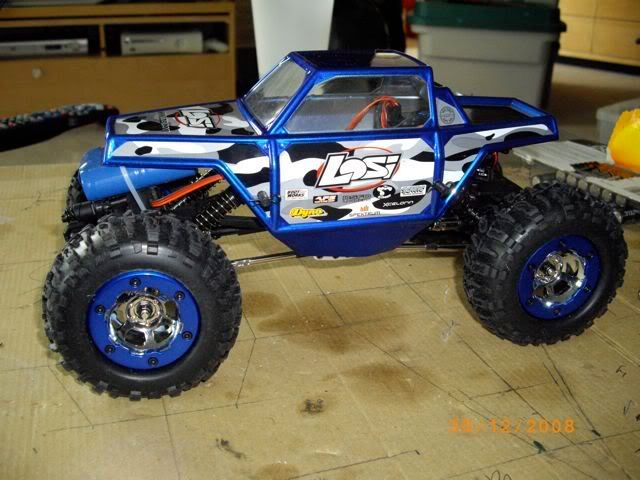 Last edited by miller; 12-30-2008 at 02:37 PM. |
|
| |
|
12-31-2008, 04:18 PM
| #3 |
| Newbie Join Date: Dec 2008 Location: Burbank
Posts: 5
|
thanks for those instructions, that clears up so much about the beadlocks
|
|
| |
|
12-31-2008, 06:07 PM
| #4 | |
| Newbie Join Date: Sep 2008 Location: Inola
Posts: 8
| Quote:
| |
|
| |
|
12-31-2008, 06:08 PM
| #5 |
| Rock Stacker Join Date: Oct 2008 Location: Richmond
Posts: 59
|
Great write up. Where did you get the lead rope? This is on my list of mods to do in the next week. Now all I need to do is sit and wait until my Proline 1.9 Flat Irons show up. |
|
| |
|
12-31-2008, 11:20 PM
| #6 |
| Rock Crawler Join Date: Dec 2005 Location: North Vancouver
Posts: 524
|
The lead rope you should be able to get from any fishing supply store. It's pounded flat with a hammer so it fits under the plastic ring. Thanks a bunch I'm glad someone's found it usefull  |
|
| |
|
01-01-2009, 08:59 AM
| #7 |
| Pebble Pounder Join Date: Jul 2008 Location: bedrock
Posts: 191
|
i used flat lead roof flashing from any hard ware store ,its cheap already flat ,its about 1/8 thick ,i got it by the foot ,did 4 wheels and have plenty left over. |
|
| |
|
01-01-2009, 04:08 PM
| #8 |
| Pebble Pounder Join Date: Sep 2008 Location: B.C., Canada
Posts: 117
|
u got quite the suspension geometry that u got going on there but nice links! |
|
| |
|
01-02-2009, 12:50 PM
| #9 |
| TN State Champ 11,12,13   Join Date: Oct 2008 Location: KTM Talk.com
Posts: 1,796
|
If you don't take care of the sharp edges on the pvc it will cut into the sidewall of the tire.:-(
|
|
| |
|
01-02-2009, 01:16 PM
| #10 |
| Rock Crawler Join Date: Dec 2005 Location: North Vancouver
Posts: 524
|
I'll keep the thread updated. I was going to round off the pipe but it doesn't sit much higher than the beadlock ring so I didn't see how it would be able to cut the tire. Time will tell. I have two packs on them and they are doing great. I had them bound up hard enough to break the shock caps off of both the front shocks. I'll have pics in a bit. Beads didn't budge. |
|
| |
|
03-09-2009, 09:55 PM
| #11 |
| Pebble Pounder Join Date: Jul 2008 Location: saipan cnmi
Posts: 153
|
been lookin for this thread... thanks guys!
|
|
| |
|
04-01-2009, 09:49 AM
| #12 |
| Quarry Creeper Join Date: Mar 2009 Location: ON THE ROCKS
Posts: 253
|
nice ride
|
|
| |
|
04-02-2009, 01:16 AM
| #13 |
| ~ Got PROPANE ? ~  Join Date: Feb 2009 Location: East-Central
Posts: 1,166
|
Nice....thanks for the tips..
|
|
| |
|
04-02-2009, 09:46 AM
| #14 |
| Rock Crawler Join Date: Mar 2009 Location: Cottontown
Posts: 880
|
thats a great write up. I have been trying to figure out exactly how to do this mod... brilliant. good job. |
|
| |
|
04-02-2009, 05:56 PM
| #15 |
| Pebble Pounder Join Date: Feb 2009 Location: Wisconsin
Posts: 138
|
thanks for the right up, i just got my mrc in the mail today, and have seen this thread before and want to do the beadlocks. thanks again |
|
| |
|
04-02-2009, 07:21 PM
| #16 |
| Rock Crawler Join Date: Dec 2005 Location: North Vancouver
Posts: 524
|
Glad it's helping guys. I said I'd keep the thread updated...lol it is. I haven't done any more to the 1.9 much but I have been making some rocks to put in my office and that's where the MRC will spend the rest of it's days |
|
| |
|
04-23-2009, 08:06 PM
| #17 |
| Quarry Creeper Join Date: Mar 2008 Location: Columbus OH
Posts: 234
|
Do you have any tips for getting the bend for the lower links? I may be a bit confused, Did you use "all thread" with a tube around it, or tap the end of a solid rod and insert 3mm between it and the ball end? Also, about ow much twist did this get rid of? Thanx for your work |
|
| |
|
04-27-2009, 08:45 AM
| #18 |
| Rock Stacker Join Date: Apr 2009 Location: Slovakia
Posts: 73
|
nice, very good beadlock mod tutorial... wonder how i will find right fit tube in mm, not inches...
|
|
| |
|
04-27-2009, 06:06 PM
| #19 |
| Newbie Join Date: Aug 2008 Location: NORFOLK
Posts: 17
|
Don't Get me Wrong the BEADLOCK MOD is GGGGREAT!! But the Shock Position caught my eye. I just did this to the front of mine. Need to move the ESC to do the back. Lowers Chassis and you can use Full Compression or a stiffer spring and still have MAX articulation. Very Cool!!!!!!
|
|
| |
|
04-27-2009, 09:39 PM
| #20 |
| Newbie Join Date: Mar 2009 Location: Anchorage
Posts: 7
|
I really like that 4 link. It would make alot of room for shocks! You must have built them your self. I think I will try to build a set. Great job, look great.
|
|
| |
|
| Thread Tools | |
| Display Modes | |
| |


 Linear Mode


