| |
| |||||||
 |
| | LinkBack | Thread Tools | Display Modes |
 05-26-2009, 10:12 PM
| #1 |
| I wanna be Dave   Join Date: Feb 2005 Location: Burnsville
Posts: 3,096
|
Jeff at Kamikaze Kustoms out did himself with this kit. It is loaded with goodies to tune an already nice kit. You can set it up to your preference with ease. You'll have to check out the Vendors Forum for the price, but trust me, it is a screaming deal. To purchase your own Kamikaze Kustoms MRC Zero kit, go here... http://www.rccrawler.com/forum/showthread.php?t=178555 My build Specs: chassis: Kamikaze Kustoms Mini Zero Battery: MaxAmps 860mah Lipo Motor/ESC: Novak Mongoose Servo: Hitec 7955TG Body: Mini Grappler Other upgrades: CVD's Aluminum diff lockers Aluminum Front C's and knuckles Transmission metal diff locker Mini-t and Hot Racing shocks There are so many great features, it's hard to know where to start. The skid is designed to get the tranny as low as possible. It not only pockets that little tab on the bottom of the tranny, but also it lowers the entire transmission. 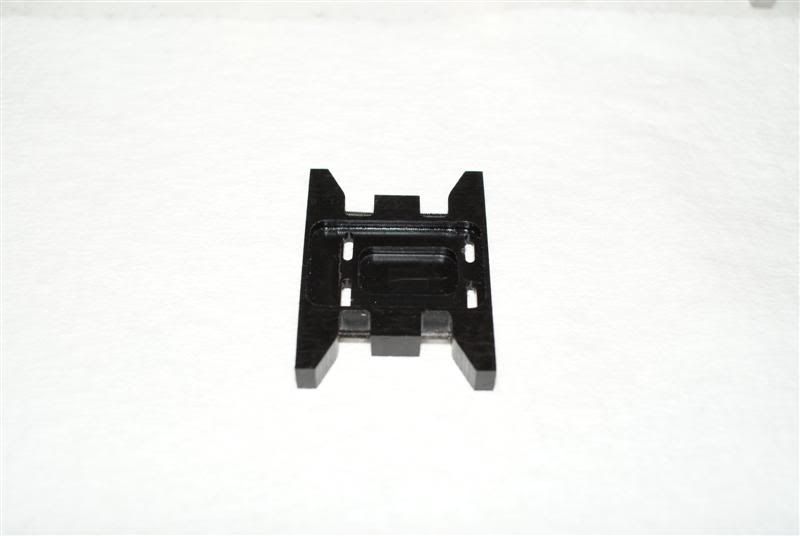 You'll also notice on the bottom of the skid plate, there are slots for you to place the transmission however you like. 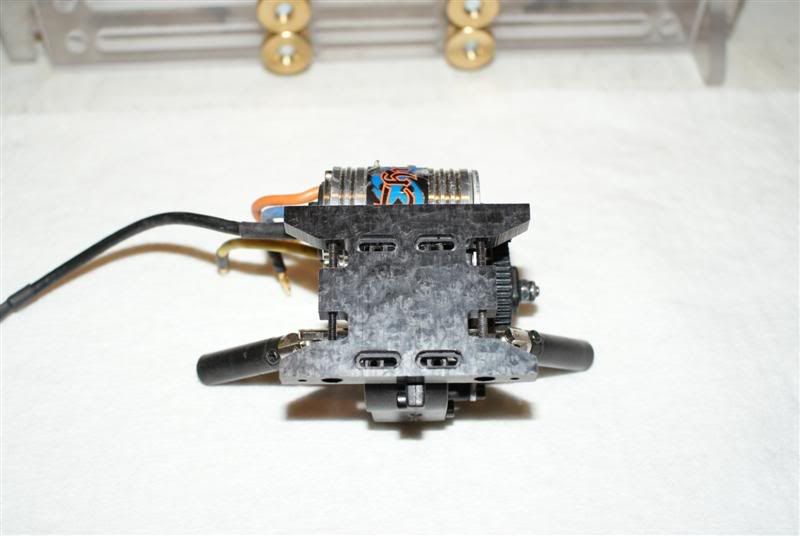 Another feature on the skid is the captured lower link screws. You won't be worrying about losing you links with this skid. Be sure to install your lower links before the side plates, which are what captures the screws. 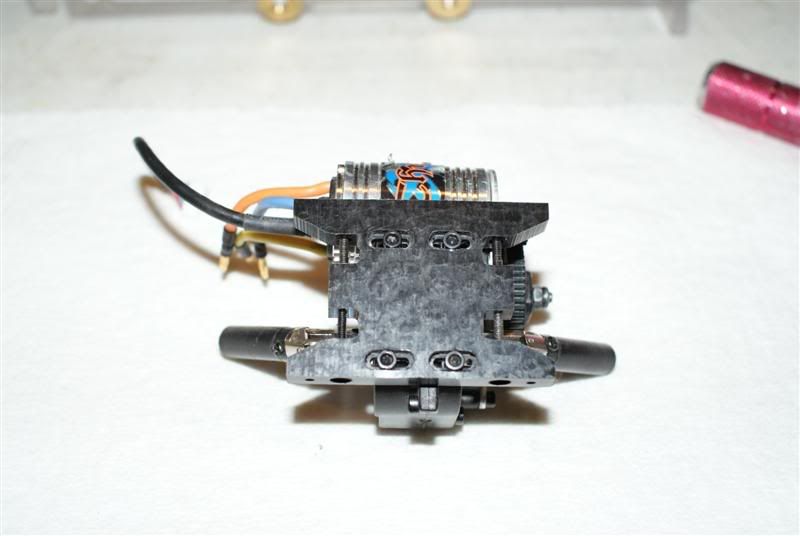 The screws are flush with the bottom of the skid. 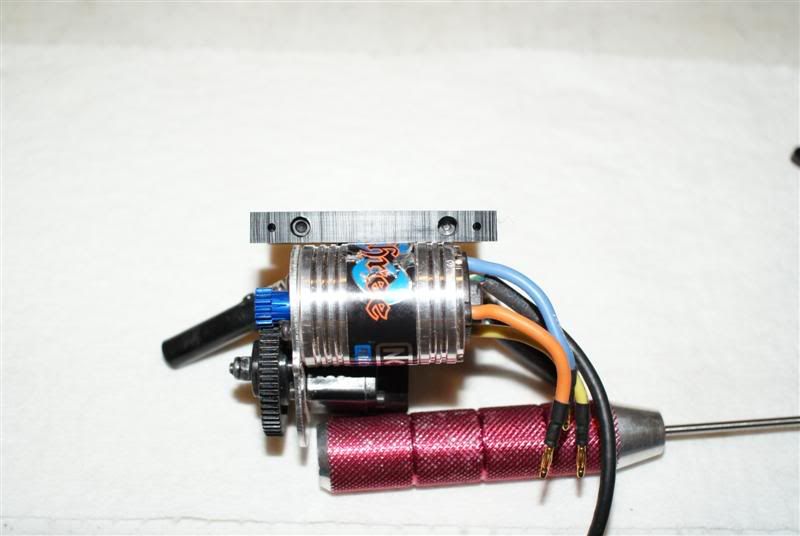 The kit includes 4, you read that right, there are 4 top link mount plates. And there are also extensions with strap holes/servo mounts. The plates can accommodate a full size servo. 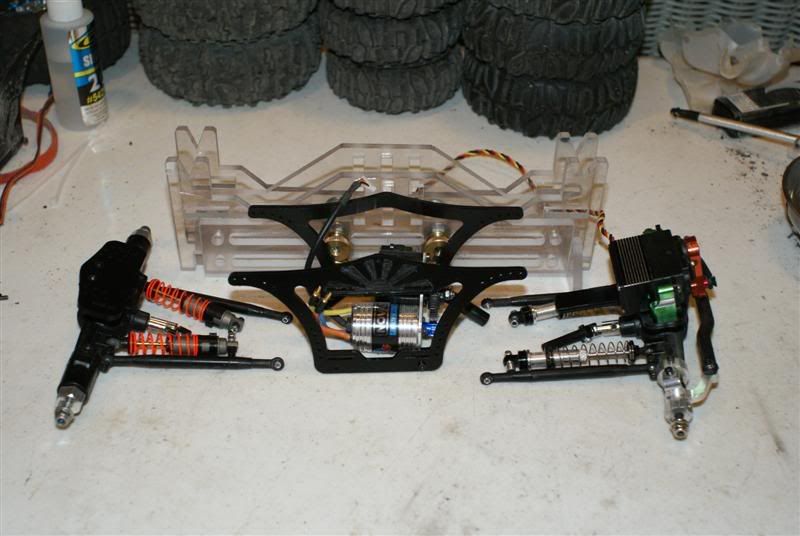 The chassis plates have some style and a lot of function built in. A Novak Mongoose motor has plenty of room and the transmission can fit on both sides of the truck. 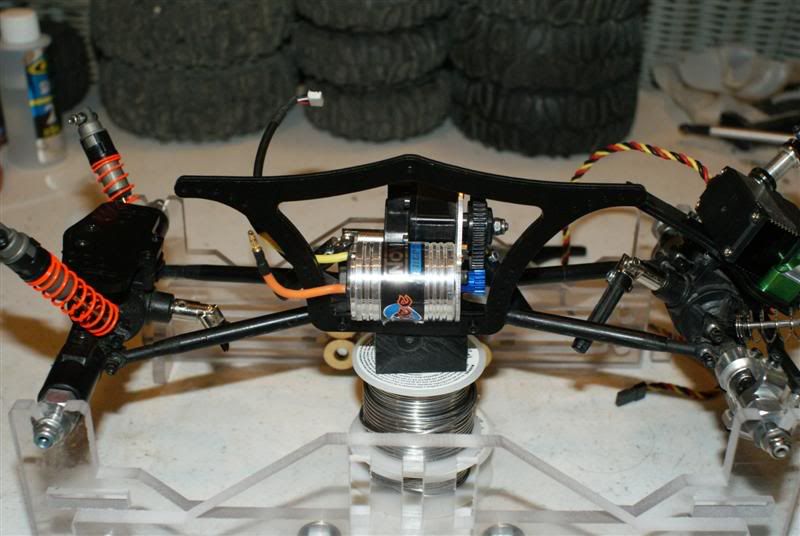 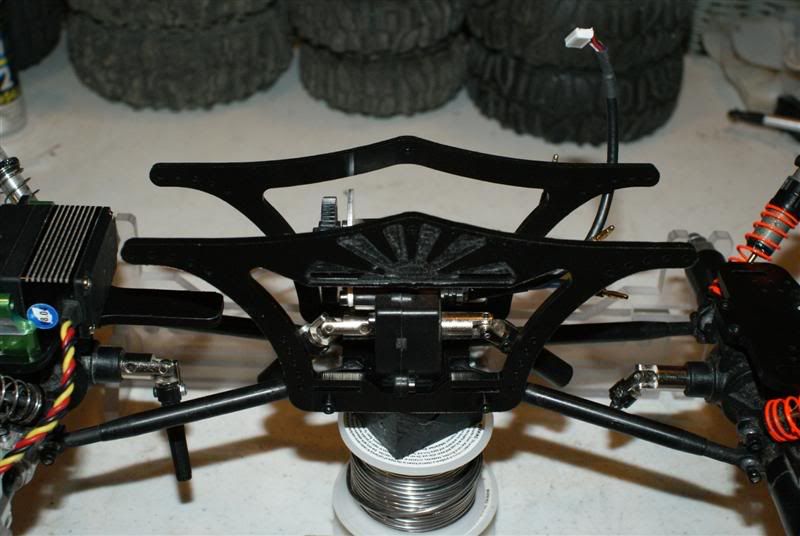 You can use your stock lower links or wait for the upgraded Delrin lower links that will be available from Kamikaze Kustoms. I am using the lowers from a mini GC2. 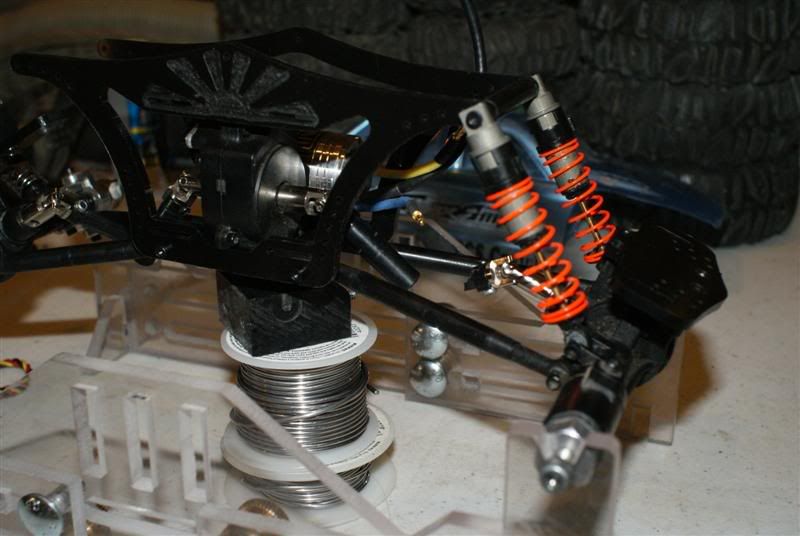 In the rear I have mounted some Losi Mini-T shocks. They fit so that they are parallel when seen from above. I threaded the shock screw right into the included cross brace, which comes drilled for the small hardware. 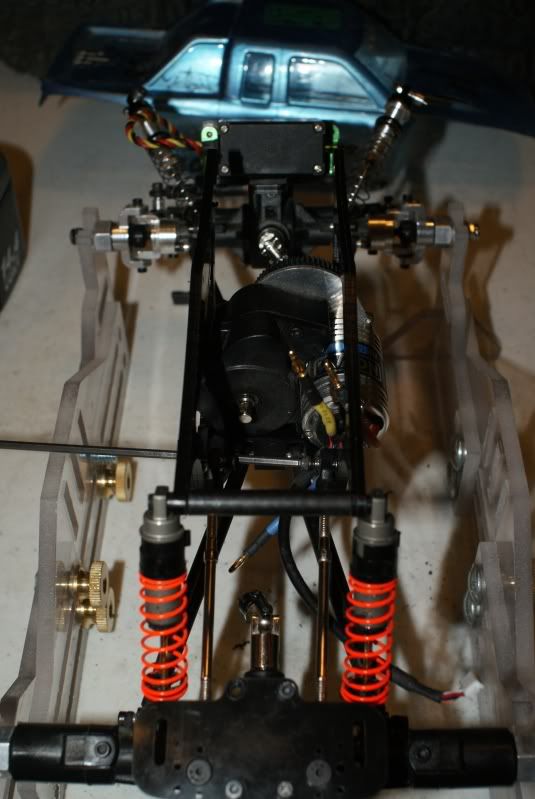 My upper links are some spare traxxas links I had, which use a standard size rod end. So I tapped the chassis and the link spacers for 4-40 hardware. I am using the spacers on the outside of the chassis to act as a locknut for the screws. 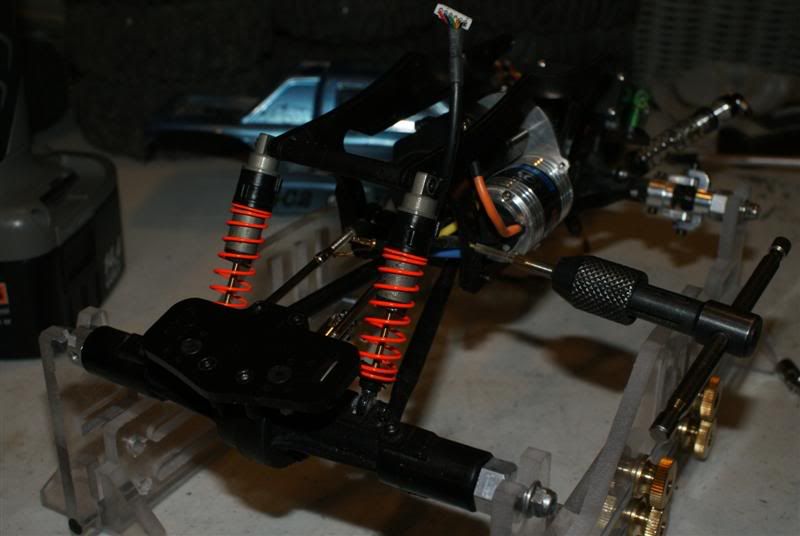 Last edited by SVEN; 05-28-2009 at 09:41 PM. |

|  |
| Sponsored Links | |
| | |
|
05-27-2009, 03:37 AM
| #2 |
| RCC Addict Join Date: Apr 2008 Location: Old Hickory
Posts: 1,137
|
Great lookin build! I got my kk zero on the way |
|
| |
|
05-27-2009, 08:25 AM
| #3 |
| WNYRCRC Join Date: Nov 2008 Location: Western New York
Posts: 540
|
Nice Job ! My Kami mrc chassis is on its way also. Should be here any day. I like the lowers. What size is the delrin rod. I was just going to make a set but I only have 5/16 rod and didnt know if it would be too big.
|
|
| |
|
05-27-2009, 10:53 AM
| #4 |
| Pebble Pounder Join Date: Dec 2008 Location: Tomball, Tx
Posts: 168
|
The design of this chassis is first rate. The options of mounting servo, battery and trans positions are phenomenal! Can one mount a mini servo for steering? And on the skid plate, the machining of the recess is beautiful. I've run out of superlatives. How about some more info on that chassis jig? |
|
| |
|
05-27-2009, 08:14 PM
| #5 | |
| RCC Addict Join Date: Apr 2008 Location: Old Hickory
Posts: 1,137
| Quote:
 | |
|
| |
|
05-27-2009, 08:17 PM
| #6 |
| MODERHATER   Join Date: Nov 2005 Location: Colorado
Posts: 10,939
|
Hmmm sure looks cool, I wonder if I shall see mine soon?
|
|
| |
|
05-28-2009, 05:49 AM
| #7 |
| RCC Addict Join Date: Nov 2007 Location: E.T.R.C.
Posts: 1,575
|
Looks killer SVEN Wish you were bringing it to the Sunbright comp this weekend |
|
| |
|
05-28-2009, 09:54 AM
| #8 | |
| Rock Crawler  Join Date: Sep 2006 Location: Esco.
Posts: 930
| Quote:
| |
|
| |
|
05-28-2009, 10:54 AM
| #9 |
| Rock Crawler Join Date: May 2007 Location: Glendora
Posts: 571
|
Great PICS and write up.....THANKS! I am waiting on my ZERO chassis also. I will definitely watch this write up for more TECH info.
|
|
| |
|
05-28-2009, 11:04 AM
| #10 | |
| I wanna be Dave Join Date: Oct 2005 Location: Columbia TN
Posts: 6,154
| Quote:
I bet you see them at the same time cause I shipped them all together. | |
|
| |
|
05-28-2009, 11:22 AM
| #11 |
| Rock Stacker Join Date: Mar 2006 Location: Las Vegas
Posts: 87
|
keep the pics coming |
|
| |
|
05-28-2009, 08:52 PM
| #12 | |||||||
| I wanna be Dave Join Date: Feb 2005 Location: Burnsville
Posts: 3,096
| Quote:
Quote:
. Quote:
Quote:
Sorry, I don't know. I got to watch mine be born Quote:
Quote:
Quote:
| |||||||
|
| |
|
05-28-2009, 10:09 PM
| #13 |
| I wanna be Dave Join Date: Feb 2005 Location: Burnsville
Posts: 3,096
|
The front Hot Racing shocks were mounted similar to the rear shocks, bolting right into the chassis spacer. 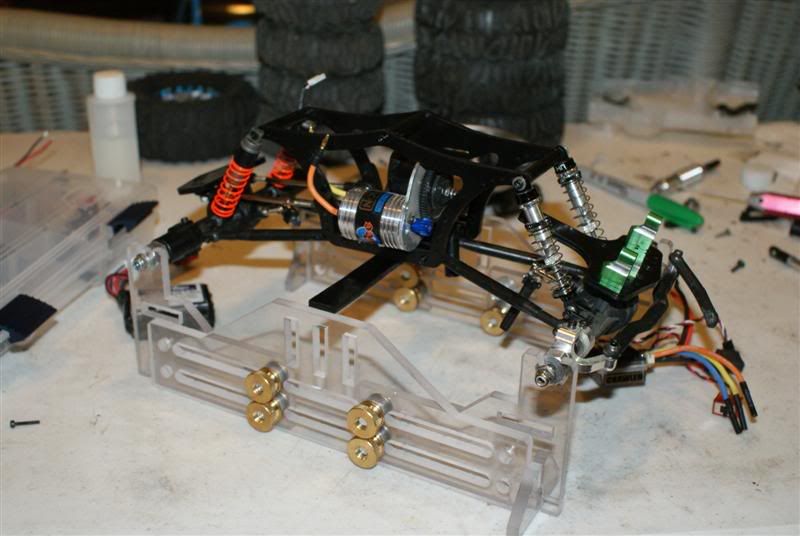 I couldn't make the zip tie wrap under the rear plate due to the upper links. So I cut the head off of one zip tie and used it to cap off the other zip tie. Thus ending up with this.... 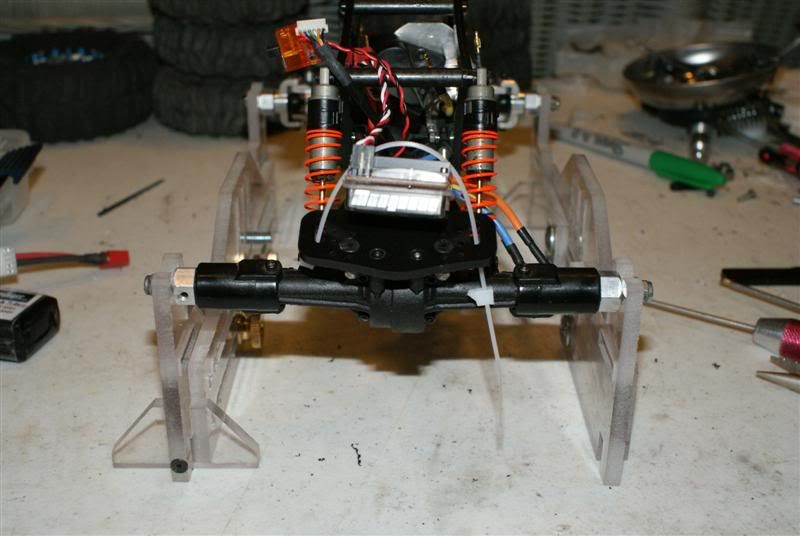 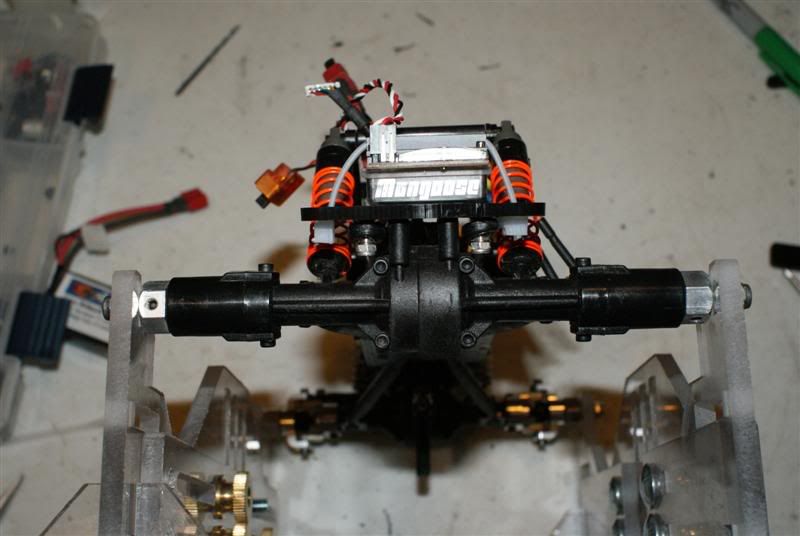 Front links are mounted just like the rears. I counter sunk the screw heads to clear the servo. I don't think Kamikaze Kustoms warranties stuff that has been counter sunk, so do this at your own risk. I figured if it breaks, I've already got a spare that came with the kit. If you don't want to counter sink, you can always use those servo mount/plate extensions as a spacer between the plate and the servo. 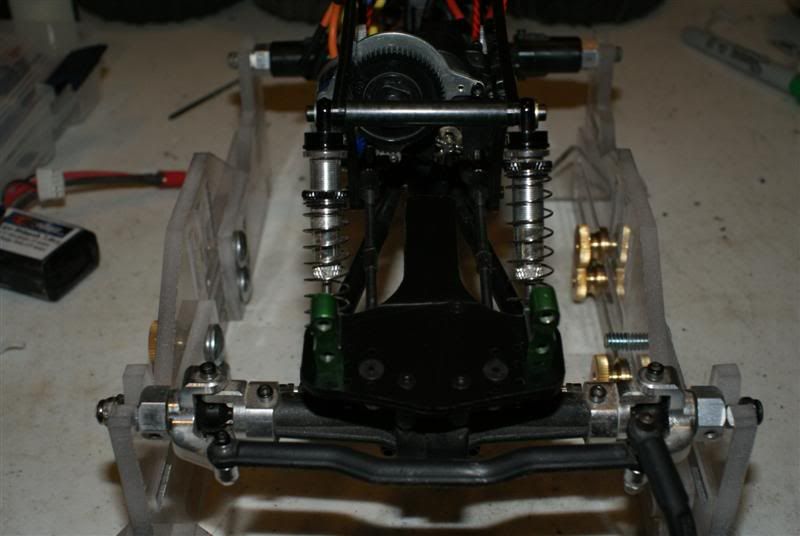 Servo is installed and ready for action. Servo horn breakage should not be an issue. 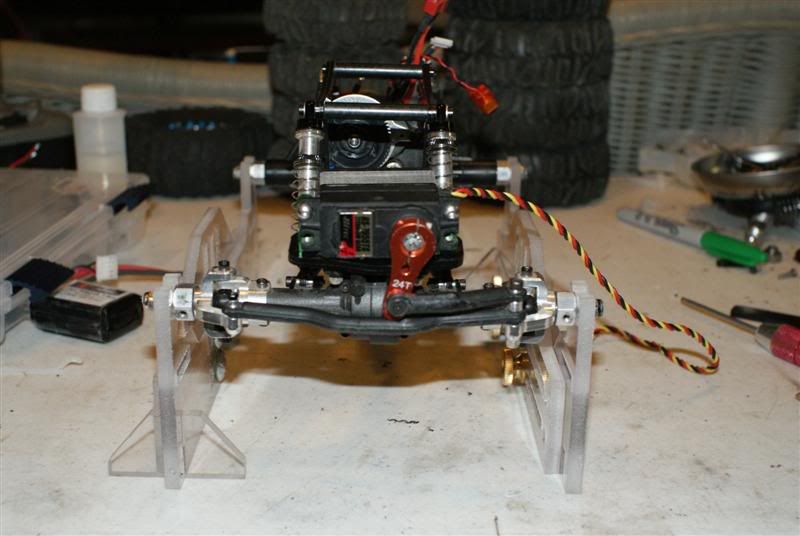 This is what I had left over from my build. Minus one shock spacer that I can't seem to find any where. I didn't use the Lipo mounting parts because I installed my Lipo on the front servo plate extension. 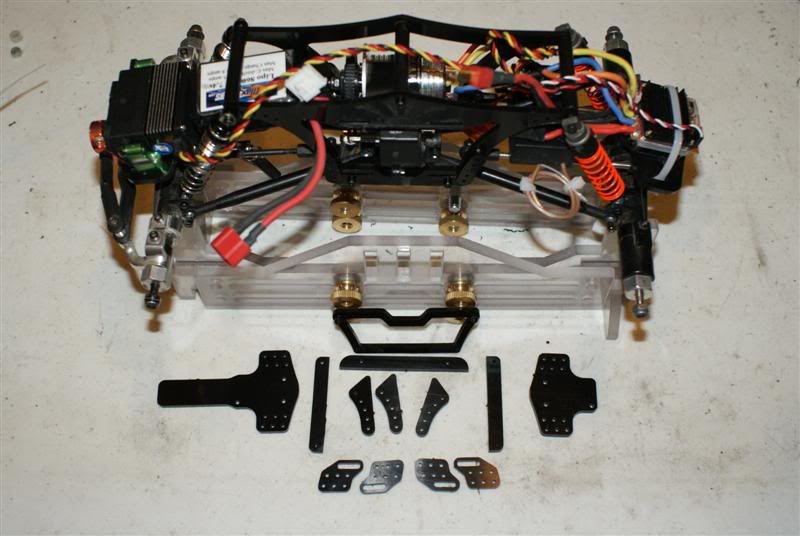 With the body (not mounted yet). I will be drilling small holes in the cross braces. And then put the body posts on those. 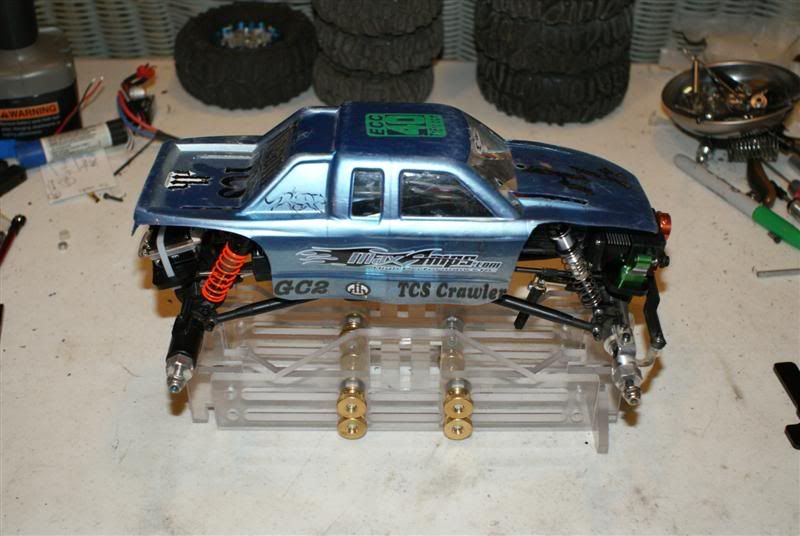 Everything is installed, just waiting on a drive shaft to make it ready to crawl. 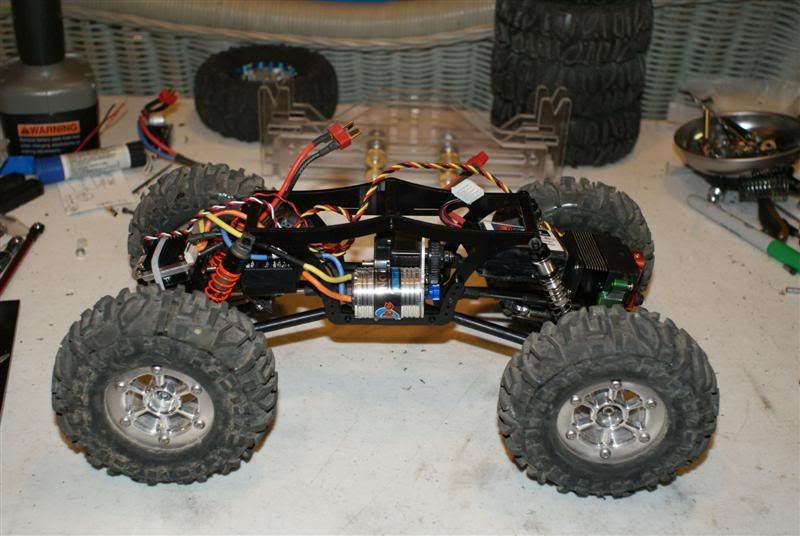 Ride height...comes in about 2.5 inches. 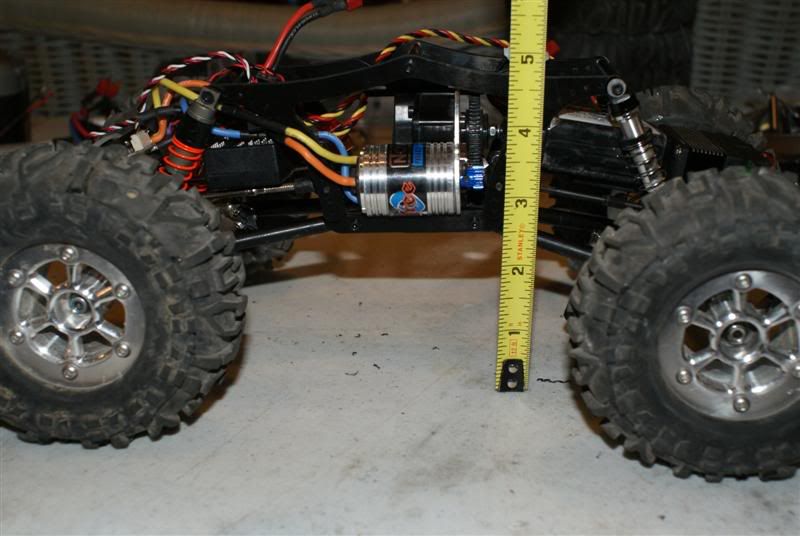 Mandatory flex shots. 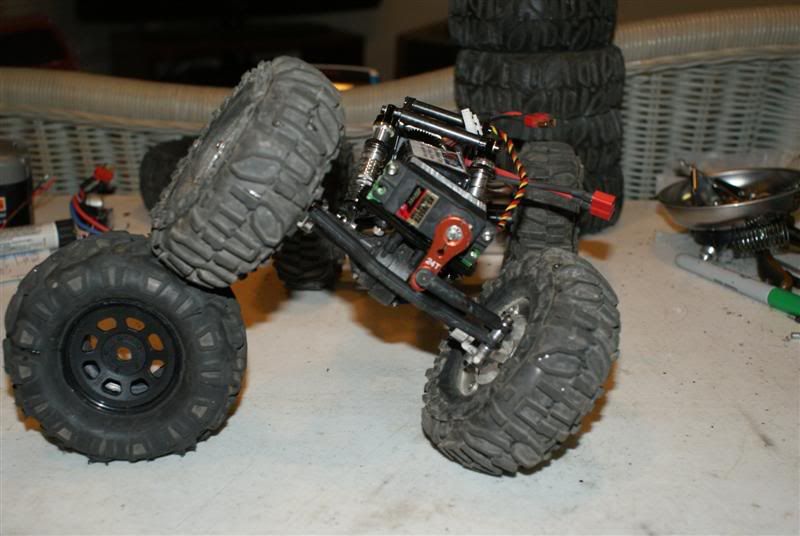 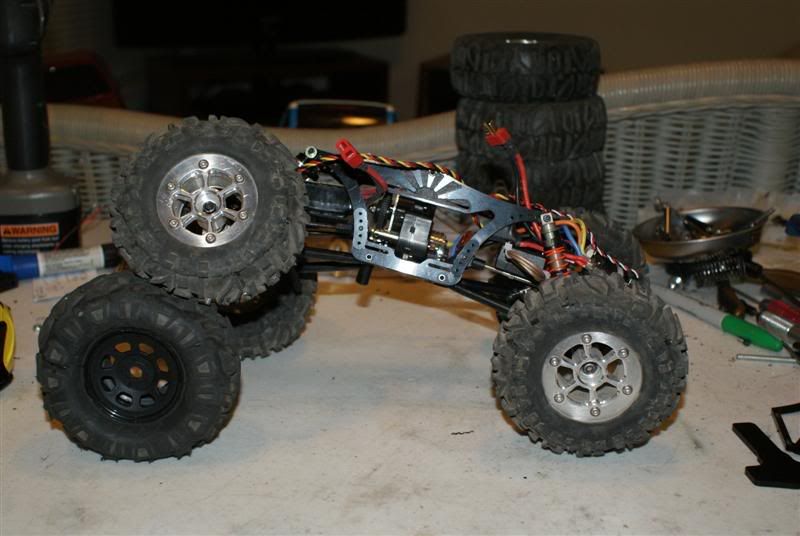 |
|
| |
|
05-29-2009, 05:20 AM
| #14 |
| Pebble Pounder Join Date: Dec 2008 Location: Murfreesboro, TN.
Posts: 108
|
Looks good Sven, All those pics will help me get mine together. |
|
| |
|
06-02-2009, 08:23 PM
| #15 | |
| I wanna be Dave Join Date: Feb 2005 Location: Burnsville
Posts: 3,096
| Quote:
Did you get it together yet? Let me know if you have any questions. | |
|
| |
|
06-03-2009, 01:00 PM
| #16 |
| RCC Addict Join Date: Nov 2007 Location: E.T.R.C.
Posts: 1,575
|
Get this on the rocks yet ?? I saw Jeff's @ the ETRC comp and Joe took first with it Looks to be an awesome set up |
|
| |
|
06-03-2009, 09:37 PM
| #17 | |
| I wanna be Dave Join Date: Feb 2005 Location: Burnsville
Posts: 3,096
| Quote:
Nope, not yet. New drive shafts should be here friday. | |
|
| |
|
07-21-2009, 07:54 PM
| #18 | |
| Pebble Pounder Join Date: Dec 2008 Location: Murfreesboro, TN.
Posts: 108
| Quote:
| |
|
| |
|
08-13-2009, 06:59 PM
| #19 |
| I wanna be Dave Join Date: Feb 2005 Location: Burnsville
Posts: 3,096
|
Ok, so I never could get the mongoose to act like I wanted, so I switched back to the Tekin FX-R and brushed motor. Before going back to the Holmes Mini, I am going to try a Losi Slider motor with a 10 tooth pinion. 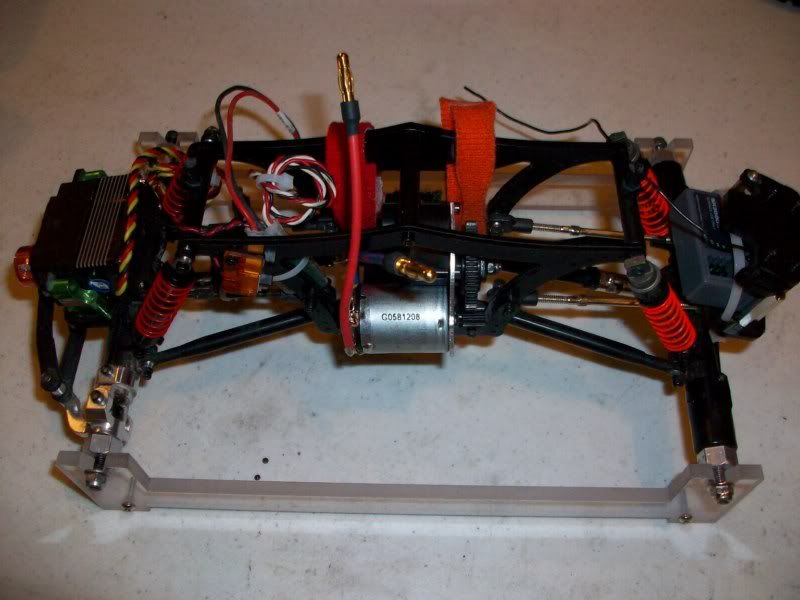 The Hot Racing shocks I had in the front were a little too tall for my liking and gave me more flex than I wanted. So, I swapped in some Mini-t front shocks to bring it back down. 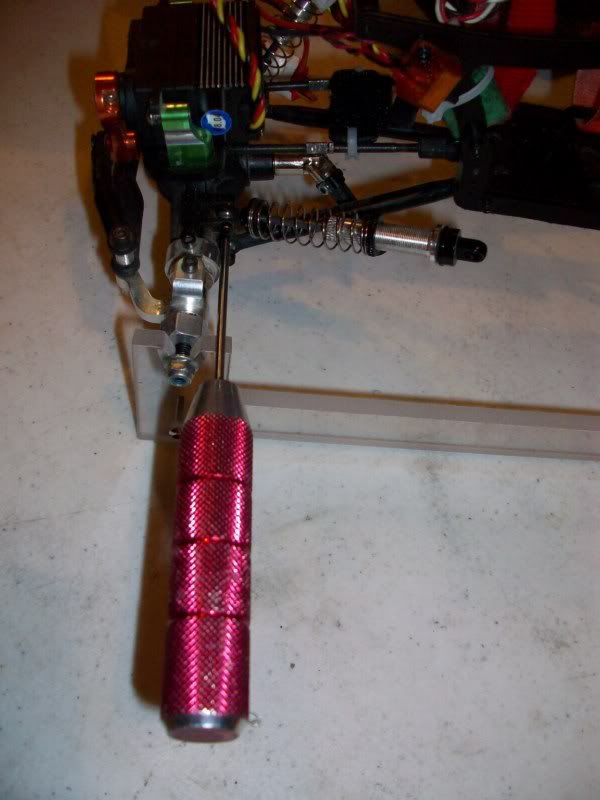  This is now the max flex... 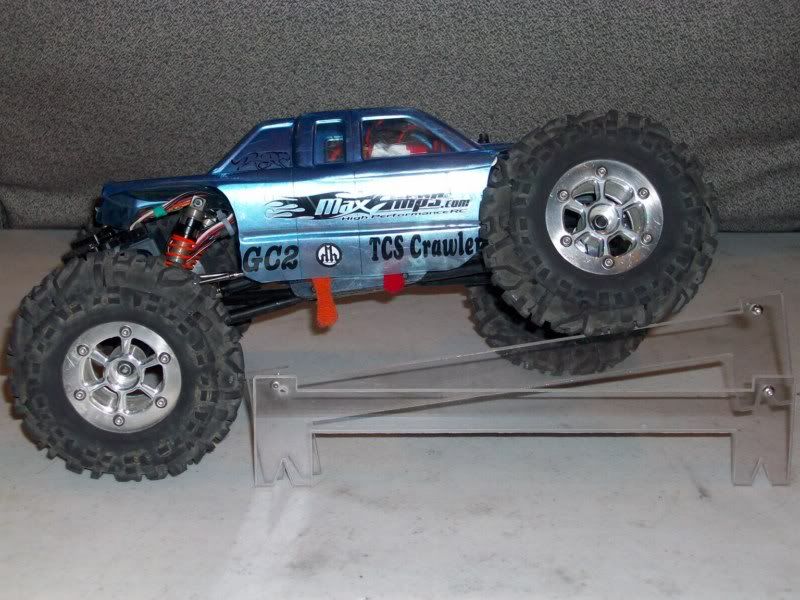 My transmission was feeling terrible. I opened it up to find all of the screw heads on the locker were sheared off. I found two of them inside the case, not really sure where the other one went 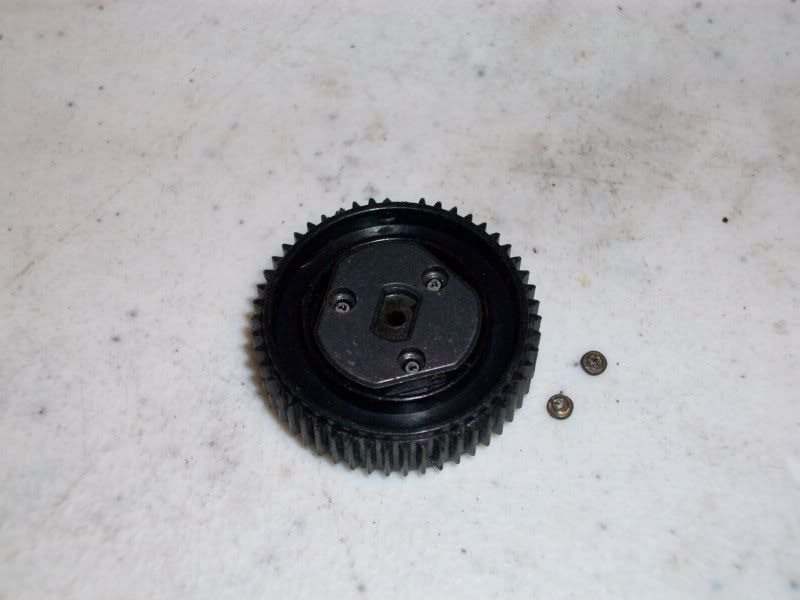 |
|
| |
|
08-13-2009, 07:23 PM
| #20 |
| RCC Addict Join Date: Apr 2008 Location: Old Hickory
Posts: 1,137
|
could you post up a better picture of your rx protection? Needin some ideas on how to mount mine I've got the Futaba and it's not very space friendly!
|
|
| |
|
| |


 Linear Mode


