| |||||||
Loading
 |
| | LinkBack | Thread Tools | Display Modes |
| |||||||
 |
| | LinkBack | Thread Tools | Display Modes |
| | #21 |
| Pebble Pounder Join Date: Jul 2008 Location: Denver
Posts: 148
|
Yeah, I have seen those around on here. More torque is always a plus |
| |  |
| Sponsored Links | |
| | #22 |
| Pebble Pounder Join Date: Jul 2008 Location: Denver
Posts: 148
|
Well, I have packed it up for now as I am moving across the country. A little sad I never got to crawl it around Denver and the rest of CO, but I figure if I am ever going to get this thing finished I need to live somewhere it is actually snowy in the winter forcing me inside to work on this guy. Unfortunately the weather here has been too nice, anywhere from 60-70 degrees during the day, which is why i have been outside playing and not working. So, to force myself to get more work done on this guy, I have decided to move to Ipswich, MA. For those of you who don't know, that is where they have been buried under 6ft of snow over the past month. I just hope it doesn't all melt as soon as I get there... Winter storm blasts New England with two feet of snow, severe winds - The Washington Post 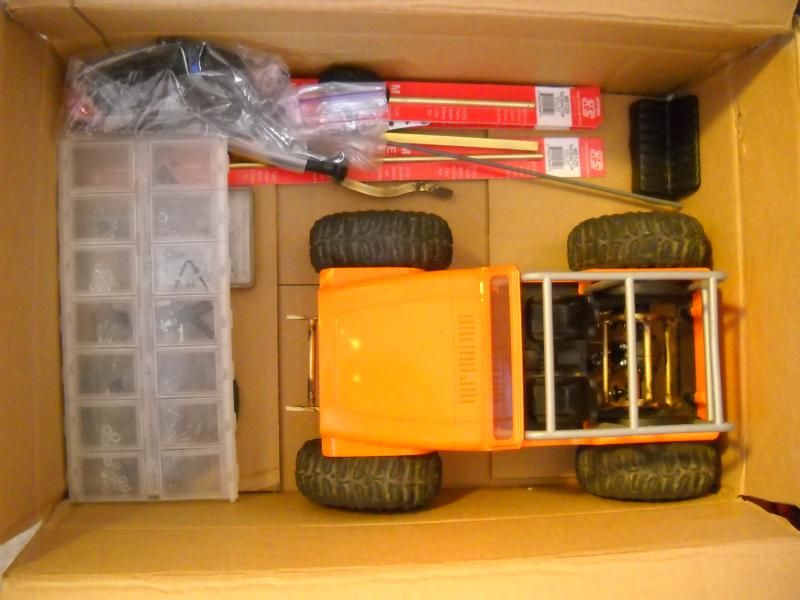 |
| |  |
| | #23 |
| Newbie Join Date: Feb 2012 Location: Wollongong NSW Australia
Posts: 32
|
Do you have a link to where you both gut that motor?
|
| |  |
| | #24 |
| Pebble Pounder Join Date: Jul 2008 Location: Denver
Posts: 148
|
I have not picked one up, but a quick google search resulted in a few distributors, most if not all were out of stock. :(
|
| |  |
| | #25 |
| Newbie Join Date: Feb 2012 Location: Wollongong NSW Australia
Posts: 32
|
That's what I found 2 this motor seems to be popular and is designed for a chopper
|
| |  |
| | #26 |
| Pebble Pounder Join Date: Jul 2008 Location: Denver
Posts: 148
|
It's been some time since I have wrenched on this guy! Weather has been nice and sunny so I have spent much time riding my bike and not much time on the crawler. Winter is coming, once it hits I will be wrenching a lot more! Onto the small bit of progress: Needed to connect the trans to the transfer case so I ordered a 4mmx4mm universal coupler for it. Trimmed down the input of the VXL trans and filed a flat for the setscrew. Just about the right length, left some room on the input shaft for adjustment in the future. Still need to mount the VXL trans to the skid and I can finish brazing the upper link mounts at the frame. Coupler 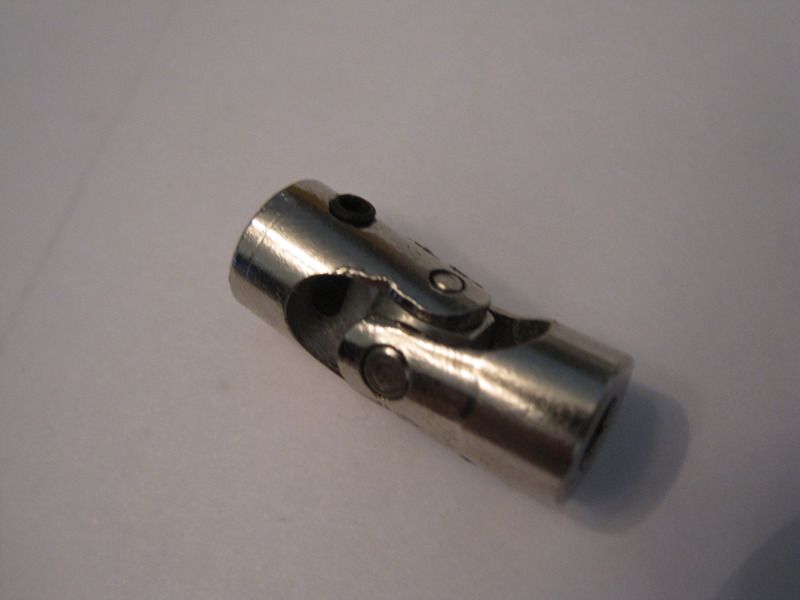 modded input shaft 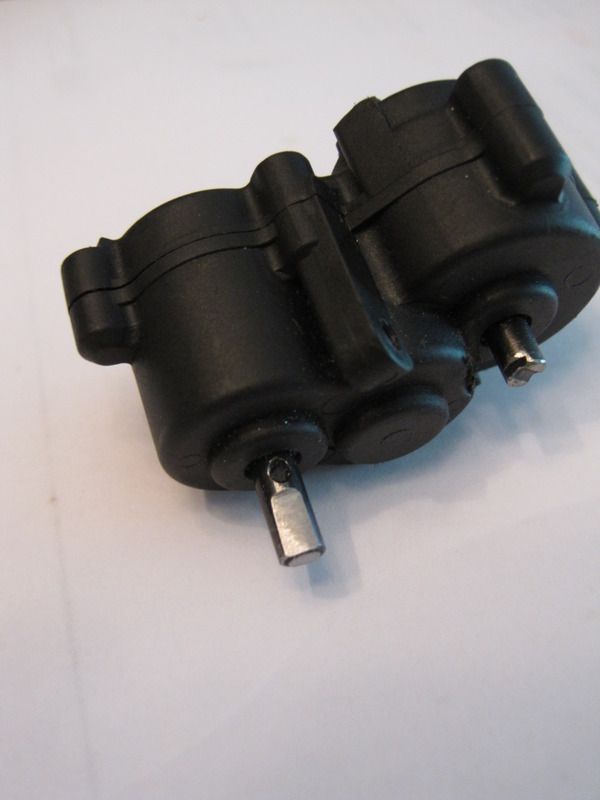 Trans and transfer case connected 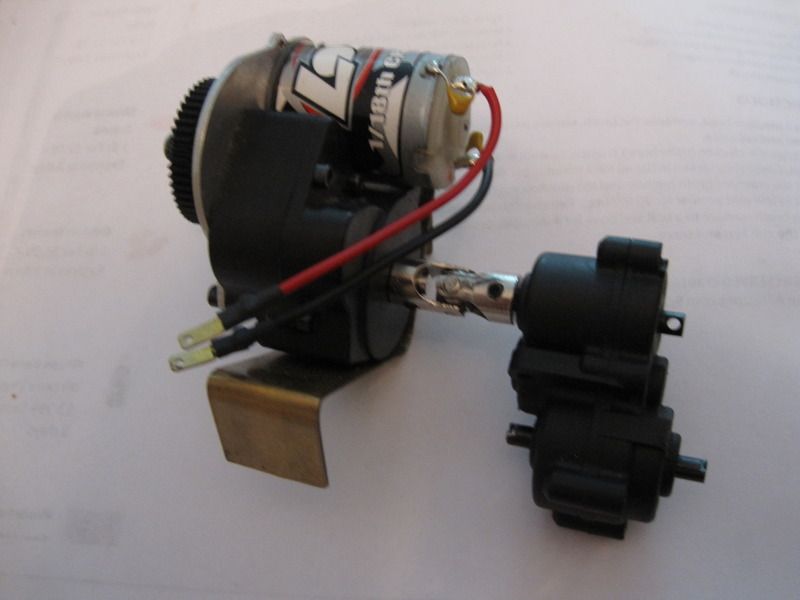 In the frame, mounts still need to be made 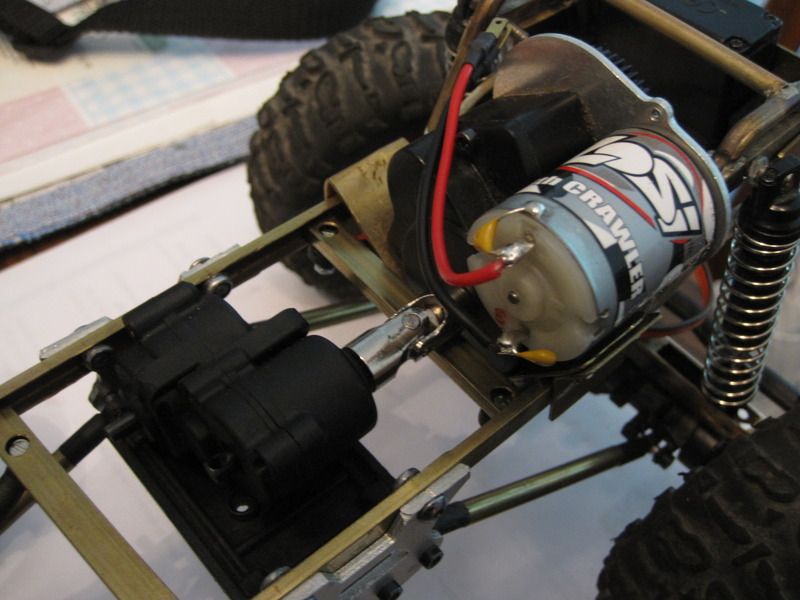 Also got a gift certificate from ebay so I got a Losi MRC motor for free, could not locate one of the xtreme 380 motors in stock at the time. |
| |  |
| | #27 |
| Newbie Join Date: Feb 2012 Location: Wollongong NSW Australia
Posts: 32
|
I ended up getting a slickrock motor for mine.
|
| |  |
| | #28 |
| Pebble Pounder Join Date: Jul 2008 Location: Denver
Posts: 148
|
Got some progress made. Figuring out the t-case mount and came up with an idea to use either U-channel or angle aluminum for the mount itself, only problem was I could not find a local supplier for a piece an inch long. Finally asked my brother to grab me some scrap from his work and he found me some 1/8" thick angle to work with: 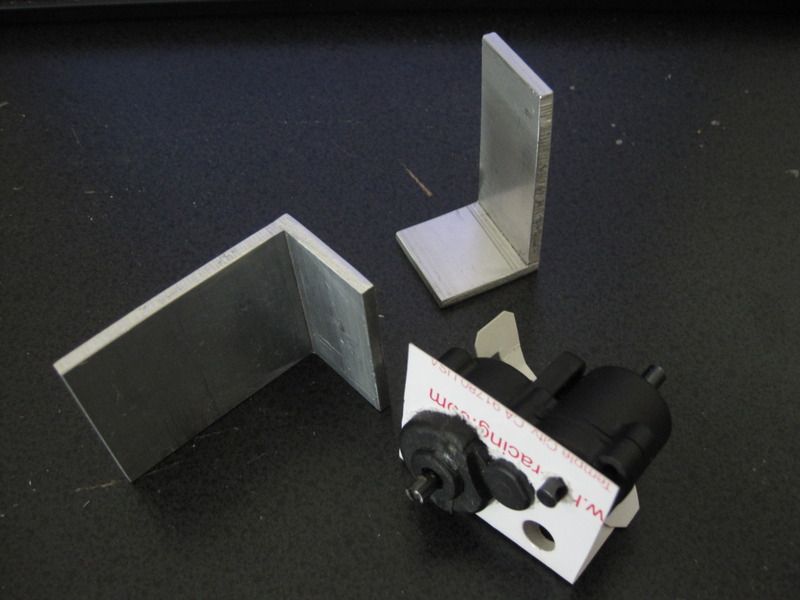 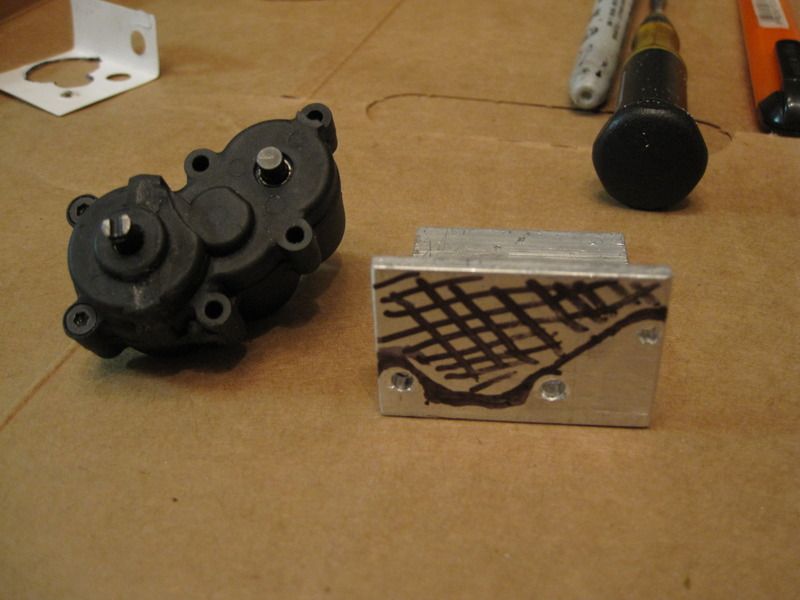 After a botched attempt at drilling holes to mount the t-case I finally had the correct locations for them and started cutting and filing until I had this: 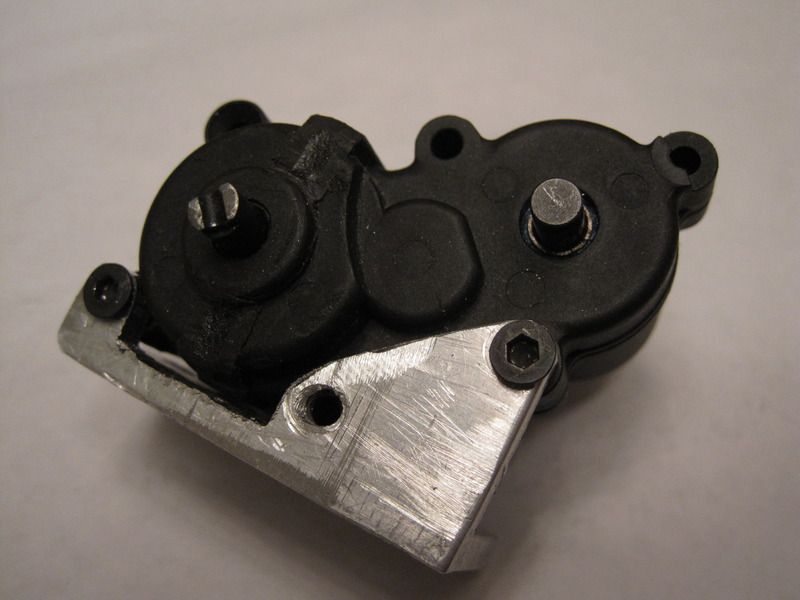 Doing some clearancing on the bottom to accommodate the MRC skid, you can see my first three holes originally intended for the t-case: 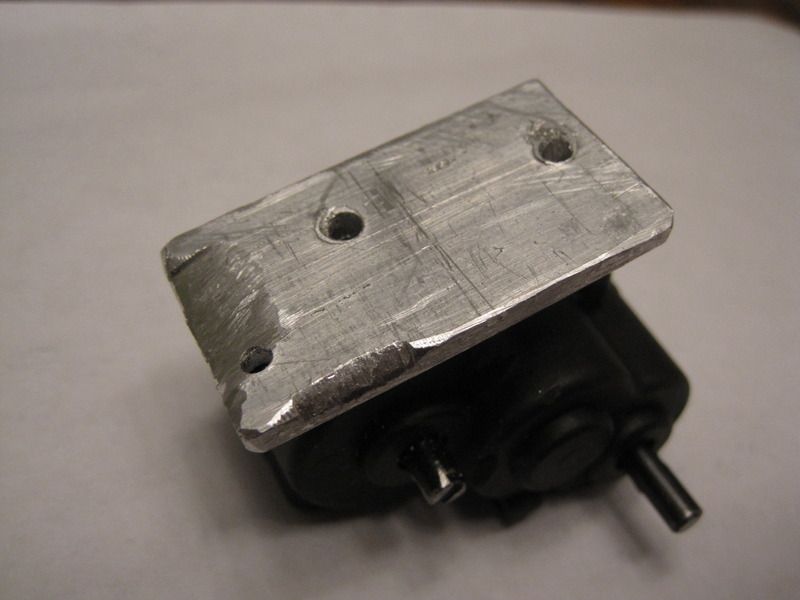 Fits fairly well in there, will need to trim the floor pan a little to make room for it, but that is not too much of a concern: 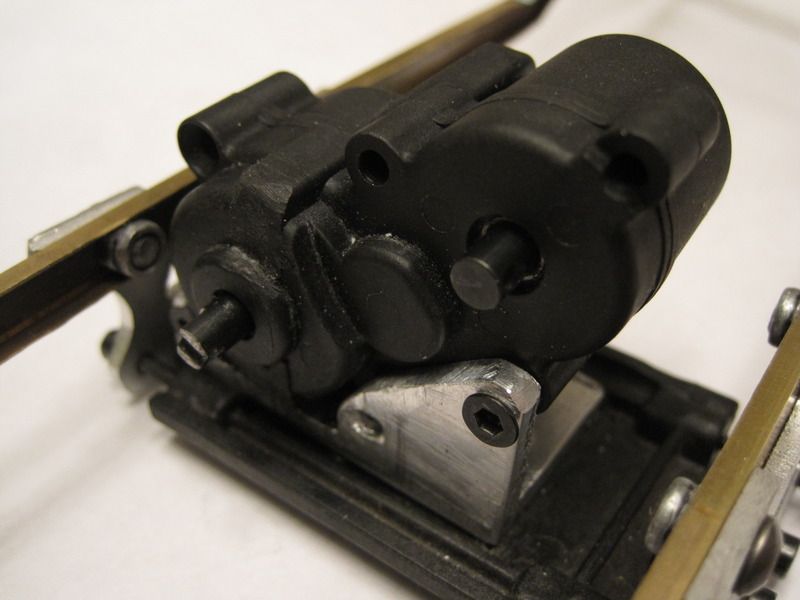 Here it is connected to the MRC transmission, still need to drill the mounting holes for the t-case mount, and the trans mount. I feel like I made some decent progress with the difficulties I was having mounting the drive train, but that the fun with doing something custom! 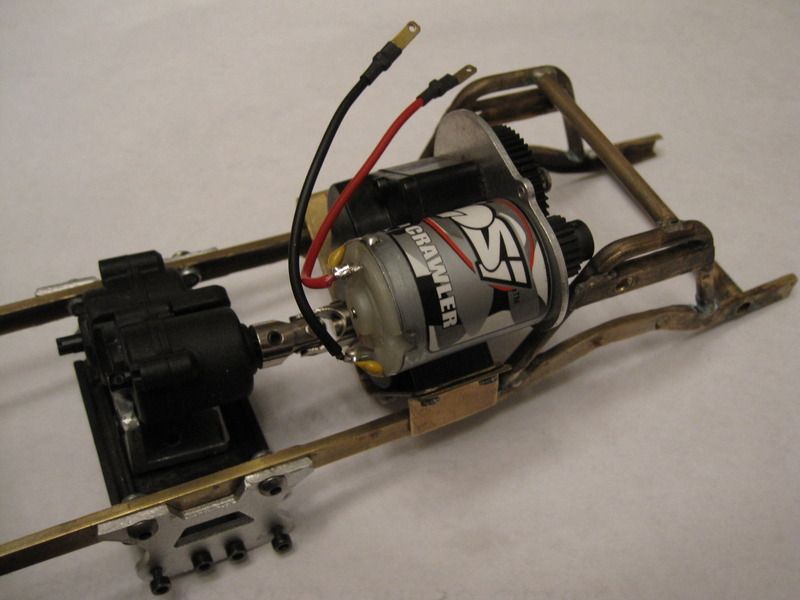 You may have noticed my pinion came in, have some clearance issues to keep in mind with the location of the pinion and the passenger shock tower, I should have enough room to play with: 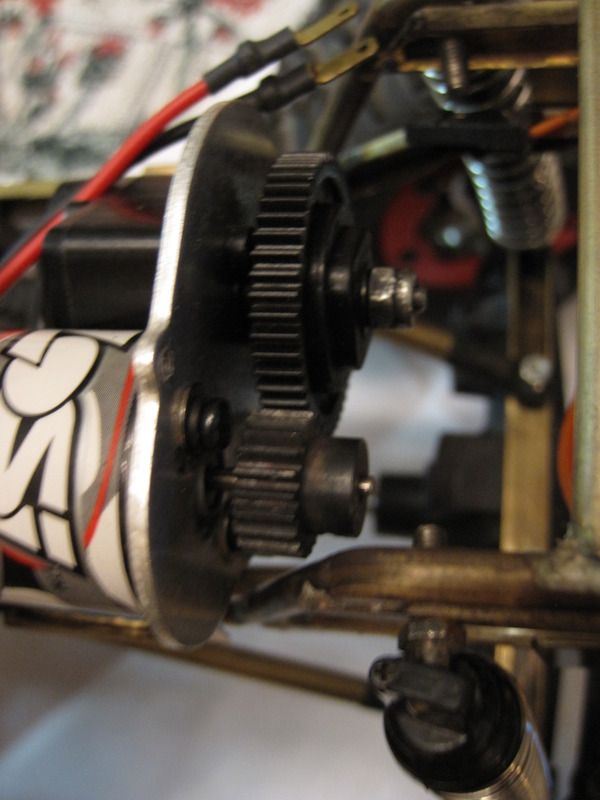 I am planning on ordering another complete screw kit so I can fasten everything with the same hardware as the rest of the MRC parts, need a few for the t-case as well! Almost finished with the frame and drivetrain, next come body mounts and a roll cage! |
| |  |
| | #29 |
| Pebble Pounder Join Date: Jul 2008 Location: Denver
Posts: 148
|
It has been quite a while since my last update. Probably the longest year of my life has passed and I am finally working on my crawler again! Have a few pics of the progress I have made, accomplished quite a bit in the past few days! I like taking pictures, but I felt like I had not taken many during the construction, just shots after I had finished some larger stages of the build. I left off with just finishing up the transfer case mount, still working on upper suspension mounts and mounting the transmission. I soldered the trans mount and both upper suspension mounts into the frame. Considering drilling through the trans mount and frame so I can bolt it up, thinking the soldered connection may not hold up there. I tried my hardest to figure out a way to mount the motor lower to help with the C.O.G. but ended up placing it here as it was the only way to line the shafts up between Trans and Transfer case. 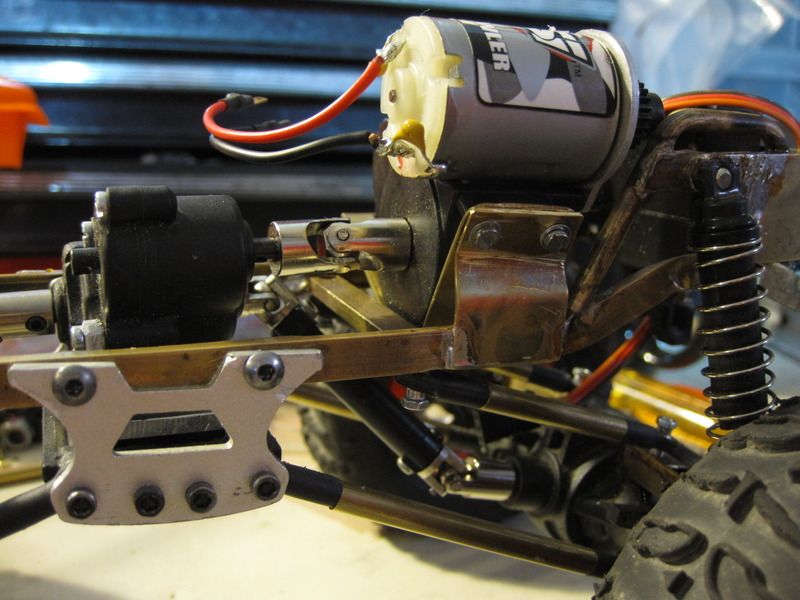 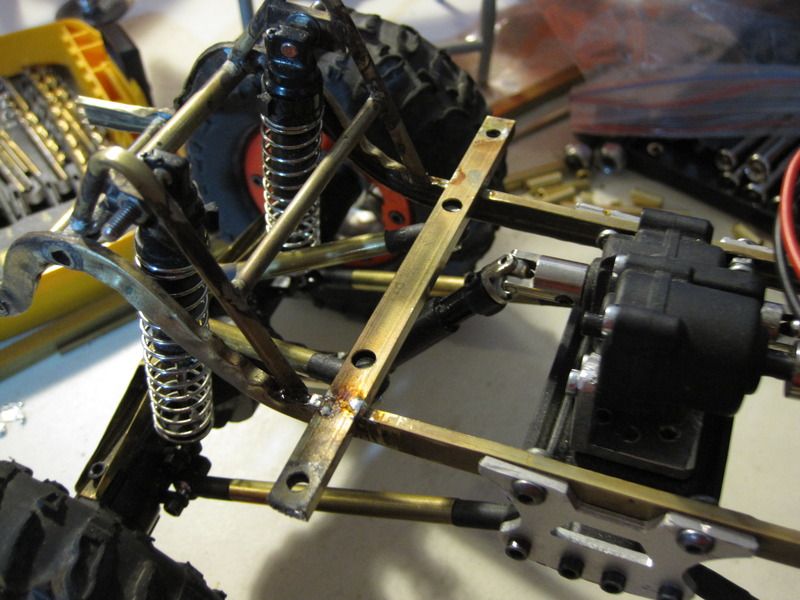 There is slight interference with the axle case and the upper link mount at full stuff. A little shaving should help that. 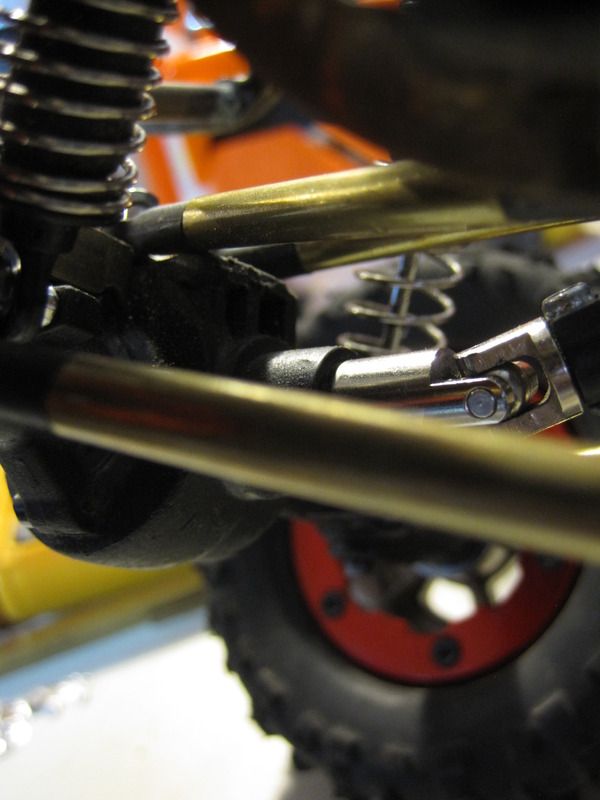 Now that the drivetrain and suspension were almost complete and bugs worked out I felt it was finally time to start working on the body. First step was to trim the floor pan to accommodate the transfer case. I started by removing the center console in one piece so I can reuse it, it sat low and I wanted to raise it anyways, then I trimmed and trimmed until the floor sat flat on the frame. Planning on building a trans tunnel and placing the original console on top of it. 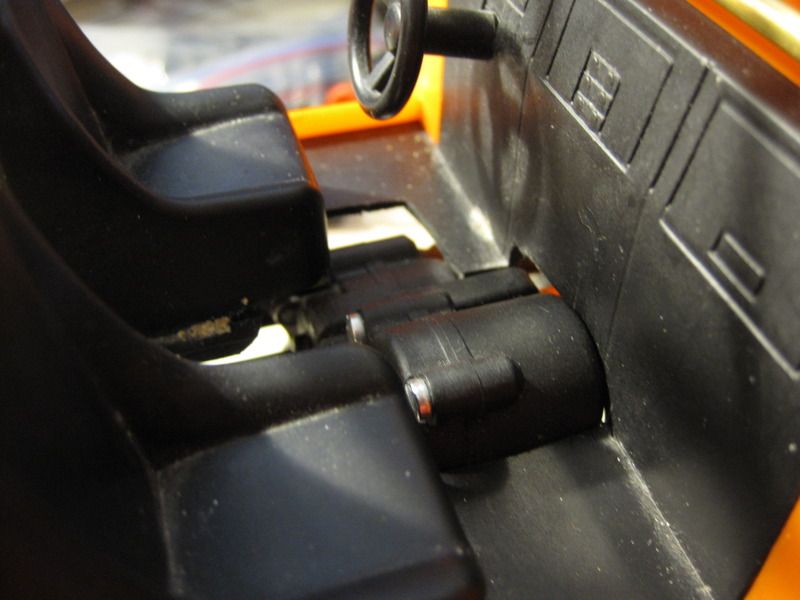 With my floor pan sitting flush, and my drivetrain 90% complete (still need to hook up steering) I was itching to get started on the cage! After a couple of years envisioning what I wanted to do, I finally came up with a plan for how to accomplish it. I started with a 4"x10" sheet of aluminum, drilled two holes in the center of it that corresponded with the two main hoop mounting points, then proceeded to bend it into shape to simulate the bulkhead mounting points and drilled two holes there for the front cage struts. This was to be my cage "Jig" 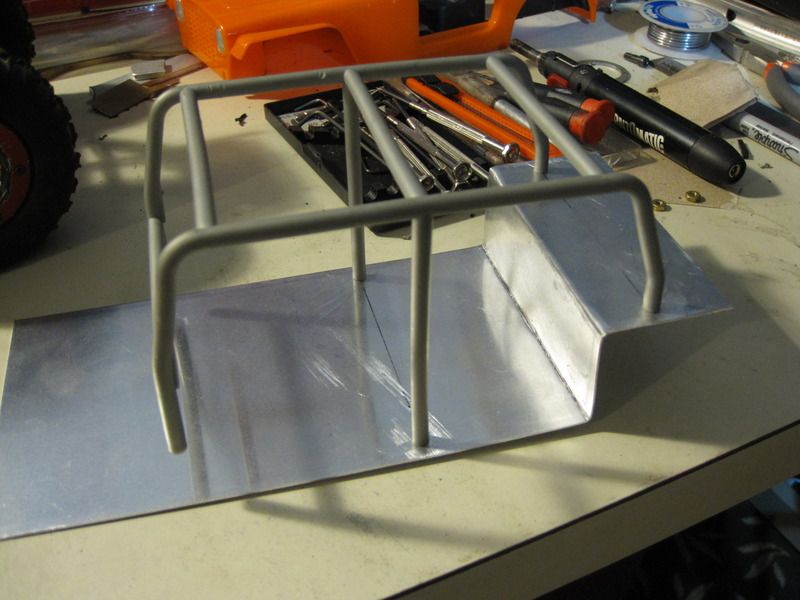 Then, I bolted these brass nuts to the Jig so I could solder the cage to these, then bolt it into the tub. 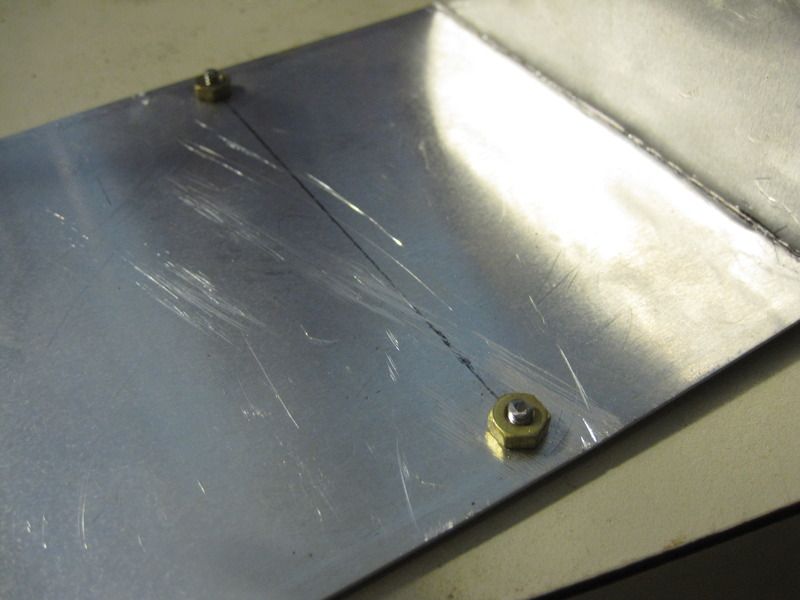 Main hoop soldered into place 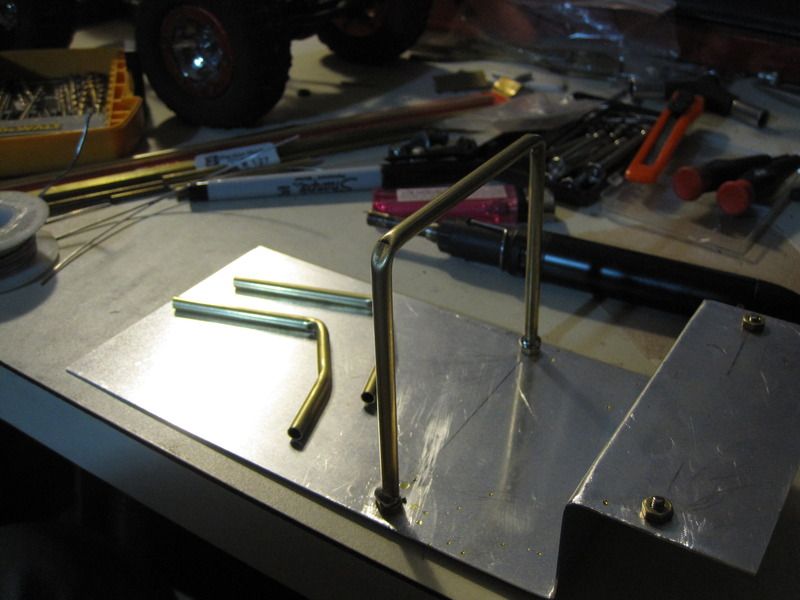 Main front structure constructured 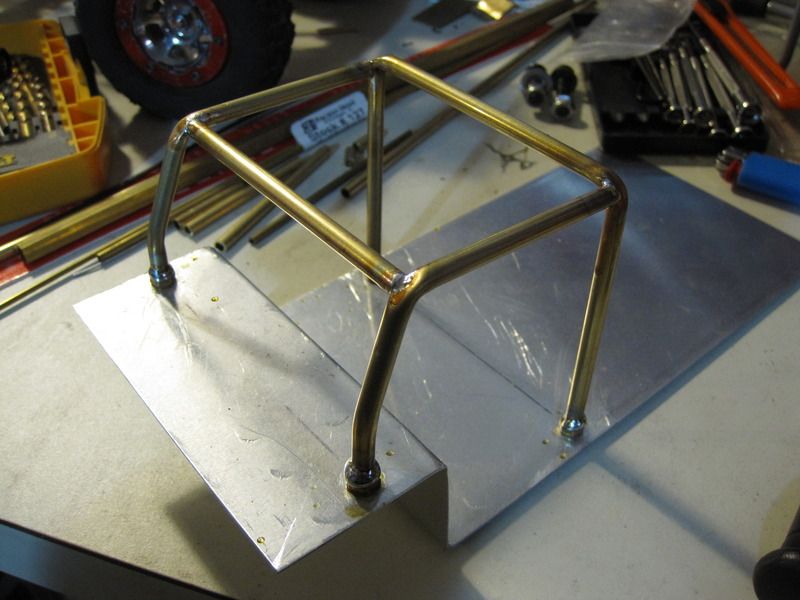 Adding structural support 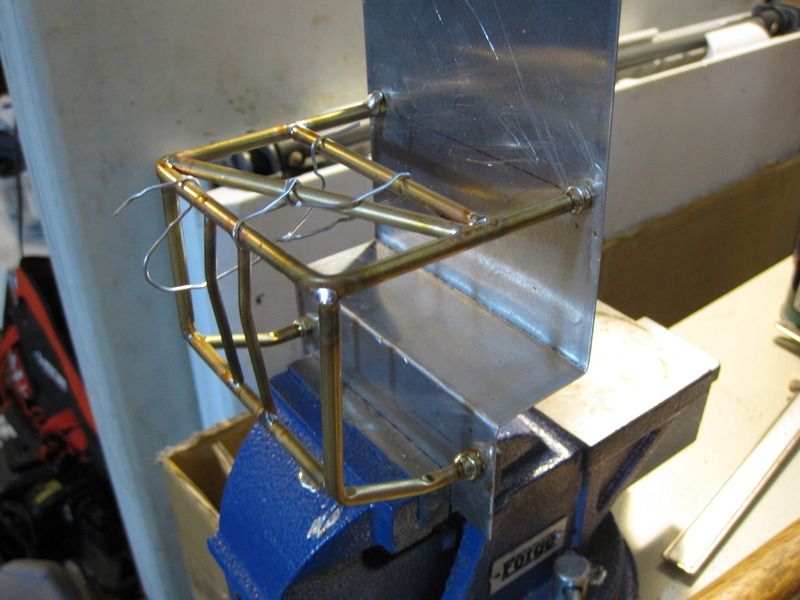 Here is the front cage section finished and bolted in, happy with the progress so far! 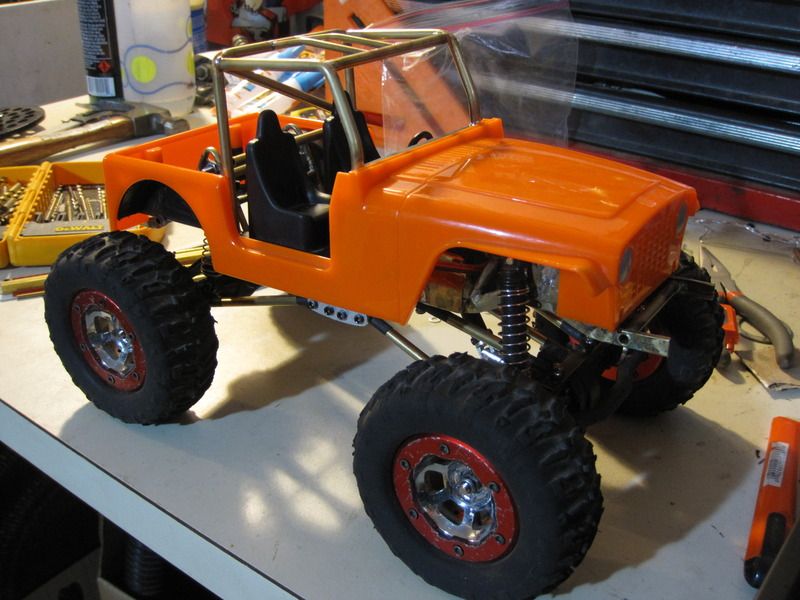 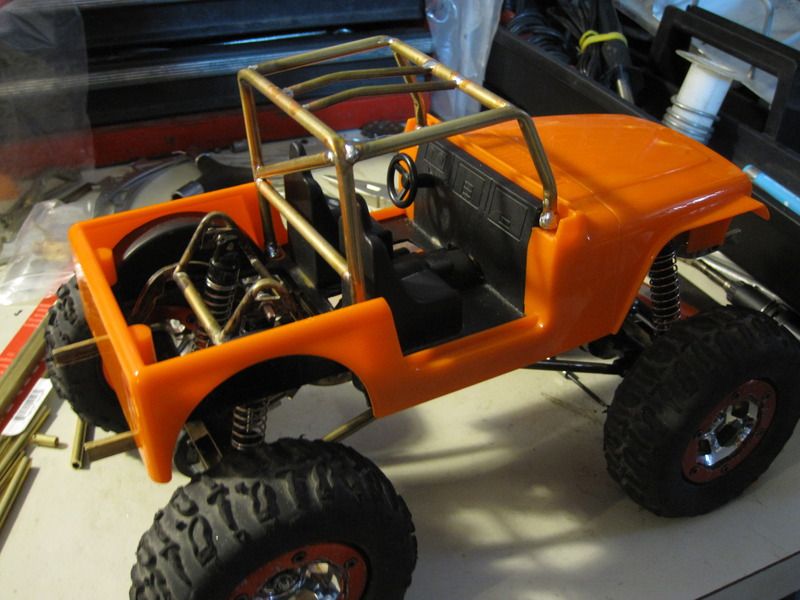 Got the angle of the front cage struts close to the windshield angle 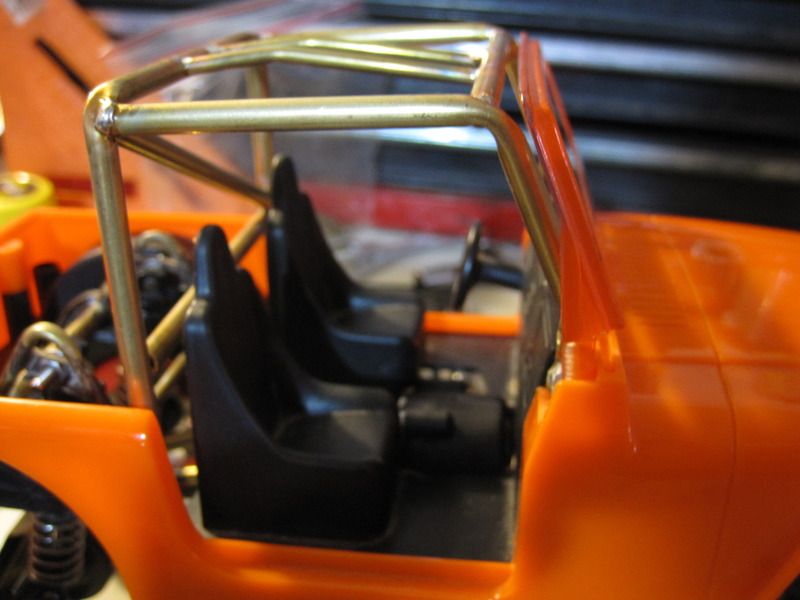 Planning on finding some hinges for a fold down windshield 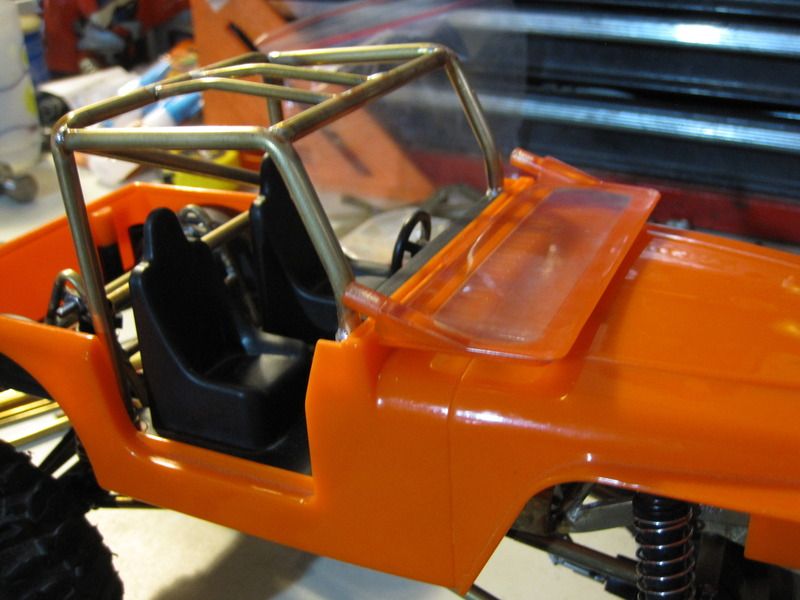 Satisfied with the front portion of the cage, I started on the rear 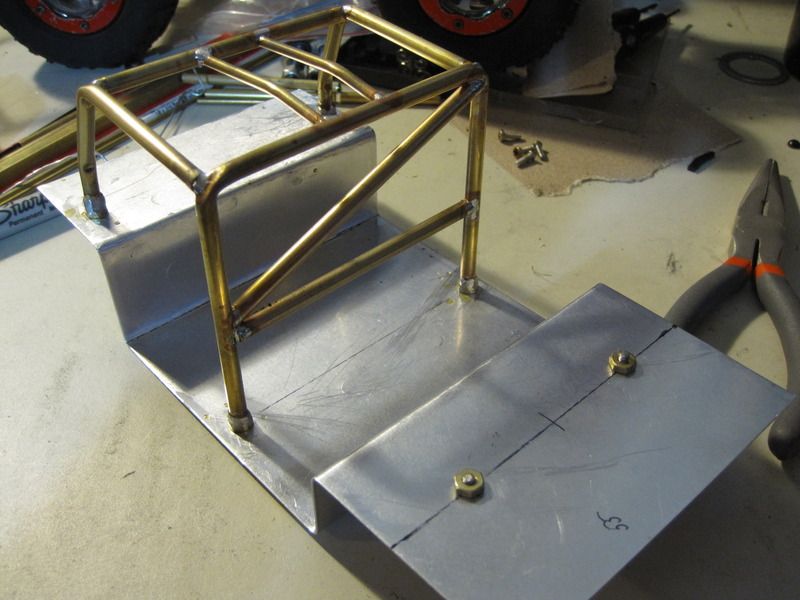 Here is the finished cage before I removed it from the jig. I tried to style it after something you would have seen at a rock crawling comp back in the early days. Added a crossbar above the dash and some cross bracing in smaller diameter tubing. Still have some cleaning of the joints but I really am impressed with my own work, was not expecting it to look as good as it does, despite the imperfections. 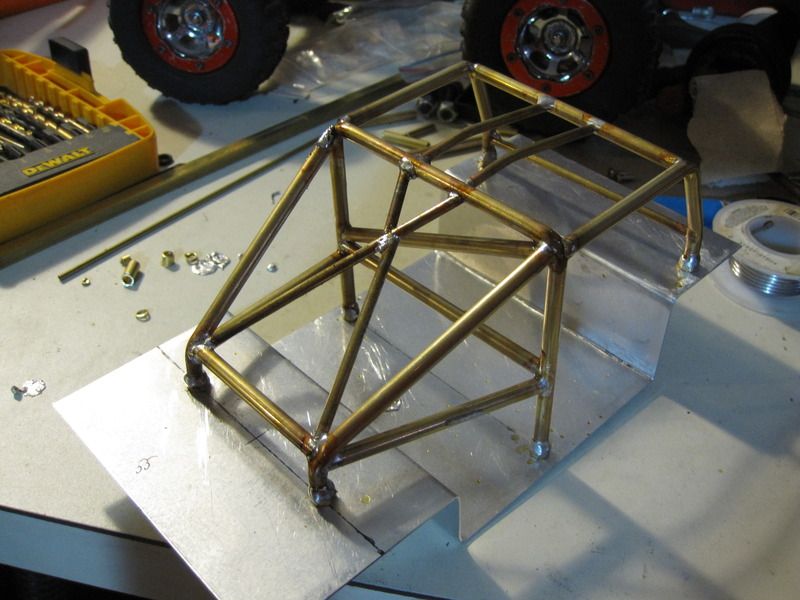 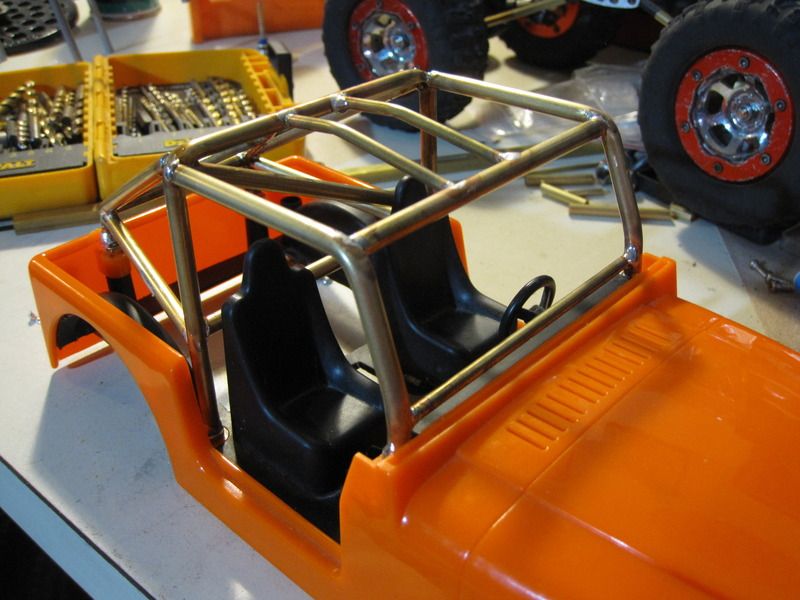 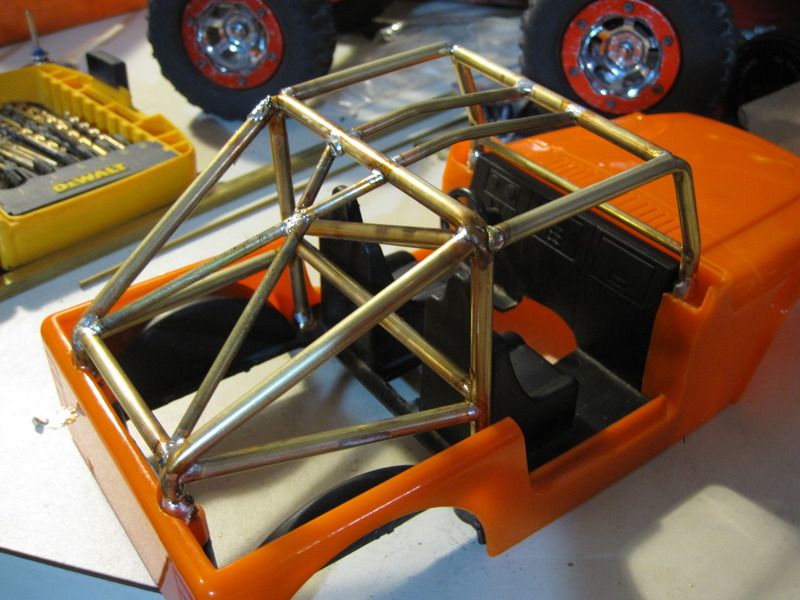 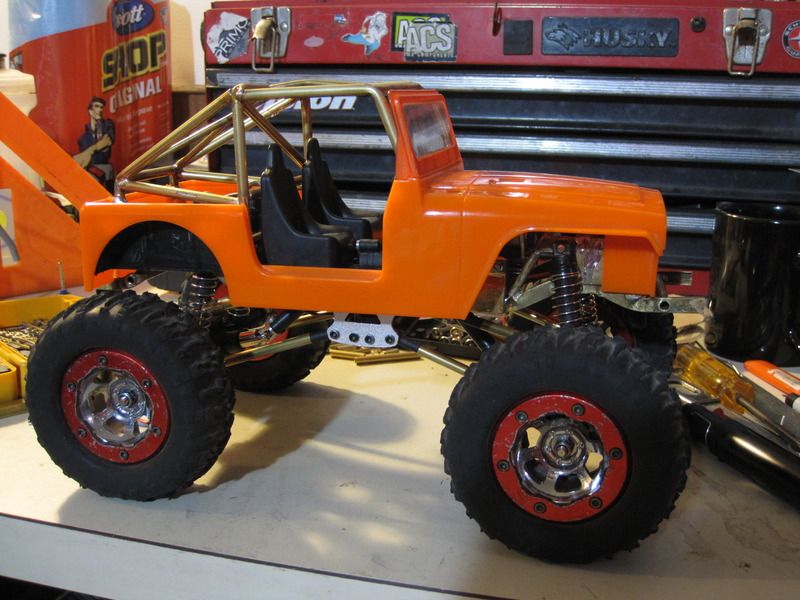 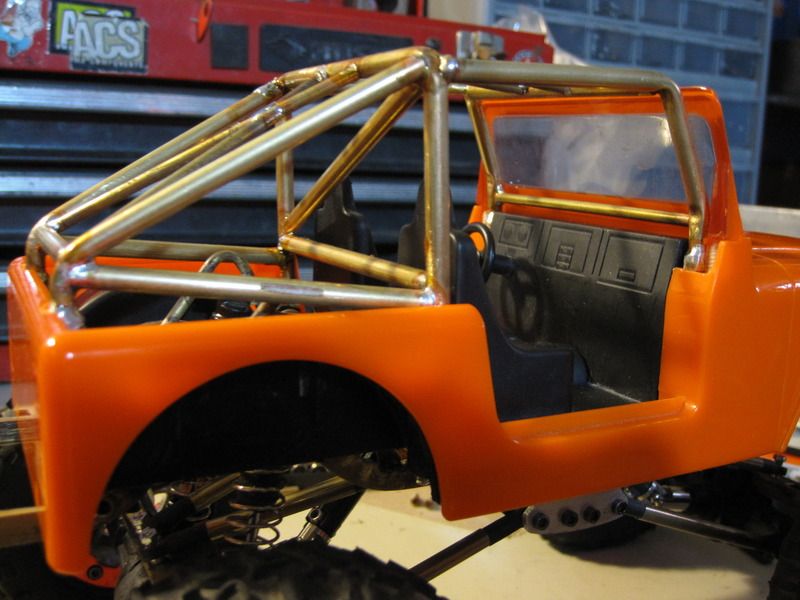 Planning on giving the rear of the tub a dovetail/pinch to match the cage and reduce the rubbing during flexing, not much room there! 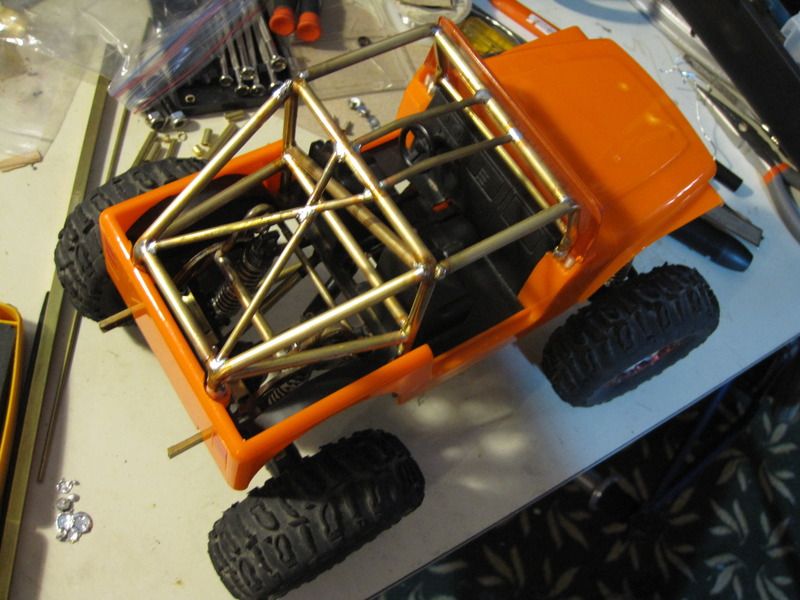 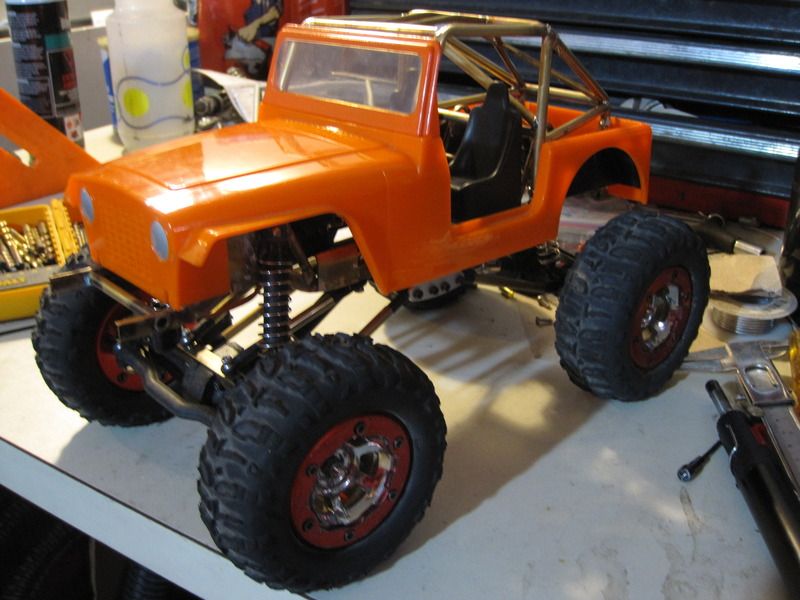 Obligatory/Preliminary flex shot 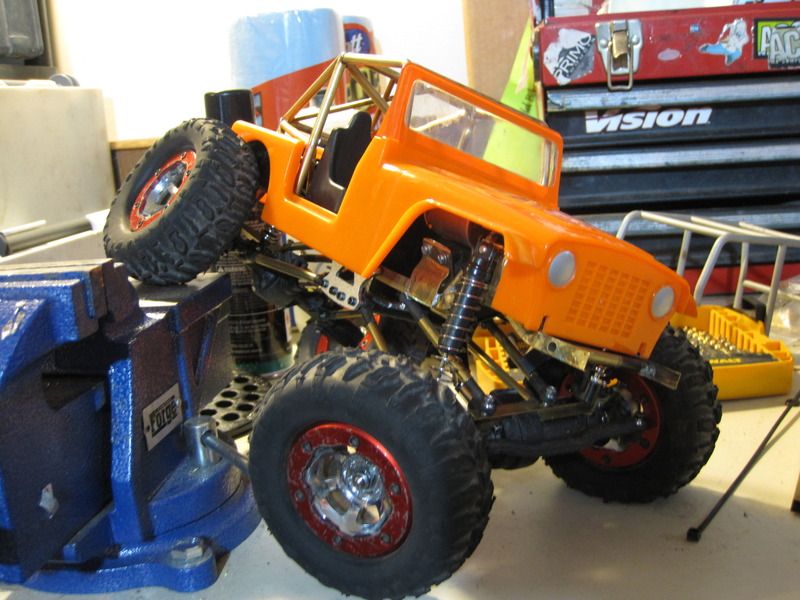 So close, yet much to do!! |
| |  |
| | #30 |
| Pebble Pounder Join Date: Jul 2008 Location: Denver
Posts: 148
|
Being spring here in Denver it can be 70 degrees one day, then dump 14"+ of the heavy white stuff the next. So, taking advantage of the weather I decided to work on the Jeep. Having finally completed the cage it was time to dovetail the rear of the tub. This was quite nerve wracking to say the least 'cause if I failed, this project was toast! First cuts, no turning back! 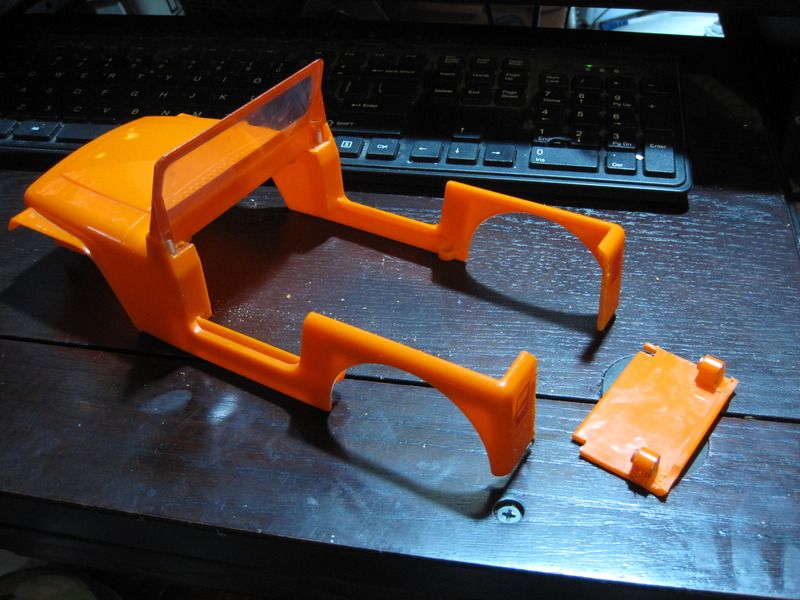 Removed the section with the molded in taillights, plans on real lighting for the future. 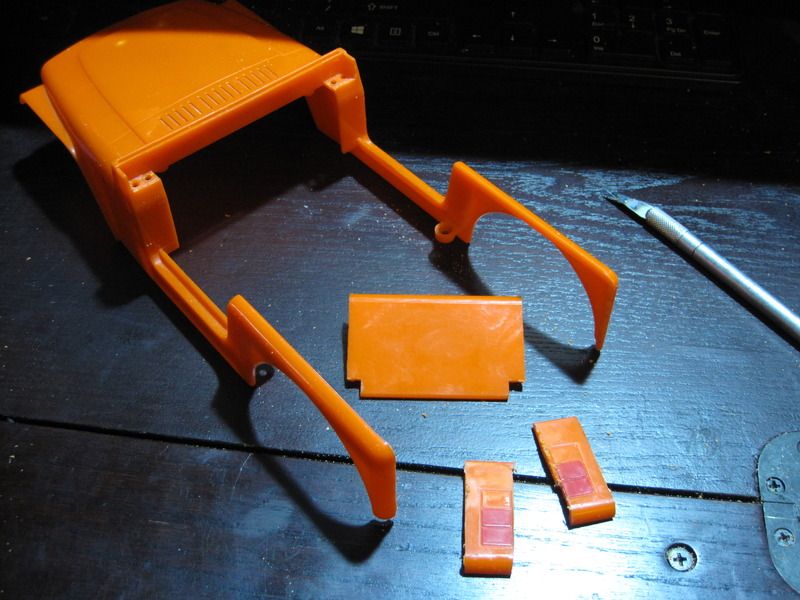 Pulling the quarter panels in towards the "Tailgate" Notched the upper rail then held it over my soldering iron to soften the plastic. 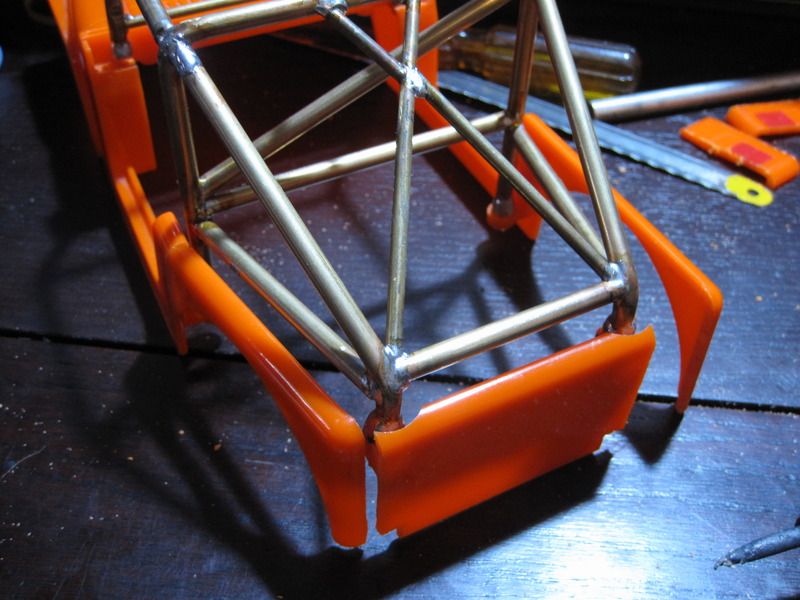 Both sides pulled in, time to glue it together! 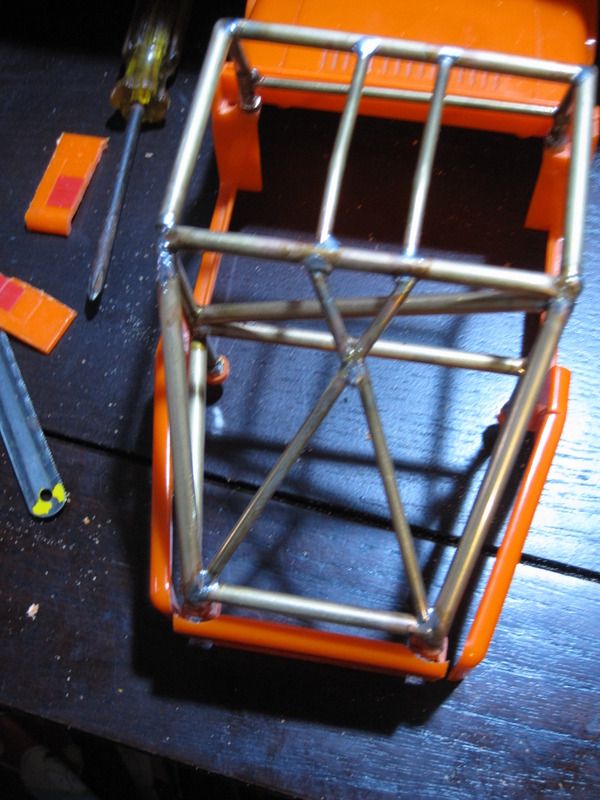 Finished with the tub it was time to work on the floorpan, wanted to retain the wheel wells. 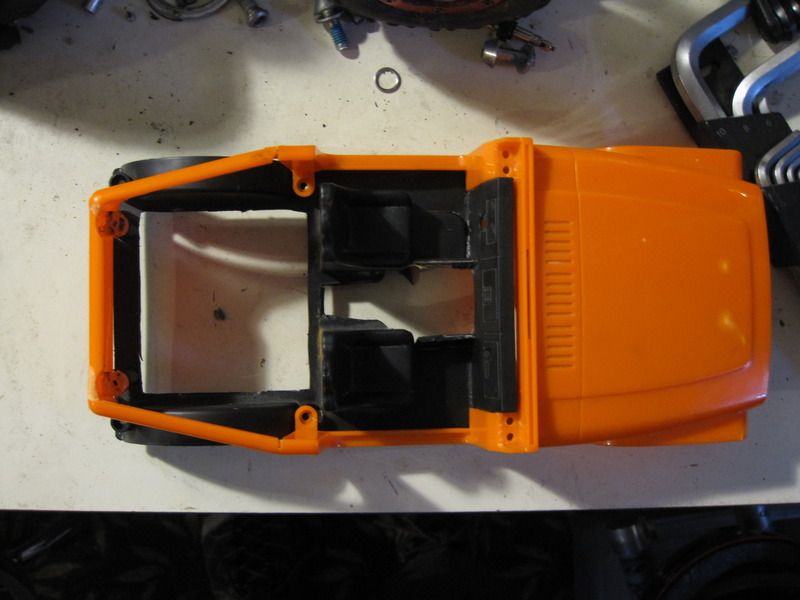 After much trimming and trial fitting I had it in! 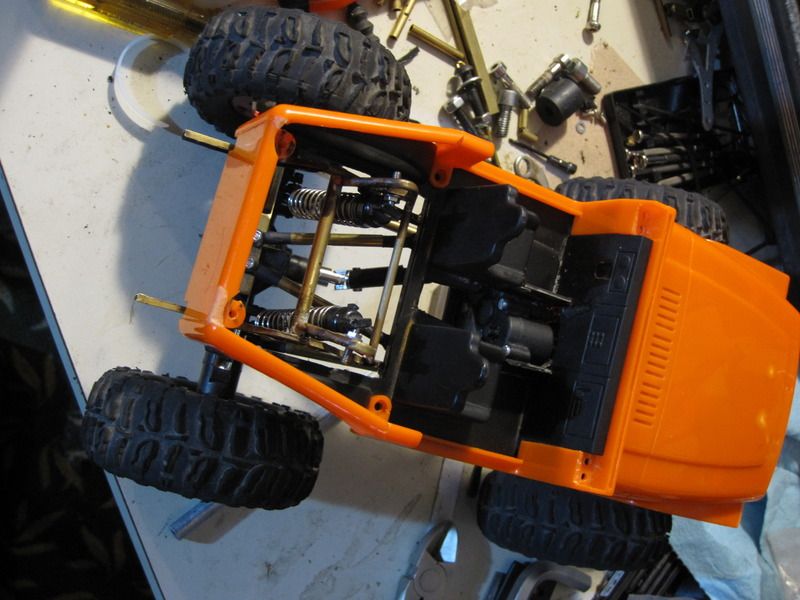 Much better during flexing, no more contact with the tub corners! 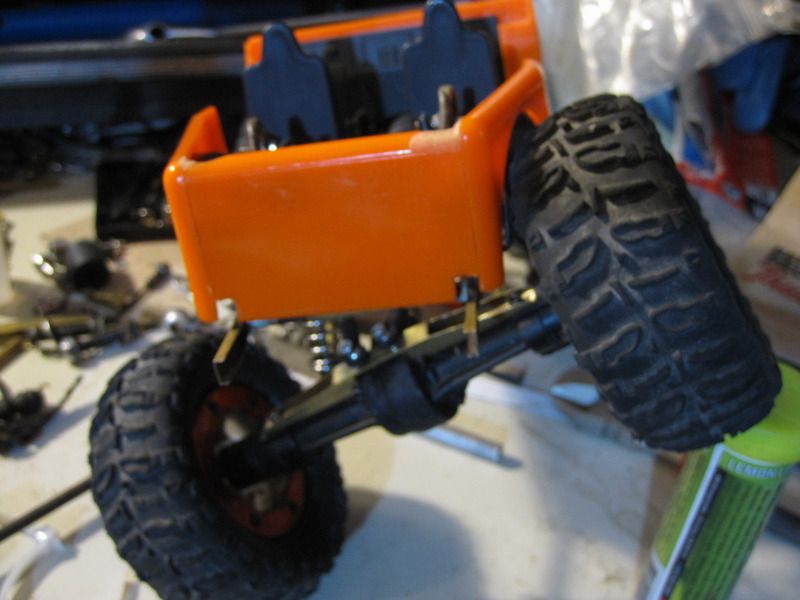 Matched the angle of the cage very well! 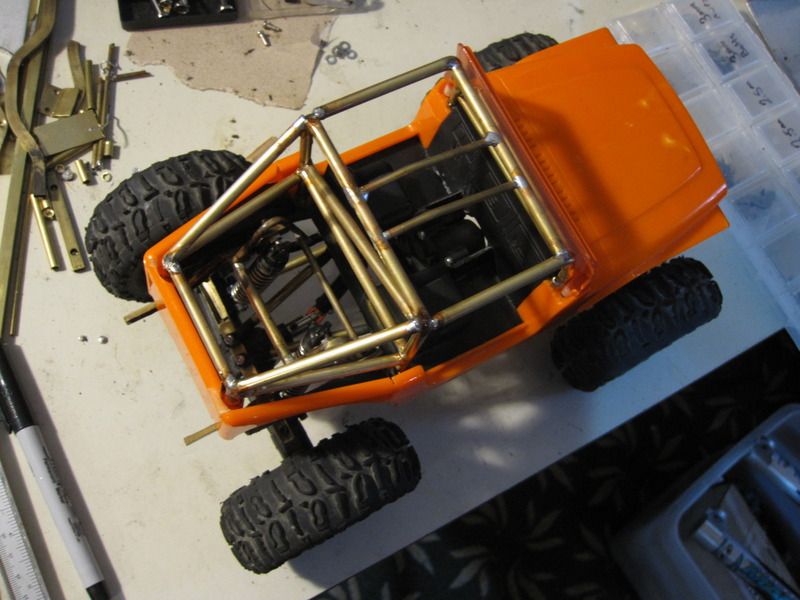 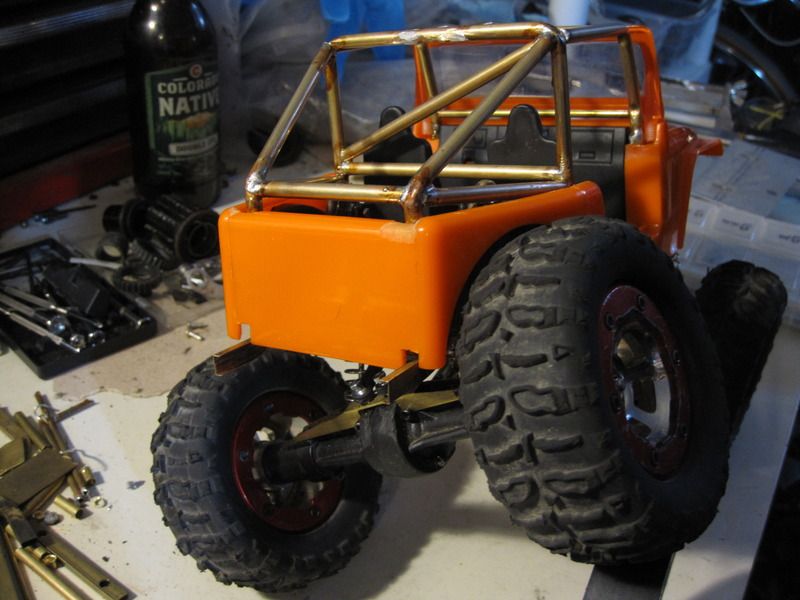 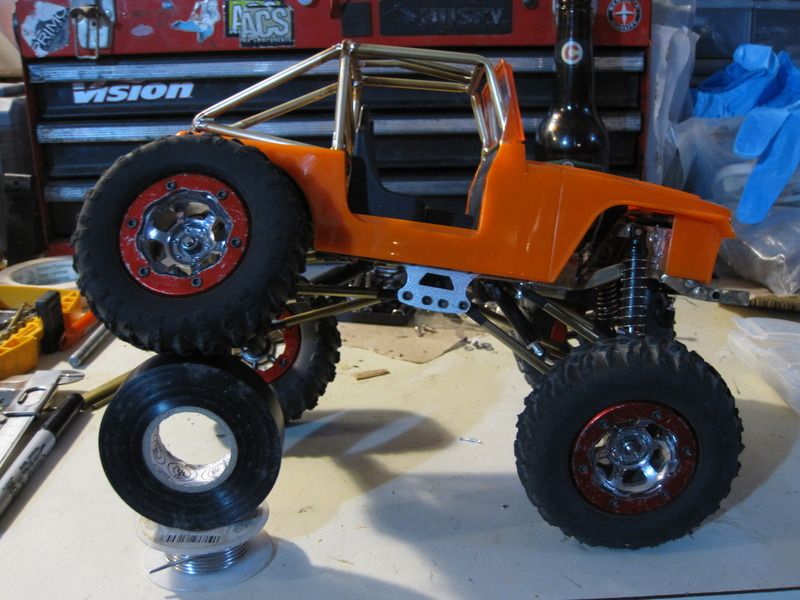 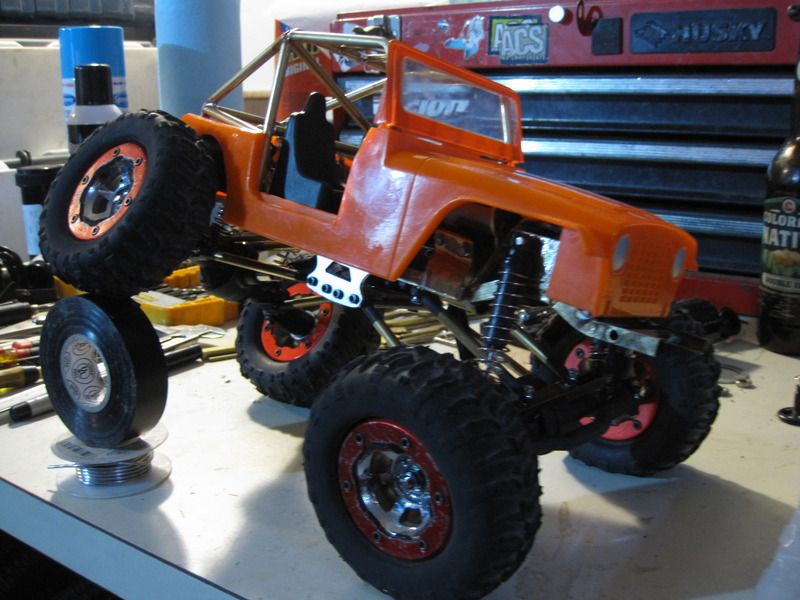 Decided to use the jig I made for the cage and make quater protection out of it! Paper template, then cut out panels. 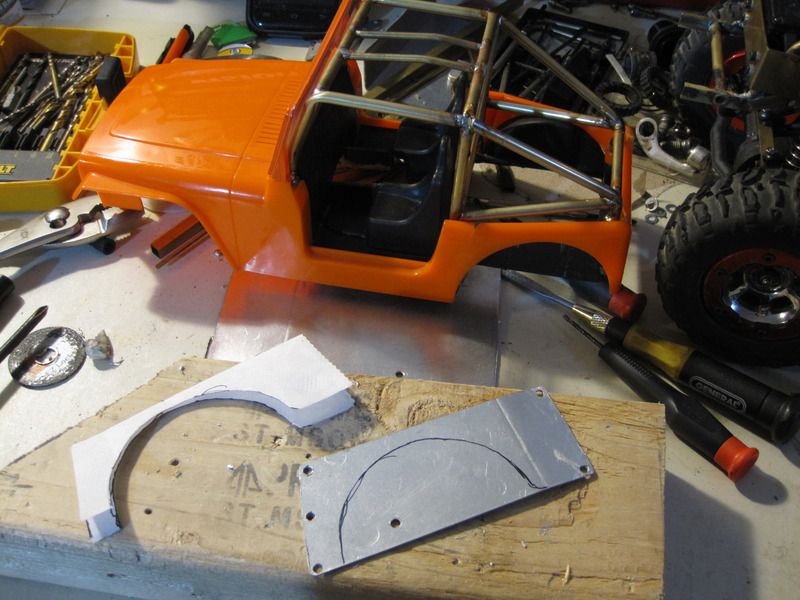 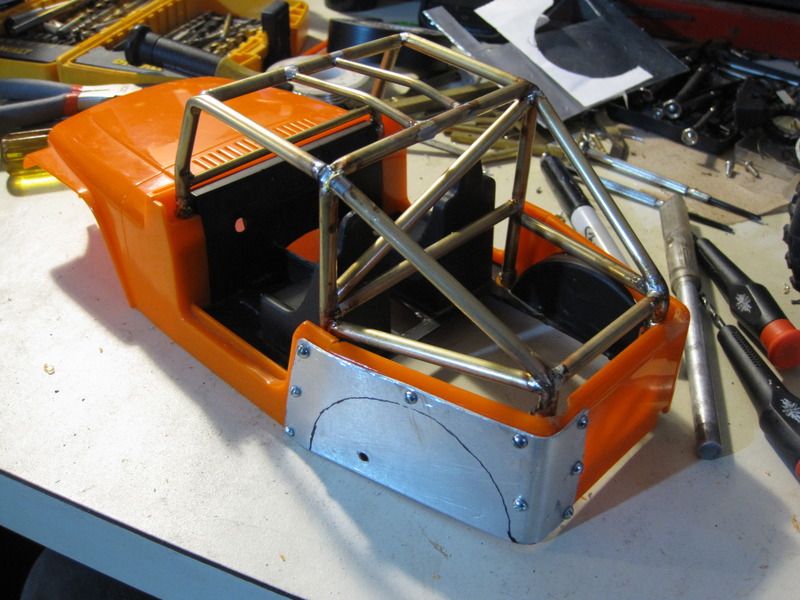 Both sides done, time to cut out wheel arches  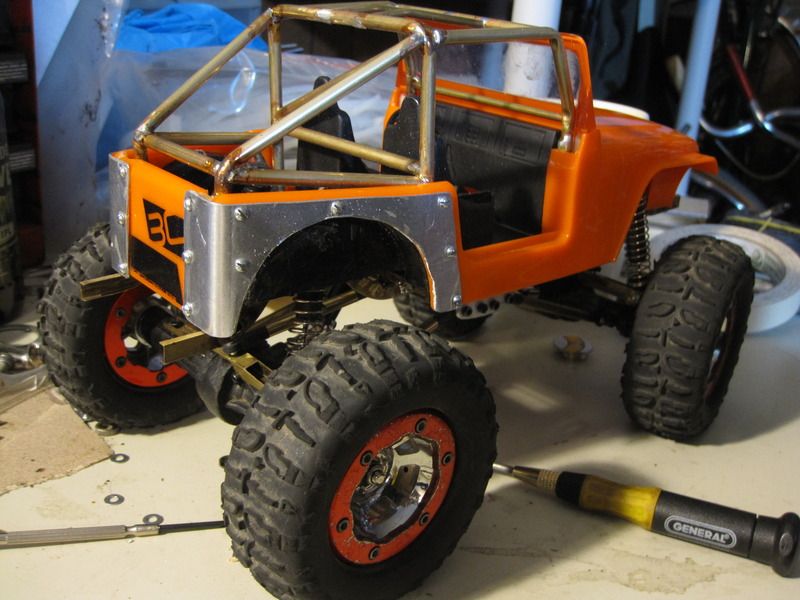 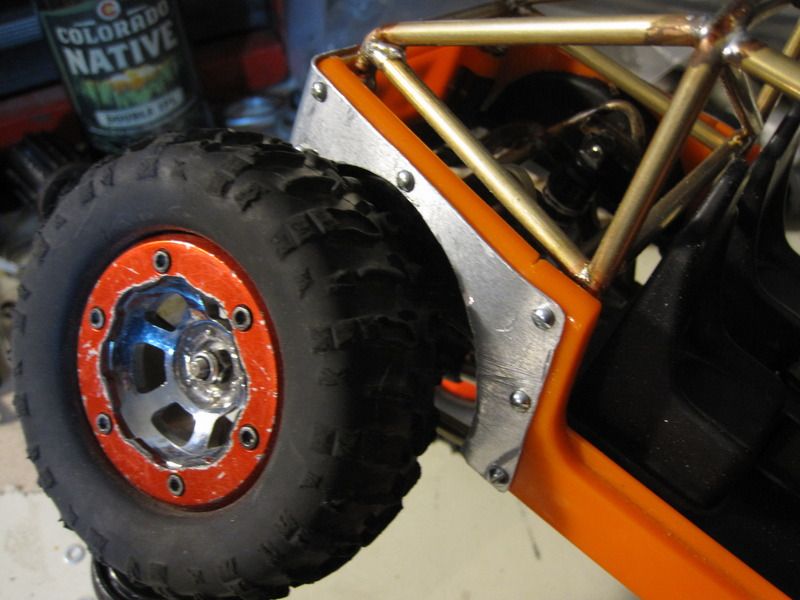 Coming along nicely, yet much to do! |
| |  |
| | #31 |
| Newbie Join Date: Feb 2012 Location: Wollongong NSW Australia
Posts: 32
|
That will hold the back together and stop the glue from coming apart nice job
|
| |  |
| | #32 |
| Pebble Pounder Join Date: Jul 2008 Location: Denver
Posts: 148
|
Thanks Jimbo! Are you still playing with your losi scaler? Sent from my SPH-M830 using Tapatalk |
| |  |
| | #33 |
| Newbie Join Date: Mar 2016 Location: Saint Clair Shores
Posts: 24
|
Wow JB, this is about the most interesting and inspiring build thread I have ever seen.  Being an artsy tartsy kind of guy myself, I get more out of the building & creating part. I'm a scratchbuild foamy plane guy myself just making the switch to surface vehicles & now to crawling. Getting an E16 and really plan on just doing tire, weight mods & just a scale body for now and then eventually see just how far I can take it doing things like what you are doing just doing it over time as funds allow. It's awesome seeing a full scratch build especially at this size and not the ever popular 1/10. Seems 1/16-18 scales require more scratch building than just ordering upgrades. Thats all the fun right there! I am loving this and can't wait to see it running. Awesome job! True artwork! Thanks for sharing! Regards, Jimmy |
| |  |
| | #34 |
| Quarry Creeper Join Date: Jan 2014 Location: round lake
Posts: 204
|
Awesome build.Just Wow!!! |
| |  |
| | #35 |
| Newbie Join Date: Feb 2012 Location: Wollongong NSW Australia
Posts: 32
| |
| |  |
| | #36 |
| Pebble Pounder Join Date: Jul 2008 Location: Denver
Posts: 148
|
Thanks for all the kind words! Sent from my SPH-M830 using Tapatalk |
| |  |
| | #37 |
| Pebble Pounder Join Date: Jul 2008 Location: Denver
Posts: 148
|
Got a little more work done to this little guy. Getting so close to being up and running, cannot wait to have it finished. This update is about the front fender wells, I found a great way to make a set for my rig! I took an old drill battery and cut up the case and trimmed to fit, I think it came out fairly well! 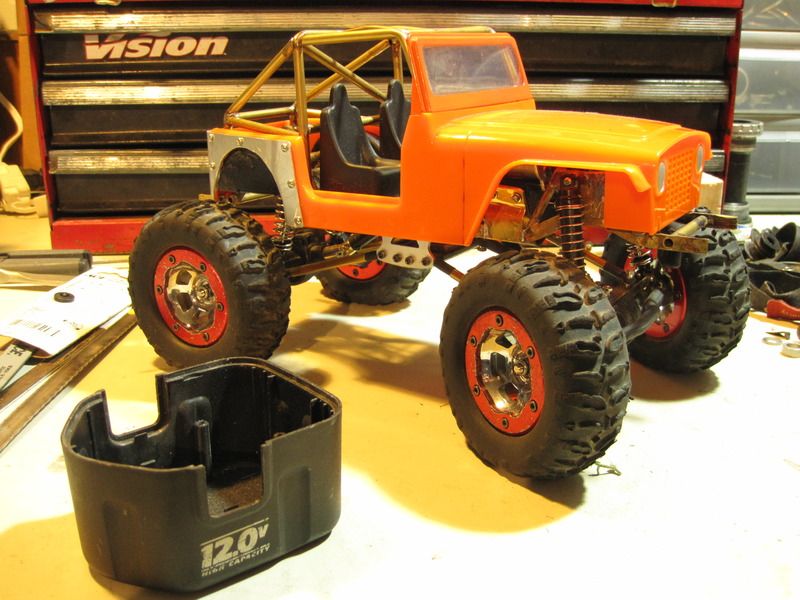 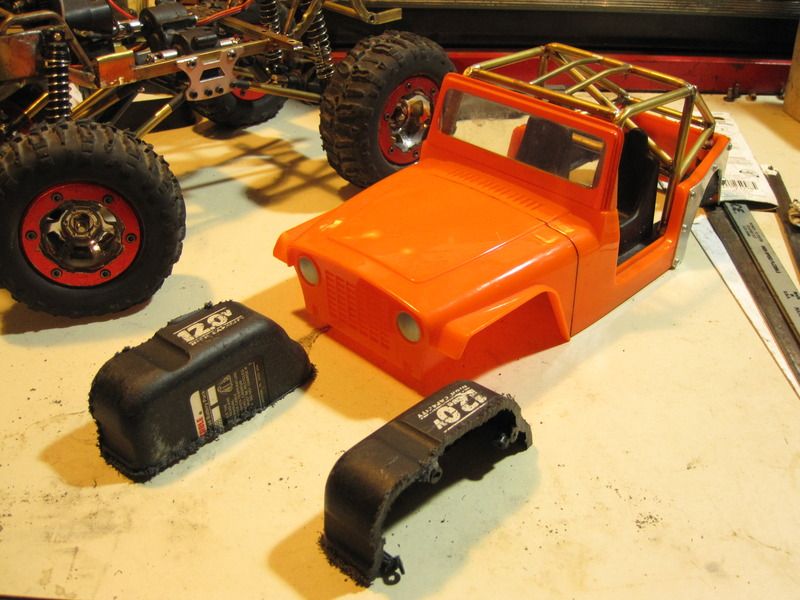  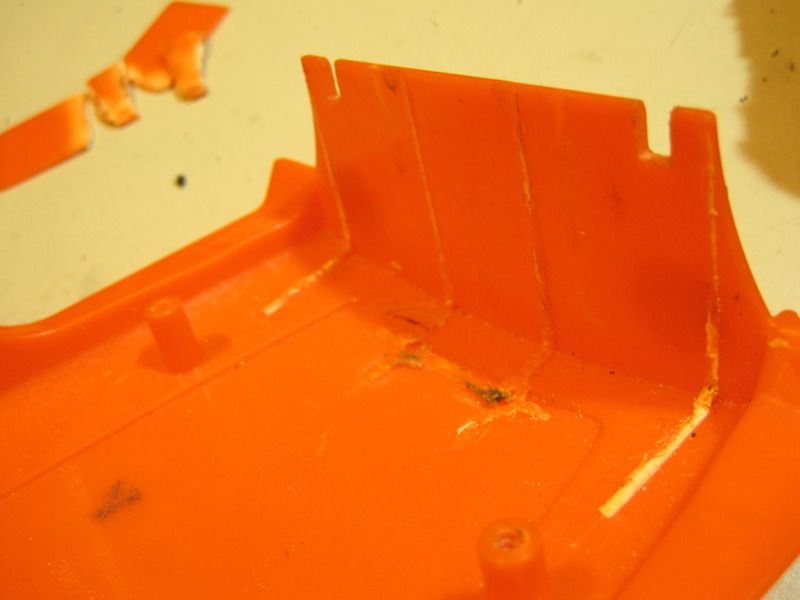  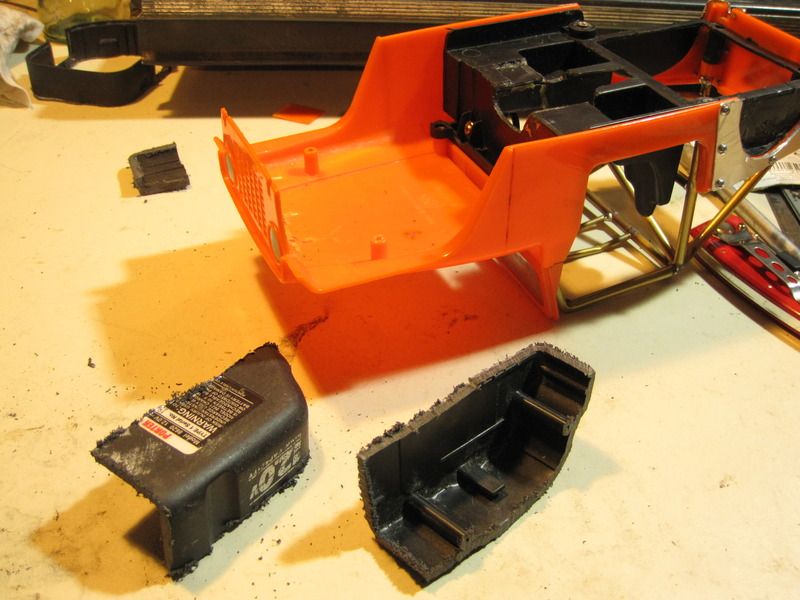 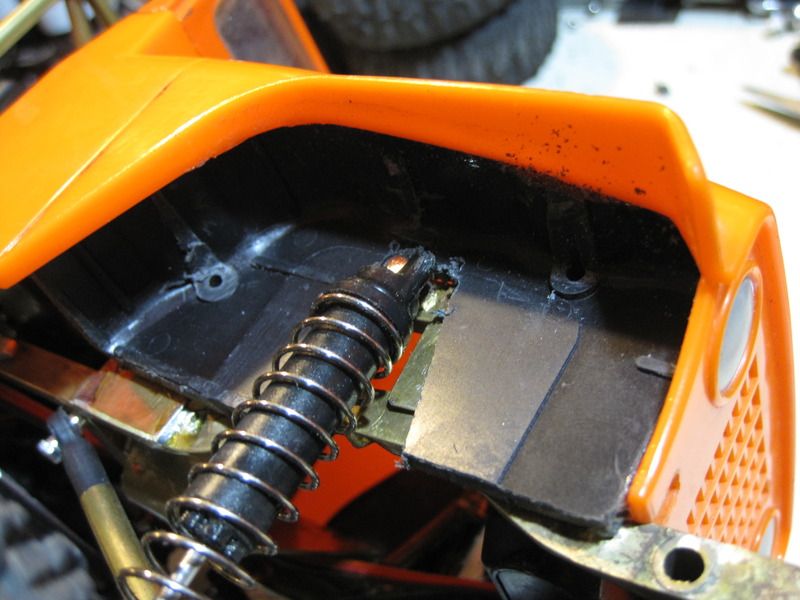 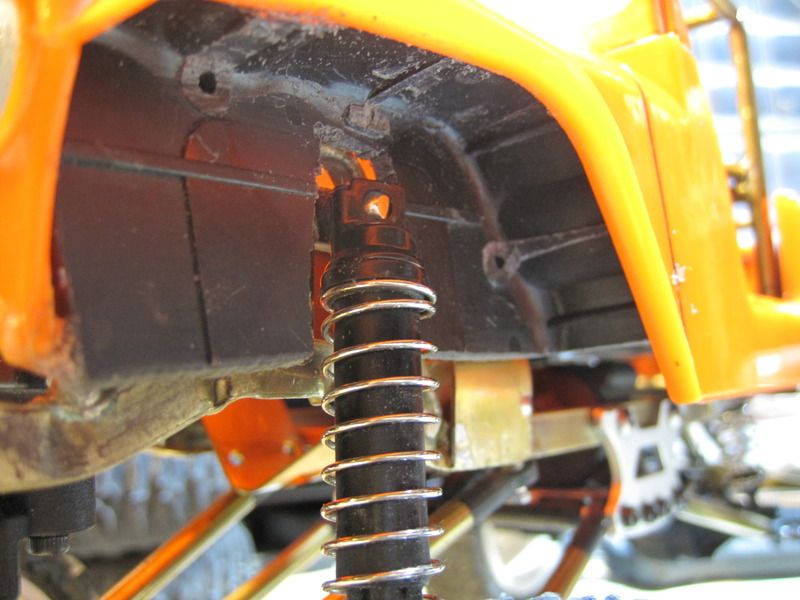 Thats all for now. More to come soon! |
| |  |
| | #38 |
| Pebble Pounder Join Date: Jul 2008 Location: Denver
Posts: 148
|
Not a huge amount of progress in this update, but the good news is I have driven it! I recently was donated a couple of mountain bikes to fix up and resell, one of them I ended up trading for a Traxxas Rustler that was pretty much ready to run. It appears to be a cheapie from the auto parts stores as the electronics in it were cheap! It had a redcat receiver and a made in Taiwan ESC, plus batteries and a charger. The electronics, despite being cheap, were also quite small. A little tinkering with them and my crawler and I found I was able to stuff it all under the hood with the motor and servo! That doesnt leave much space to hide a battery though, and I am currently doing some research into what I can get for a NiMH battery that will fit this thing, as I dont think the esc will handle LiPos, no low voltage cutoff and little room for a low battery indicator. 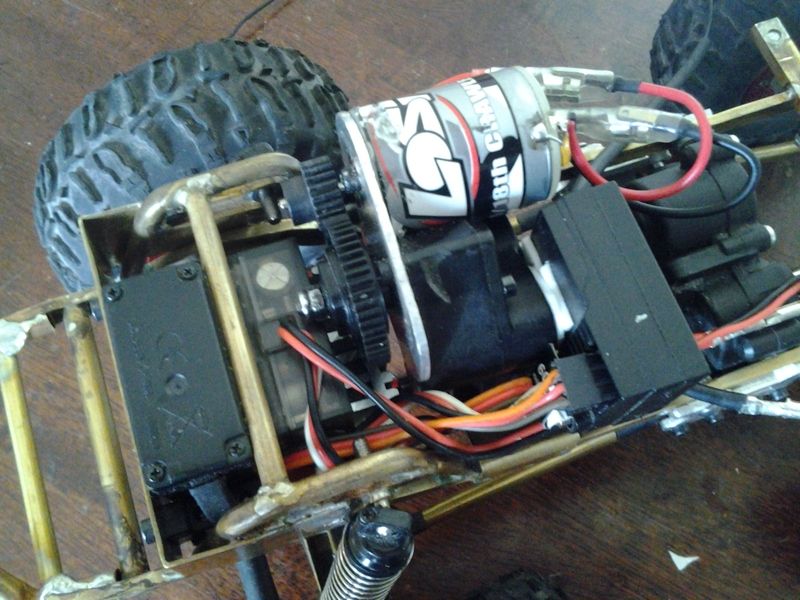 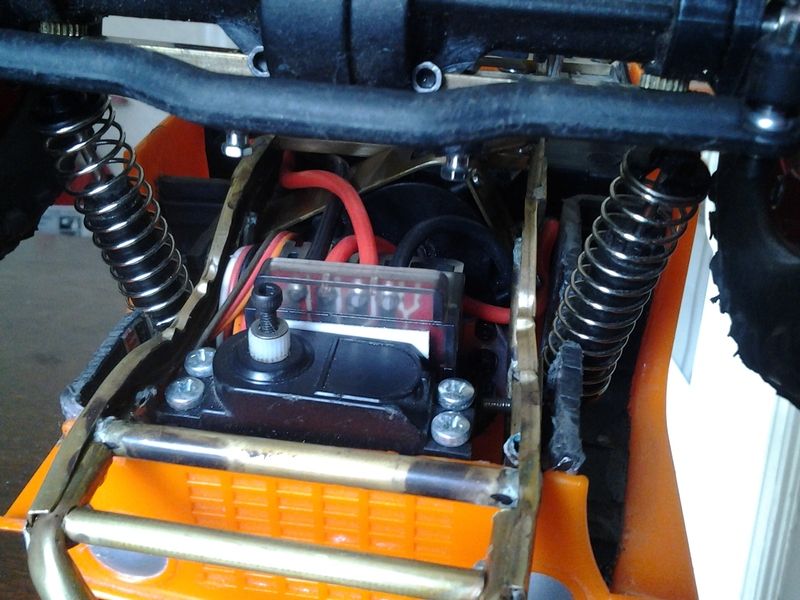 What I have found out so far... 1) Tighten everything before driving! There have been a few screws come loose during my test drives. 2) I am liking the ground clearance from the stock 1.9s, but not the look of the huge rim. Rc4wd white wagon wheels are on the list, in 1.5 flavor. Need to find a decent tire as far as scale looks and performance thats close to the diameter of the Losi 1.9. 3) Suspension dampers that have no oil inside make for unpredictable handling ;) Searching for an aluminum bodied shock that is slightly shorter to help lower the whole rig. 4) Strapping a full size stick pack to the body probably isnt a good representation of how this thing will handle when finished... a little top heavy 5) 4 link suspensions need trac bars. As a full size Jeeper I already knew this, just wondered if I could get away with not running one as I am not going to comps with this guy. It needs one. 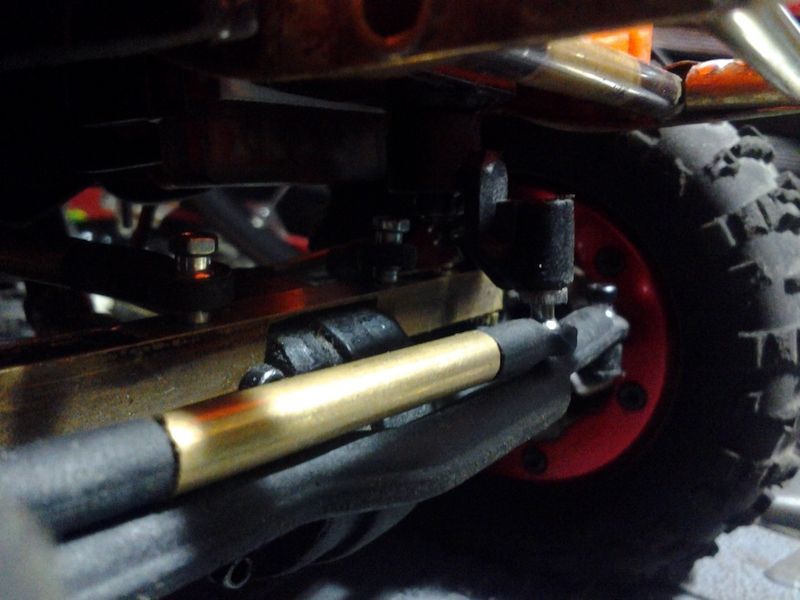 Shorter shocks up front will be giving me issues with the current steering setup using the stock servo horn. I plan on finding a "Flat" horn to gain some steering linkage clearance, then need to figure out the trac bar. Also need to locate some small battery packs, there are plenty of sources out there! Once all that is done its time to strip it down, paint it, and loctite everything during reassembly. Almost finished! Last edited by JBcustoms; 07-29-2016 at 07:27 AM. |
| |  |
| | #39 |
| Newbie Join Date: Oct 2010 Location: Omaha
Posts: 28
|
Nice build and gives me some ideas on how to start a build I've been thinking about for a couple years.
|
| |  |
| | #40 |
| Pebble Pounder Join Date: Jul 2008 Location: Denver
Posts: 148
|
Thanks! Glad to hear I am inspiring you to build something of your own! GOt the trac bar figured out for now. If and when I go with shorter shocks I will probably have to rework it, but its operational for now! Used parts from the stock chassis as mounts, and attached it to the steering servo mounting screws. It seems to work great, but I still have not had it on the rocks as of yet, need some smaller batteries already! Full droop 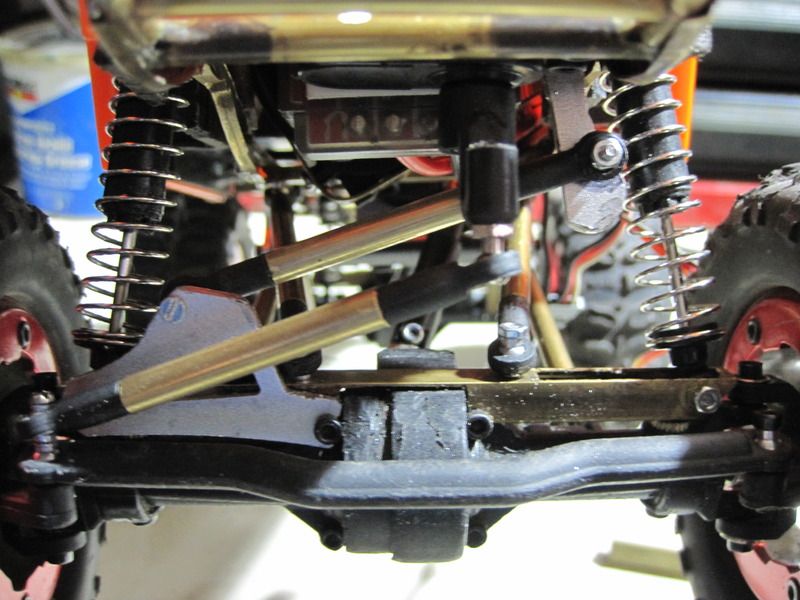 Full compression  Mount at servo, I have trimmed the excess of the mount below the trac bar attachment point, just took pics prior to that 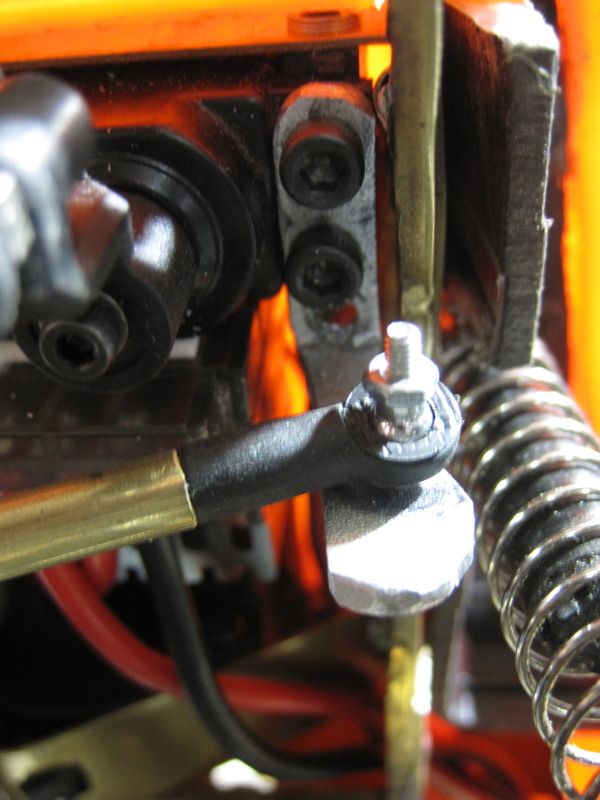 Barely clears the servo arm and esc 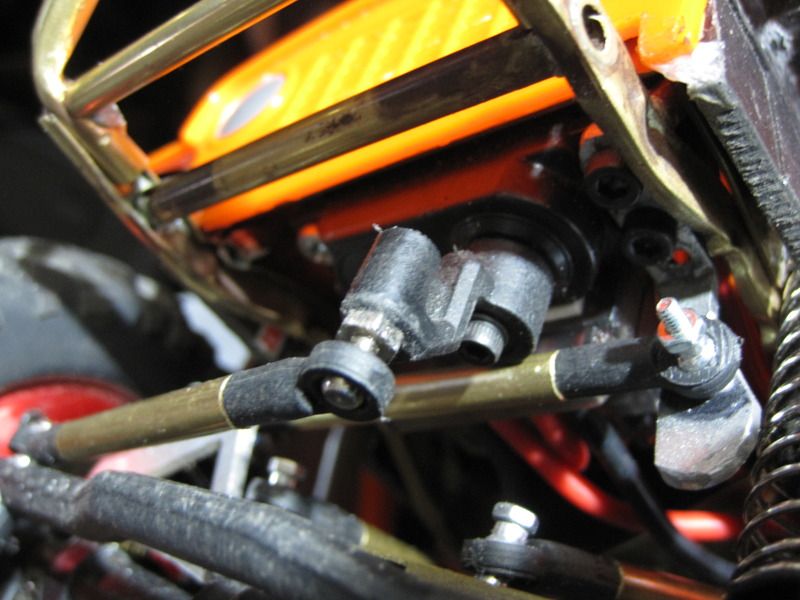 At 2lbs 11.4oz without battery 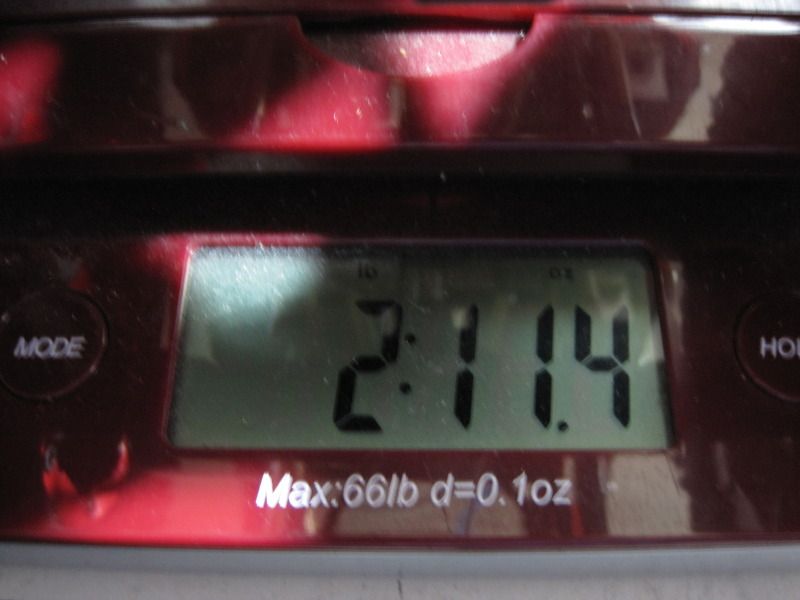 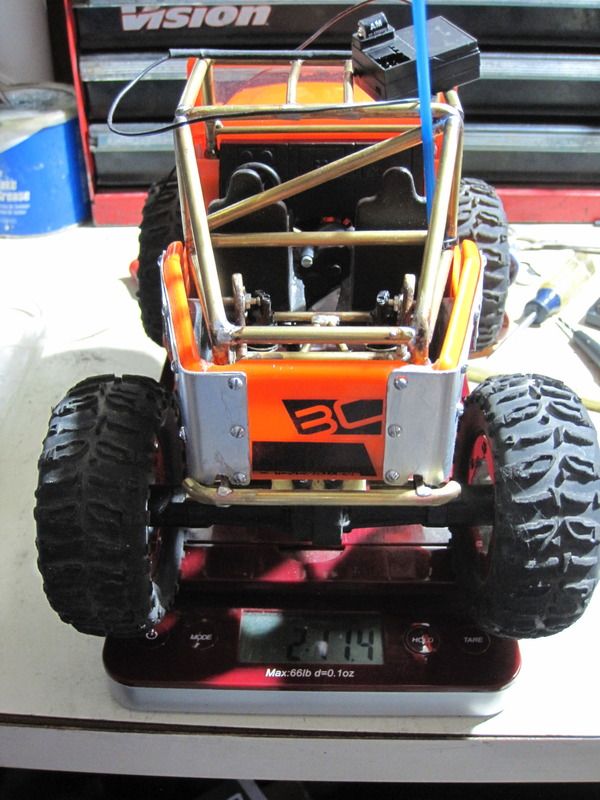 Hoping it will come in under 3lbs complete, but going with steel wheels and adding the battery may send it over. There are already BBs in the tires from the previous owner, and I may convert these stockers to beadlocks before I get a set of 1.55 wheels and tires. |
| |  |
 |
| Tags |
| cookies, food, jeep, jeepster, mrc |
 Thrift shopping at its best, a MRC build... - Similar Threads
 | ||||
| Thread | Thread Starter | Forum | Replies | Last Post |
| Thrift store finds | MikeChino | Losi Micro-Rock Crawler | 10 | 01-02-2014 12:41 AM |
| New Build "Navy Cut" prelim shopping list | Orph3o | Axial XR10 | 57 | 05-12-2012 07:56 PM |
| Thrift Store H2 Build | scrapen | Axial SCX-10 | 6 | 06-22-2011 08:31 AM |
| thrift stores... | braceysdad | Chit Chat | 28 | 02-10-2010 07:06 PM |
| Thrift store willys | CrawlnSlow | Large Scale Rigs | 55 | 03-25-2009 02:58 AM |
| |