| |
 07-05-2011, 12:46 AM
| #21 |
| Rock Crawler Join Date: Nov 2008 Location: Nor*Cal Cameronpark
Posts: 510
|
Nice work on the shocks, the tube work is looking spot on  |

|  |
| Sponsored Links | |
| | |
|
07-05-2011, 06:58 PM
| #22 |
| Pebble Pounder Join Date: Aug 2009 Location: Fullerton
Posts: 180
|
Holy crap that's sick.
|
|
| |
|
07-05-2011, 11:02 PM
| #23 |
| Quarry Creeper Join Date: Jun 2008 Location: anchorage
Posts: 395
| Thanks alot for all of the replies, I really appreciate it. So I had to scratch the whole brass skidplate idea because I was planning on brazing the 4-link mounts but i do'nt think you can braze brass. I made two sets of brackets, one set for the chassis and one set for the skid. I also used some 1\4 round to reinforce the skid brackets. 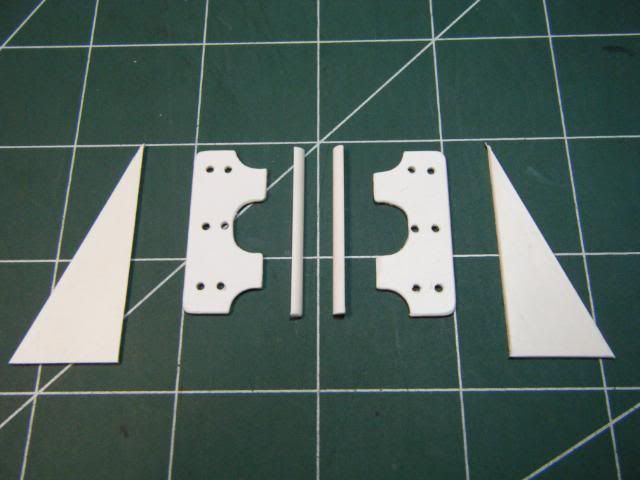 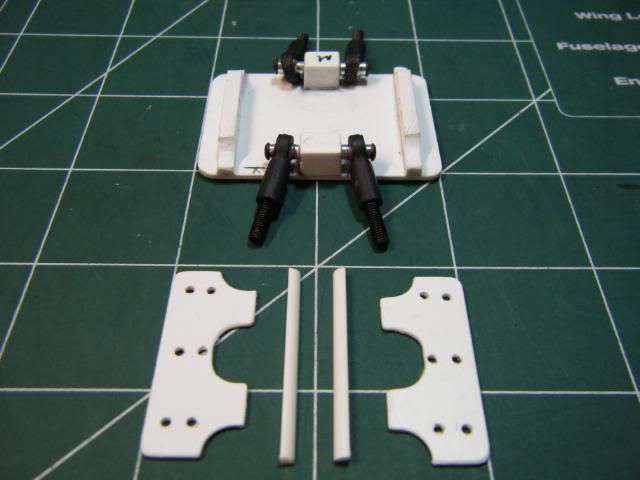 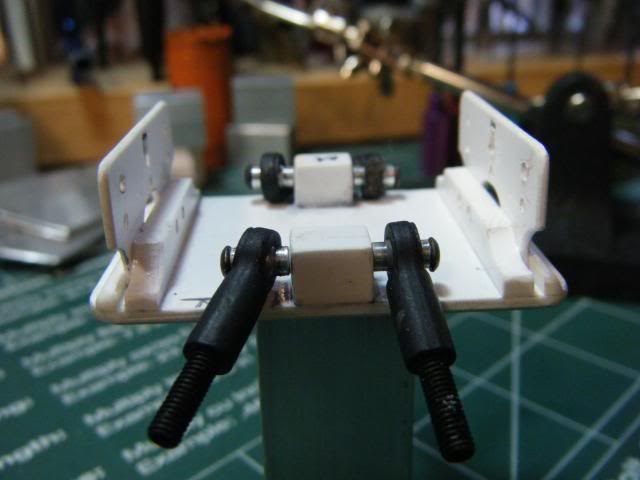 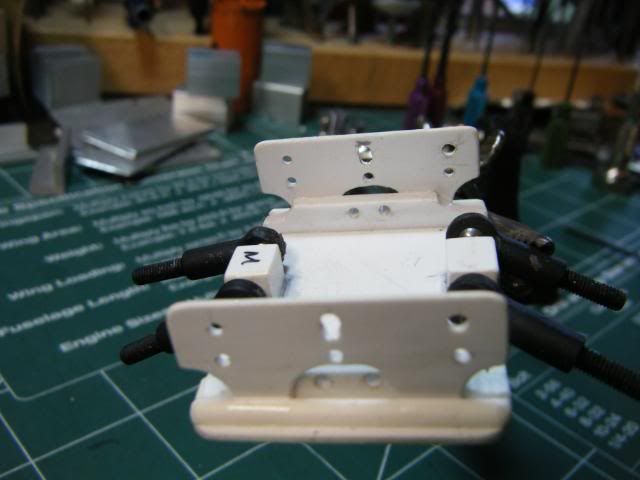  Then the set for the chassis. Then the set for the chassis.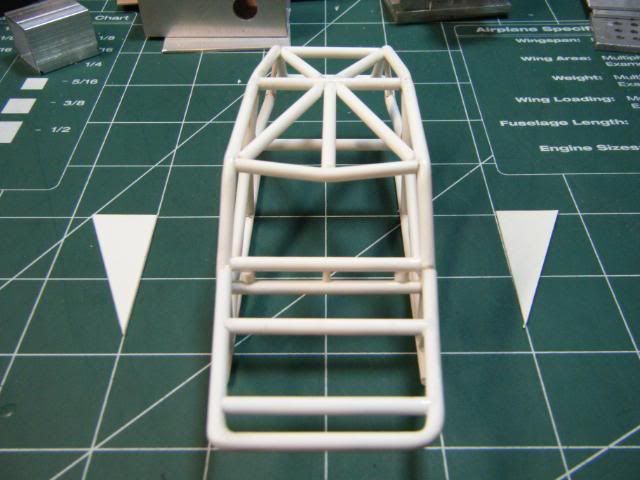  Made a couple of marks on the inside and then transfered them to the outside by holding chassis to the light. 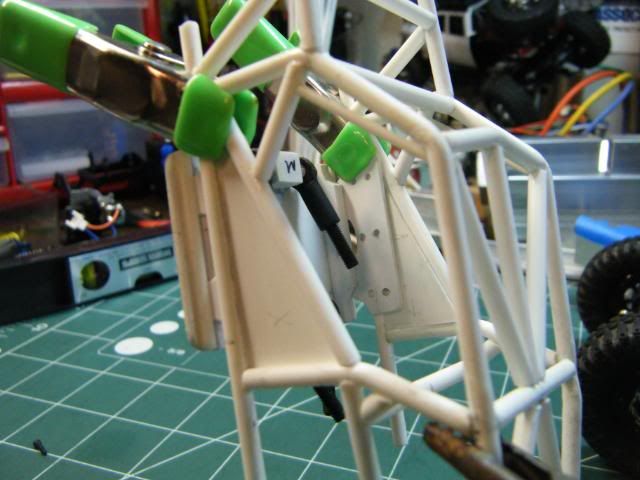 Then I mounted it up. 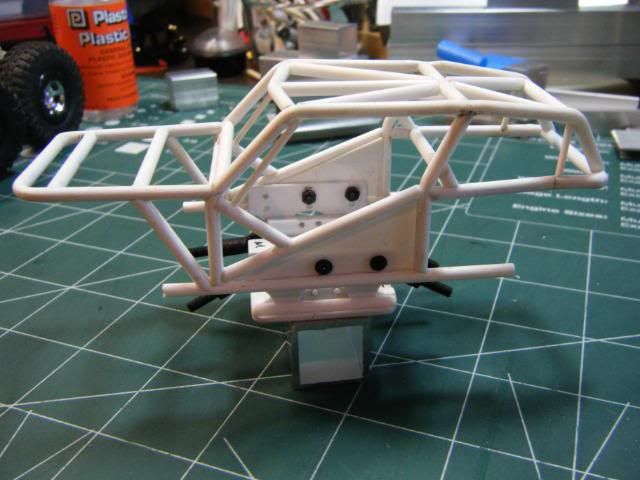 I proabably should have made skidplate brackets a little higher in case of clearence issues but just have to wait and see.  I also reinforced lower link mount. 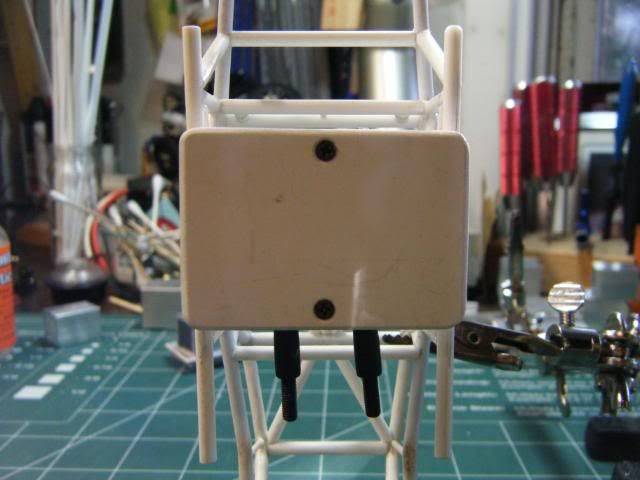 Heres with the tranny. 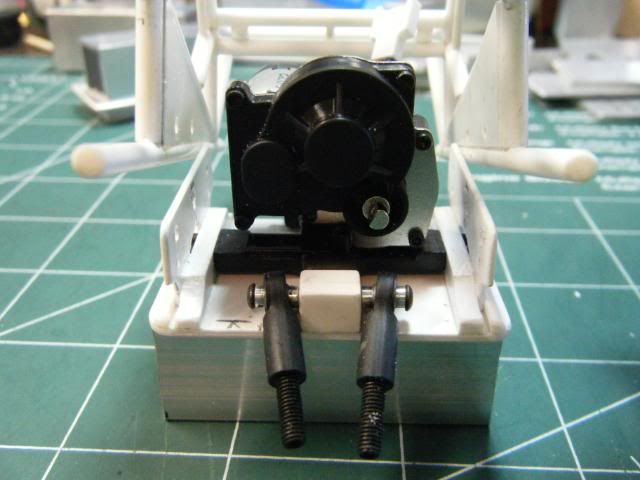 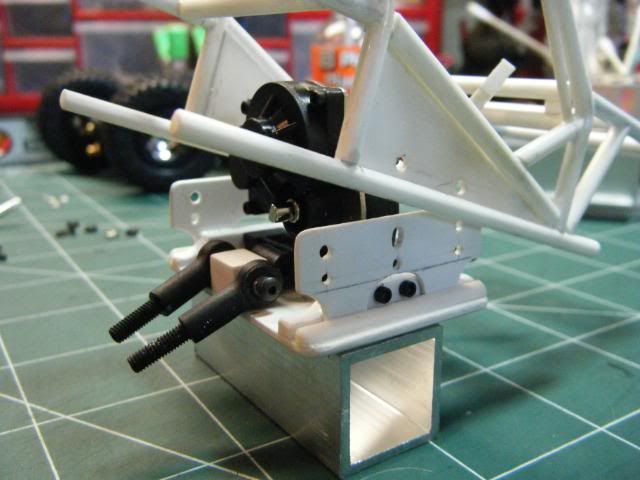 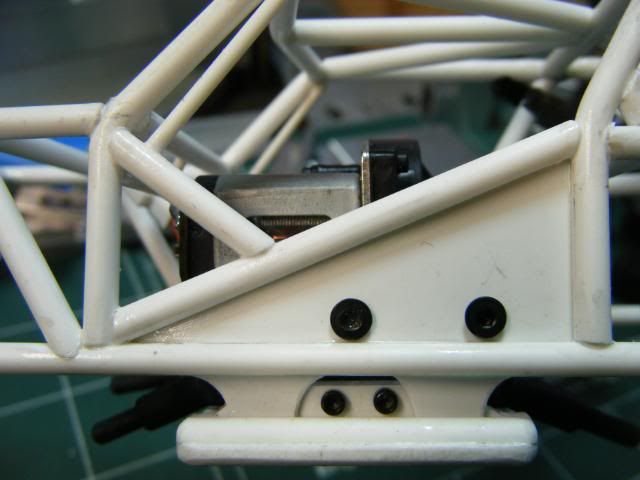 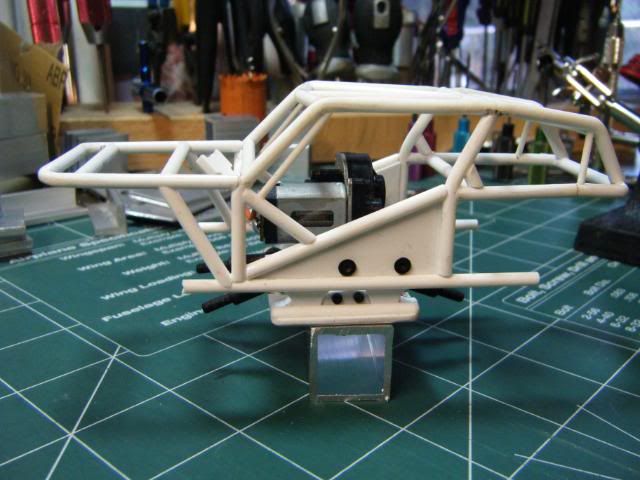 You can just barely see the tranny hump from a straight on shot. 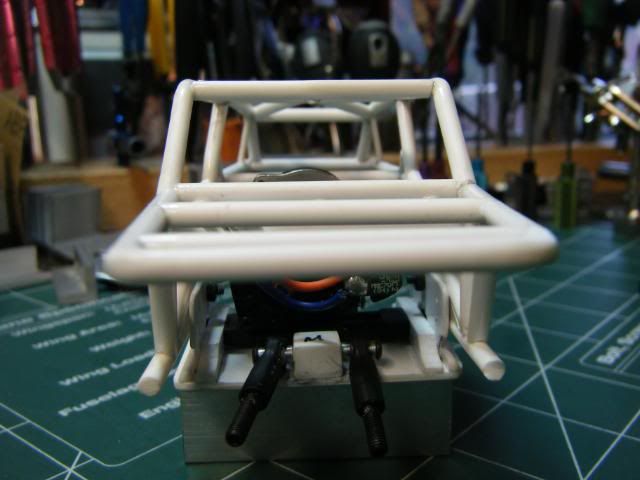 That's it for now, more to come! Last edited by crawlski; 07-12-2011 at 04:23 PM. |
|
| |
|
07-06-2011, 12:49 AM
| #24 |
| RCC Addict Join Date: Jun 2008 Location: Wasilla
Posts: 1,304
|
that styrene tube work is crazy |
|
| |
|
07-06-2011, 08:17 AM
| #25 |
| 20K Club   Join Date: Jul 2004 Location: Sending illegals home one Hayabusa at a time.
Posts: 22,981
|
Nice work man! That's a sweet little rig you have started. I'm looking forward to seeing it done!
|
|
| |
|
07-07-2011, 03:50 PM
| #26 |
| I wanna be Dave Join Date: Feb 2007 Location: South FL
Posts: 3,349
|
thats some very clean work there! |
|
| |
|
07-10-2011, 09:50 AM
| #27 |
| Newbie Join Date: Feb 2011 Location: stockton
Posts: 47
|
i was gona to do something like this and build like a micro wraith looks like u beat me to it. nice work so far |
|
| |
|
07-12-2011, 10:28 AM
| #28 | |
| Quarry Creeper Join Date: Jun 2008 Location: anchorage
Posts: 395
| Quote:
 Last edited by crawlski; 11-18-2011 at 11:08 AM. | |
|
| |
|
07-12-2011, 10:29 AM
| #29 | |
| Quarry Creeper Join Date: Jun 2008 Location: anchorage
Posts: 395
| Quote:
| |
|
| |
|
07-12-2011, 10:30 AM
| #30 | ||
| Quarry Creeper Join Date: Jun 2008 Location: anchorage
Posts: 395
| Quote:
Quote:
| ||
|
| |
|
07-12-2011, 04:03 PM
| #31 |
| Quarry Creeper Join Date: Jun 2008 Location: anchorage
Posts: 395
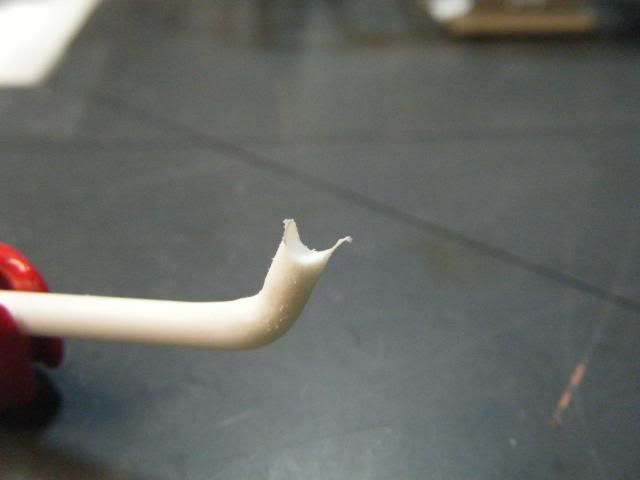
| I found these at the LHS the other day in case anybody was interested, perfect for the axle nuts.  Back to the build. With the skid mounted to the main chassis it was time to move on to the bending up the sub chassis and then tying that into the main chassis. 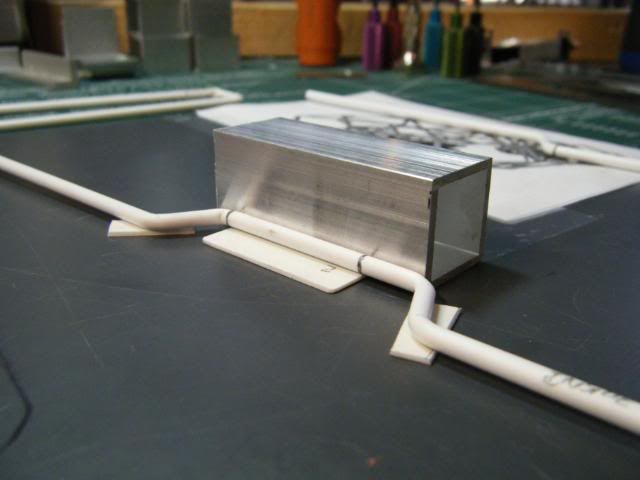 Made some gussets to re-inforce the mounting bracket. 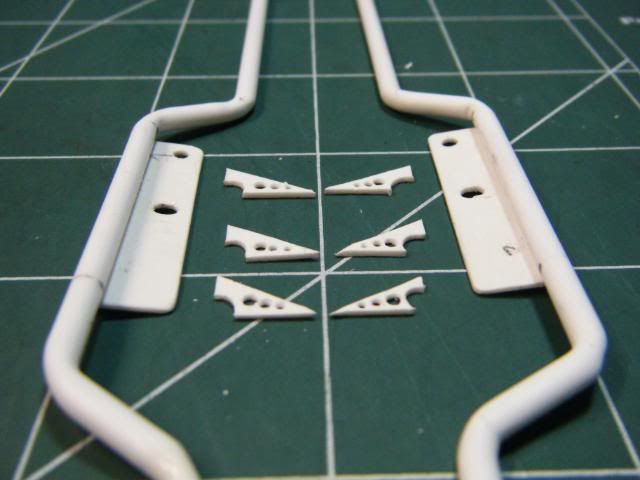 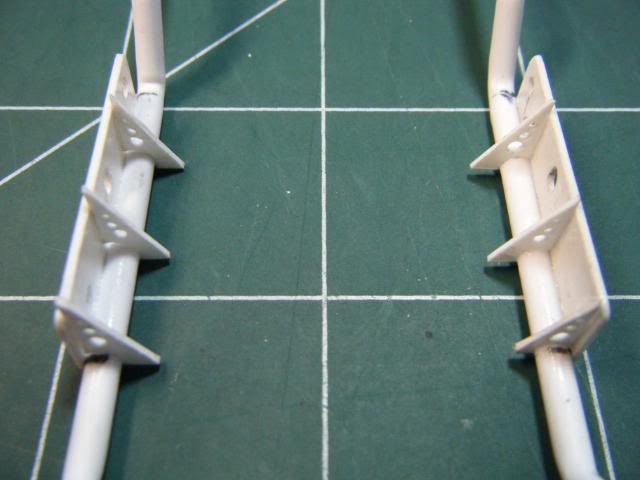 I used various pieces of aluminum to make braces to try and keep everything square when making my bends. 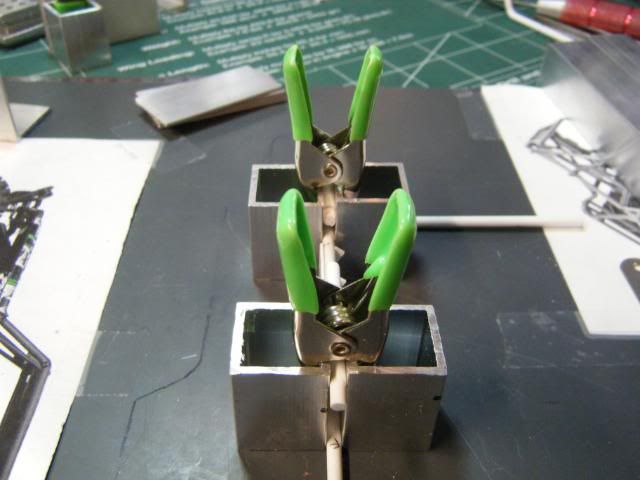 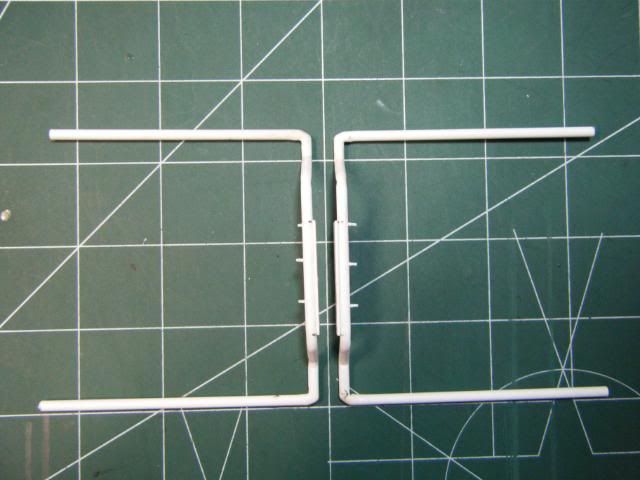 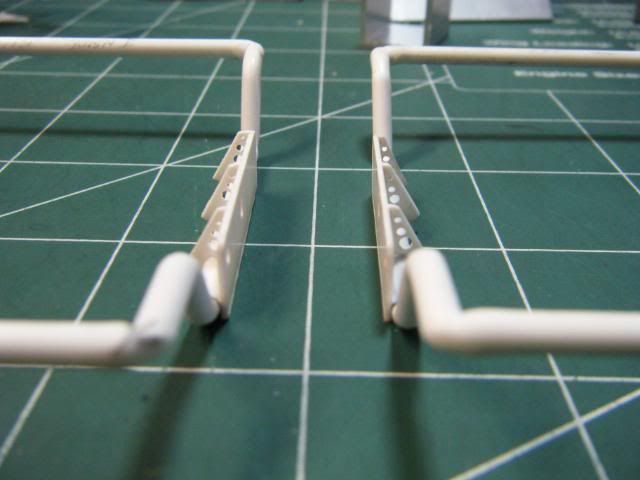 Now I just need to make the final 90 deg. bends in the sub chassis. I braced everything up trying to keep it square.  These bends ended up taking a better part of a day trying to get them right. I bent and re-bent about a half a dozen times before I was finally happy with how they turned out. 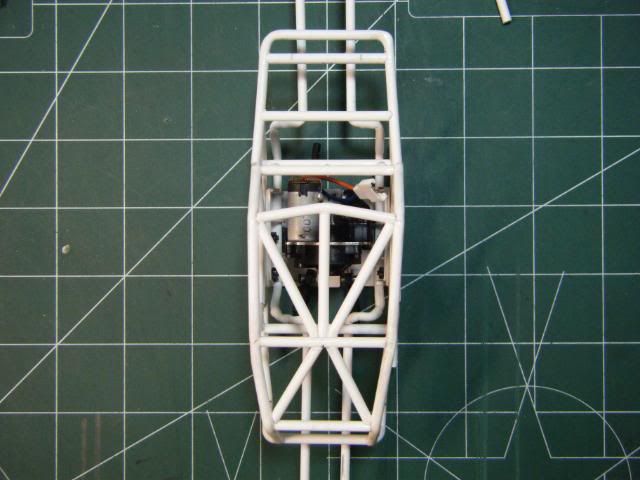 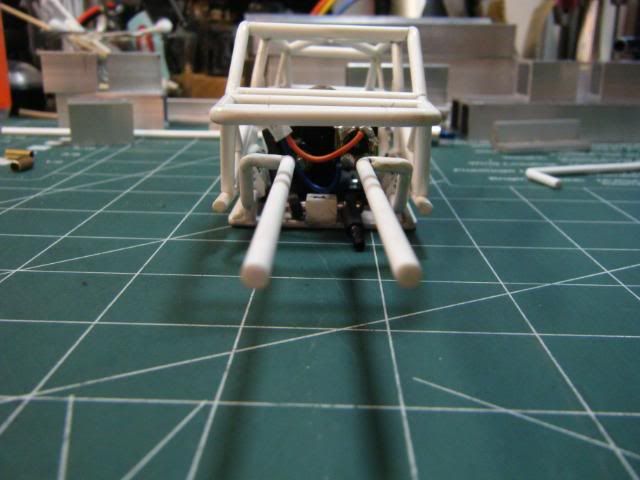 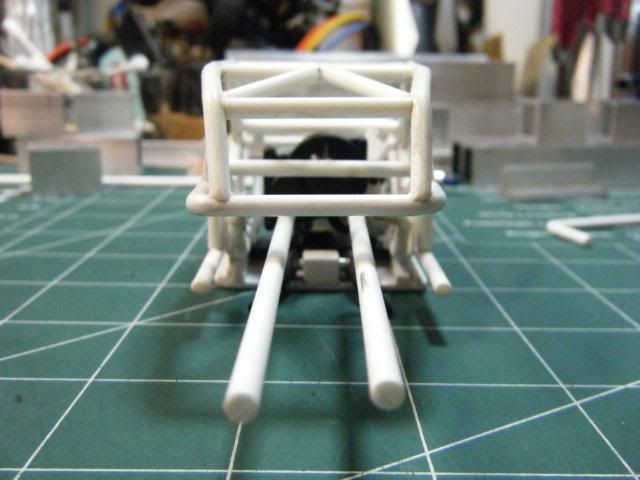 There was no way I was even going to attempt and make the bumper and rear end bends out of the same rod as the sub chassis because I wouldn't have been able to keep things square. So I came up with some brass collars that I will use as connectors. 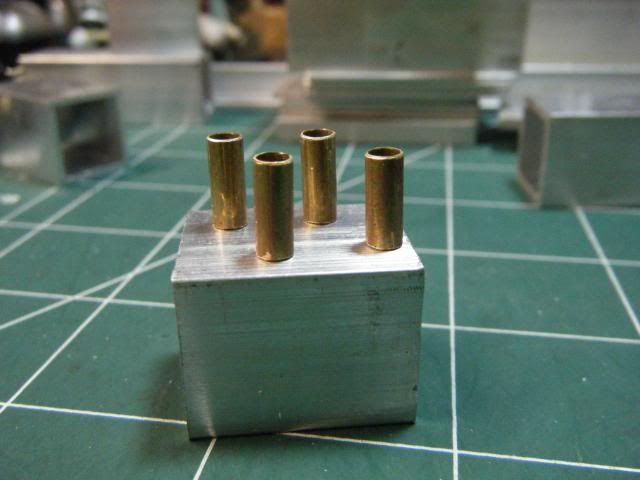 Chopped remaining rod off the ends of the sub chassis. 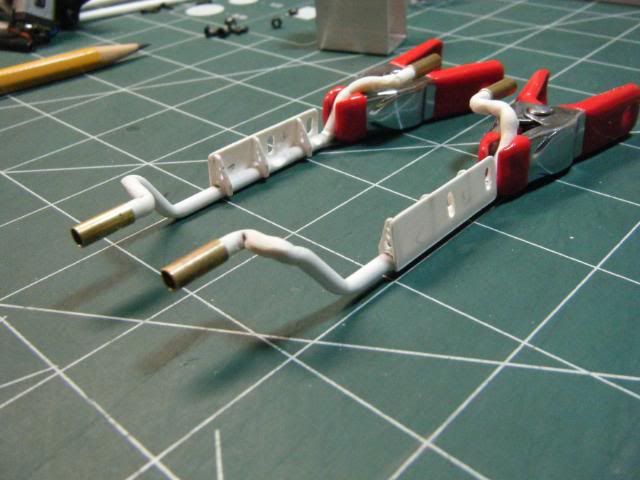 Then I needed to make the front bumper and the rear braces. 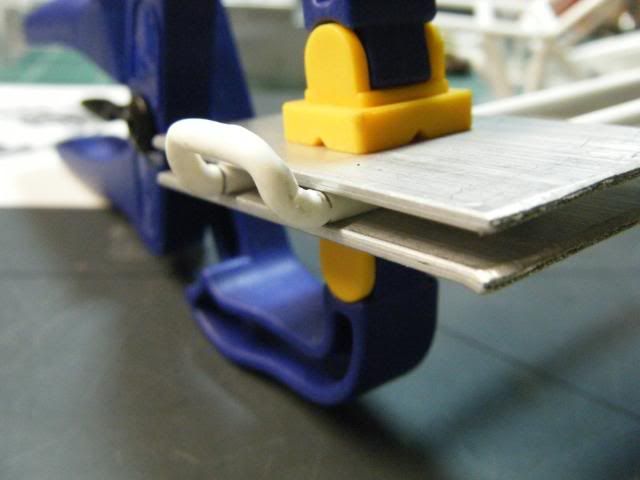 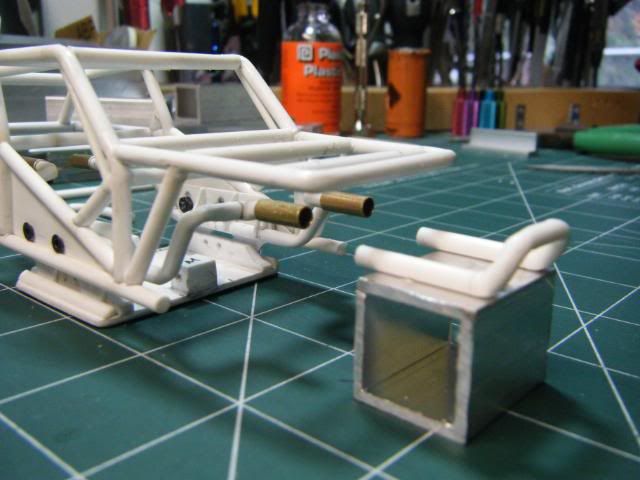 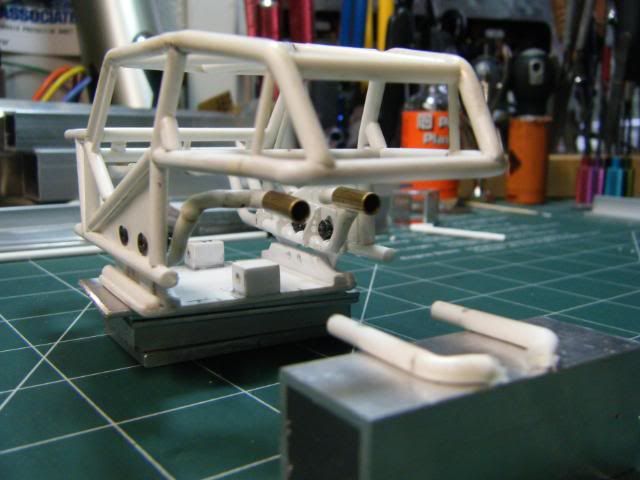 And then mounted up. I am not going to epoxy these joints untill I have the shock mounts installed and the remaining bracing for the main chassis to the sub-chassis. 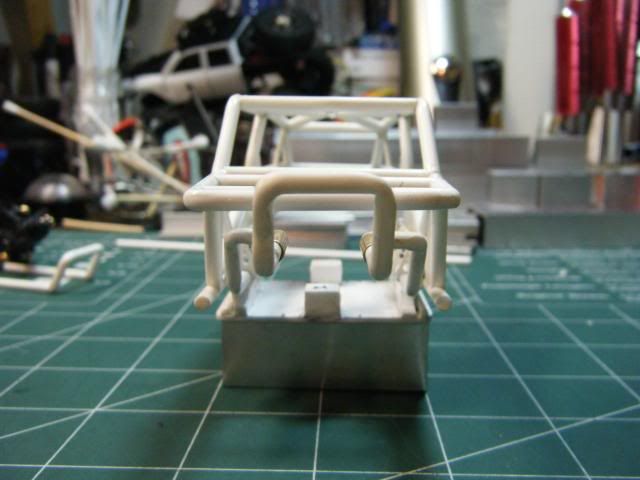 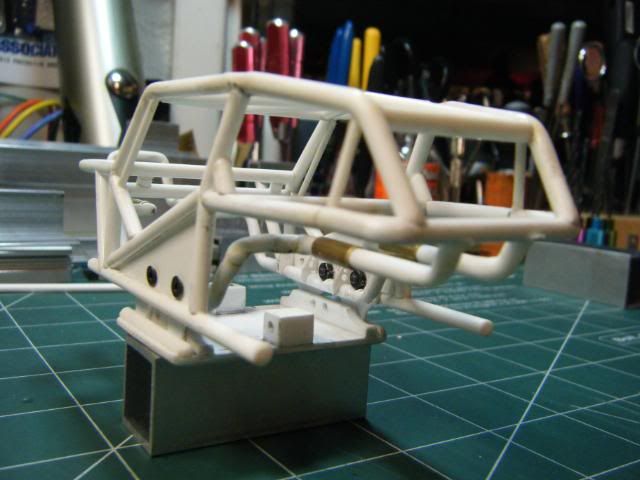 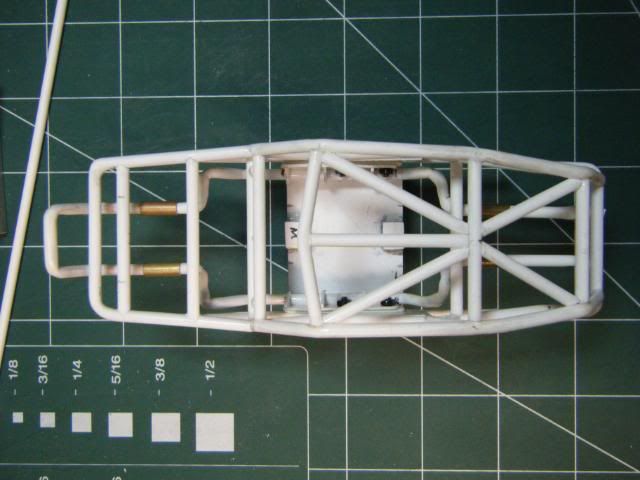 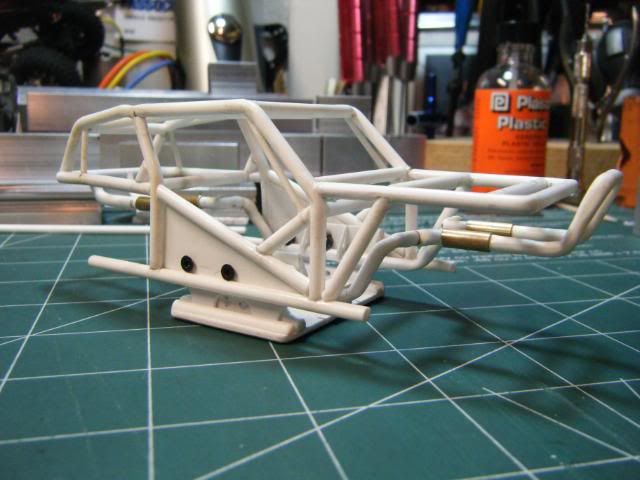 Next up I will proababley re-make the front bumper as it is sitting a little high, and I also need to make the side braces for the front bumper. Last edited by crawlski; 07-12-2011 at 04:10 PM. Reason: spelling |
|
| |
|
07-15-2011, 01:36 AM
| #32 |
| Newbie Join Date: Jun 2011 Location: Europe
Posts: 10
|
Wow, it´s amazing what people can do with these tiny tubes of styrene |
|
| |
|
07-15-2011, 06:14 AM
| #33 |
| Quarry Creeper Join Date: Oct 2010 Location: Newport, South Wales
Posts: 257
|
This is looking awesome, the attention to detail is amazing. I look forward to updates on this.
|
|
| |
|
07-15-2011, 11:53 AM
| #34 |
| RCC Addict Join Date: Nov 2007 Location: -
Posts: 1,134
|
Very great work, keep it up. Last edited by Hydro-Tank; 07-16-2011 at 11:36 AM. |
|
| |
|
07-16-2011, 12:08 PM
| #35 | |
| Quarry Creeper Join Date: Jun 2008 Location: anchorage
Posts: 395
| Quote:
Last edited by crawlski; 07-16-2011 at 12:12 PM. | |
|
| |
|
07-17-2011, 02:25 AM
| #36 |
| Quarry Creeper Join Date: Jun 2008 Location: anchorage
Posts: 395
| I want to start by thanking spoo76 for the heads up on the sumo crawler and the tires because they are definatley right on the money as far as this build is going. So I tore down the the little sumo and started with the rims and tires. The sumo rims are pretty close to the stock wraiths so I got rid of the stock rubber and painted up the rings. 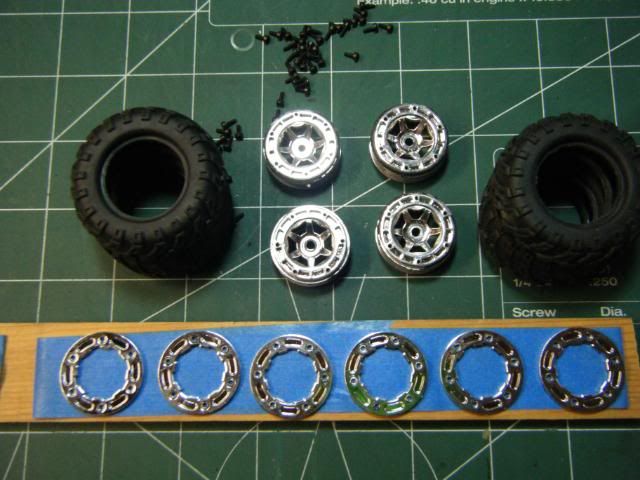 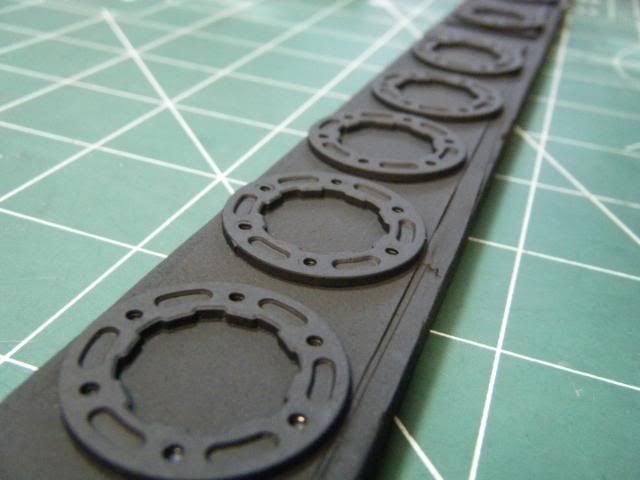 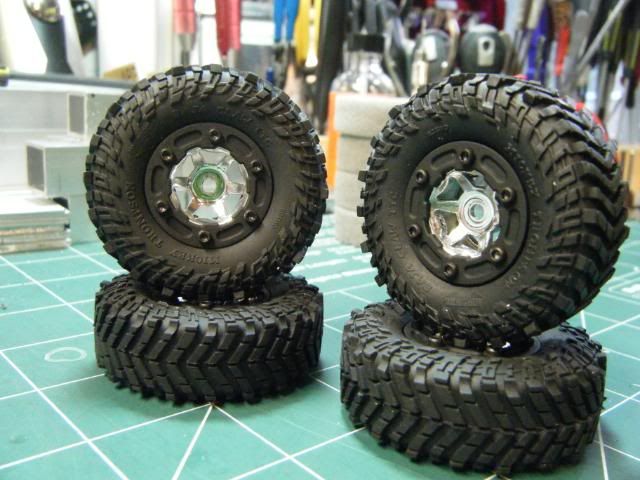 Next up was to come up with the links, I found these at the LHS and thaught they might just work. They ended up bieng the same thread and the lengths were pretty close. 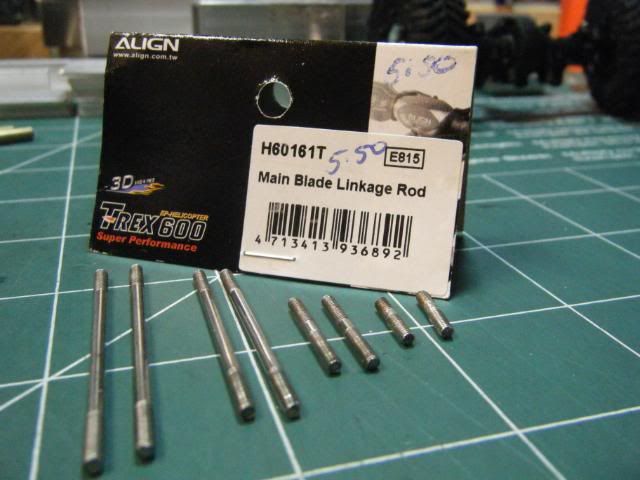 The rod ends closest to the axles needed the ball studs cut down and drilled so the shocks can be mounted in the same spot. 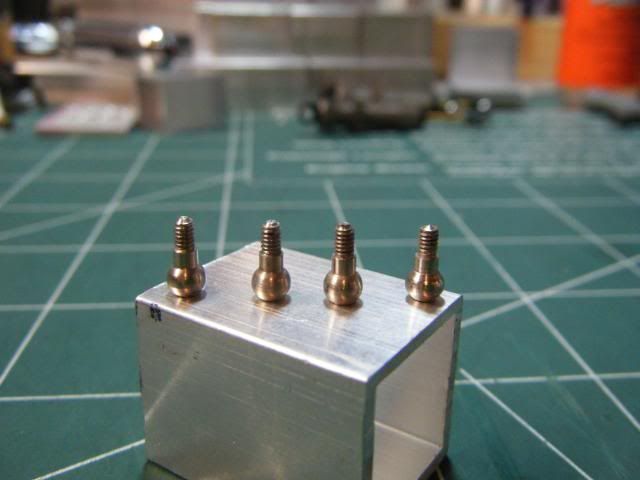 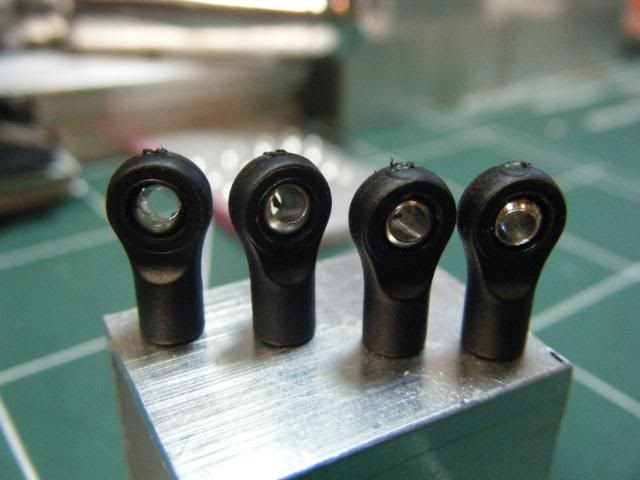 I made up all of the links except for the front uppers because I still have to drill out for the mounts. 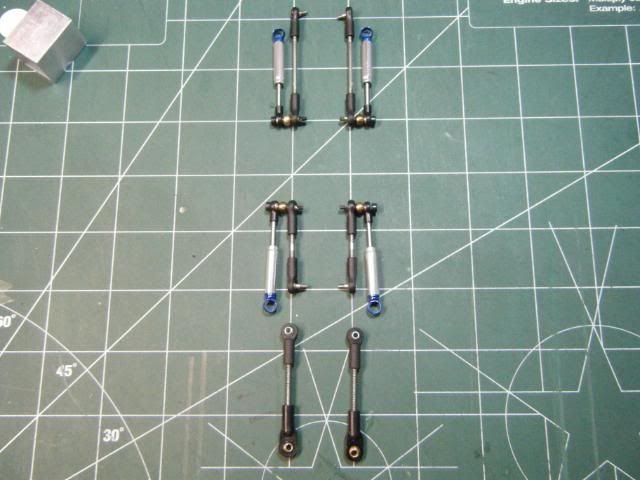 Here is the links mounted up on the front and rear axles. 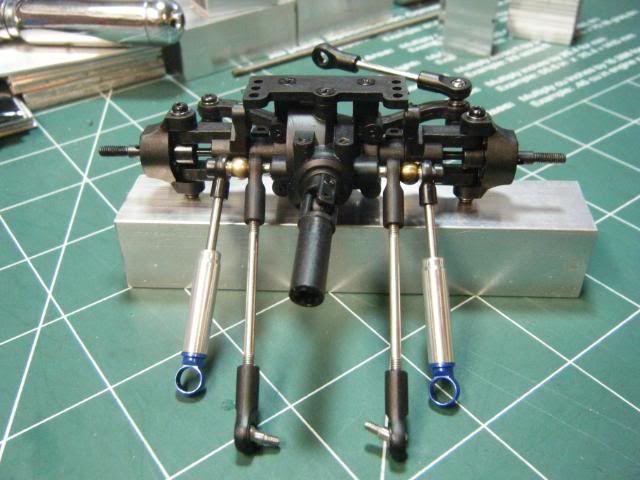 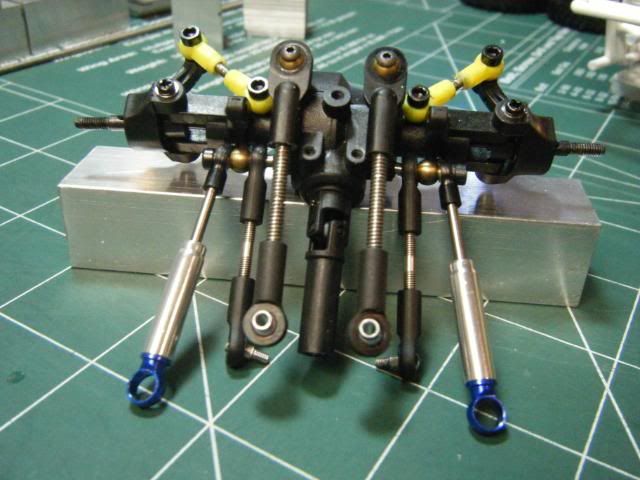 And then on the chassis! 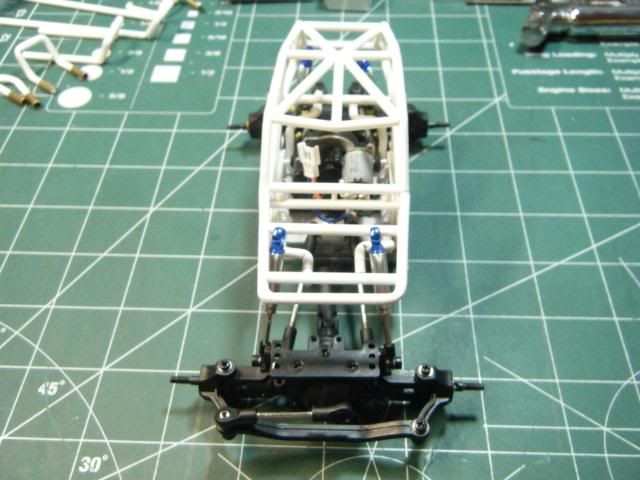 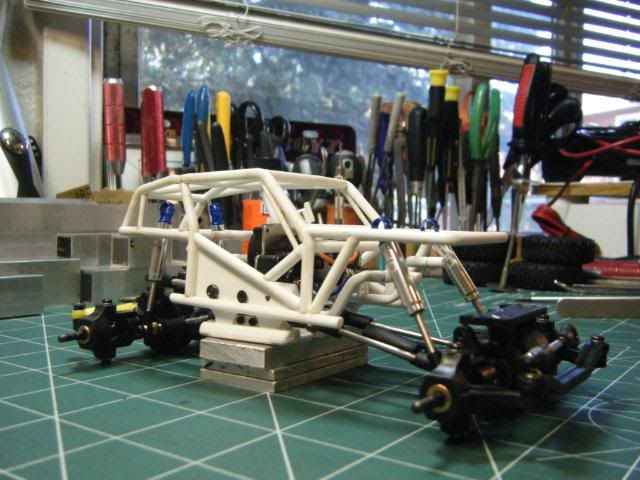 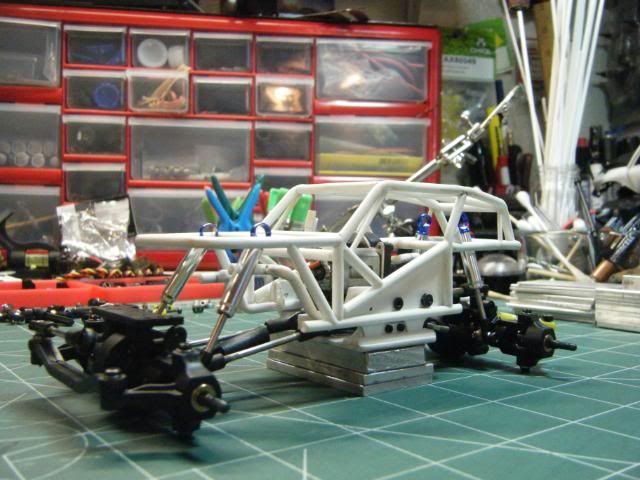 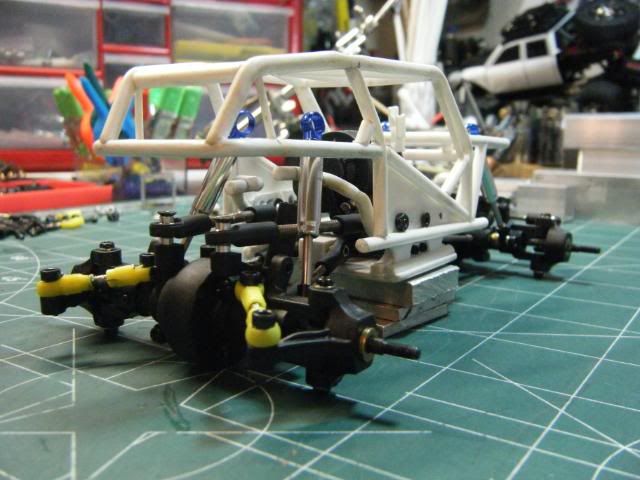 Now for some rubber. But first I wanted to get the stance as wide as possible so I just used some spacers behind the hexes. 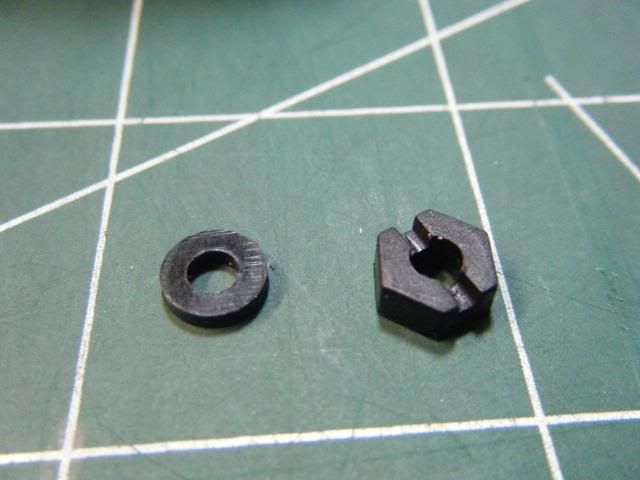 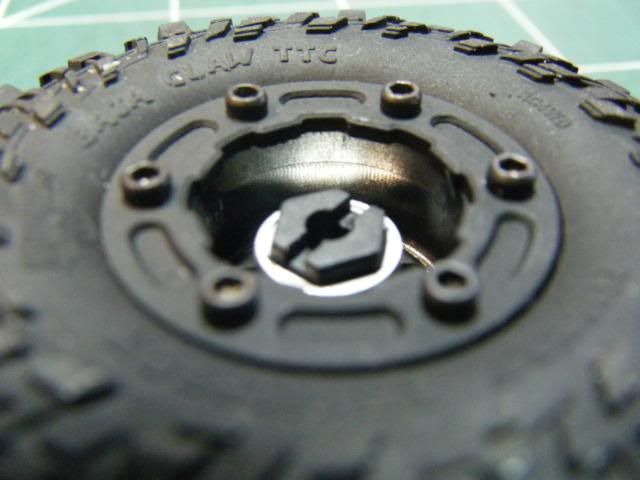 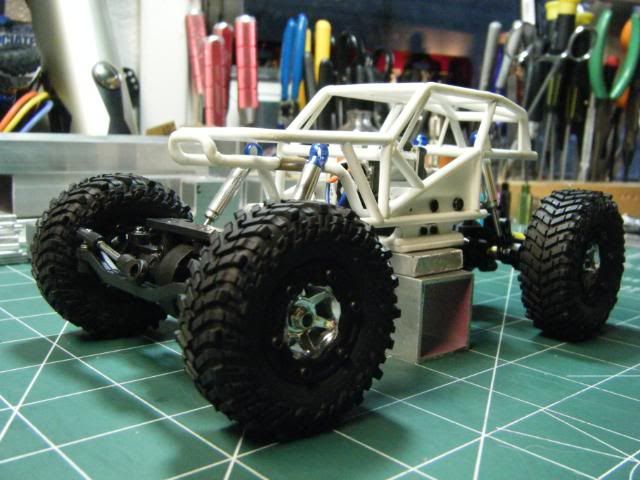 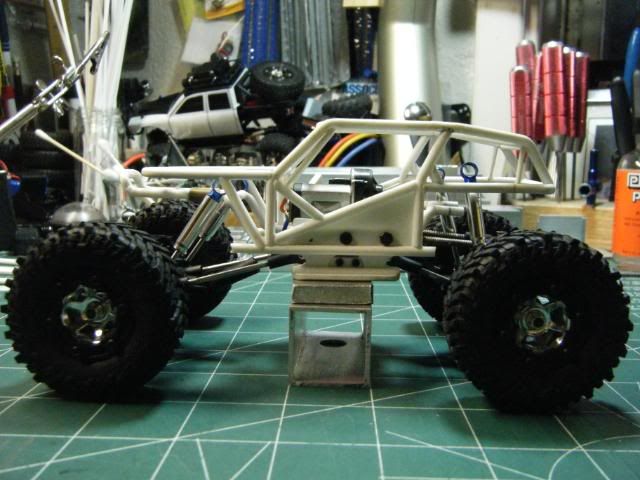 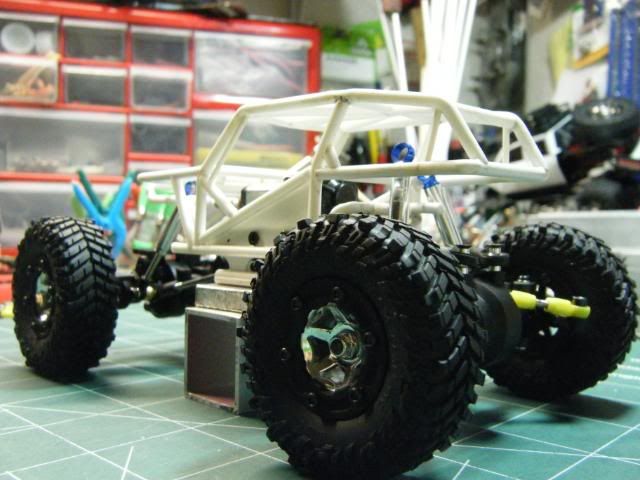 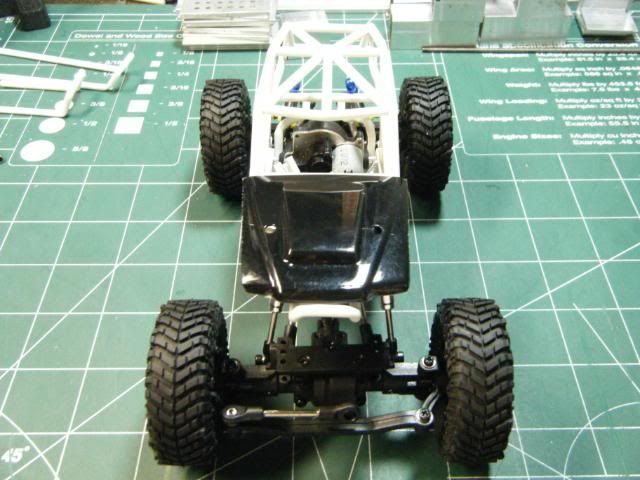 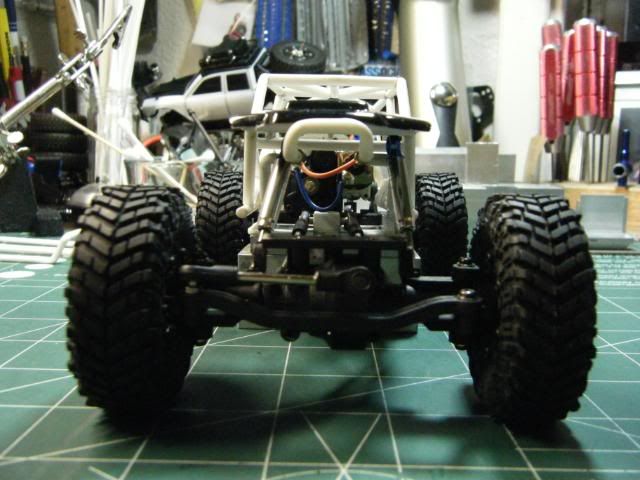 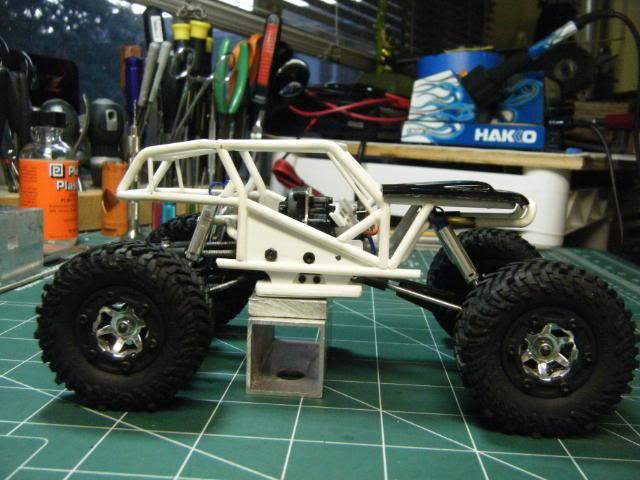 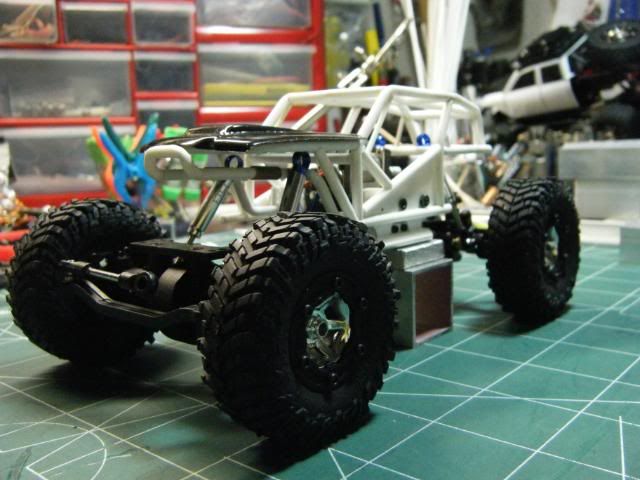 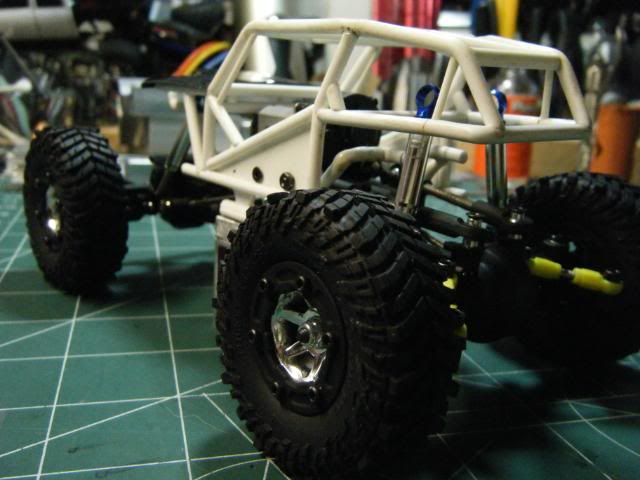 Next up I need to drill the mounting holes for the upper links up front and make a set of links. Then proababley on to the shock mounts. Last edited by crawlski; 07-17-2011 at 02:28 AM. |
|
| |
|
07-17-2011, 07:39 AM
| #37 |
| I wanna be Dave Join Date: Feb 2007 Location: South FL
Posts: 3,349
|
Awesome! Told ya the baja claws and RSMC axles would make it a true micro wraith! |
|
| |
|
07-17-2011, 10:13 AM
| #38 | |
| Quarry Creeper Join Date: Jun 2008 Location: anchorage
Posts: 395
| Quote:
 | |
|
| |
|
07-17-2011, 11:50 AM
| #39 |
| I wanna be Dave Join Date: Feb 2007 Location: South FL
Posts: 3,349
|
Ive always said if I found a small enough Tacoma I would build a micro honcho
|
|
| |
|
08-05-2011, 01:30 PM
| #40 |
| RCC Addict  Join Date: Feb 2008 Location: Tekin, ID
Posts: 1,940
|
Sweet, any more progress? That is an awesome mini Wraith!
|
|
| |
 |
| |


 Linear Mode


