| |||||||
Loading
 |
| | LinkBack | Thread Tools | Display Modes |
| |||||||
 |
| | LinkBack | Thread Tools | Display Modes |
| | #1 |
| Rock Crawler Join Date: Oct 2004 Location: The thumb
Posts: 788
|
Hey guys and gals, I received a package with a 1/35 DIY kit from Sam. I couldn't get the outer wrapping off of the package fast enough to check out this little truck! My first impression when I got in to it was how nice the box art and labeling was. It looks like something from a large company and not a thrown together brown box with a bunch of parts in it. To me thats a good sign. 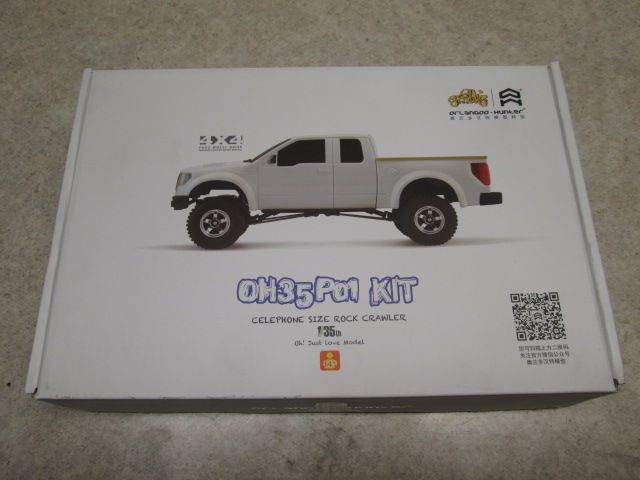 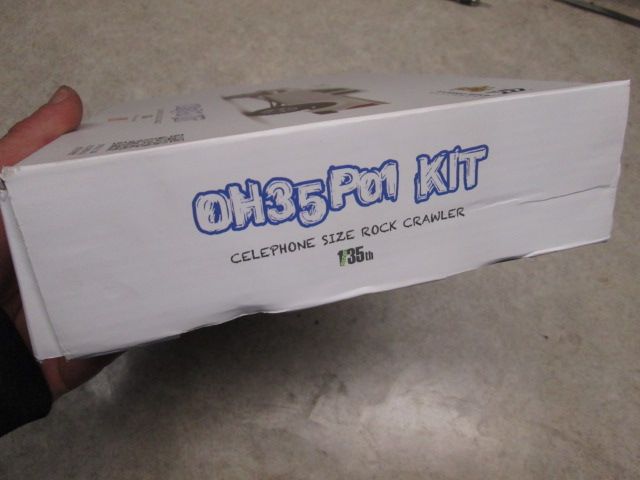 Popping it open the instructions are right up front, one last barrier before the good stuff. 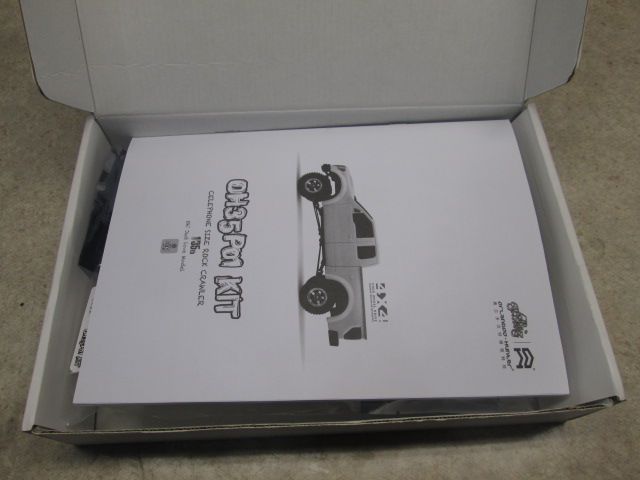 Yaaay! A bunch of bags with goodies. 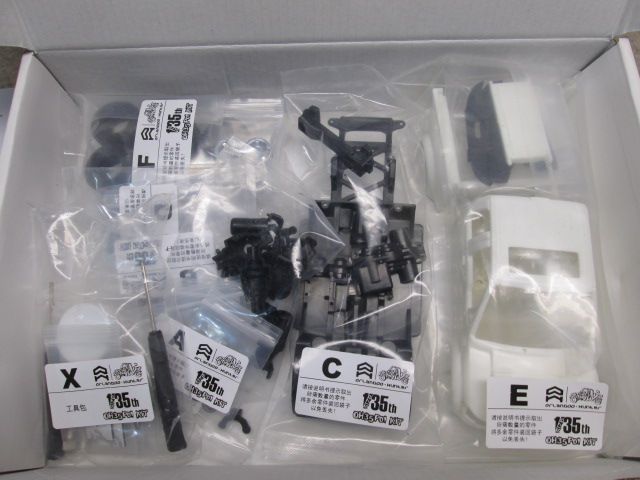 Everything all out on the bench. 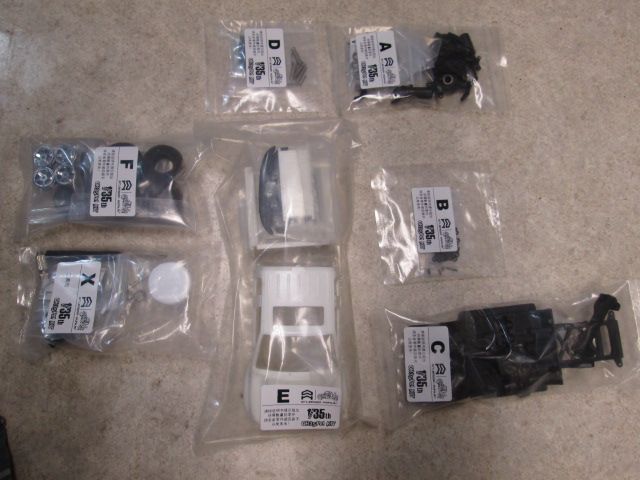 The body looks pretty neat and in two pieces with some separate details. 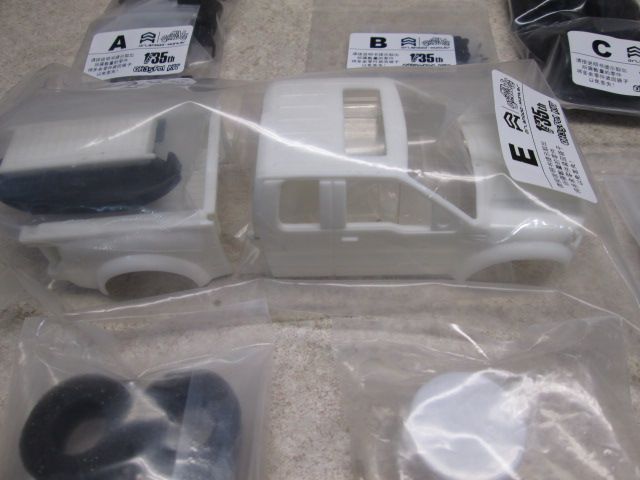 Opening up the instructions everything is layed out really nice. Again these look like stuff from a large company. I had no real problems at all assembling what I have done by looking at the pictures alone. 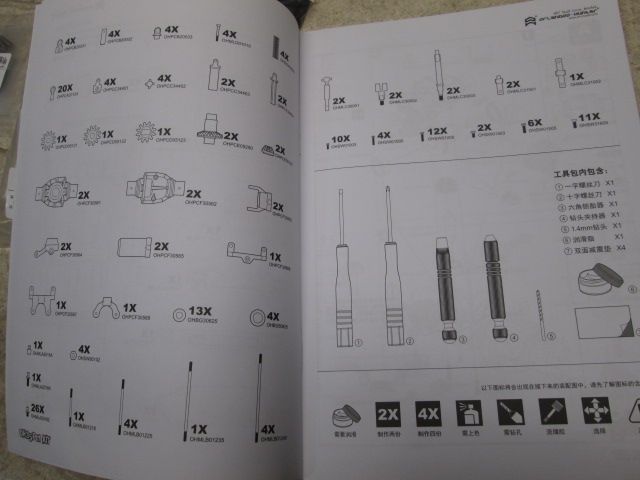 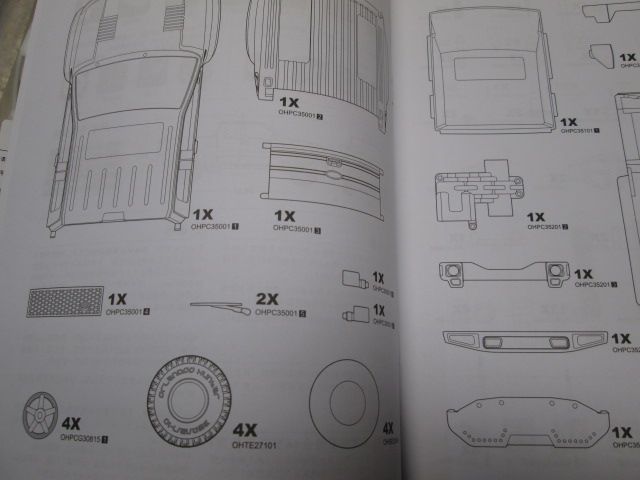 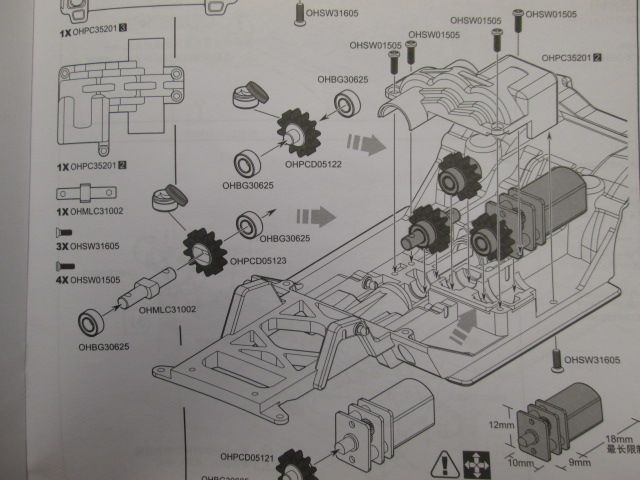 Starting with the bag-O-tools etc. labeled X 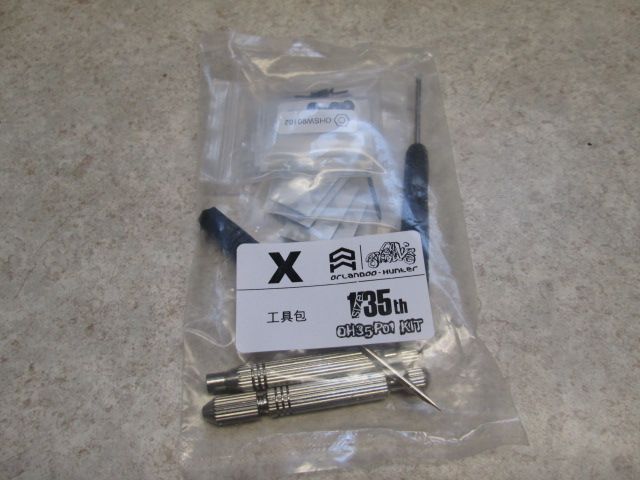 Actually a pretty nice selection of tools are included. You get a metal nut driver, Phillips and flat head screwdrivers, an metal pin vise:nice:a drill bit and some 3M double sided tape. The screws for the whole kit are also packaged in this bag. 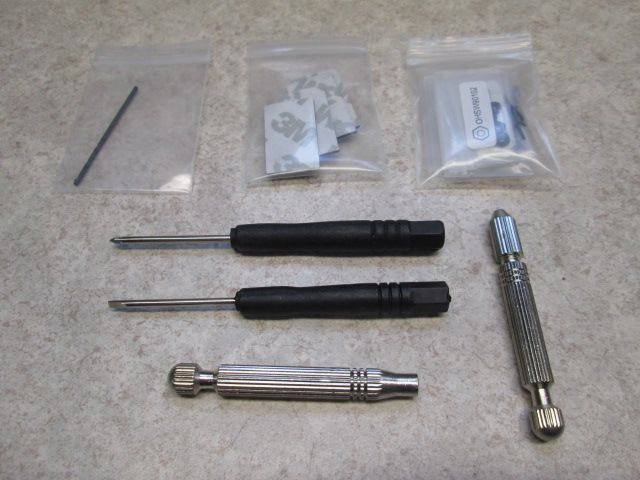 Clearly labeled bags of tiny screws. 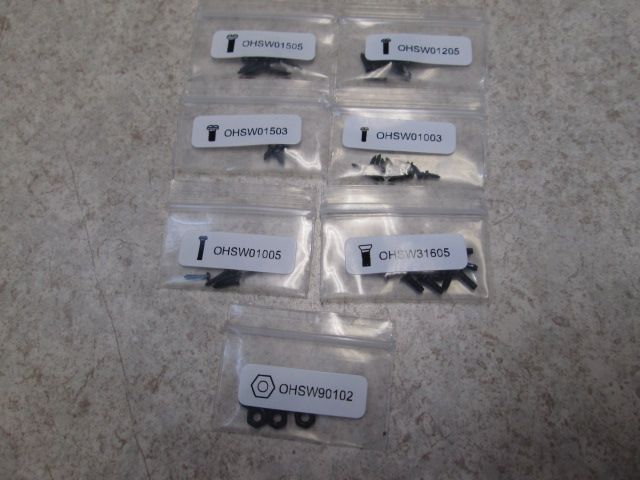 All of the contents of bag A all spread out. 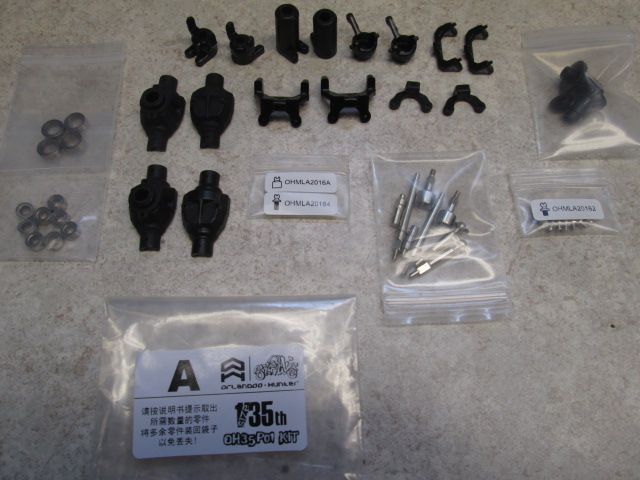 Here's the axles bevel and crown gears. 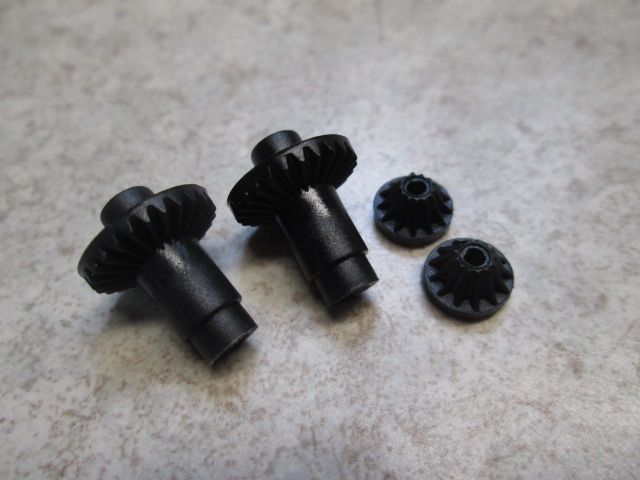 Super beefy metal internals for the axles:blink: 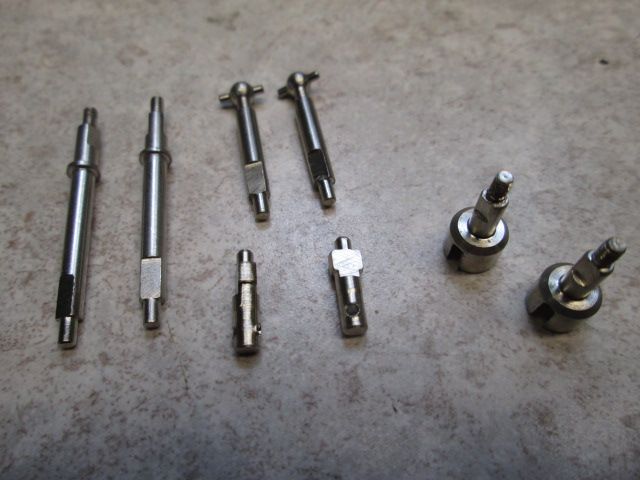 Here's why I say "super beefy" Losi micro parts on the left, Sams 1/35 parts on the right. 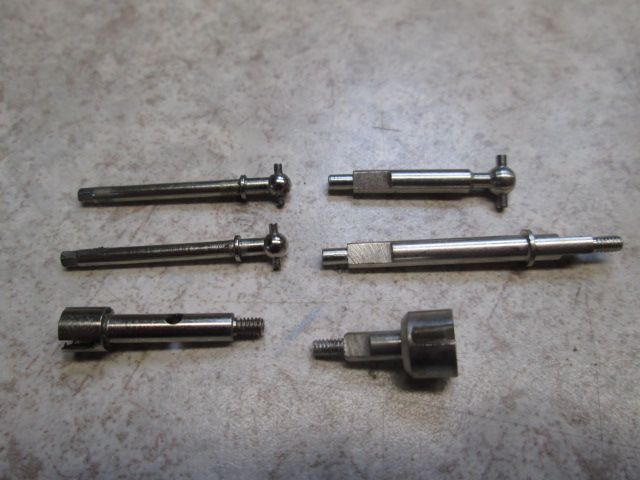 The input shaft for the bevel gear. 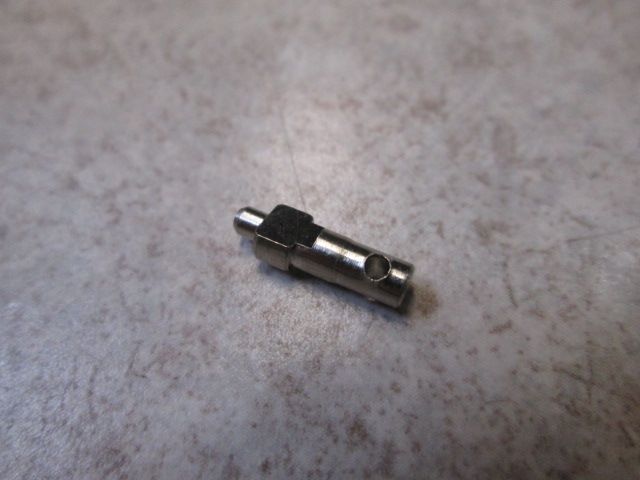 This is the only thing I have had to touch in the kit and i'm not sure if its something with my early production piece or not. Either way it very minor. I needed to file down the blue area in this picture just a hair for the bearing to slide on smoothly. Mostly around the edge of the hole where its drilled where the driveshaft screw passes through the shaft. I used a jewelers file but just plain old nail file would work. Take it easy as it doesn't take much. 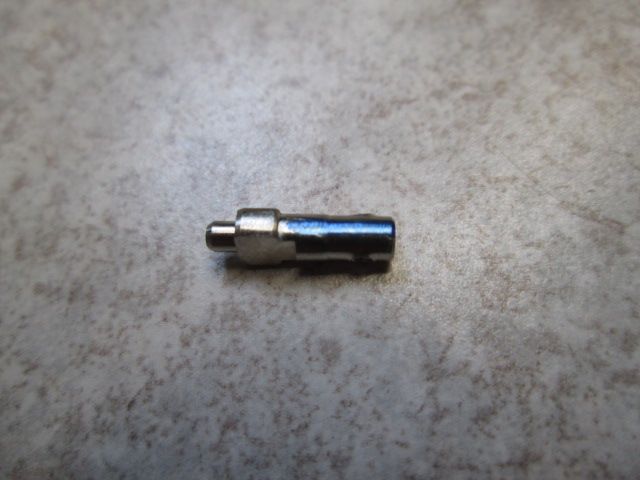 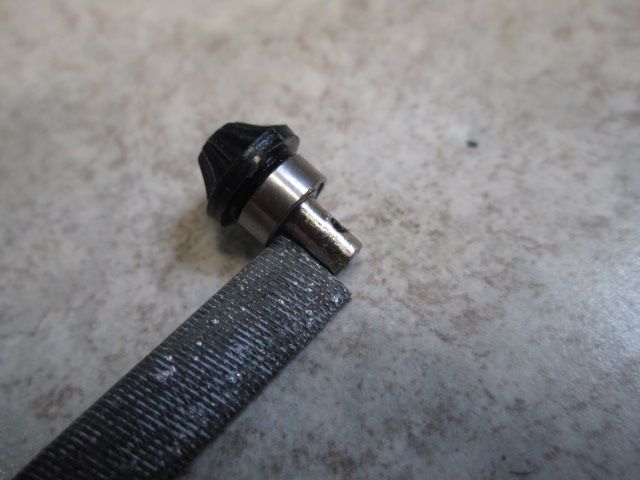 After that slide the bearing onto the shaft and press on the bevel gear tightly. Make sure that the bearing and gear are evenly seated and 90 degrees from the shaft. 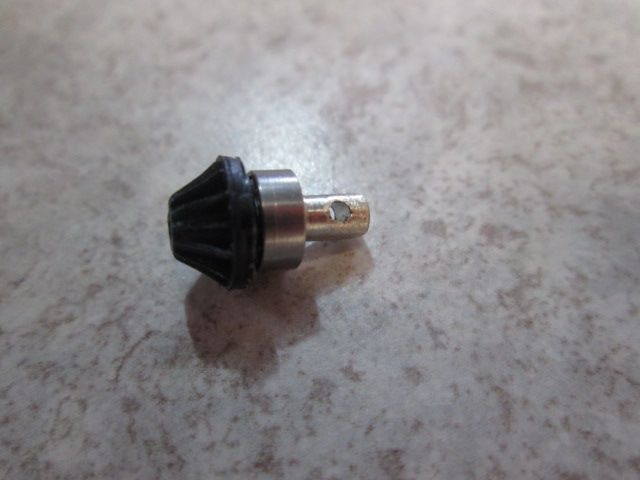 Apply a good bit of grease to the gear and press it into the housing. 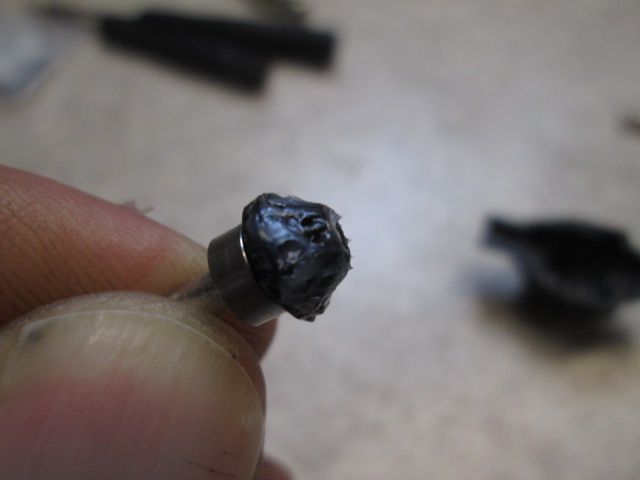 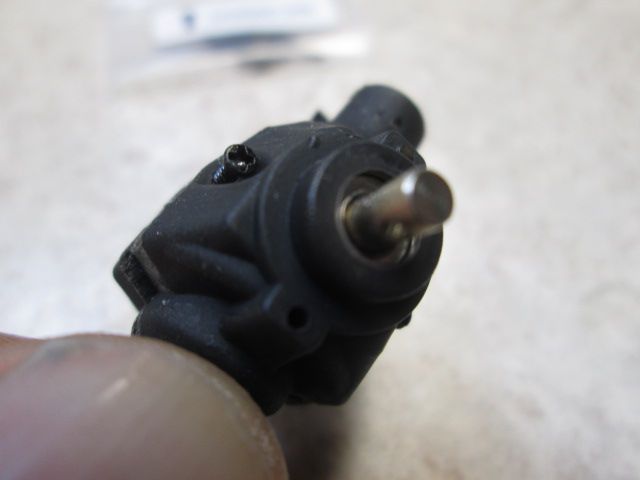 Next place a larger bearing on both ends of the crown or center gear and apply a bit of grease to the teeth. 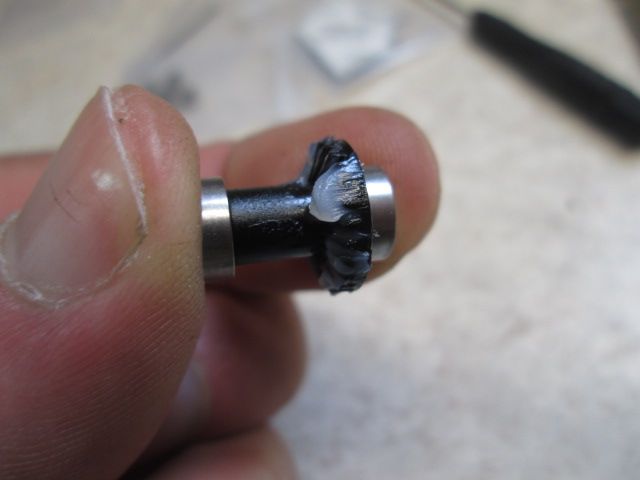 Set the whole unit into the axle housing and get your front half of the axle housing ready. 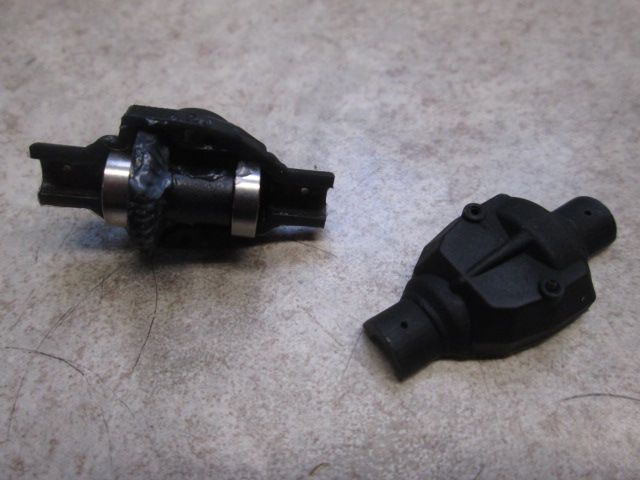 Screw together the two halves using the proper length screws top and bottom seen in this picture.  Gotta do it twice obviously.. 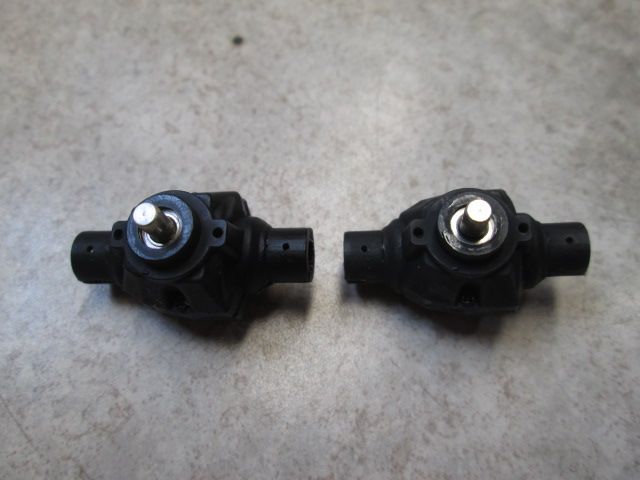 Lets start with the front. 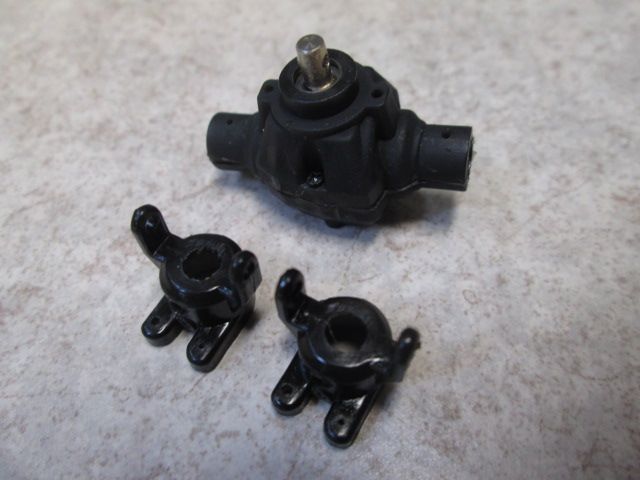 Use the supplied drill bit and pic vise to clean up the holes where the ball studs will screw in to the C-hubs. 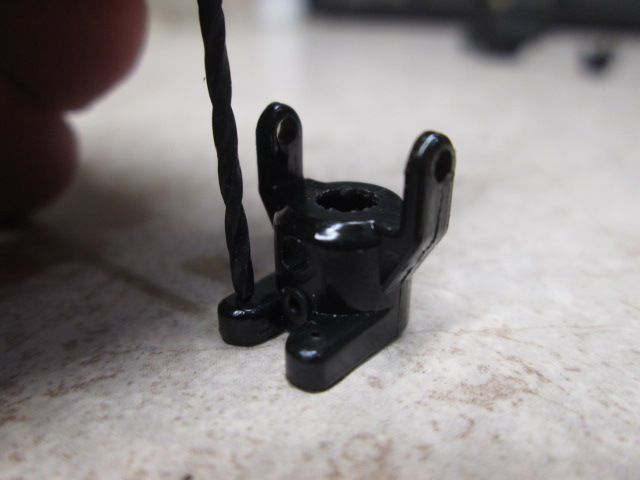 Slide another set of small bearing into the knuckle housing. Use the tail end of your nut driver to push them in all the way. I would also install the proper ball studs in the hub they are installed. Might make it easier as they are very small. 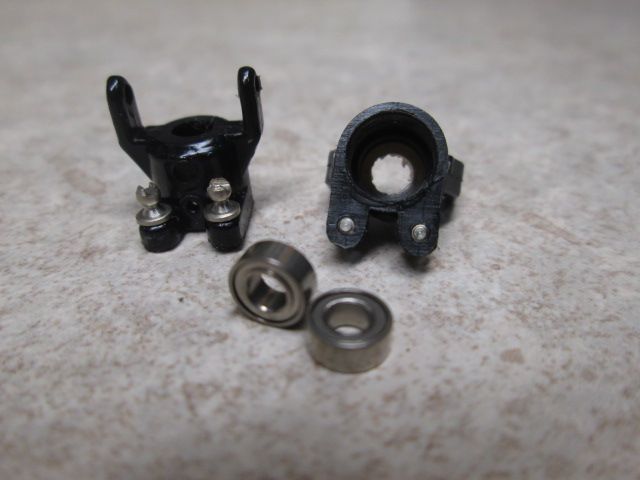 Next you will need these screws, they hold it all together. 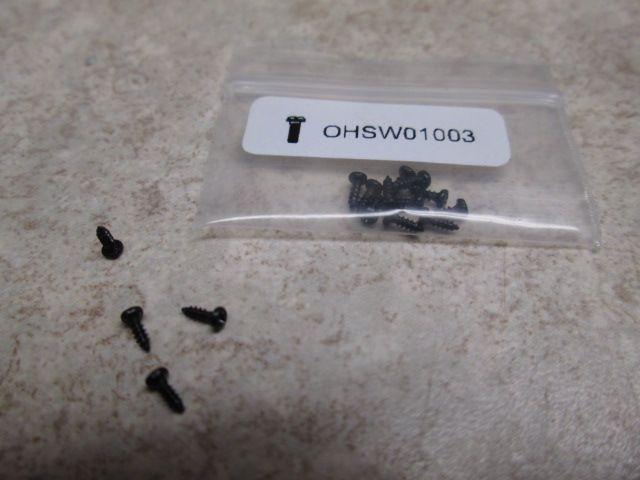 Slid the "C" over the end of the center section and screwed them down. 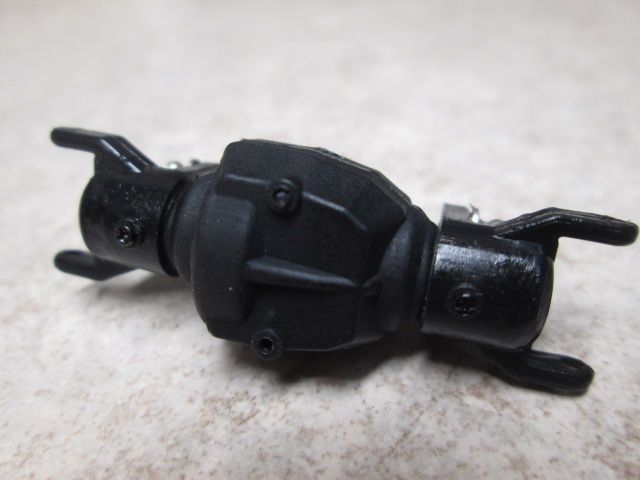 Axles next, be sure to line up the flat of the shaft with the hole in the center gear before shoving them in. 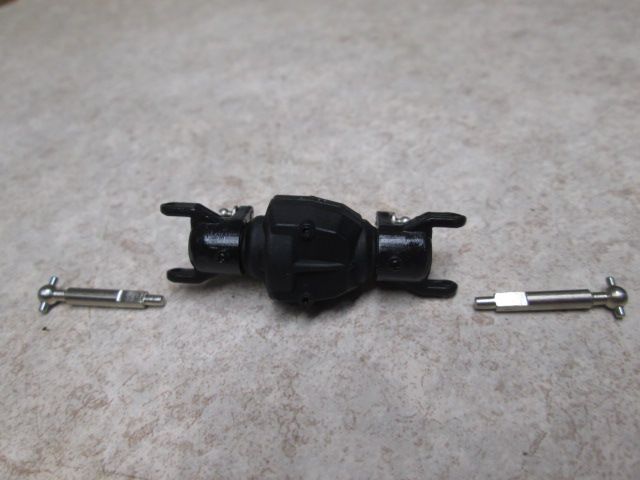 |
| |  |
| Sponsored Links | |
| | #2 |
| Rock Crawler Join Date: Oct 2004 Location: The thumb
Posts: 788
|
Putting on the steering ball studs into the knuckles next. 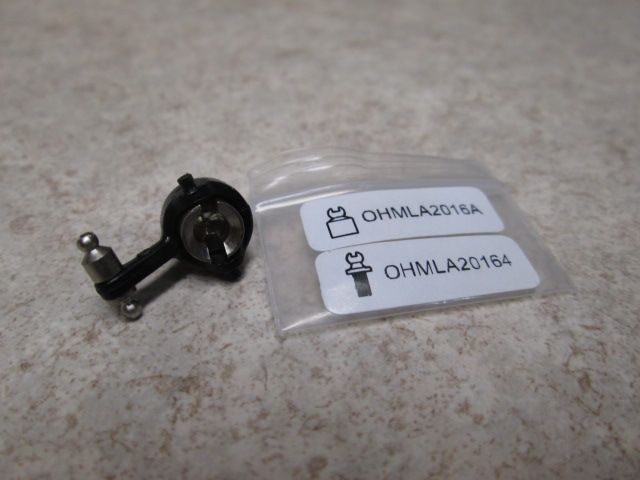 Make sure these are oriented in the proper directions and slide in the outer axle ends. 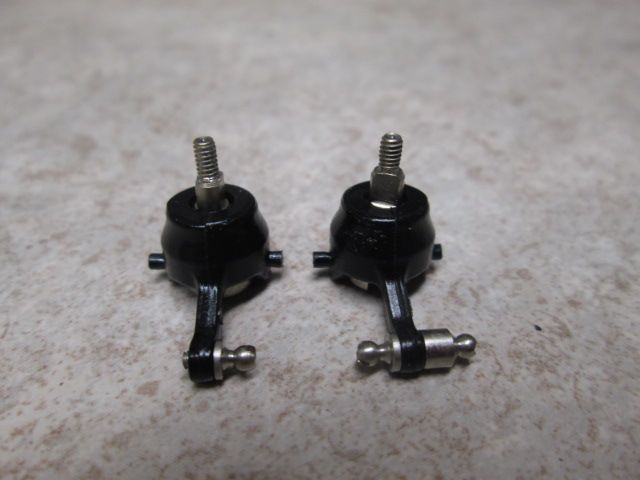 Apply a bit of grease to the dog bone and simply snap the knuckle pins in the holes in the C hubs. Presto... A front axle. 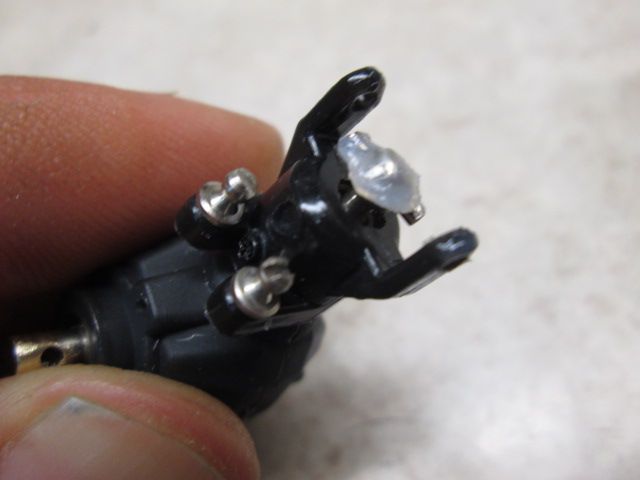 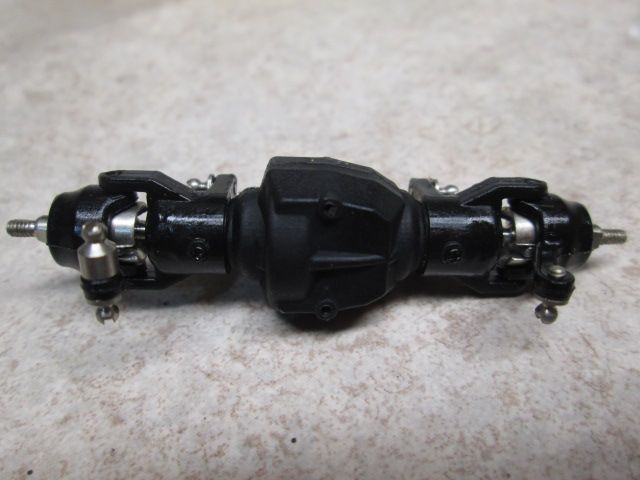 Servo mount/axle truss. The pins in this part.. 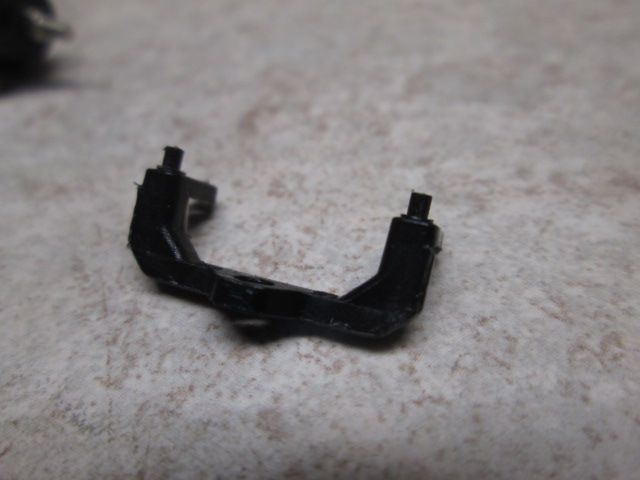 Line up with the bottom two holes in this upper servo mount/truss. 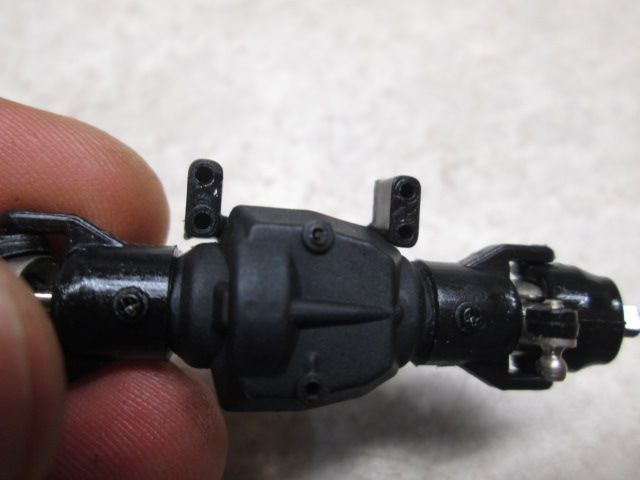 The assembly installed. 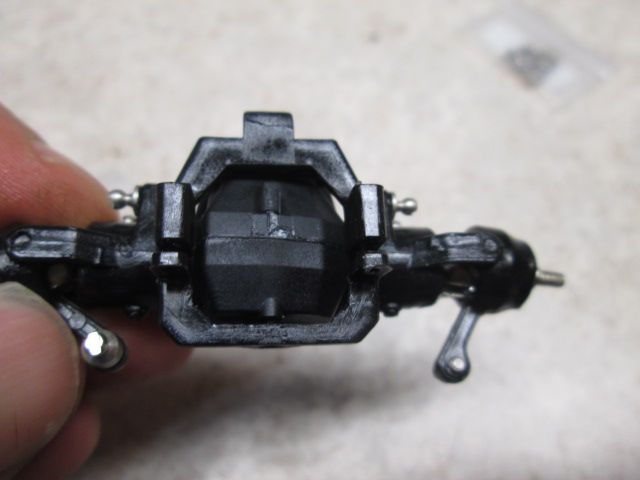 I choose to do this step after the parts where installed.. You will need to drill the holes in the upper link mount. The plastic is soft enough to easily drill but is still strong. The spot you need to drill is marked on the mount. Its a pretty straight forward procedure. just make sure your drilling straight across the mount. 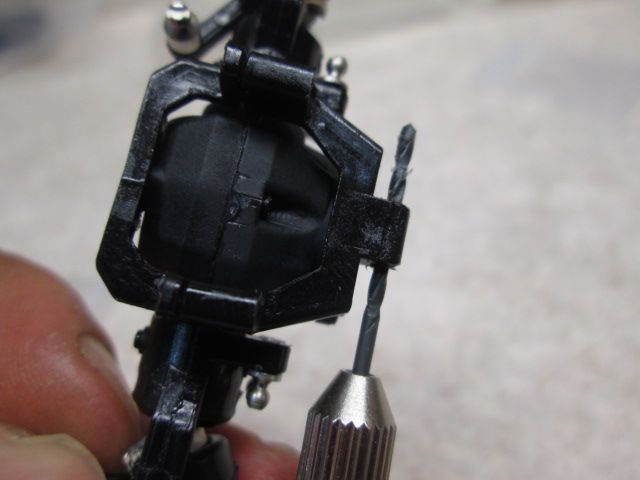 The rear axle is very similar to the front. The rear lockouts need the four ball studs installed after cleaning up the holes with the drill bit. Then install the smaller bearings into each tube. 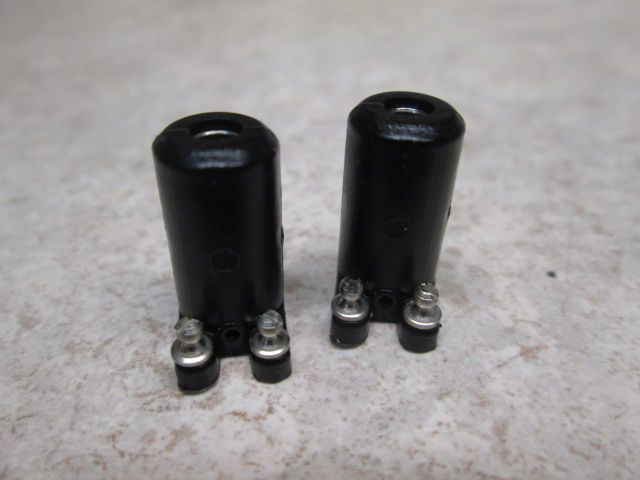 Slide the rear axles in place and slip the lockouts over the ends of the center section. Lock them down with the proper screws. Now install the upper link mount, drill the holes for the ball studs and you should have something like this. 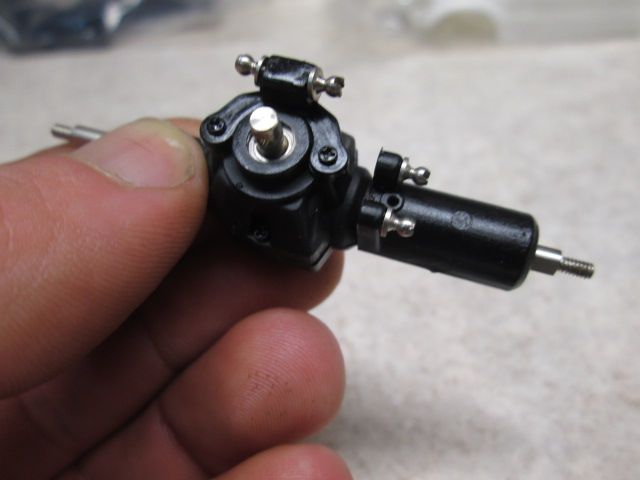 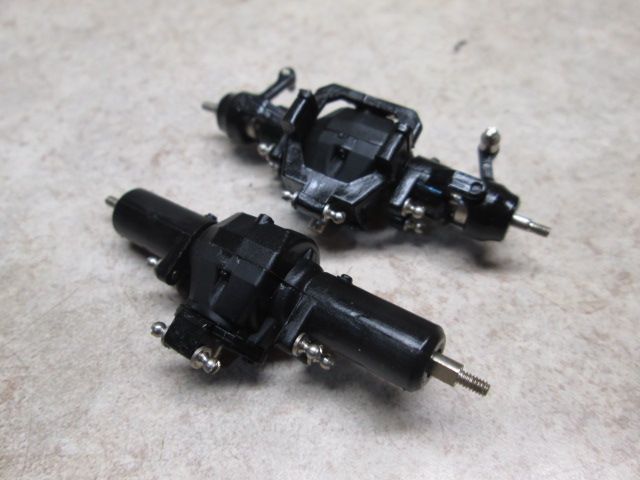 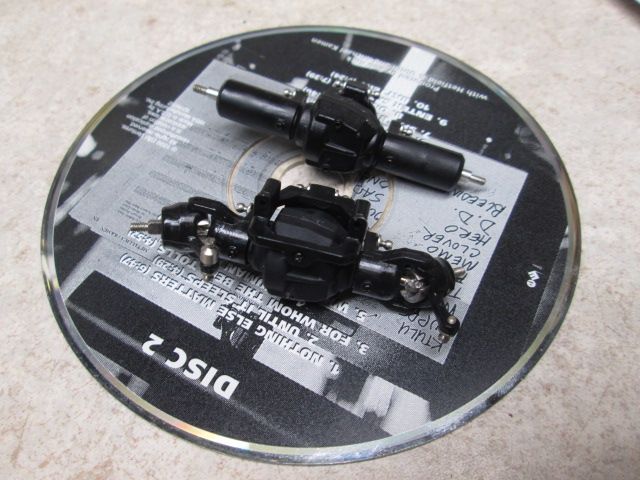 This is what is will receive if you order the servo direct from Sam. 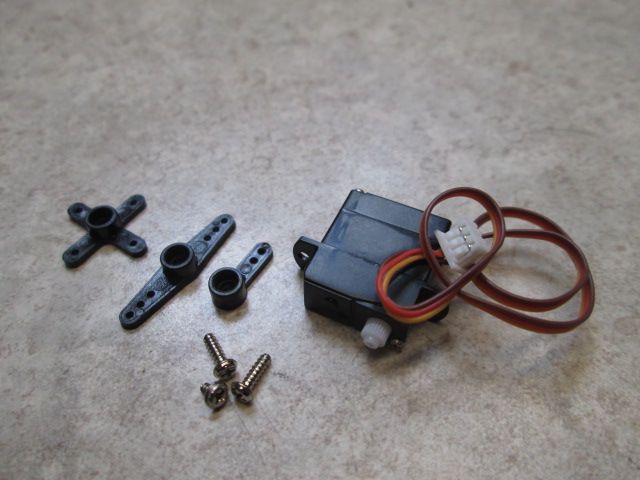 It fits snug in the axle mount and with the two appropriate sized screws its locked in. 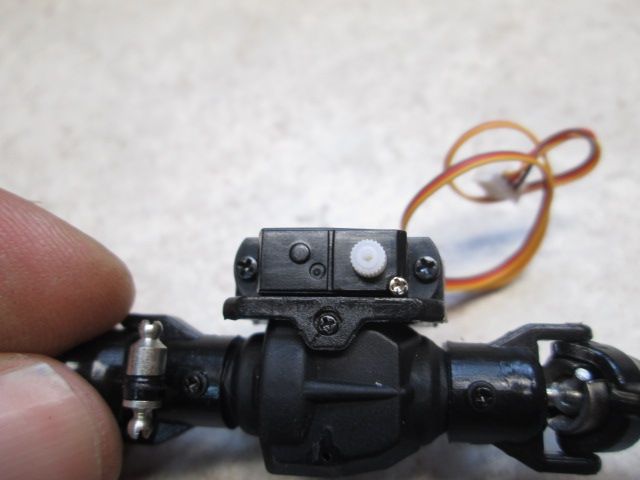 Before anything I would drill the lower hole out of the arm with the supplied drill/bit. Insert a ball stud into that hole. I then slid the servo arm on to the servo and carefully turned it left to right to find the center of its range. You can re-position the arm accordingly and fasten it down with the correct number screw. 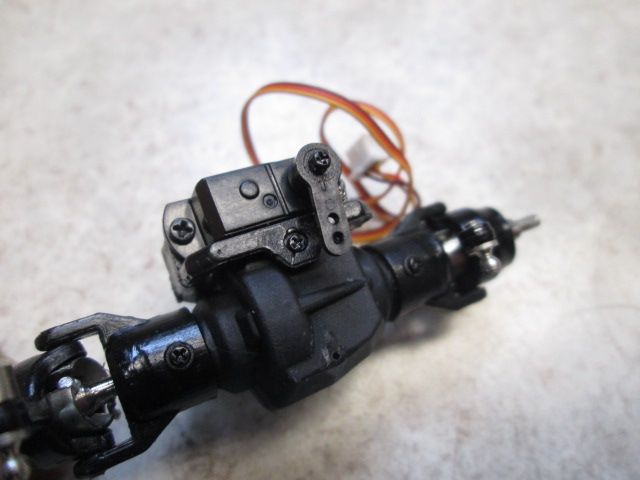 Suspension links are next. I separated them into equal length piles. The shortest one is the upper steering link, the other oddball is the lower steering link. The instructions specify the exact lengths to set these to as well as the suspension links with ends installed. 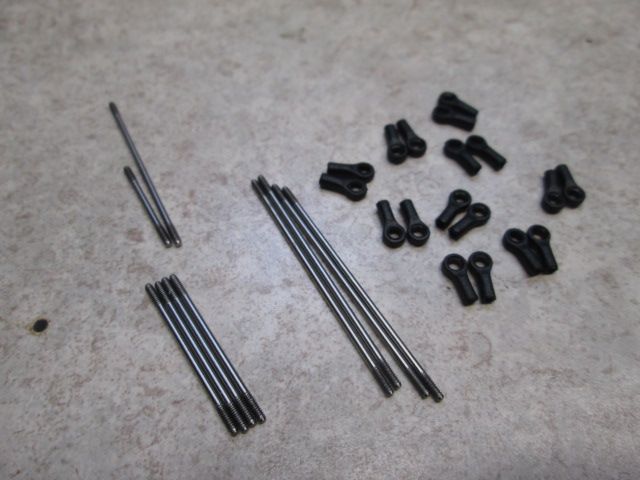 Here is my suggestion for getting the plastic ends onto the threaded links.. A pair of needle nose pliers comes in handy here. Hold the steel link like so- 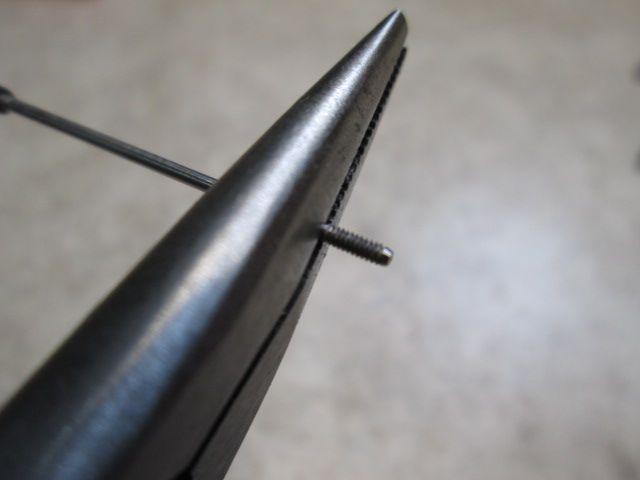 Hold the plastic ball cup and push the threaded end of the rod into the link end while twisting back and forth a few times and it should thread right on. Here's what you'll end up with. 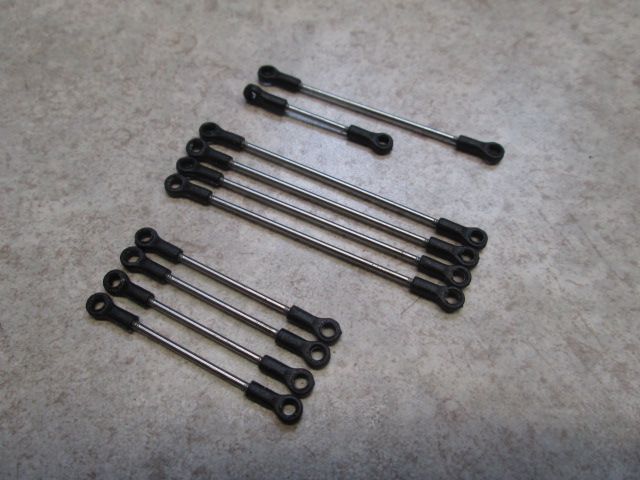 Connected the newly made steering links to the axle, if you come across an end that fits loose on the ball just flip to the other side of the plastic end to push over the stud. They seem to be tighter one side or the other. 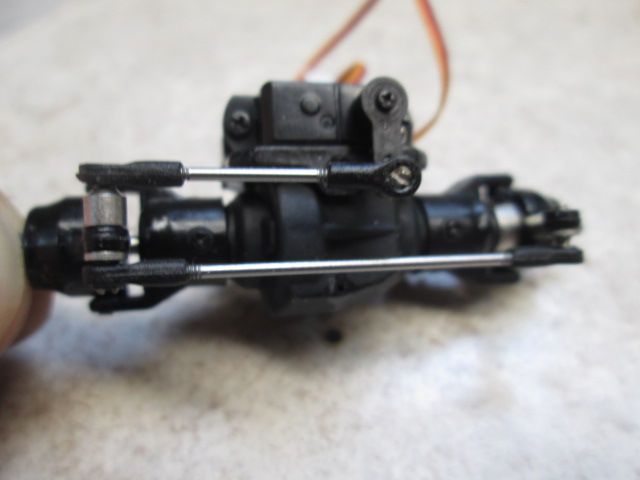 Upper and lower suspension links work the same 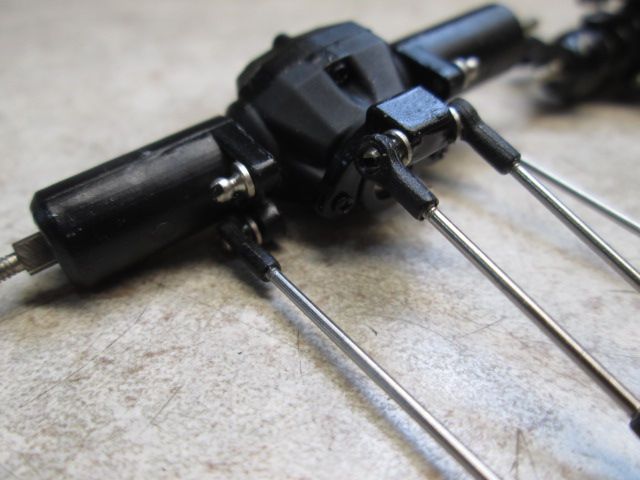 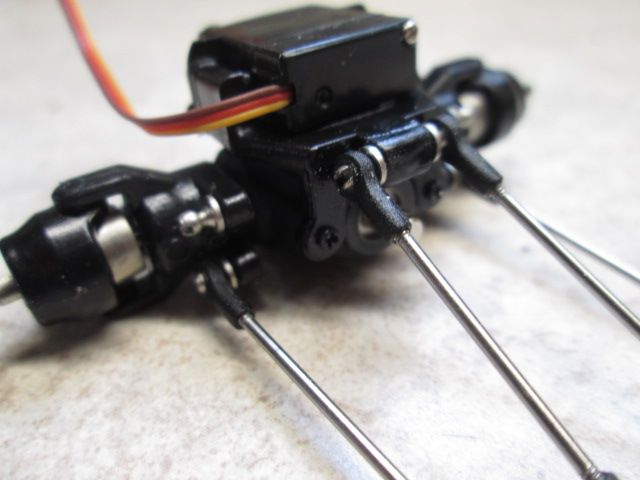 Both axles linked up and ready for the chassis. 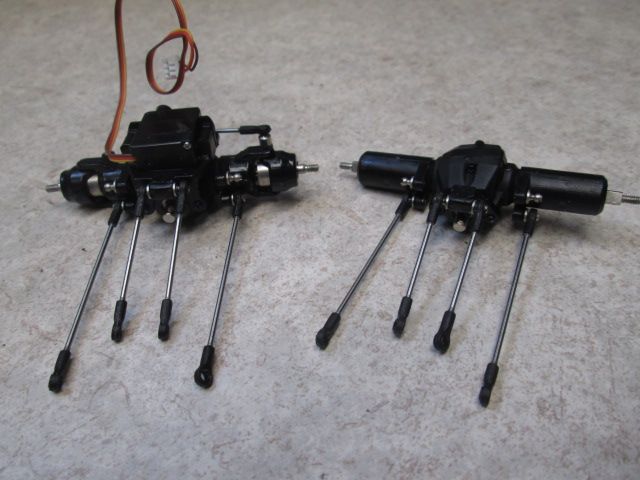 Onto bag "C" then. 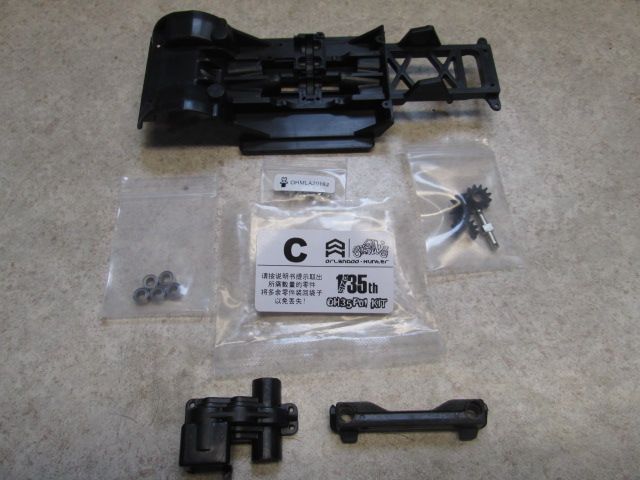 Again we are going to need to drill a few holes here.. The center or bottom of the transmission need the four holes drilled out. The marking are the same to direct you where to drill these holes. 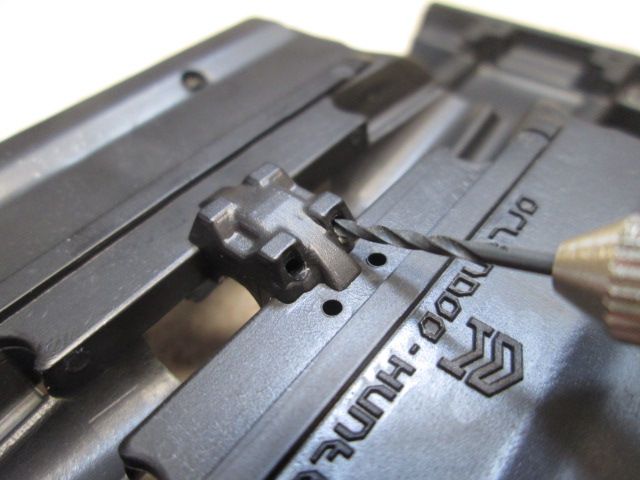 Shock stud holes in the front, the instructions show only drilling the rear most holes but is another spot for changing the angle of the shocks. I opened up both on each side in case some adjustments are needed down the road. 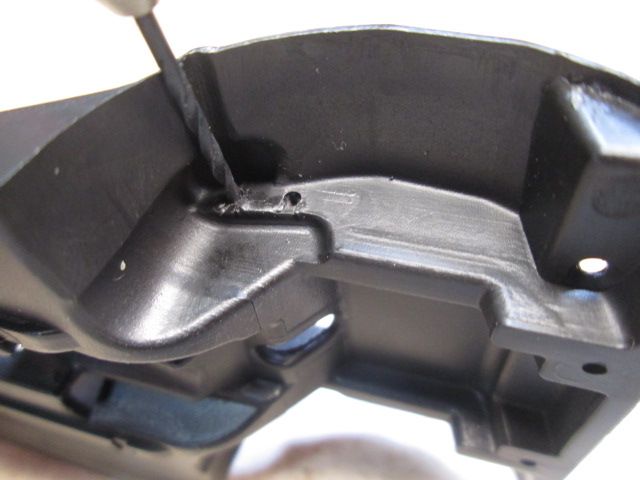 I used a pair of tweezers to get the stud tucked back in the corner of the wheel well. Just a little force to push the ball into the hole should hold it in until you can screw it in. 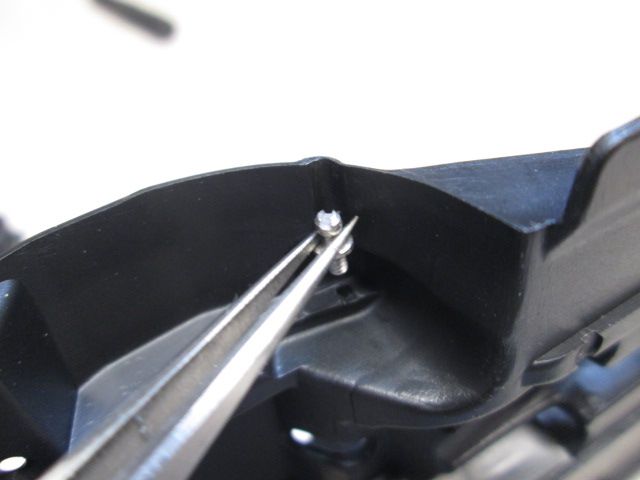 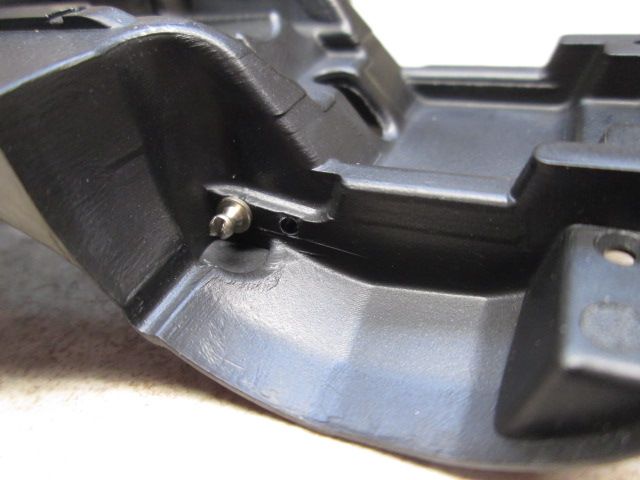 Now the lower suspension link studs need some holes.. Try and get these holes straight through the chassis. 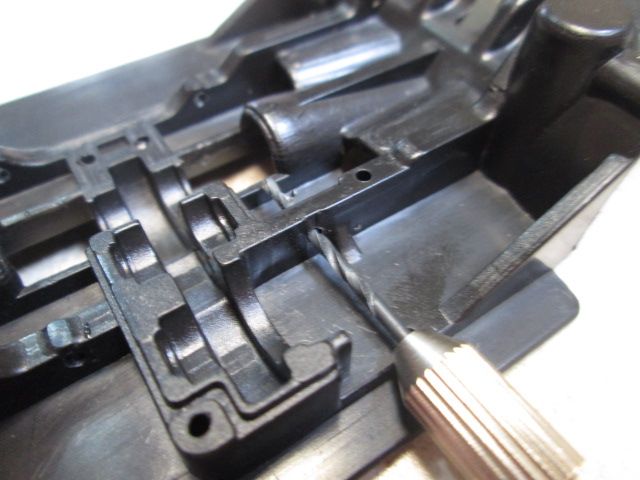 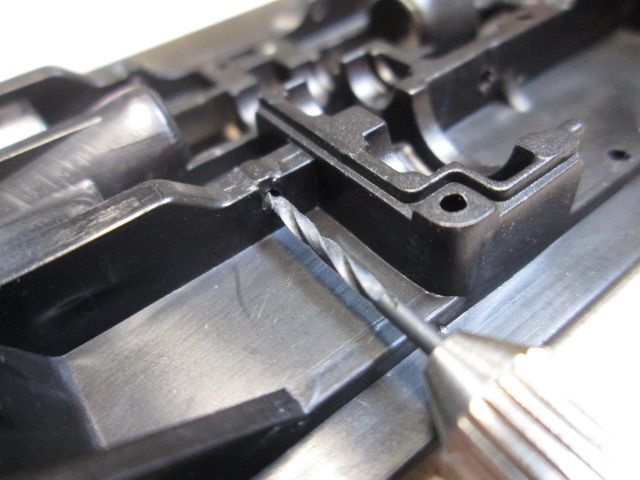 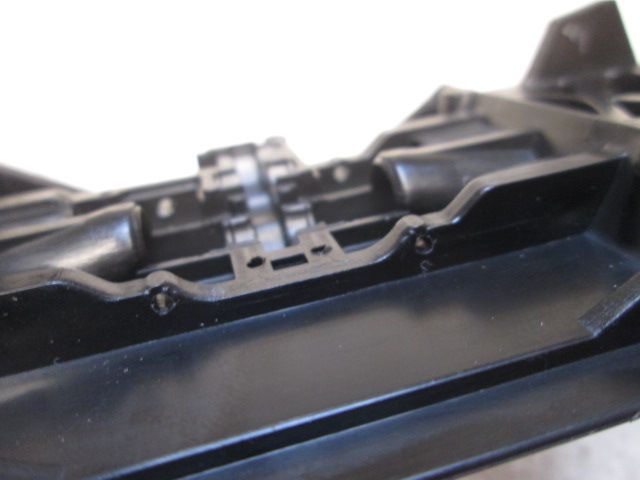 Holes in the rear shock support drilled and studs installed. 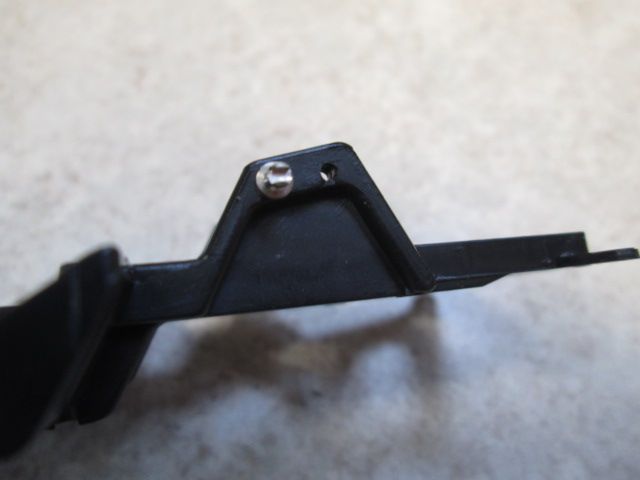 Now for the upper suspension ball studs. These are installed from the top of the chassis. Tweezers again are very helpful here, try and push the ball into the hole with a little force and it should stay put long enough to get the screwdriver on them. 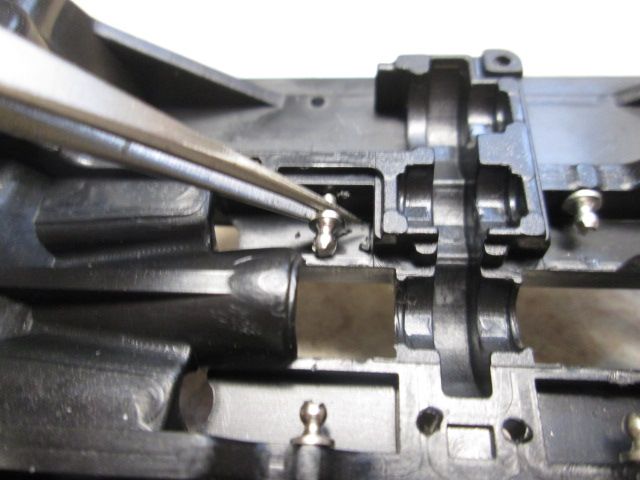 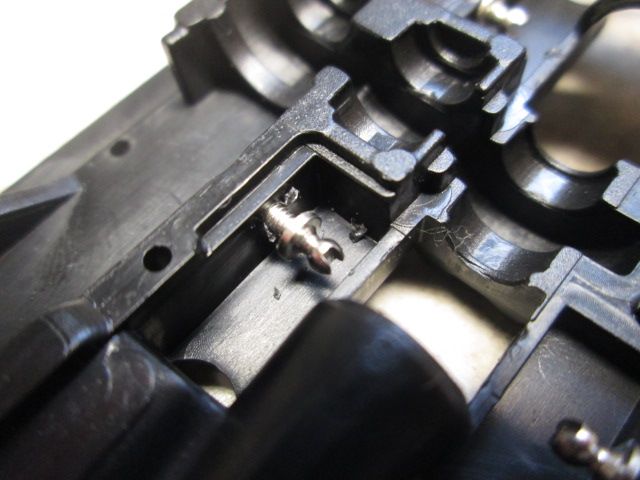 Next take the grill/headlight panel and screw it onto the chassis with the correct numbered screws from underneath. 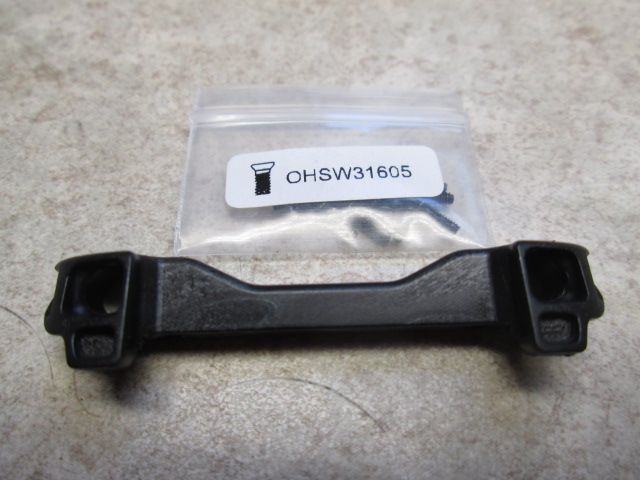 Fits nice and snug 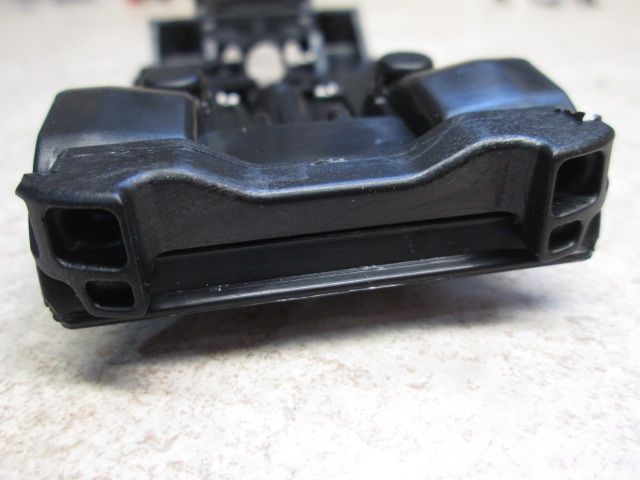 You can see the two outer holes the grill panel uses. 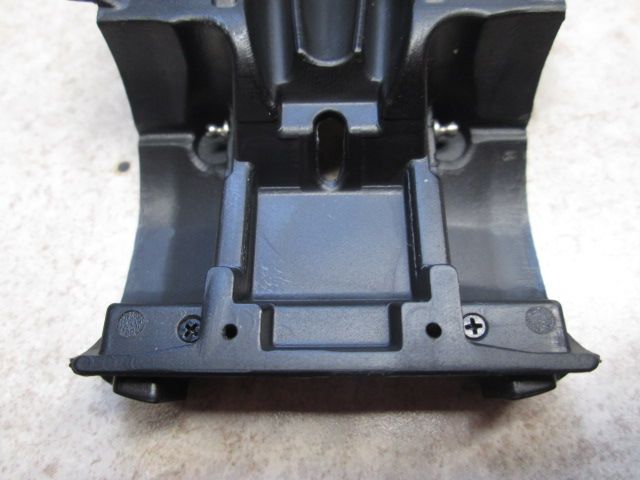 Last edited by MGCrawler; 02-01-2015 at 07:29 AM. |
| |  |
| | #3 |
| Rock Crawler Join Date: Oct 2004 Location: The thumb
Posts: 788
|
Now for the transmission. This design Sam went with here, simple but effective. Here's the trans parts laid out. Pictured also is the N20 gear motor that is not included but can be purchased direct from Sam. This one is the 150 RPM motor. 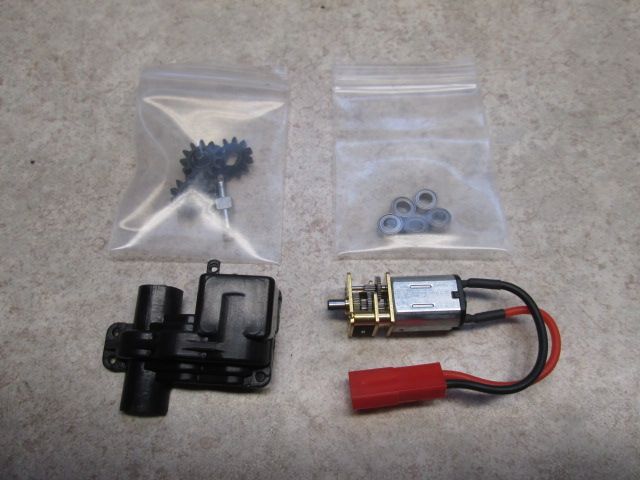 Trans gears/bearings 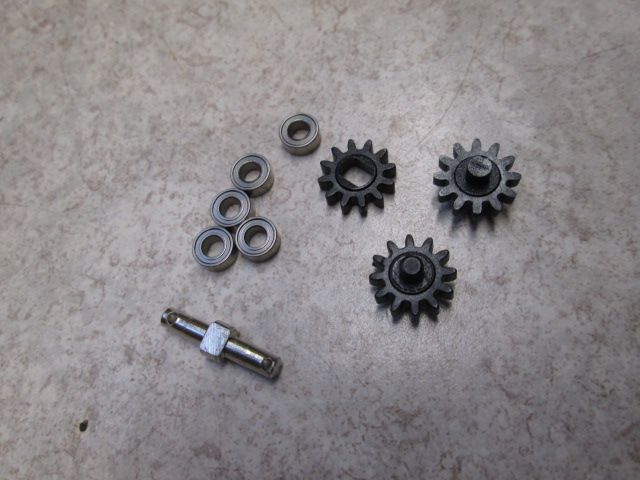 I took the idler gear first and applied a bearing to each side. 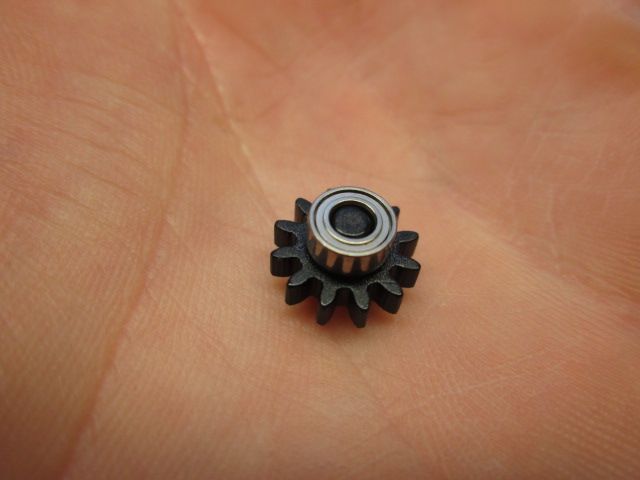 The motor gear will have an opening one side and a spot for a bearing on the other side. 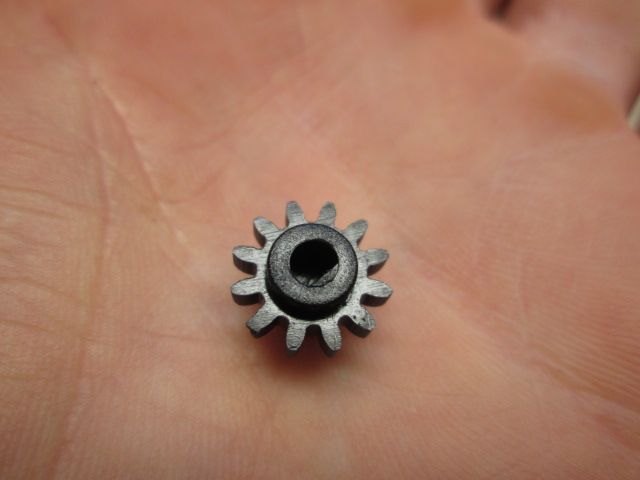 Installed on the motor shaft and appropriate bearing on the end. 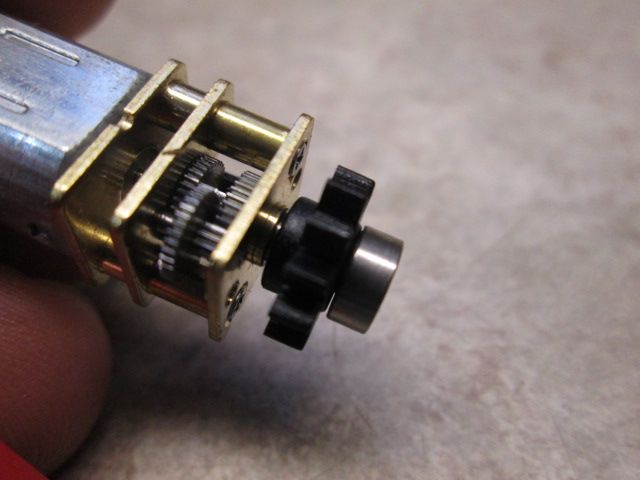 Slip metal output into middle of plastic gear. 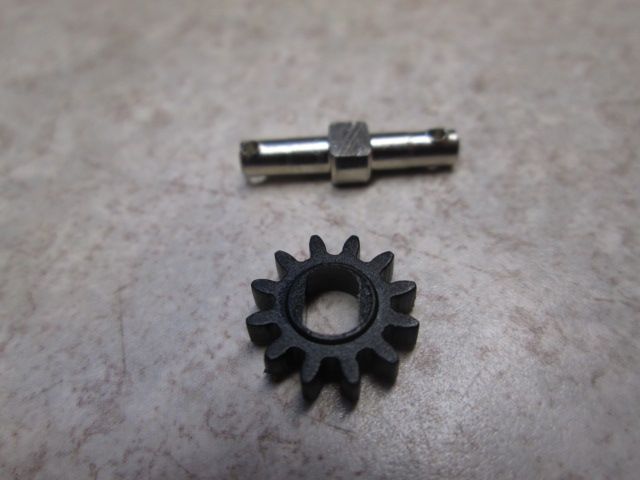 For the bearings to slide on smoothly I again filed around where the holes are drilled through the shaft on both ends. This doesn't take much.. 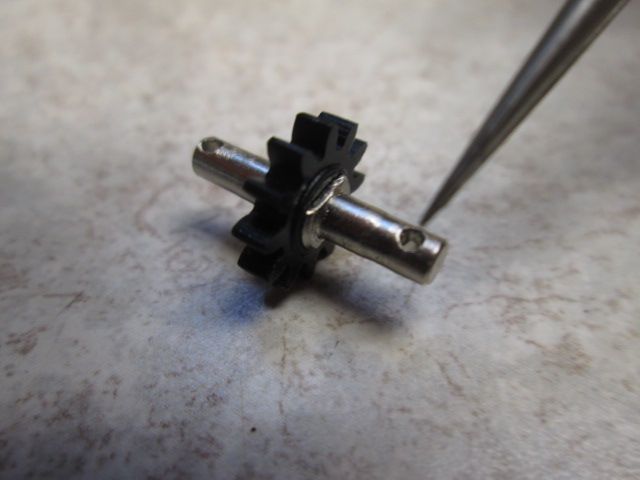 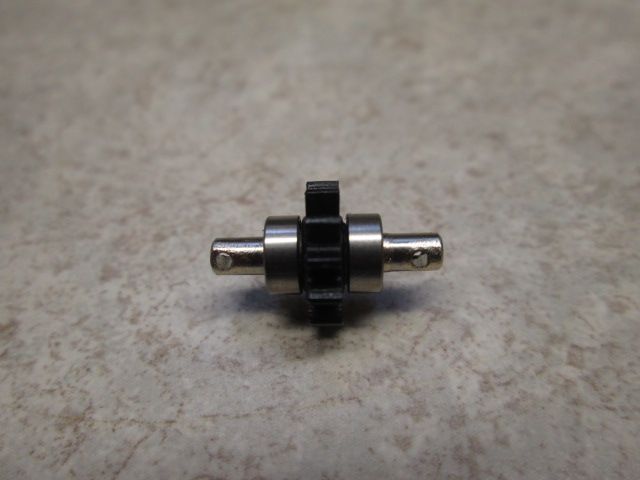 Next apply a generous amount of grease to all three gears. 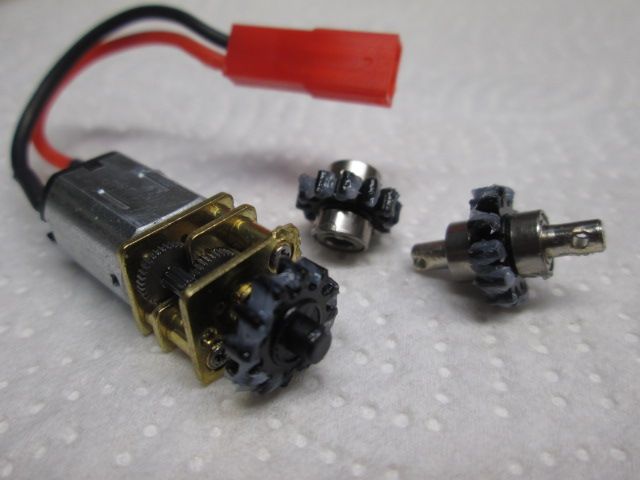 Slide the center output gear/shaft down into the middle of the trans housing. Try and get the holes in this running up and down. (not like I did lol) It will make driveshaft installation easier. 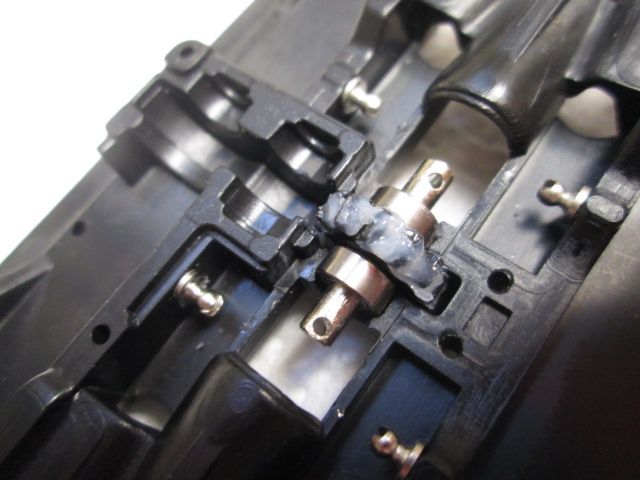 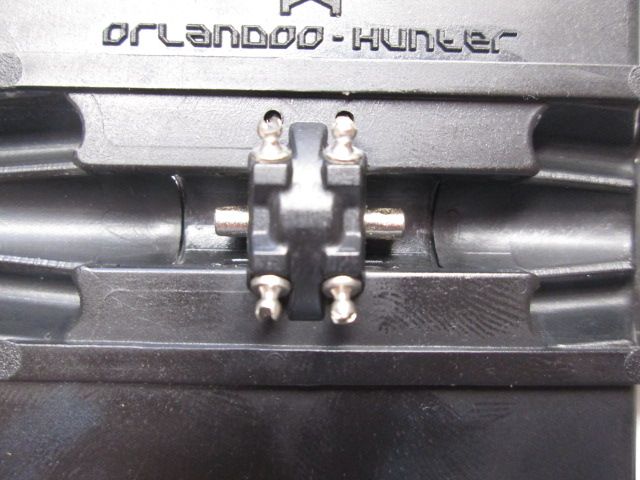 Then the idler gear. 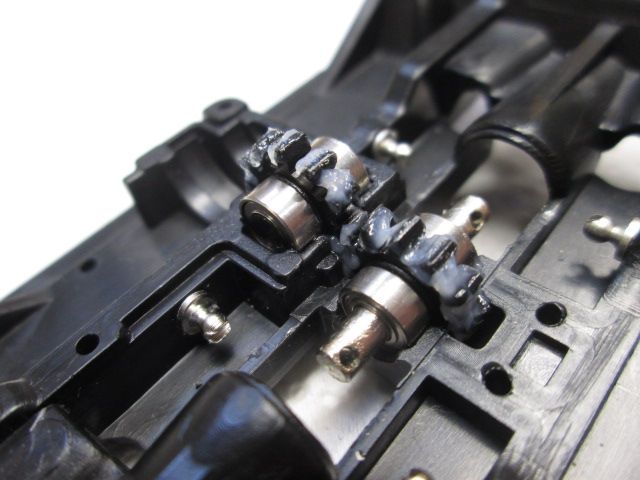 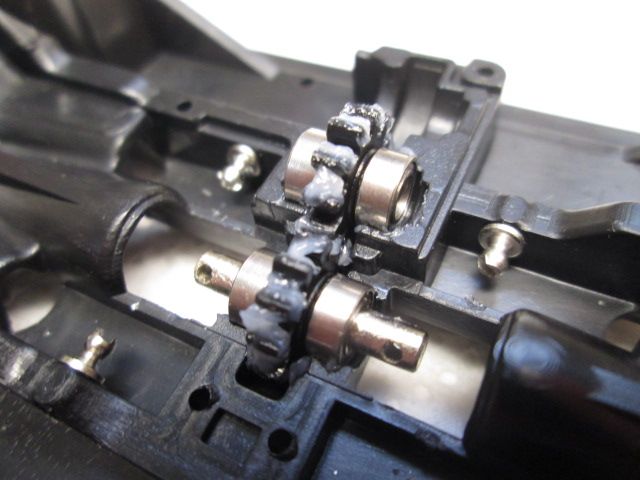 Install the last bearing on the end of the motor shaft 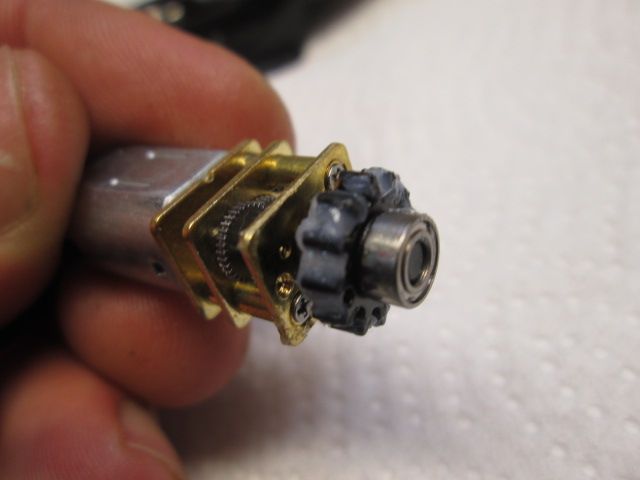 The whole unit will slide down into the chassis snugly. 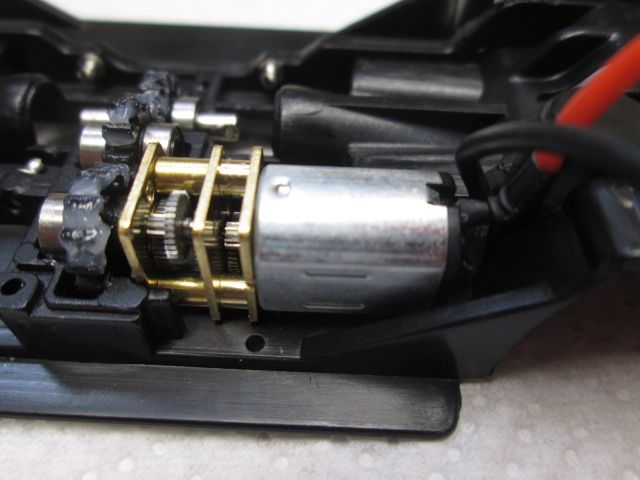 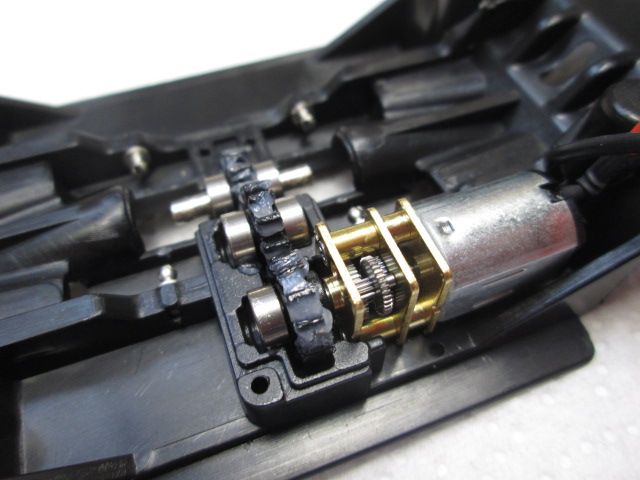 Take the motor/trans cover, line it up and press it down over everything. 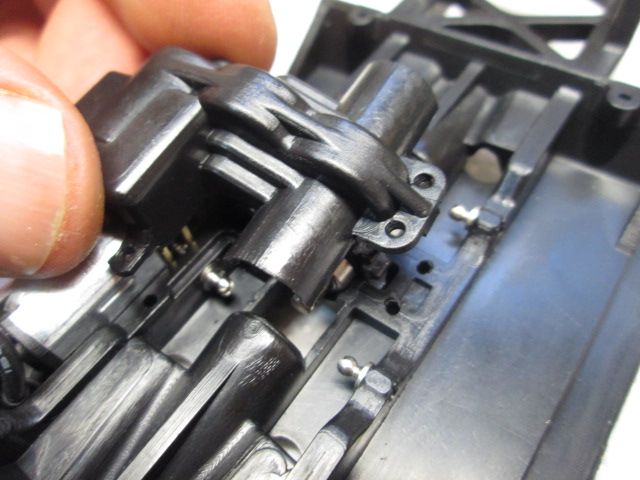 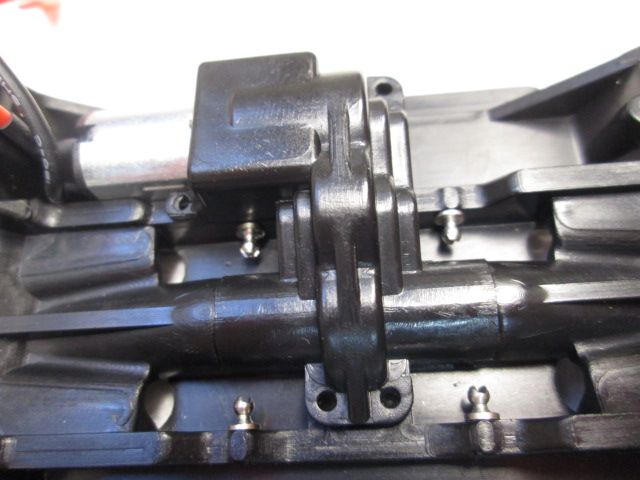 Five of these screws to hold it down. 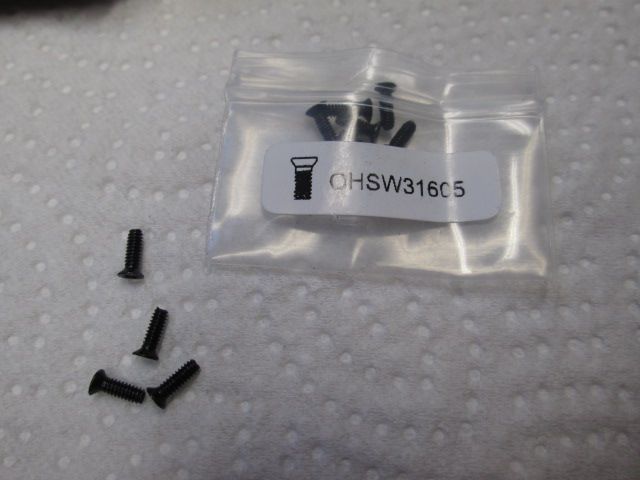 Four on top and one on the bottom  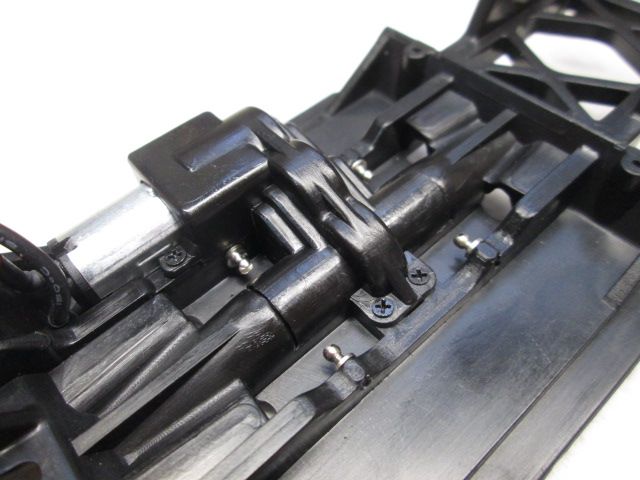 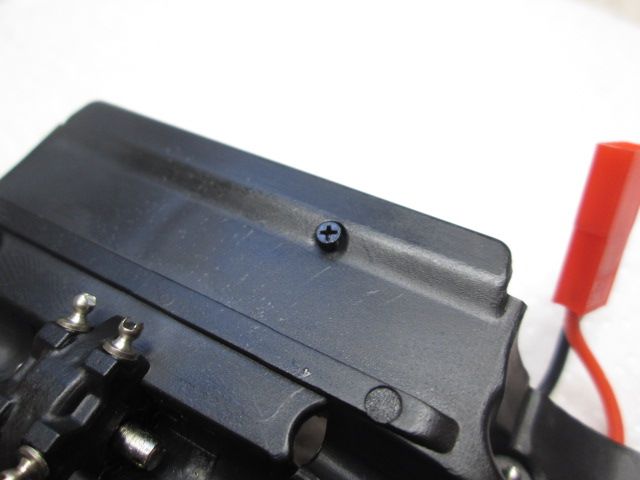 Next, Shocks 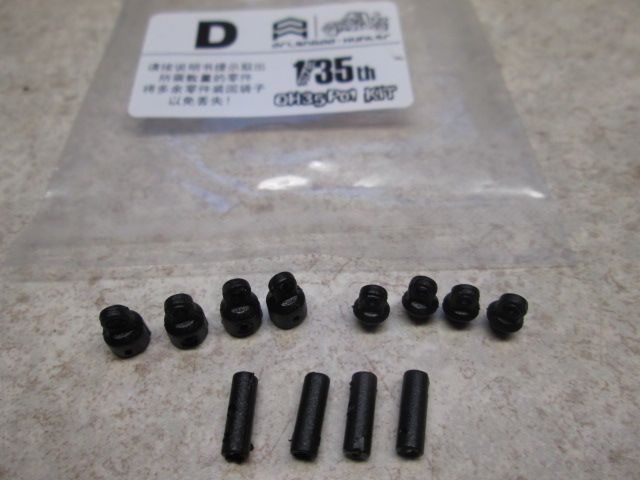 First dip the end of the shock shafts in some grease. 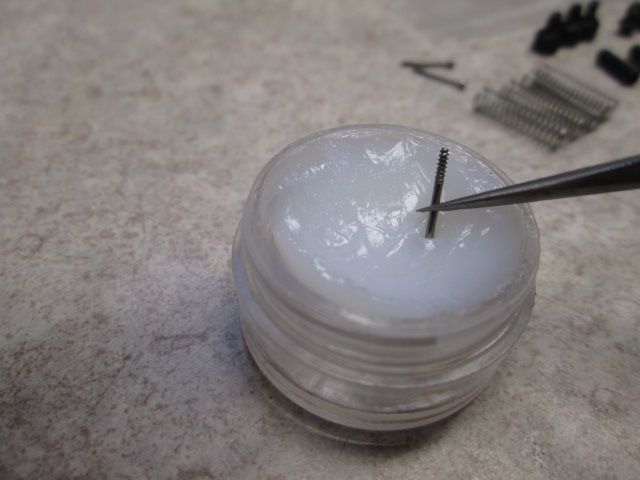 Slide the shaft into the housing and top it with the upper cap. Using the correct screw. run it in through the cap/shock body. Keep the screw straight while threading it in so it will line up on the other sides hole. Next slide the spring over the shock body and thread the lower ball cup onto the end of the shock shaft. 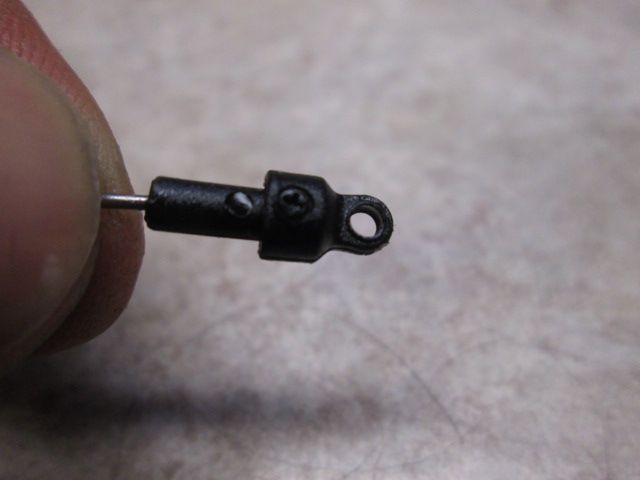 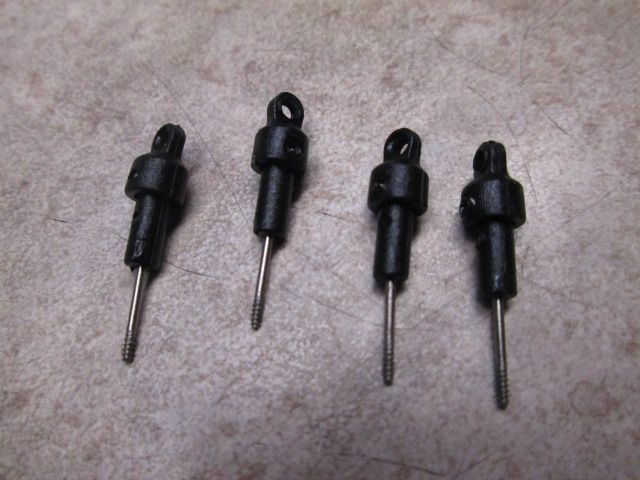 A tip for holding the shock/spring to installing the lower end. 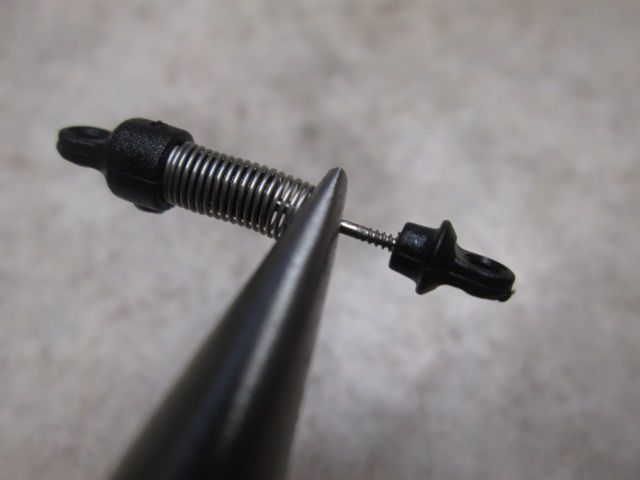 I know they look like shocks your used to however they are a touch smaller 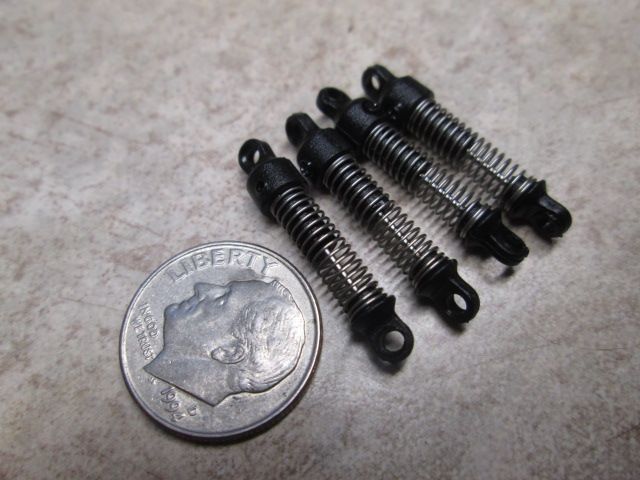 Driveshafts.. 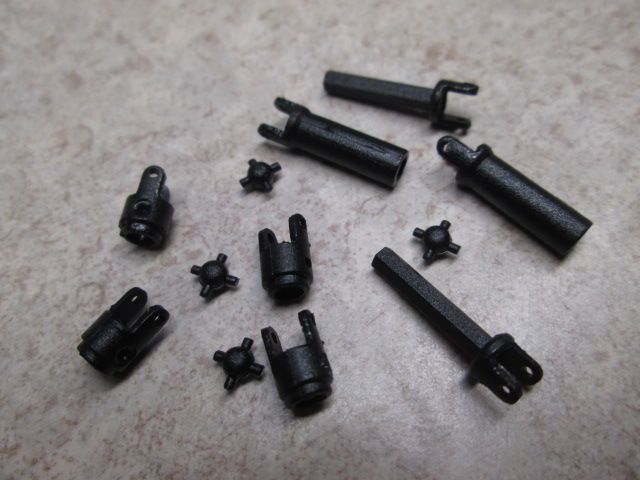 Put one pin in hole.. 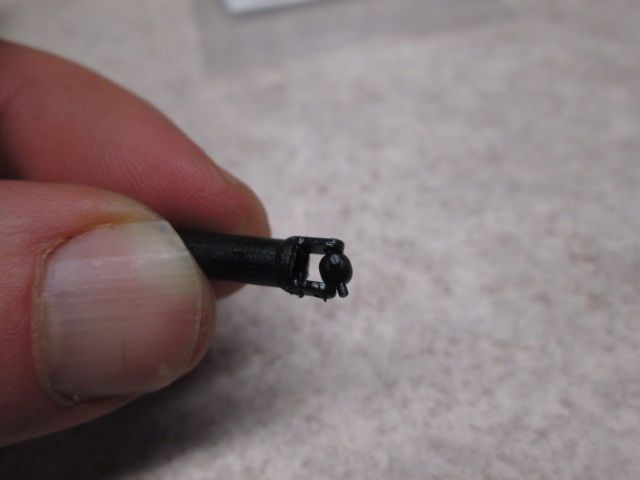 Using your thumb carefully push the other sides pin in toward the hole and it'll snap in. 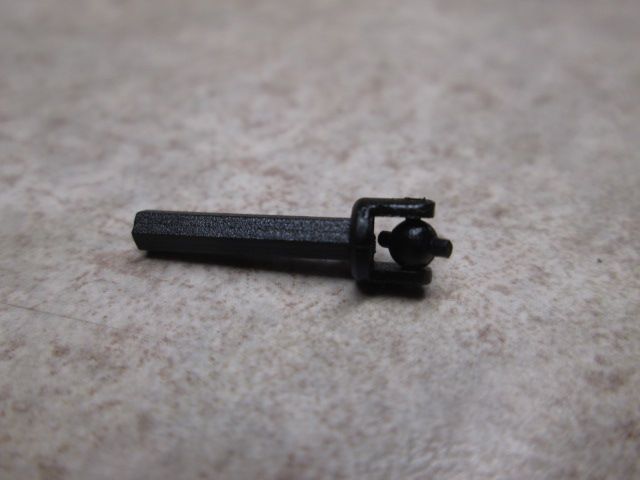 This is what you should have when your done:nice: 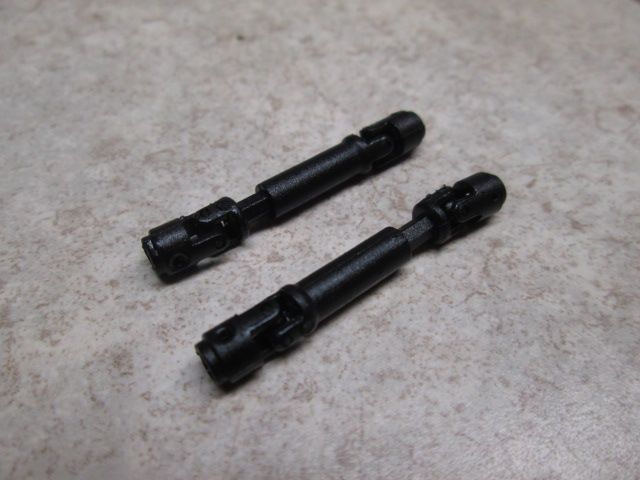 Now lets install the axles under the chassis. Slide your upper links into the slots that pass through the chassis. 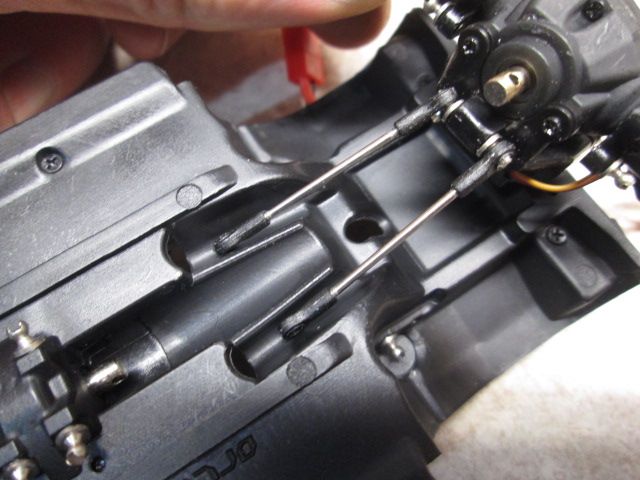 Your going to have to use your little flat head screwdriver to snap the cups over the ball studs as this is a tight spot. 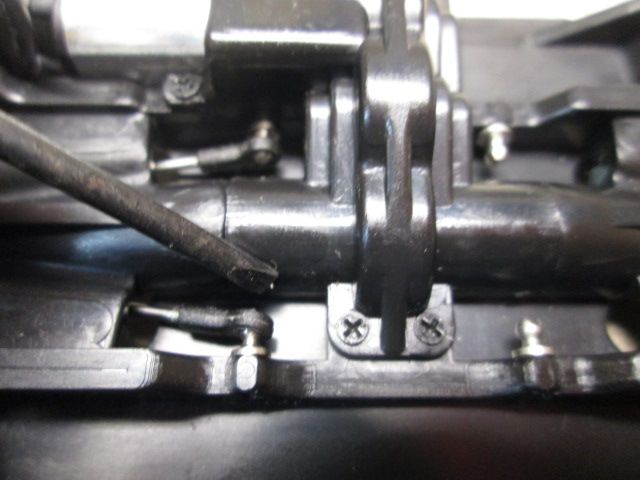 Run your servo wire up through the hole in the middle of the chassis. Do this before you snap on the lower links. 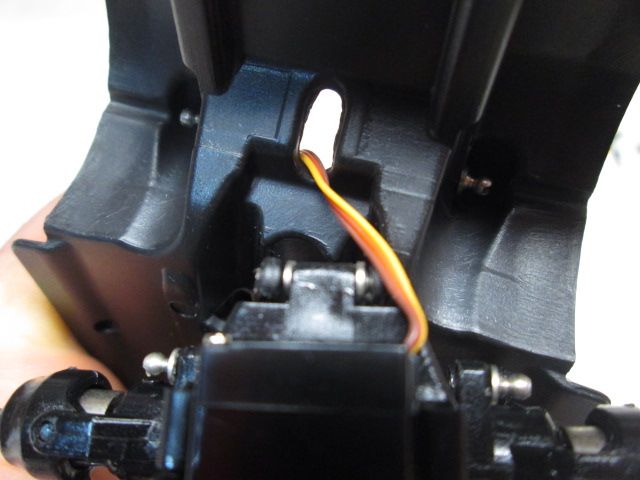 Install the shocks next. The upper ball stud on the axle is the shock stud, snap the shock over and the other to the chassis studs. 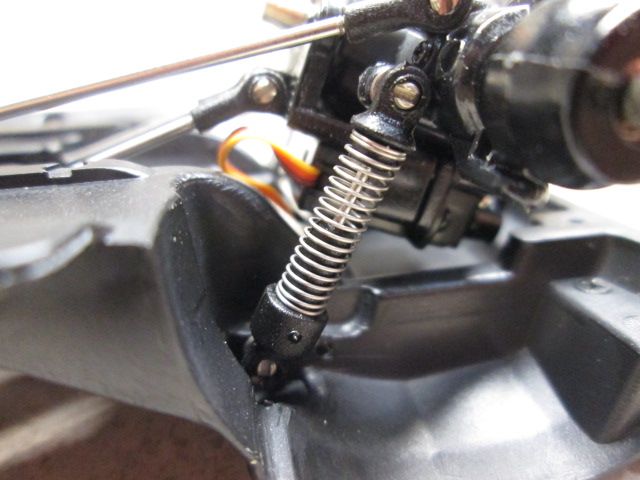 Install the completed driveshafts using the appropriate screws.. 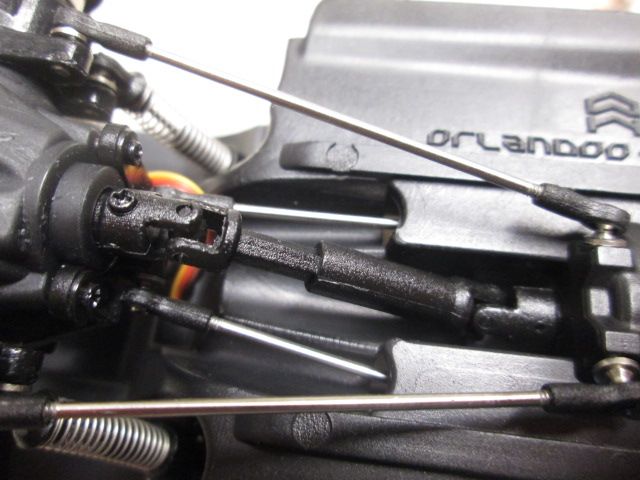 The tires are very soft and will need the foams for sidewall support in my opinion. 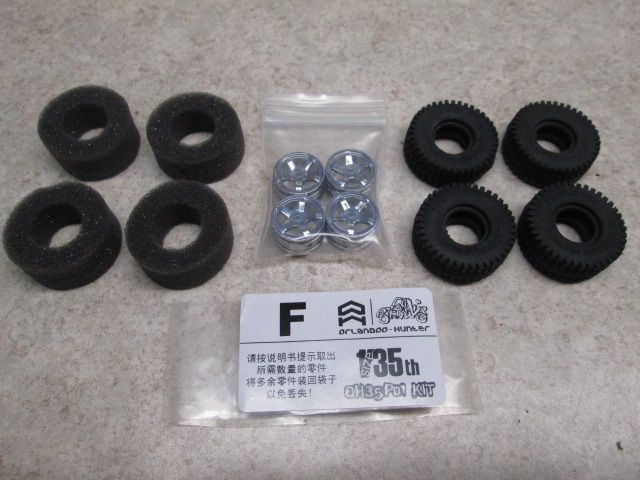 Getting the foam in was probably the toughest part of the build LOL! Patience... 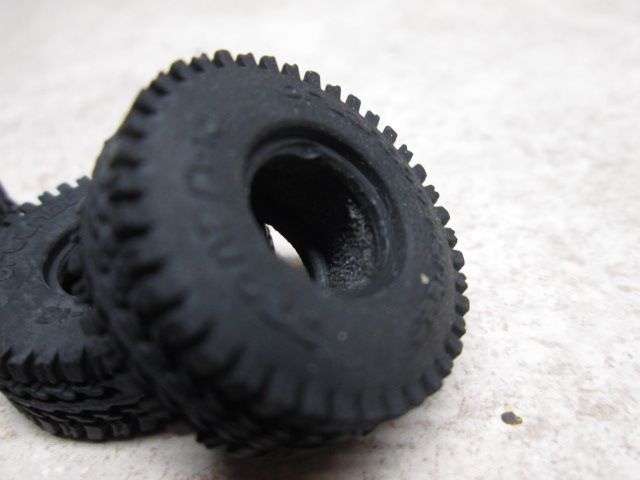 The wheels supplied are standard stuff. Chromed plastic just like its big brother the micro crawler. 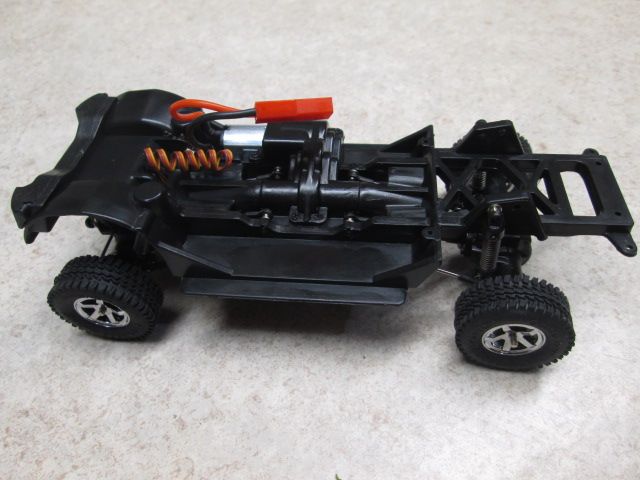 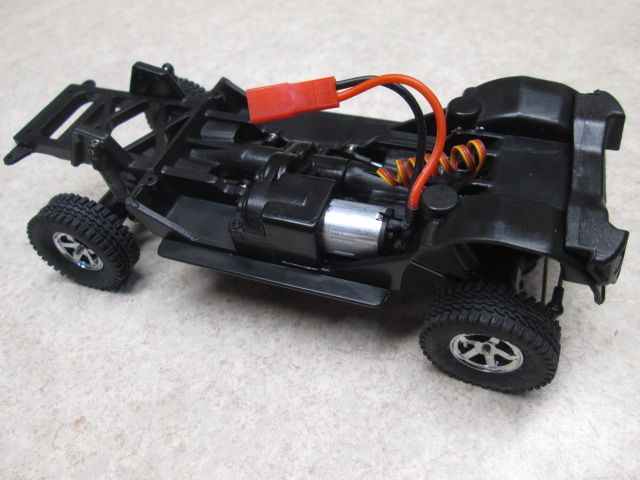 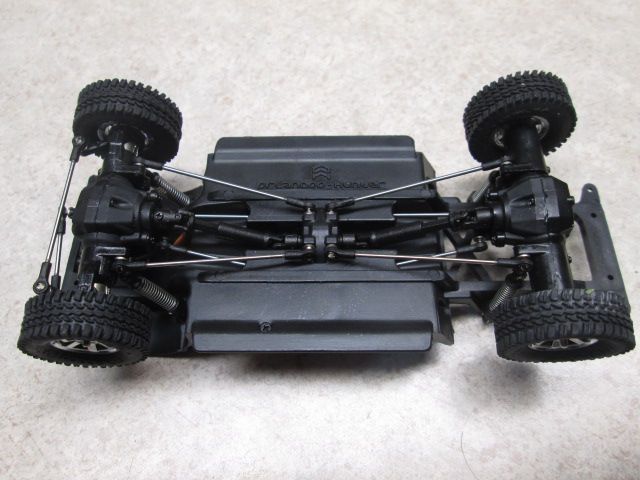 Last edited by THX_138; 12-15-2016 at 09:59 PM. |
| |  |
| | #4 |
| RCC Addict Join Date: Jun 2010 Location: Australia NSW
Posts: 1,266
|
didnt think it would take long for ya MG!! im tempted to get one, so im watching this  |
| |  |
| | #5 |
| Newbie Join Date: Dec 2011 Location: france
Posts: 44
|
Received mine too Can't wait to see yours finished as I got to finish my GMC truck before building this one. |
| |  |
| | #6 |
| Quarry Creeper Join Date: May 2013 Location: Chino
Posts: 386
|
Im waiting for mine also, i recieved shipping info so shouldn't be too long, want to see what MG does once he builds it stock for review.  |
| |  |
| | #7 |
| Pebble Pounder Join Date: Nov 2013 Location: tracy city
Posts: 129
|
Where did you get that I have to have one
|
| |  |
| | #8 |
| Rock Crawler Join Date: Oct 2004 Location: The thumb
Posts: 788
|
Email Sam at sangyue@gmail.com He will set you up  |
| |  |
| | #9 |
| Rock Crawler  Join Date: Dec 2013 Location: Nevada City
Posts: 872
|
I just can't wait to see what you end up doing for paint!  I'm also curious what bodies you have laying around that might fit it. I'm not a huge modern Ford fan, otherwise I'd probably have one on order. I'm also curious what bodies you have laying around that might fit it. I'm not a huge modern Ford fan, otherwise I'd probably have one on order.
|
| |  |
| | #10 |
| Newbie Join Date: Nov 2014 Location: Queens NY
Posts: 7
|
I sent him an email haven't heard back. Its been about a week...i know he is busy and had problems with the return due to the grease in the box. I want one...ur'z looks great...congratz
|
| |  |
| | #11 | |
| Rock Crawler Join Date: Oct 2004 Location: The thumb
Posts: 788
|
I edited the first two posts with most of the kit assembly.  Quote:
 Yes, Sam is very busy. I'm sure this is not the only product he is sending out daily also. Have patience, i'm sure he will get back to you. | |
| |  |
| | #12 |
| Quarry Creeper Join Date: May 2013 Location: Chino
Posts: 386
|
Looking good, what receiver and sc you going to use?
|
| |  |
| | #13 |
| Rock Crawler Join Date: Aug 2006 Location: Pinedale, WY
Posts: 873
|
Does Sam have a website?
|
| |  |
| | #14 |
| Rock Crawler Join Date: Oct 2004 Location: The thumb
Posts: 788
| Thanks Mike, I had an SR3500 Spektrum RX laying around and it binds to the OE losi 2.4 radio. I also ordered a couple of HobbyKing GT2's to show the fitment in this truck. Around 20 bucks for the rx/tx  Just shoot him an email.. Have patience though, he is a busy man. Works all day then comes home to this stuff... Finally got the paint done... 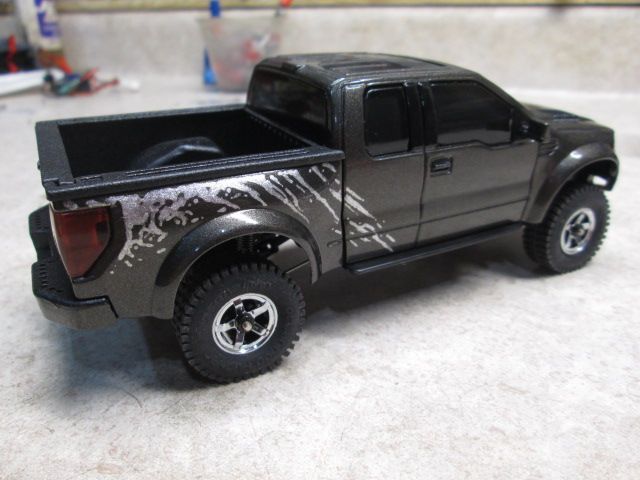 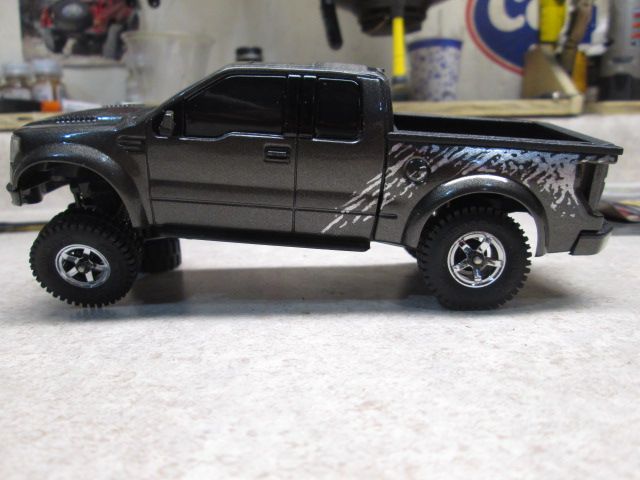 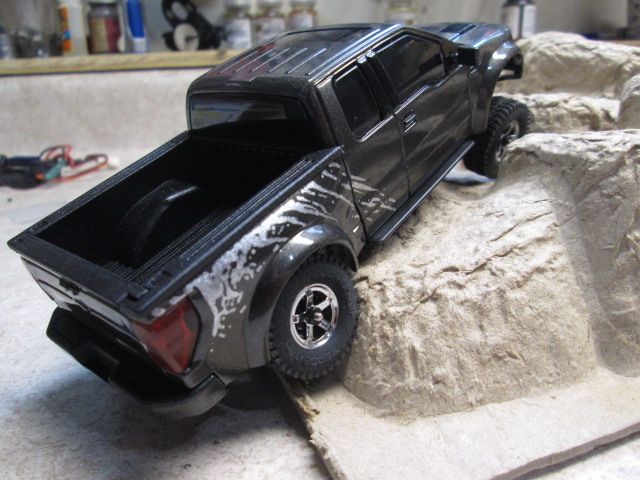 I used some rustoleum textured paint for the bedliner. 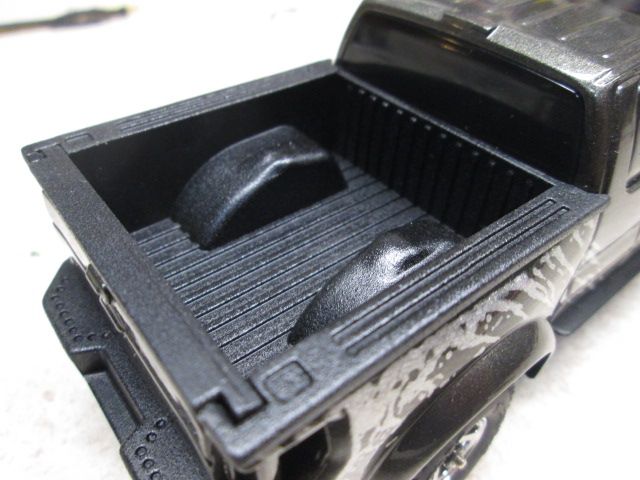 Next to a trekker 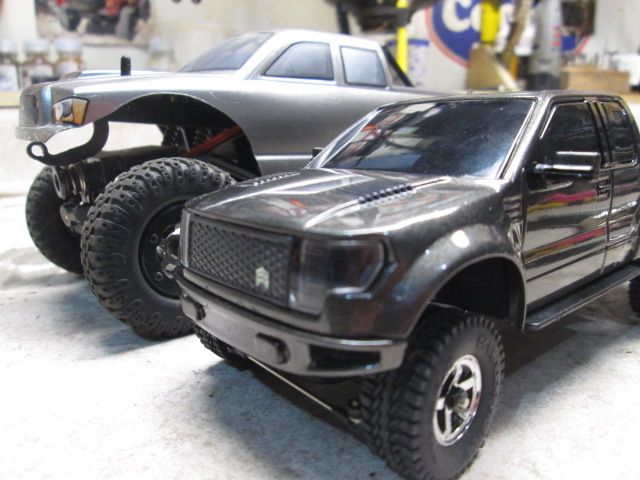 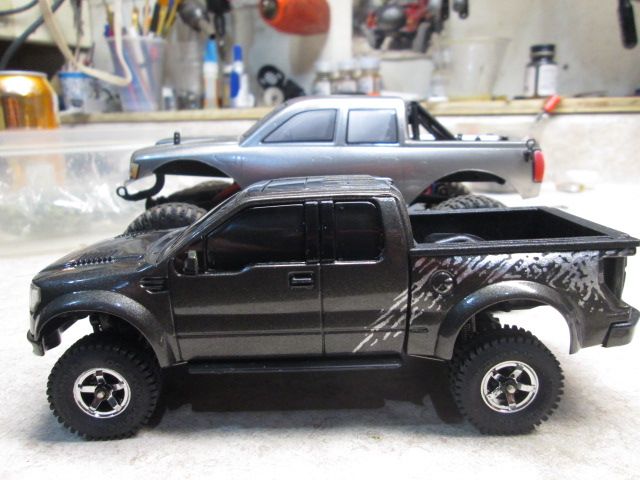 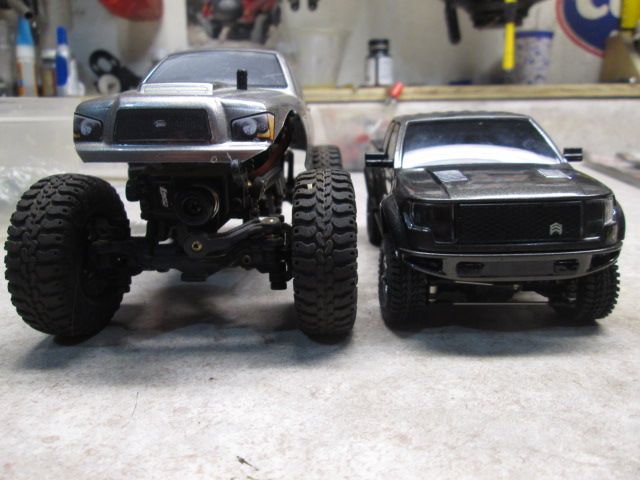 Here it is sitting on a magazine. 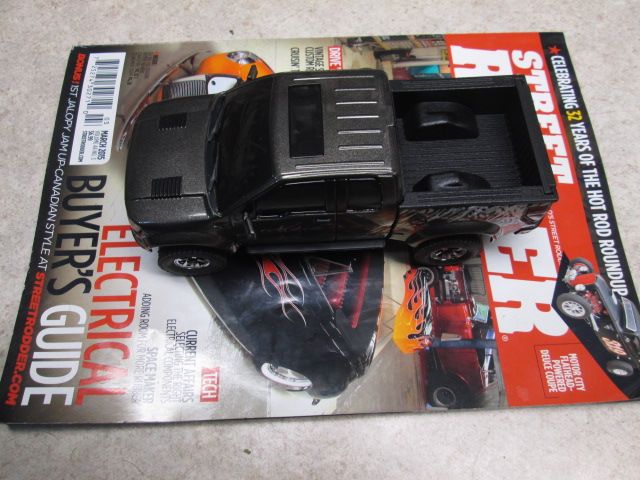 Thats all for now, I will try and get a run vid up this evening. Gotta drag my crawler course out of storage. Thanks for the views and comments fella's! |
| |  |
| | #15 |
| Rock Crawler Join Date: Oct 2004 Location: The thumb
Posts: 788
|
Thank you! Sam relayed that replacement/spare parts should be available around March as well.
|
| |  |
| | #16 |
| RCC Addict Join Date: Jun 2010 Location: Australia NSW
Posts: 1,266
|
Definitely do want one. I have the perfect jeep grand body to suit that size |
| |  |
| | #17 |
| Quarry Creeper Join Date: May 2013 Location: Chino
Posts: 386
|
That looks amazing Adam, seems like you have painted a few trucks in your day. I received mine about a week ago, but am waiting til i finish a few other projects to get to this one, Thanks again for the write up and tips, also cant wait to see what other body options fit on this one,  |
| |  |
| | #18 |
| Rock Stacker Join Date: Jan 2015 Location: LONDON
Posts: 75
|
Great write up thanks, might pick one of these up.
|
| |  |
| | #19 |
| Rock Crawler  Join Date: Apr 2008 Location: Wrightsville, PA
Posts: 627
|
What ESC are you using?
|
| |  |
| | #20 |
| Rock Crawler Join Date: Oct 2004 Location: The thumb
Posts: 788
|
I am using the ESC that is offered by Sam (The manufacturer) It is an option to buy with the kit when you place your order and is remarkably cheap  |
| |  |
 |
 1/35 F-150 4X4 kit Assembly/Review - Similar Threads
 | ||||
| Thread | Thread Starter | Forum | Replies | Last Post |
| SCX10 Dingo Kit Center Diff assembly issue (maybe wrong parts?) | RacerR | Axial SCX-10 | 9 | 12-30-2014 08:08 PM |
| My JK kit assembly. | project_mayhem | Axial SCX-10 | 30 | 04-09-2013 03:06 PM |
| 80īs Colnago Roadbike assembly kit | Unimog | Chit Chat | 3 | 04-08-2009 09:01 AM |
| |