| |
| |||||||
 |
| | LinkBack | Thread Tools | Display Modes |
 06-20-2011, 03:33 PM
| #1 |
| Quarry Creeper Join Date: Feb 2006 Location: San Jose, Ca
Posts: 367
|
Edited the original post.. lost the pics from my old Photobucket..... scroll down to see updates on my scratch built Man Kat 6x6
Last edited by dankycrawler; 06-01-2012 at 02:21 PM. |

|  |
| Sponsored Links | |
| | |
|
06-25-2011, 03:12 PM
| #2 |
| Quarry Creeper Join Date: Feb 2006 Location: San Jose, Ca
Posts: 367
|
Still playing around with the cnc ... Decided to design a replica of a MAN-KAT this time.. getting better .. 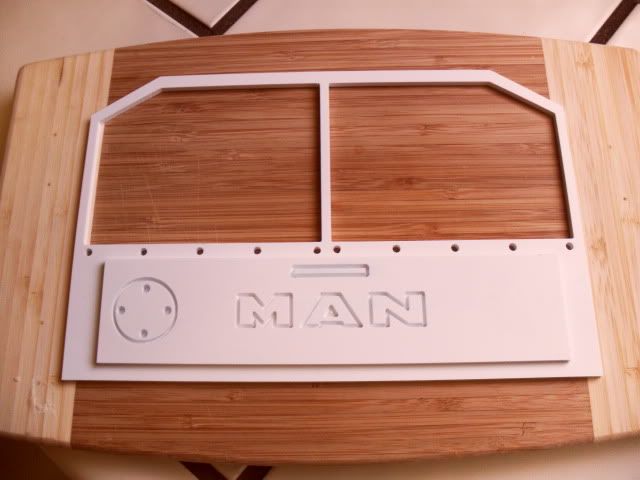 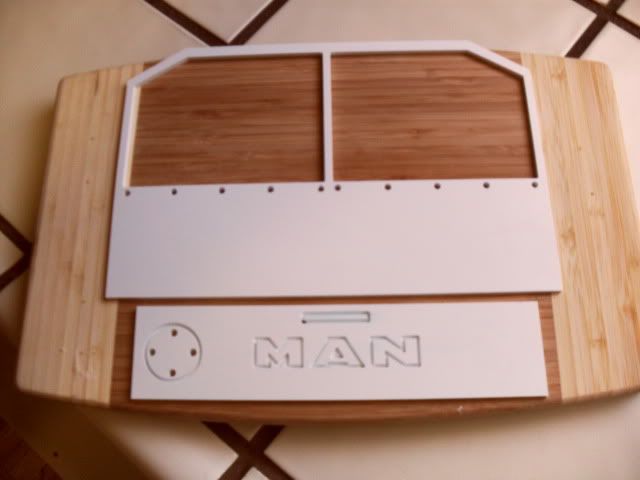 Played around with the chassis a bit too... Originally I was going to use a bruder Actros cab  Started on the rear suspension 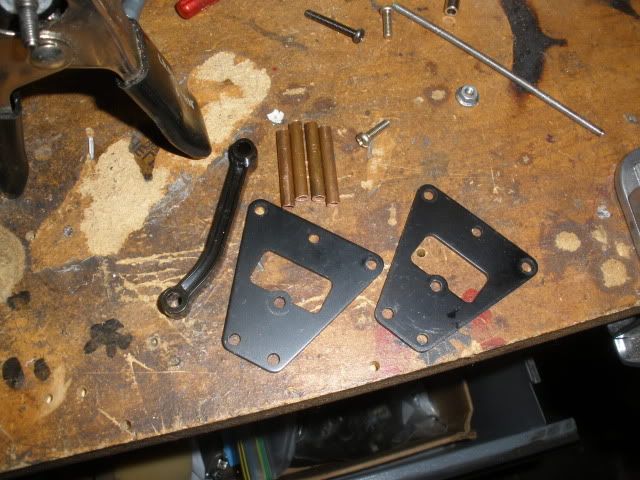 Mocking up some bracing to be brazed 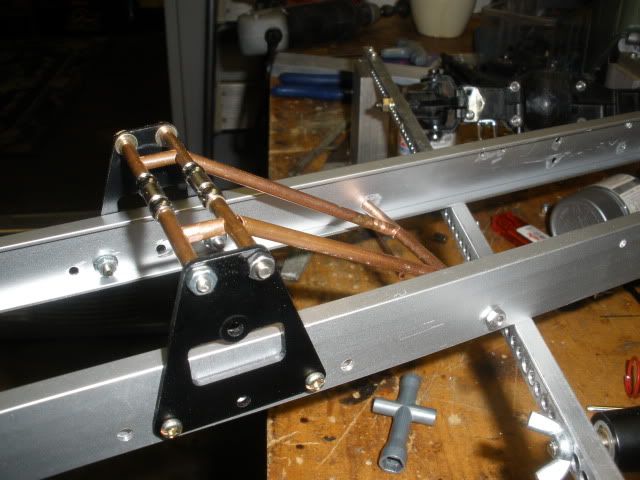 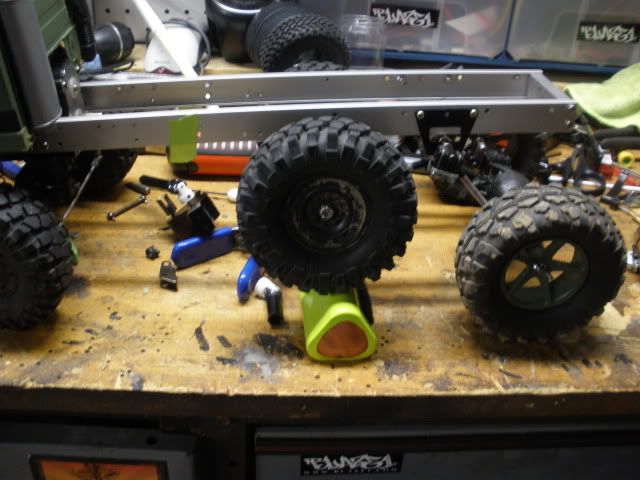 |
|
| |
|
06-25-2011, 03:19 PM
| #3 |
| Pebble Pounder Join Date: Feb 2009 Location: PA
Posts: 131
|
looks great..  whats that tool called. i want one. whats that tool called. i want one.
|
|
| |
|
07-13-2011, 02:06 PM
| #4 |
| Quarry Creeper Join Date: Feb 2006 Location: San Jose, Ca
Posts: 367
|
Been making a lot of progress with the cnc ... Here is what i have put together so far on the scratch made cab .. I have reworked the design a number of times but have been using a system of cutting a base and top layer for each panel to add some depth in the detail. Too bad I dont have a pic of all the panels layed out before i assembled them but i got a bit impatient after cutting them all out and didnt stop to take any pics. 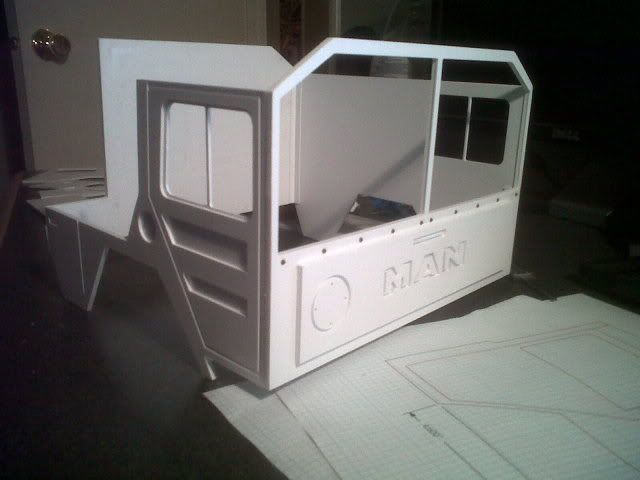 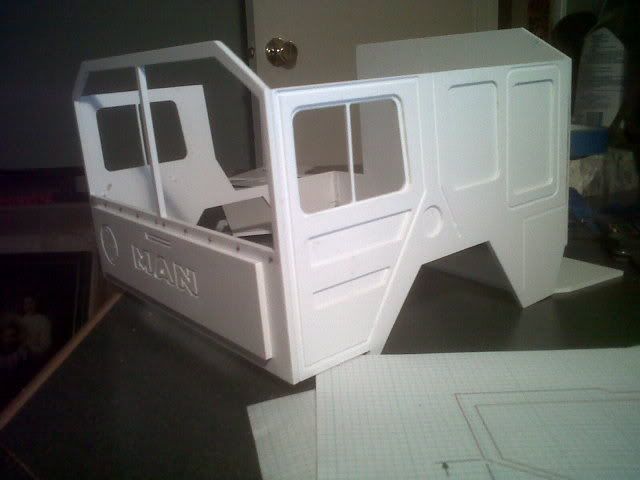 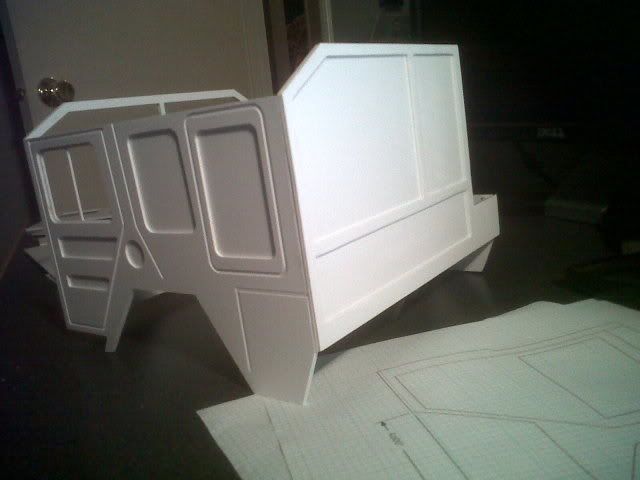 Next Ill be finishing up the area for the spare and making a some inner supports and roof. I am trying to come up with something ingenious for mounting the roof so that it can open, I plan to include some sealed compartments for the elctronics to sit inside the cab. |
|
| |
|
07-13-2011, 03:38 PM
| #5 |
| Quarry Creeper Join Date: Aug 2009 Location: Syracuse
Posts: 455
|
looks really good! |
|
| |
|
07-13-2011, 07:30 PM
| #6 |
| Rock Stacker Join Date: Feb 2011 Location: Alberta, Canada
Posts: 73
|
WOW thats looks cool! Nice attatchement for the dremel tool |
|
| |
|
07-13-2011, 09:29 PM
| #7 |
| Quarry Creeper Join Date: Sep 2010 Location: Gulf Coast
Posts: 214
|
Simply amazing!!! I love seeing scratch builds like this! |
|
| |
|
07-14-2011, 06:31 AM
| #8 |
| I wanna be Dave Join Date: Apr 2007 Location: clarksburg
Posts: 2,009
|
awesome! where did you get the cnc dremel cutting table?
|
|
| |
|
07-14-2011, 08:16 AM
| #9 |
| RCC Addict Join Date: May 2010 Location: The heart of the south
Posts: 1,138
|
WHat is and where did you get that Dremel setup?
|
|
| |
|
07-14-2011, 08:38 AM
| #10 |
| Quarry Creeper Join Date: Feb 2006 Location: San Jose, Ca
Posts: 367
|
I built the cnc machine. It took a lot of work to get it to cut styrene. It isn't really an ideal material for milling. It melts far to easy. Its really a prototyping machine, its slow to cut and takes a while to set up. I'm making it work for me though. I am really just happy to be learning cnc I have always wanted to give it a try and am having a blast learning it on my own.
Last edited by dankycrawler; 07-14-2011 at 09:08 AM. |
|
| |
|
07-14-2011, 04:55 PM
| #11 |
| I wanna be Dave Join Date: Sep 2009 Location: n. palm beach
Posts: 4,123
|
CNC and 6x6, freakin nutz. I like it. .
|
|
| |
|
07-14-2011, 04:56 PM
| #12 |
| I wanna be Dave Join Date: Sep 2009 Location: n. palm beach
Posts: 4,123
|
You should market the CNC. Awesome.
|
|
| |
|
07-15-2011, 01:40 PM
| #13 |
| Quarry Creeper Join Date: Feb 2006 Location: San Jose, Ca
Posts: 367
|
Made a little more progress... cut out pieces for the roof and fender, they are resting on top for now cause im trying to come up with a removable roof setup. 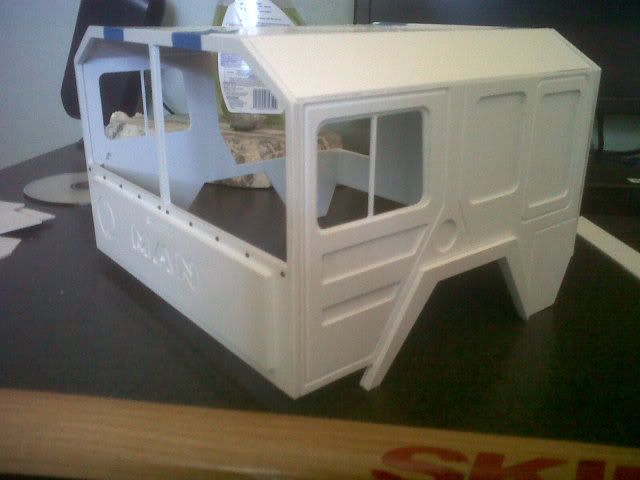 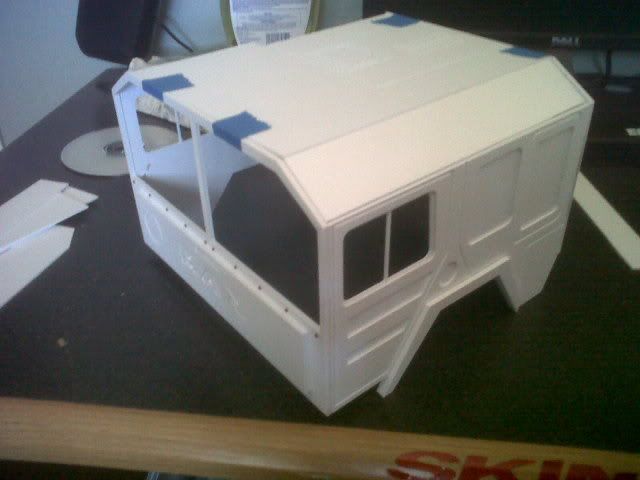 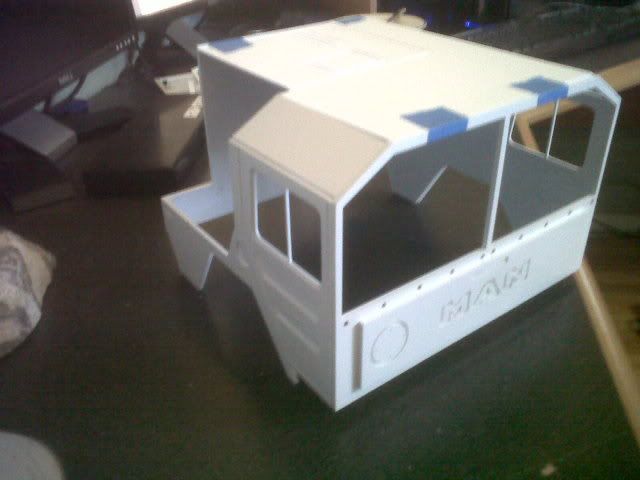 |
|
| |
|
07-28-2011, 12:11 AM
| #14 |
| Quarry Creeper Join Date: Feb 2006 Location: San Jose, Ca
Posts: 367
|
Got a bit more work done ... cut out and built the roof and cut out some plexiglass for the windows. roof is just resting on for now, there wont be a gap once I figure out a good way to mount it so its removable ... any suggestions? .. but the supports work well i notched them so it lines things up easy. 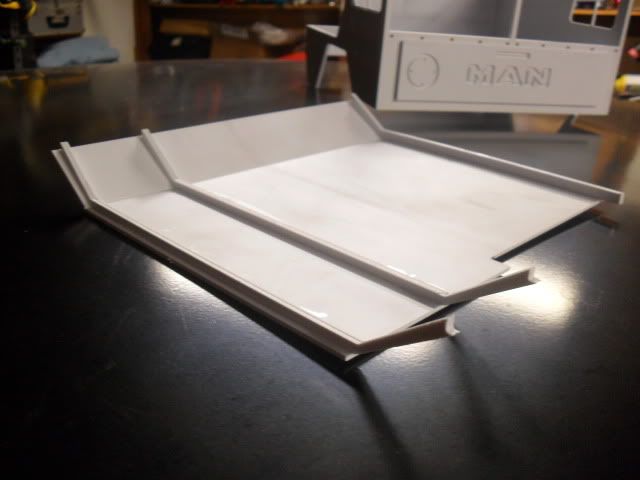 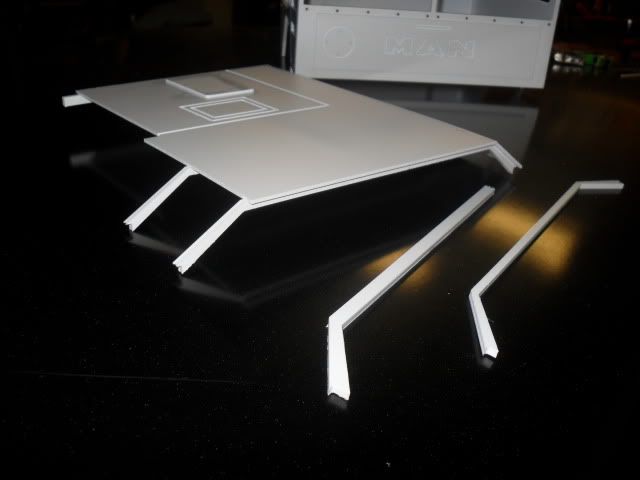 Fisrt cut with Plexiglass ... not easy stuff to machine... 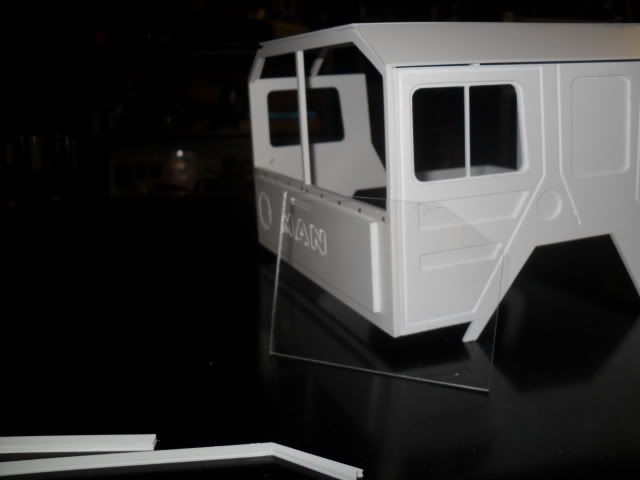 Kinda hard to see but one side is fitted ... coundt ask for anything more as far as how well it fit  Heres the body so far resting on the chassis.. 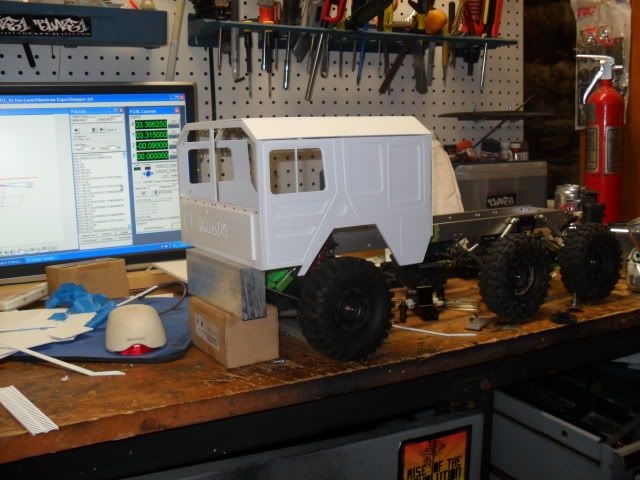 Im waiting on a package from RPP to see if I can use a GD-600 to get the 3speed to fit correctly... right now the offset between the trans and the transfer case is to much.. so im waiting until I igure that out before cutting the floor parts. I hope I can keep the 3 speed. Last edited by dankycrawler; 07-28-2011 at 07:39 AM. |
|
| |
|
07-30-2011, 11:10 AM
| #15 |
| Quarry Creeper Join Date: Feb 2006 Location: San Jose, Ca
Posts: 367
|
I want to see if I can mount the 3 speed upside down to keep the weight of the motor low and tucked between the frame rails. I was having trouble getting the outputs to line up so I thought id see about attaching a GD-600 to the back of the trans for gear reduction but also to lower the output. I took the prop shaft the GD-600 came with and spun it down on my lathe to make it into an adapter for the pinion. not sure if its going to be strong enough but if not ill make another out of steel. 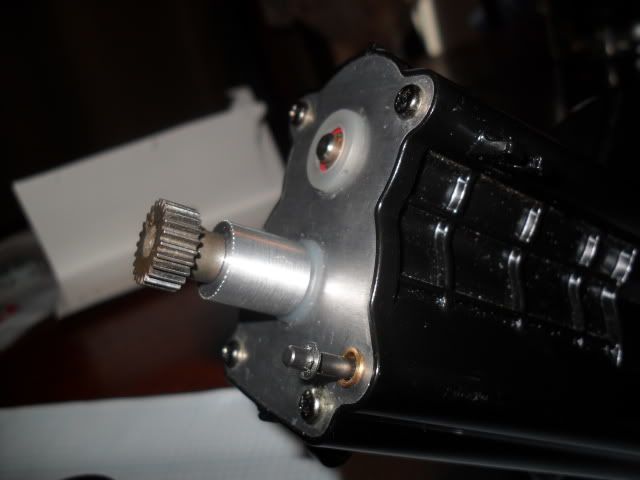 Then I drew up a new backing plate to mount the GD to the trans on and cut it out of Derlin  Here is the cut plate mounted to the trans 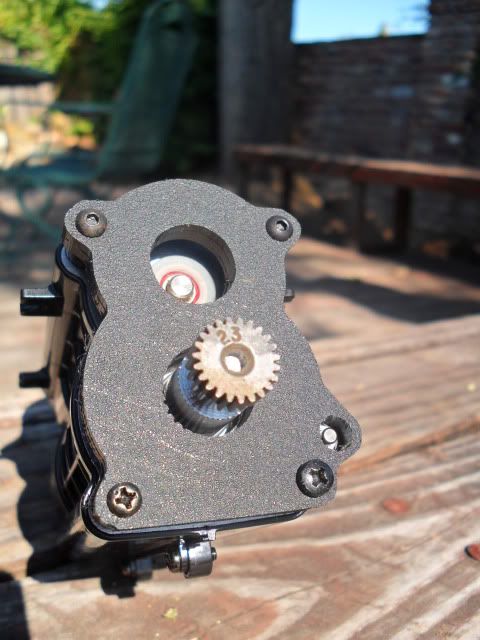  I am going to mount the GD-600 using the adjustable holes so I have options to change out pinions going forward if I need to. 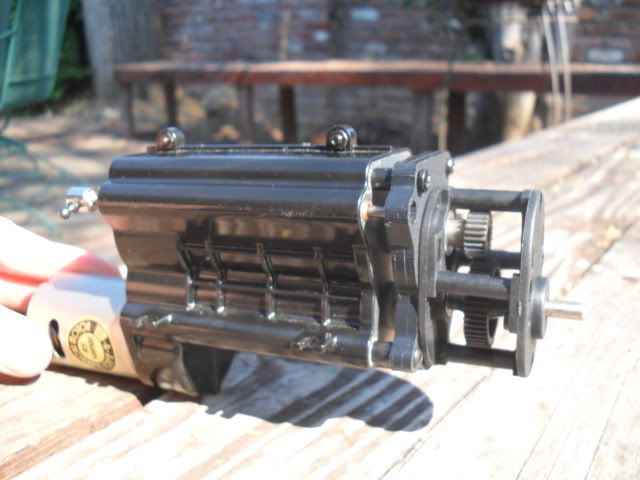 Hopefully this will let me mount the trans upside down and allow for good driveline angle. |
|
| |
|
06-01-2012, 10:36 AM
| #16 |
| Quarry Creeper Join Date: Feb 2006 Location: San Jose, Ca
Posts: 367
|
Well it spent a lot of time on the shelf... but here are some updates on the styrene work Built up the underside 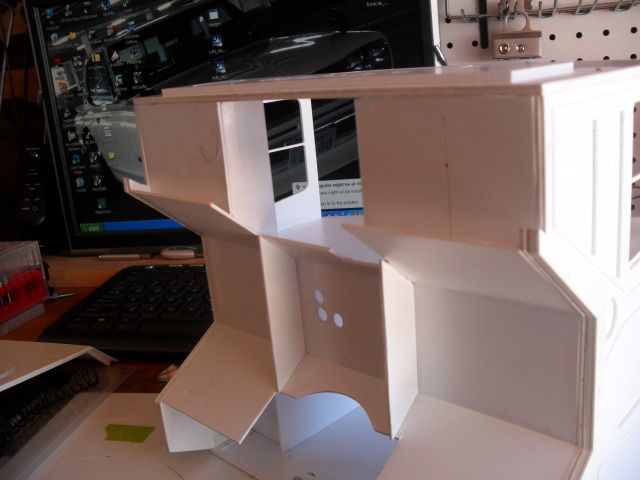 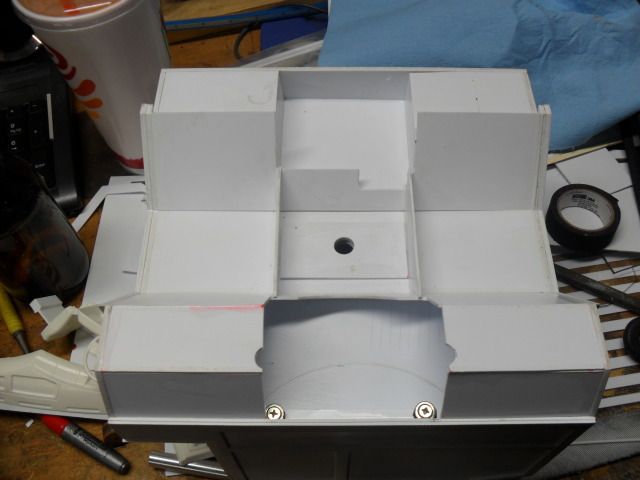 and the inside of the cab, im trying to modify the interior of a tamiya semi to hopefully work with the Kat 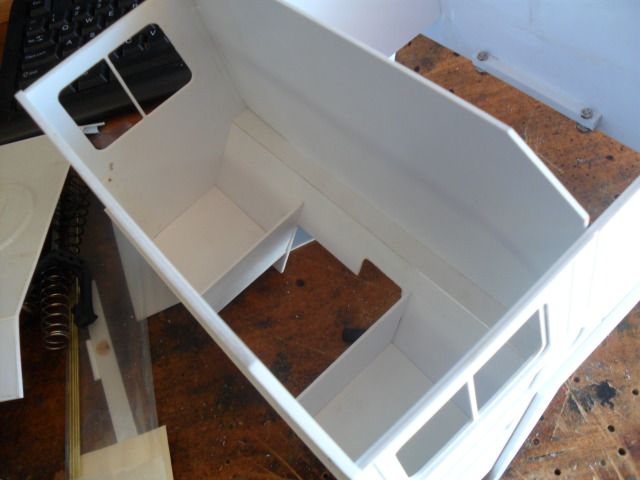 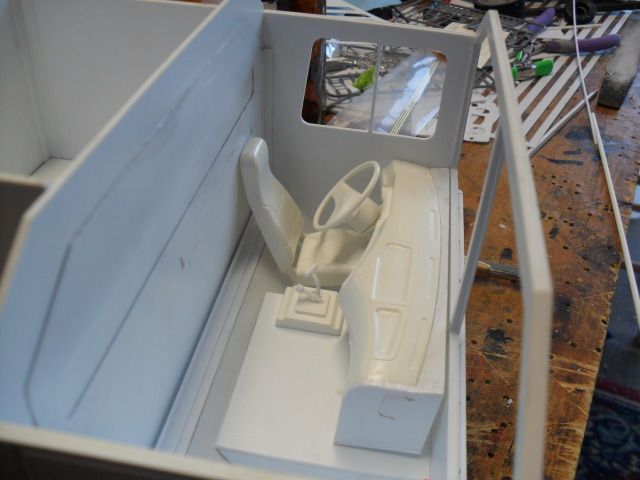 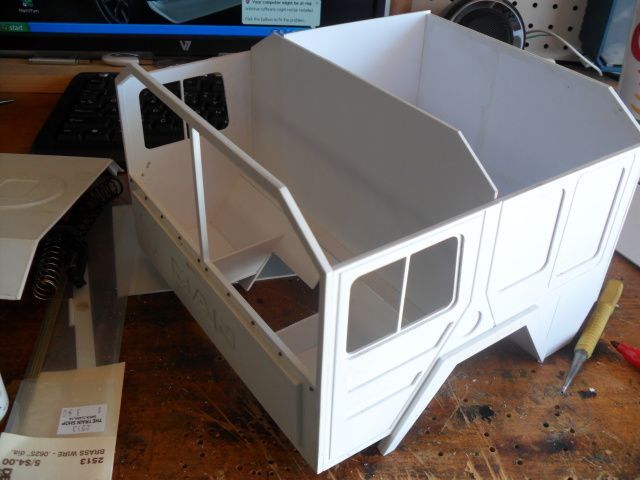 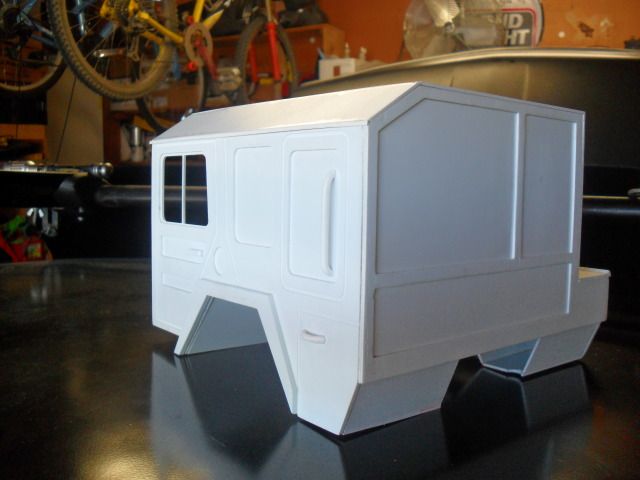 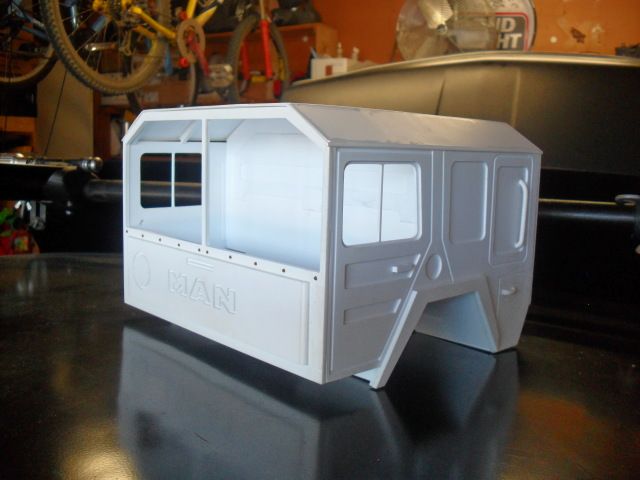  |
|
| |
|
06-02-2012, 12:46 AM
| #17 |
| Rock Crawler  Join Date: Oct 2011 Location: Another place, another time
Posts: 575
|
Nice build, definitely need to learn some machining, have a mill and lathe (manual), need to get my stuff set up someday. You might need to get a dashboard stretcher kit. |
|
| |
|
06-02-2012, 11:48 AM
| #18 |
| Pebble Pounder Join Date: Aug 2009 Location: Fullerton
Posts: 180
|
I LOVE the 3 speed work, and the cab is fantastic. keep it up, its bound to be a beast. Have you thought about wheels and rubber yet?
|
|
| |
|
08-13-2012, 10:33 AM
| #19 |
| Quarry Creeper Join Date: Feb 2006 Location: San Jose, Ca
Posts: 367
|
Thanks sfor the comments.. for wheels, at the moment I have a set of Tamiya hummer rims and rock crushers.. i think i am going to stick with them until I pick sometihng else up.. got to get over the sticker shock of picking up a set of those sweet rc4wd militants and some military tires .. X 7 ! Finally got the oppertunity to work on this rig over the weekend.. Now that the cab has taken shape I decided to get to work on the bed.. I cut out the base for the floor and sides on the cnc.. notice the holes in the bed.. they are there to allow for the mounting of some body protection im working on... so many hours in the styrene work i got to protect my investment 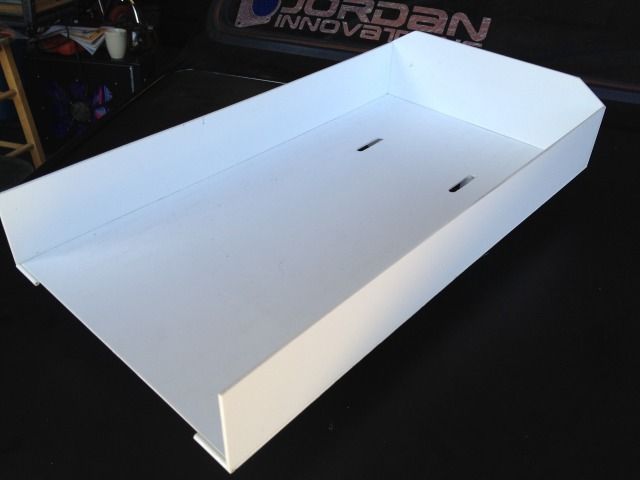 Made a simple hinge for the tailgate... well see if it holds up, i might be changing it up  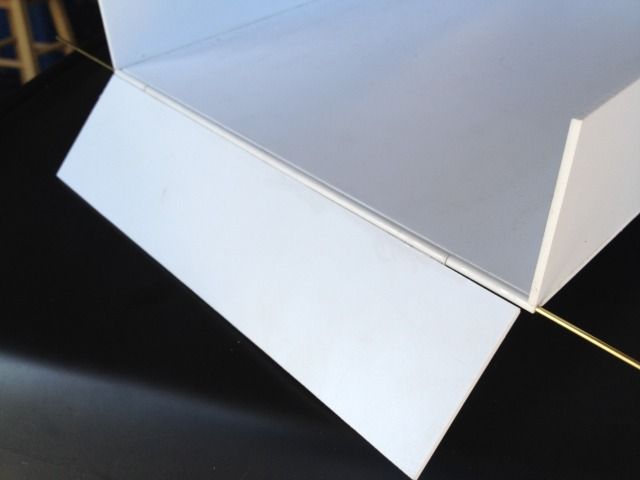 A few cnc cut mounts to hold it to the chassis 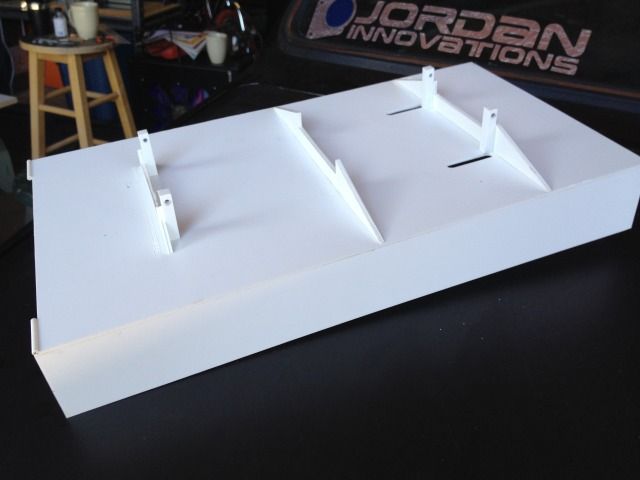 then it was time to start with some detail Got the floor and sides cut 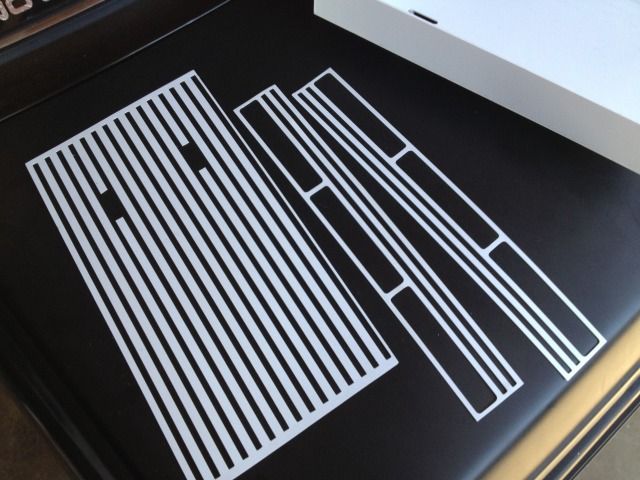 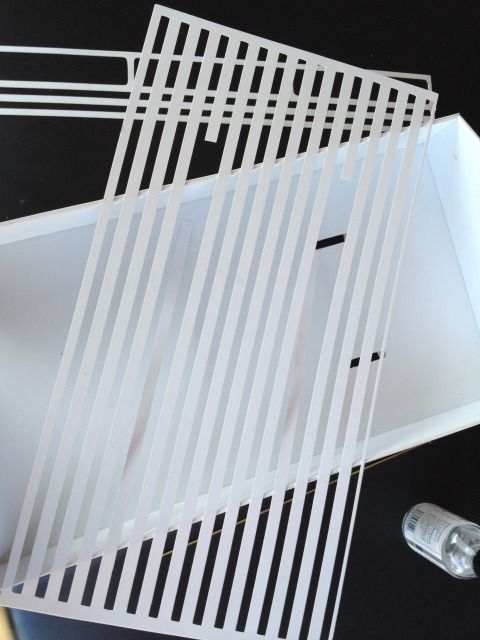 Glued on 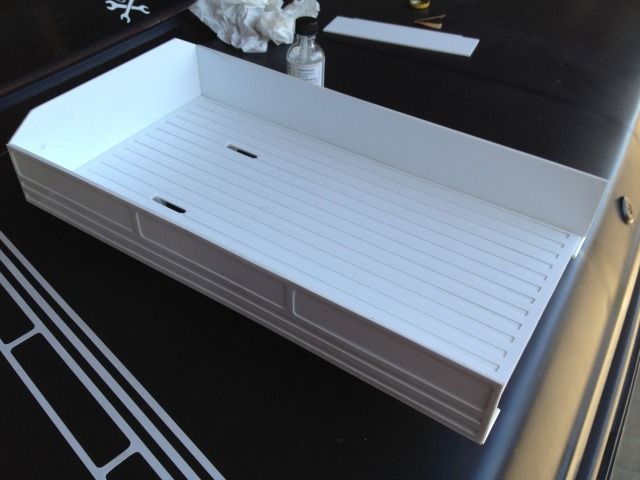 Got some more done .. just need to load the pictures .. so check back soon! |
|
| |
|
08-14-2012, 01:14 PM
| #20 |
| Quarry Creeper Join Date: Feb 2006 Location: San Jose, Ca
Posts: 367
|
PAINT!! and a lot of it.. got a bunch of stuff painted this weekend Body, Frame Axles, shocks, are all getting the military treatment 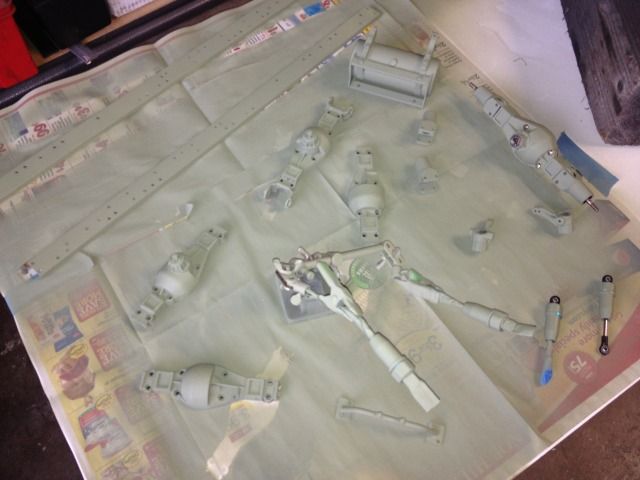 Started putting the rig back together after paint.. for some reason i am missing pictures of the frame being built up when i was cutting all the various mounts and test fitting.. but you kinda get the idea since i am basically rebuilding the whole thing after paint. 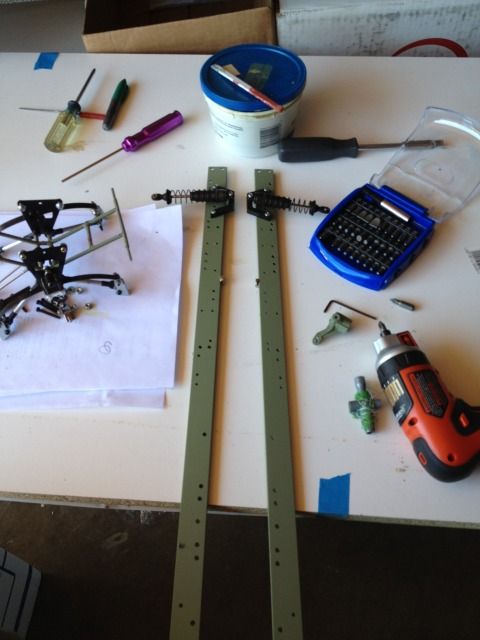 Here is a couple shots of the front suspension and motor mount setup 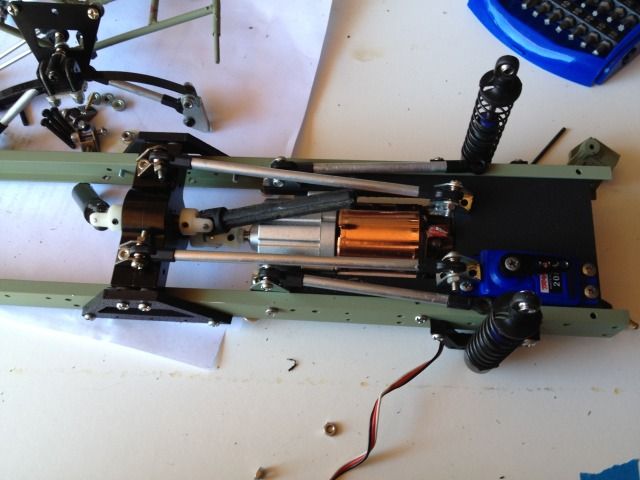 I went with a planitary gearbox to keep things compack under the cab, cut out a mount plate for the motor and servo on the cnc along with mounts for the transfer case.. (servo is only temp till i get a more powerful one) 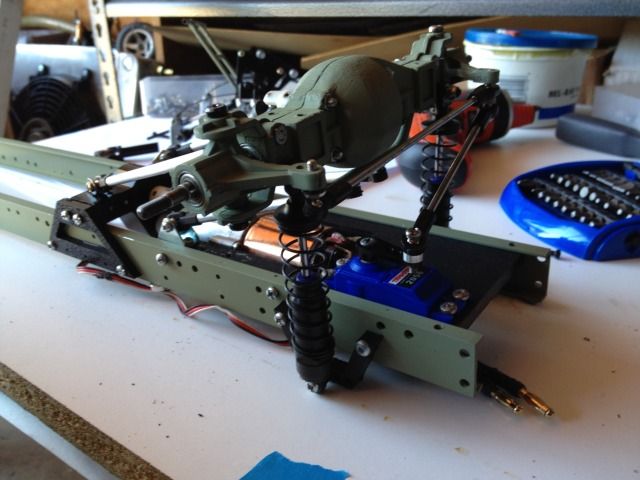 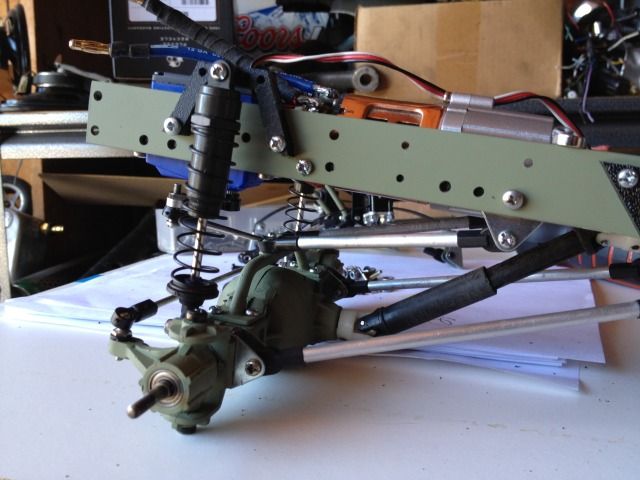 I have since lowered the front to correct that awful driveline angle. I Assembled the rear suspension .. took me a while to find a design that worked well.. it is using the semi leaf with a highlift spring and is linked to keep things straight.. 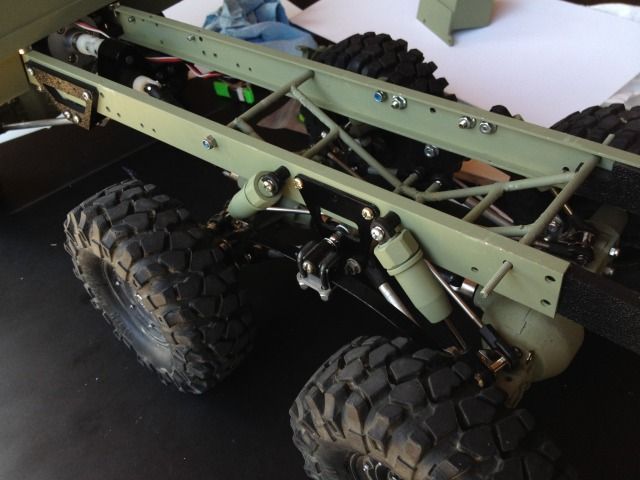 Also painted the cab and added some more detail to the bed 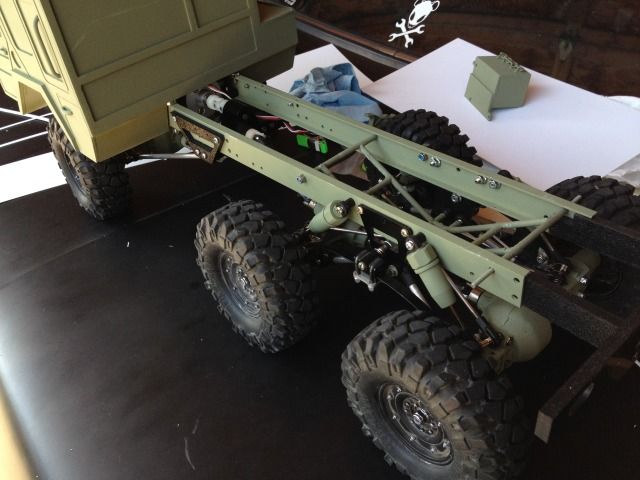 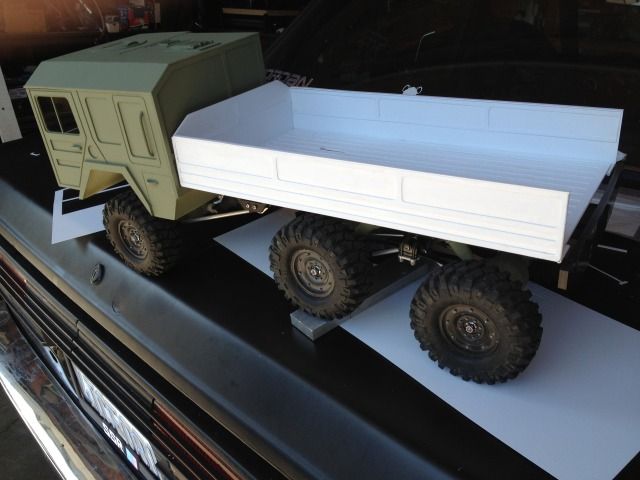 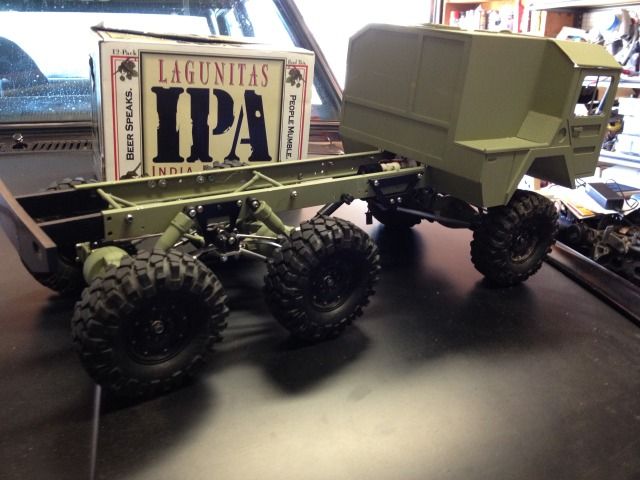 |
|
| |
|
| Thread Tools | |
| Display Modes | |
| |


 Linear Mode


