| |||||||
Loading
 |
| | LinkBack | Thread Tools | Display Modes |
| |||||||
 |
| | LinkBack | Thread Tools | Display Modes |
| | #21 |
| I wanna be Dave  Join Date: Apr 2013 Location: Streamwood, IL
Posts: 2,442
|
I'm interested to see how you do the steering, got to hide the servo, and hook it up with linkages
|
| |  |
| Sponsored Links | |
| | #22 |
| Rock Crawler  Join Date: Jun 2015 Location: In the Sticks in the Ozarks
Posts: 940
|
Awesome build, sir !! You have phenomenal talent ! Just to throw out a lunatic suggestion... I know you're tight on space, but with all of that "expose" on the nose, maybe you could go "rail-dragster" style with your steering. Put a mini servo in the gas tank, with a crank arm out the side and a rod running to the axle. Kind of like the "Red Baron" or the "Bad Medicine" rods. |
| |  |
| | #23 |
| Quarry Creeper Join Date: Jun 2015 Location: Petaluma, Ca
Posts: 237
|
I was going to suggest putting a servo behind the cowl and running a rod out to a bell crack to look like a steering shaft.
|
| |  |
| | #24 | |||||
| Fan of wheelspeed Join Date: Jun 2011 Location: Southern IN
Posts: 3,369
| Thanks man. It may be for sale one day. Quote:
Quote:
Quote:
Thanks Quote:
Quote:
 | |||||
| |  |
| | #25 |
| Fan of wheelspeed Join Date: Jun 2011 Location: Southern IN
Posts: 3,369
|
I've got a lot of updates to show Mr. Sczerba sold me a set of Tamya semi tires, and my Guru from another state Derrick Johnston sent me some vintage slicks that you've all been seeing here. So in the quest to have a nice ratrod style white wall drag radial I had to chop these tires into several pieces. Here's how the mayhem went down... I cut the sidewalls off and opened the beads up by roughly 1/8th". 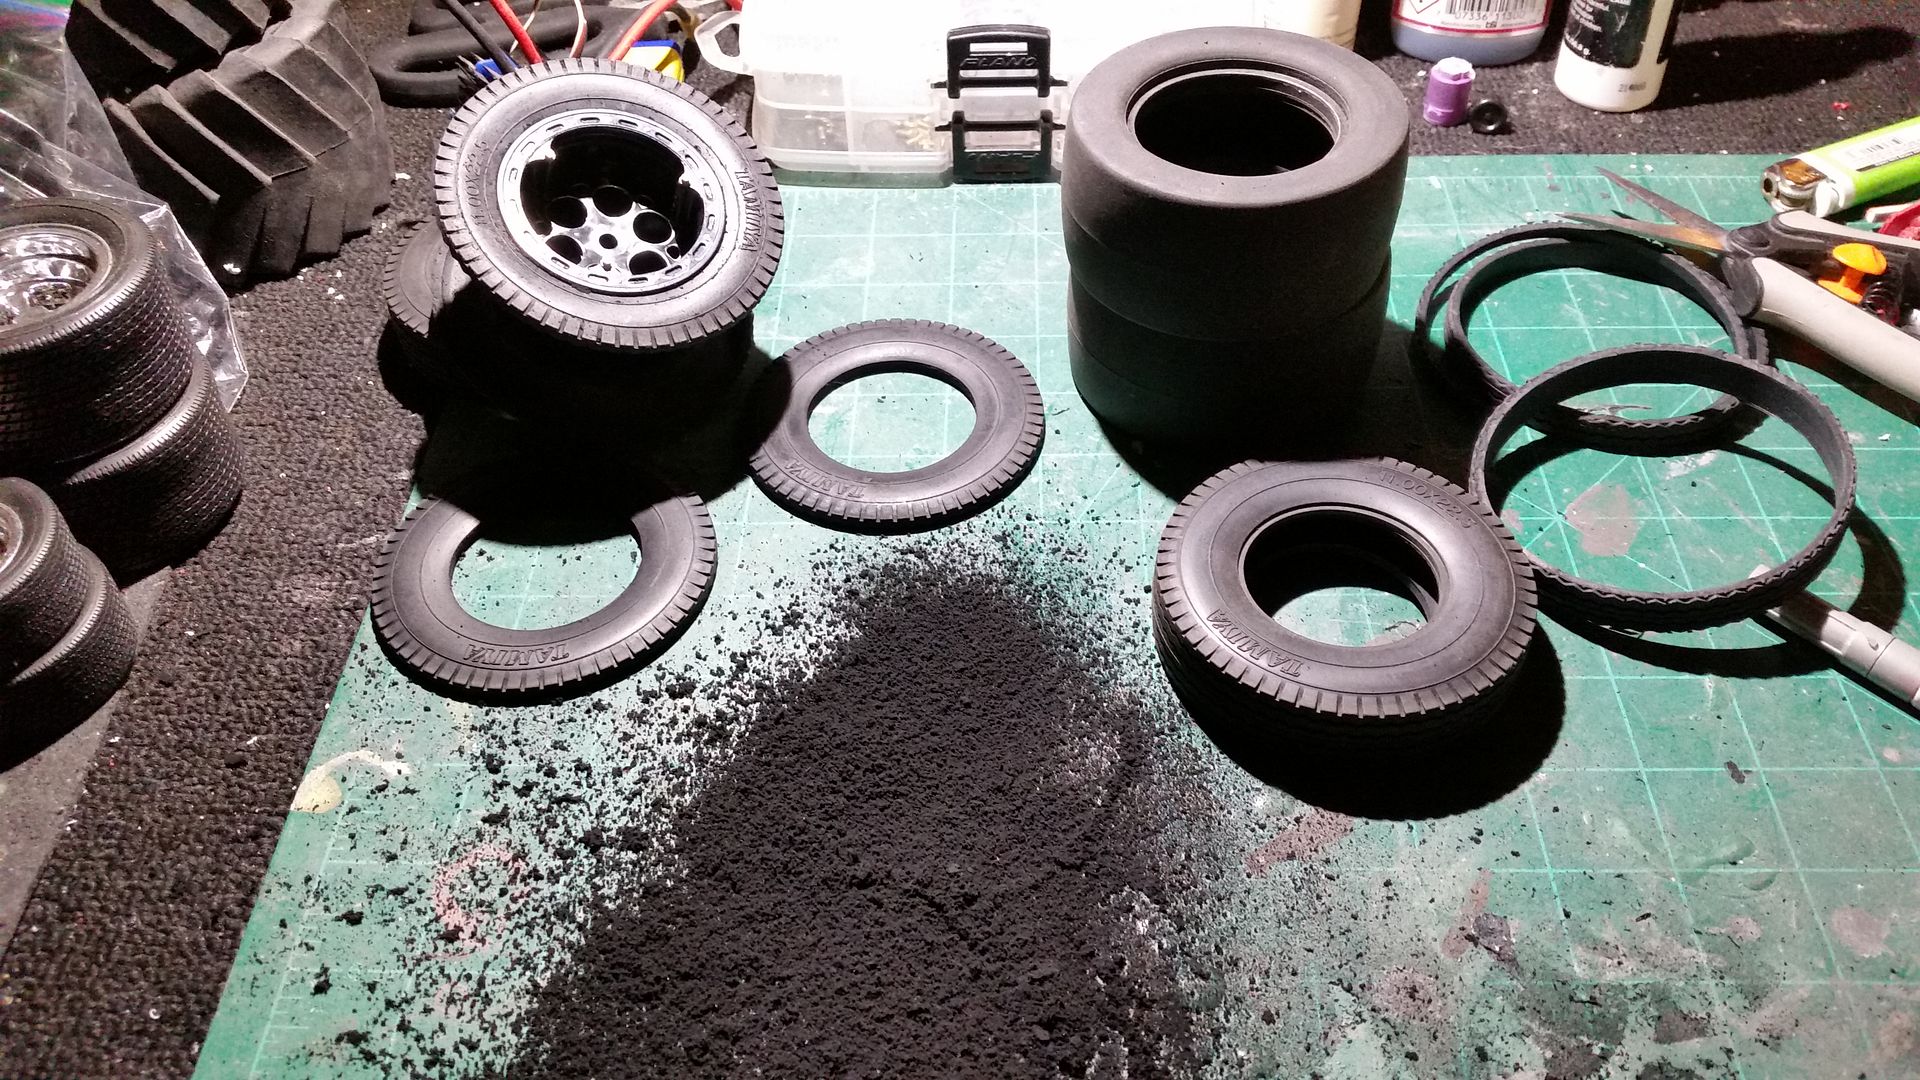 Then I installed one sidewall on the rim and glued the slick (minus sidewalls) to the semi sidewalls while it was installed on the rim. 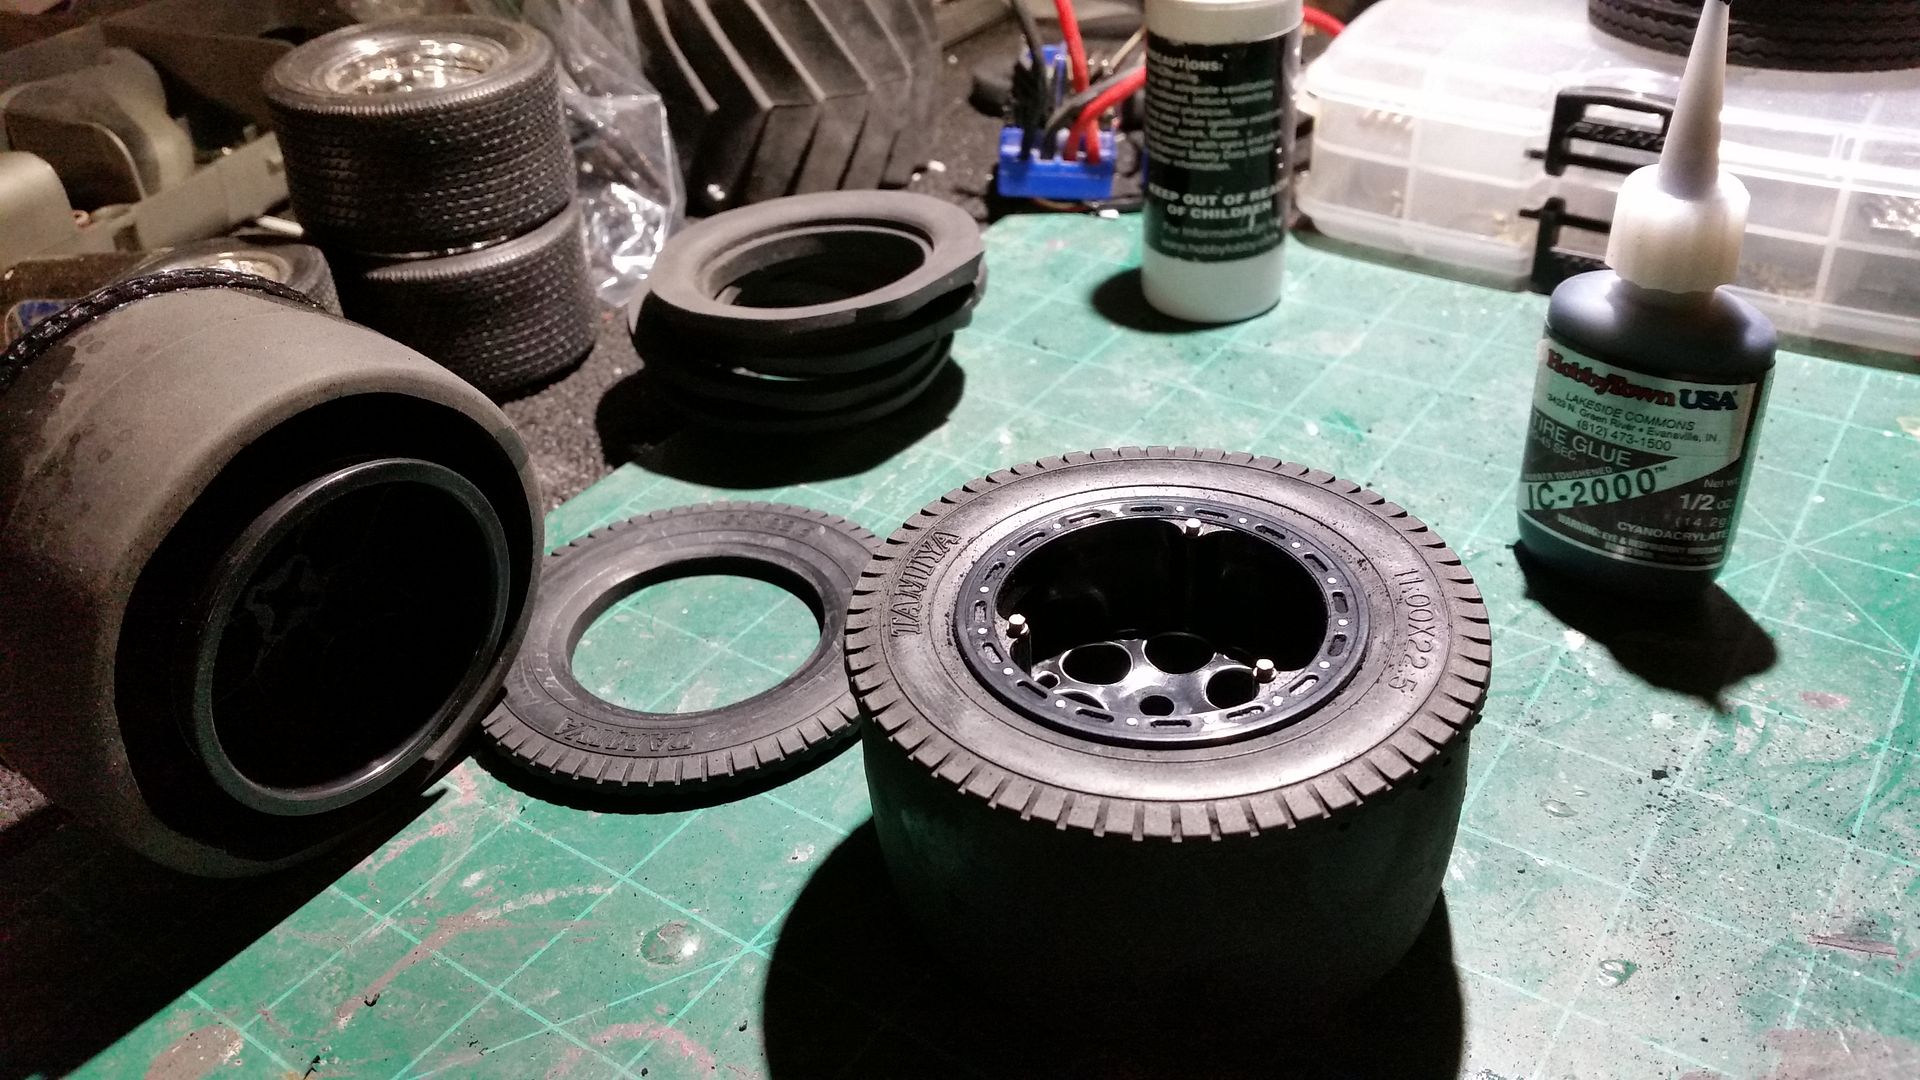 Next, glue the other side... 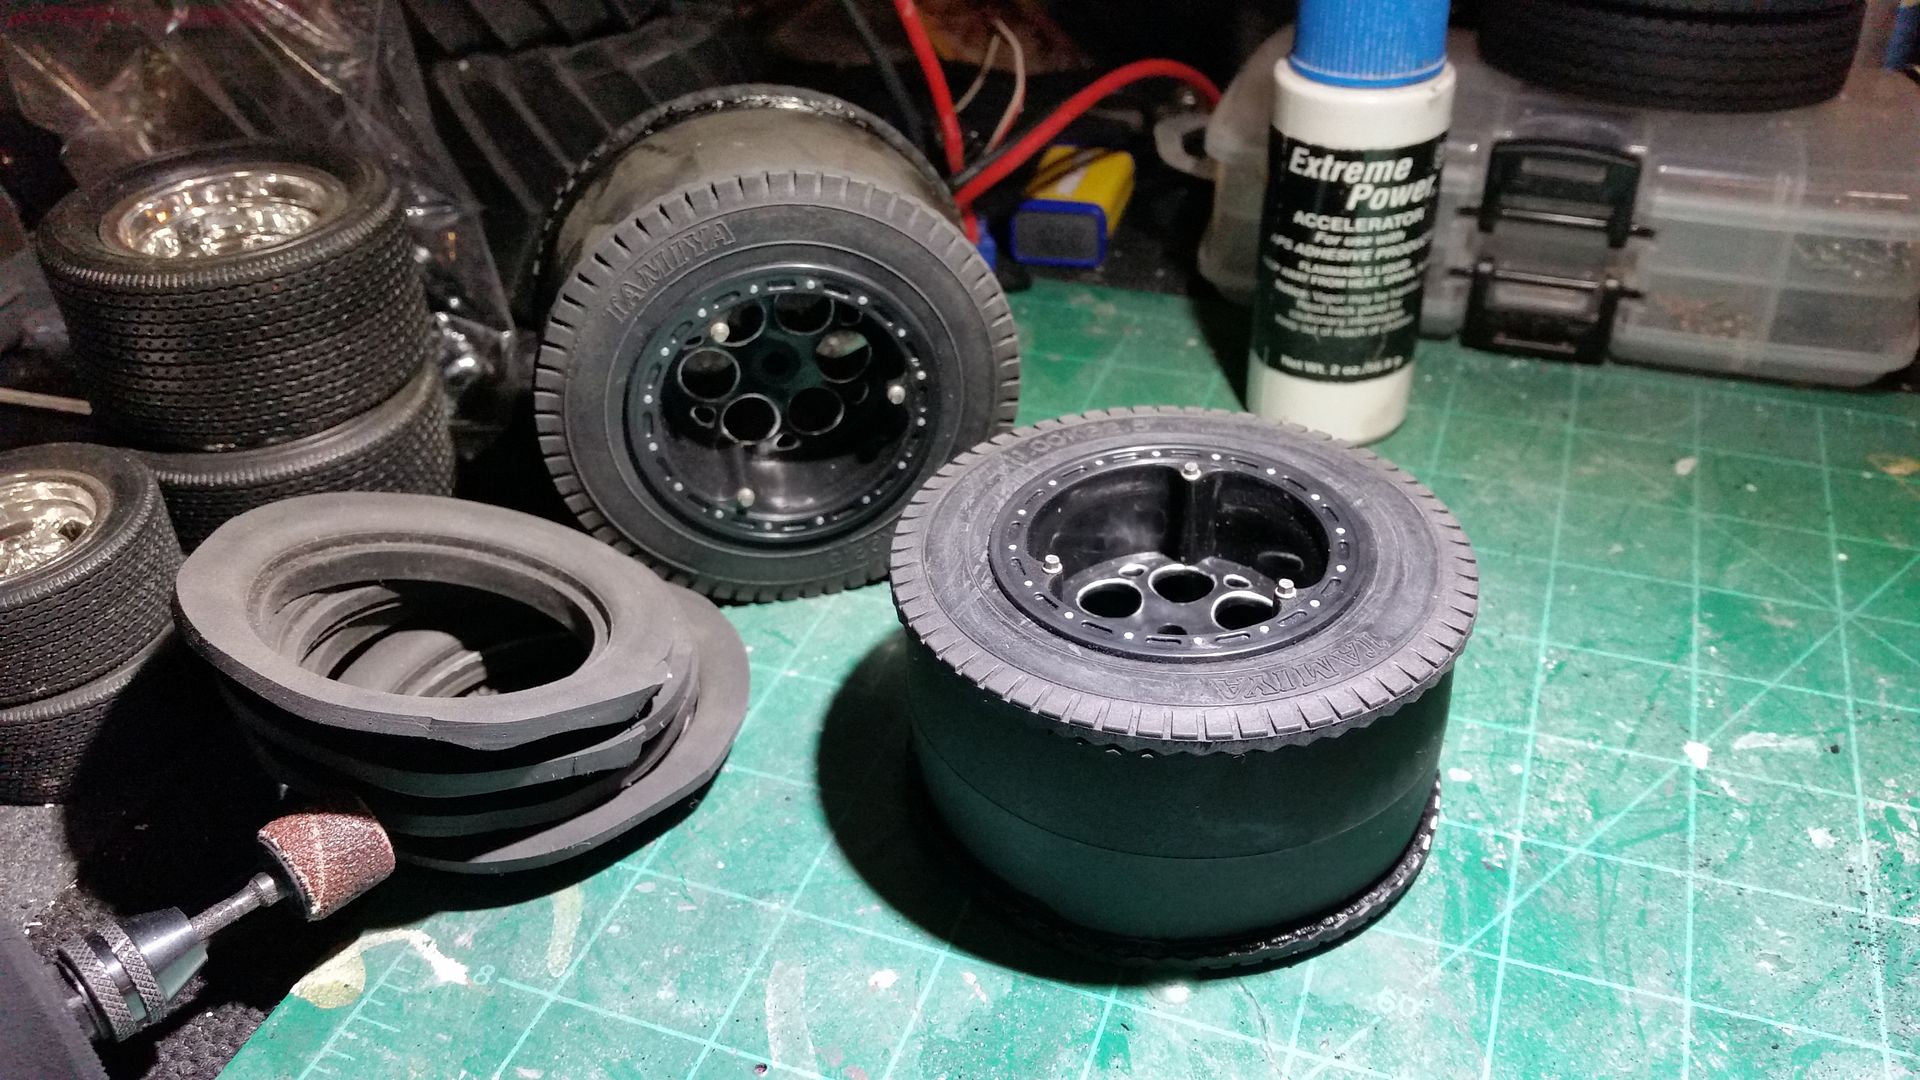 I was left with this. The sidewalls were to high, but I planned on that. 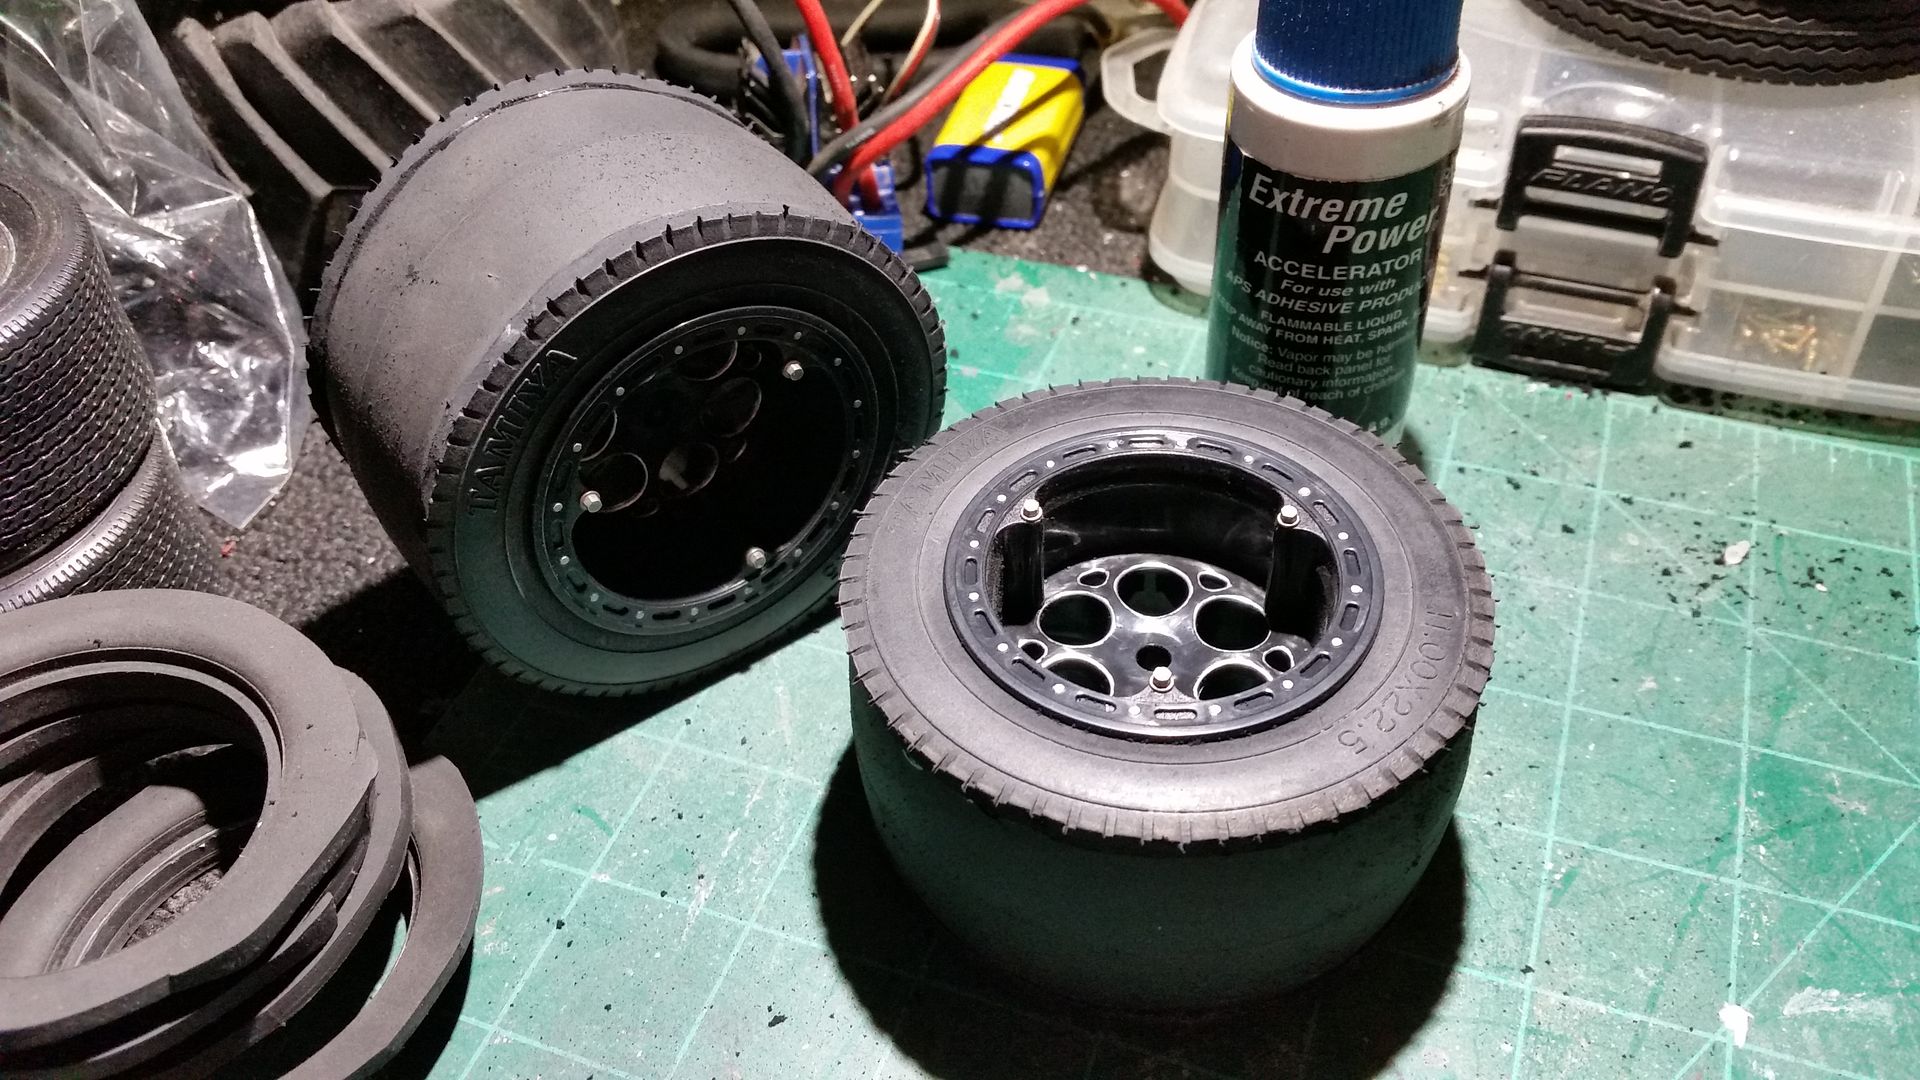 After a lot of sanding I had these. 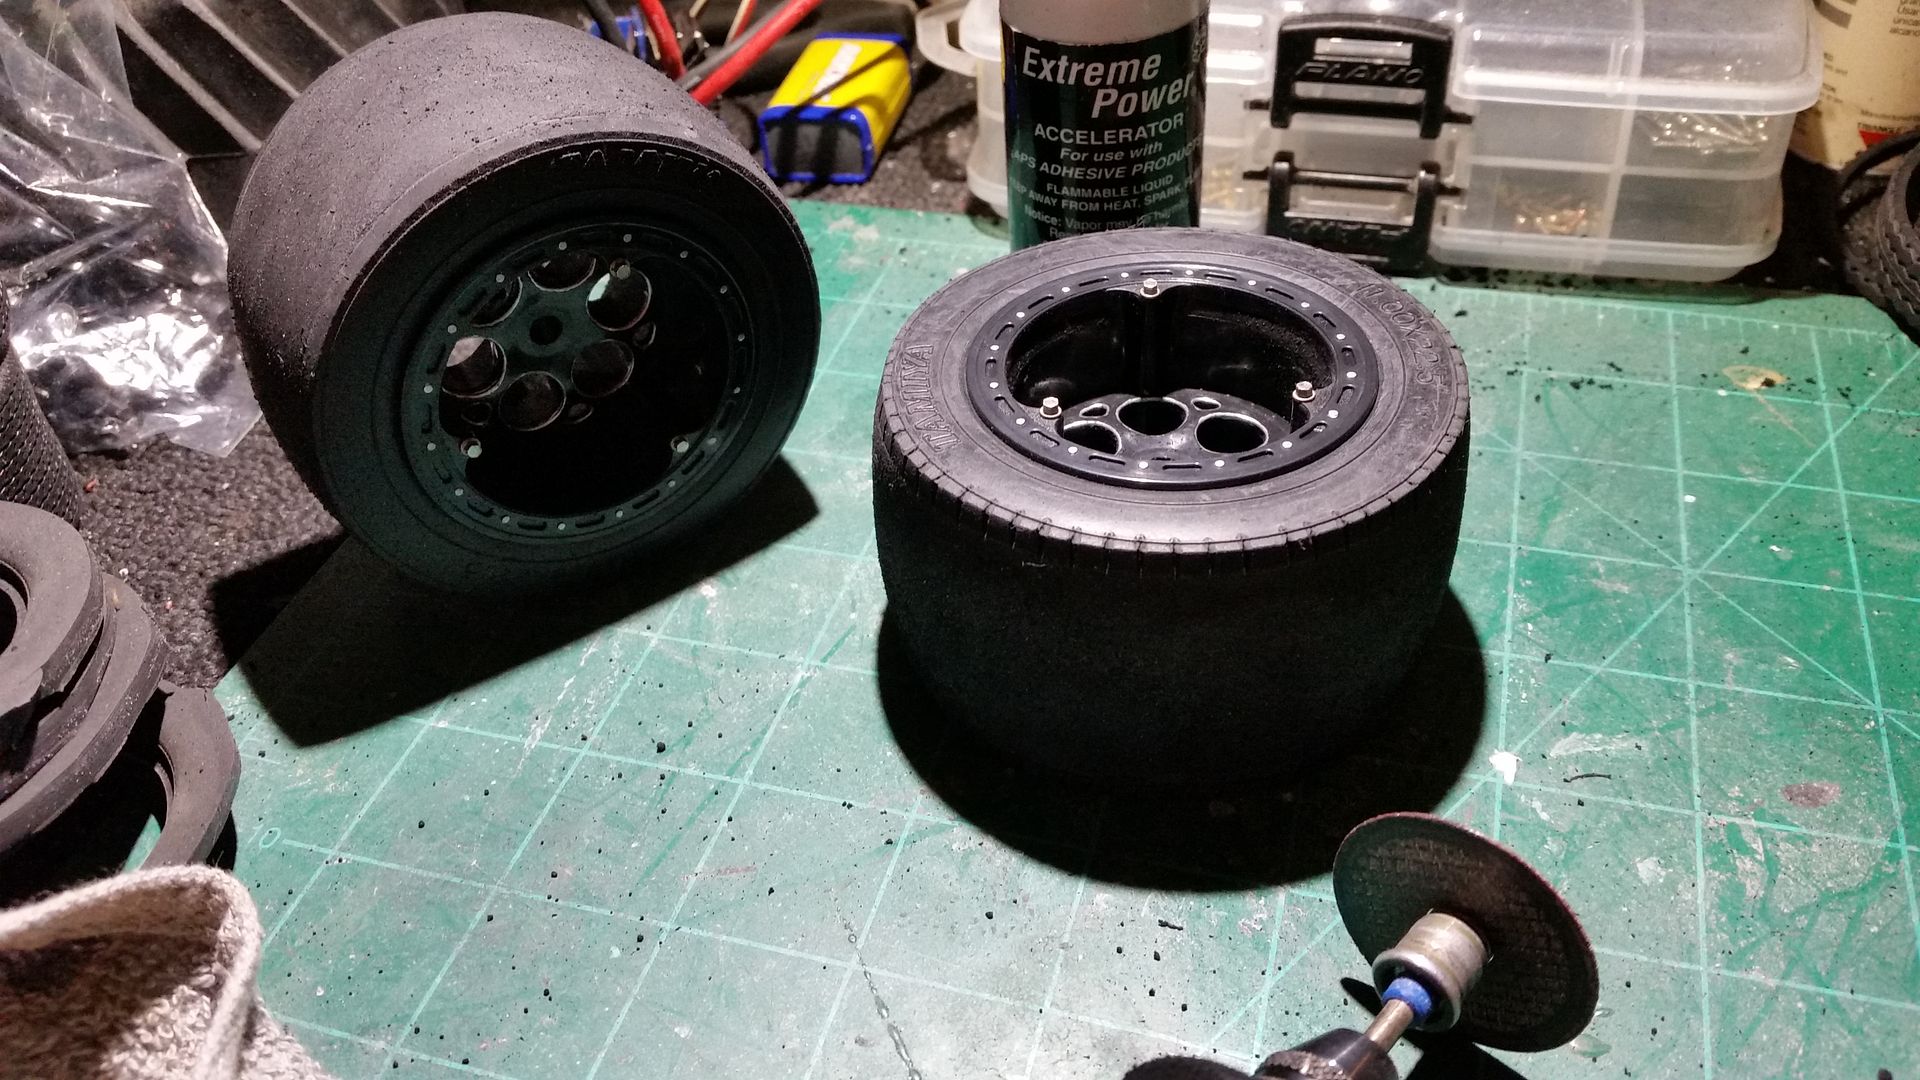 I followed up by painting the sidewalls white with a Laquer paint Sharpie marker, sanding everything smooth and cutting new tread grooves into the sidewalls and the slick portion of the tire. The end result is a BADASS set of tires! 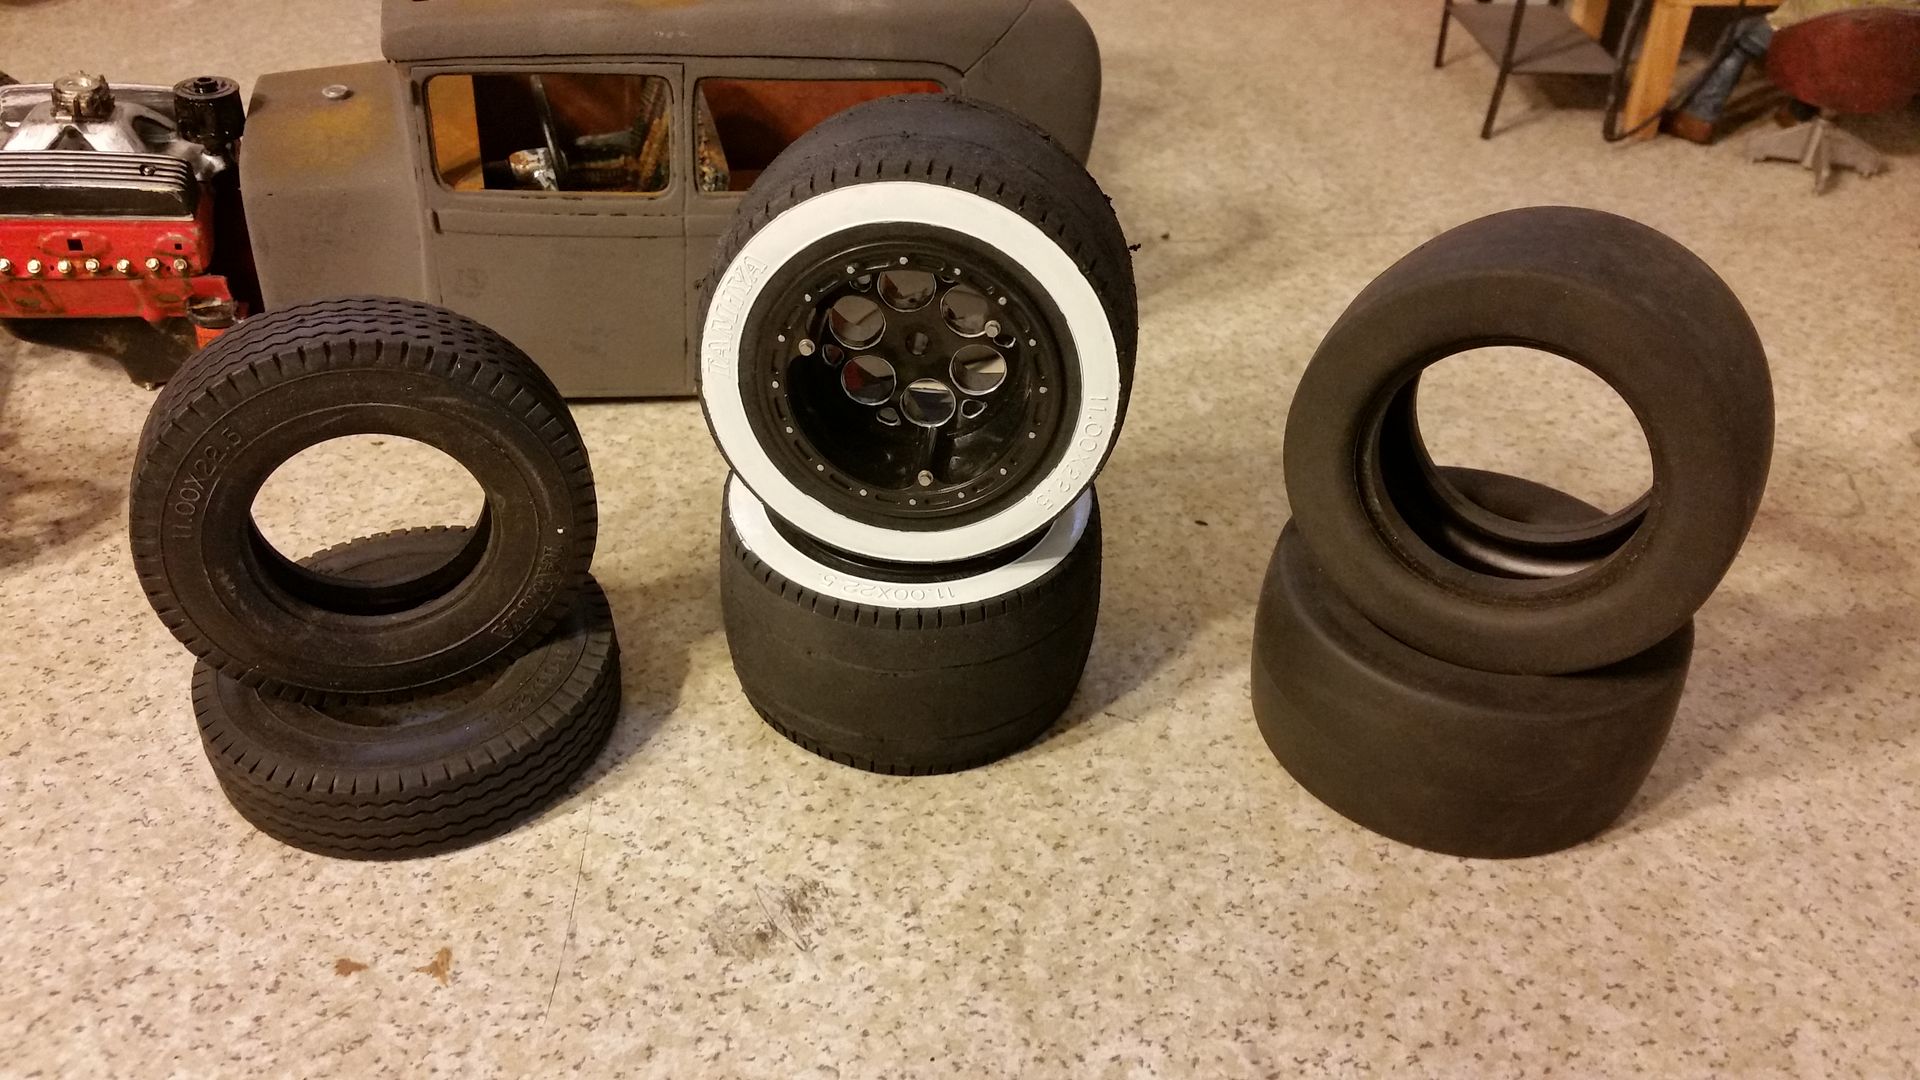 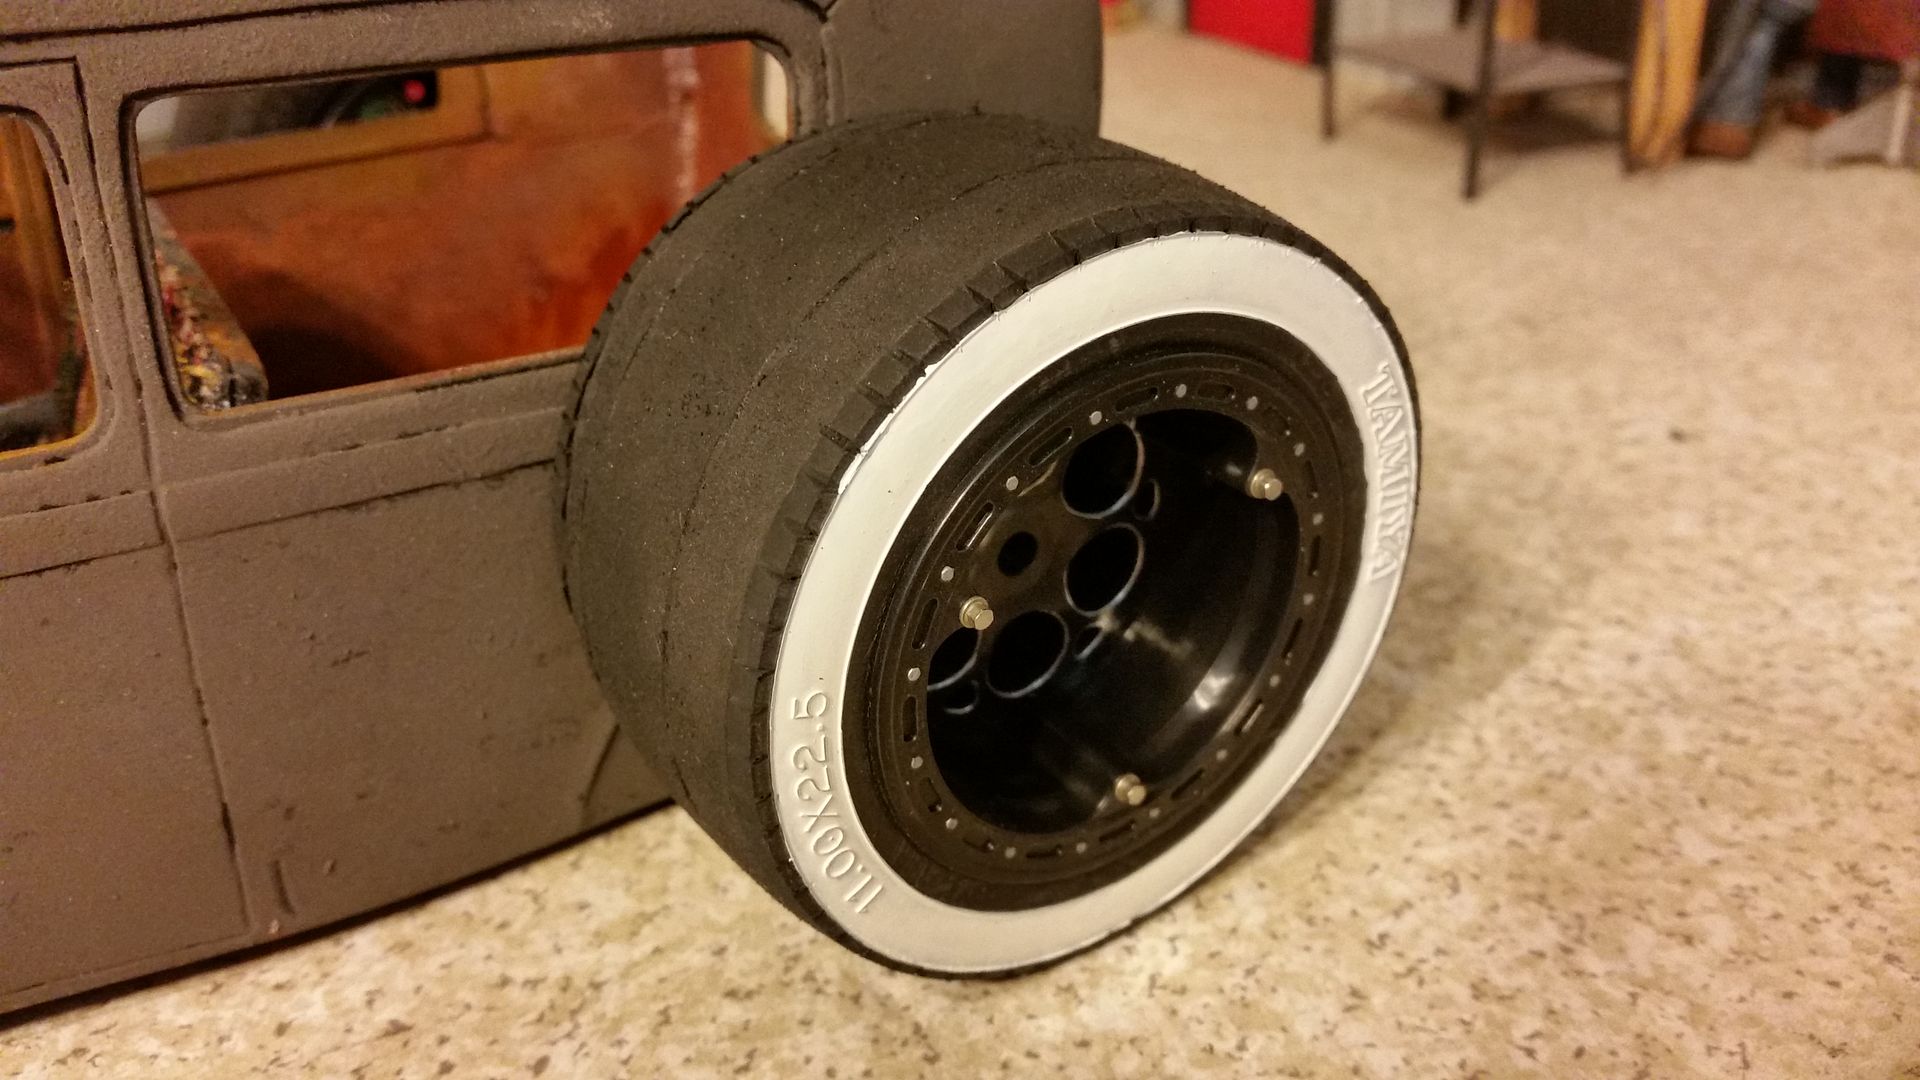 My servo showed up for the steering. I'm planning on sticking the servo horn out of the side of the cowl and running my steering linkage up front. 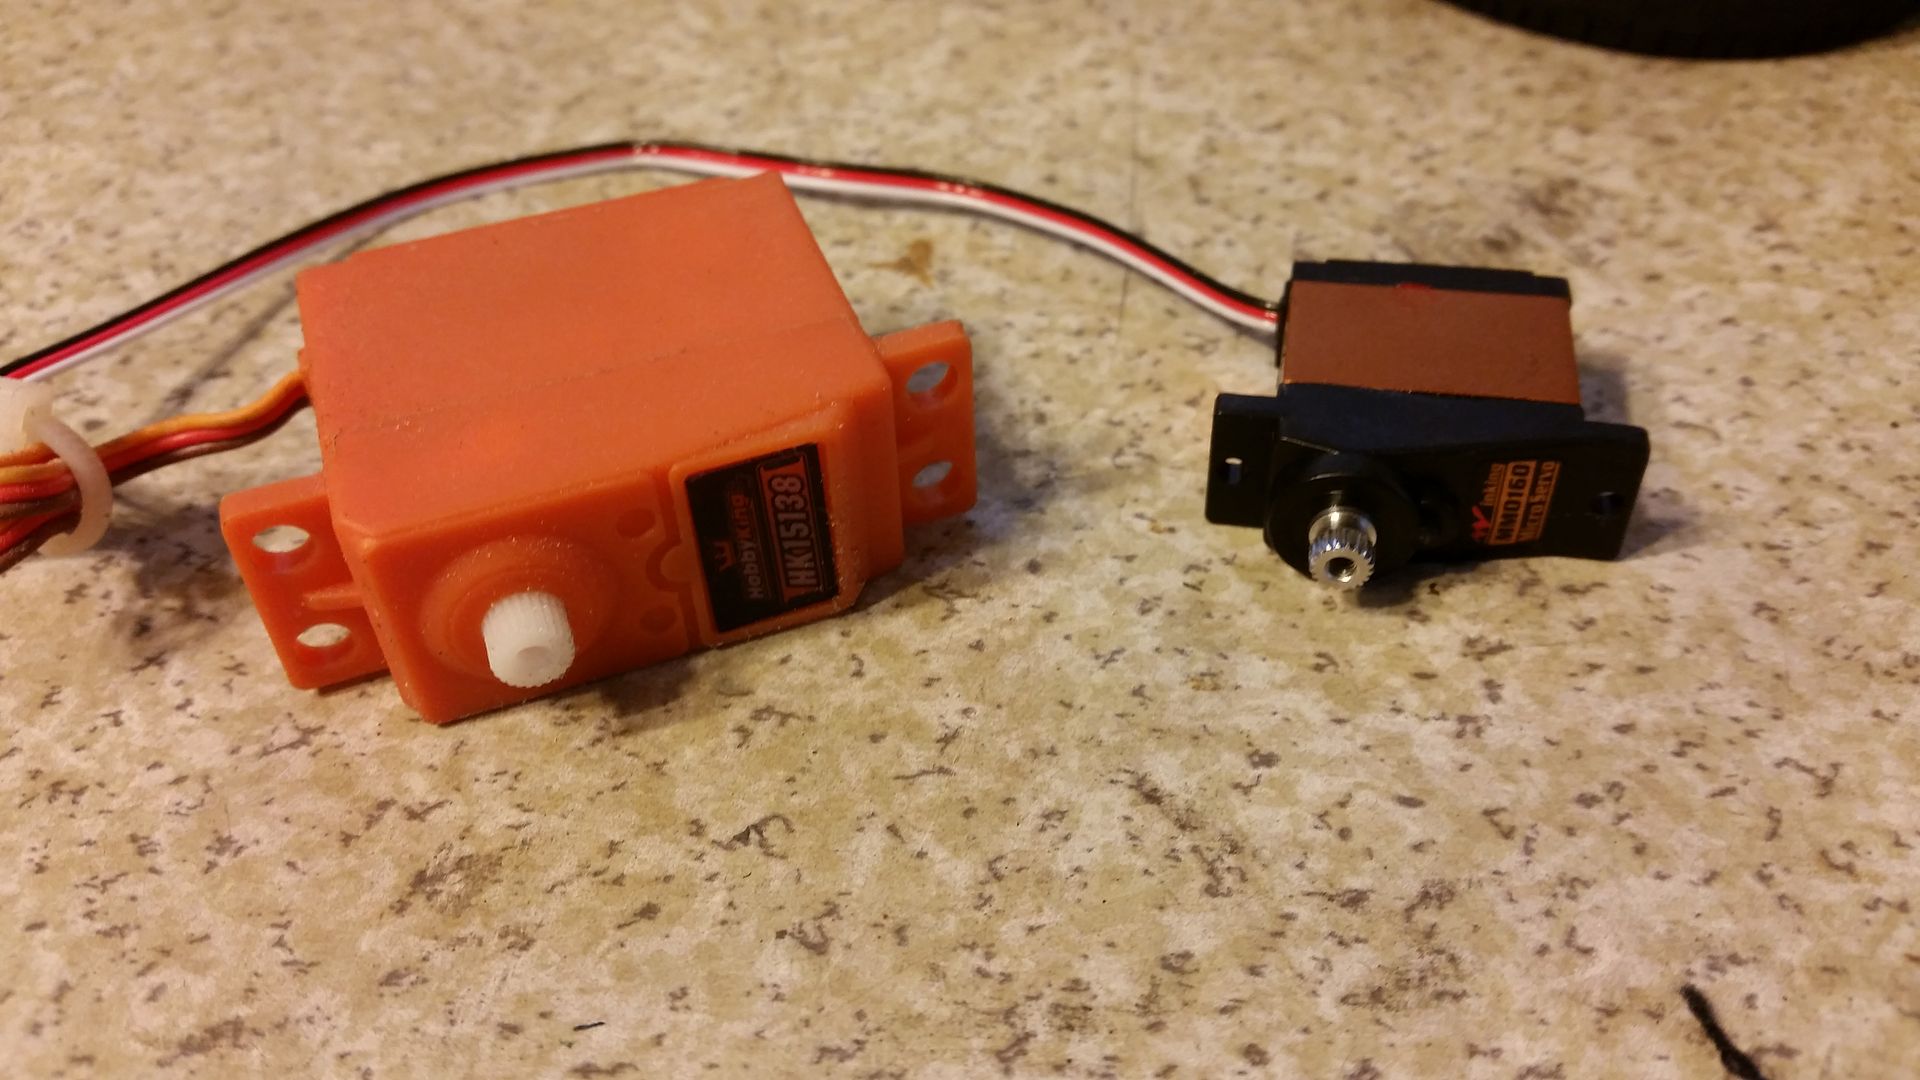 It's just a little fella 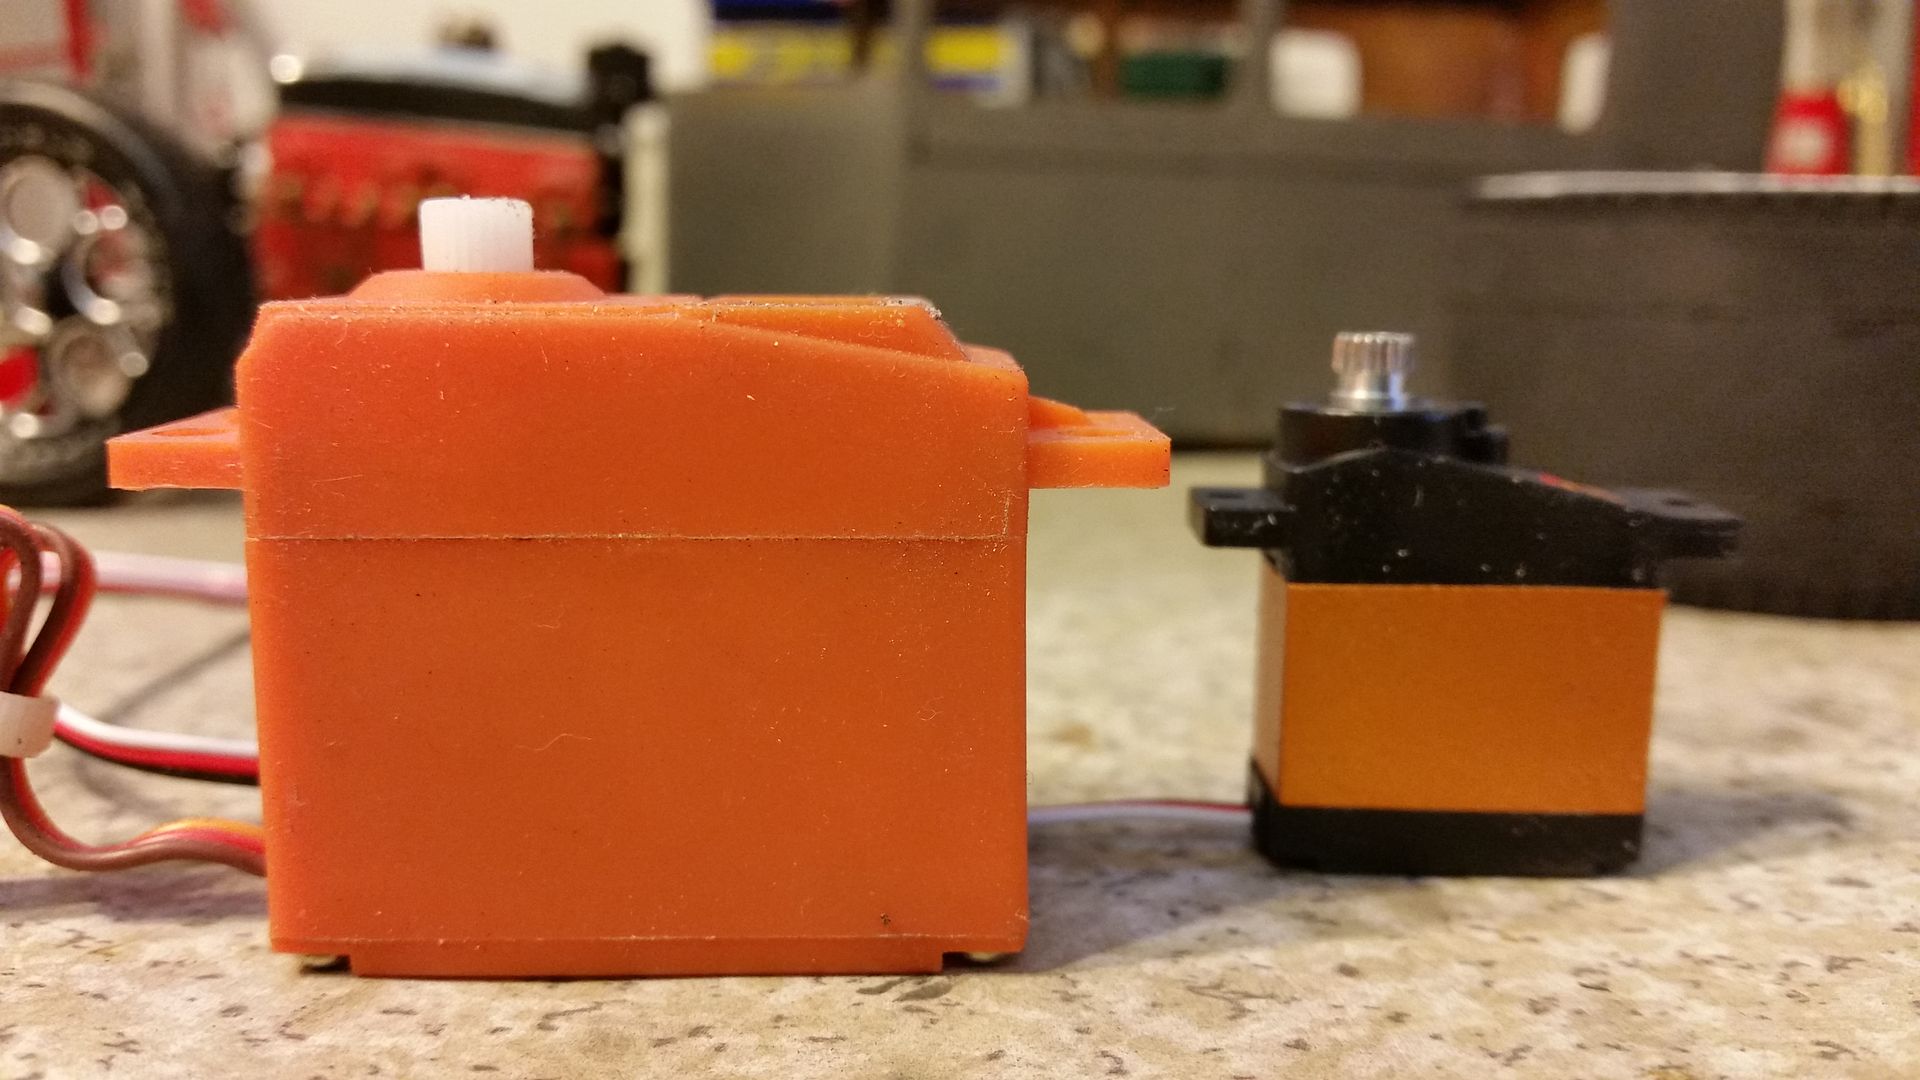 Next up, I did some detailing on the engine and installed more scale hardware from Lockeduprc.com. Notice the black around the intake? I used black rubberized CA glue on those pieces to simulate RTV gasket maker. 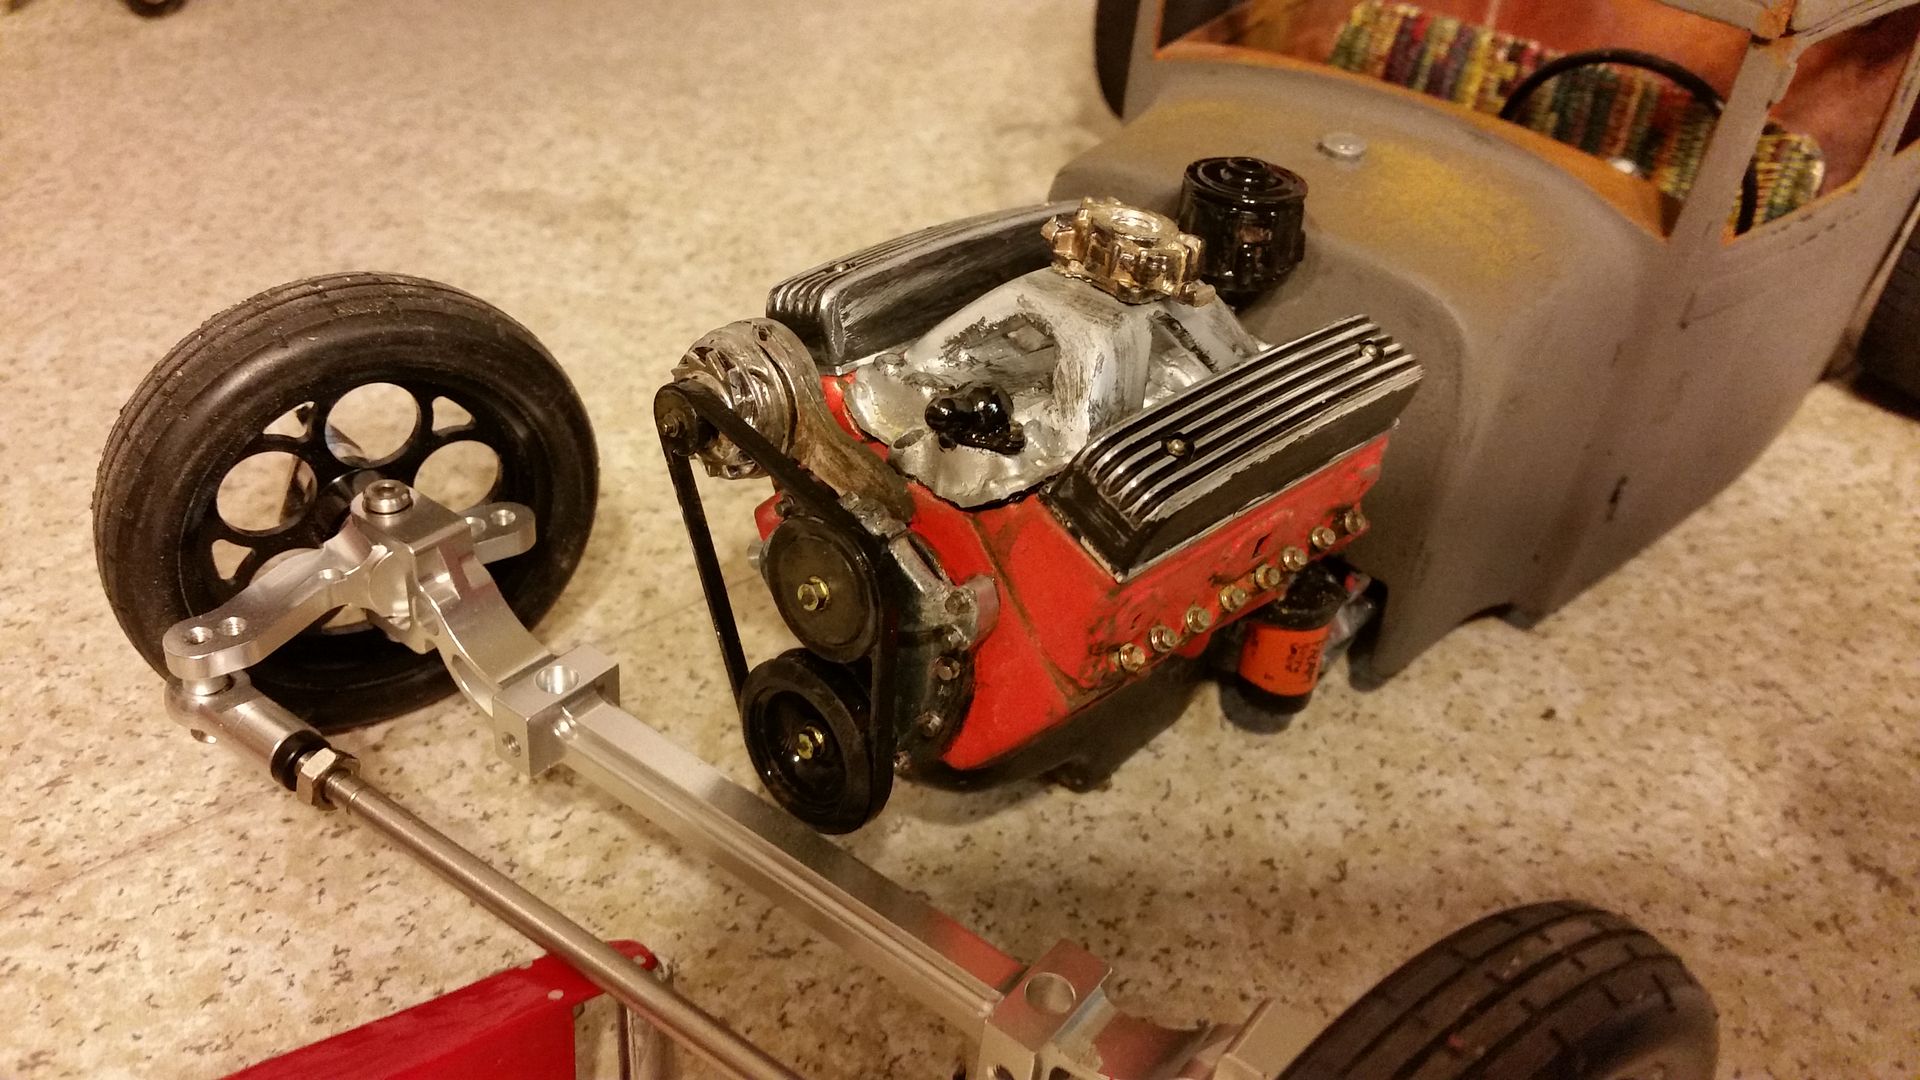 MOCK UP PICS!! 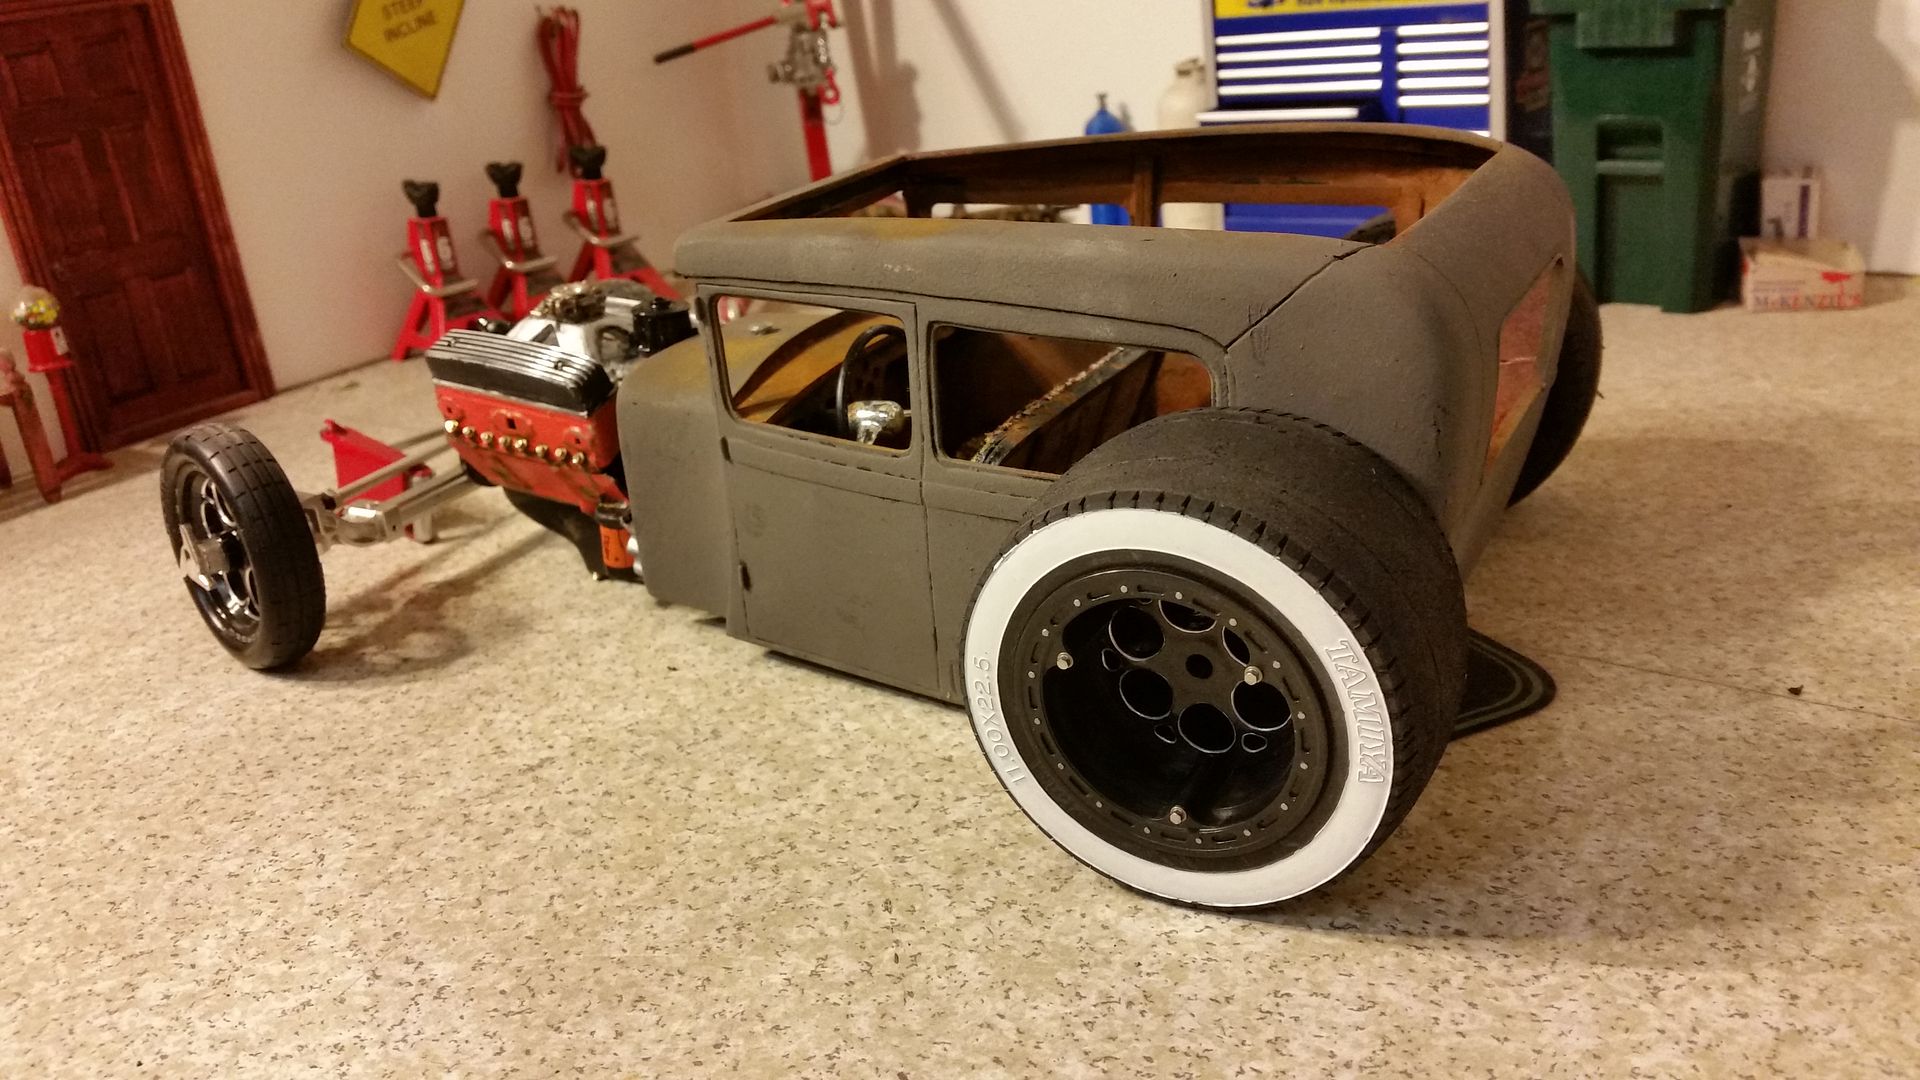 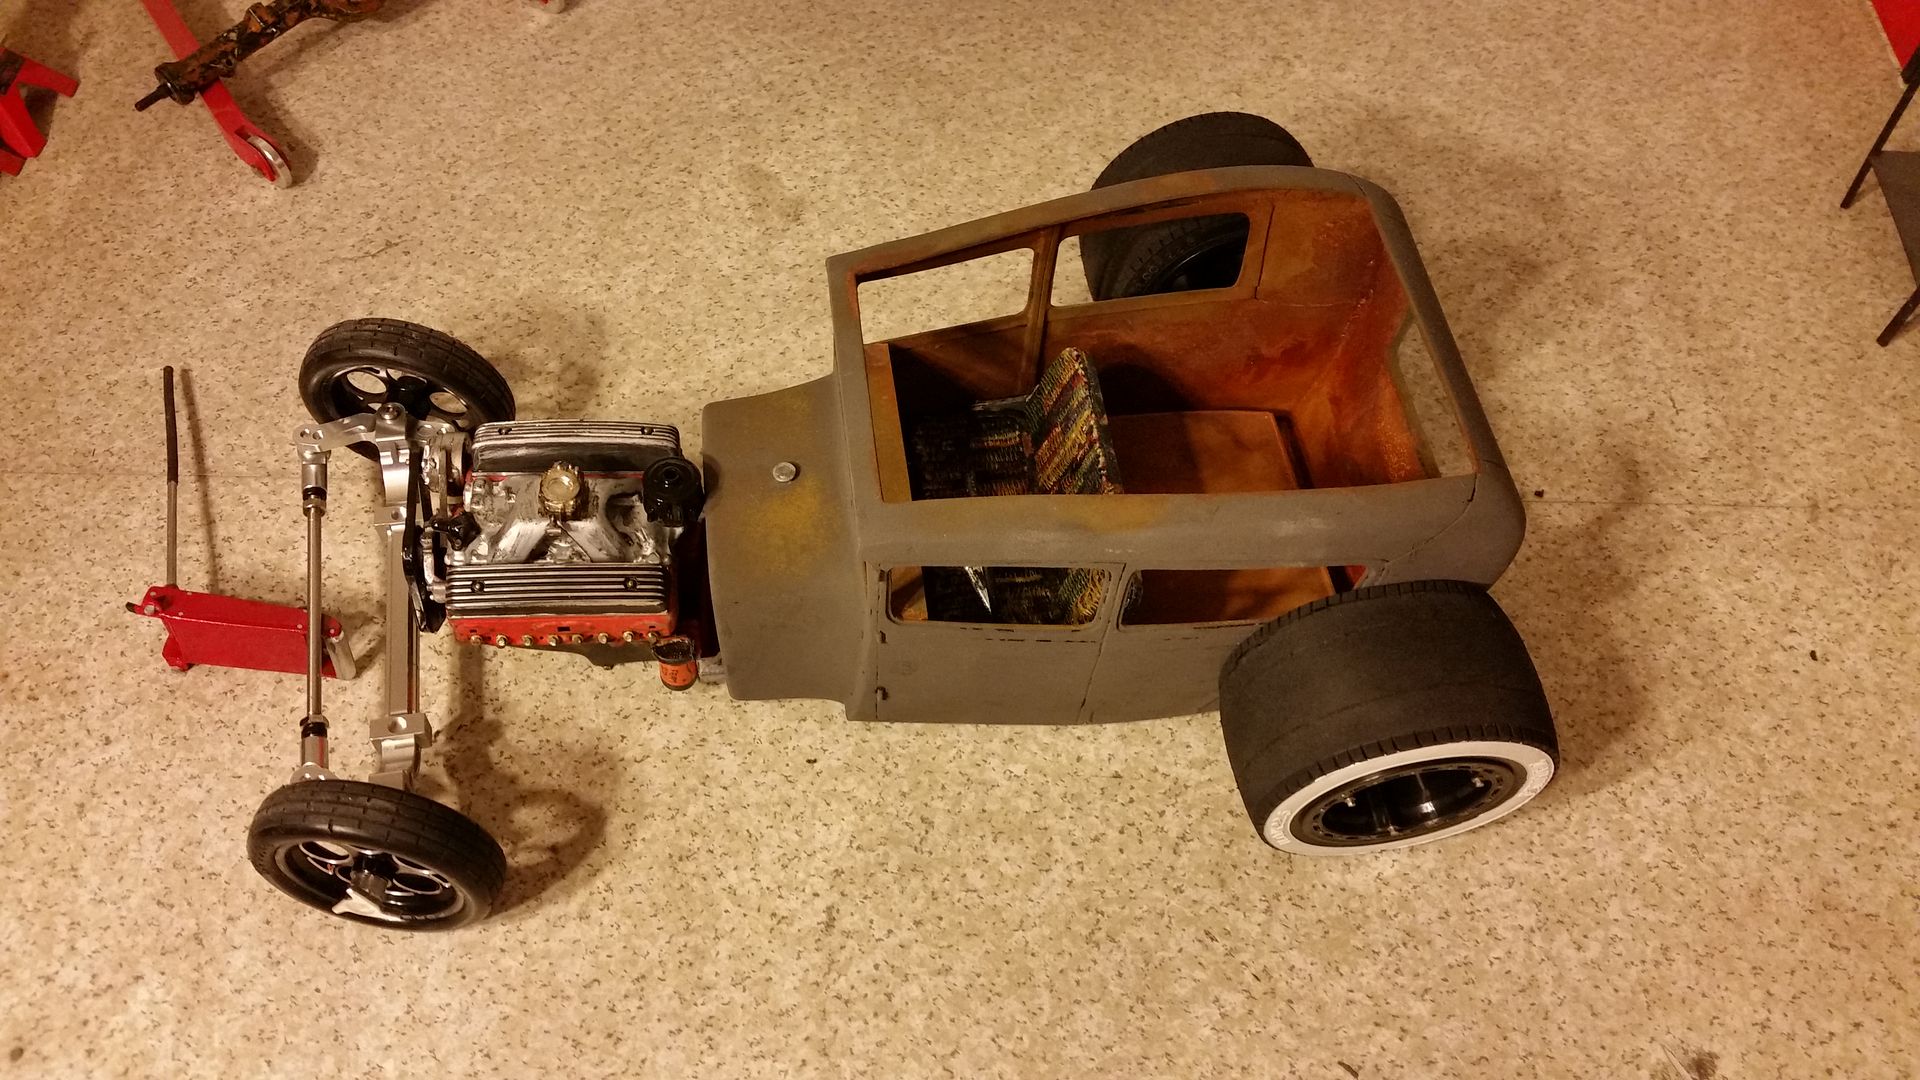 Then sometime around 1am I came up with the Shotgun style scoop. I'm running one on my 1:1 rat once I get to that point so it only made sense to have one for my 1:10. I used a couple of pieces of aluminum tube and styrene to make it. I painted the styrene portion with the Model Masters Metalizer paint and once it cured I used my Dremel and a soft fabric buffing wheel and compound to polish it all up to a "like new but used" shine. 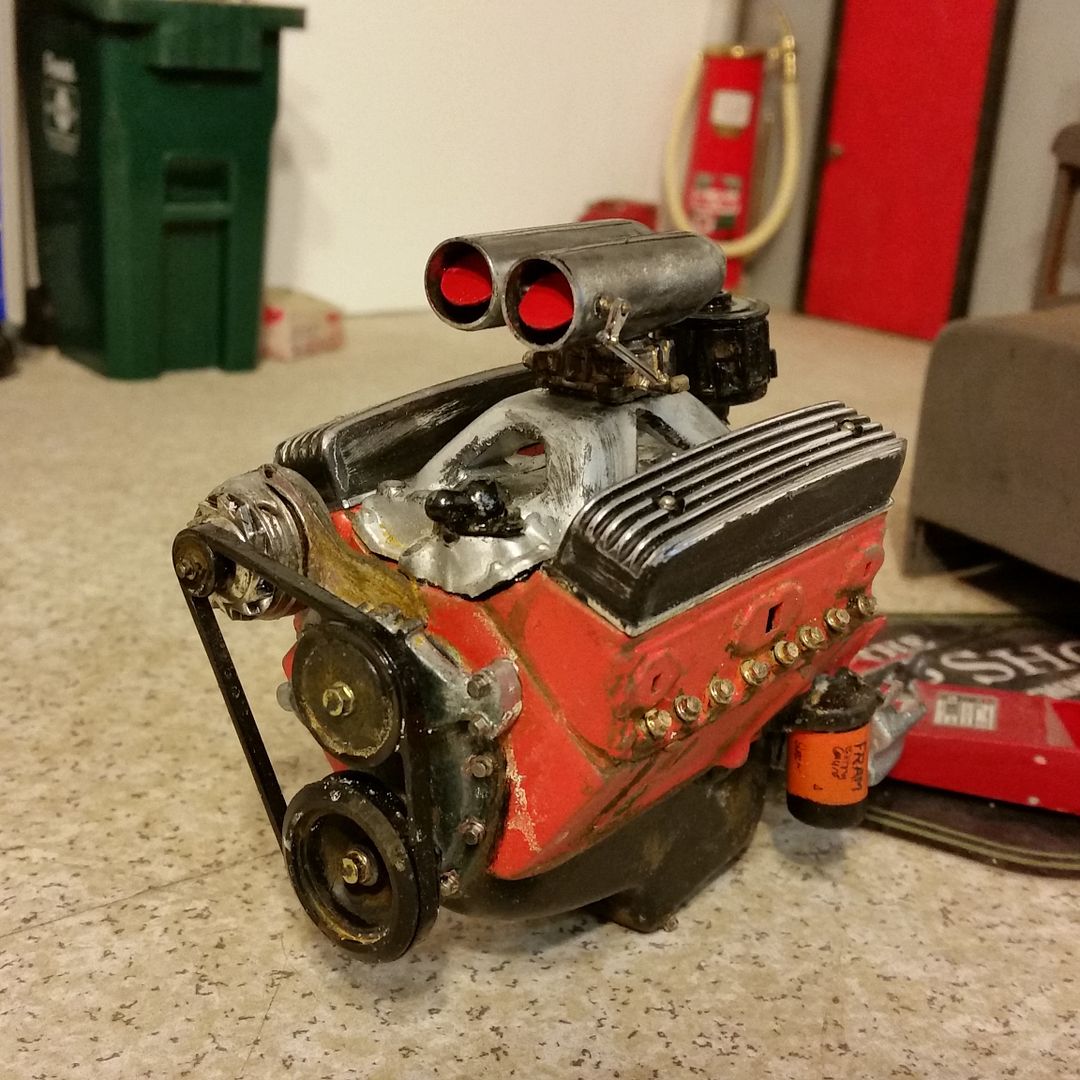 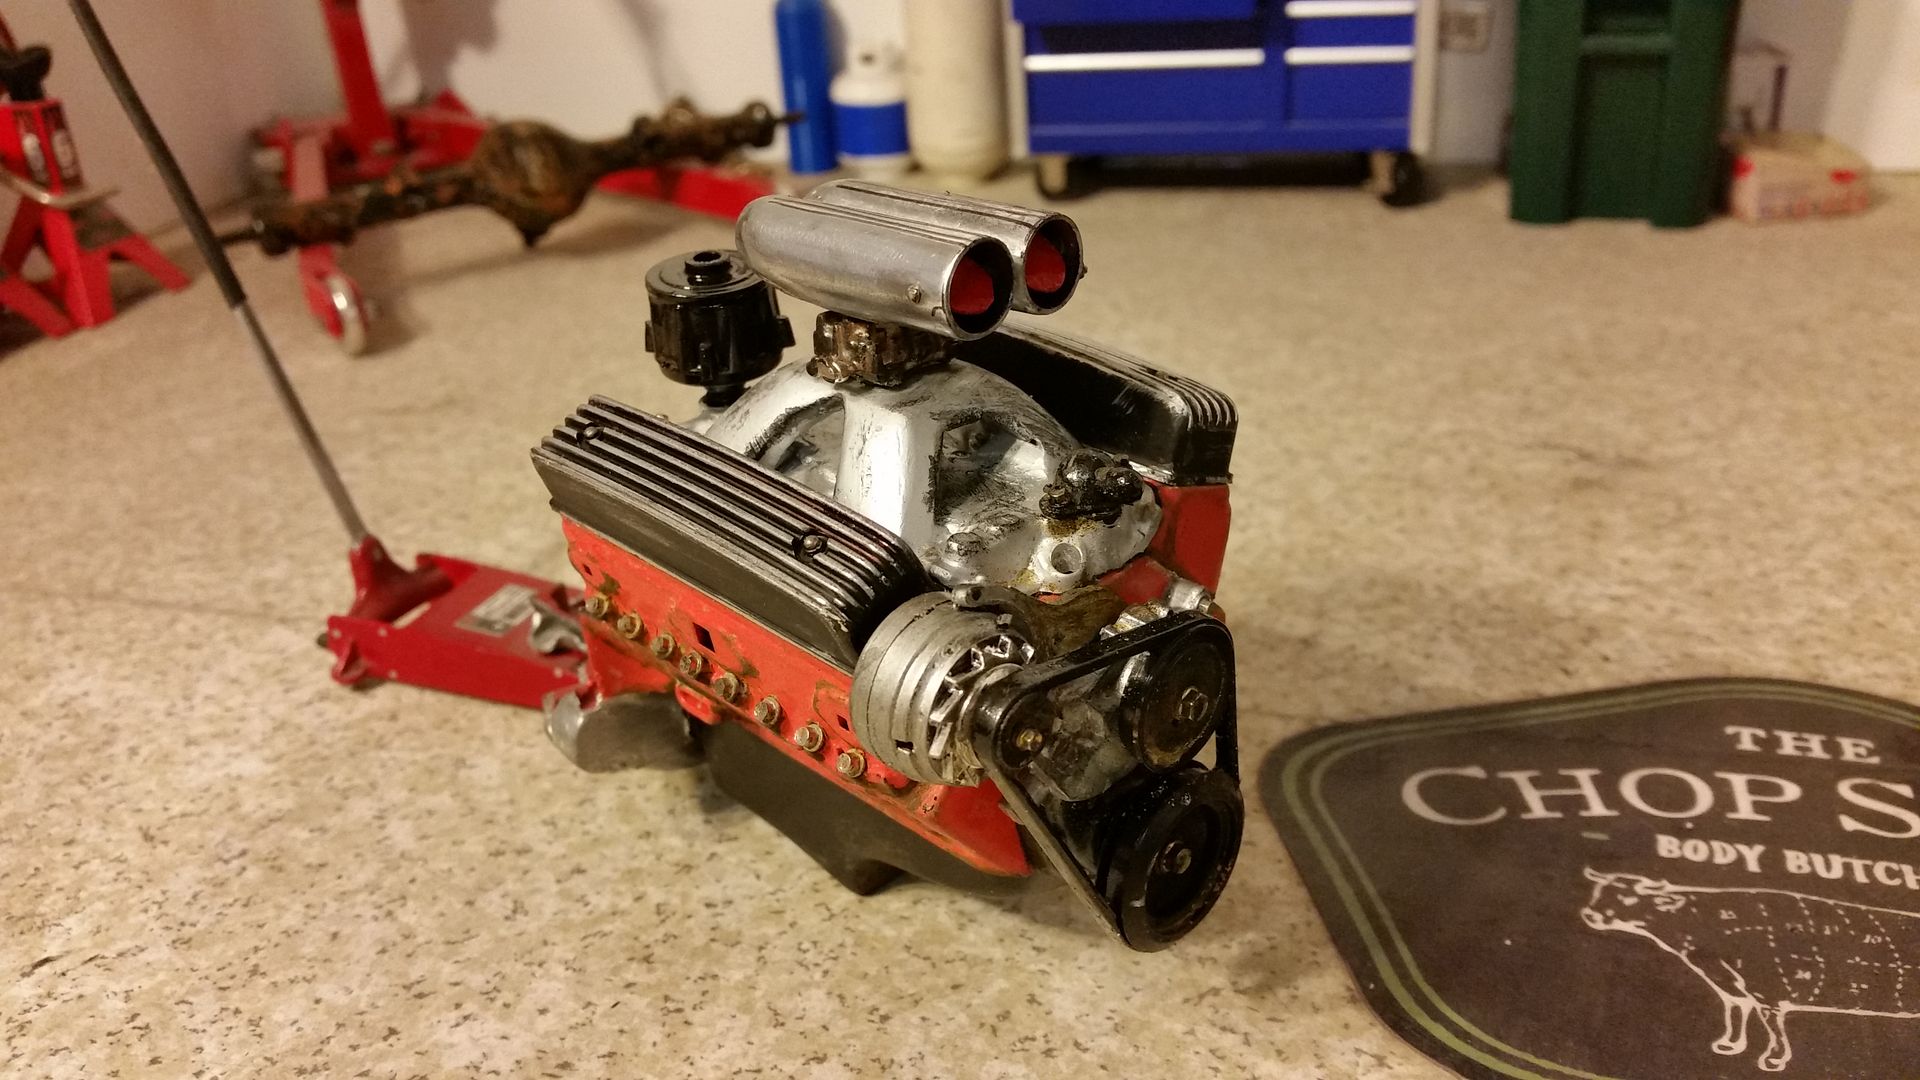 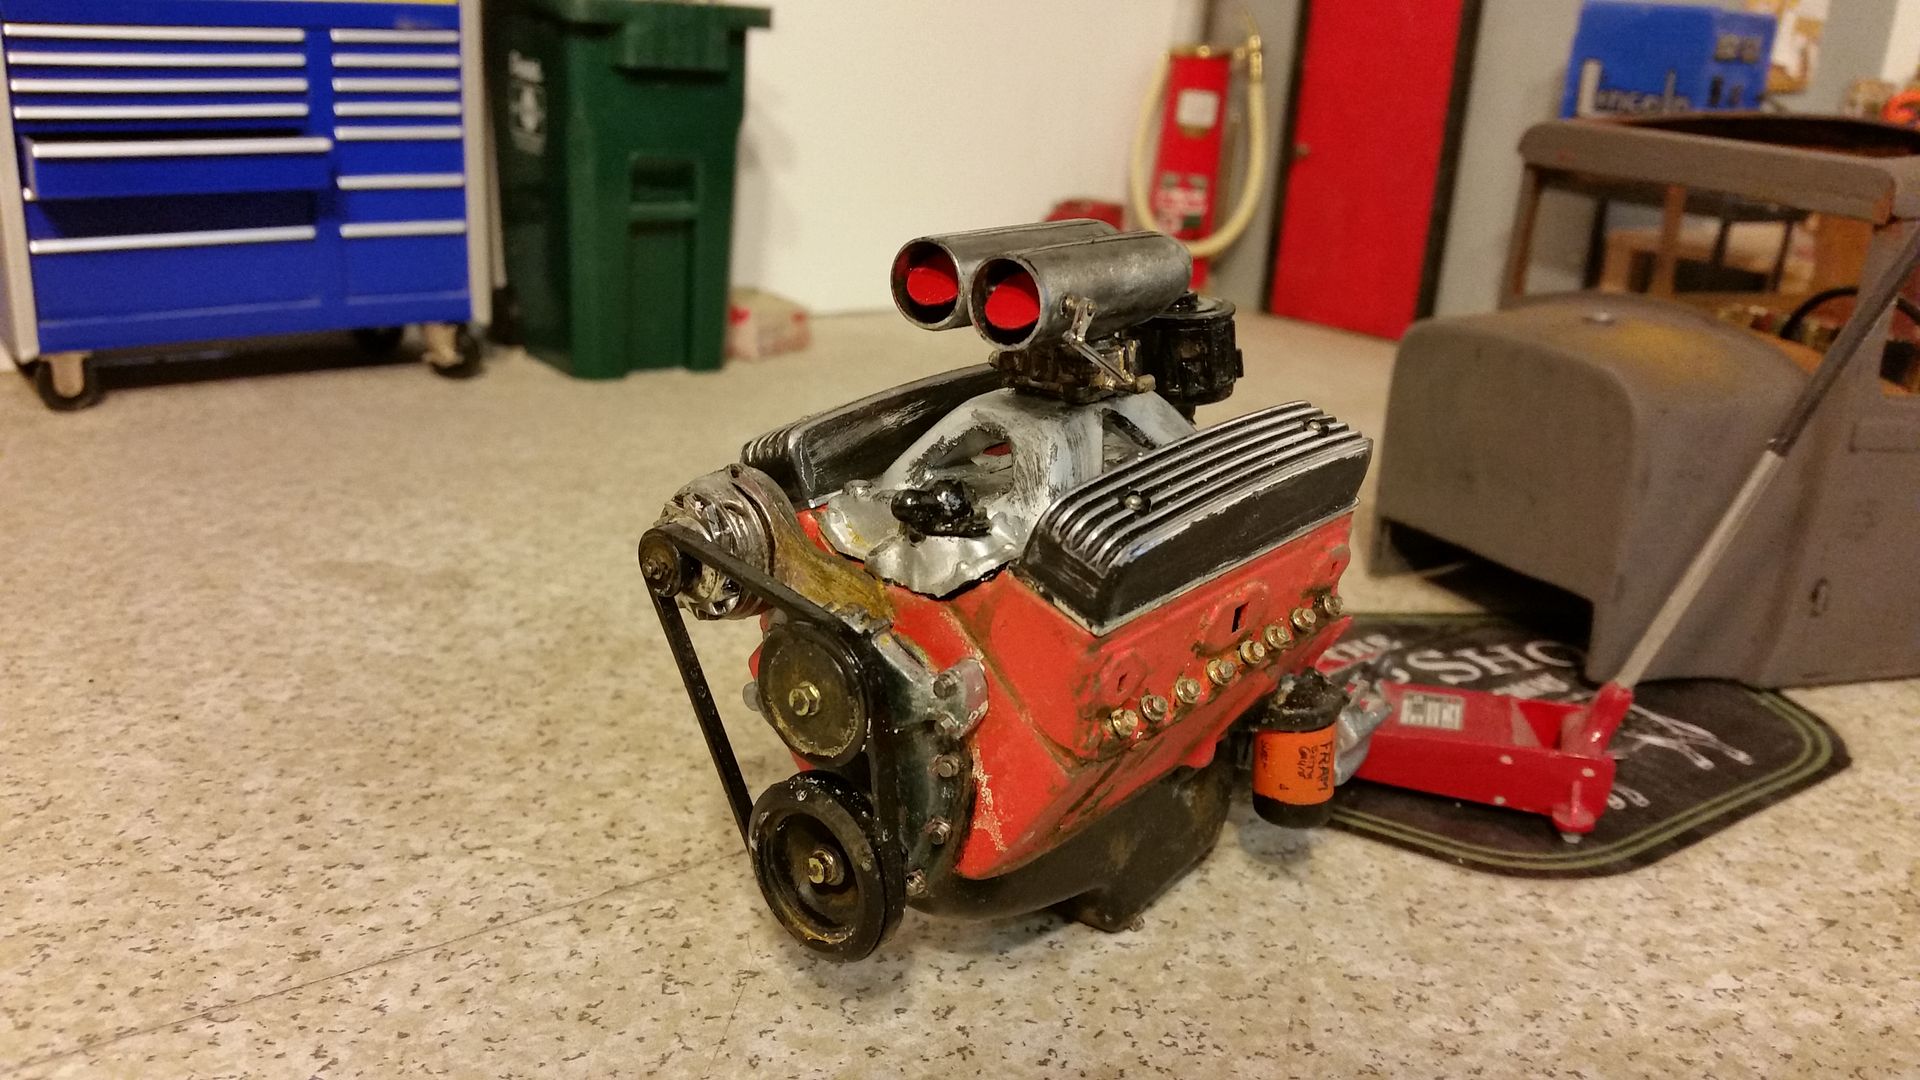 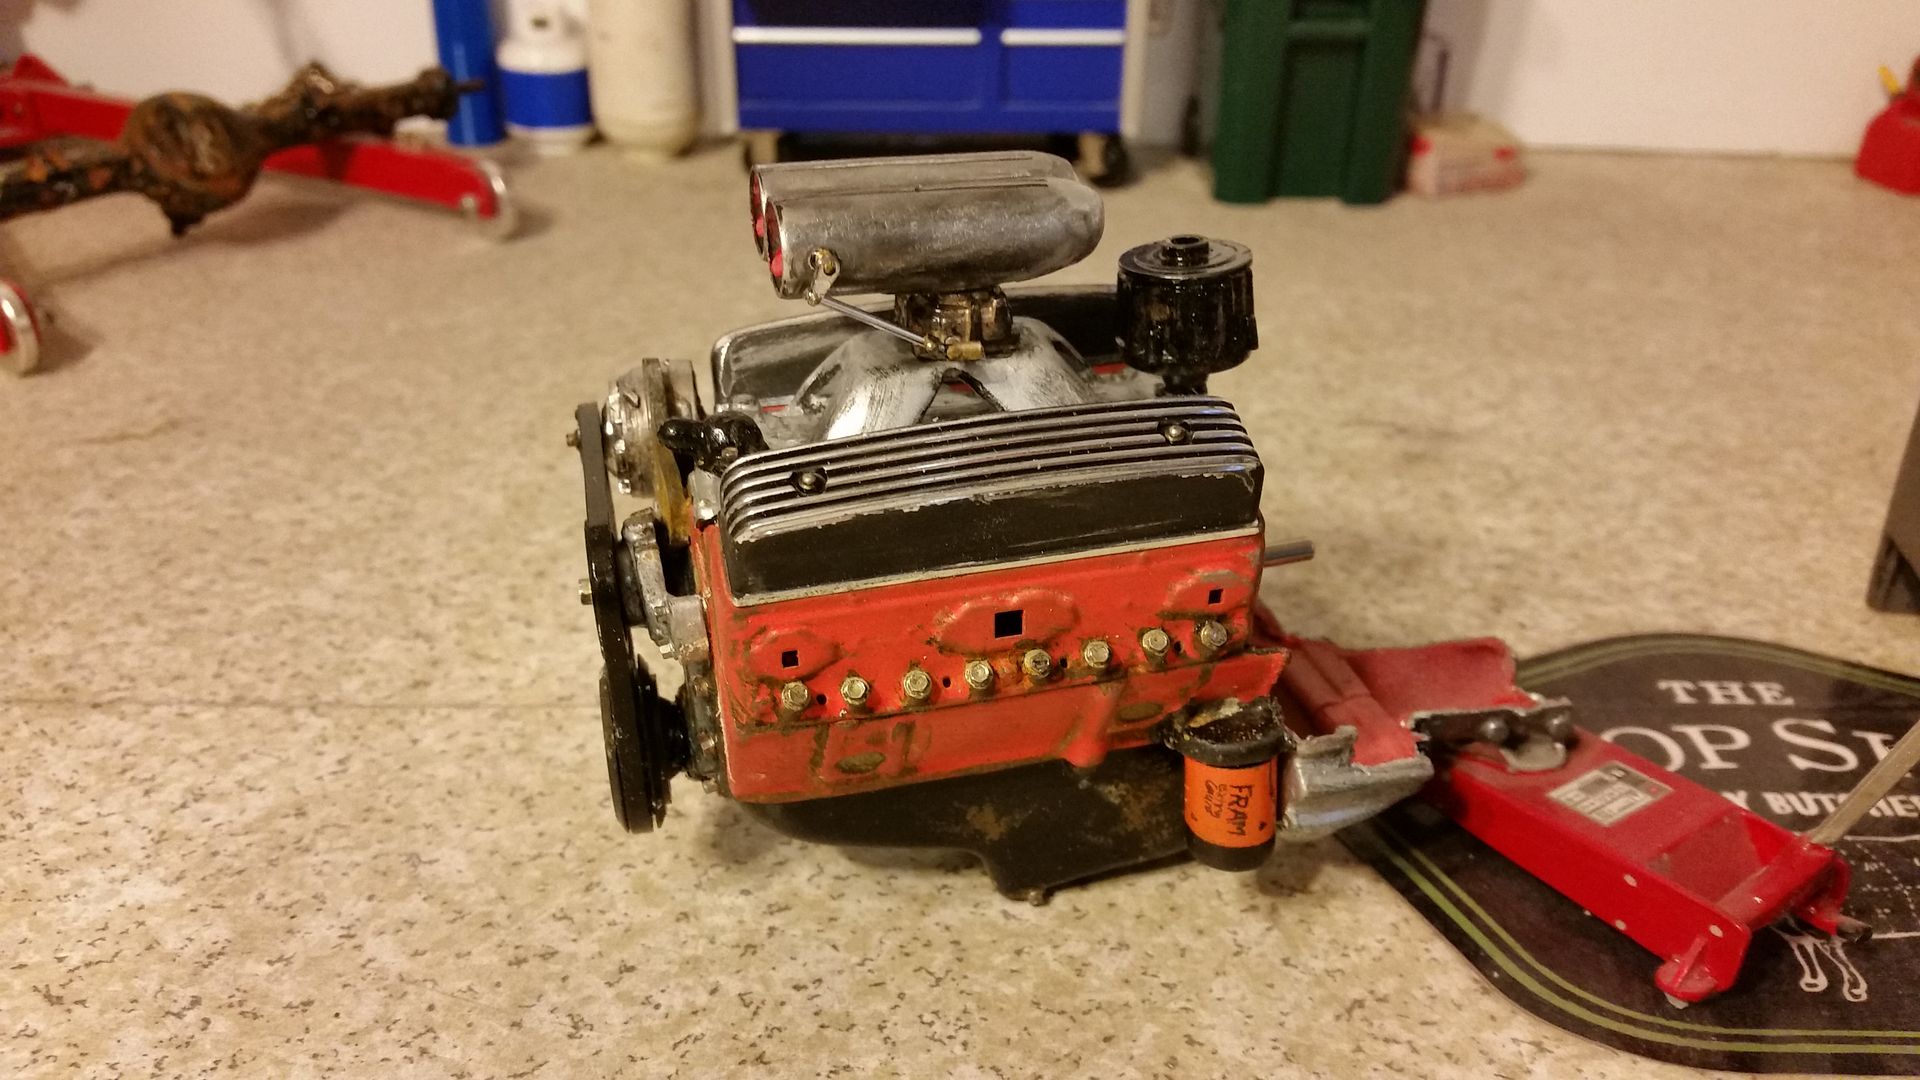 I got a 30t HPI motor from Sczerba too, it fits super tight in the block. It's shown here flush with the back of the block, but once I get my Great Planes transfer case in I'll push it all the way forward in the engine block to try to hide it all. 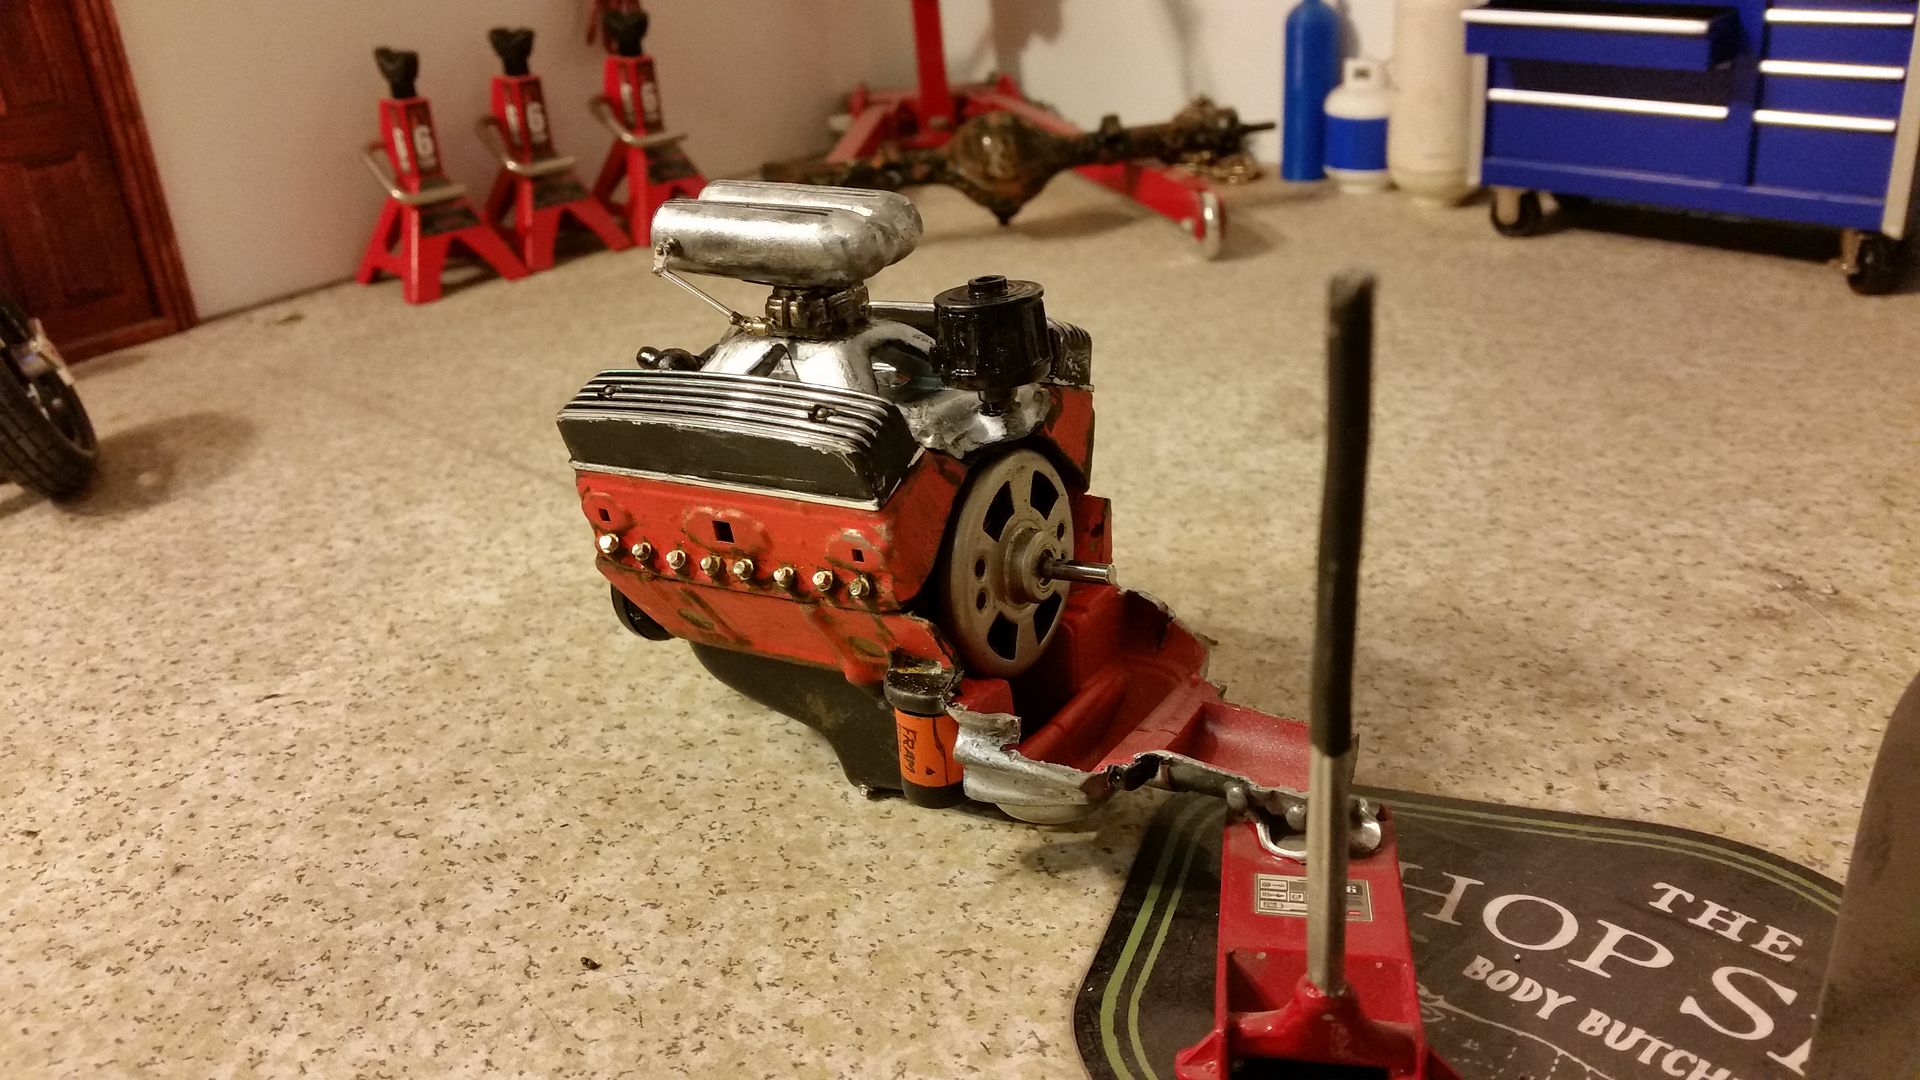 Last edited by Hoosierdady; 03-25-2016 at 09:40 AM. |
| |  |
| | #26 |
| Quarry Creeper Join Date: Jun 2015 Location: Petaluma, Ca
Posts: 237
|
Those tires came out great that is the correct look. The simulated RTV is a nice touch. The rat is looking good. Are you going to try and keep it low like the mock up.
|
| |  |
| | #27 |
| Fan of wheelspeed Join Date: Jun 2011 Location: Southern IN
Posts: 3,369
| Me too  Thanks. The ride height you see in mock up is my target ride height. I just spoke with my fab guy at Big River in Owensboro and my frame rails are costing me right at $51 for CAD, materials and table time. He expects them to be cut and delivered to my house Monday or Tuesday so I'll know more then. The only issue I'm foreseeing is the drive shaft and pinion angle. I may have to run a carrier bearing to get the ride I want. I'd like to see 1/2" ride height and be able to lower the rear to drag the frame rails via another micro servo positioned above the rear axle. |
| |  |
| | #28 |
| I wanna be Dave  Join Date: Apr 2013 Location: Streamwood, IL
Posts: 2,442
|
You've outdone yourself, great build so far.  After I had posted the question above about the steering, I saw your post in joe122's build, that'll be the best way with the linkage coming out the side of the cowl. After I had posted the question above about the steering, I saw your post in joe122's build, that'll be the best way with the linkage coming out the side of the cowl. So is it safe to assume, that since you're going for the low slung look, you'll be using a suicide front axle setup? |
| |  |
| | #29 | |
| Fan of wheelspeed Join Date: Jun 2011 Location: Southern IN
Posts: 3,369
| Quote:
 . As for the front end I'm not a huge fan of the suicide look believe it or not. I very well may go that route but I want to see how mock up goes once the body, engine and trans are mounted. I'd like to keep things as 1:1 as possible so my personal taste might take a backseat on this part of the build. . As for the front end I'm not a huge fan of the suicide look believe it or not. I very well may go that route but I want to see how mock up goes once the body, engine and trans are mounted. I'd like to keep things as 1:1 as possible so my personal taste might take a backseat on this part of the build.
| |
| |  |
| | #30 |
| Quarry Creeper Join Date: Jun 2015 Location: Petaluma, Ca
Posts: 237
|
What kind of rear axle are you going to be using to get the 1/2" ground clearance you are after? Will you have to cut into the body at the rear to accomplish this? I guess you are going to have to use a lot of micro electronics since there is not a lot of room.
|
| |  |
| | #31 | |
| Fan of wheelspeed Join Date: Jun 2011 Location: Southern IN
Posts: 3,369
| Quote:
| |
| |  |
| | #32 |
| Pebble Pounder Join Date: Sep 2015 Location: Centralia, WA
Posts: 123
|
This is absolutely insane man, I love it. Great work.
|
| |  |
| | #33 |
| RCC Addict Join Date: Mar 2013 Location: Commerce Township
Posts: 1,594
|
Anticipation! We're as excited as you are for those frame rails. Awesome mock up, going to be an epic build.
|
| |  |
| | #34 | |
| Fan of wheelspeed Join Date: Jun 2011 Location: Southern IN
Posts: 3,369
| Thanks, I appreciate it. Thank you. Quote:
I've got ALOT of updates on the "29 Tudor Sedan | |
| |  |
| | #35 |
| Fan of wheelspeed Join Date: Jun 2011 Location: Southern IN
Posts: 3,369
|
UPDATES....... I got a 30T HPI motor from Shane Sczerba and grabbed a fresh pack of Noodle wire from HobbyTown. I still like to support my LHS as much as possible. He cuts me 30% off deals on old styrene and stuff that gets out dated or when he makes a brand change like he did when he switched to Evergreen Styrene after me asking for nearly 2 years 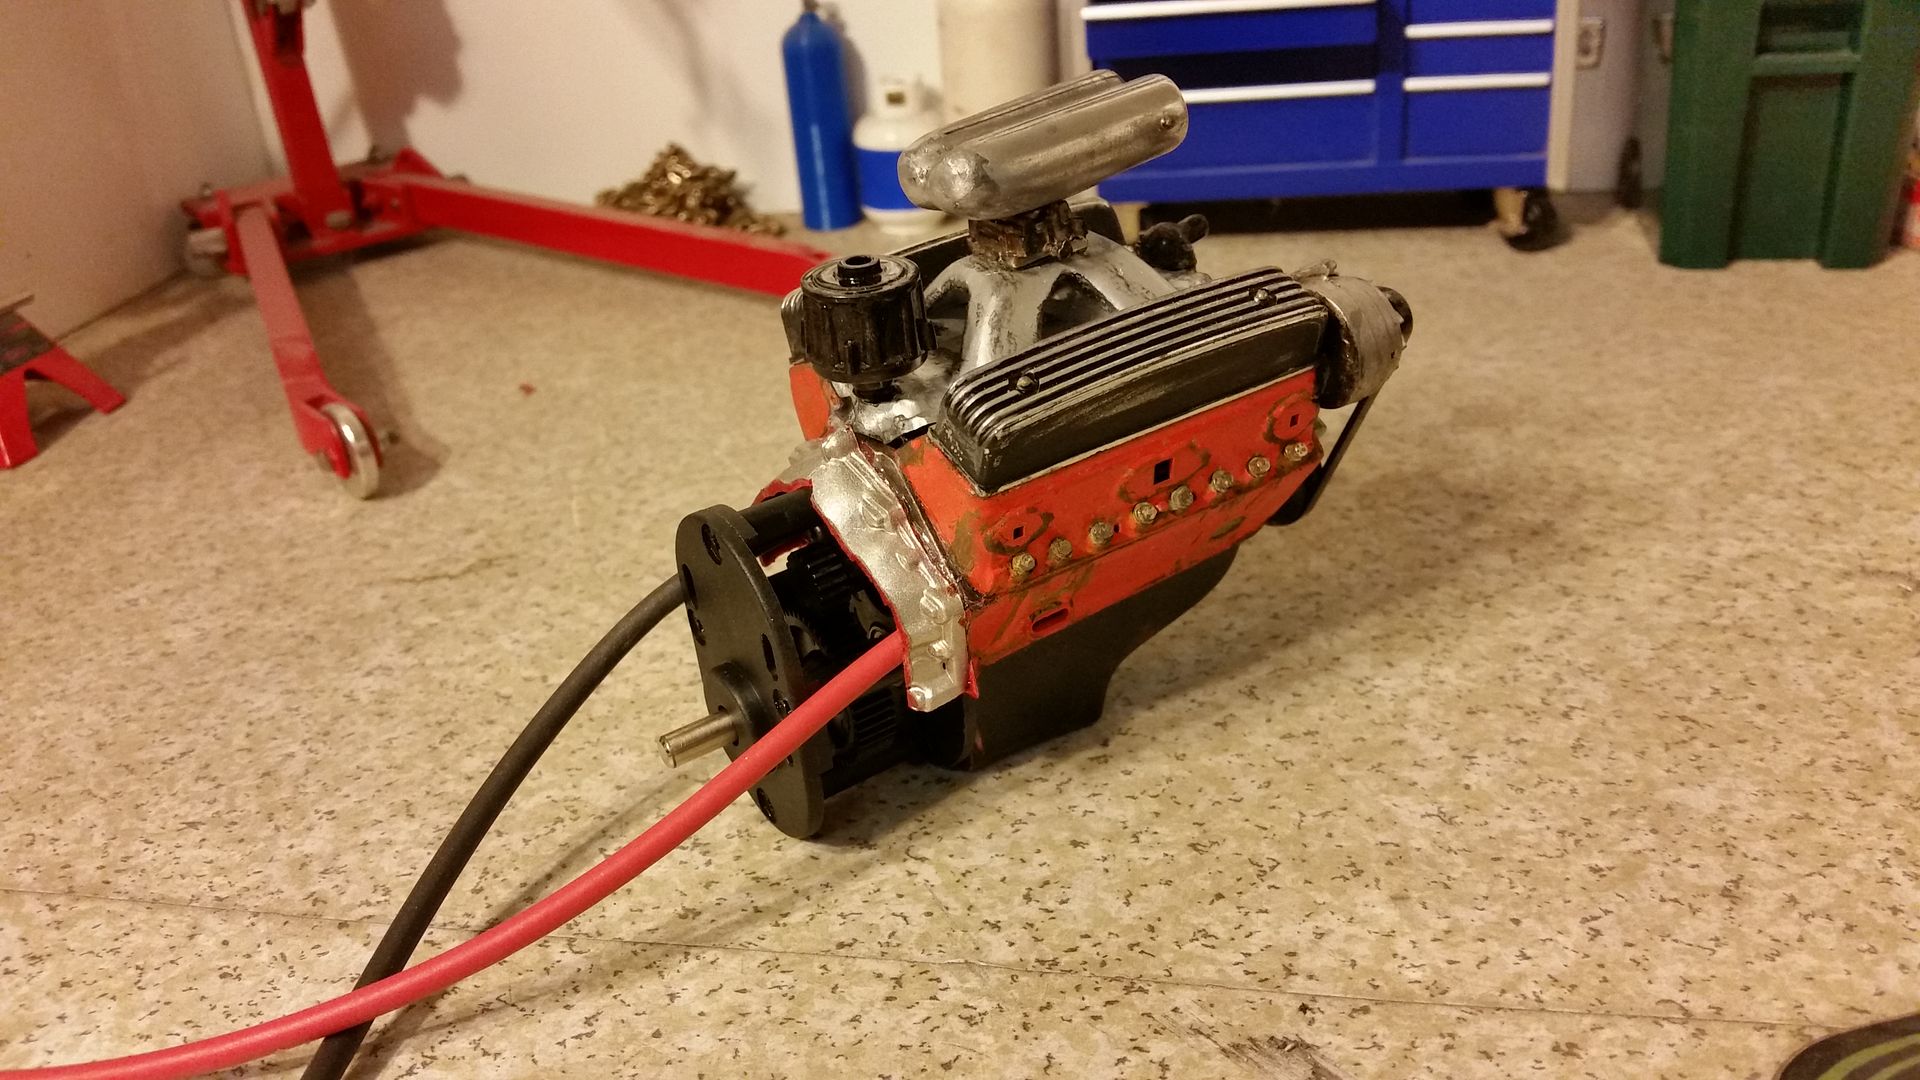 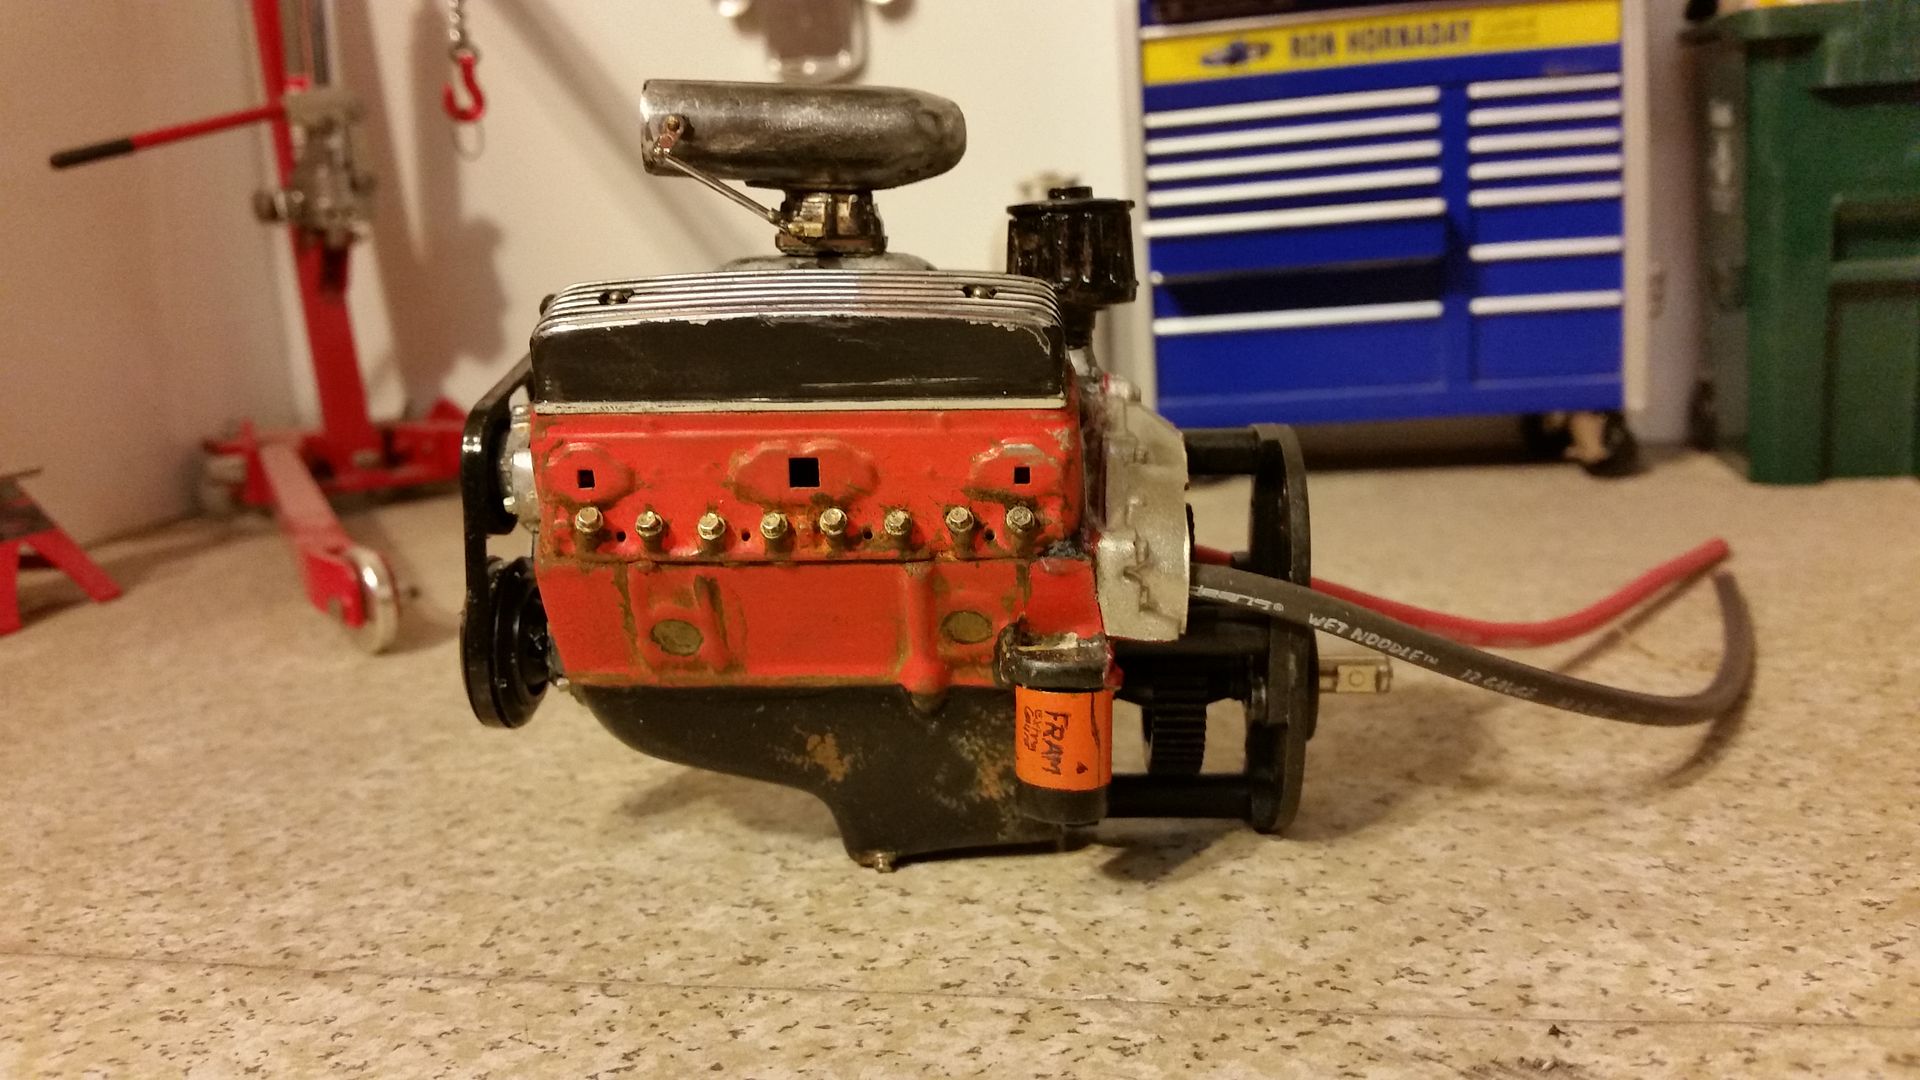 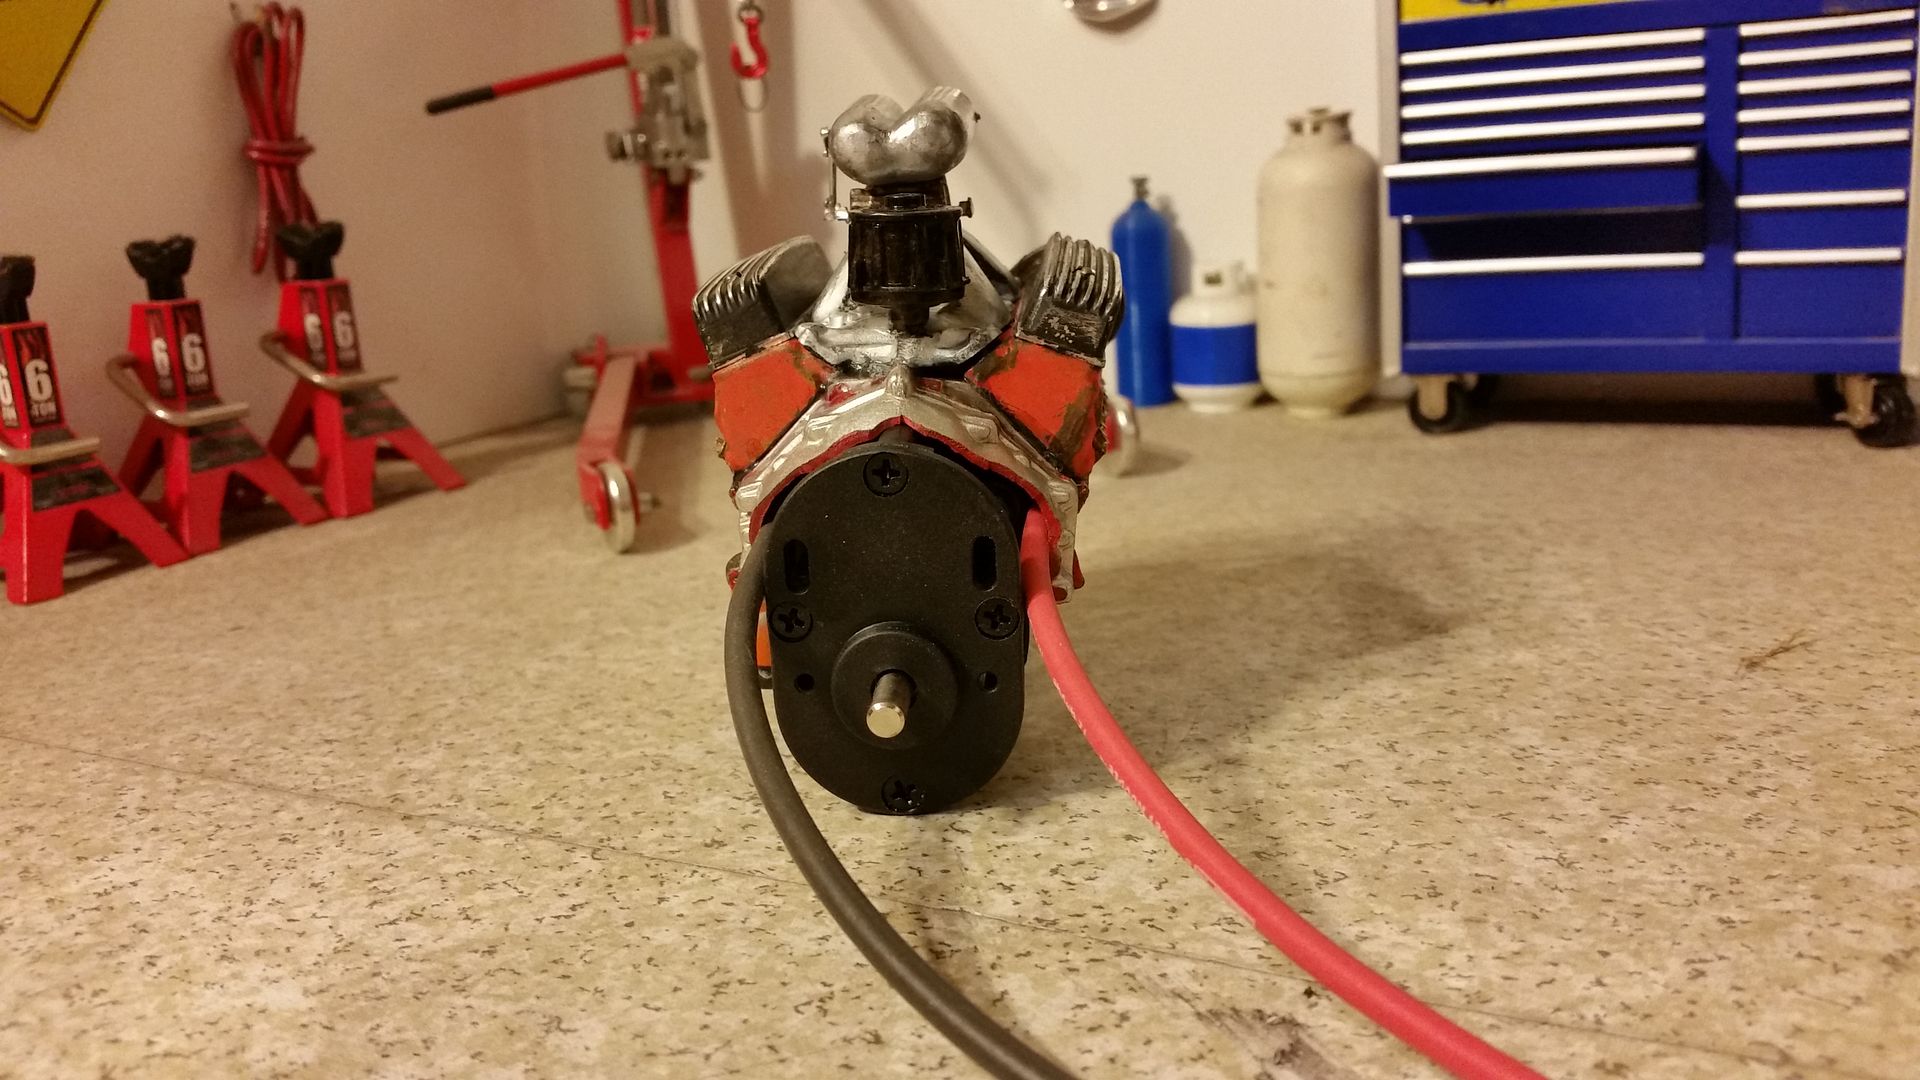 Next up, a windshield. But not just any windshield. Part of the allure of the Model A is that you can open up the front windshield to help ventilate the car. You've got two curved tracks on either side made of brass and then a knob on each side to tighten and hold the windshield in place while driving. I made my windshield channel out of C-channel styrene and used a piece of tube styrene up top. 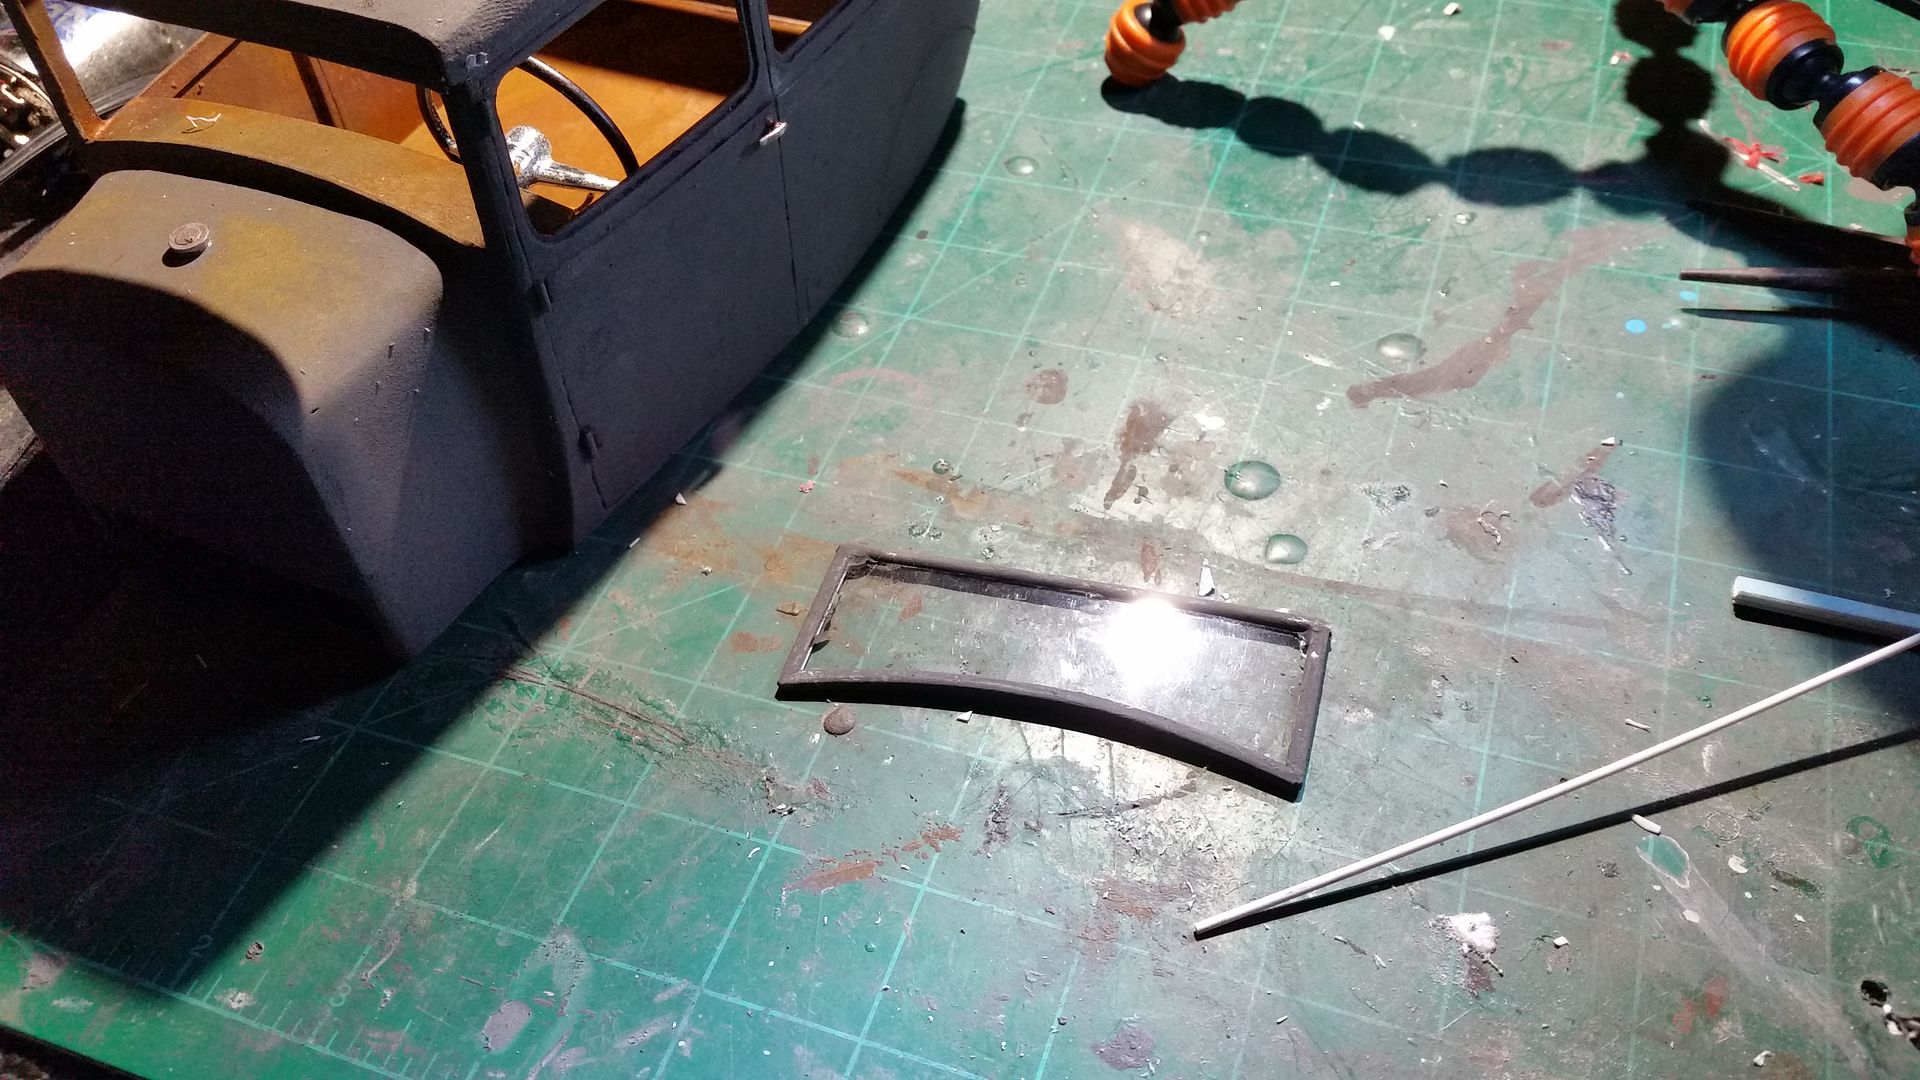 I used a sharp pick to melt a hole in the ends of the windshield to open up the tube again after glue found it's way in. 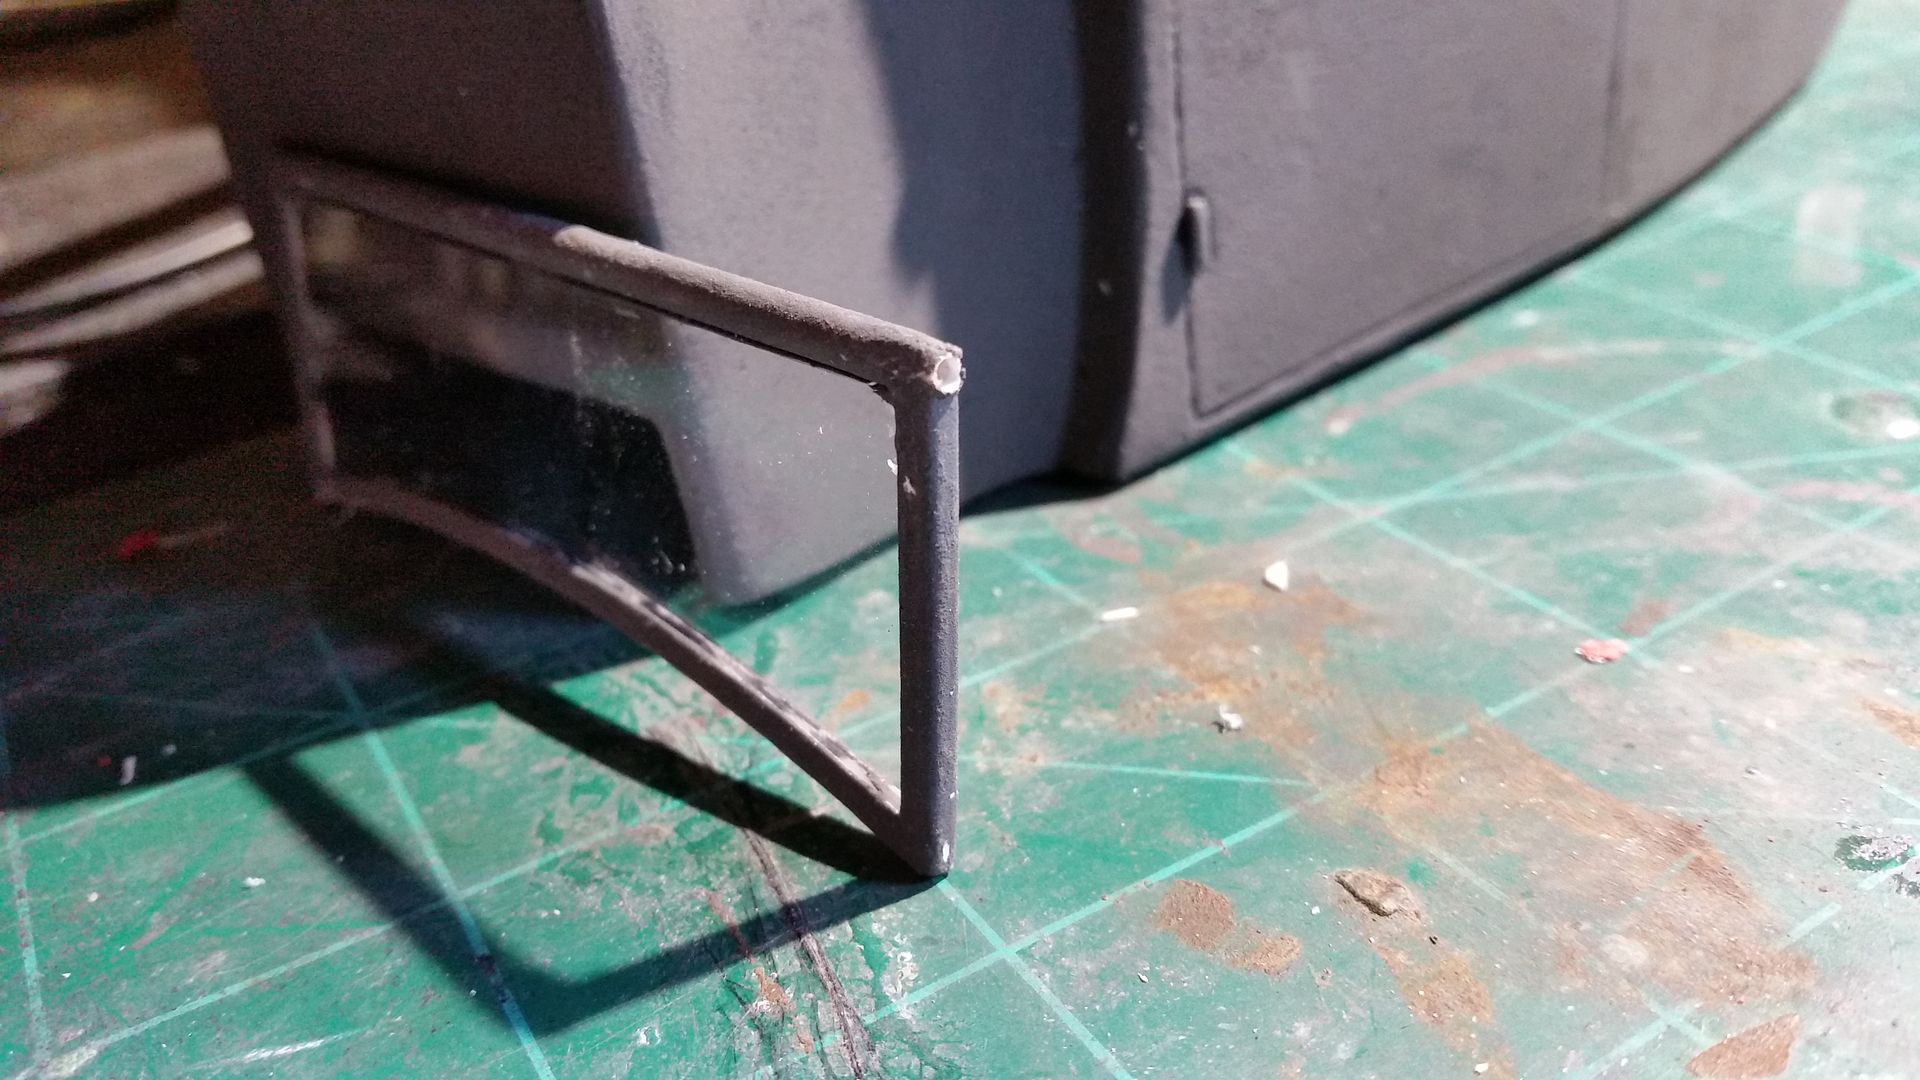 As you can see, a solid piece of styrene rod fits perfectly in the tube. Almost like I did it on purpose 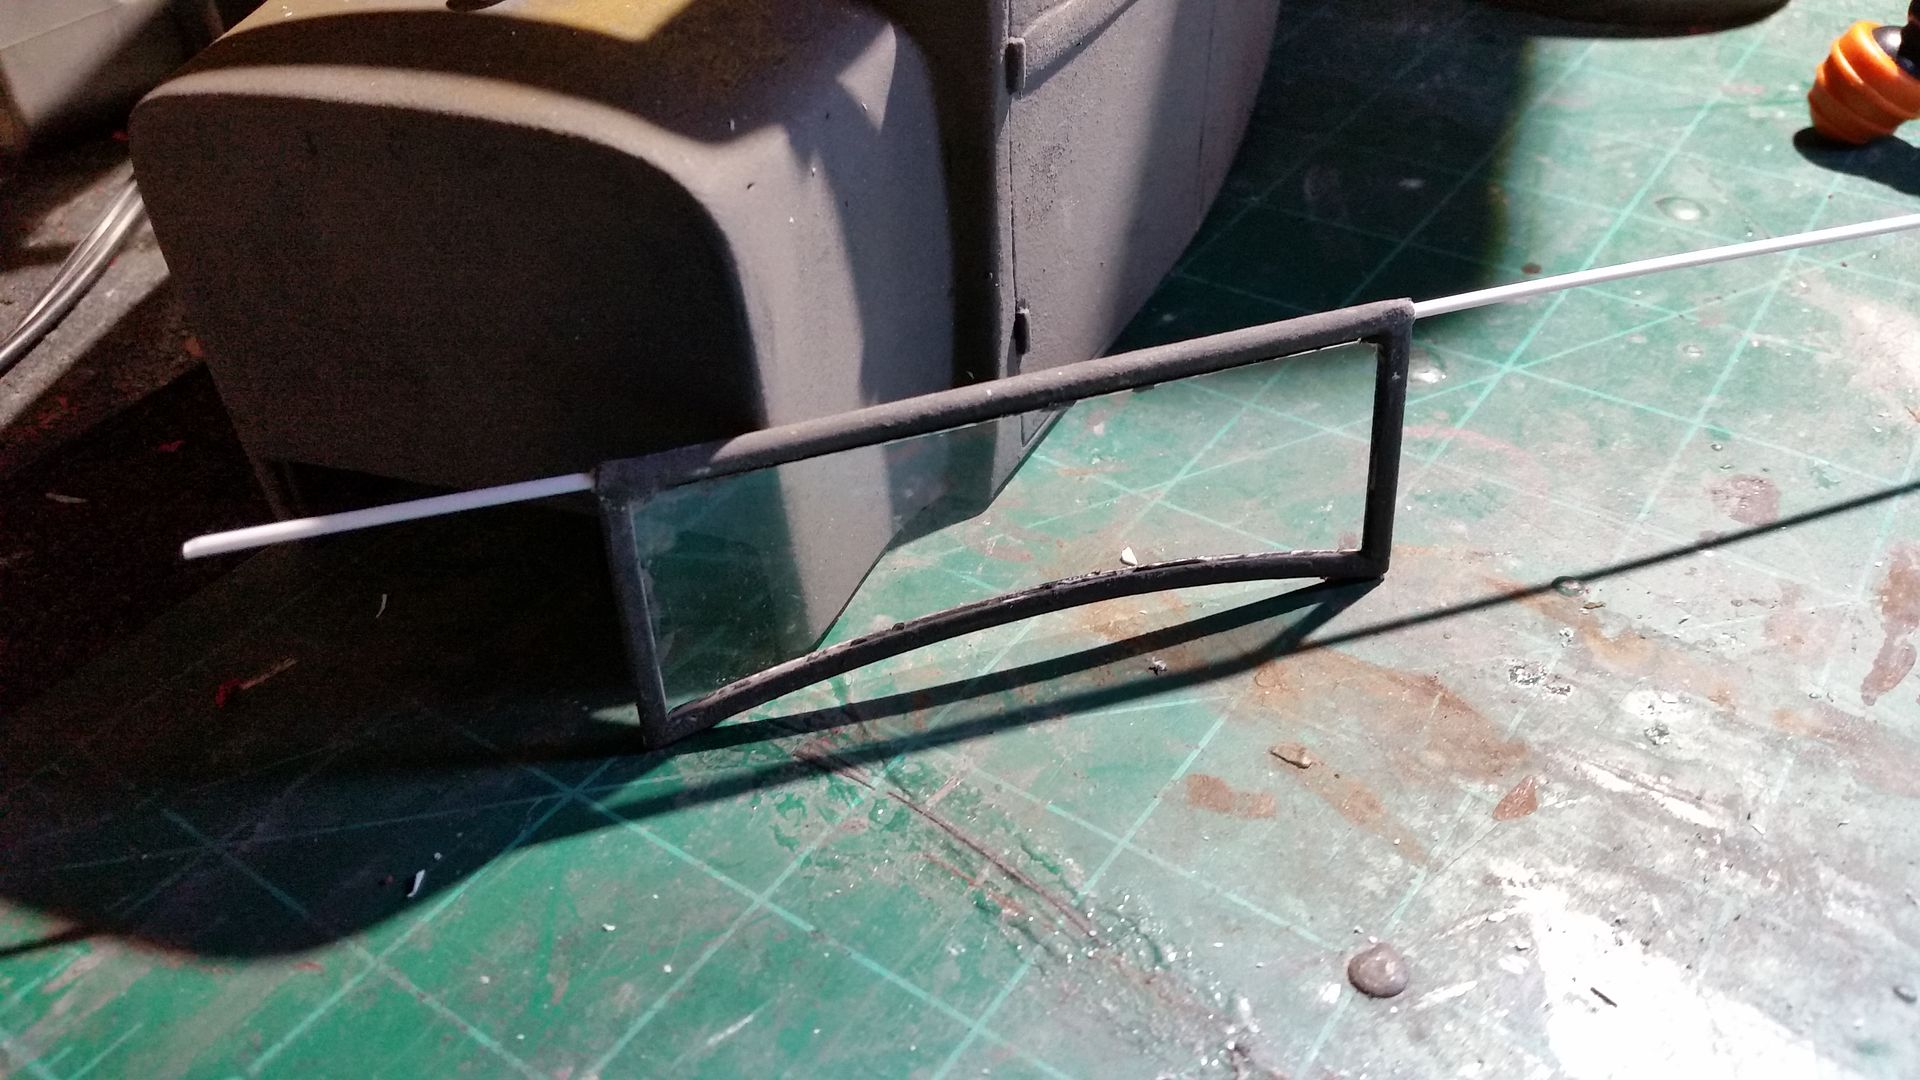 With the holes drilled on the cab, it all slides together perfectly. 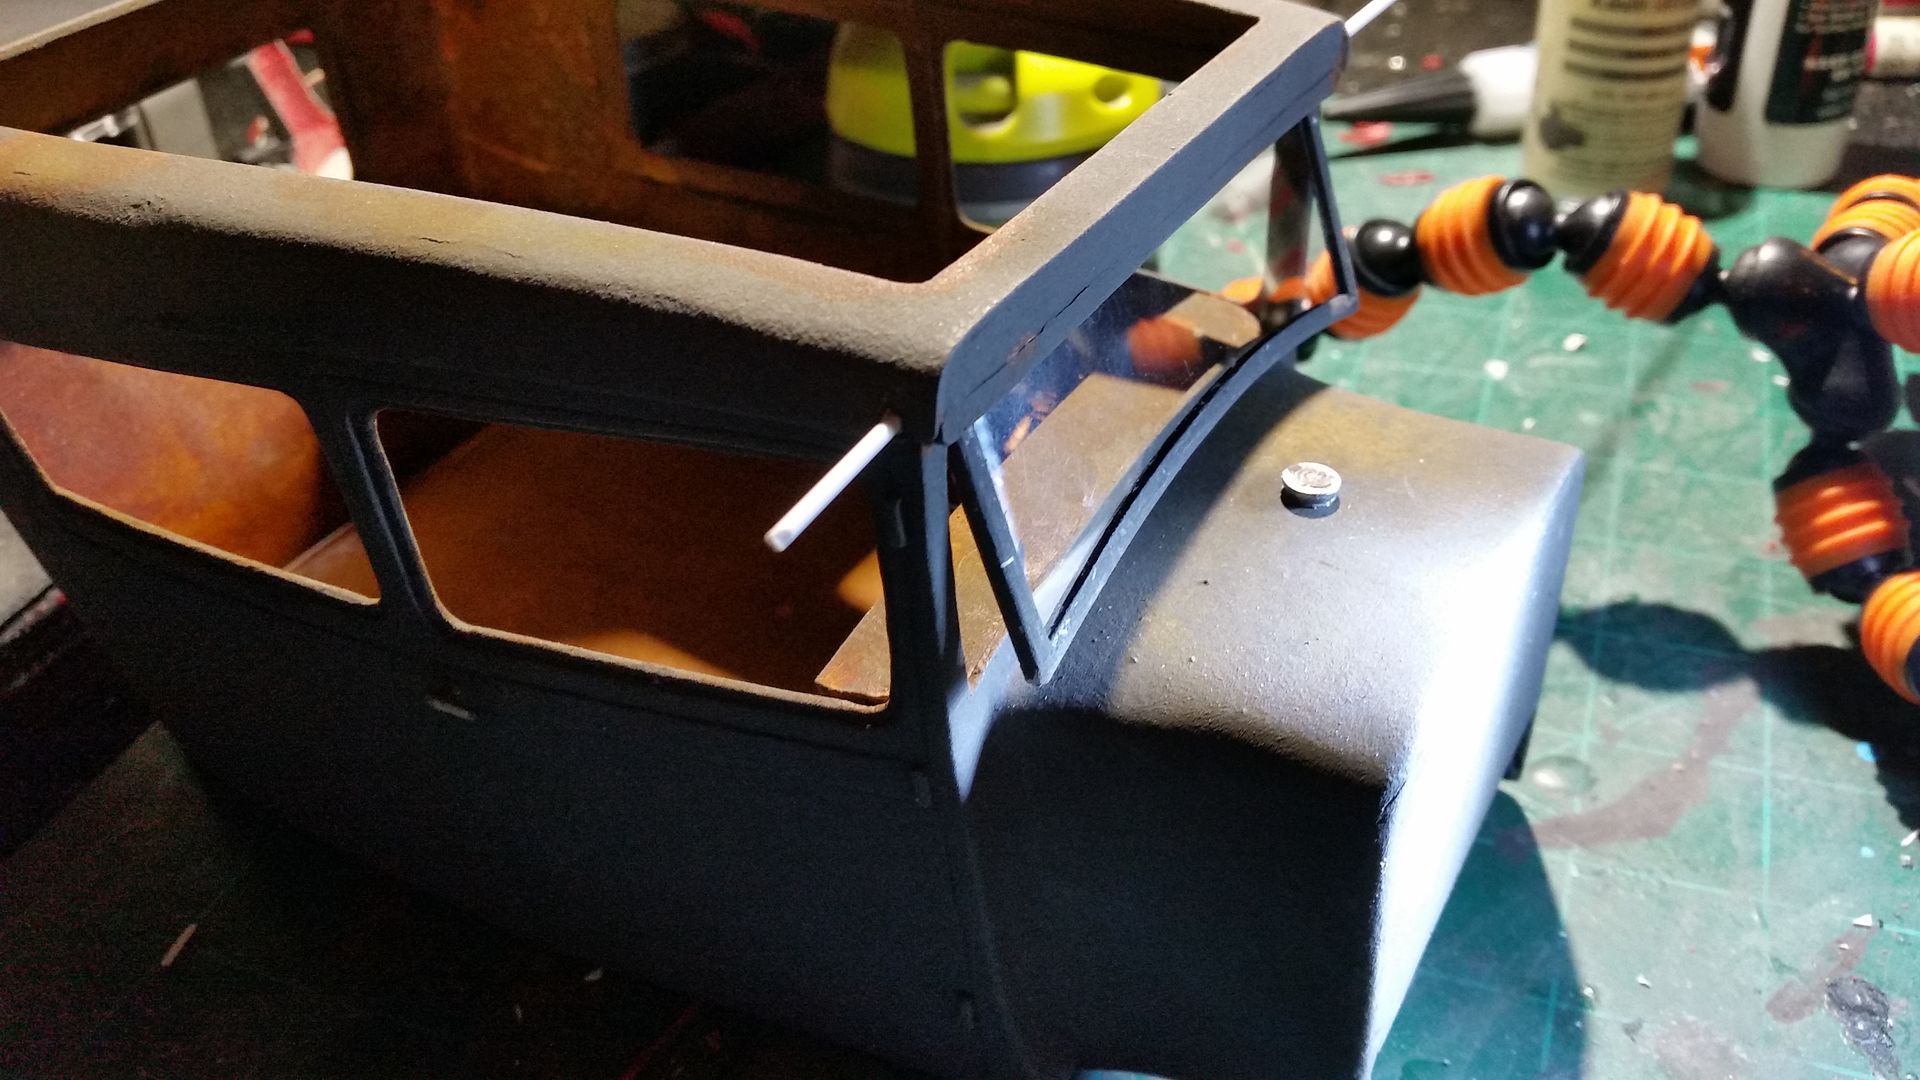 Next up, make the brackets out of .20 styrene. These were a pain in the ass to keep the same. 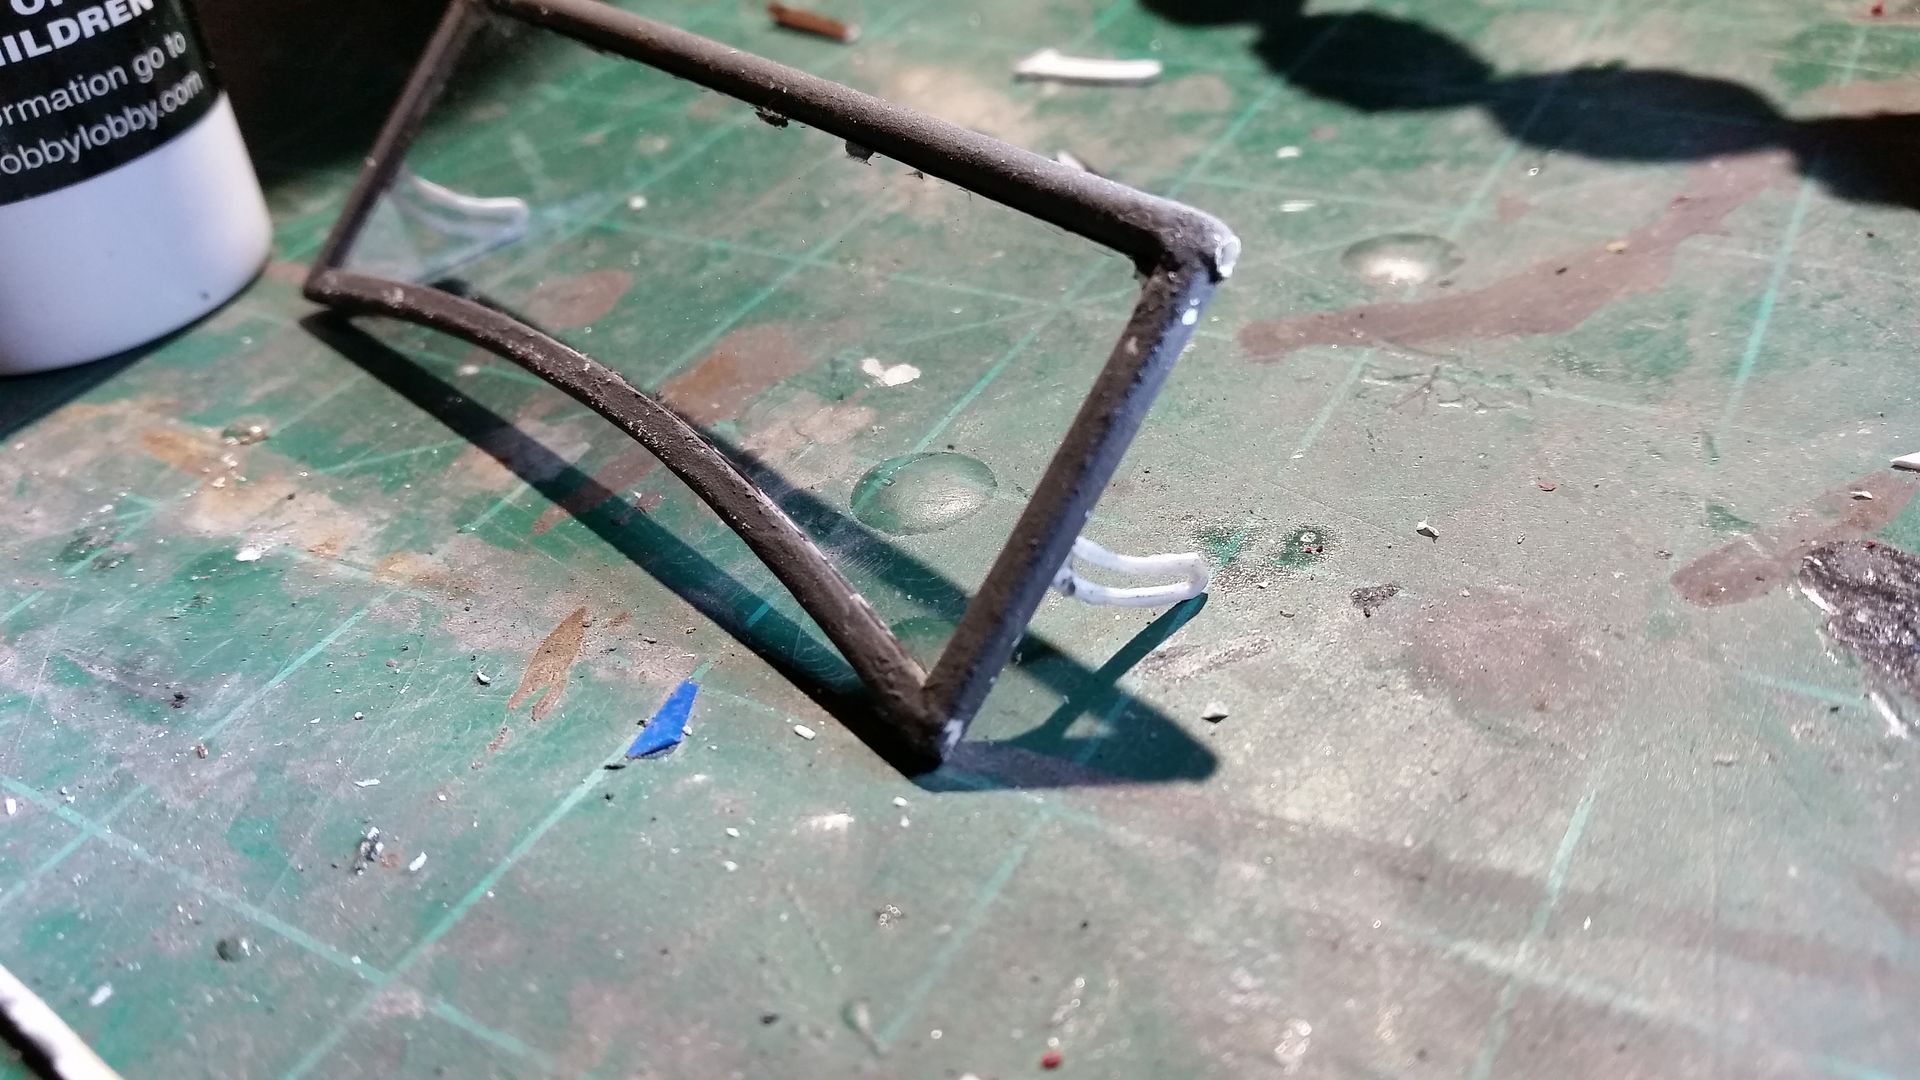 Once I reassembled everything I glued the ends of the solid rod in place, sanded the rods ends down until they disappeared and repainted the exterior. After some detail work on the tracks I had this... 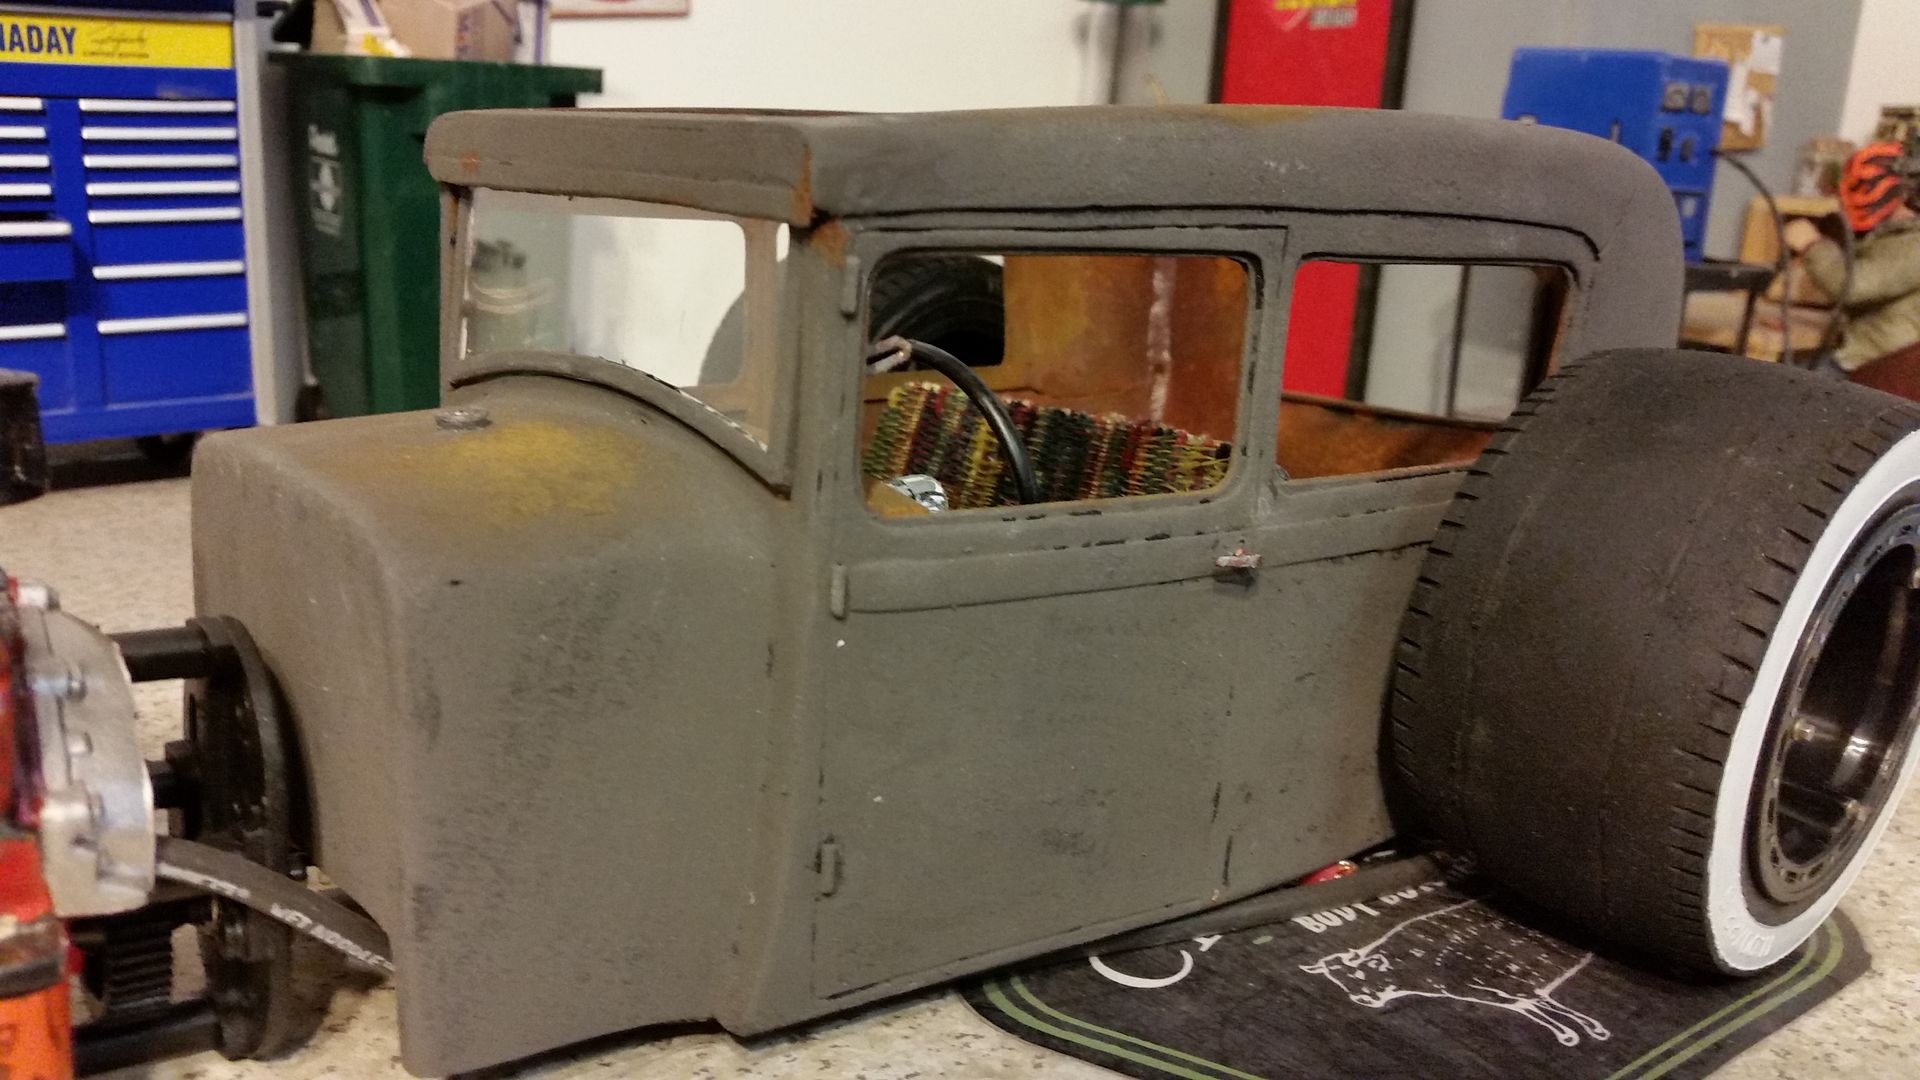 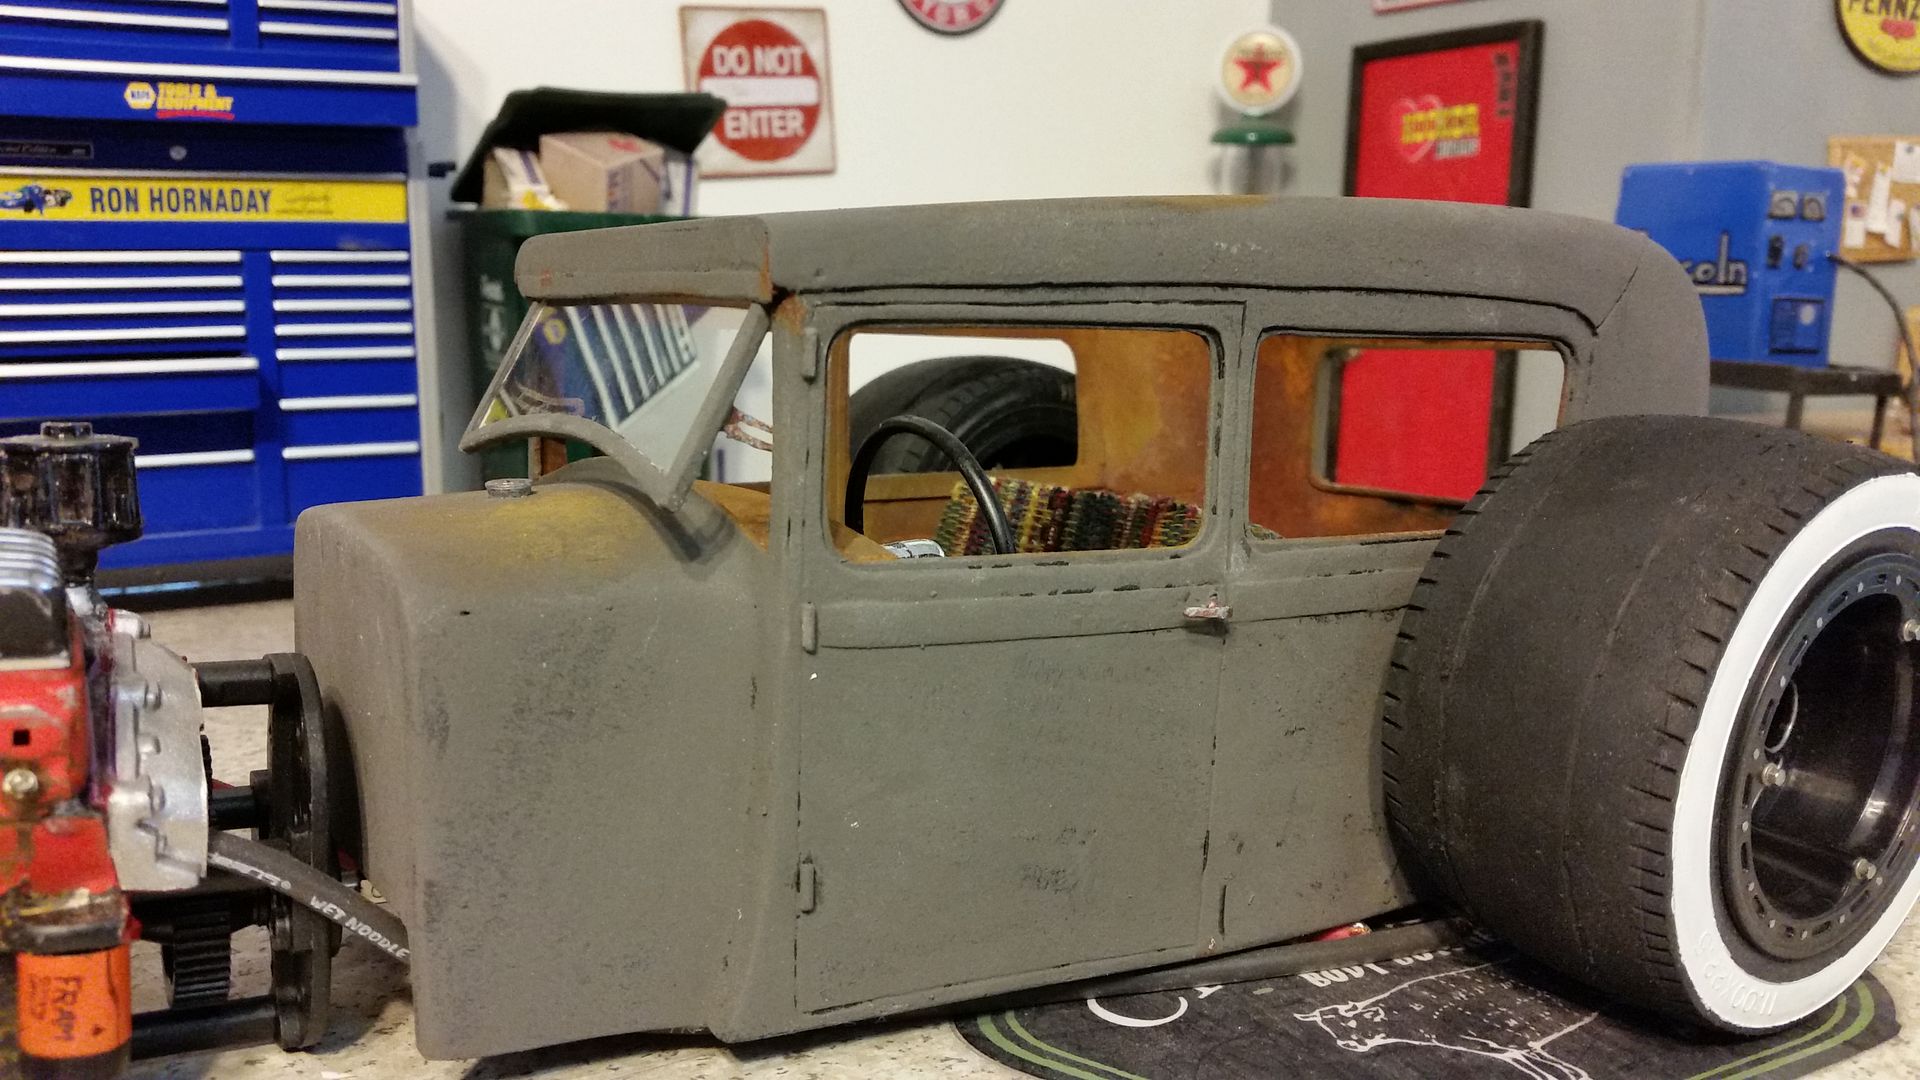 More mock up pics... 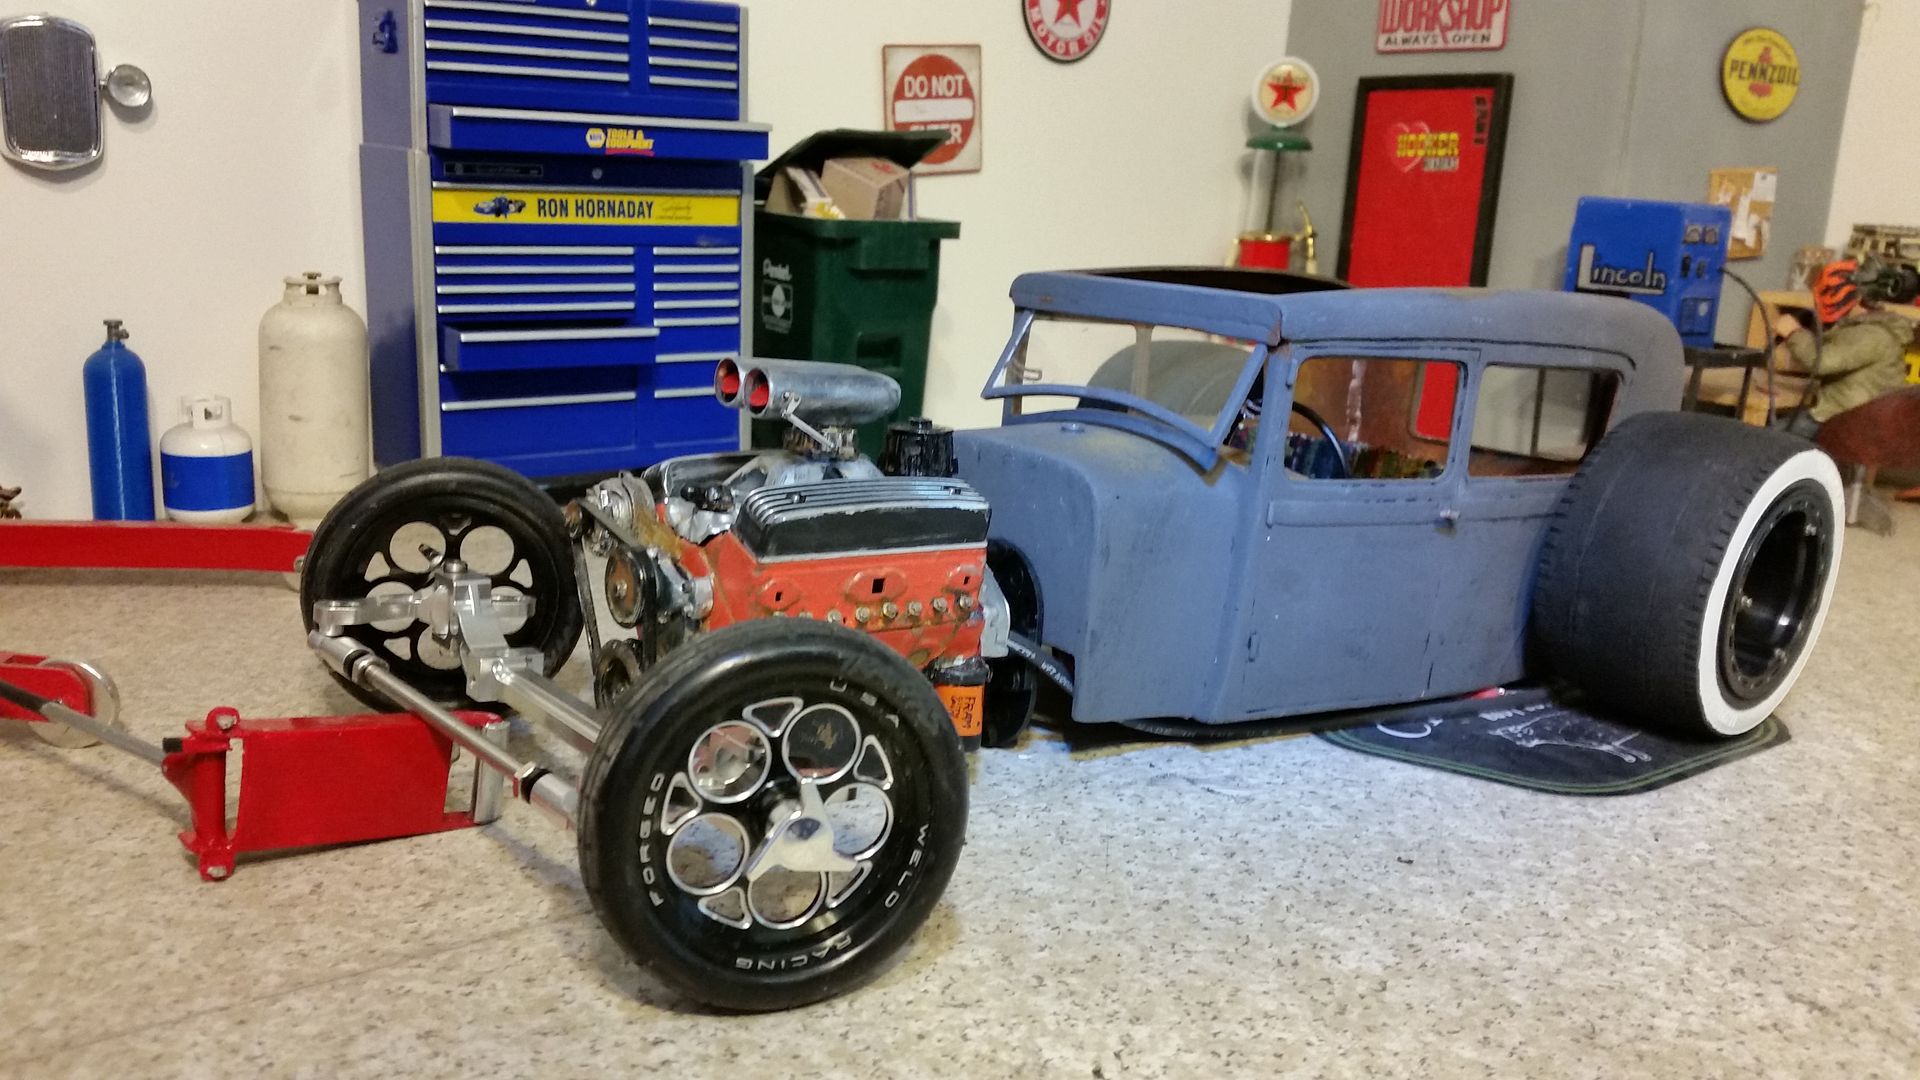 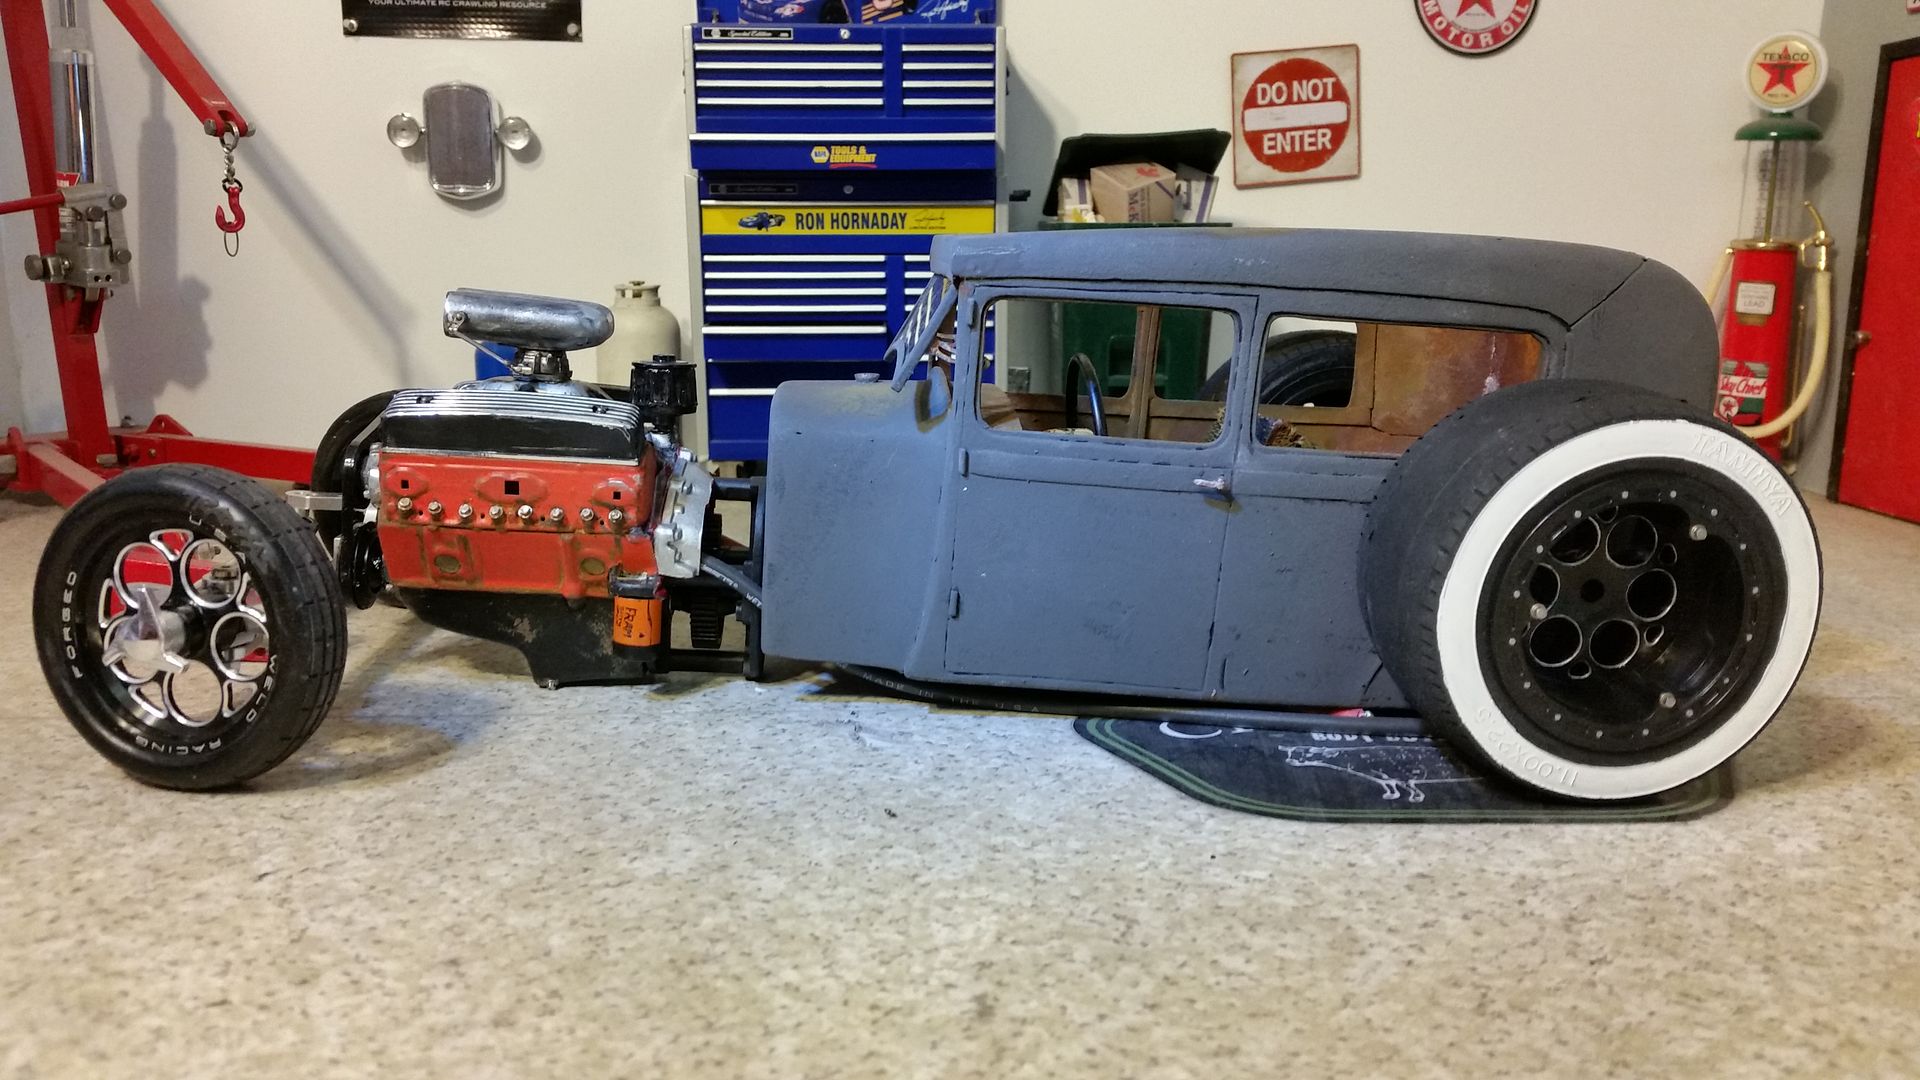 |
| |  |
| | #36 |
| Fan of wheelspeed Join Date: Jun 2011 Location: Southern IN
Posts: 3,369
|
FRAME RAILS!!!! My neighbor dropped off my frame rails from Big River Rubber & Gasket in Owensboro, KY. Water jetted out of 1/8th" steel these frame rails are perfect in every aspect. 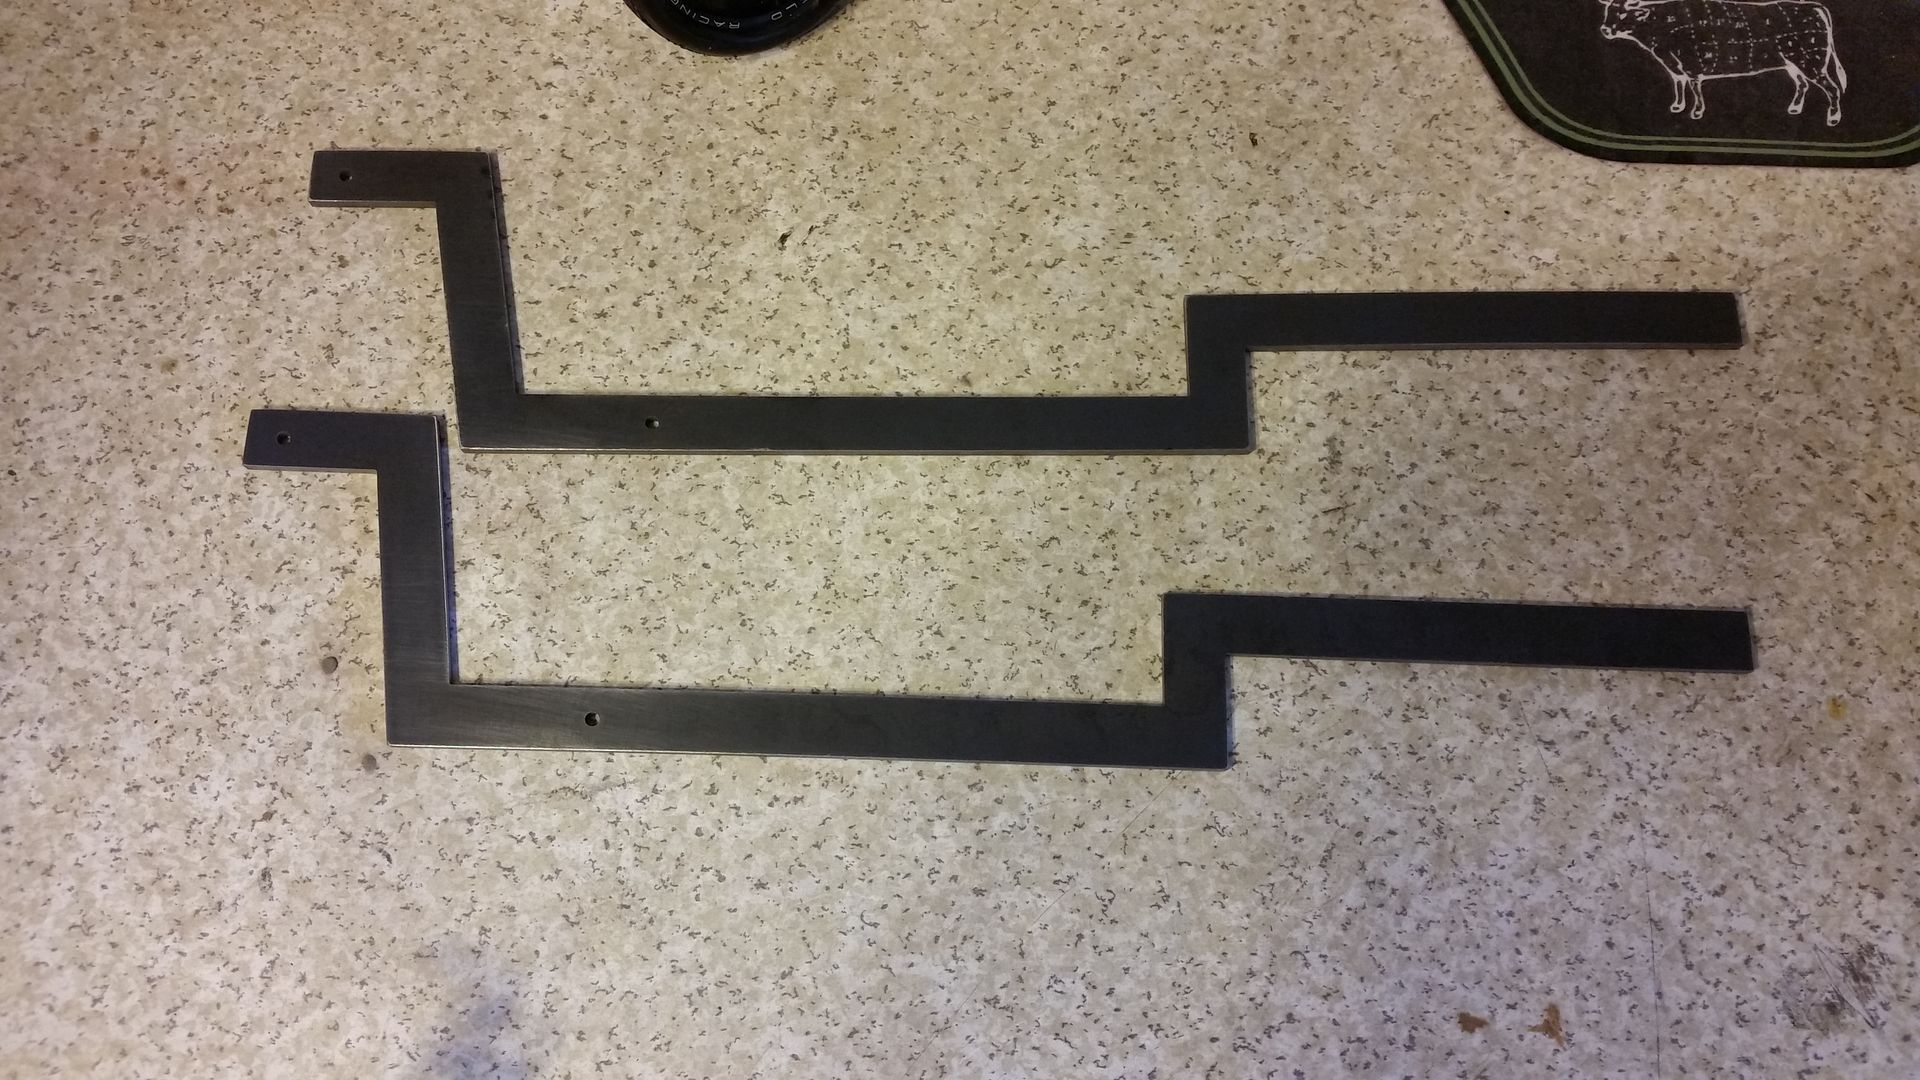 After cutting out the floor of the body they fit right in place. 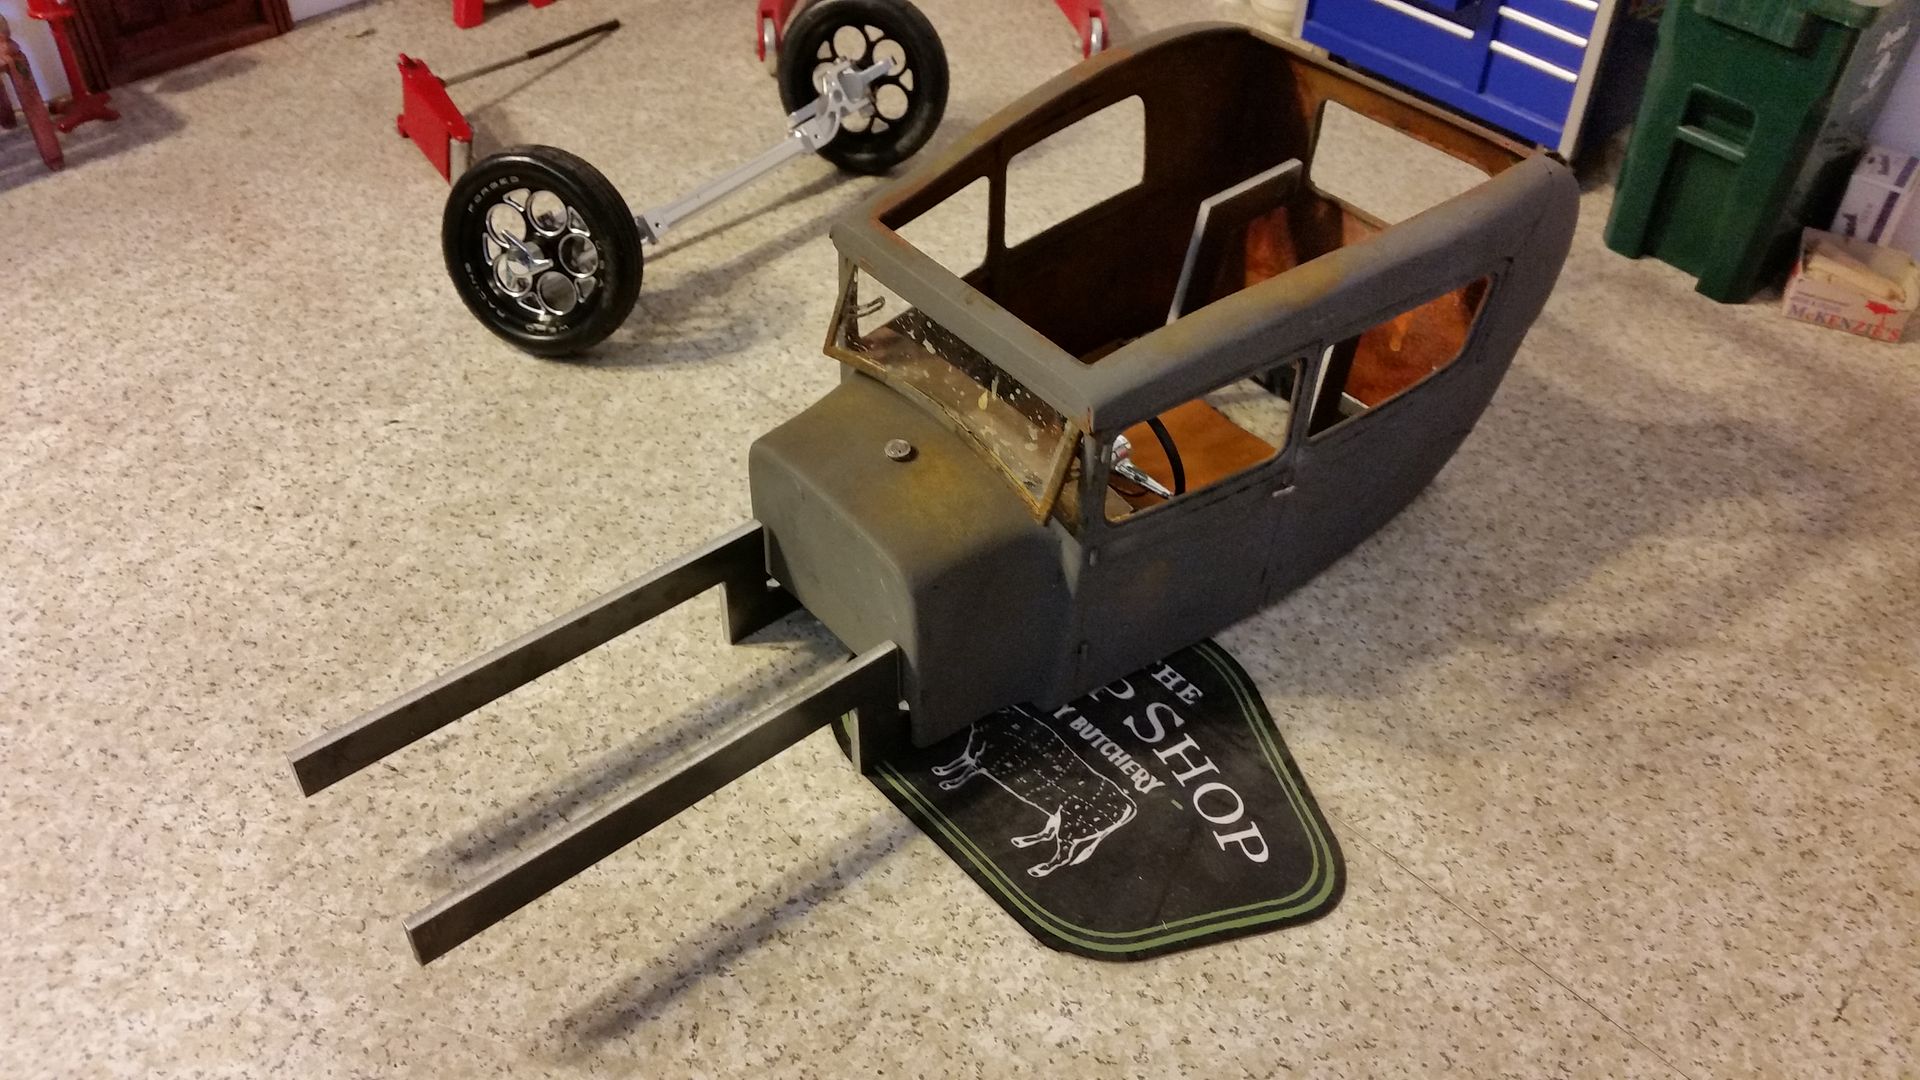 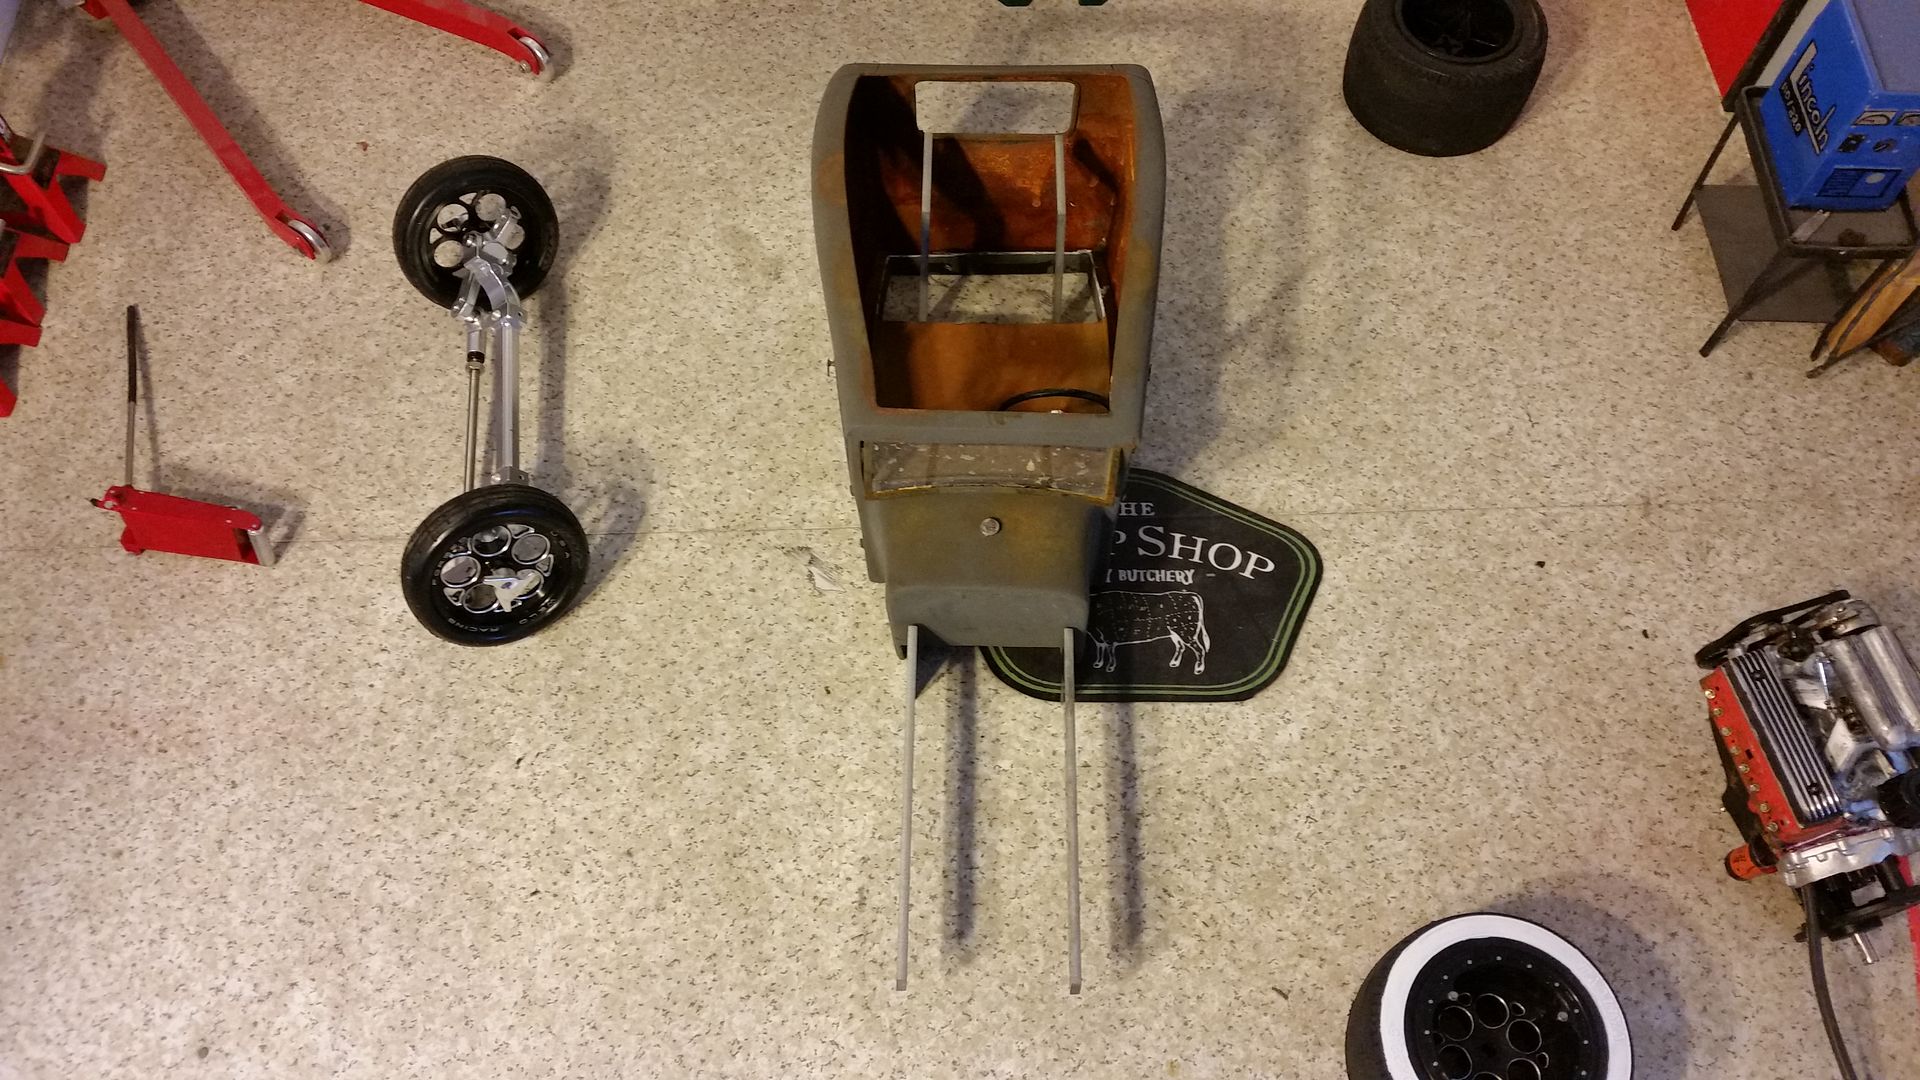 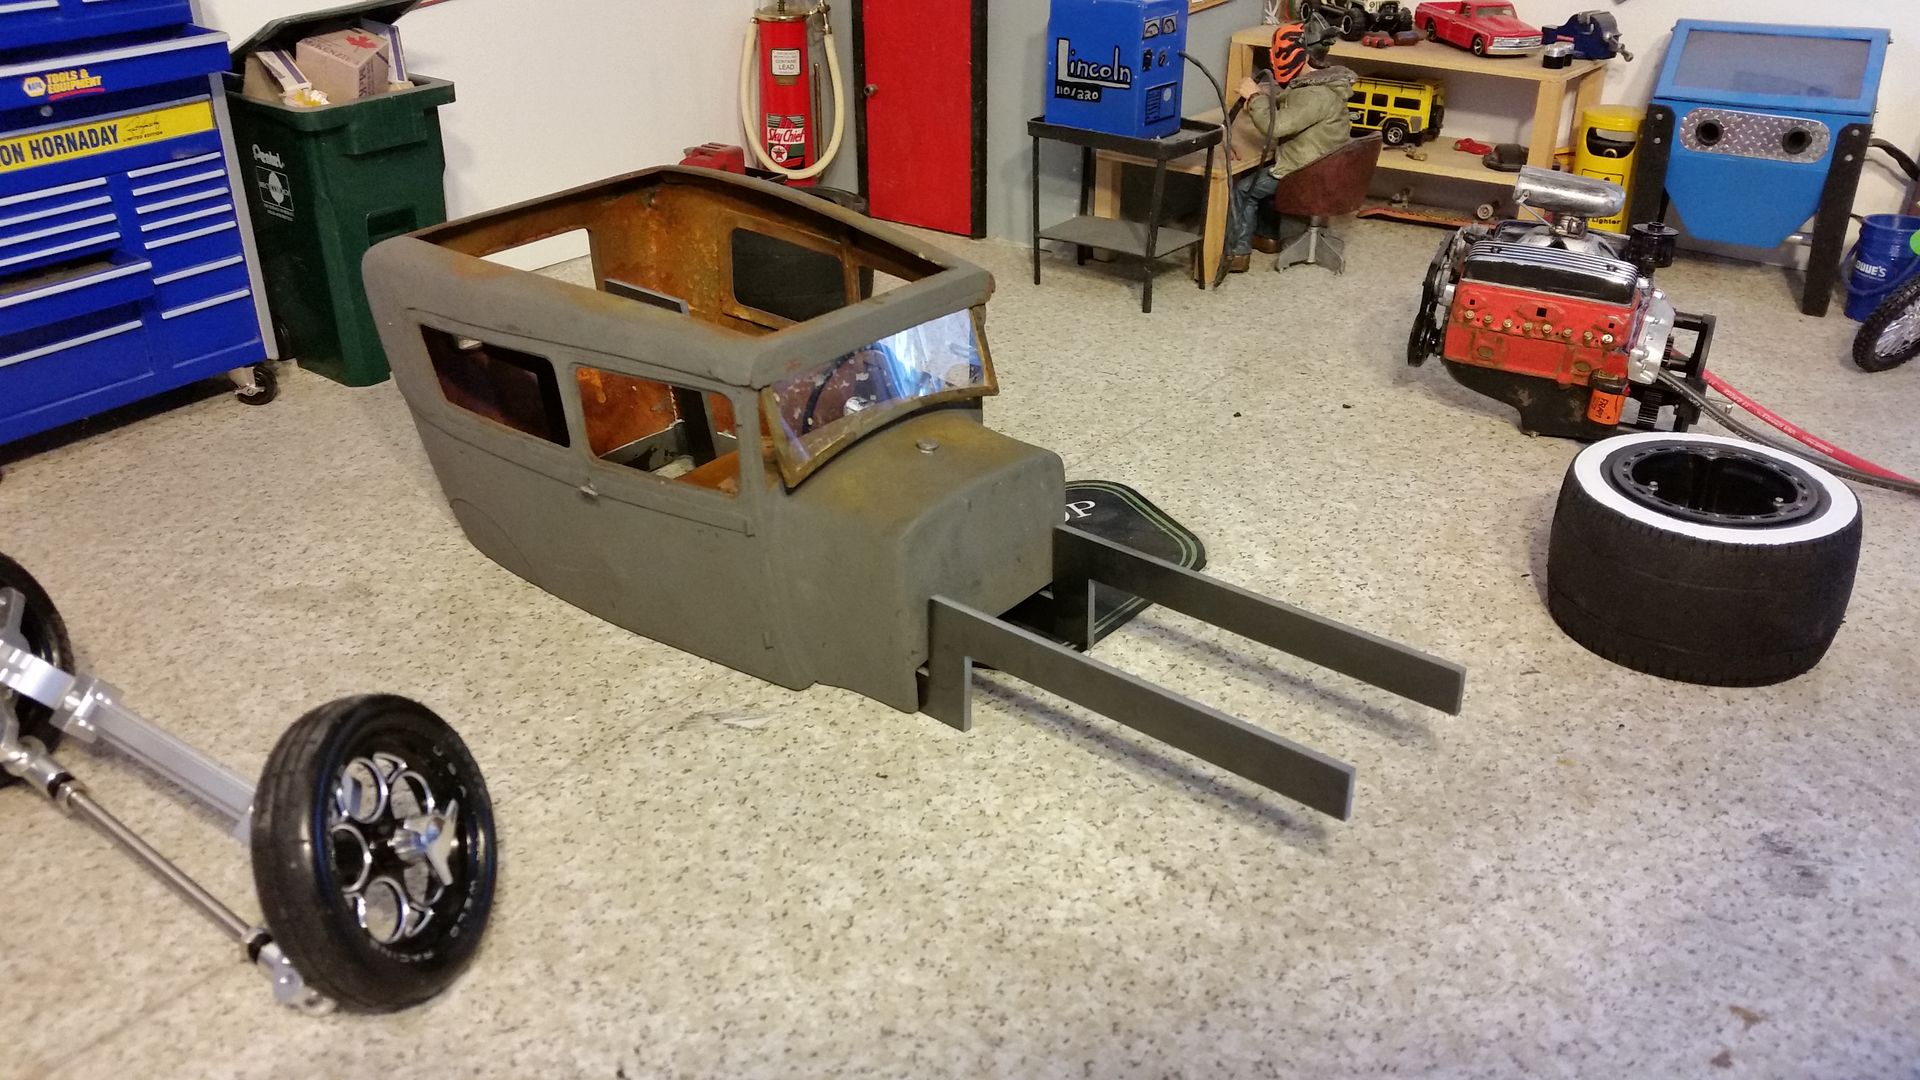 It all fits together real nice like. 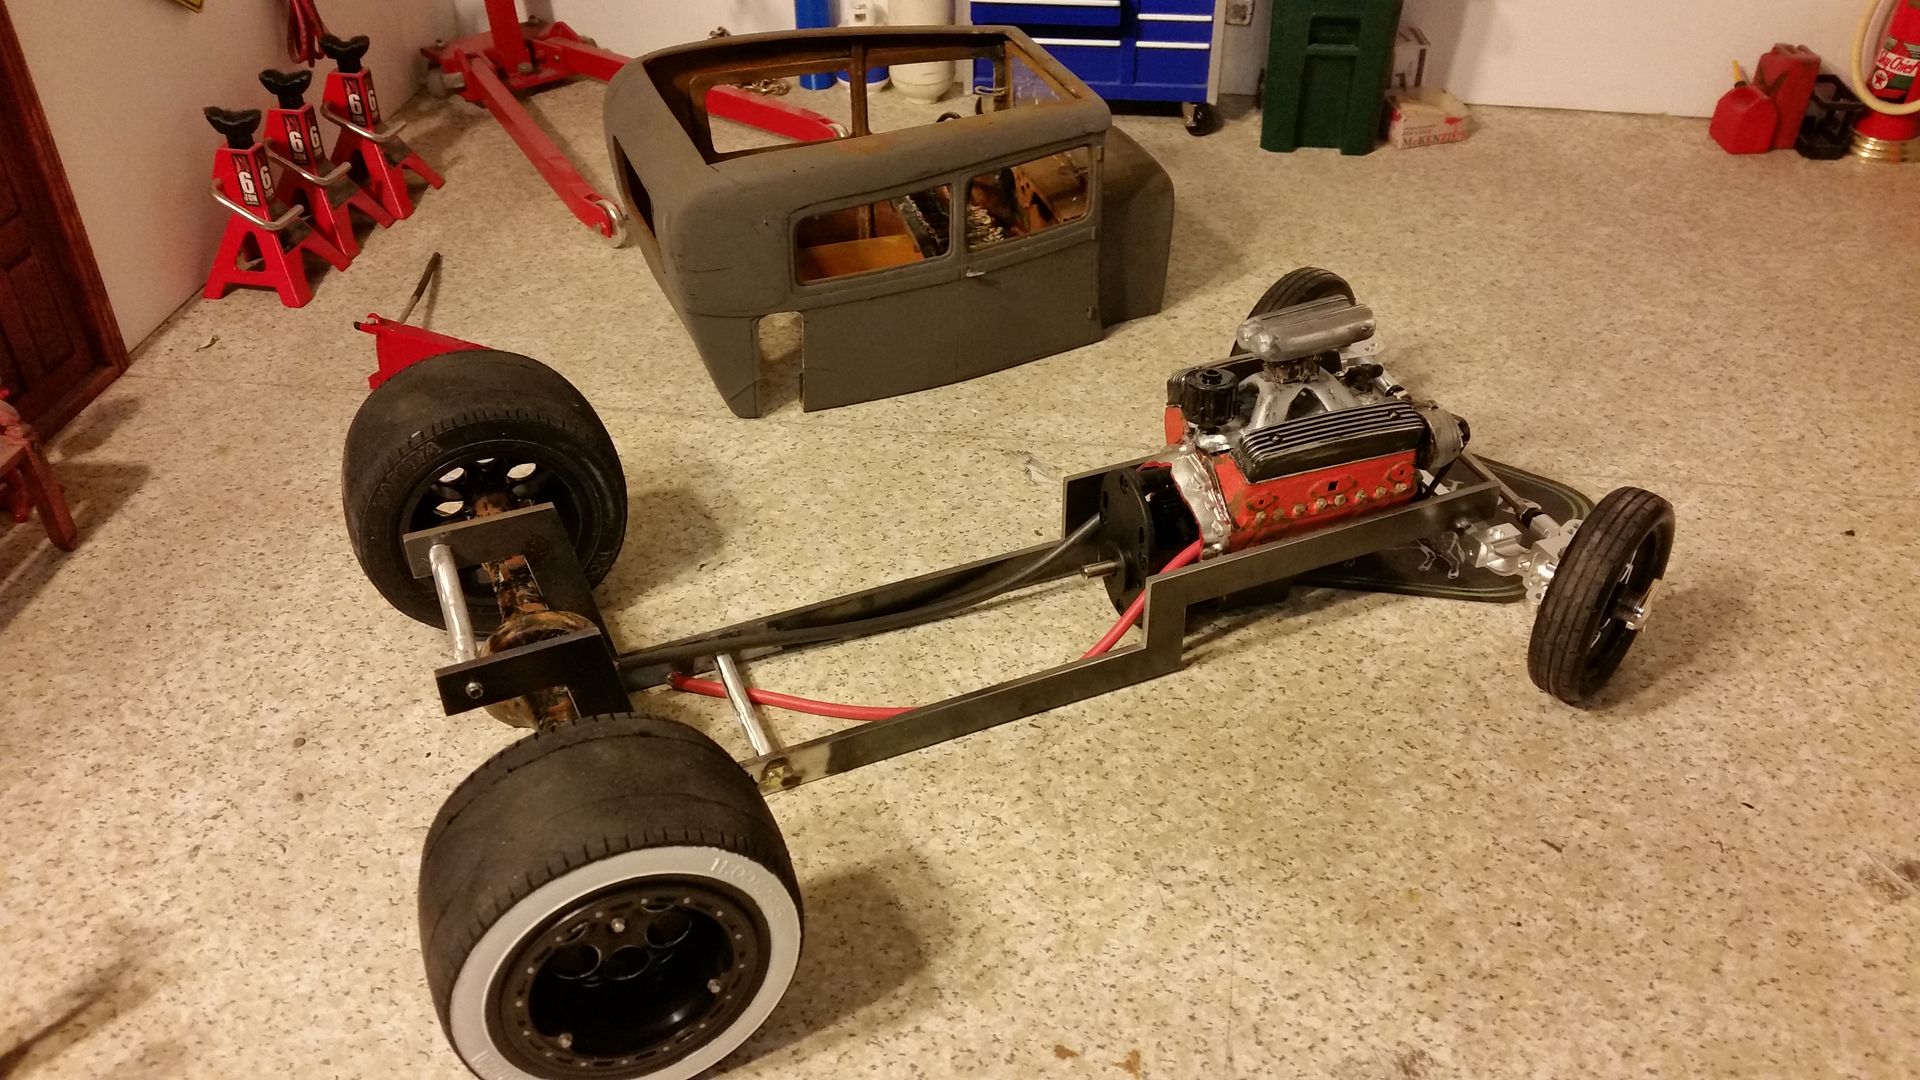 That motor needs to come back further. 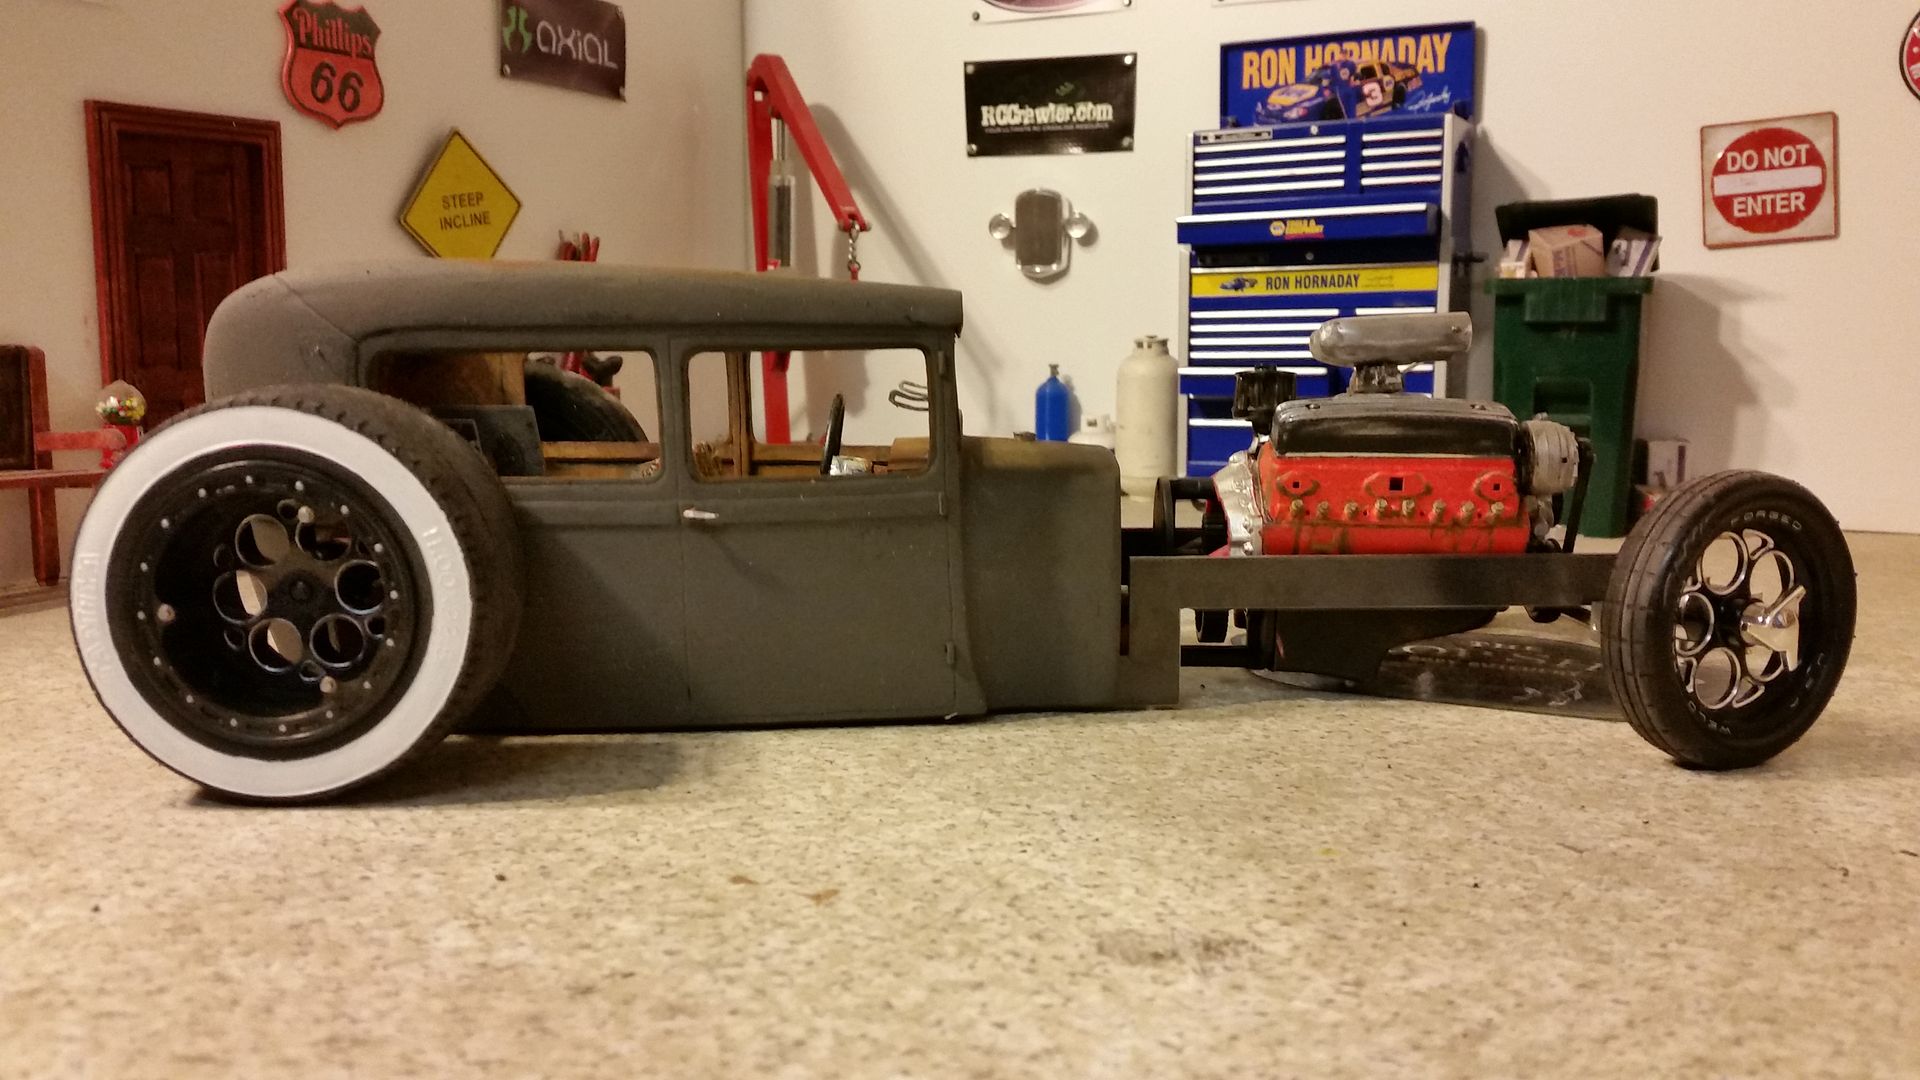 Should sit about right here on the frame. 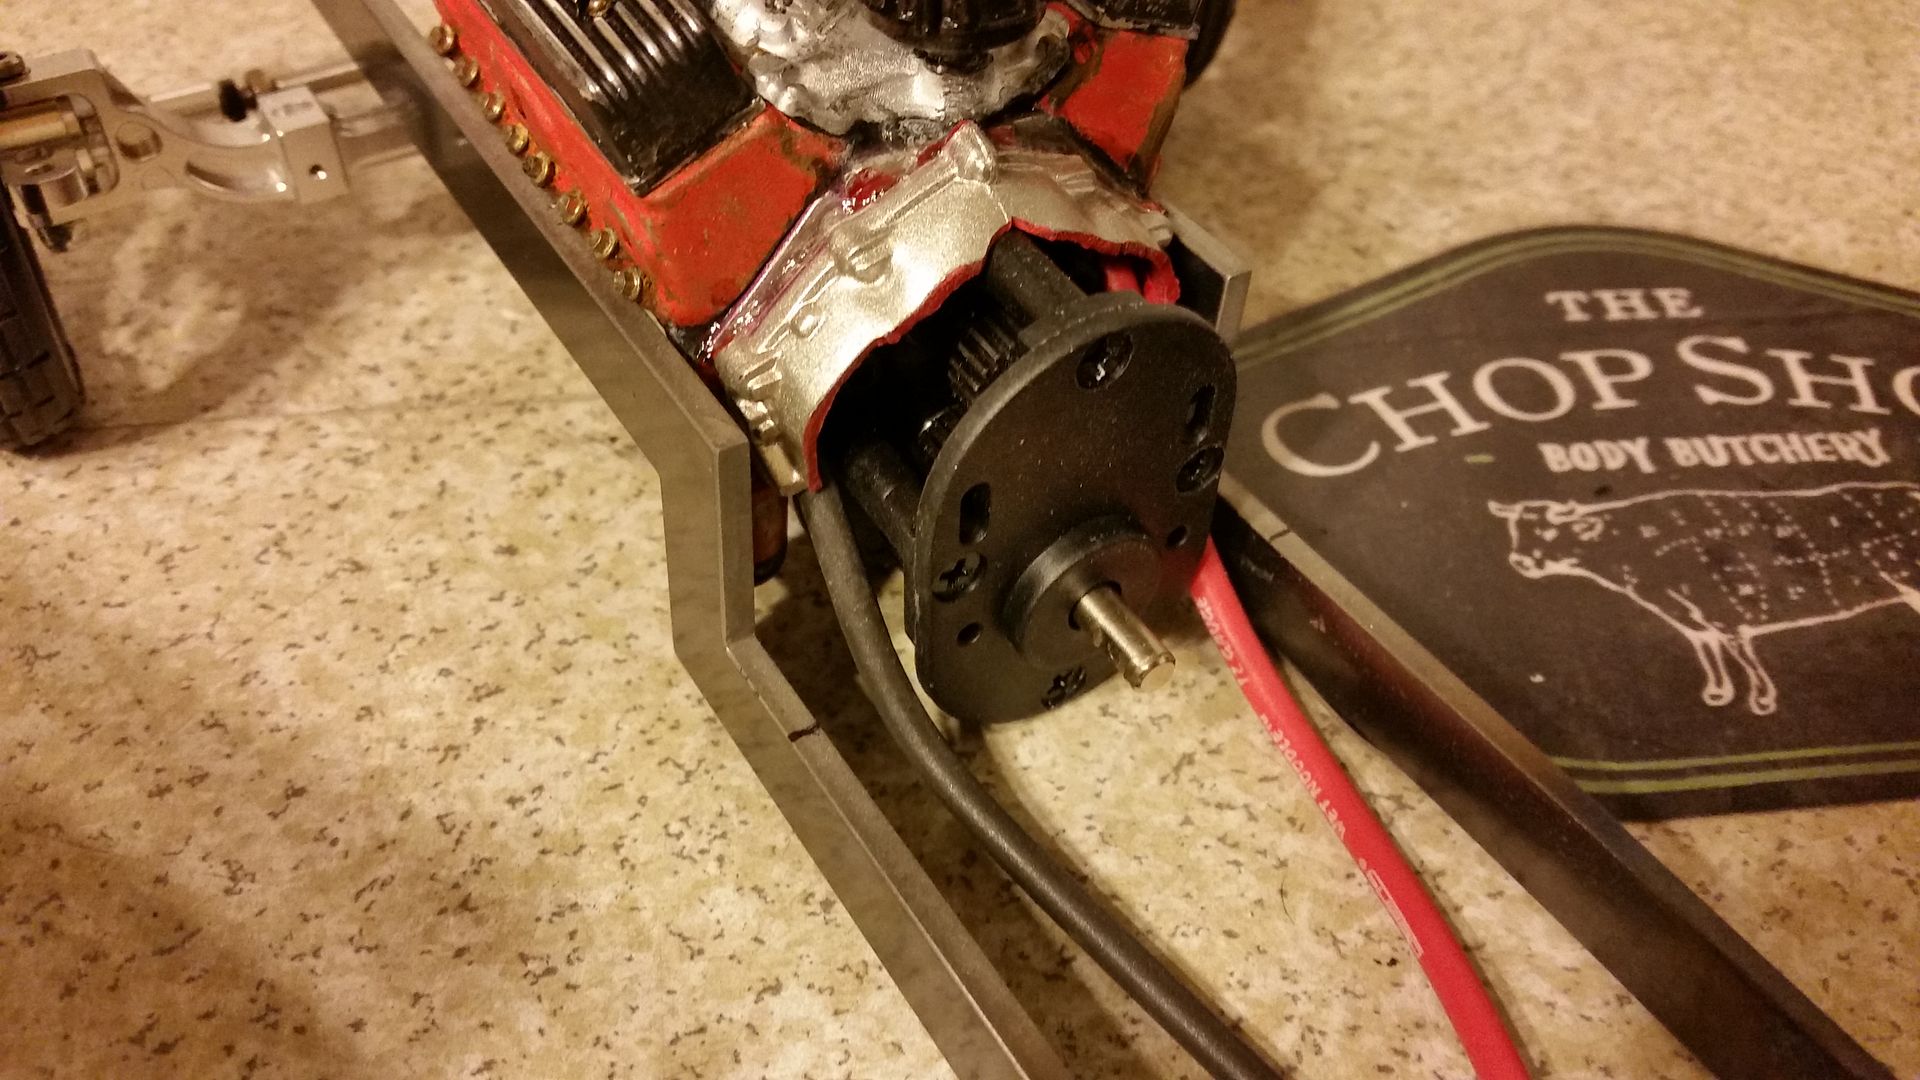 I cut out the firewall to allow for the gear box to be hidden. MUCH better!!! 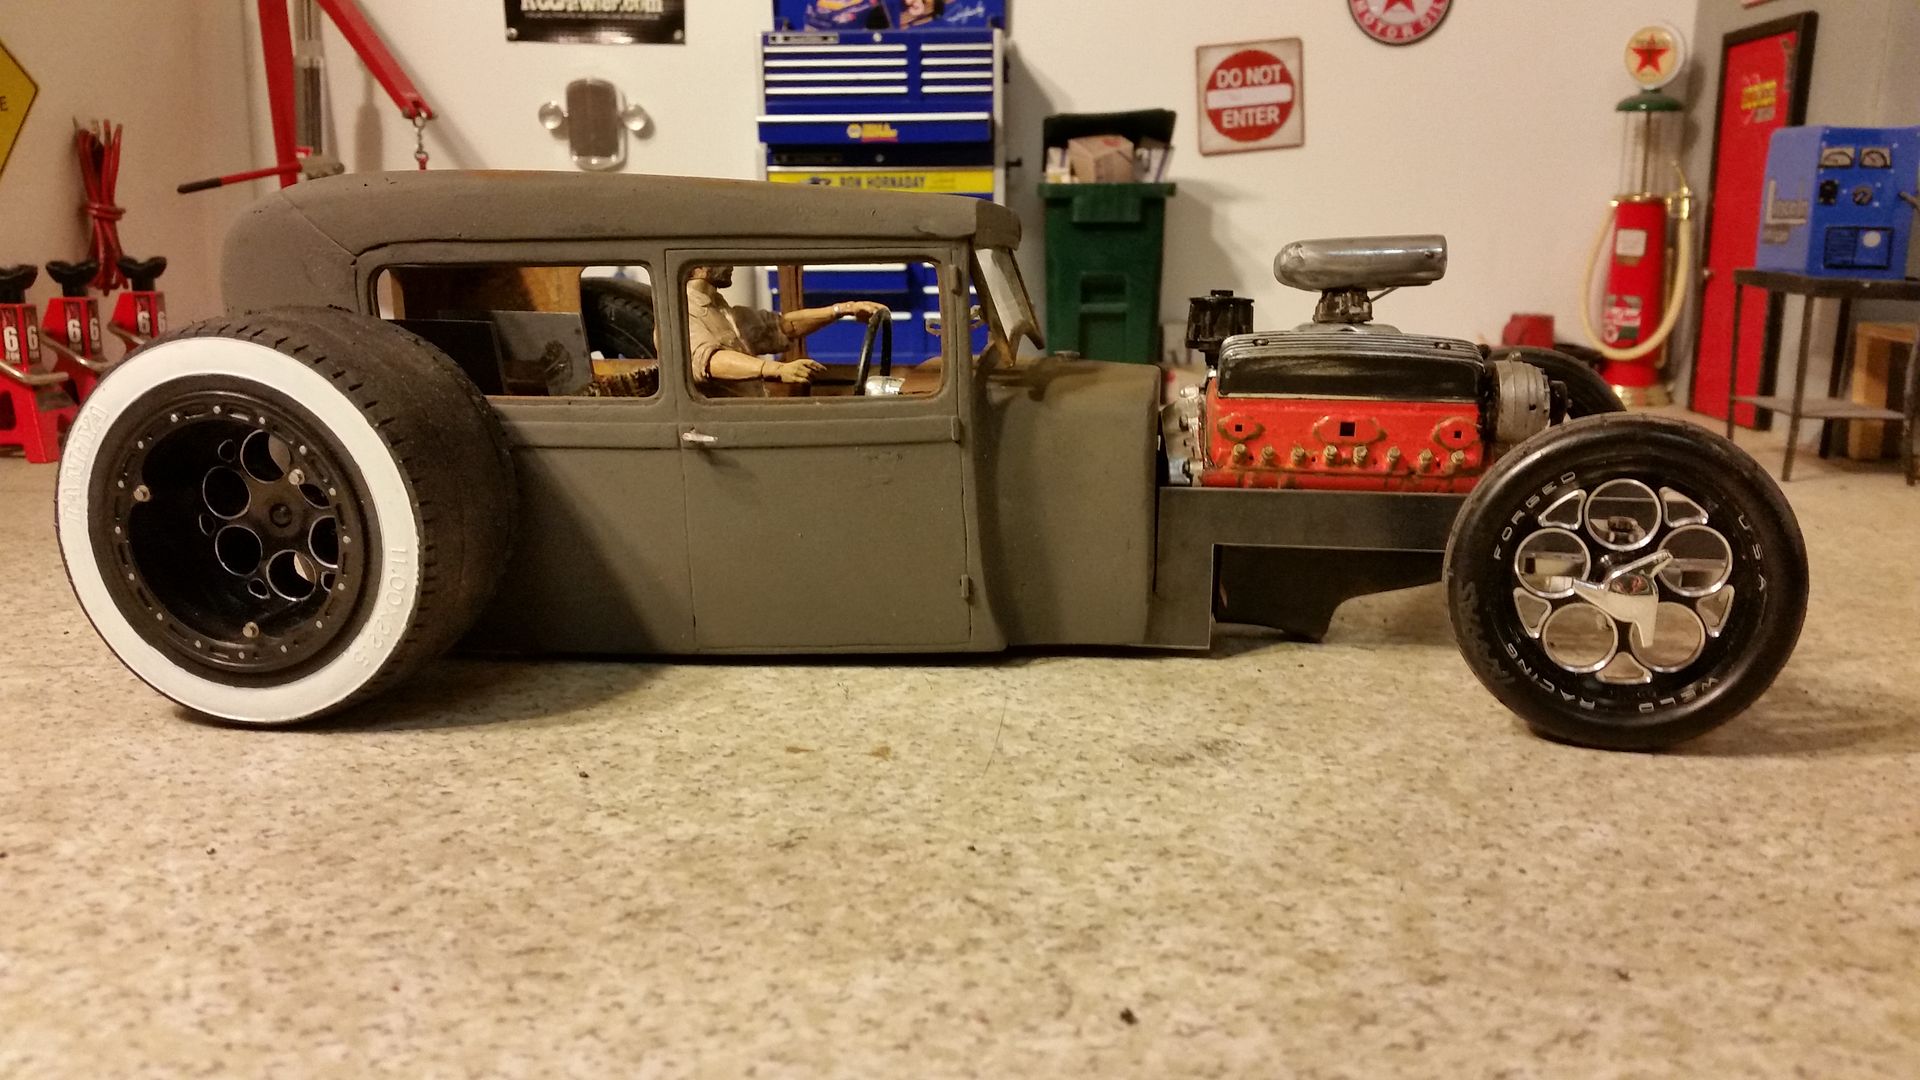 MOCK UP PICS!!! 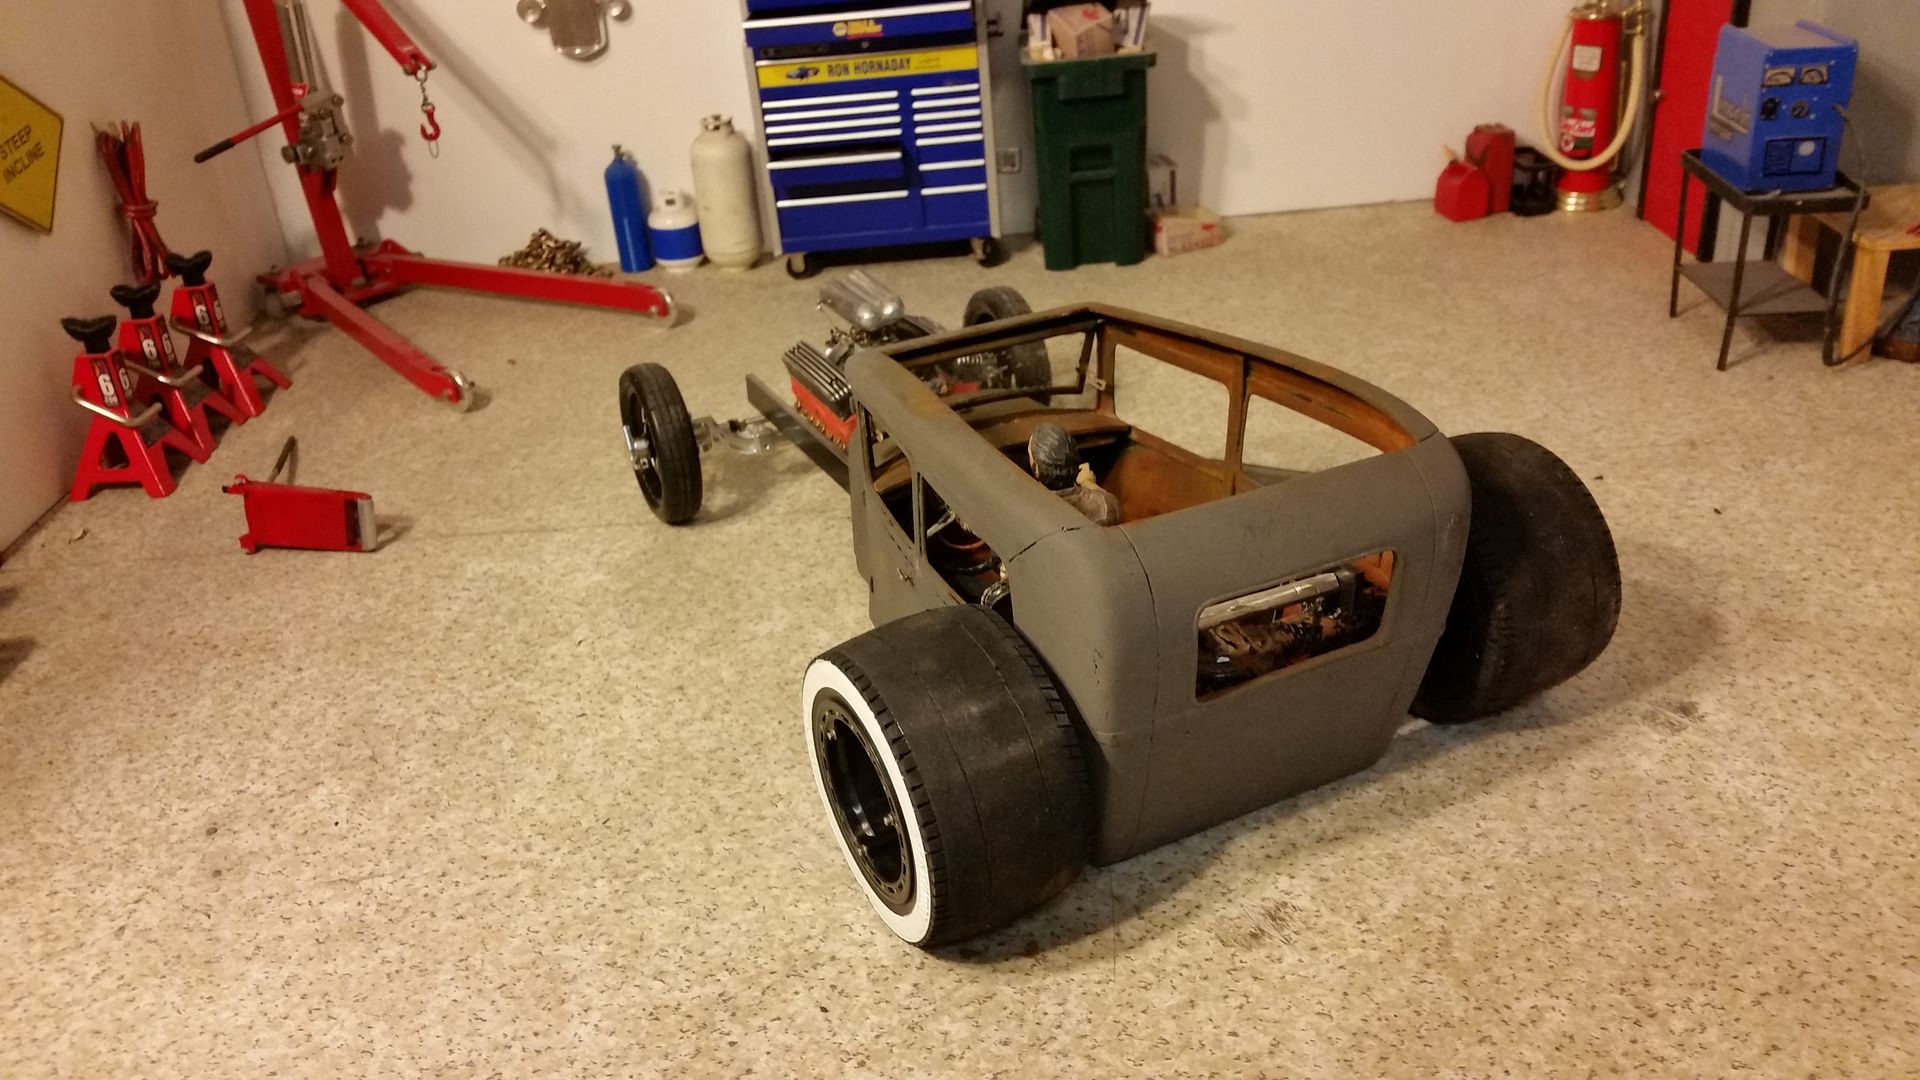 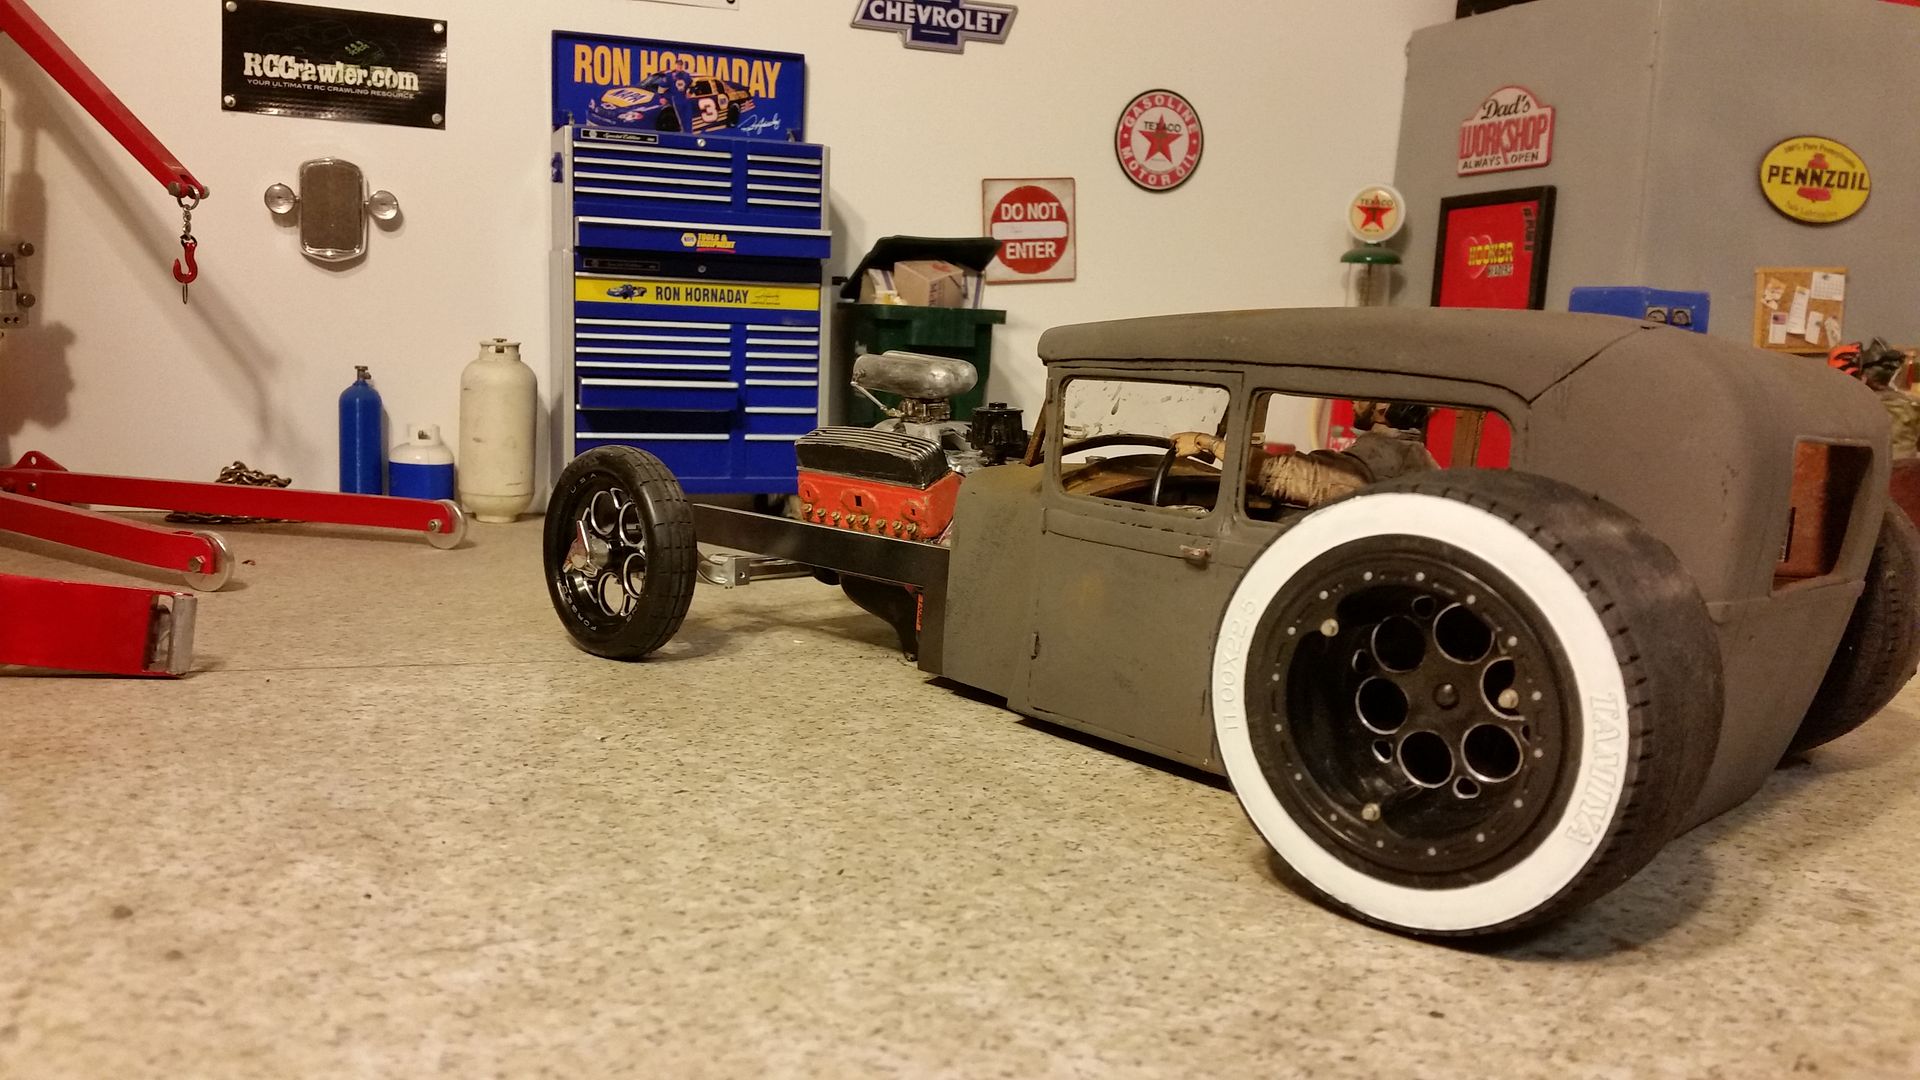 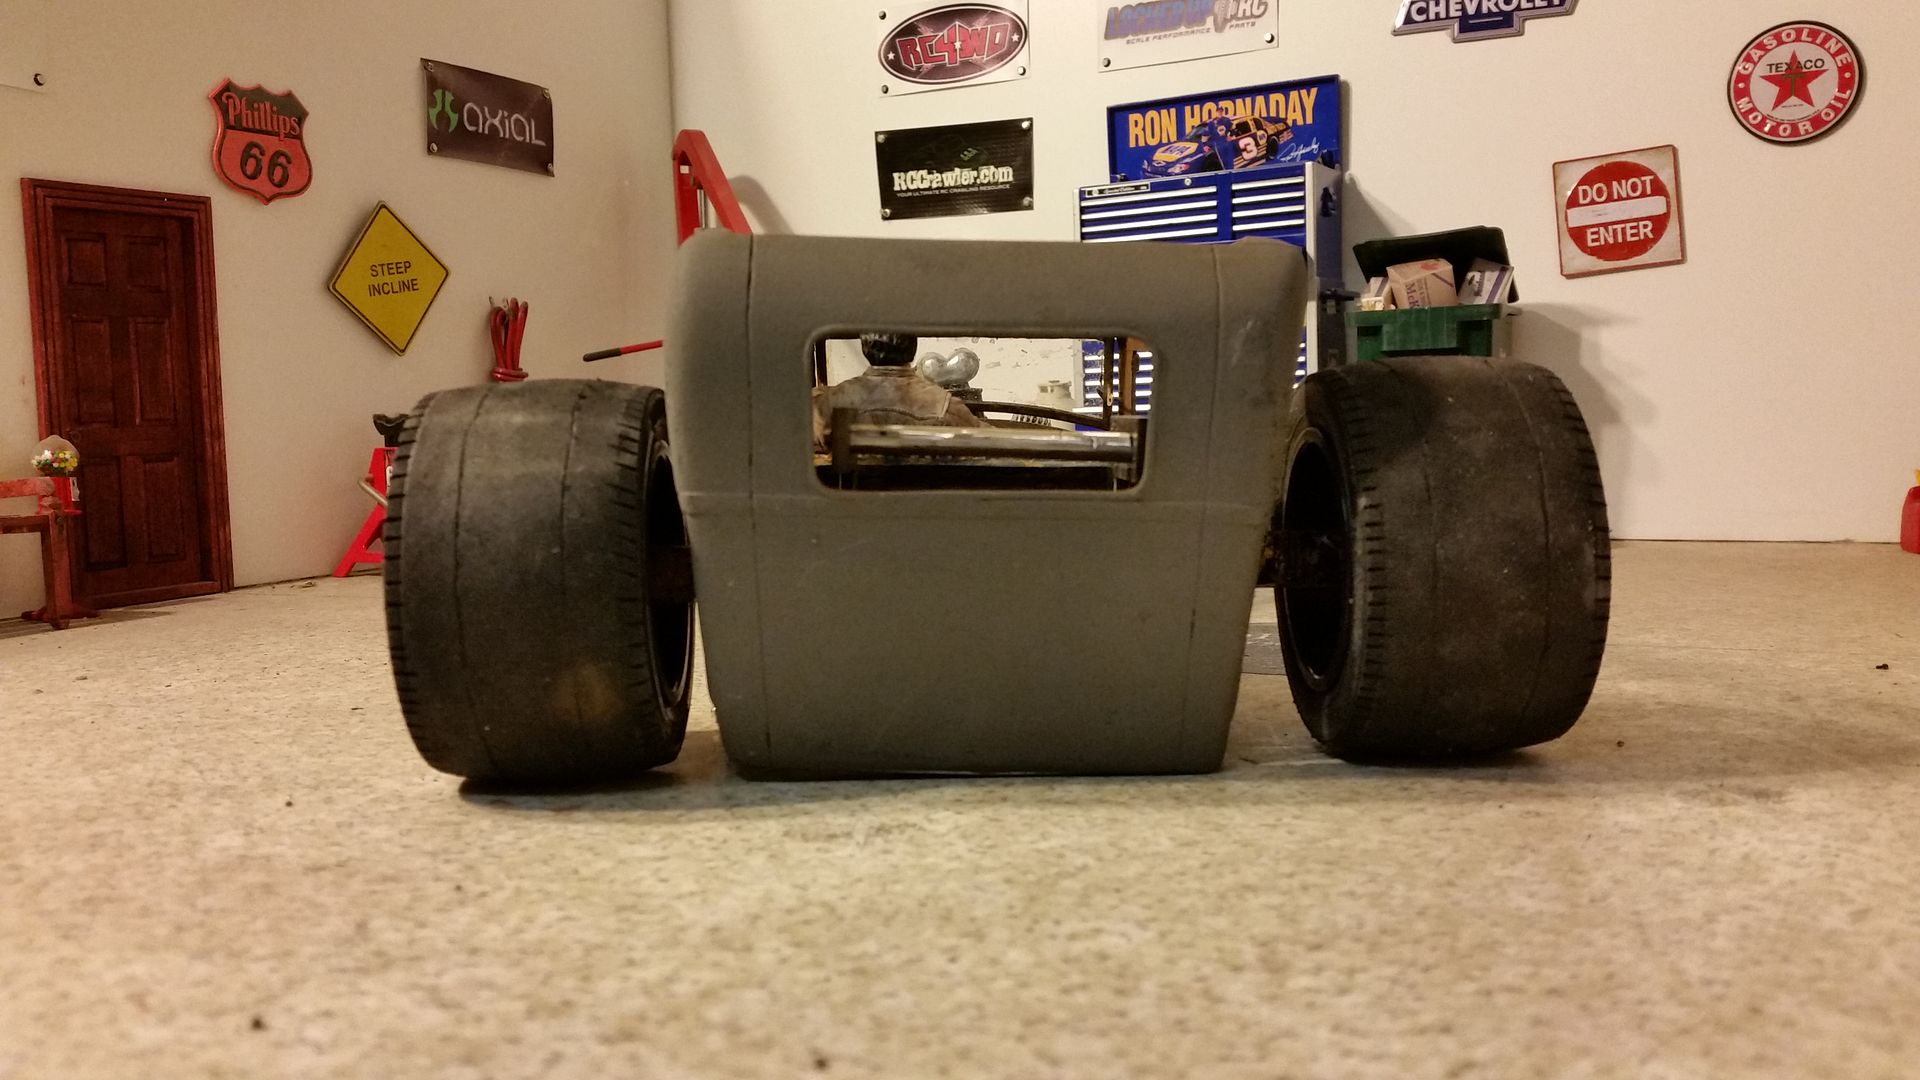 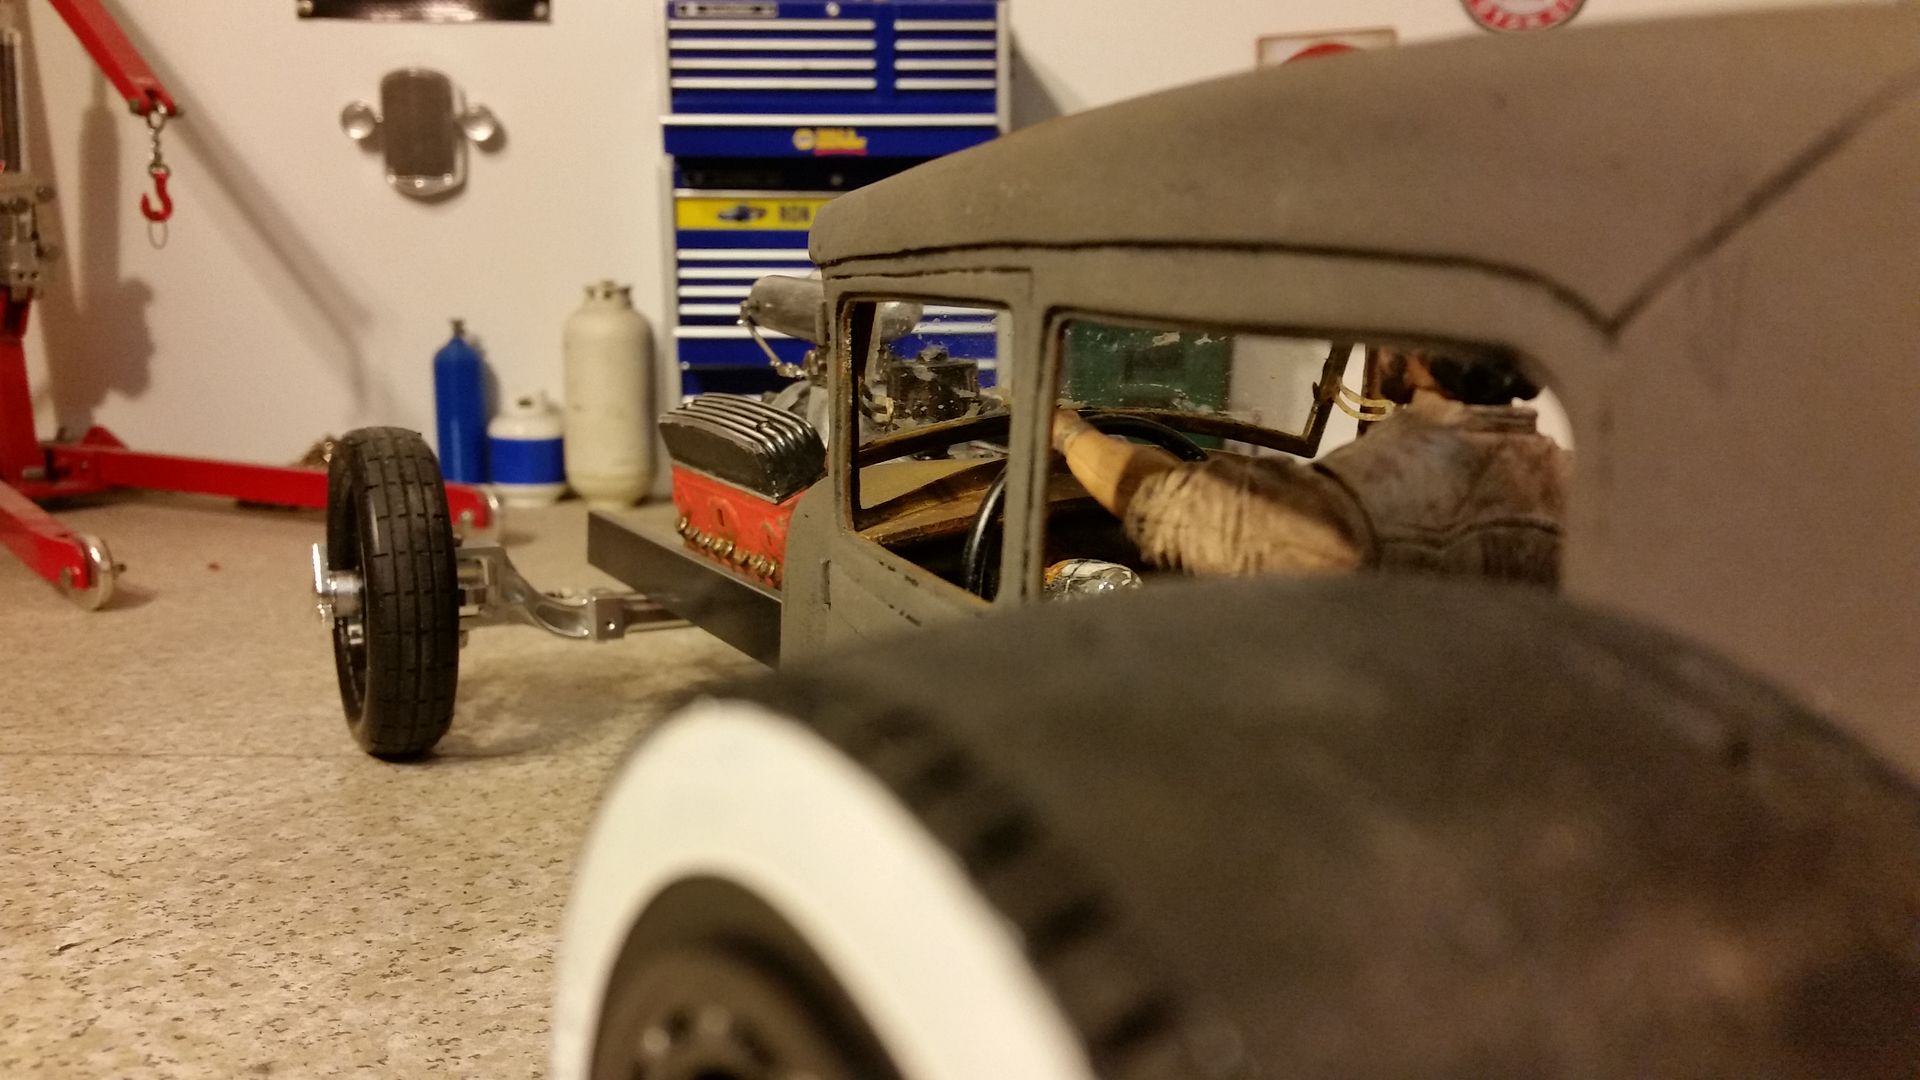  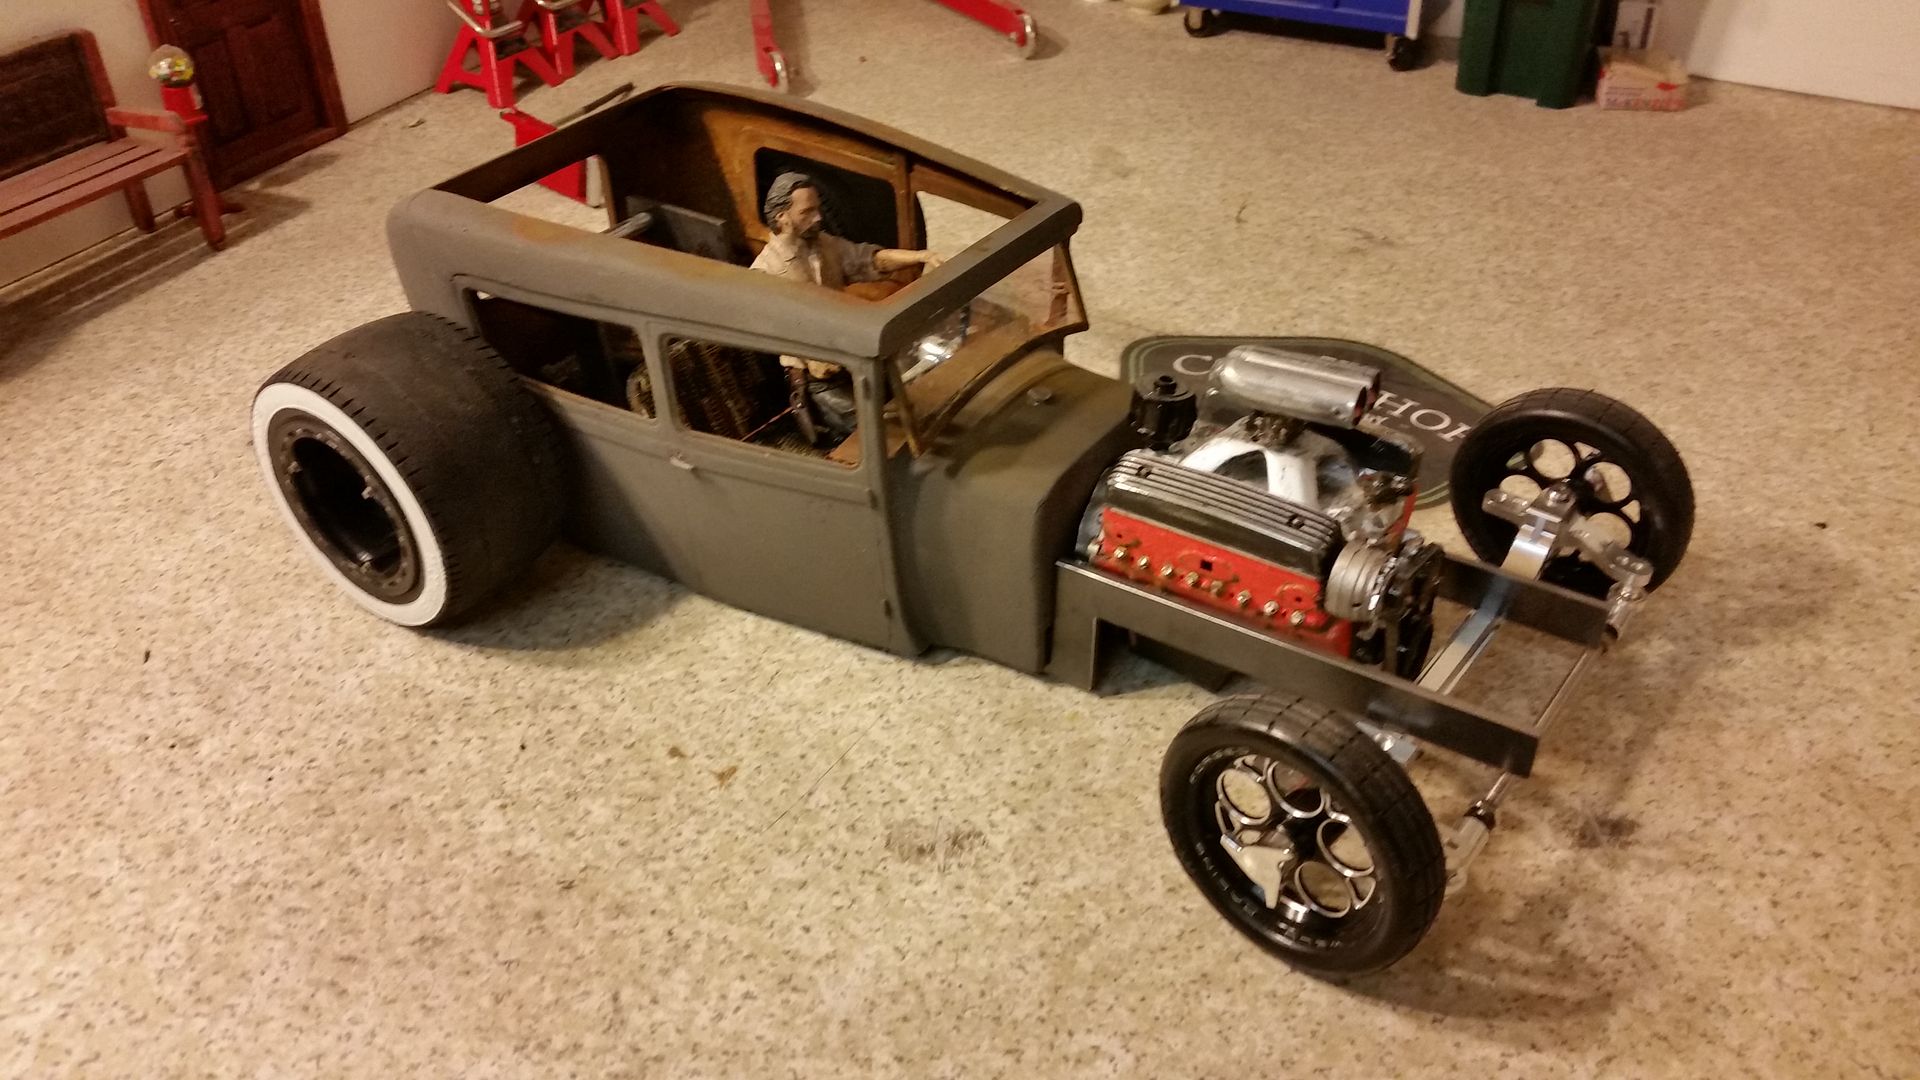 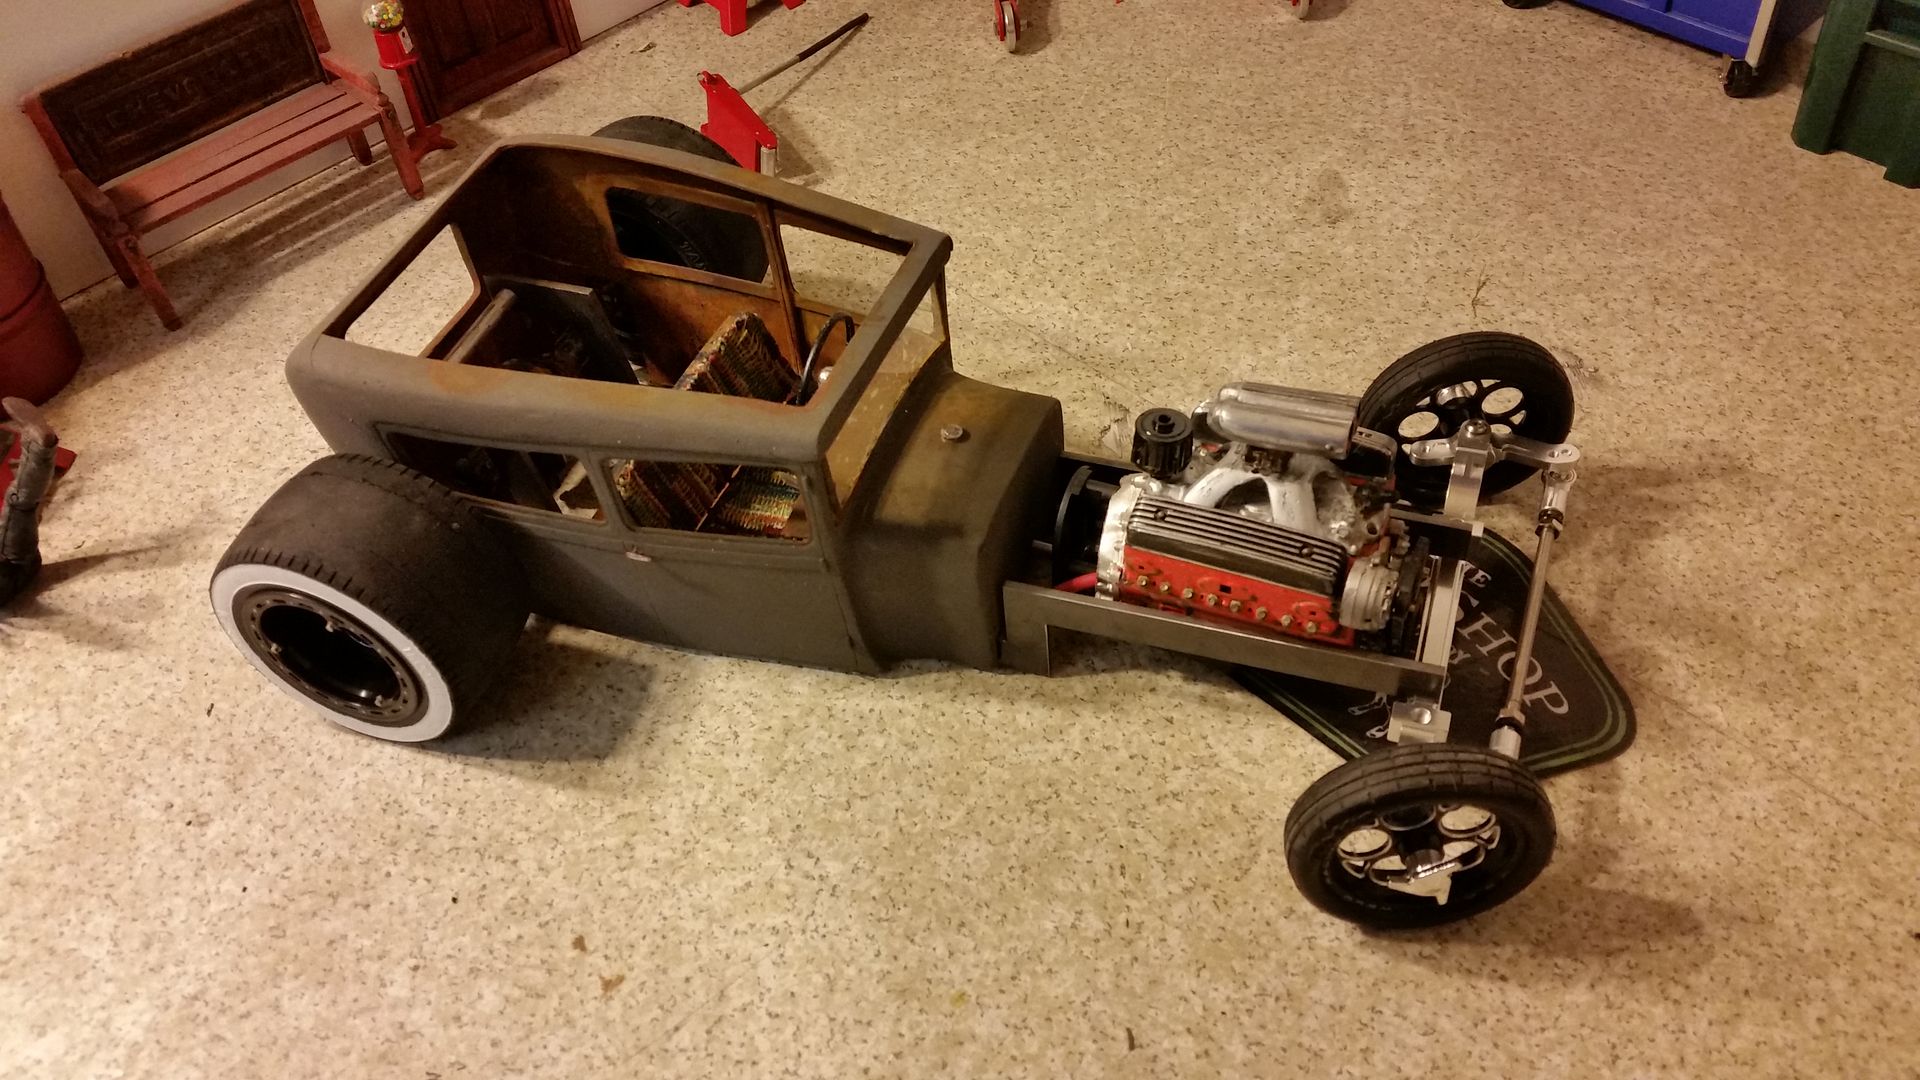 I felt like it was time to make the radiator shell. Man did I nail it too! I started with a piece of .40 and a piece of .20 styrene. I used the one I have hanging on my wall for reference. 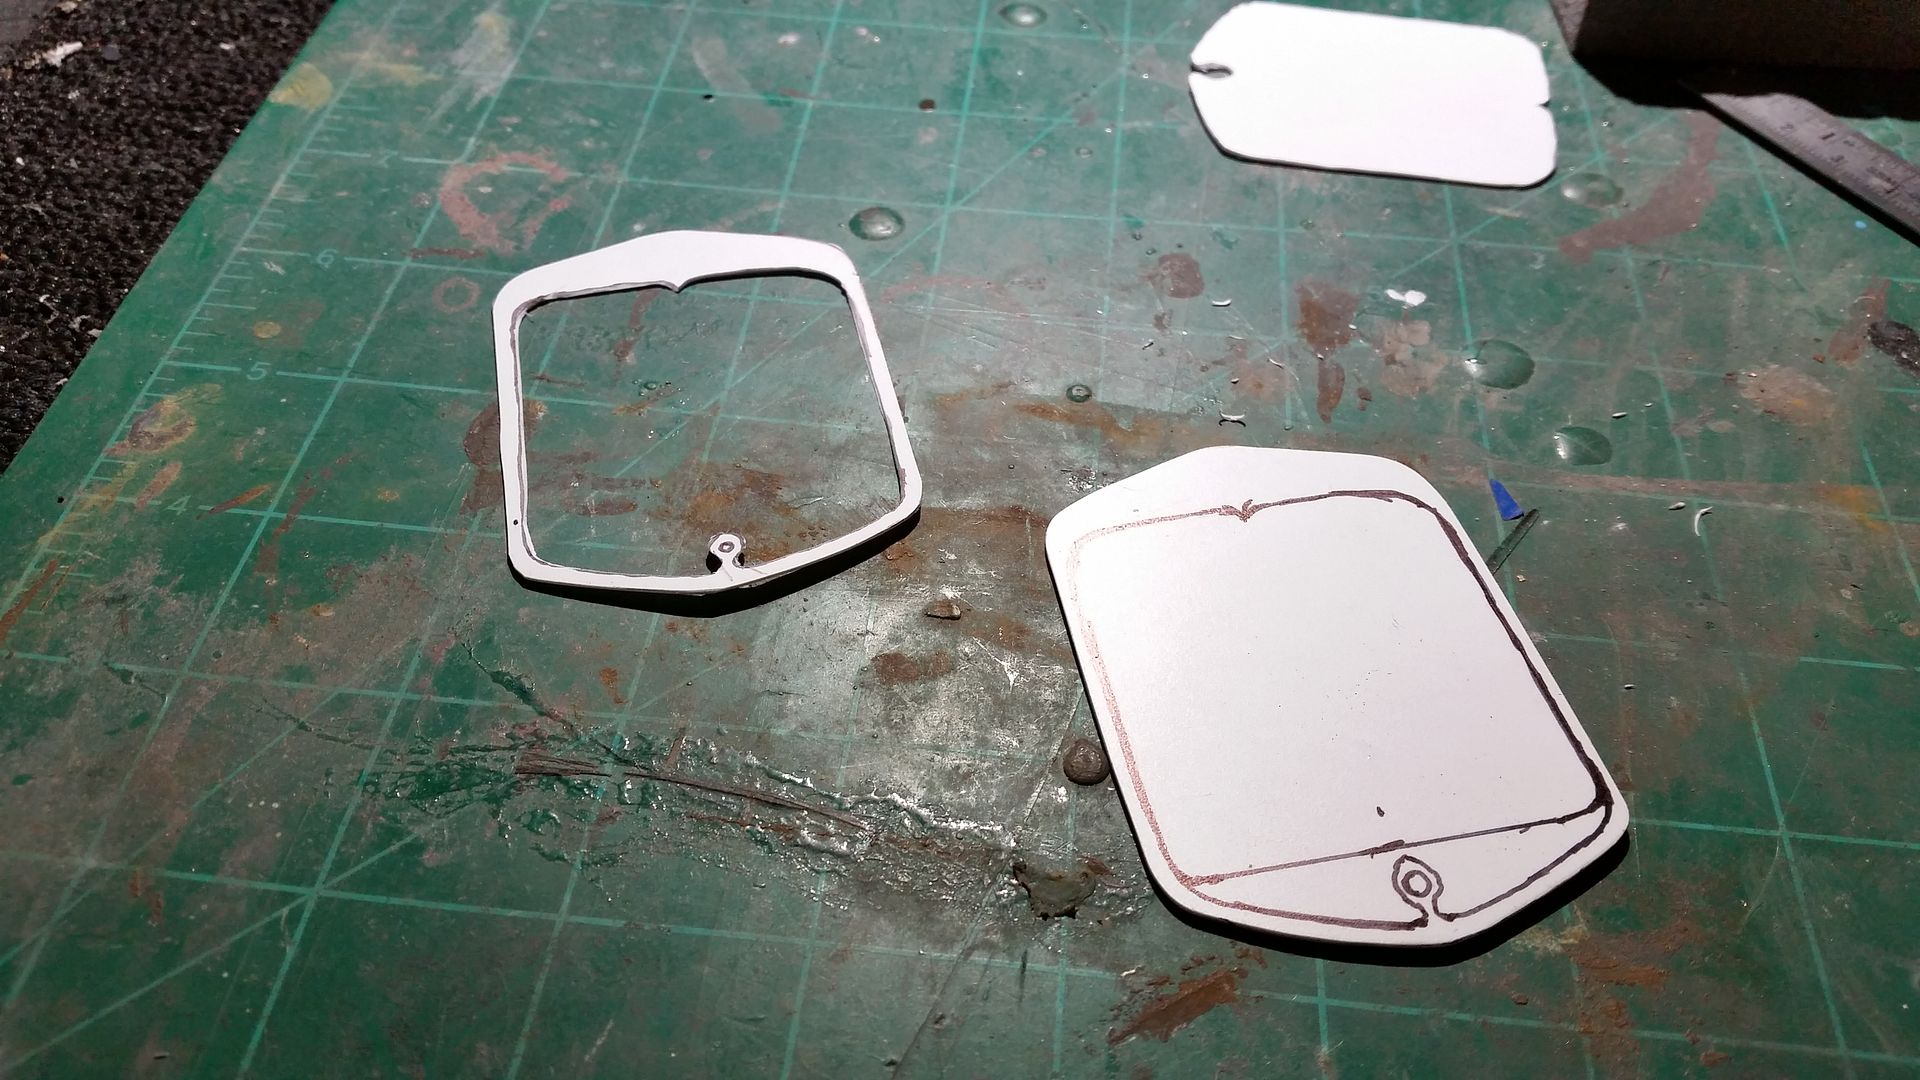 A few minutes later (well maybe more than a few) I had this! 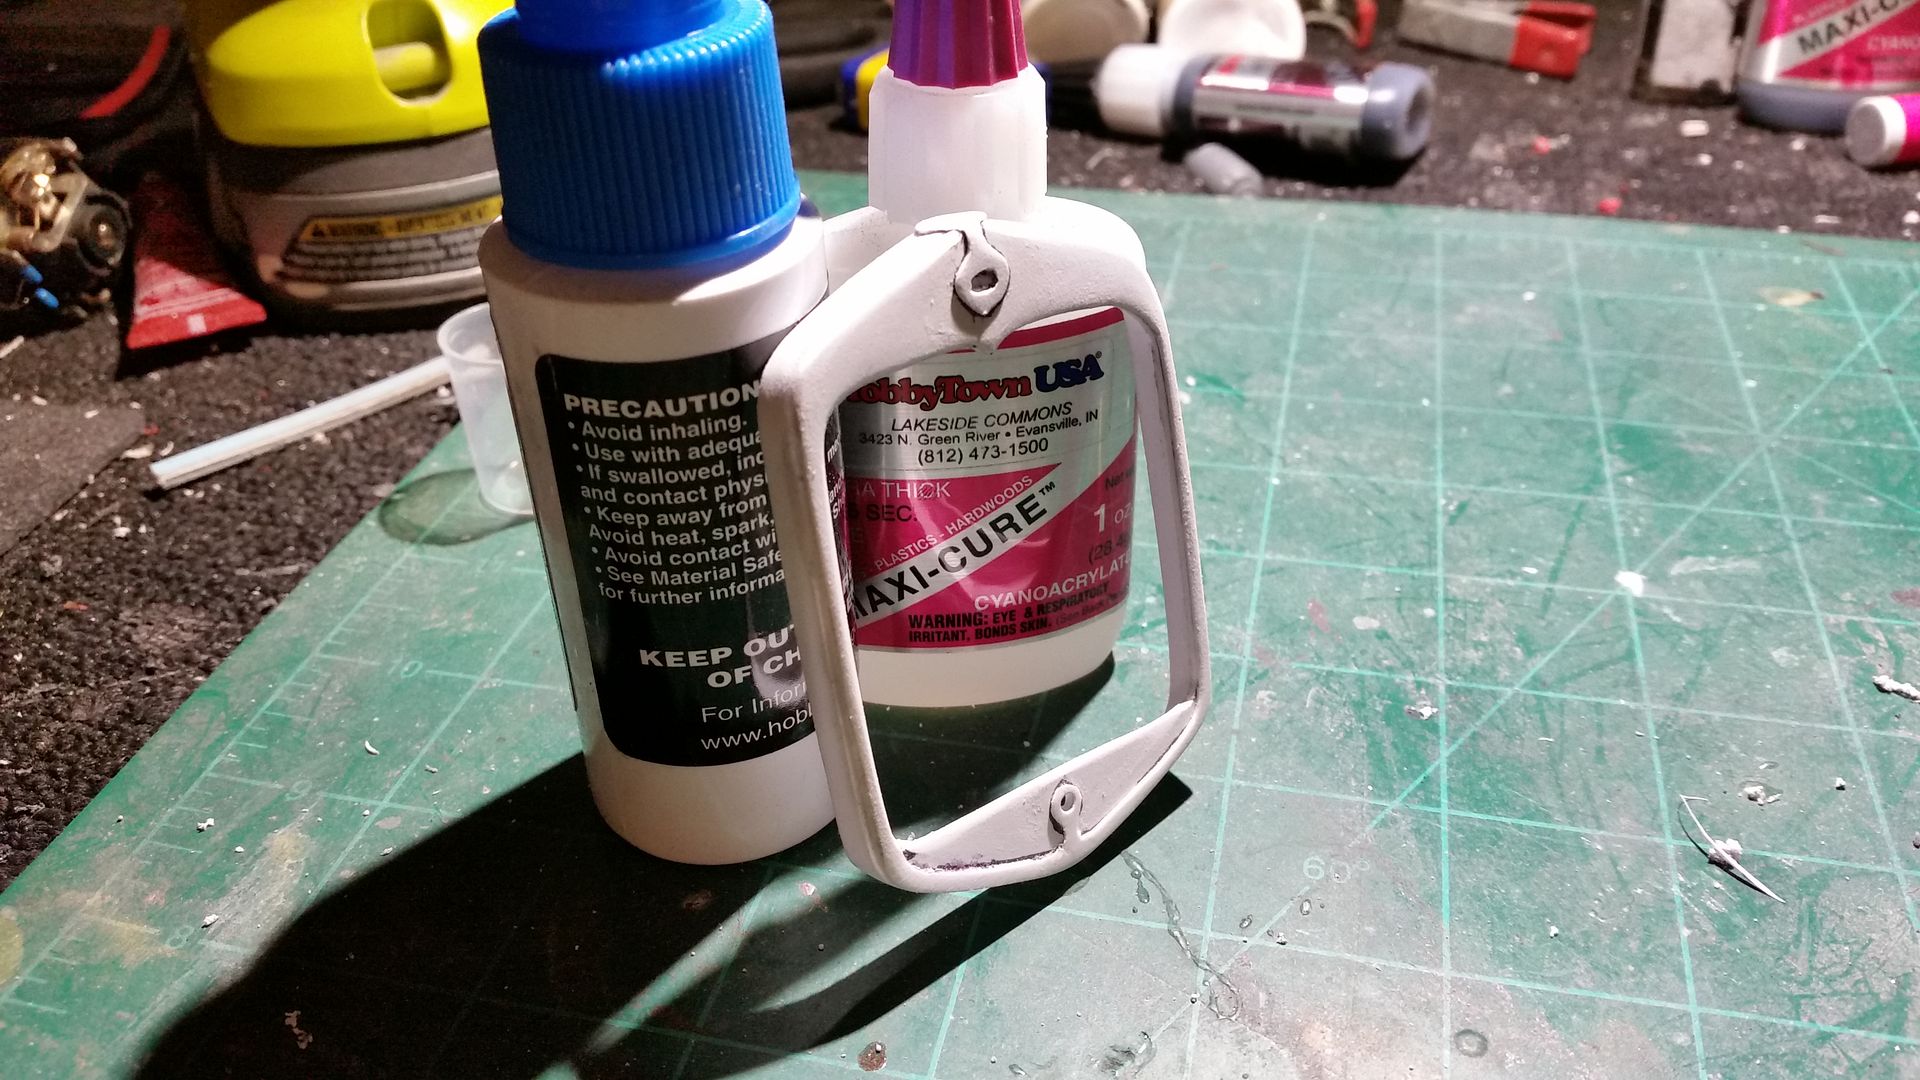 Which lead to this. Definitely nailed it! 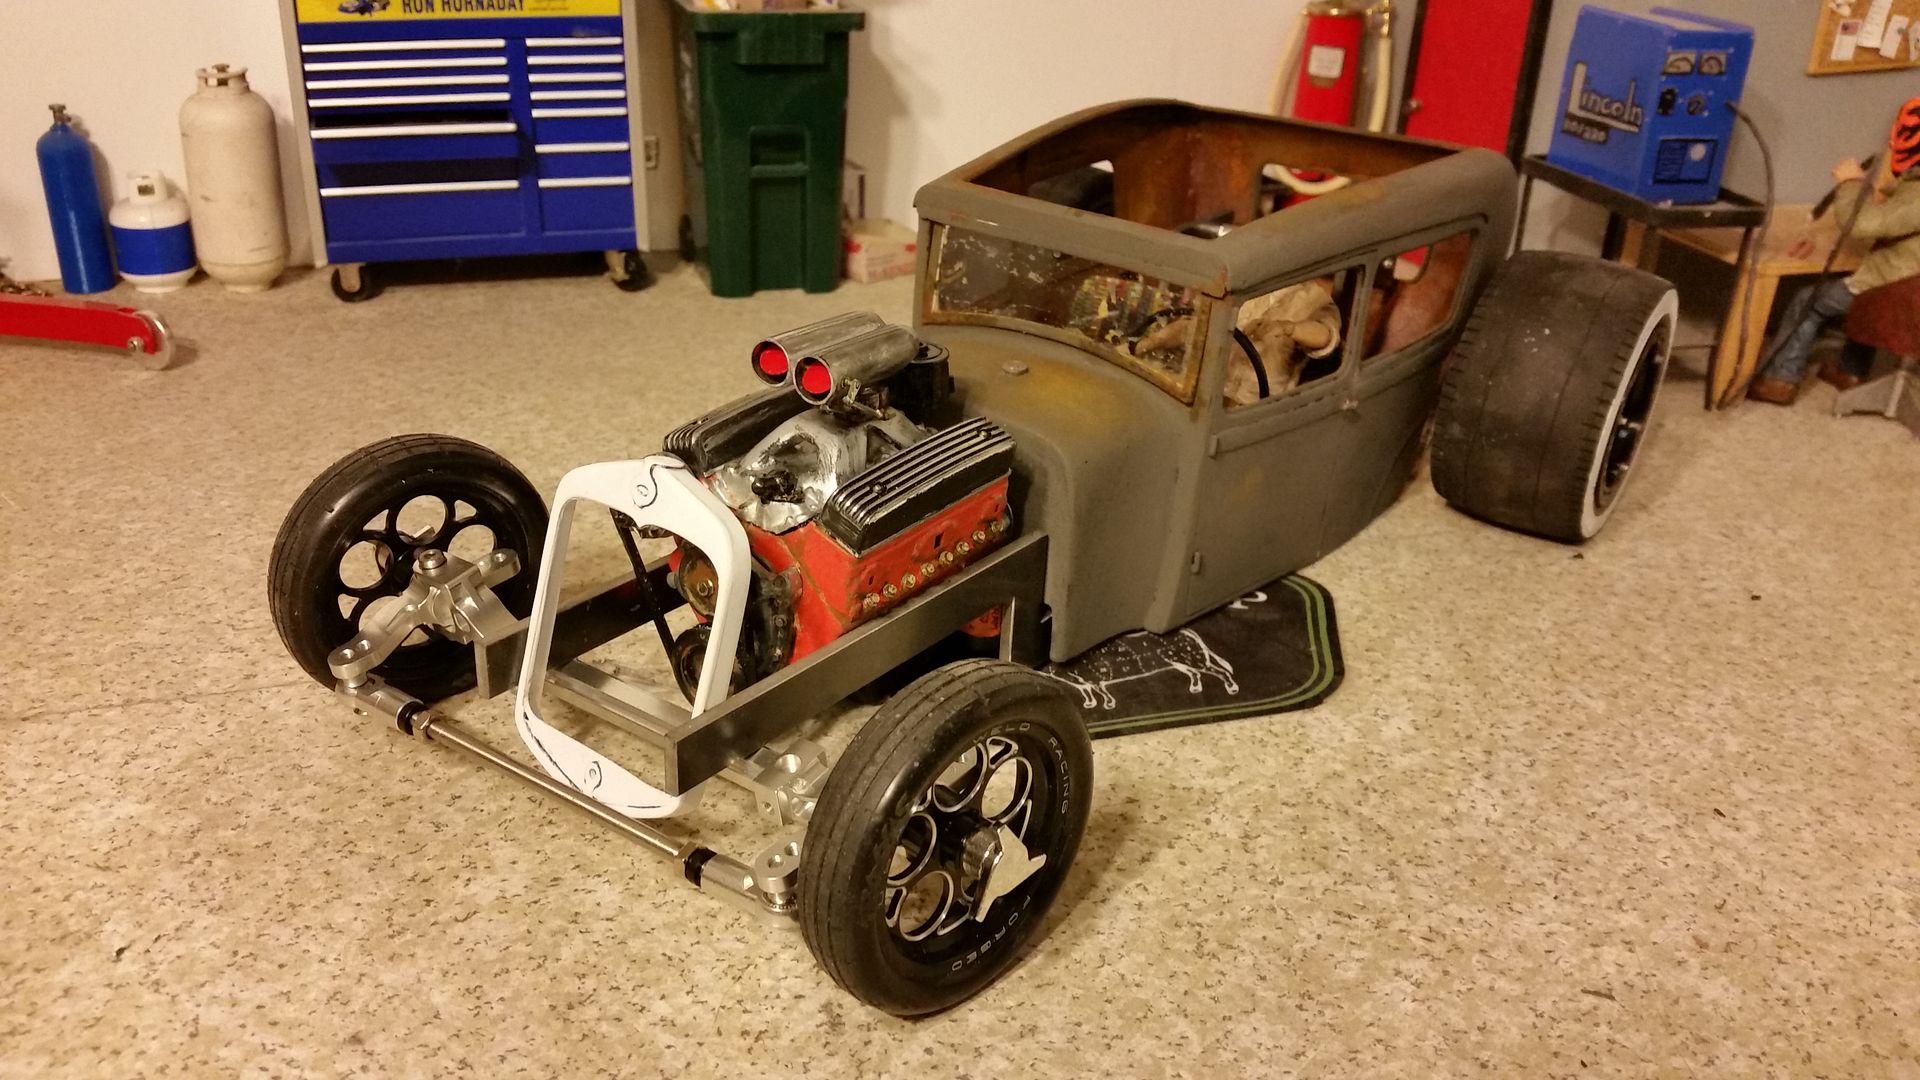 |
| |  |
| | #37 |
| I wanna be Dave Join Date: Feb 2009 Location: Detroit
Posts: 2,075
|
next should be the headers!
|
| |  |
| | #38 |
| Rock Crawler  Join Date: Jun 2015 Location: In the Sticks in the Ozarks
Posts: 940
|
Definitely NAILED It!!
|
| |  |
| | #39 |
| I wanna be Dave  Join Date: Apr 2013 Location: Streamwood, IL
Posts: 2,442
|
Outstanding!  |
| |  |
| | #40 |
| Quarry Creeper Join Date: Jun 2015 Location: Petaluma, Ca
Posts: 237
|
Rear tires and wheels came out great. Like the grill work. Can't wait until you install the rear end to see what the stance is going to look like.
|
| |  |
 |
| Tags |
| chop, model, ratrod, shop, tudor |
 Scratch build '29 Model A Tudor Sedan Ratrod - Similar Threads
 | ||||
| Thread | Thread Starter | Forum | Replies | Last Post |
| 1930 Model A Ford "Ratrod" Pickup | 51WillysJeep | 1:1 Full Size Vehicles | 19 | 08-18-2016 12:04 PM |
| My first 100% Scratch styrene build. 1929 Model A Tudor Sedan | Hoosierdady | Paint and Body | 22 | 03-18-2016 07:24 PM |
| Scratch build model builder from down under | thecrusader | Chit Chat | 3 | 11-02-2013 11:10 PM |
| wow, check out this model plane. Scratch built from metal with Dental tools.... | BigB_117 | Chit Chat | 8 | 12-25-2009 11:03 AM |
| |