| |
| |||||||
 |
| | LinkBack | Thread Tools | Display Modes |
 11-04-2014, 07:44 PM
| #1 |
| Pebble Pounder Join Date: Sep 2012 Location: Kansas City
Posts: 148
| I have had many people ask how I got my rigs looking so life like so I thought I would show people one way to get the "trail ridden" and "weathered" look to your hard body scale rig. Cause lets face it, you don't see many nice shiny rigs with perfect paint out on the trails, especially on extreme rigs or expedition vehicles. This particular rig means a lot to me as it came from my best friend Andy Curran(Altered-Images on here) who took his own life a short while ago. He and I grew up together since about kindergarten and have been into various forms of RC as long as I can remember. After college he moved to Grand Rapids and had plates that said "BADANDY'. The start of the project as I got it...at this point just a roller.  Stage 1: Grime Read ENTIRE article before starting any projects! So to start off I put a fresh coat of pumpkin orange on the body.  After removing the masking  For the weathering part this is my supplies. 3 mixing cups 1 jar burnt red paint 1 jar dark green paint 1 jar black paint water soft rag paint brush sophisticated finishes rust effect  First I start by squeezing about a quarter sized dollop of paint into one of the mixing cups and then adding water until it was watery thinned.   !!!From this point on you have to be prepared to work fairly quick.!!! I start by dabbing the brush in the thinned paint and painting it over the whole body. You really want to make sure to get it into all the lil crevices and nooks and crannies. Apply very generously so it pools up on the body panels. I usually start off with the green paint, but as long as you use black last it will be fine.  Now I keep going back to the areas I started with and lightly brushing more on. Once I can see that when I am brushing that some of the pigment is staying on the body then it is time to start blotting and wiping. I usually use a wiping motion to get most of the liquid off and then go back and blot to create more random grime and funk patterns.  after the green is blotted and wiped  You can see how after wiping it will leave a very grimy look around all the details on the body, and then areas I didn't blot as much when I was wiping it down.  Now to Red, you can't see much because of the orange body but you start seeing it after looking like water stains.  after wiping  Now to do the black wash, this one you really want to set into the cracks to give the element of depth. 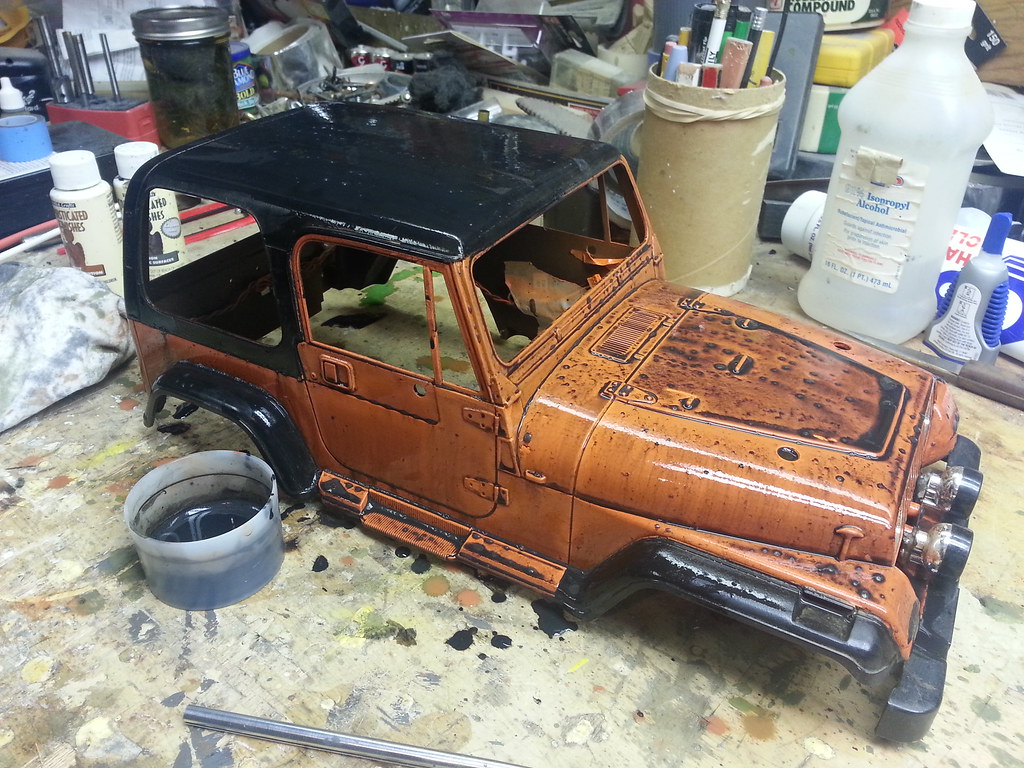 after wiping   Stage 2: Rust At this point I like to use a thick bristle stiff brush as posted in the photo above. with the right motions it will look like rusted scratched surfaces. I first apply the iron paint in areas likely to have rust on a real vehicle. Be mindful of things that are fiberglass or plastic in real life as they wouldn't rust of course. But I like to do things like under hinges, under body molding lines, quarter panels...etc. Use as little or as much as you want.    Now you just apply the rusting solution and wait. Then reapply and wait some more. Then repeat until those grey spots of iron paint are nice and rusty. 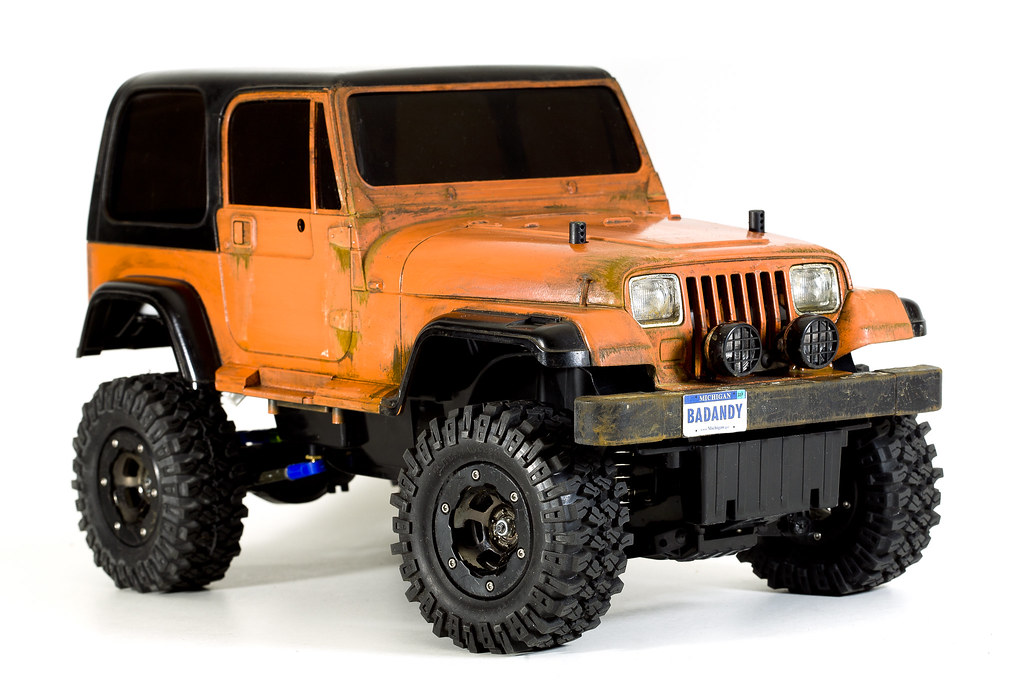 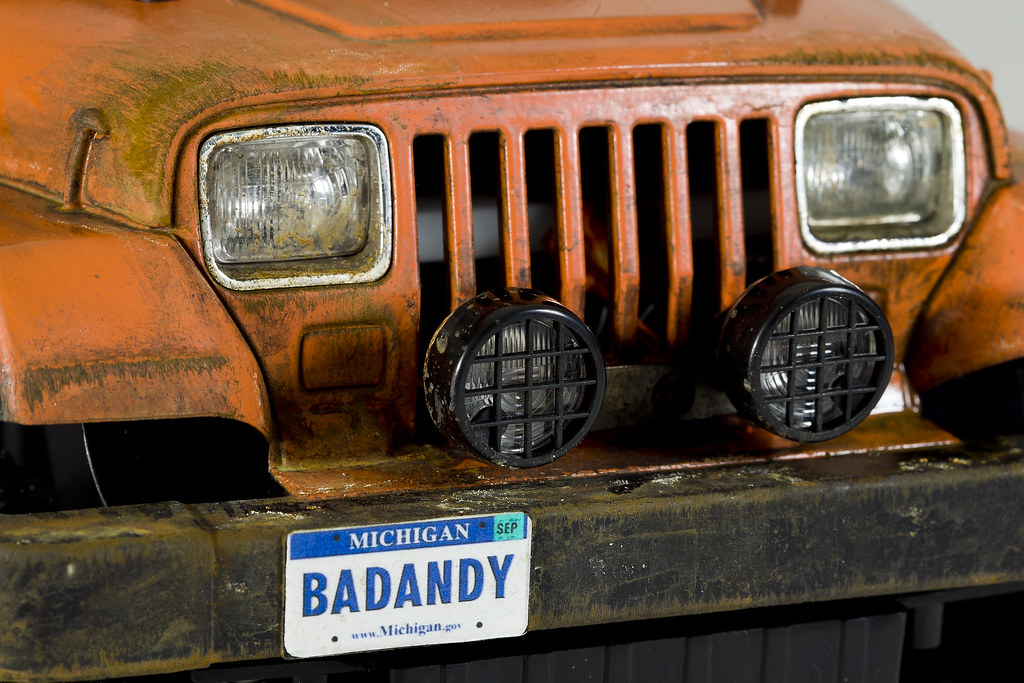 Stage 3: Wind Dusting Unfortunately this is a part I really couldn't take photos of me doing. But basicly you use an airbrush and mist some brown, tan, or even grey paint onto the rig from the front angle as it would get on it from driving down the road. Before you do this you may want to take the time to make some wiper templates out of tape and put on your windshield. Here are the results. (I halfassed my wiper templates but will be putting clear glass on soon and redoing it.) 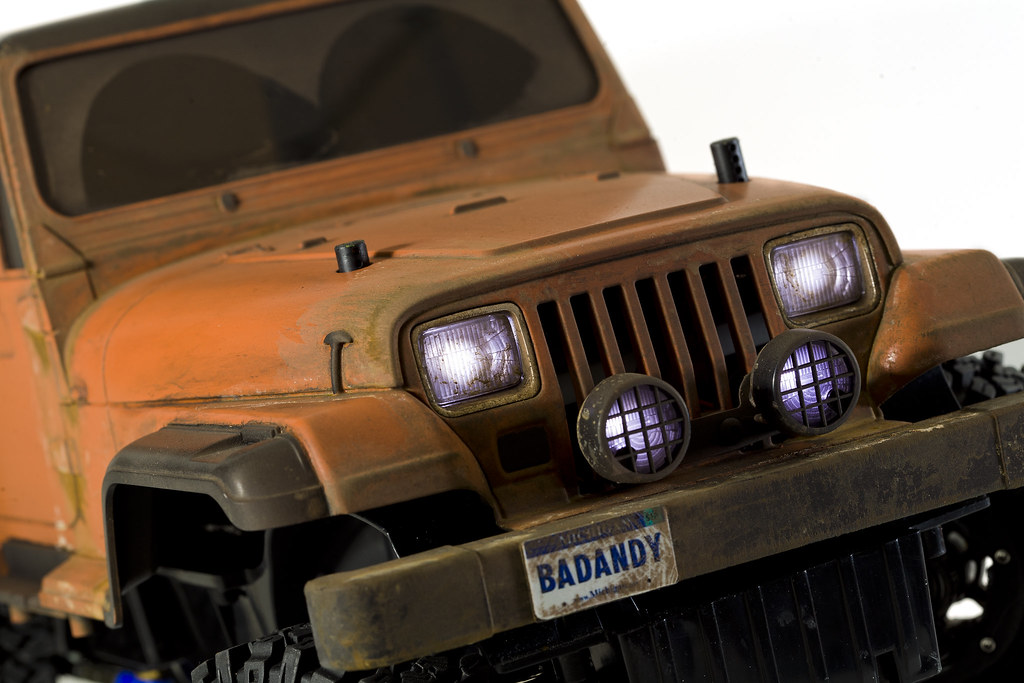 And with my Yota I did with the same 3 stage weathering technique. 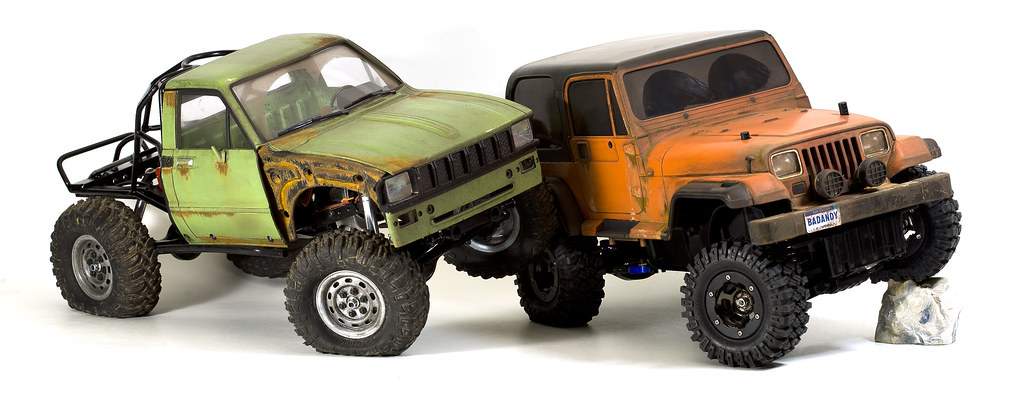 Notes.... I would suggest going fairly thin with watering down the paints. If you wipe it down and don't see as much "grime" as you want then repeat the process. If one wash color completely overtakes your previous one just go back and do the previous one again. Change the colors up, these work well for me, but you may try different shades and colors altogether. Rust and dusting can get out of hand quick, do a little then look it over after it drys and if ya want more go back and do more. When you do the dusting get it straight on and at a slight angle to the side as well so it travels down the sides a bit. Do multiple colors of dustings just like your grime colors. Last edited by R|M|D Photography; 11-04-2014 at 07:57 PM. |

|  |
| Sponsored Links | |
| | |
|
11-04-2014, 10:04 PM
| #2 |
| Pebble Pounder Join Date: Aug 2012 Location: Salina
Posts: 124
|
Very well written sir. Shouldve invited me over and I would have worked you up a video while doing it too
|
|
| |
|
11-04-2014, 10:05 PM
| #3 | |
| Pebble Pounder Join Date: Sep 2012 Location: Kansas City
Posts: 148
| Quote:
But yeah, next one we can. | |
|
| |
|
11-06-2014, 06:57 PM
| #4 |
| Rock Crawler Join Date: Jul 2011 Location: USA
Posts: 624
|
Awesome write up!! Thanks for the tips!!  |
|
| |
|
11-10-2014, 12:55 AM
| #5 |
| Rock Crawler Join Date: Apr 2009 Location: NE Ohio
Posts: 794
|
Nice writeup, the final product looks great. I tried this once and like you said it can get out of control very quickly!!! The thinner the better as you can always add more and its a lot easier to add vs removing all the paint and starting over. I may have to give it a shot again on the next build in line. Its going to be an old clod crew cab, I'm thinking of going more for the daily driven, expedition type look and the weathering would just kill it. -Dan |
|
| |
|
11-16-2014, 10:06 AM
| #6 |
| RCC Addict Join Date: Feb 2010 Location: a house
Posts: 1,986
|
i like to use my wifes eye liner stuff to make it look aged, comes in alot of good colors for that weathered looks and stays on well
|
|
| |
|
01-14-2015, 07:43 AM
| #7 |
| Rock Crawler Join Date: Mar 2012 Location: bel air
Posts: 577
|
great info! im going to try this on my hilux
|
|
| |
|
01-14-2015, 07:08 PM
| #8 |
| RCC Addict Join Date: Dec 2008 Location: pullin somebody else out of a mud hole
Posts: 1,759
|
maybe caleb can shoot a video of you doing the weathering on my yota .... ought to be interesting since i am going to paint the yota ......white |
|
| |
|
01-14-2015, 08:03 PM
| #9 | |
| Pebble Pounder Join Date: Sep 2012 Location: Kansas City
Posts: 148
| Quote:
| |
|
| |
|
01-14-2015, 08:09 PM
| #10 |
| Pebble Pounder Join Date: Sep 2012 Location: Kansas City
Posts: 148
|
Most recent of my rigs I used this method on. Being a D90 Expedition rig I went pretty heavy as it would be in real life. 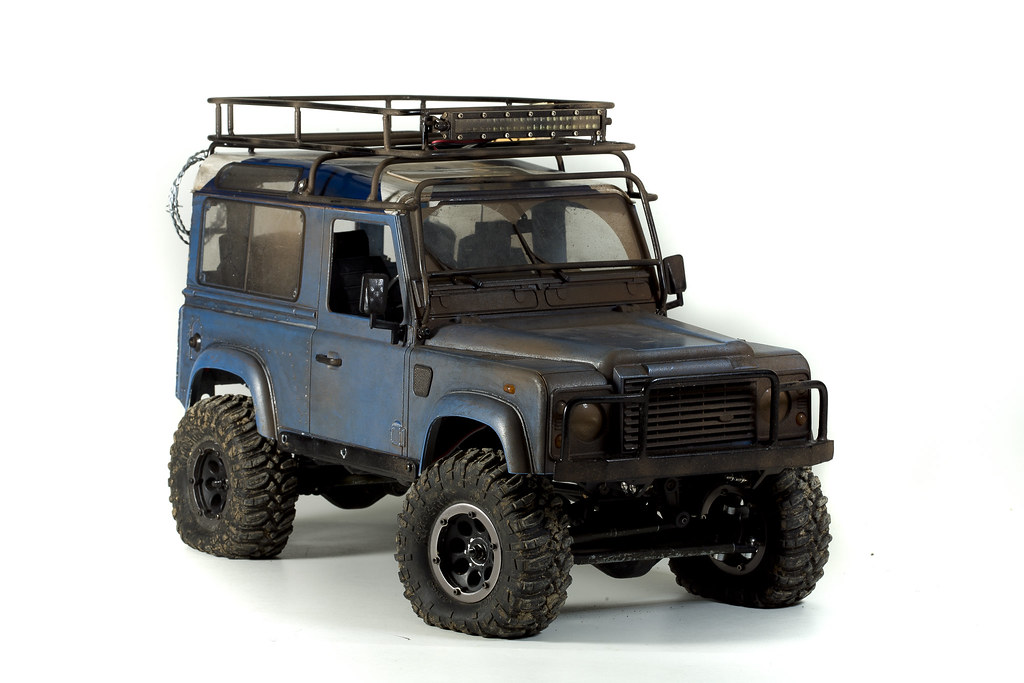 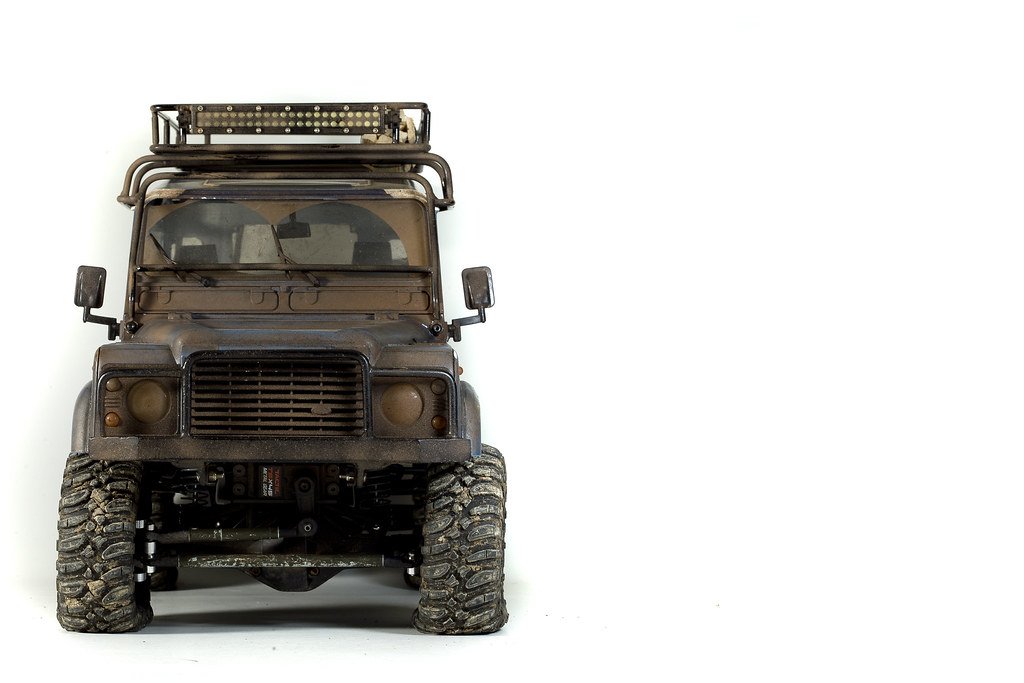 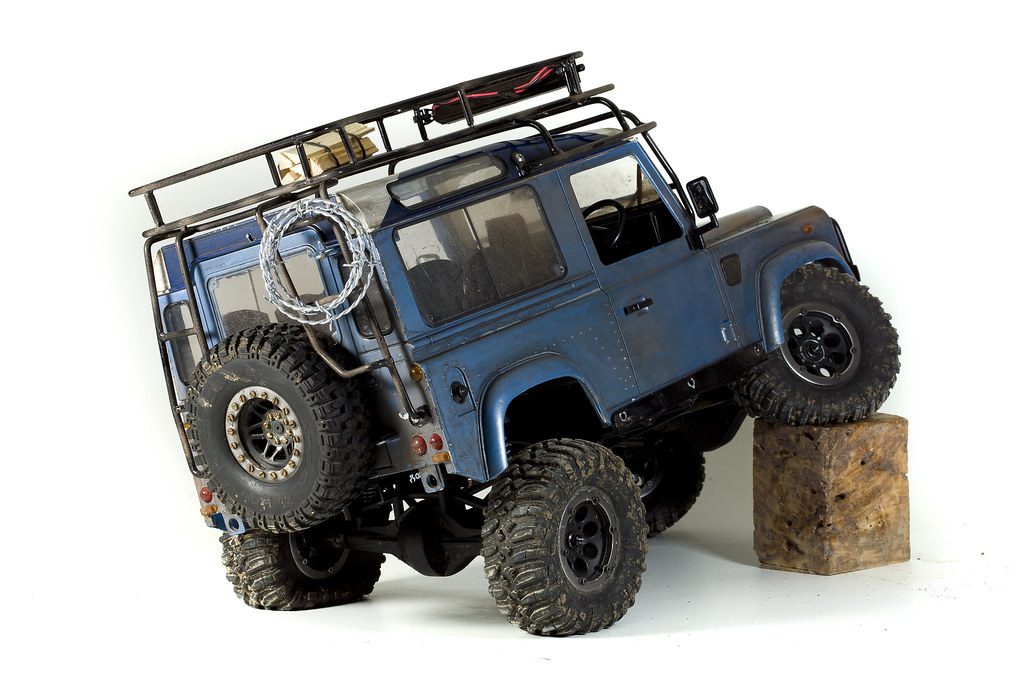 |
|
| |
|
01-14-2015, 08:18 PM
| #11 |
| Quarry Creeper Join Date: Nov 2012 Location: spanish fork
Posts: 435
|
What paint do you use in the air brush? Just the model color?
|
|
| |
|
01-14-2015, 10:08 PM
| #12 | |
| Pebble Pounder Join Date: Sep 2012 Location: Kansas City
Posts: 148
| Quote:
| |
|
| |
|
01-14-2015, 10:25 PM
| #13 | |
| Quarry Creeper Join Date: Nov 2012 Location: spanish fork
Posts: 435
| Quote:
| |
|
| |
|
01-15-2015, 03:59 AM
| #14 |
| Sinking with the ship   Join Date: Mar 2005 Location: El Capitan...sole survivor and sinking fast
Posts: 8,864
|
Quality thread, stickied for all to see
|
|
| |
|
01-15-2015, 06:15 AM
| #15 |
| Rock Stacker Join Date: Jan 2014 Location: Duluth, MN
Posts: 91
|
Question, has anyone attempted this with wheels? Or have any thoughts on it? May try my RC42D TF2 wheels like this...
|
|
| |
|
01-15-2015, 10:08 AM
| #16 |
| I wanna be Dave Join Date: Mar 2008 Location: Wayne county. PA
Posts: 2,507
|
it would be the same I think....
|
|
| |
|
01-15-2015, 11:34 AM
| #17 | |
| Pebble Pounder Join Date: Sep 2012 Location: Kansas City
Posts: 148
| Quote:
| |
|
| |
|
01-18-2015, 05:52 PM
| #18 |
| Newbie Join Date: Jan 2015 Location: Maryland
Posts: 3
|
Great thread this is definitely on the list of things to do on my current build
|
|
| |
|
02-20-2015, 08:15 PM
| #19 |
| RCC Addict Join Date: Mar 2013 Location: Commerce Township
Posts: 1,594
|
Great write up, very well done. Will give it a try on my next build.
|
|
| |
|
02-22-2015, 08:51 PM
| #20 |
| Newbie Join Date: Feb 2015 Location: Plymouth
Posts: 5
|
Very well written, makes even an idiot like me be able to understand. When I am ready to make my scx10 look real scale then I will refer back to this article for sure.
|
|
| |
|
 3 Stages of Hardbody Paint Weathering - Similar Threads
 | ||||
| Thread | Thread Starter | Forum | Replies | Last Post |
| Hardbody paint removal questions. | Dualdigger | Paint and Body | 16 | 11-08-2014 08:40 AM |
| best way to strip paint on a hardbody? | JS412 | Paint and Body | 1 | 05-03-2011 11:49 PM |
| Hardbody paint removal | ser3100 | Paint and Body | 3 | 07-24-2010 08:21 AM |
| jugg hardbody paint, what kind? | rcracer | General Crawlers | 10 | 07-29-2005 02:27 PM |
| |


 Linear Mode


