| |
 08-18-2017, 09:08 PM
| #1 |
| I wanna be Dave Join Date: Jul 2005 Location: North Idaho
Posts: 3,648
|
I am trying the TF2 again, from everything I have read RC4WD has corrected a lot of the problems the older TF2s had out of the box. I have just completed doing the normal stuff, opening up the axles, transfer case and transmission, checking for grease and putting Loctite on all of the bolts when they went back in. One must-do item from the older kits was to reverse the shims on the axle inputs, while they were apart I noticed that there was a shim on the outside, and no shim on the inside, is this the way they are built now, or am I missing shims? So here is where I am at... 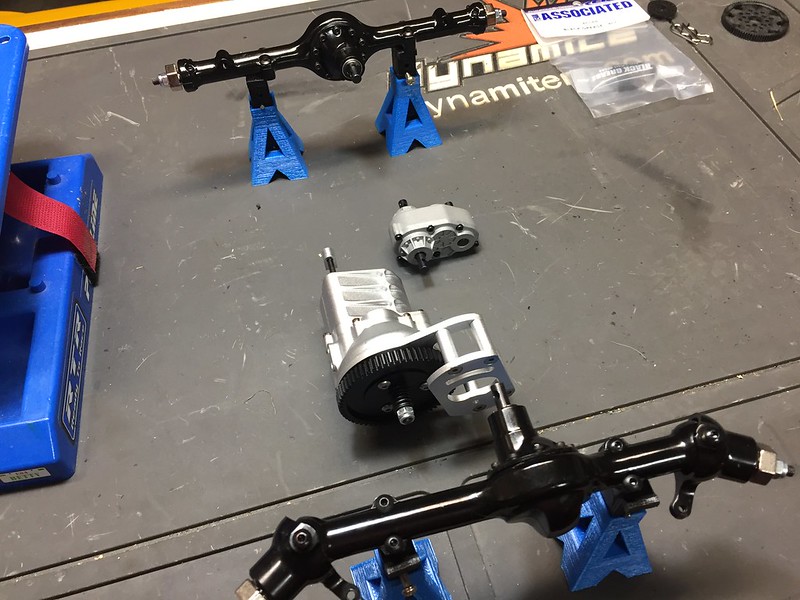 Untitled by Scott O, on Flickr Untitled by Scott O, on FlickrThis weekend I'll start putting the chassis together, and hopefully start working on the body as well. I have to relearn how to prep/paint a hard body, along with what paints to use, so I don't think I'll have the body in the booth this weekend. After being chastised for not doing it, I have read through the tips/tricks pages, but any additional advise is more than welcomed. |

|  |
| Sponsored Links | |
| | |
|
08-20-2017, 01:35 AM
| #2 |
| I wanna be Dave Join Date: Jul 2005 Location: North Idaho
Posts: 3,648
|
Progress continues... The chassis is pretty much done, and have the body, wheels and electronics... 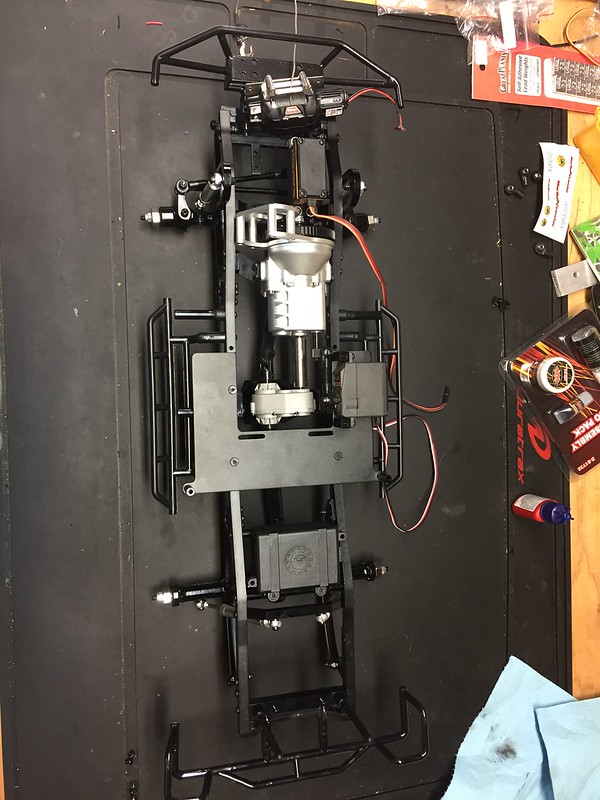 TF2 by GreatScott, on Flickr TF2 by GreatScott, on FlickrI am happy to see the the parts fit better than my last TF2 kit, but there are still some issues. The nylock nuts for the bottom of the axles still do not seat all the way down to the axle without ripping into the axle housing. 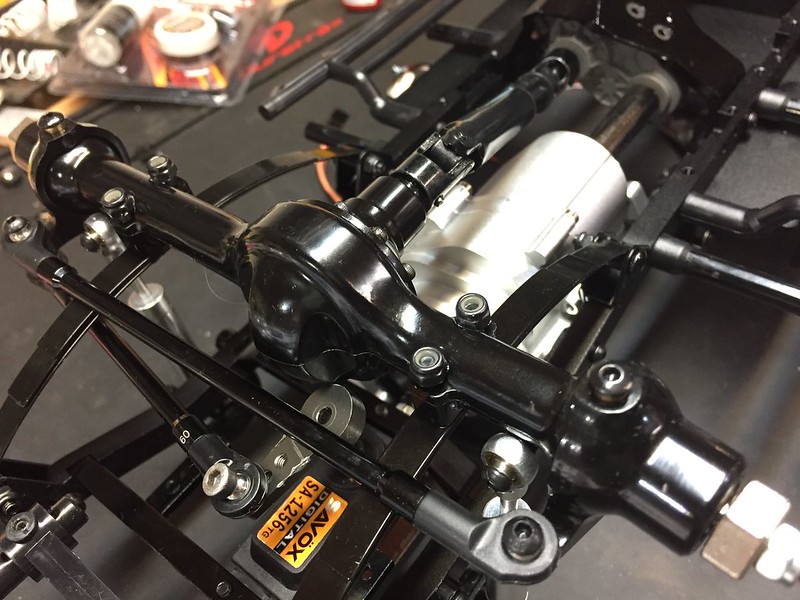 TF2 by GreatScott, on Flickr TF2 by GreatScott, on FlickrThe kit came with drive shaft rings, but installation was not shown in the manual, I am assuming the go on the plastic side of the drive shafts. One major disappoint was in the Marlin Crawler steel bumper I bought with the kit, the RC4WD 9.5 CTI winch does not fit properly, the holes are about 1mm from lining up properly (the fair lead is hitting the cross bar). I really don't want to drill into that nice powder coating to make them work, but I may have no choice...  TF2 by GreatScott, on Flickr TF2 by GreatScott, on FlickrI am still trying to decide what color to paint it. I have a can of grey primer, and a couple cans of flat black for the bed. Also, I bought the lexan fron fenders, need to figure out how to paint those up, and on which side of them I paint... As far as the wheels go, I am thinking about adding 3oz per tire in the front, and adjusting from there. I am going to run this with my DX5R, through a 4ch RX. I haven't decided what ESC to run yet, might go with the Dynamite ESC I have on the shelf, and a 35T motor. Last edited by Greatscott; 08-20-2017 at 01:39 AM. |
|
| |
|
08-21-2017, 02:41 PM
| #3 |
| Quarry Creeper Join Date: Aug 2016 Location: The Netherlands
Posts: 334
|
If you're still looking for an ESC, look into the Hobbywing WP1080 if you're going with brushed. They're great, especially for the price. With lexan, just be aware it'll look REALLY shiny when you paint on the inside, so it really depends on the look you're after. Make sure you use lexan specific paint as well(like Tamiya PS). It needs to be flexible, or else it'll crack really easily. |
|
| |
|
08-24-2017, 07:37 PM
| #4 |
| I wanna be Dave Join Date: Jul 2005 Location: North Idaho
Posts: 3,648
|
This build is going A LOT slower that I want it to, but there are three projects on the work bench including this one, and working a lot more OT than I really care to. I do have the wheels put together. I have had several set of these and found a trick for putting them together. I use to hex wrenches to line up the hub and inner/outer rims. Once everything is lined up correctly, I use a 3mm screw to bring everything together to the point were I can easily get the nuts started on those little 2mm bolts. After four of the 2mm bolts are started are started I remove the 3mm screw and wrenches, start the other two bolts and nuts, then torque everything down is a start pattern. 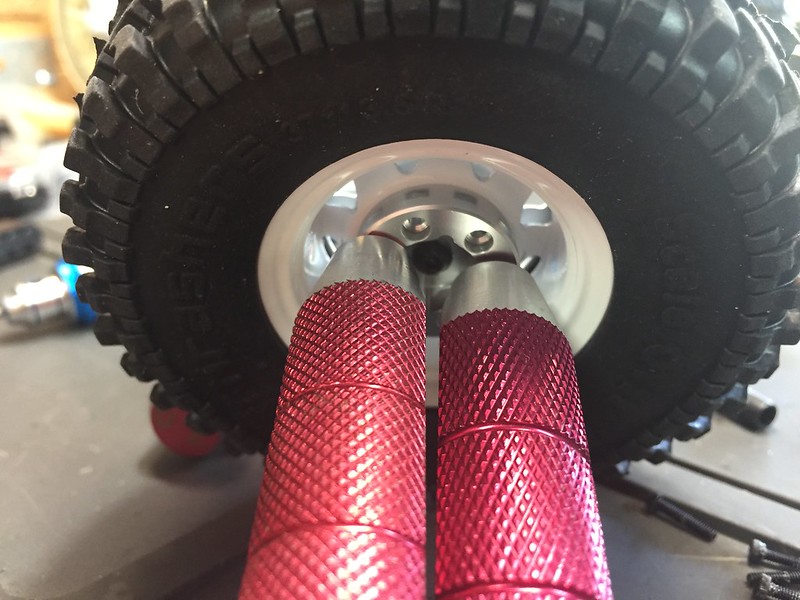 Untitled by Scott O, on Flickr Untitled by Scott O, on Flickr Untitled by Scott O, on Flickr Untitled by Scott O, on Flickr
|
|
| |
|
08-25-2017, 03:17 PM
| #5 |
| Pebble Pounder Join Date: Jan 2008 Location: high point
Posts: 177
|
On your axle nut deal there...... put a cap head screw through the axle bottom first,and nuts on the spring side.....nothing hanging from axle......not sure why they don't tell you to do this straight up......only seems logical to me......
|
|
| |
|
08-25-2017, 07:49 PM
| #6 |
| Quarry Creeper Join Date: Sep 2013 Location: Hicktown
Posts: 299
|
Nice trick on the wheel installation. I just got one a week ago and my build has also been going a little slower than id like. I pulled the axles apart after checking the pinion slop. They were pretty good out of the box for me so I didnt have to address the shims but I did pack it with marine grease while i had the halves separated It looks like in your pic you have the steering servo with the output over top of the axle. I havent driven mine yet like this but I have it flipped 180* so the output on the servo is in front of the axle. This makes for a nicer drag link angle |
|
| |
|
08-25-2017, 07:51 PM
| #7 | |
| Quarry Creeper Join Date: Sep 2013 Location: Hicktown
Posts: 299
| Quote:
| |
|
| |
|
08-25-2017, 09:34 PM
| #8 | |
| I wanna be Dave Join Date: Jul 2005 Location: North Idaho
Posts: 3,648
| Quote:
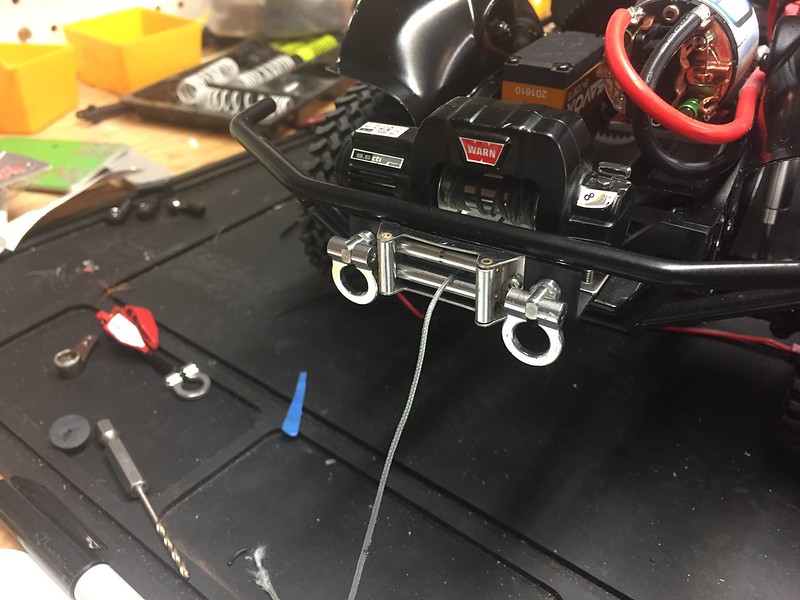
I fixed my issue with the winch not fitting the bumper by making an aluminum bracket for the fair lead to mount to. The winch not fitting right is annoying, but my 100% fault for not reading the fine print when I bought it. 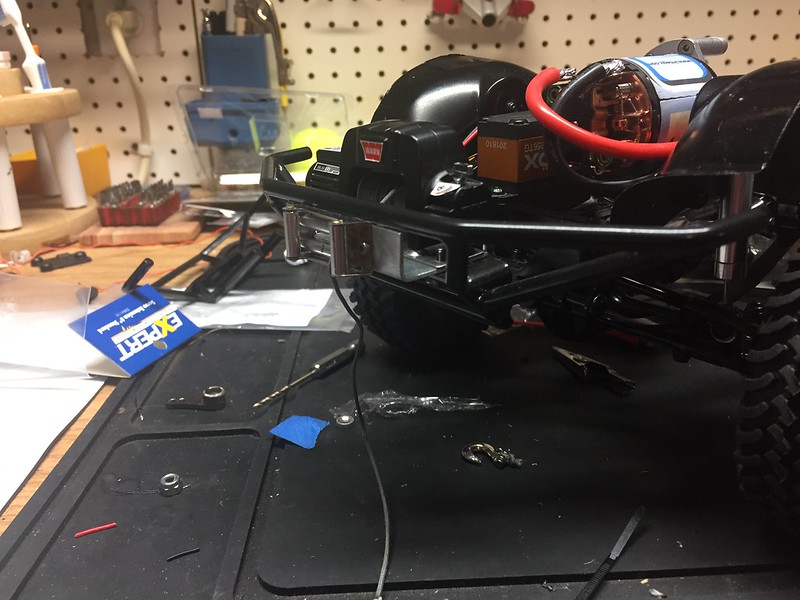 TF2 by Scott O, on Flickr TF2 by Scott O, on Flickr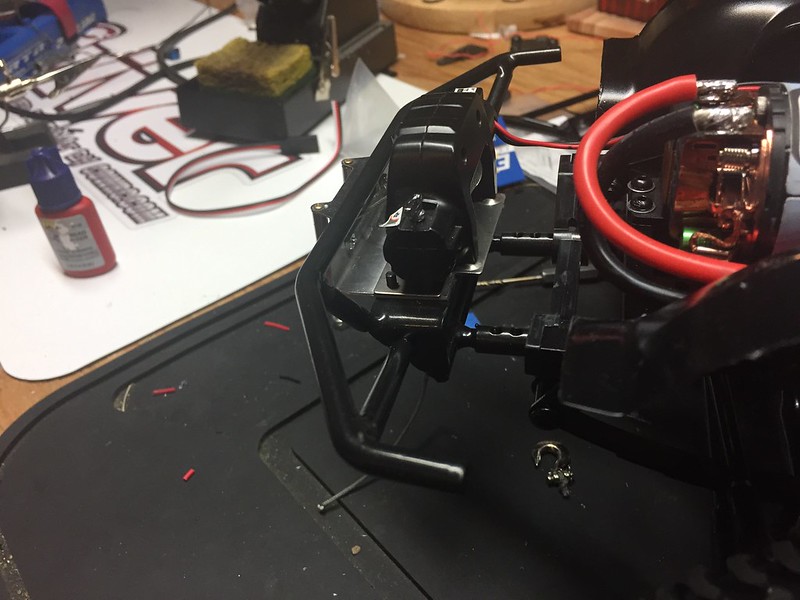 TF2 by Scott O, on Flickr TF2 by Scott O, on Flickr
Last edited by Greatscott; 09-29-2017 at 01:06 PM. | |
|
| |
|
08-27-2017, 05:52 AM
| #10 |
| Quarry Creeper Join Date: Nov 2008 Location: Cincinnati
Posts: 383
|
[QUOTE=Greatscott;5742113] I fixed my issue with the winch not fitting the bumper by making an aluminum bracket for the fair lead to mount to. The winch not fitting right is annoying, but 100% fault for not reading the fine print when I bought it. You can always get rid of the big roller fairlead that comes with the winch and get something a little slimmer like the one in the link below. RC4WD Aluminum 1/10 Winch Line Fairlead I've used the same bumper and same winch and this works better. Just a suggestion. |
|
| |
|
08-27-2017, 01:46 PM
| #11 |
| Quarry Creeper Join Date: Sep 2013 Location: Hicktown
Posts: 299
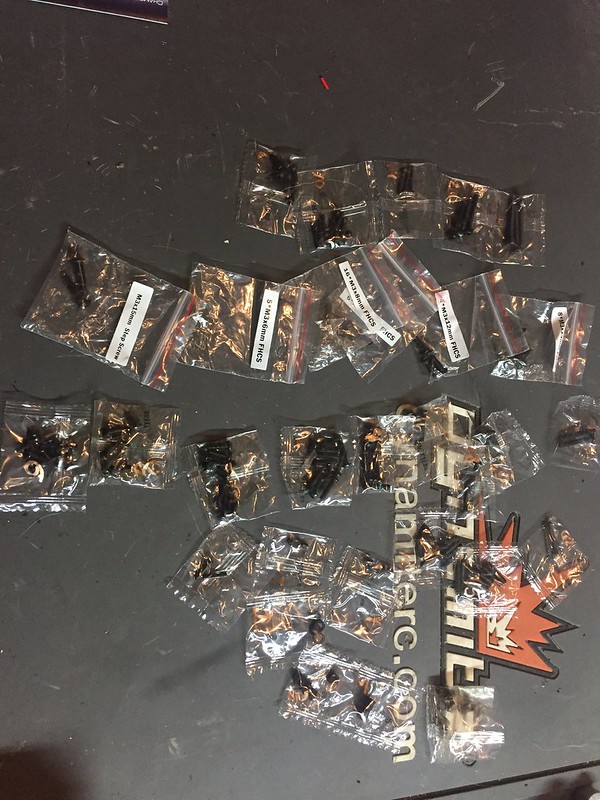
| Im wondering if the "scrwes bag" is the same for ALL of the RC4WD kits. So I could see the 6x6 using up quite a bit more, the Gelende II using maybe a little less but different packs opened etc etc
|
|
| |
|
08-29-2017, 09:33 PM
| #12 | |
| I wanna be Dave Join Date: Jul 2005 Location: North Idaho
Posts: 3,648
|
[QUOTE=ebbet;5742465] Quote:
With that... Work continues at a snail's pace, I work a good amount of OT so I can buy my toys, but never have time to play with them because of the good amount of OT I work... First-world problems... Having done a couple of these Mojave bodies, and with the excellent mold the bed was made in, I do not understand why the back window can't already be installed; making so that the only piece that has to be glued on is the part under the back window, if you want it... I have picked up a trick or two for gluing the back window. First I use a couple of spare links and a couple of screws to pull the body into position so that the back window can be glued with as few gaps as possible (106mm & 32mm). I use a clothes pin and two alligator clips to hold the window in place while gluing. The clothes pin keeps the top of the window snug against the cab when gluing. 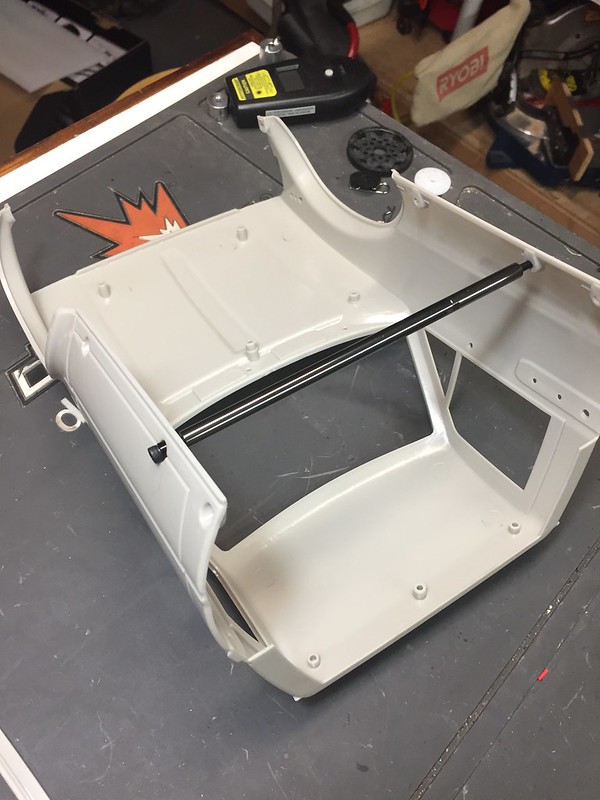 TF2 by Scott O, on Flickr TF2 by Scott O, on Flickr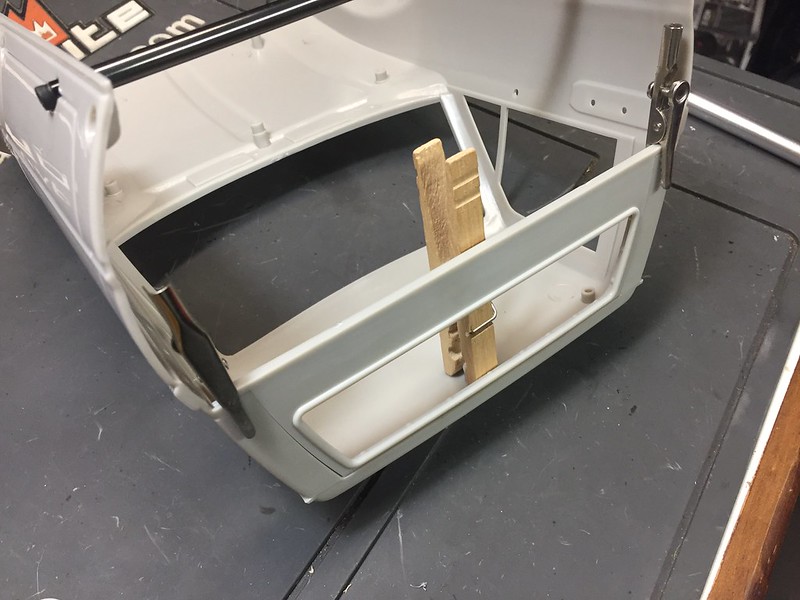 TF2 by Scott O, on Flickr TF2 by Scott O, on Flickr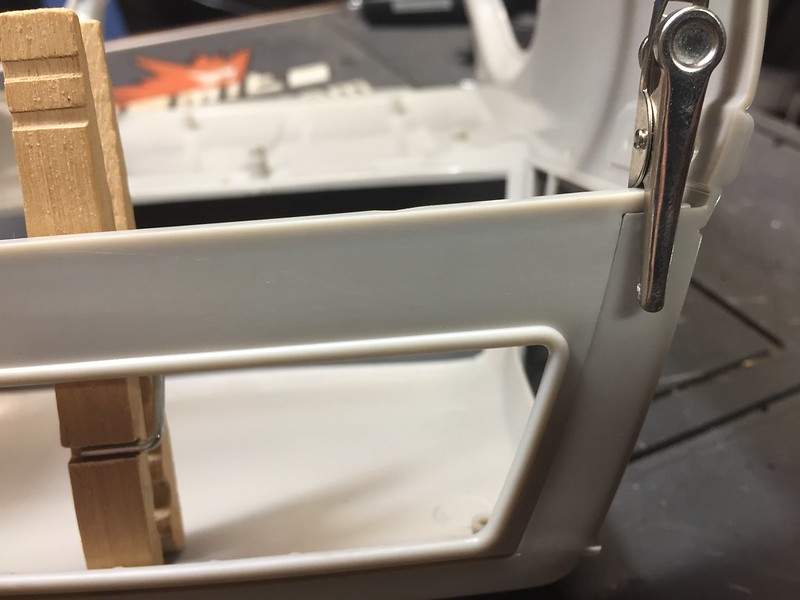 TF2 by Scott O, on Flickr TF2 by Scott O, on Flickr
| |
|
| |
|
08-29-2017, 10:16 PM
| #13 |
| Quarry Creeper Join Date: Sep 2013 Location: Hicktown
Posts: 299
|
Good idea...im a little late to use it though... I understand your slight frustration. It was kind of a bear to get the rear window lined up and glued in. Even with CA glue Body lines look good though! |
|
| |
|
09-04-2017, 12:31 AM
| #15 |
| I wanna be Dave Join Date: Jul 2005 Location: North Idaho
Posts: 3,648
|
Progress continues... One thing that had to change was the RX box, the stock box is just too small, mashes the heck out of wires and is not waterproof. My RX box of choice is the Traxxas 4x4 Slash LCG RX box, its nice and roomy, so I made a mount for it. Not to fear though, the stock box has been pressed into service for the winch controller and excess wiring. Here is the base of the RX box mounted up, along with the moved stock box... 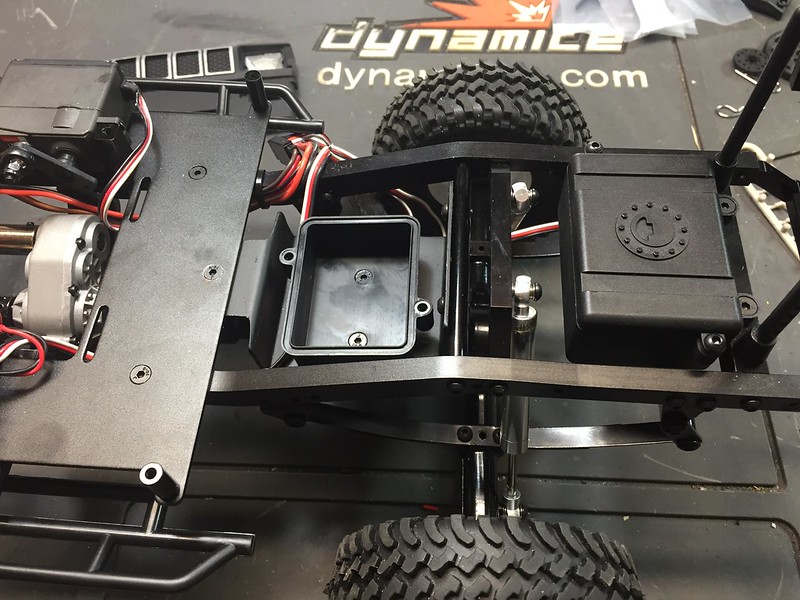 TF2 by Scott O, on Flickr TF2 by Scott O, on FlickrThe bottom view... 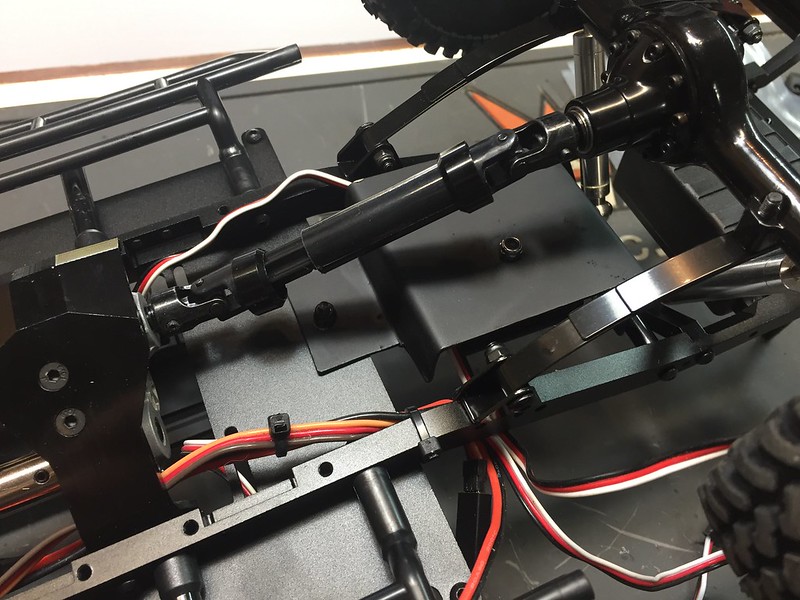 TF2 by Scott O, on Flickr TF2 by Scott O, on FlickrA 4-ch RX for my DX5R. I put a little bit of silicone sealant around the count sunk screws for a little added water protection. Once the silicone was set, I wiped the inside of the box and RX down with alcohol before attaching the two with double-sided taped. 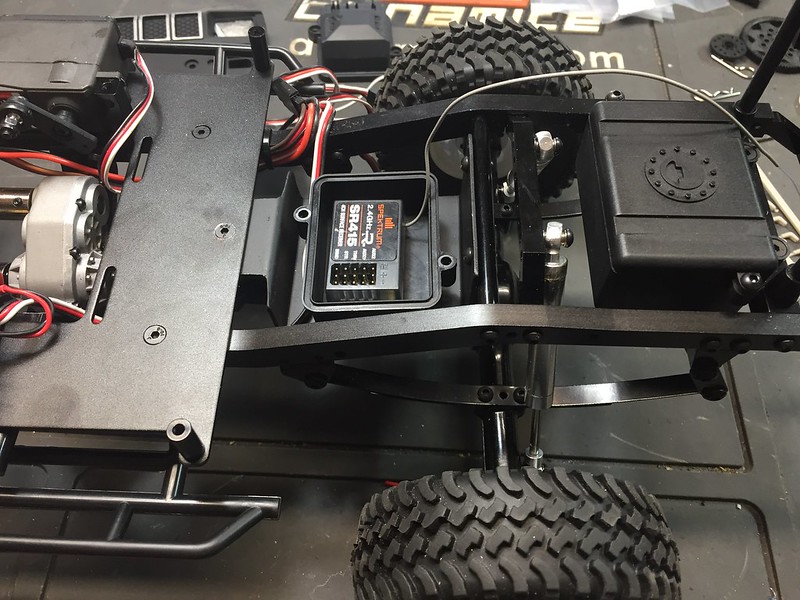 TF2 by Scott O, on Flickr TF2 by Scott O, on FlickrA tip to make your wiring easier, I mark my connectors with silver paint pen, makes so I don't have to worry about what goes where: S = Steering E = ESC W = Winch G = Gear/2-speed 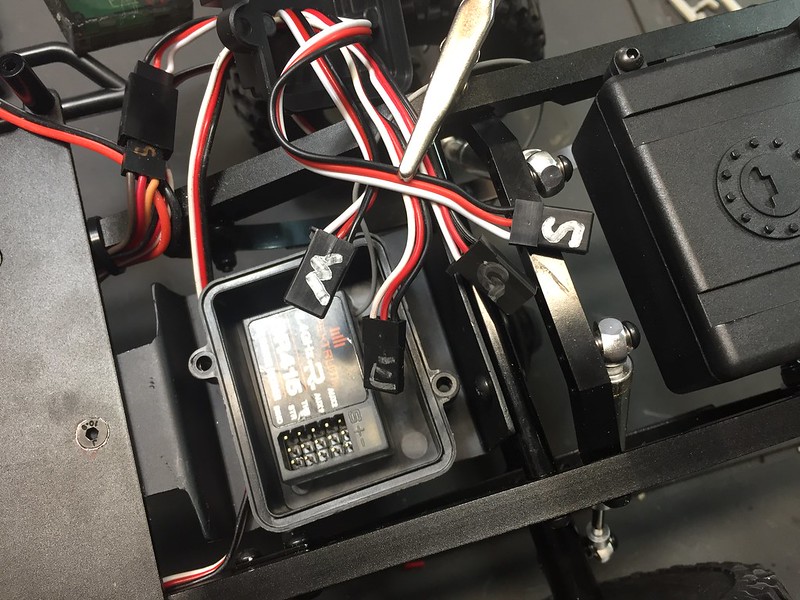 TF2 by Scott O, on Flickr TF2 by Scott O, on FlickrI had to do a little modification of the RC4WD winch controller, with both plugs plugged in it will not fit in the stock RX box. So, I pulled the whole mess apart, put two coats of conformal coating on the controller circuit board, and routed both plugs outside of the box before putting it back together.  TF2 by Scott O, on Flickr TF2 by Scott O, on FlickrIt is a little messy with everything buttoned up, but its not bad. The female plug hanging out of the stock RX box is for the lights. 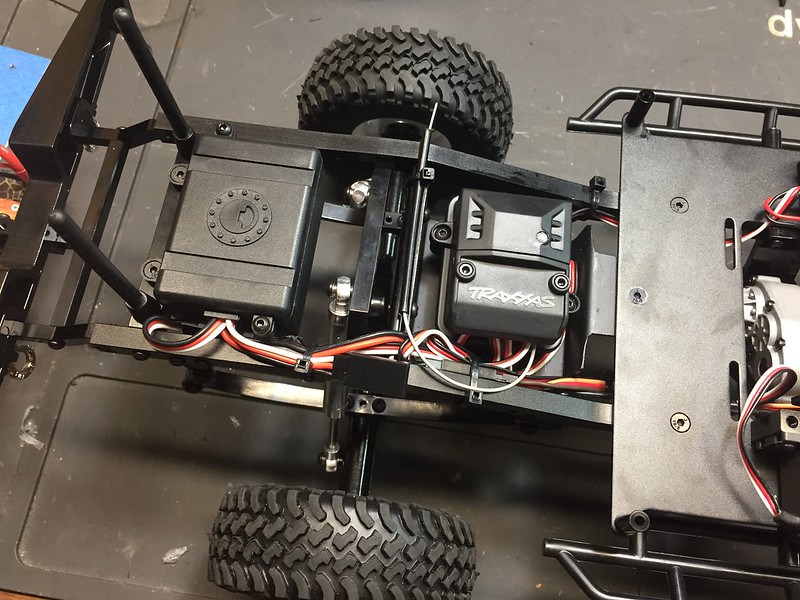 TF2 by Scott O, on Flickr TF2 by Scott O, on Flickr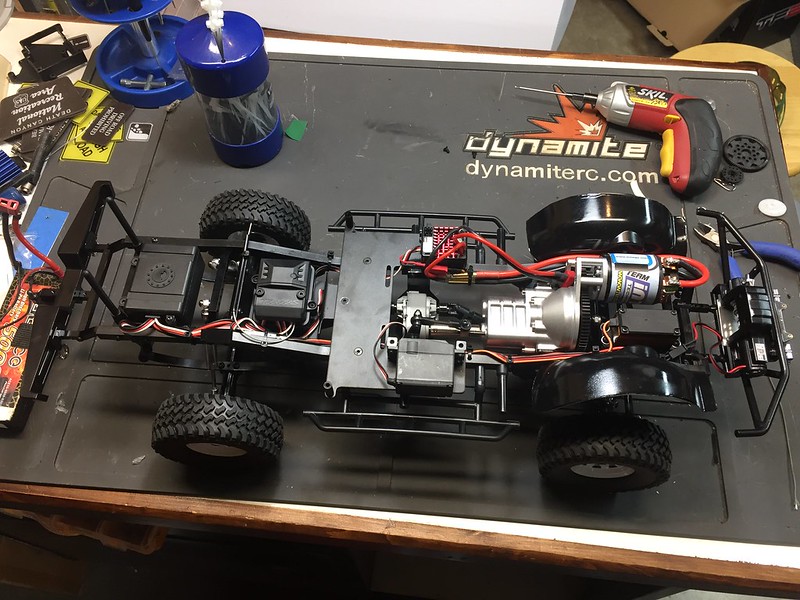 TF2 by Scott O, on Flickr TF2 by Scott O, on FlickrI am most of the way through putting the body together after it spent almost two days in the paint booth. Here I am putting a couple of lacquor coats on before I start assembling it. 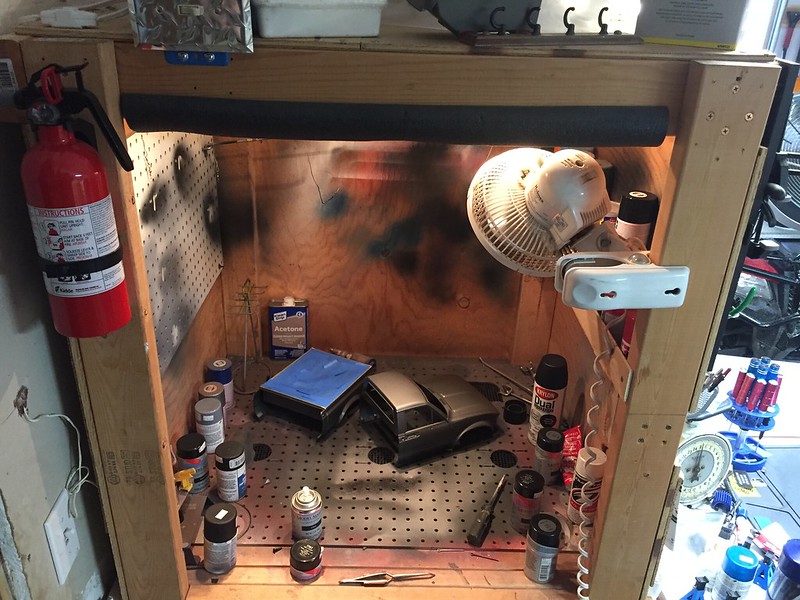 TF2 by Scott O, on Flickr TF2 by Scott O, on FlickrWith any luck by tomorrow evening I'll have the whole mess put together and can start tuning. I do know I need to take at least one leaf out of the suspension, its just too stiff. |
|
| |
|
09-04-2017, 02:23 AM
| #16 |
| Quarry Creeper Join Date: Aug 2016 Location: The Netherlands
Posts: 334
|
Always enjoy a clean wiring job. Great work.
|
|
| |
|
09-04-2017, 11:16 AM
| #17 |
| Newbie Join Date: Jun 2016 Location: Canada
Posts: 29
|
Looks like it is coming along nicely I have a TF2 to build up that has never been run, no body no stock wheels or tires but has a billet front axle. He claimed they lasted him longer. Anyways for the inner fenders use some automotive rocker guard paint, its rubberized and has the proper look. |
|
| |
|
09-04-2017, 11:36 AM
| #18 | |
| I wanna be Dave Join Date: Jul 2005 Location: North Idaho
Posts: 3,648
| Quote:
| |
|
| |
|
09-04-2017, 06:41 PM
| #19 |
| I wanna be Dave Join Date: Jul 2005 Location: North Idaho
Posts: 3,648
|
I am at the point where my annoyance and frustration has kicked into high gear. I see a lot of improvements from my last TF2 I built to this one, but there are a lot of things that should have been corrected, especially for a kit that costs $400. The windshield and dash still don't fit properly, the dash still ends up pointing down because the windshield is too long. Minor point that I expected, but still something that isn't right... Now, for what is REALLY bugging me, I have the body together and it isn't going together correctly. With the body all of the way on the body mount screw holes are WAY off, not a little, but at least 1/4" the body is too far forward on the chassis. Moving the body back so that it lines up with the screw holes requires the front to be above the bumper mount, which raises the body too high to line up with the body mounts; plus, with the body mount holes lined up front-to-back with the body the bed is mashed up against the back bumper. I remember this was an issue with the last one and I had to cut the lower portion of the grill piece away to make it fit with the body post holes, which does not seem like I should have to do. So, am I missing something here? Or, are we really expected to hack a $400 rig to get the body to fit properly? 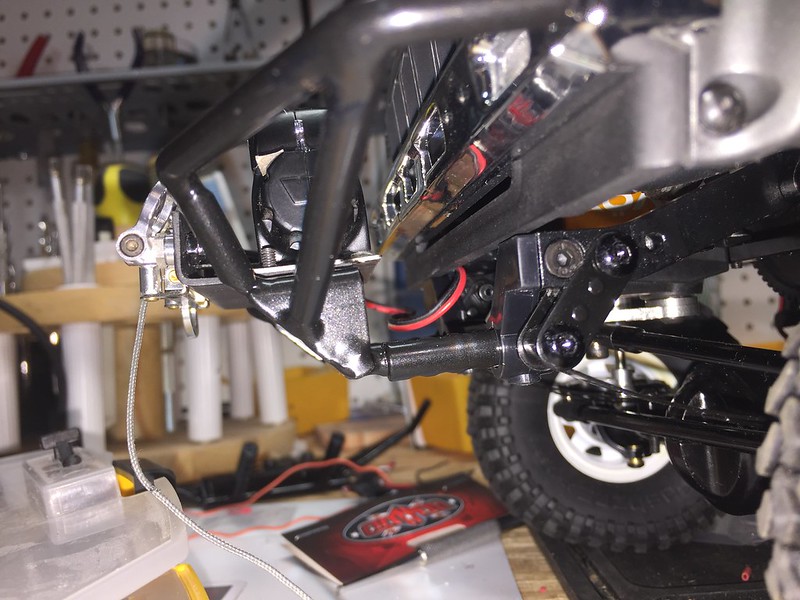 TF2 by Scott O, on Flickr TF2 by Scott O, on Flickr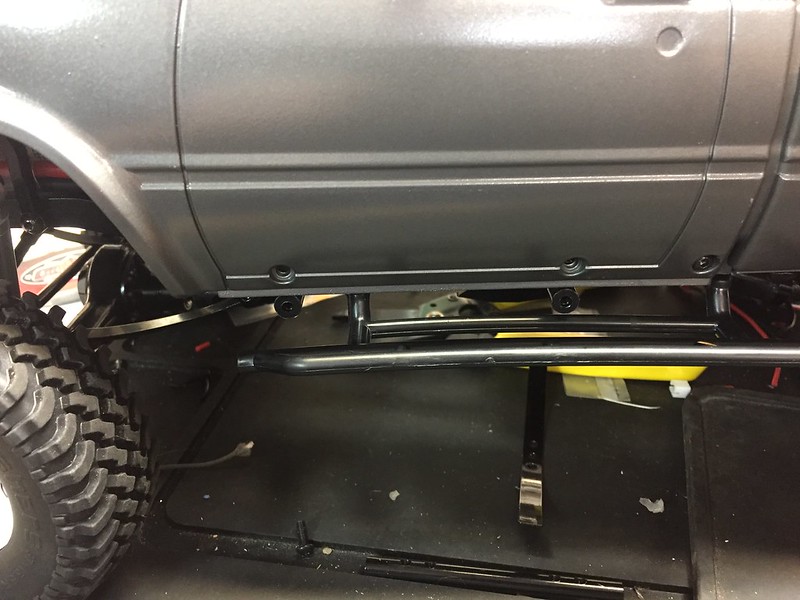 TF2 by Scott O, on Flickr TF2 by Scott O, on Flickr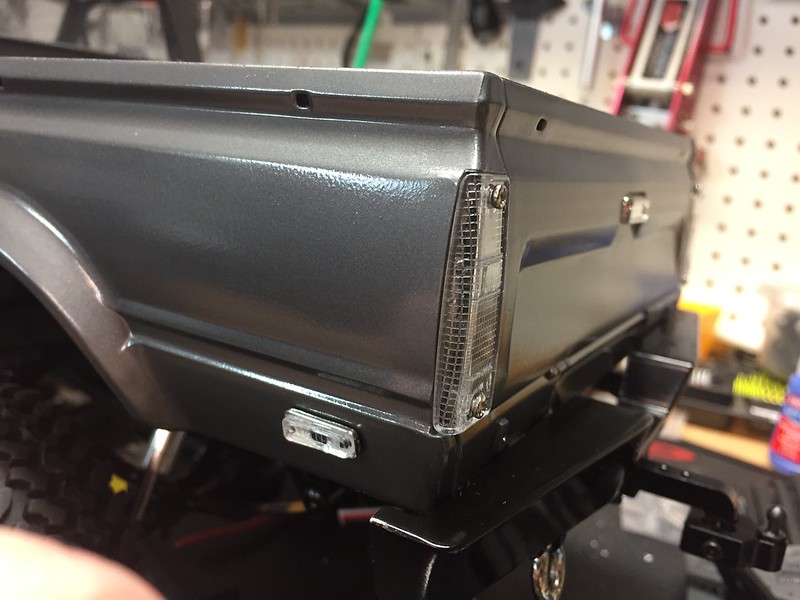 TF2 by Scott O, on Flickr TF2 by Scott O, on FlickrThis is a metal RC4WD back bumper that is supposed to be a direct fit. To add to many annoyance, I pulled the from wheels wells off to repaint and have found the front screw holes completely ripped apart. I know these things are only $15, but given that we have to paint and cut them ourselves, it seem like they could use a thicker plastic. |
|
| |
|
09-04-2017, 07:36 PM
| #20 |
| RCC Addict Join Date: May 2015 Location: Price Twp.
Posts: 1,291
|
Sorry for your annoyance, but i feel your pain as i am just finishing up a beast kit. I had several missing parts, a cracked shock, warped body panel an a few threads not cut right. I will never purchase another rc4wd product, thats how bad it went. |
|
| |
 |
 GreatScott's TF2 Reboot - Similar Threads
 | ||||
| Thread | Thread Starter | Forum | Replies | Last Post |
| Dan's Hilux reboot/2.0 | Sugarfree85 | RC4WD Trail Finder 2 | 0 | 01-21-2017 12:31 PM |
| Greatscott's M2 XR-10 | Greatscott | Axial XR10 | 94 | 01-27-2015 11:55 AM |
| reboot of my black dog and the start of a micro rig | slim_chance | General Scale Talk | 0 | 11-25-2012 12:27 AM |
| Greatscott's SWX (Finished at last!!!) | Greatscott | Axial AX-10 Scorpion | 7 | 03-08-2010 11:02 PM |
| |


 Linear Mode


