| |
| |||||||
 |
| | LinkBack | Thread Tools | Display Modes |
 04-19-2019, 01:02 PM
| #21 | |
| RCC Addict Join Date: Nov 2017 Location: Austin Texas
Posts: 1,615
| Quote:
| |

|  |
| Sponsored Links | |
| | |
|
04-29-2019, 09:53 AM
| #22 | |
| I wanna be Dave Join Date: Dec 2006 Location: Where the sheep run scared.
Posts: 3,008
| Quote:
 | |
|
| |
|
04-30-2019, 12:11 AM
| #23 | |
| RCC Addict Join Date: Nov 2017 Location: Austin Texas
Posts: 1,615
| Quote:
| |
|
| |
|
04-30-2019, 06:24 AM
| #24 |
| Go Buckeyes!   Join Date: Jun 2017 Location: Mid-Ohio
Posts: 4,134
|
Hey Drifter, your de-marlinized Marlin is looking great! Nice looking wheels. Looking forward to seeing pics of the badges.
|
|
| |
|
04-30-2019, 11:58 AM
| #25 |
| RCC Addict Join Date: Nov 2017 Location: Austin Texas
Posts: 1,615
|
Thanks Brian. They were a PITA to do... had to paint em black then sand down for the raised metal to show. Then had to apply the adhesive and make sure to get everything lined up, centered, level, etc before pressing in place. The older I get the harder these tiny detailed tasks are becoming lol.
|
|
| |
|
05-14-2019, 02:58 AM
| #26 |
| RCC Addict Join Date: Nov 2017 Location: Austin Texas
Posts: 1,615
|
Time for an update! So the rear taillights have really been bugging me... more specifically the phillips-head screws. I think they're an eye-sore... so much so that I had to take action. After a lot of head-scratching I decided that I either needed to a) not use any hardware at all and just glue the lenses in or b) use more scale/ real looking hardware. Problem with gluing was that I wouldn't be able to remove the lenses and there would be two visible holes in each lens. So I went ahead and used some small wheel zinc screws ( 2x6mm iirc). It's not ideal but imo it's a lot better looking than the silver phillips-head screws. I'm happy with the way it looks for now despite that it's not truly scale. At the same time I wanted to hide the holes that you can see behind the lenses. These are the holes that would be used if adding full lighting. Since I've already got the red lights in the bottom holes and didn't feel the need to wire in any additional orange or clear lights for the time being, I opted to use some orange and clear faux plastic gemstones from the walmart craft dept. These have a chrome backing so they shimmer really well. Just pressed 'em into place and put the lenses back on with the new hardware. Much better looking now imo. Before:  After: 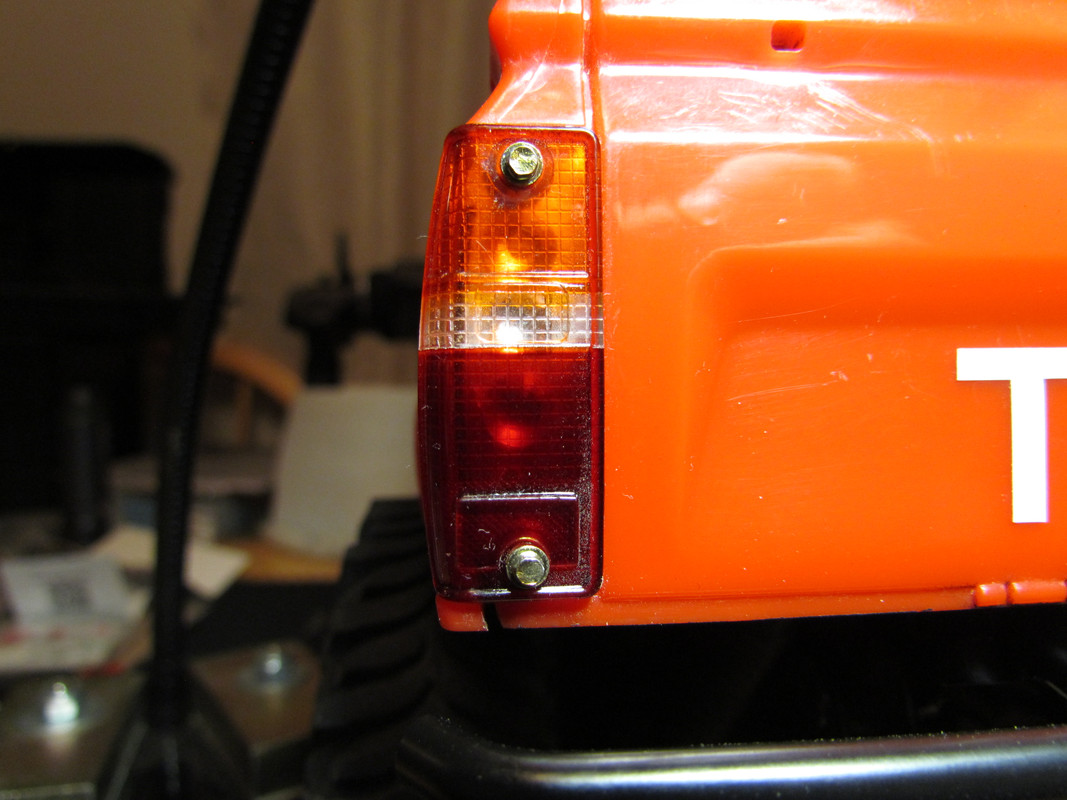 This pic ^^^ shows the lens installed with the new "lights" and screws. The pic below shows the fake lights that cover the holes: 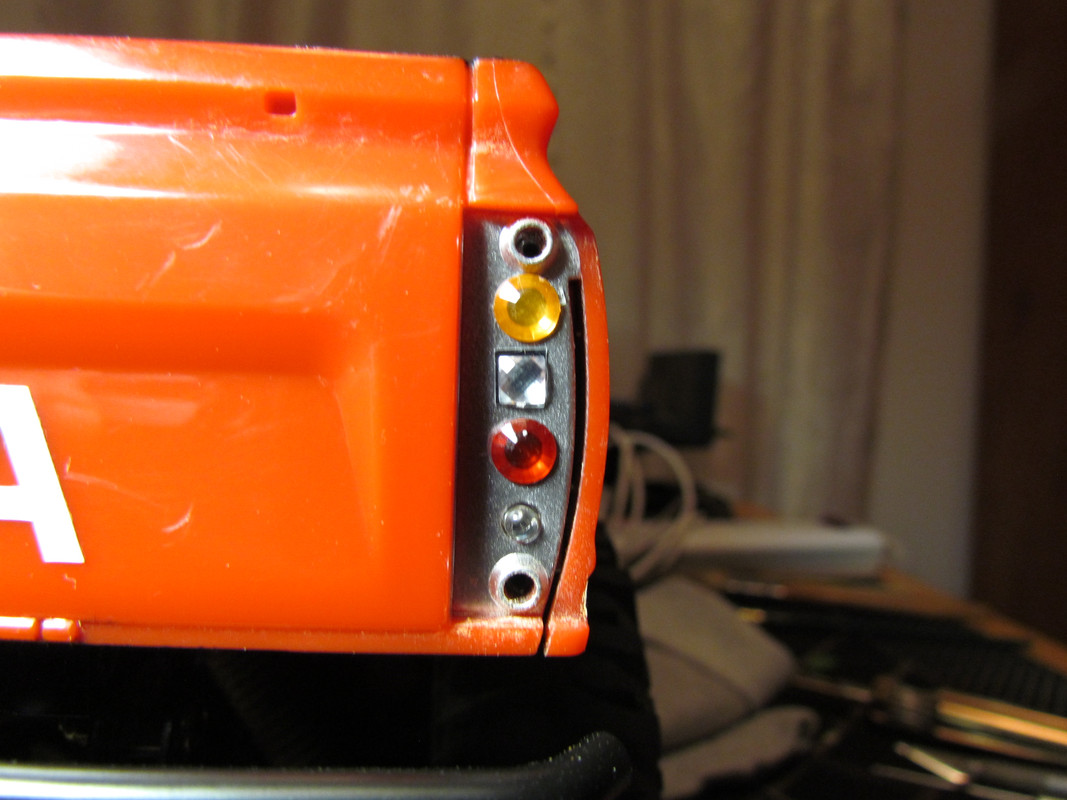 Next up were the badges. Talk about a delicate project! Anyway... pretty self-explanatory. I painted 'em black then sanded 'em with fine grit. On the Toyota logo front grill badge I actually used a razor blade to remove the black paint from the raised lettering. This was much quicker than sanding and produced great results. I used Gorilla Spray glue ( clear) for the backing. It holds very well with no excess around the edges. 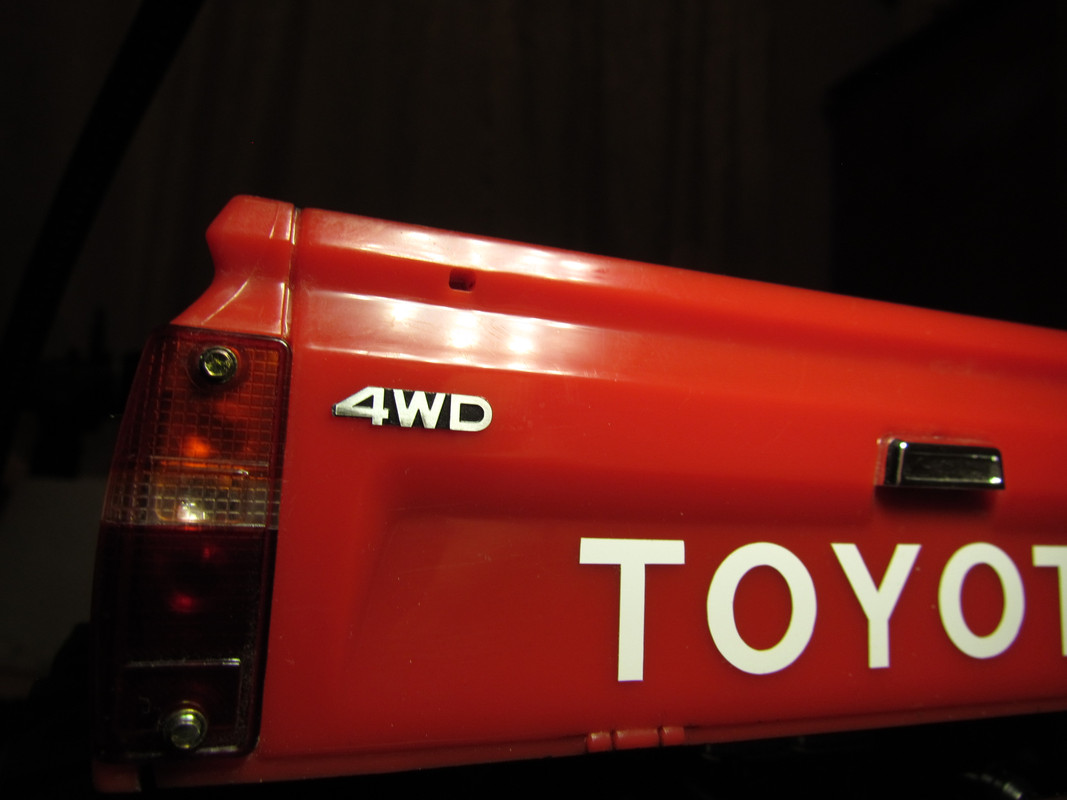  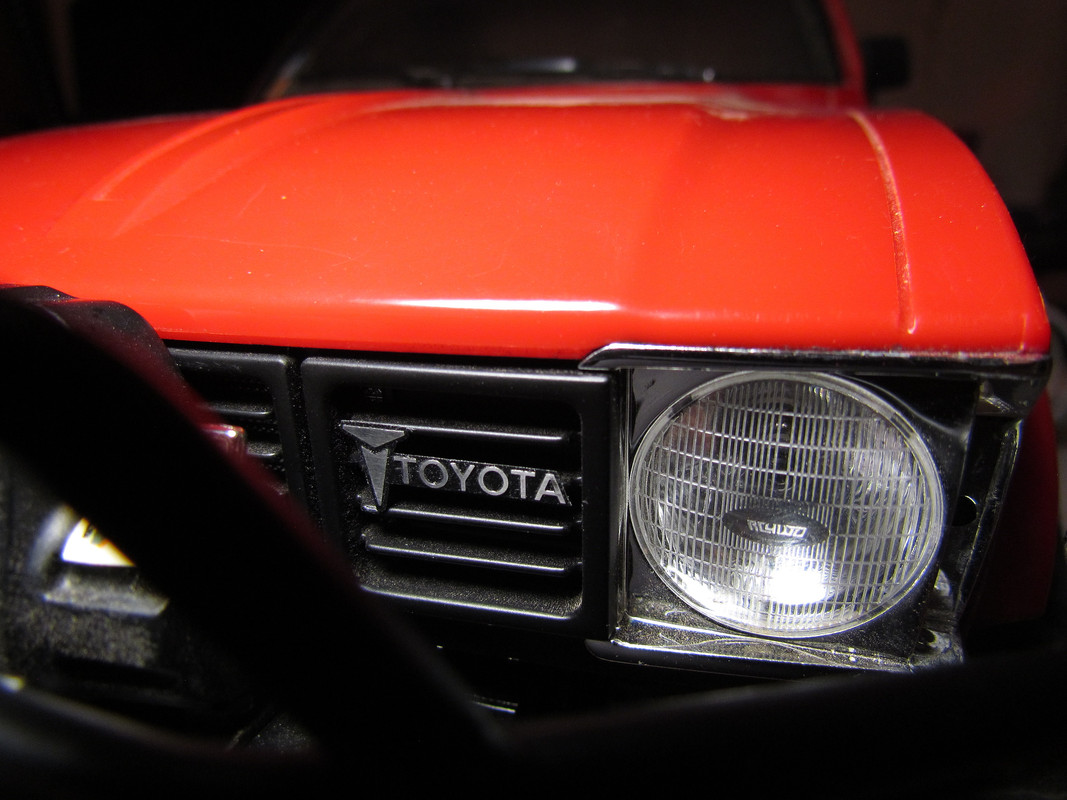 I also had an issue with my particular Marlin Crawler with a gap around the side and front windows at the a-pillars as well as a gap between the front windshield and dash. I remedied that by attaching the "glass" to the dash and drilling new mounting holes in both the dash and glass. It's hard to explain so maybe a pic will help. Anyway... now everything fits nice and snug with no more gaps. I think the issue is that the three pieces ( body/ window insert piece/ dashboard) just don't fit together quite perfectly. Maybe I just got unlucky with mine... dunno if they're all "off" like mine was but it's fixed now.  Hey... Why not add a dashboard penguin and license plate while I'm at it!? 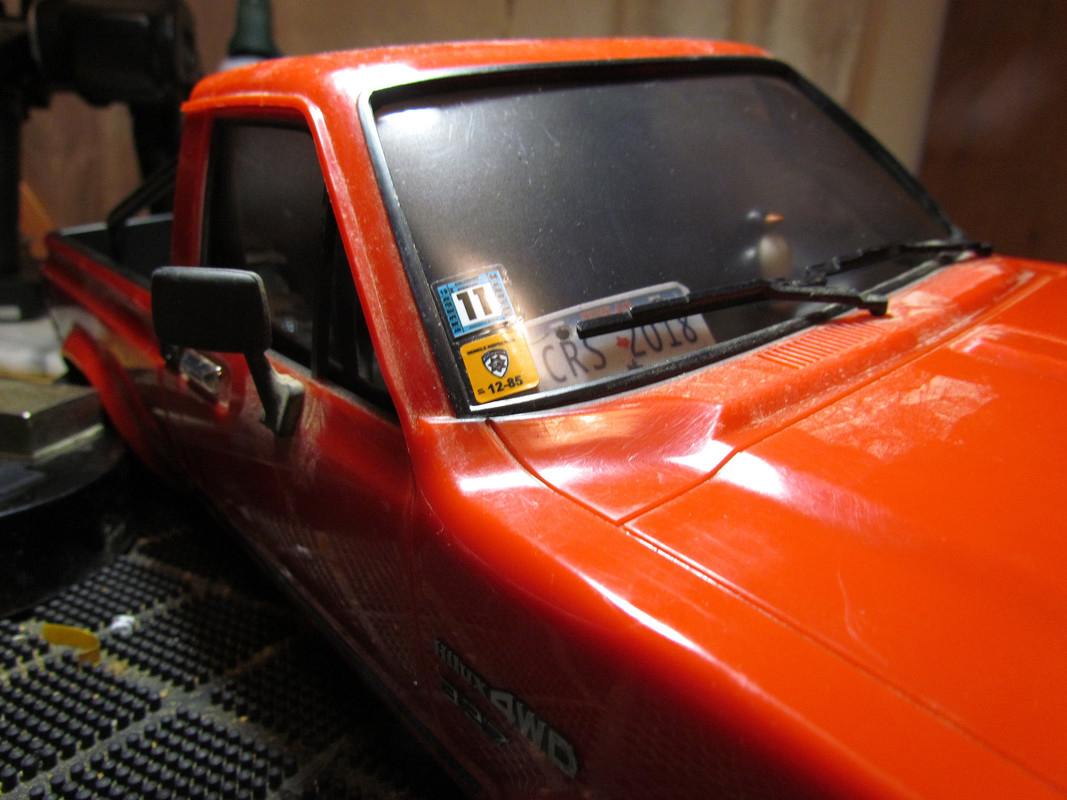  Next up were the ball ends on the drag-link ( from servo horn to steering knuckle). I mean... they were REALLY tight! I initially popped out the pillow balls and added some graphite but they were still too tight. Next I used a dry lube spray... better but still too tight. So at that point I felt like the only way to truly remedy the issue was to just replace the ball ends and balls. Bingo! I don't know what brand I used from my parts bin but they are nice and silky smooth now... still with zero play but so much easier to rotate. Also no more squeaking nor hindered movement in the suspension. Anyway... pic of the old and new ball ends... 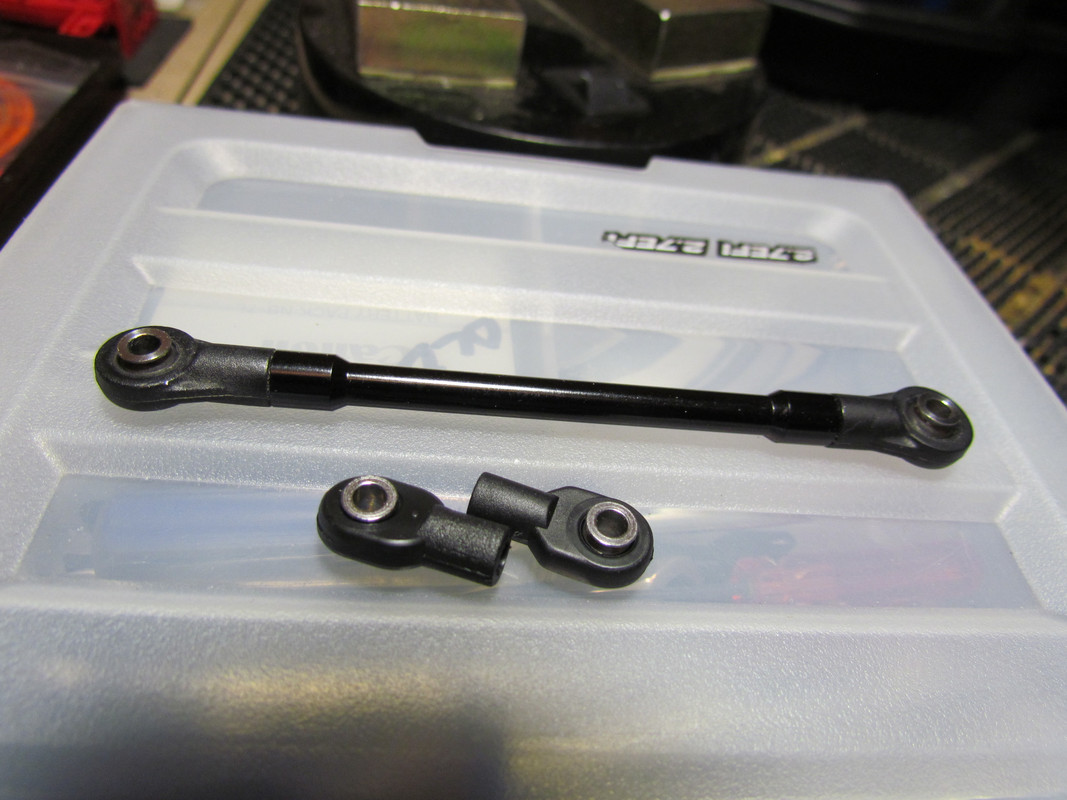 Finally I went ahead and swapped out the stock axle shafts for some XVD's. Straight fwd install with no hiccups. I cleaned the bearings and surrounding parts at the same time fwiw. Was a quick and easy job. 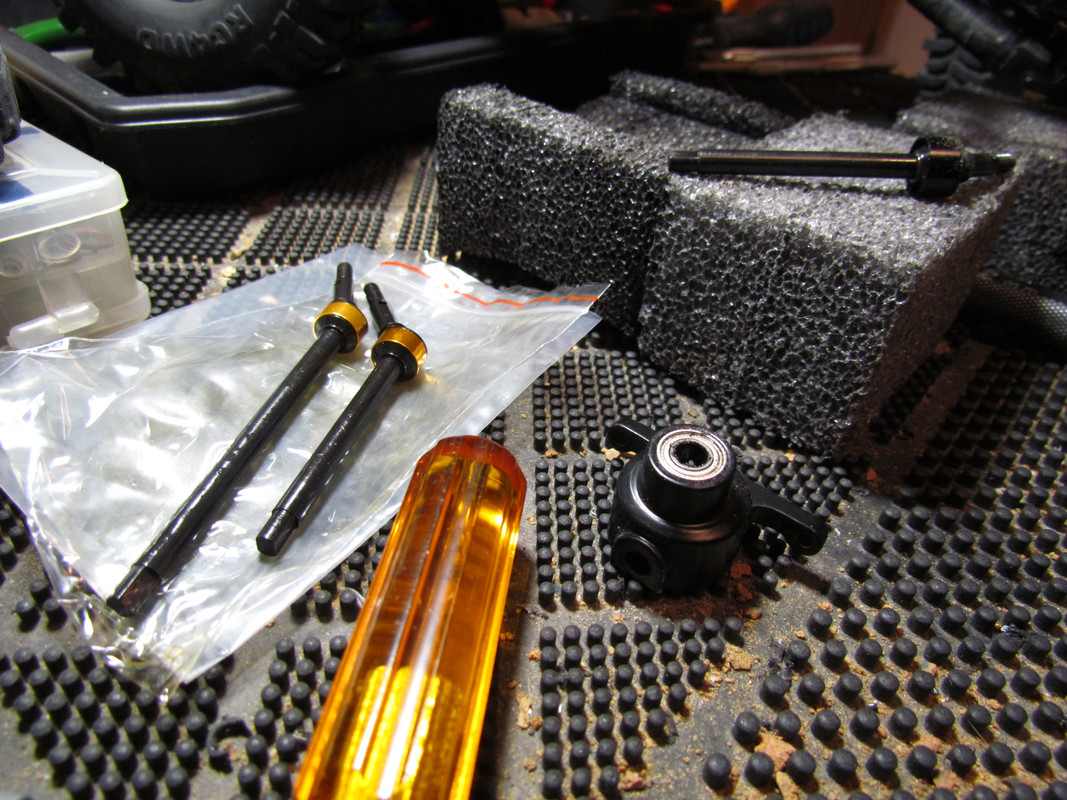 Next up... hitting the rocks for some fun! Thanks for looking! |
|
| |
|
05-14-2019, 03:03 AM
| #27 |
| RCC Addict Join Date: Nov 2017 Location: Austin Texas
Posts: 1,615
|
After the new mods/ upgrades ( also new rear bumper)... 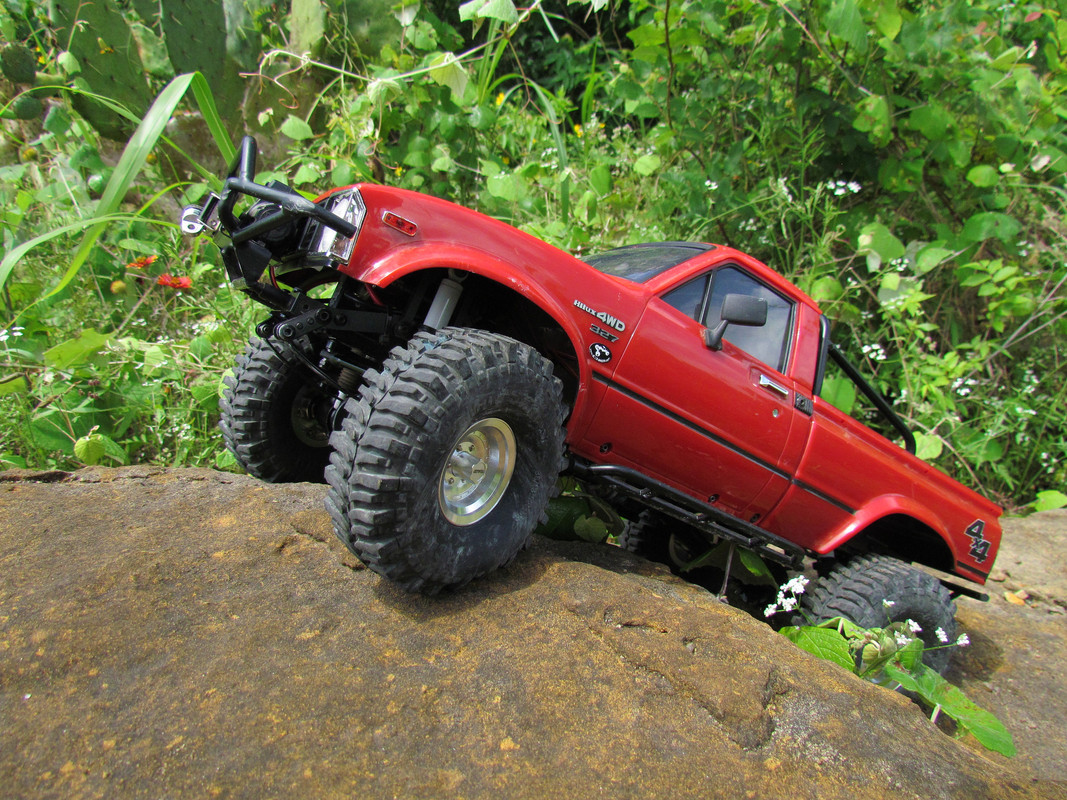  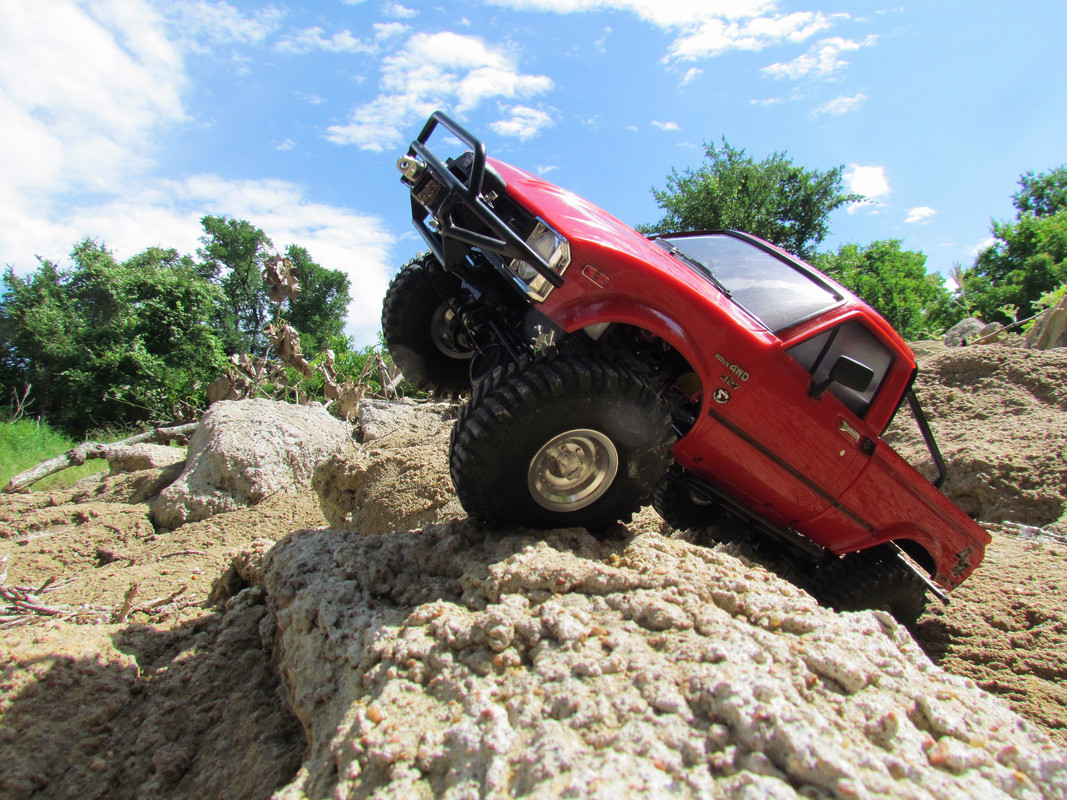  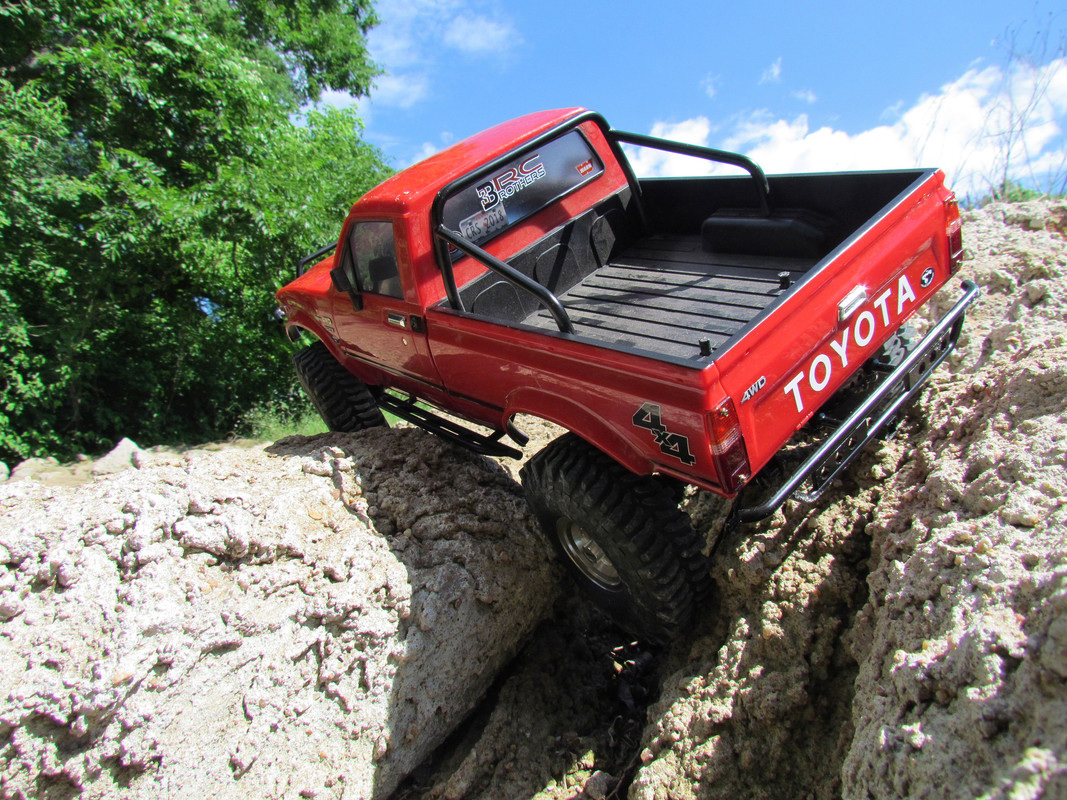    |
|
| |
|
05-14-2019, 09:26 AM
| #28 |
| I wanna be Dave Join Date: Dec 2006 Location: Where the sheep run scared.
Posts: 3,008
|
This build is turning out on point! I love the little details you are adding. The penguin is super cool. I have something similar but needs paint before I can display... I like the new wheels as well.... |
|
| |
|
05-14-2019, 05:20 PM
| #29 |
| I wanna be Dave  Join Date: Jan 2006 Location: Corruptifornia
Posts: 12,107
|
Yes, well done and coming along nicely! Might have to do the gemstone tail light trick too. My rod ends are same, very tight even after crawling a good amount. My windshield also fits poorly and is forcing the dashboard down, should be slightly angled upwards. I've been wanting to try trimming the bottom of windshield off little at a time until it's correct, if not replacement is about $15. I'm not sure from the pics what you did to improve yours? Glued windshield to dash with Gorilla glue and trimmed off excess bottom edge or?
Last edited by Natedog; 02-27-2020 at 10:56 AM. |
|
| |
|
05-16-2019, 11:34 AM
| #30 | ||
| RCC Addict Join Date: Nov 2017 Location: Austin Texas
Posts: 1,615
| Quote:
Quote:
You can see in one of the pics that I used a Sharpie to mark where the center of both a-pillars were ( on either side of the windshield. I was initially going to cut the lexan window insert into three pieces and E6000 them separately into place. I believe that would've eliminated any gaps but I didn't want to permanently affix them to the hard body. Anyway... it seems that the 3 parts ( window insert/ dash insert/ body) don't quite fit together perfectly so I went ahead and pressed the window piece to the dash piece but when I did, the holes didn't all line up. So with the dash and window pressed together I drilled 3 new holes into the dash piece ( as it was aligned with the window piece now). Then I ran into another issue- Each bolster molded into the hard body, relies upon each "channel" molded into the dash piece for aligning the parts together. I think that this is sort of a design flaw regardless... because the channels don't seem to be deep enough to be able to completely press the dash piece into place. That's one of the reasons that the gap between the window insert and body exist in the first place. So now I had to make the new holes large enough to fit around the body bolsters... no longer utilizing the channels molded into the dash. This way, with the dash and window insert aligned and pressed together, I was now able to press them into place flush against the inside of the body. All three pieces now fit snugly with no gaps. Essentially the dash and window inserts are sandwiched in between the body and the mounting screws. I didn't use glue to affix the dash insert to the window insert but that would certainly work. I instead just kept the green masking tape in place so that I can adjust or separate them if I ever need. This mod doesn't rely upon the tape to keep them in place but rather the larger holes that slide down around the molded body bolsters and the screws. Sorry for the confusing explanation. I do understand if it doesn't make sense. Another picture probably would've been better to show all of that lol. | ||
|
| |
|
05-21-2019, 12:52 AM
| #31 |
| I wanna be Dave  Join Date: Dec 2005 Location: Happiness is a warm AK.
Posts: 12,563
|
Rig is looking fantastic! Where did you ring the roll bar with the smaller tubing? Looks much more scale.👍🏼 |
|
| |
|
05-21-2019, 02:25 AM
| #32 | |
| RCC Addict Join Date: Nov 2017 Location: Austin Texas
Posts: 1,615
| Quote:
| |
|
| |
|
05-23-2019, 08:25 AM
| #33 |
| Newbie Join Date: Apr 2019 Location: Central Mass
Posts: 28
|
Great looking rig it looks so real in several of your shots awesome job.
|
|
| |
|
05-24-2019, 05:40 AM
| #34 | |
| RCC Addict Join Date: Nov 2017 Location: Austin Texas
Posts: 1,615
| Quote:
| |
|
| |
|
02-17-2020, 12:10 AM
| #35 |
| RCC Addict Join Date: Nov 2017 Location: Austin Texas
Posts: 1,615
|
Did some things to the Marlin lately so figured I'd update. > Rear bumper had been bugging me... hung too low and too far out from the body. Had to get it tucked in better but I was limited regarding how to accomplish things. Out of the 3 different RC4WD rear alum cross-member choices ( straight/ dropped/ raised) none of them put the bumper exactly where it needed to be. Went ahead and repurposed the home-fabbed aluminum plate ( that mounts between the rear shock towers) to attach the bumper without any longer utilizing the rear cross-member at all. It's surprisingly solid and rigid! Bumper is tucked up and in perfectly under the corners of the body now. I also decided at the same time to clean up the profile by removing the rear receiver hitch that was welded under the bumper tube. All it did was drag the rocks and snag on stuff so it was time to go. I had to be mindful of getting it finished smooth and clean before new paint. Fortunately it came out nice. 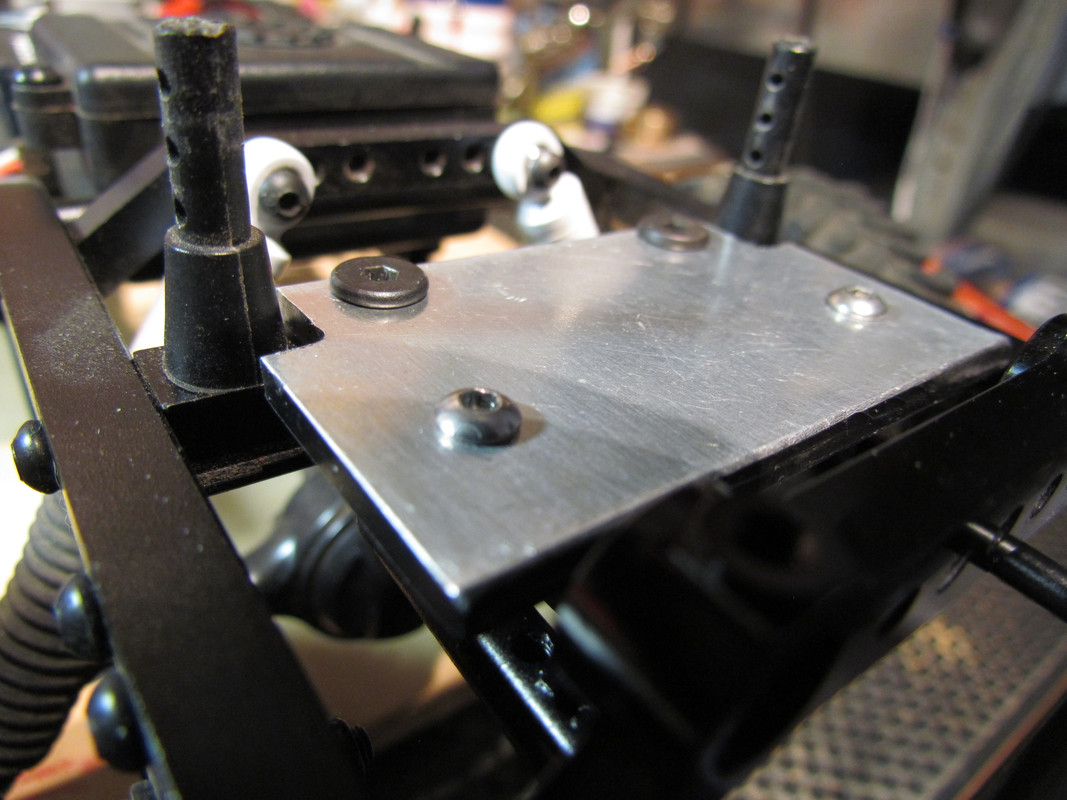   > Next up was to get rid of some up/ down movement of the front bumper. For this I made a couple of aluminum plates that utilize spacers and two extra bolts to kind-of sandwich the cross-member between the bumper mounts. Added some strength as well as secured the bumper in place... no more movement up/ down.  > I also wasn't happy with the Factor55 shackle-mount... not for this particular set-up. So I went ahead got rid of it and mounted a RC4WD Warn hook to the [steel] winch cable and secured it with a nice aluminum crimp ring. Cable is snug against the roller fairlead now and the hook shouldn't catch on everything in sight like the shackle-mount did. I like the look better too regarding proper era accessory.  > Cargo hooks: I've had 'em as long as I've had this TF2 so I decided to finally install 'em. Decided on black for the color and I think they look pretty good. I'm sure I'll lose a couple along the trails but since I try to baby this truck more than my other crawlers, maybe they'll be okay for a while. > Antenna: I've had this forever but never liked the long length for this rig so I decided to cut it down and mount it as more of a firestick or factory type antenna. Put it on top of the bed-rail between the roll-cage and rear cab. Also added a drop of black paint to the top so that it didn't look "cut in half" lol. Also used a guitar string-end between the antenna and the body to act as mounting hardware.. sounds weird but looks legit. Here's a few poser shots from today... 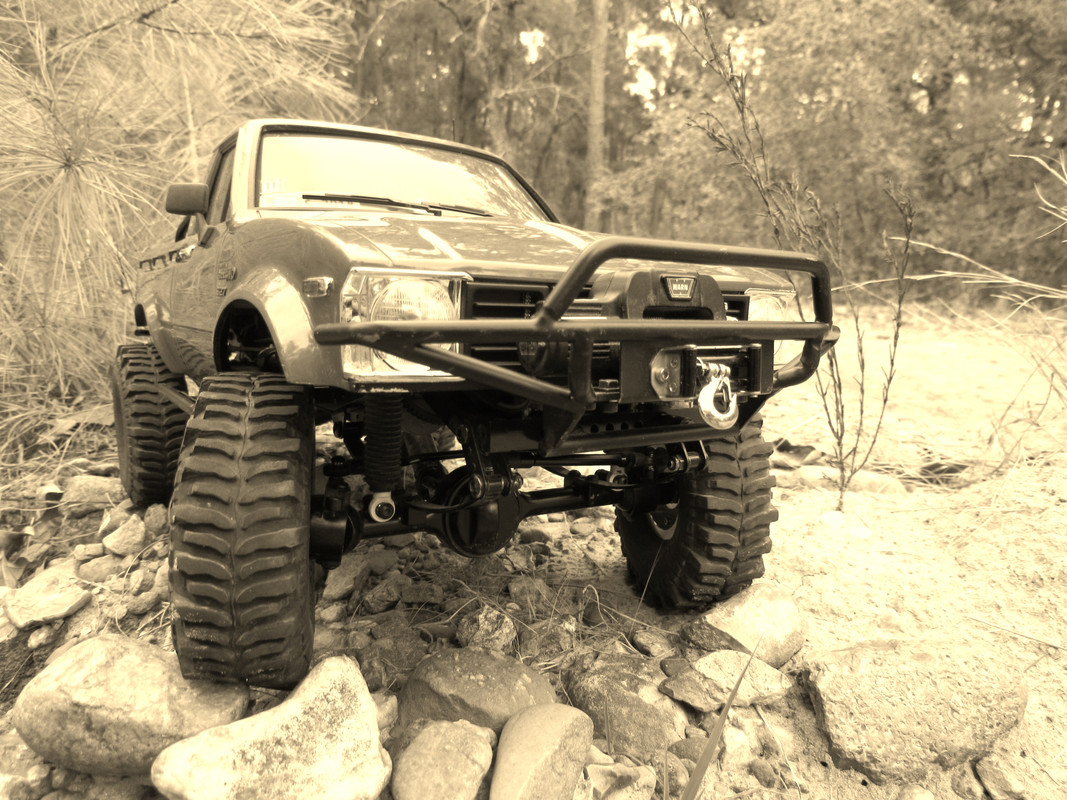 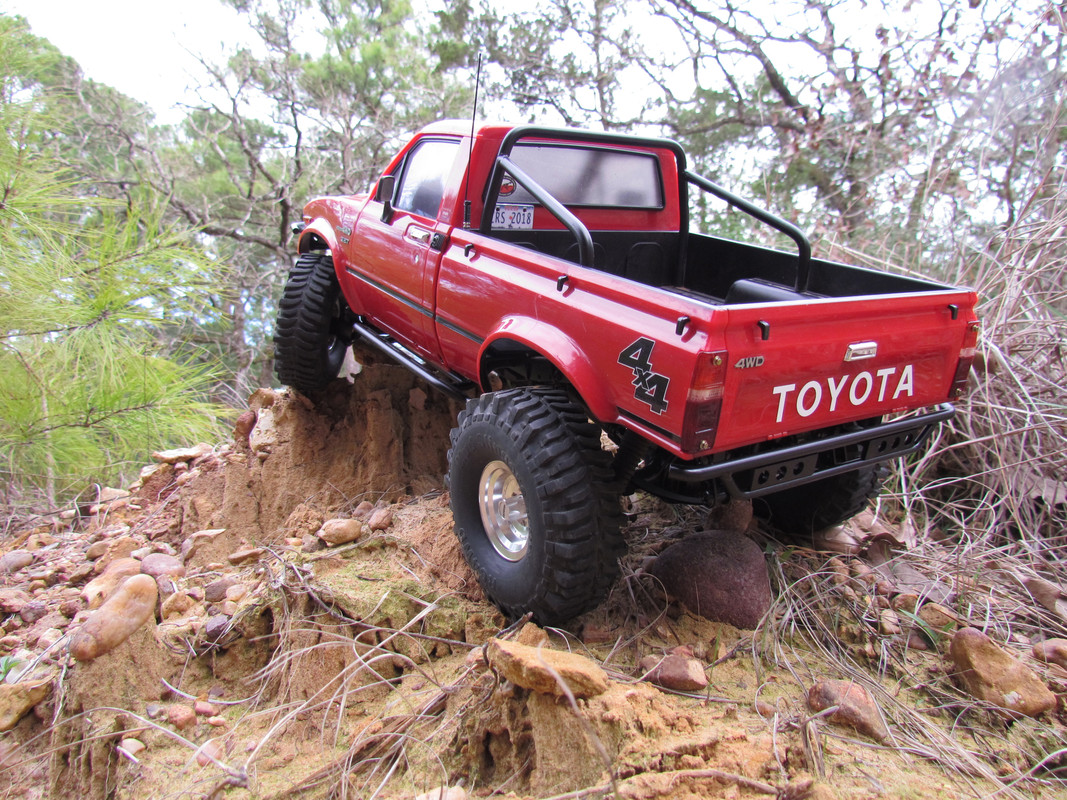 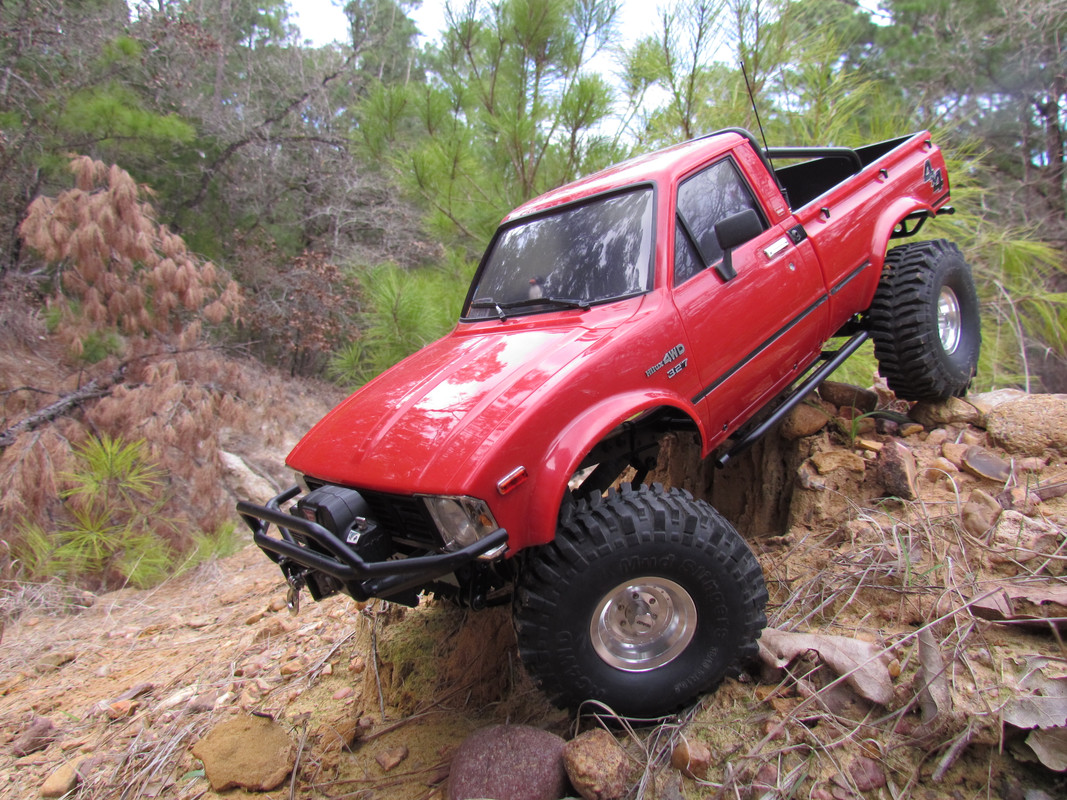 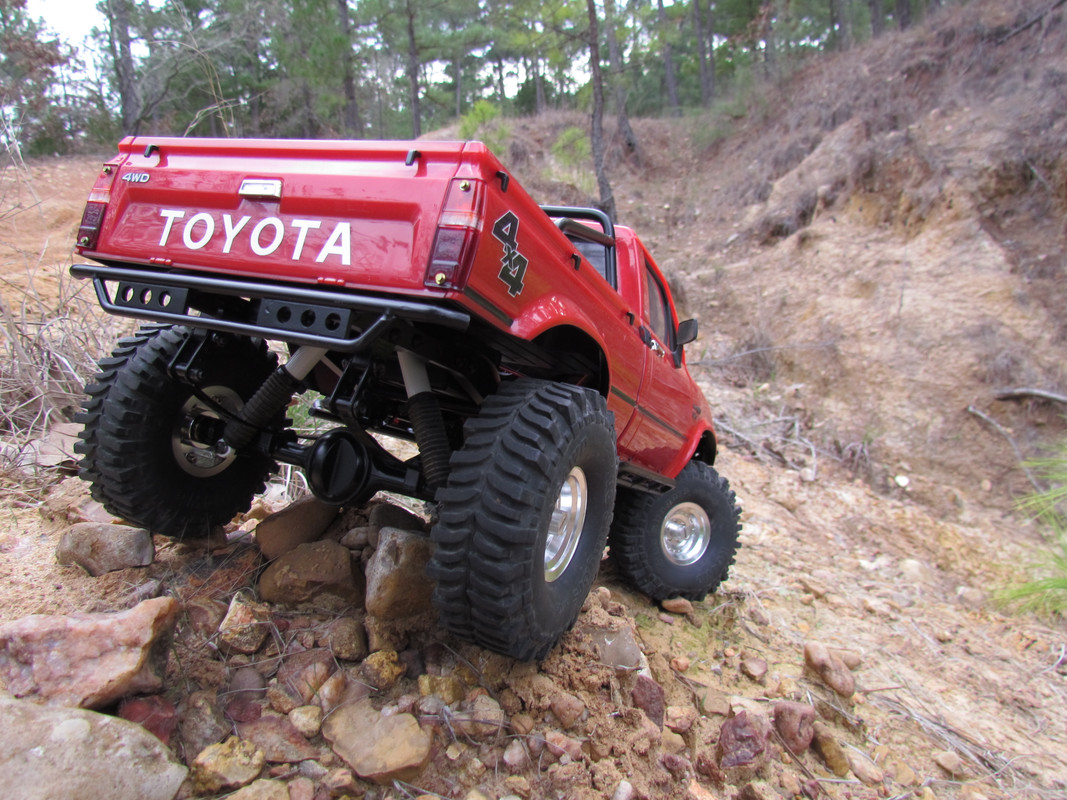  Last edited by high plains drifter; 02-23-2020 at 03:45 AM. |
|
| |
|
03-25-2020, 09:04 AM
| #36 |
| Rock Crawler Join Date: Dec 2008 Location: Fortuna Calif.
Posts: 997
|
Your truck is looking great. I am going to use the set screw body mount setup on this body, I have always screwed the body down tight to the frame but I think it should be able to move around a little. I cant remember ever having a lexan body tightly mounted to the frame, I ran my latest project around the yard last night with the mounting screws loose and seemed to free things up its worth a try Another thing I noticed was the RC4WD body ( well this one anyway) don't have the fit and finish of a Tamiya body, the rear window piece and the grill/headlight piece doesn't fit all that well.
|
|
| |
|
05-10-2020, 12:16 PM
| #37 |
| Newbie Join Date: Oct 2016 Location: Chicago Burbs
Posts: 9
|
I just got mine marlin a week or 2 ago. I like your build and agree that there is something about leaf springs.
|
|
| |
|
05-10-2020, 05:39 PM
| #38 | ||
| RCC Addict Join Date: Nov 2017 Location: Austin Texas
Posts: 1,615
| Quote:
Quote:
Next up for the de-marlinized toy is to hit it with a little matte clear... need to reduce that shine. | ||
|
| |
|
03-08-2022, 08:13 AM
| #39 |
| RCC Addict Join Date: Nov 2017 Location: Austin Texas
Posts: 1,615
|
Getting back into my 'slightly de-marlinized tf2' recently. Currently waiting on a new motor ( Crawlmaster Sport 550) but figured in the meantime, I'd address something that's been on my list of things to do for this rig for quite some time... Making a new front bumper. I didn't want to buy one because of the expense as well as not liking most of what's available out there for one reason or another. So while what I made isn't perfect, I feel that it's much better than the previous one. It doesn't match the rear tube bumper but I'm over the whole 'matching aesthetic' thing on this rig at this point. Main issue with the previous bumper was that it just stuck out too far and got hung-up on sticks and things. Obviously it compromised approach angle as well. It looked cool with the pre-runner appearance but it was time to put something on this rig that would improve it's performance rather than hinder it. The winch on the old bumper wasn't functional anyway so... time to go. New bumper I made from 1/8" ( 3.10mm) steel bar stock. Nothing fancy and I guess that's obvious from looking at the pics lol. I used an old bumper mounting bracket from a no name chinese trx4 bumper that I had in my traxxas parts bin. The shackle mounts are actually modified aluminum body-mounting posts that I've had for over 20 years and never used. Just had to drill the [body clip] holes larger to accommodate the shackle screws. Pretty straight-fwd besides that. Paint is self-etching primer under Krylon High Heat satin black.  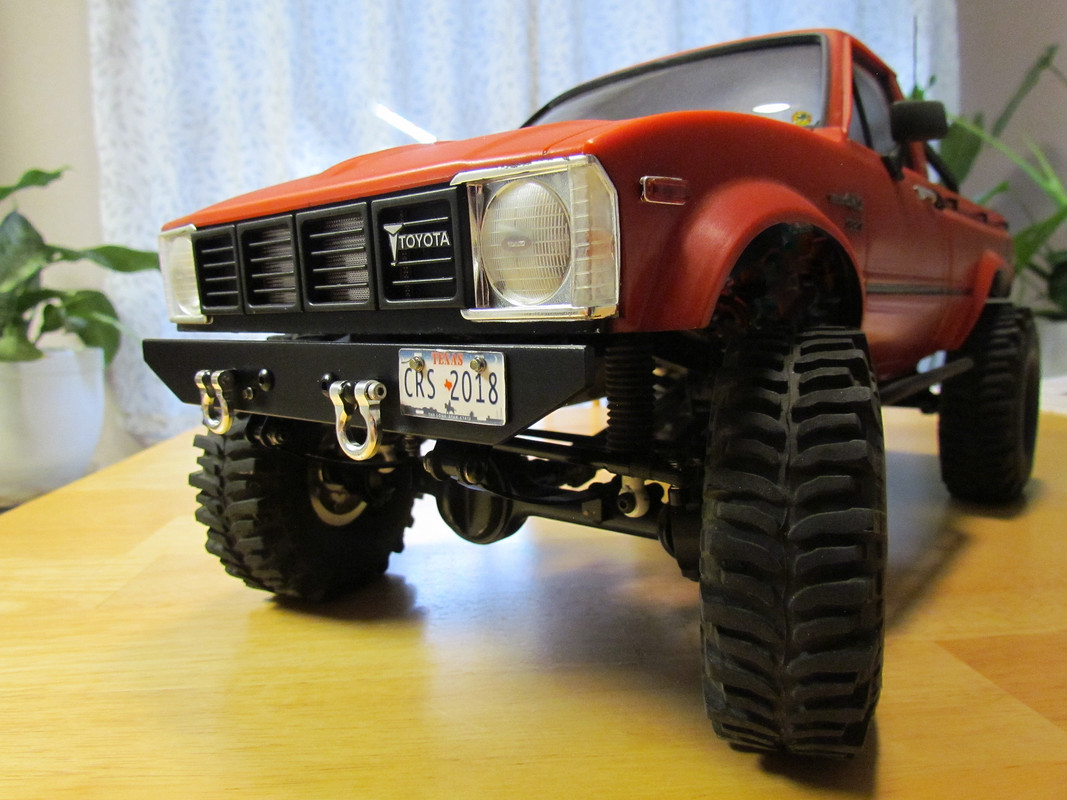 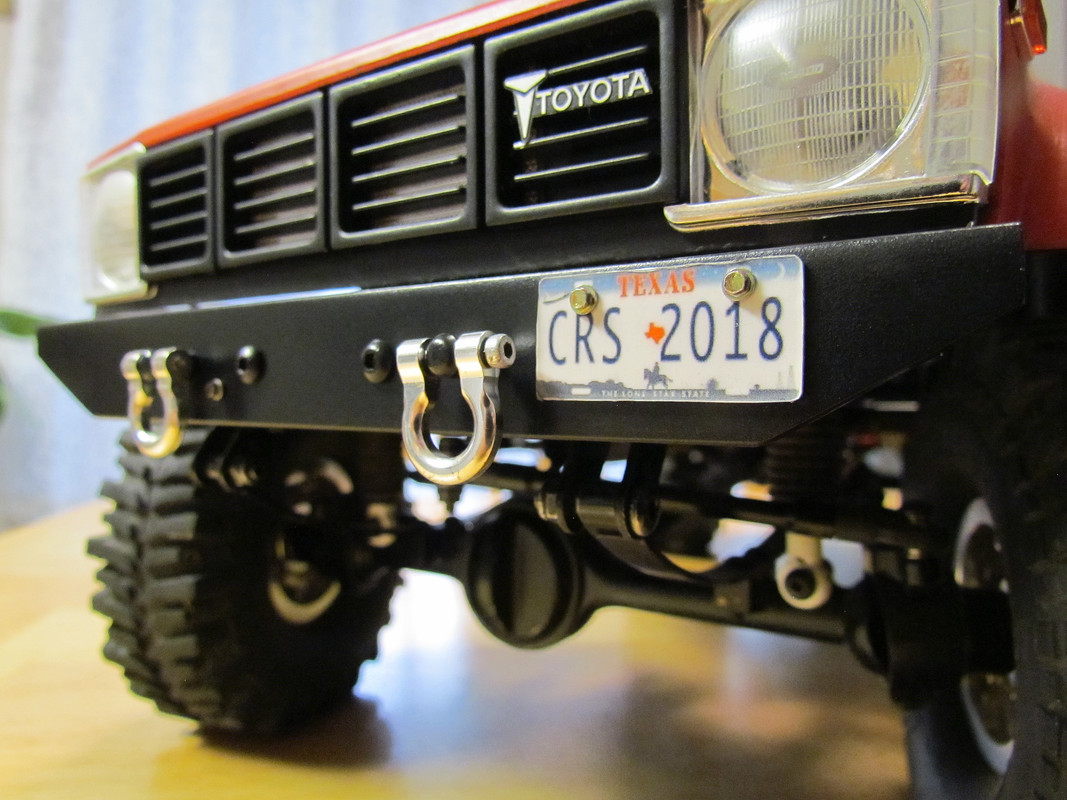 |
|
| |
|
03-08-2022, 09:16 AM
| #40 |
| Go Buckeyes! Join Date: Jun 2017 Location: Mid-Ohio
Posts: 4,134
|
I've missed seeing the de-marlinized Marlin!! The new bumper looks great! Sure is a ton better than the stock bumper that would get hung up on everything. I'm glad I removed mine from my Marlin. Shackles look factory and I like the scale bolts holding on the plate! Excellent job! |
|
| |
|
 The journey of a slightly de-marlinized TF2 - Similar Threads
 | ||||
| Thread | Thread Starter | Forum | Replies | Last Post |
| Journey of SMP | TAT76 | Axial SCX10 II | 57 | 03-08-2021 06:08 AM |
| My trx-4 journey | dittohead | Traxxas TRX-4 | 6 | 08-05-2017 10:42 PM |
| I seen Journey last night... | Kamikaze | Chit Chat | 8 | 08-09-2008 01:47 AM |
| |


 Linear Mode


