| |
| |||||||
 |
| | LinkBack | Thread Tools | Display Modes |
 04-24-2010, 11:54 PM
| #1 |
| Newbie Join Date: Dec 2009 Location: Fulltime RV'r
Posts: 38
|
Got some styrene supplies in the mail today and thought I would try my hand at something kinda simple before I start my VW Thing build. It is based on an old Coleman cooler that I have. It is not as nice as some but I think it came out good. Need to get some paint for it. 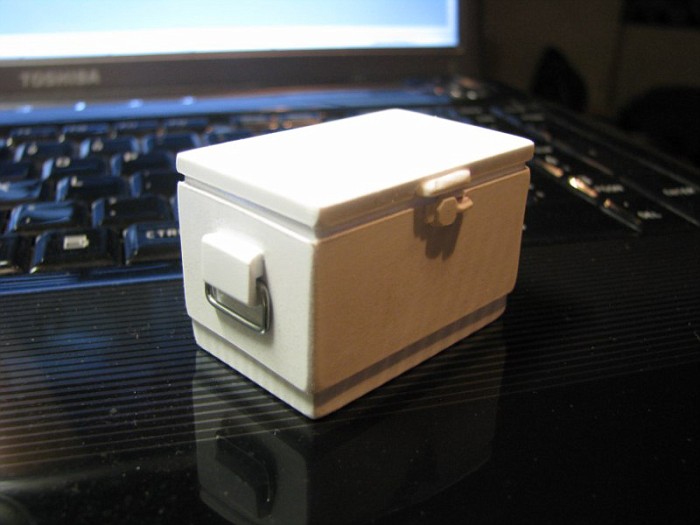 1:1 Coleman Cooler 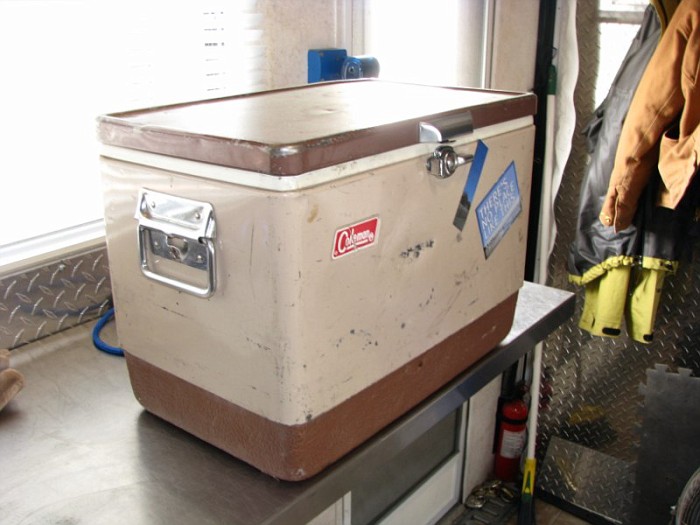 |

|  |
| Sponsored Links | |
| | |
|
04-25-2010, 12:04 AM
| #2 |
| Pebble Pounder Join Date: Jan 2010 Location: Anaheim/Chico
Posts: 114
|
Very nice. Clean looking work too. Gotta paint it similar to the full sized one.
|
|
| |
|
04-25-2010, 07:43 AM
| #3 |
| I wanna be Dave Join Date: Apr 2009 Location: Unnecessary Surgery Land
Posts: 3,406
|
If you can build that, you can build anything. Looks great.  |
|
| |
|
04-25-2010, 12:20 PM
| #4 |
| Newbie Join Date: Dec 2009 Location: Fulltime RV'r
Posts: 38
|
Thanks for the compliments. I do plan to paint it to match the 1:1, and I can't wait to start on my Thing build! Not sure I would want to start selling them, it only took me 3 1/2 hours to make this one, I am slow as **** |
|
| |
|
04-25-2010, 05:44 PM
| #5 |
| Rock Crawler Join Date: Jul 2008 Location: gilbert
Posts: 613
|
Looks great! Use a silver under coat, then beat the TAR out of the top coat and you will be golden! What are the scaled down dimensions? |
|
| |
|
04-26-2010, 12:28 AM
| #6 |
| Newbie Join Date: Dec 2009 Location: Fulltime RV'r
Posts: 38
|
cruiserkb, the silver paint is a great suggestion, I think I will try it. Need to get some paint. It is actually very close to 1/10th scale, I use Visio to do 2d cad and set the scale at 1:10 so when I print it out it is pretty close. The scale dimensions are Width 1 7/8" Depth 1 1/4" Height 1 1/4" 1:1 size is W 18" D 12" H 12" |
|
| |
|
04-26-2010, 12:28 PM
| #7 |
| Rock Crawler Join Date: Jul 2008 Location: gilbert
Posts: 613
|
Thanks for the dimensions. I may use your design and build a 1/6 scale one for myself.
|
|
| |
|
04-26-2010, 08:56 PM
| #8 |
| Quarry Creeper Join Date: Mar 2009 Location: Torrance, CA
Posts: 492
|
Looks great but you forgot the bottle opener!
|
|
| |
|
04-29-2010, 10:34 PM
| #9 |
| Pebble Pounder Join Date: Dec 2006 Location: Colorado Springs
Posts: 113
|
Looks reall good in person! Nick |
|
| |
|
05-02-2010, 04:08 AM
| #10 |
| Newbie Join Date: Dec 2009 Location: Fulltime RV'r
Posts: 38
|
First coat of paint, gonna try cruiserkb's suggestion. 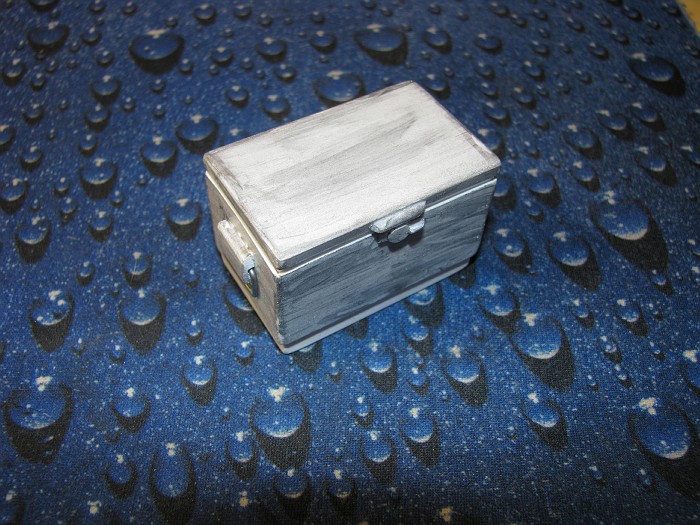 top layers of paint, I am using acrylic, didn't want to much shine on it. 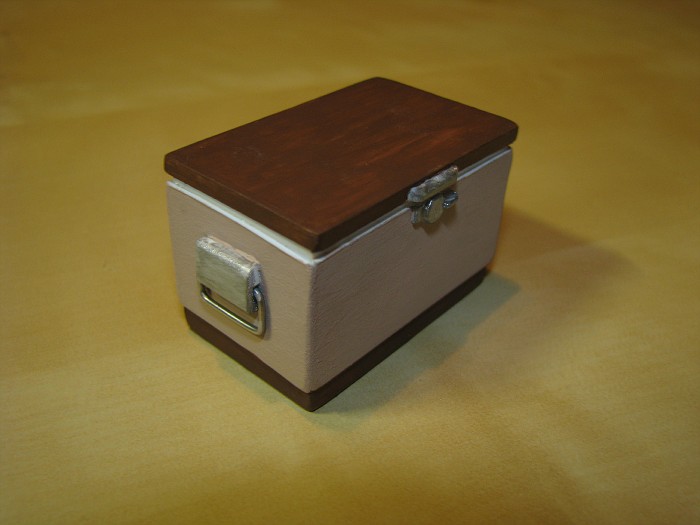 gonna give it a couple of days to dry really good and then try and to give it a little road rash. |
|
| |
|
05-02-2010, 04:09 AM
| #11 |
| Newbie Join Date: Dec 2009 Location: Fulltime RV'r
Posts: 38
|
Any body know if I can find a small Coleman sticker?
|
|
| |
|
05-02-2010, 09:09 AM
| #12 |
| Rock Stacker Join Date: Apr 2006 Location: Clovis
Posts: 52
|
Looks sweet, nice job!
|
|
| |
|
05-02-2010, 04:07 PM
| #13 |
| Rock Crawler Join Date: Jul 2008 Location: gilbert
Posts: 613
|
Looking good! Now just get a red scotch bright pad and scuff off some of the top layer, then you will have it. Keep the picks coming.
|
|
| |
|
05-02-2010, 10:19 PM
| #14 | |
| Rock Crawler Join Date: Jun 2007 Location: Nova Scotia,Canada
Posts: 561
| Quote:
| |
|
| |
|
05-18-2010, 11:51 PM
| #15 |
| Newbie Join Date: Dec 2009 Location: Fulltime RV'r
Posts: 38
|
Finally got a finished pic. I used the scotch brite pad to do some weathering. It really adds some character to it. 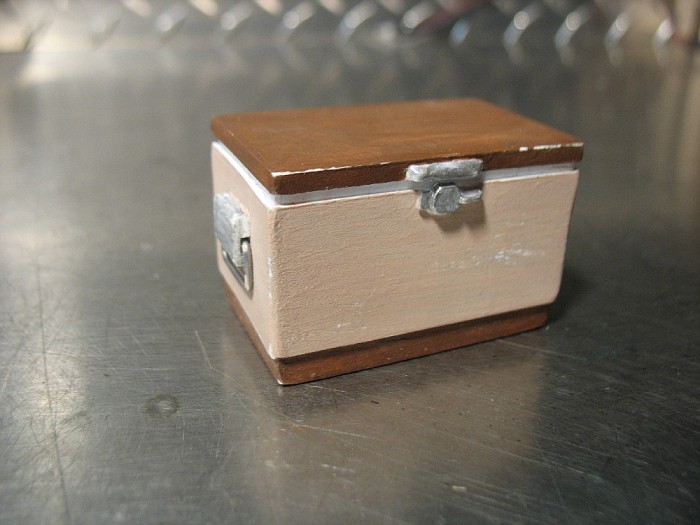 Thanks for all the comments and ideas to help me make this cooler. It wouldn't have come out as good without the help. Rich |
|
| |
|
05-20-2010, 07:20 PM
| #16 |
| RCC Addict Join Date: Apr 2009 Location: United States of the Offended
Posts: 1,184
|
That turned out great!!! Does it open?? |
|
| |
|
05-20-2010, 08:09 PM
| #17 |
| Rock Crawler Join Date: Jul 2008 Location: gilbert
Posts: 613
|
Man this thing is looking great. One more suggestion just to add a little more detail would be to get some black liquid paint and an old tooth brush. What you do is lightly dip the ends of the bristles in the paint; and with the bristles facing up in the palm of your hand; run your thumb from front to back on the bristles. You will have to point your thumb strait down over the bristles. By doing this you will cause the paint to be flicked off the bristles so they will hit the cooler as individual spots. I would suggest practicing this first so you know how much paint will be needed. The more times you run your thumb over the bristles without reloading with paint the finer the mist will come off them. Just play around with it first and I would suggest use some gloves. Hope this helps. Keep us posted and definitely get some shots of it in the vehicle. |
|
| |
|
05-20-2010, 11:01 PM
| #18 | |
| I wanna be Dave Join Date: Oct 2006 Location: Centered
Posts: 2,082
| Quote:
Did that for my 1.9 bed box...just trimmed it with an Xacto, a bit of spray adhesive and then sealed it within the flat clear finish coats. | |
|
| |
|
05-21-2010, 07:09 AM
| #19 |
| Rock Crawler Join Date: Feb 2010 Location: costa rica
Posts: 705
|
This is nice.... ^^^^^^^
|
|
| |
|
05-21-2010, 08:54 AM
| #20 | |
| RCC Addict Join Date: Nov 2005 Location: Utah
Posts: 1,530
| Quote:
| |
|
| |
|
| |


 Linear Mode


