| |
| |||||||
 |
| | LinkBack | Thread Tools | Display Modes |
 01-17-2008, 06:06 PM
| #1 |
| Quarry Creeper Join Date: Nov 2007 Location: Northern
Posts: 311
|
Tamiya Hilux Highlift Integy 65t lathe motor rooster crawler ESC Spektrum DX6 radio Radio Shack 3300 NIMH Futaba S3305 Servo High-Torque for steering Futaba S3003 for shifting Hobbico CS-70MG for a winch Junfac Lift Junfac Diff. Covers RC4WD leafs RC4WD 2.2 mud slingers on beadlocks. First ever build and this kit is fun to put together. After a week of assembly.... I didn't like the stance so I ordered the Junfac Lift kit.  A few more weeks of progress and help from others... 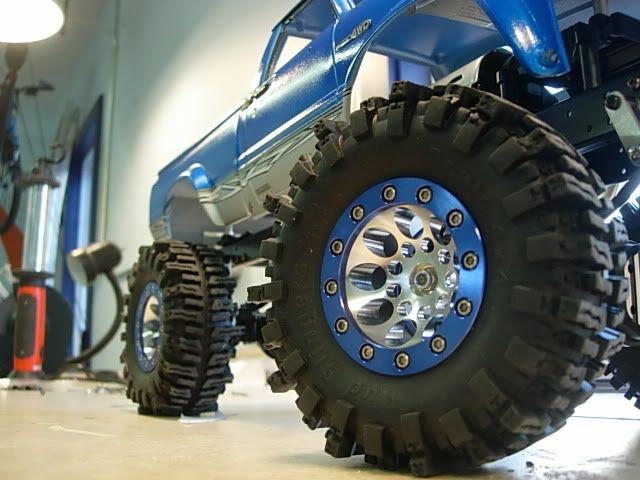 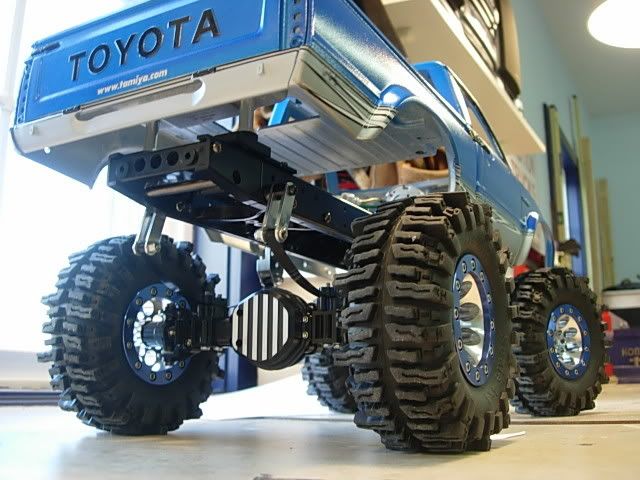 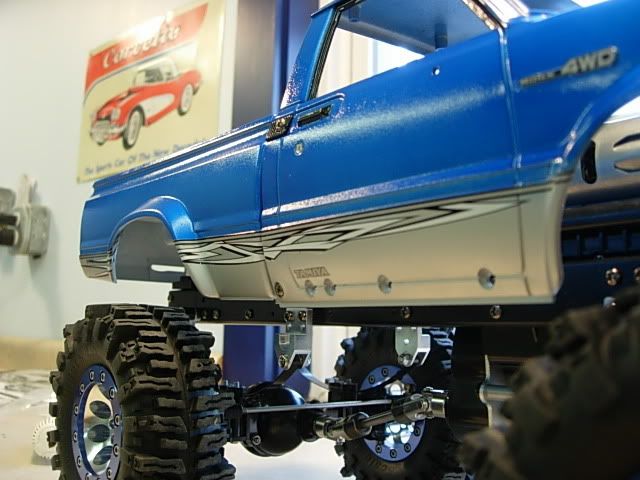 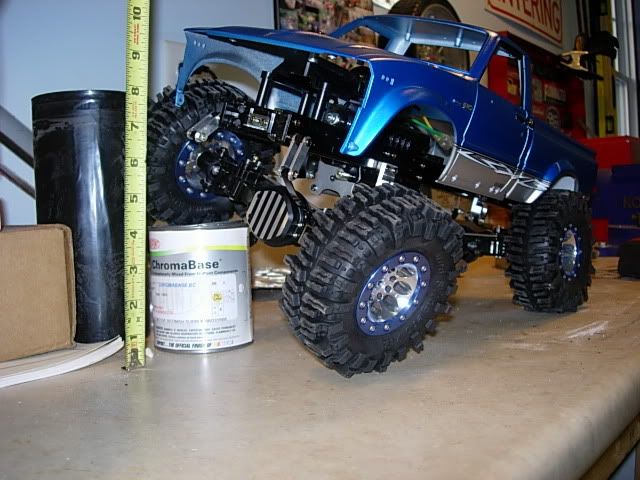 |

|  |
| Sponsored Links | |
| | |
|
01-17-2008, 07:53 PM
| #2 |
| Rock Crawler Join Date: Aug 2007 Location: usa
Posts: 593
|
very nice!  |
|
| |
|
01-17-2008, 08:07 PM
| #3 |
| Rock Crawler Join Date: Dec 2007 Location: buckeye,AZ
Posts: 723
|
nice truck, i like the color combo on it |
|
| |
|
01-18-2008, 12:40 AM
| #4 |
| Quarry Creeper Join Date: Jan 2005 Location: GUAM
Posts: 479
|
nice colors. looks good
|
|
| |
|
01-21-2008, 10:45 PM
| #5 |
| Newbie Join Date: Dec 2005 Location: Honolulu
Posts: 30
|
Is that automotive paint you used on your hilux? And how did you prep body for it to stick well? TRuck looks awesome. looks really good.
|
|
| |
|
01-21-2008, 10:58 PM
| #6 |
| RCC Addict Join Date: Aug 2005 Location: Pocatello
Posts: 1,032
|
Ditto, I love the paint job on it.
|
|
| |
|
01-22-2008, 03:51 AM
| #7 |
| Quarry Creeper Join Date: Nov 2007 Location: Northern
Posts: 311
|
thanks for the compliments. Prepped with paint thinner and wetsanded with 2000 grit. I sprayed the entire truck with Testors Silver. Masked the two tone and sprayed the upper half with Testors translucent blue to try and match the wheels. I used the decals from the kit to seperate the two tone. Not entirely happy with the orange peel but pretty excited for my first paint job... |
|
| |
|
01-23-2008, 07:41 PM
| #8 |
| Newbie Join Date: Aug 2007 Location: Beloit
Posts: 31
|
great colors, looking good.
|
|
| |
|
01-24-2008, 02:05 AM
| #9 |
| Newbie Join Date: Apr 2007 Location: BAY AREA
Posts: 35
|
Very nice. |
|
| |
|
01-27-2008, 07:45 AM
| #10 |
| Quarry Creeper Join Date: Sep 2005 Location: LRAFB
Posts: 398
|
I love theas thing where can i get one other than from the Tamiya site they are lik $600 and still need radio gear :-( so pleas help me out guys other wise i will flood the sight with pics of my 1/6 nylint |
|
| |
|
01-30-2008, 08:48 PM
| #11 |
| Newbie Join Date: Dec 2005 Location: Honolulu
Posts: 30
| Do you have problems with tires rubbing? And how do you like the 3 speed trans? Any plans of changing it?
|
|
| |
|
02-02-2008, 09:25 PM
| #12 |
| Quarry Creeper Join Date: Nov 2007 Location: Northern
Posts: 311
|
tires do rub a little bit. Mainly in the front. I added the Junfac lift and about 3/8" body lift using (2) of the supplied "junk" bearings stacked. Here's a video of its first so called "crawl". Pretty excited with this being my first step into the world of RC Crawling. 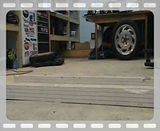 |
|
| |
|
02-02-2008, 09:41 PM
| #13 |
| Rock Crawler Join Date: Dec 2007 Location: buckeye,AZ
Posts: 723
|
looked like it did good |
|
| |
|
02-02-2008, 10:43 PM
| #14 |
| Rock Stacker Join Date: Sep 2006 Location: Scottsville
Posts: 65
|
Very nice. Looks like it done a good job.
|
|
| |
|
02-04-2008, 05:06 PM
| #15 |
| Quarry Creeper Join Date: Nov 2007 Location: Northern
Posts: 311
|
modified the factory brushguard...  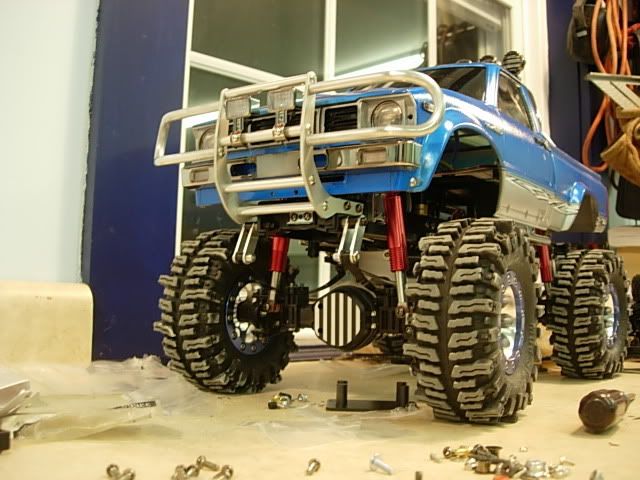 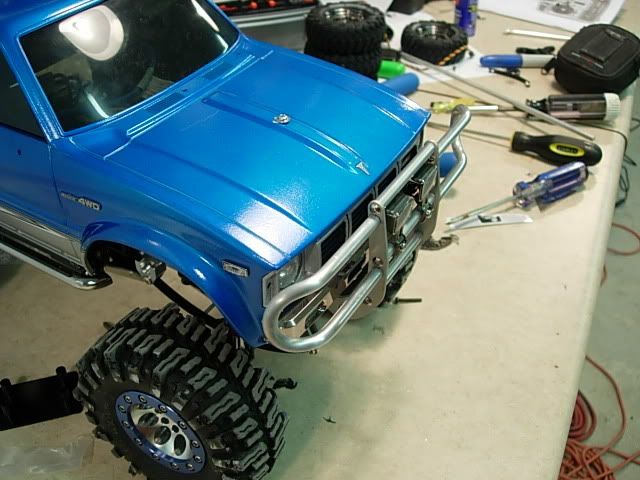 Last edited by sierradmax; 02-04-2008 at 05:09 PM. |
|
| |
|
02-04-2008, 05:50 PM
| #16 |
| Rock Stacker Join Date: Oct 2007 Location: dahlonega
Posts: 68
|
that is a pretty nice truck and how did you make the mod to the brush garde
Last edited by mattman; 02-04-2008 at 05:53 PM. |
|
| |
|
02-04-2008, 06:25 PM
| #17 |
| Quarry Creeper Join Date: Dec 2007 Location: a place where everything looks the same. oh and no rocks.
Posts: 214
|
damn man! $hit that nice! great work!
|
|
| |
|
02-04-2008, 06:53 PM
| #18 |
| Quarry Creeper  Join Date: Jul 2005 Location: In my shop
Posts: 307
|
Very nice lookin Toyota.Awesome job for your first crawler Boy that stock tranny really hangs low,I see many mods in your future!
|
|
| |
|
02-04-2008, 06:59 PM
| #19 |
| Quarry Creeper Join Date: Nov 2007 Location: Northern
Posts: 311
|
Go to Home Depot and pick up some 1/4" aluminum roundstock. Cut off two 12" pieces and make a 180 degree bend right in the middle. I set roughly 1" of the bent side in a vise standing up to give the 35 degree bend in the opposite direction. Mark how far out you want them to stick beyond the body and cut off the excess. Now you have your 2 ends to mount to the factory brushguard. I can't remember what drill bit to use but because aluminum is so soft, I drilled a hole in the rod ends to accept a bolt with some loctite. It holds real well. Simply mock up where they are going to the brushguard support, drill and install. Because I added a bodylift, I had to modify the mounting location. Dremel worked well here. Notice I mounted to the frame clearing the shackles for the leaf springs. I've tested its strength pushing an E-maxx |
|
| |
|
02-05-2008, 04:29 PM
| #20 |
| Quarry Creeper Join Date: Nov 2007 Location: Northern
Posts: 311
|
This was my first attempt at MIG welding small pieces of aluminum so I decided to make a rear bumper. 1/10 scale shackles are on order. After I mount those, I'll clean it up a bit. 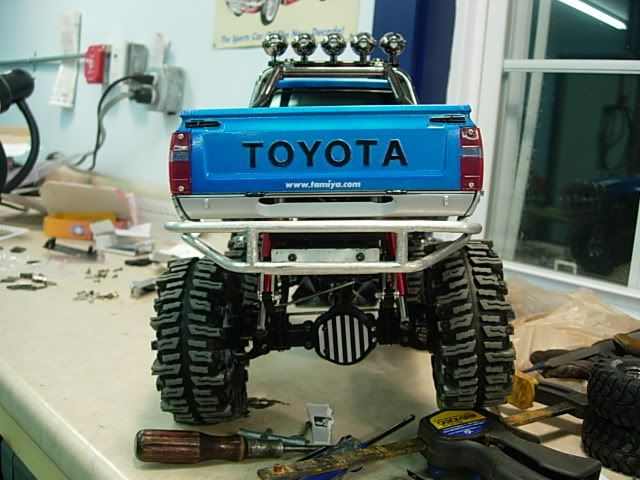  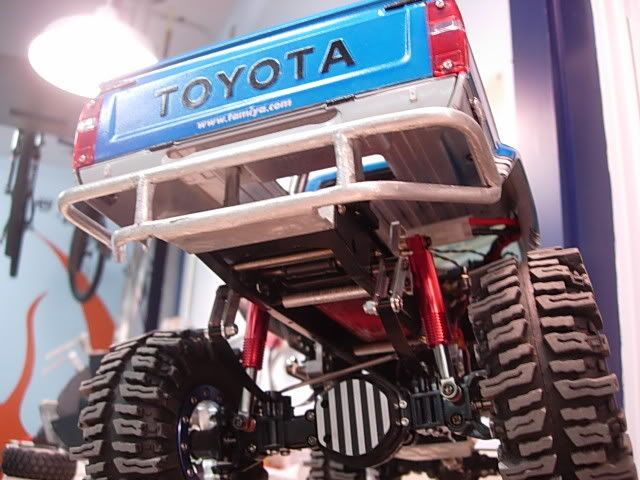 |
|
| |
|
| Thread Tools | |
| Display Modes | |
| |


 Linear Mode


