| |
| |||||||
 |
| | LinkBack | Thread Tools | Display Modes |
 04-12-2009, 01:52 AM
| #1 |
| I wanna be Dave Join Date: Aug 2007 Location: santa monica
Posts: 3,687
|
Might as well start a thread. more a placeholder for the photos I currently have...slow build as I've started putting time into the Charity Montero Build again. so this is what I am building. 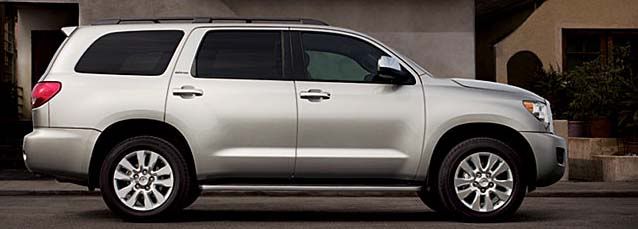 My plan is to take a Tundra cab and bed, combine them, build a back upper part and make my own SUV. The Sequoia is based on the Tundra running gear so it makes sense to me doing the same at 1:10. I was expecting to split the cc-01 chassis transversely to stretch the wheel base to the Tundra's but upon further research I found that the Sequoia is not based on the Tundra double cab (tamiya's tundra is a double cab). So I'm going to have to take an inch out of the Tundra to make the sequoia which will leave me near the 10.5" lwb setting of the chassis. I bought the chassis used, should have kept the new chassis from when I bought the pajero kit, d'oh. Had the chassis lift and clearanced the arms for more articulation up front already done. I further modified it (as most of you have seen already) by turning the knuckles forward, adding a tie rod and relocating the steering servo into a more traditional over axle chassis mounted setup with a simple drag link to a knuckle.  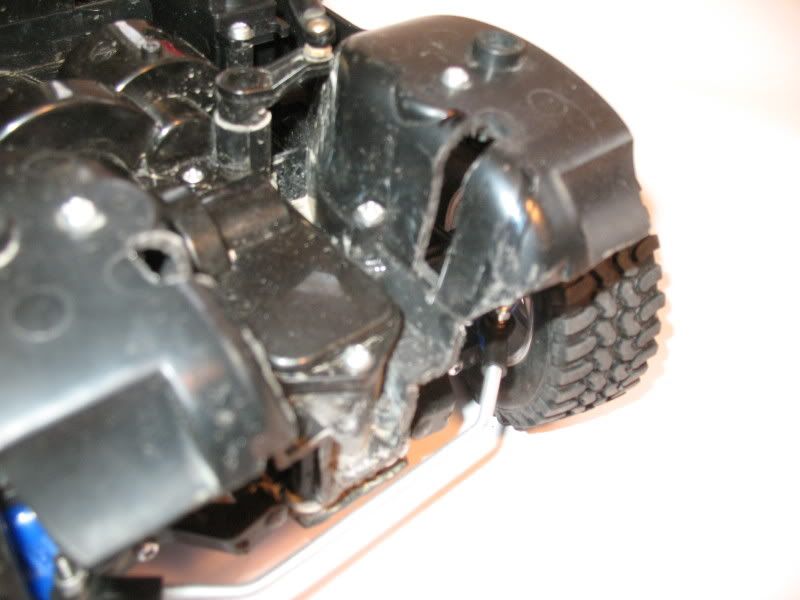   no approach lost 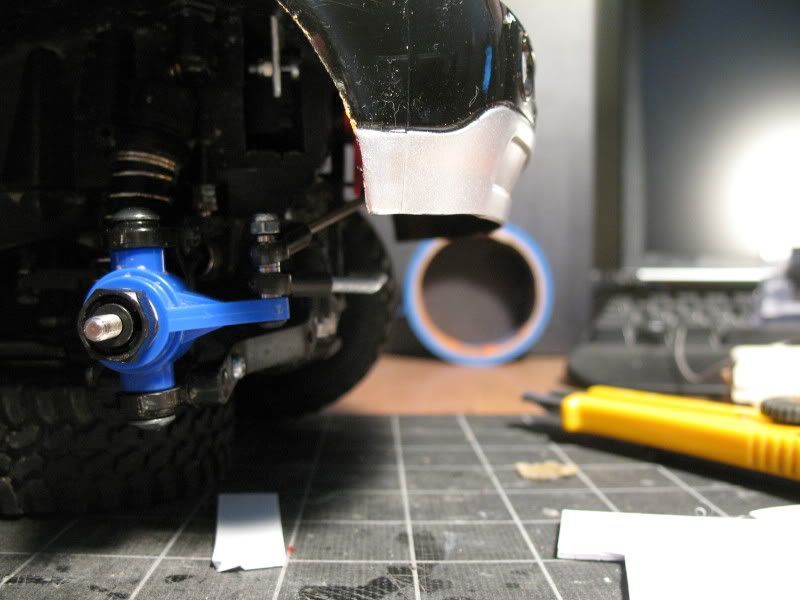 Going to run the BFG Thrashes I made (BFG sidewalls, Mud Thrasher treads) 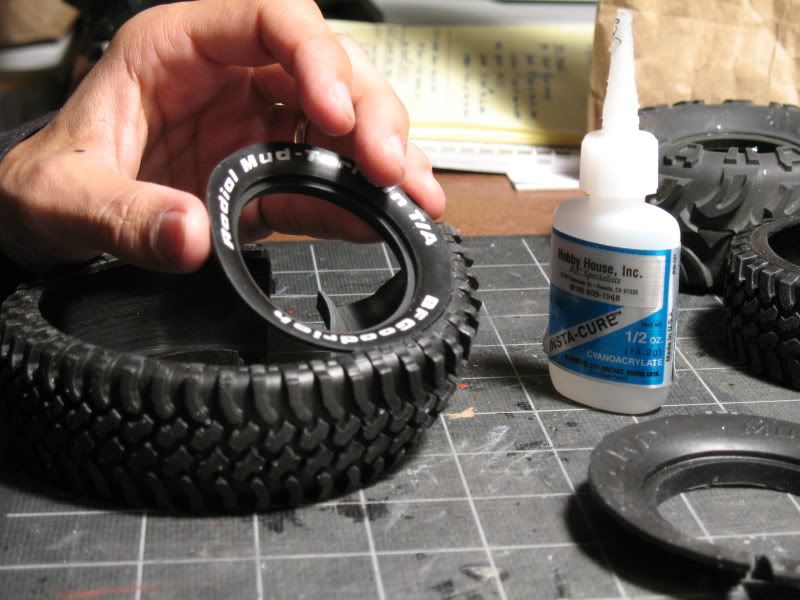 The chassis is just about a runner (short a pinion) so I'll run my spare Range Rover Sport body on it for now. (earlier picture, no Thrashers)  Good tuck too. 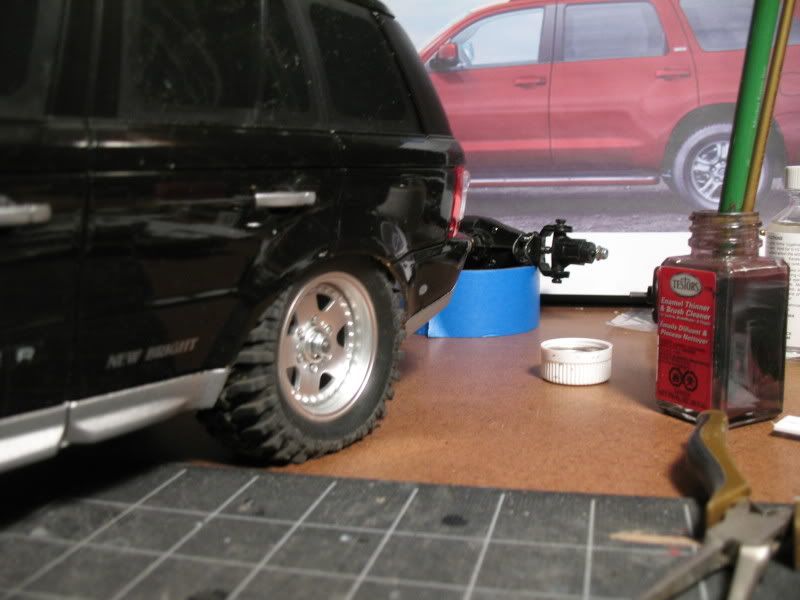 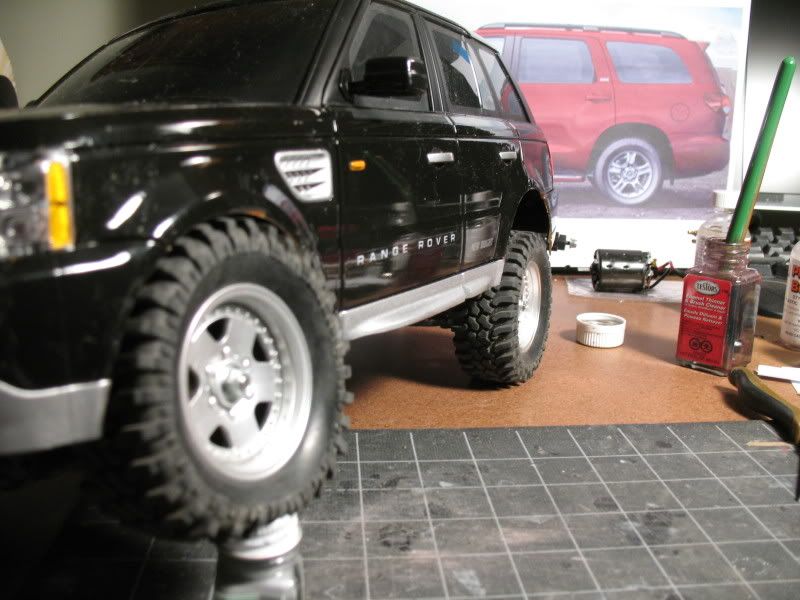 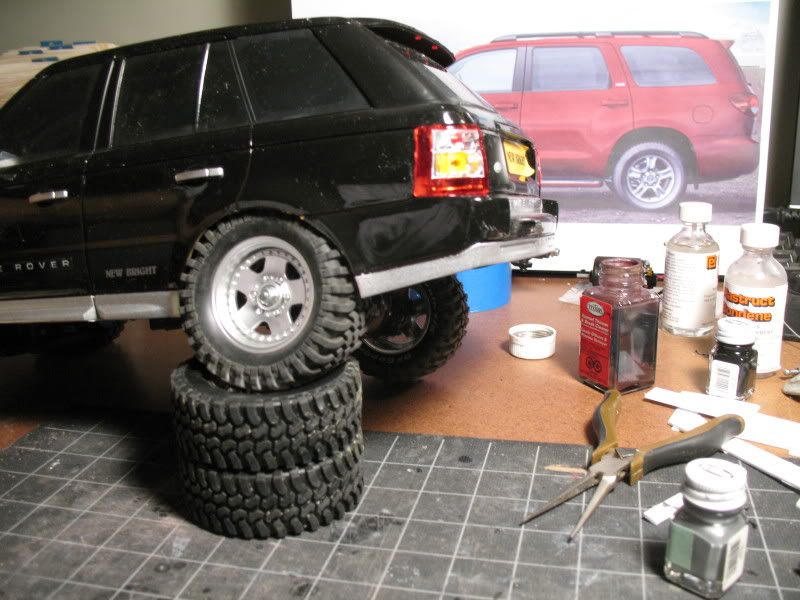 will run a Novak 55t in it and possibly add a RC4WD 4:1 gear reduction unit. has an old school Futaba esc (with built in 30A fuse, lol). will possibly try making sliders and wheel arch exo for this one. more later. |

|  |
| Sponsored Links | |
| | |
|
04-12-2009, 10:04 AM
| #2 |
| Rock Crawler Join Date: Jan 2008 Location: Cotati
Posts: 704
|
Can't wait for this. Looks awesome.
|
|
| |
|
04-12-2009, 10:34 AM
| #3 |
| Quarry Creeper Join Date: Jan 2008 Location: Calabash, NC
Posts: 348
|
Can't wait. Your fabbing skills are top notch.
|
|
| |
|
04-12-2009, 03:04 PM
| #4 |
| '08 2.2 National Champ  Join Date: Nov 2006 Location: UTRCRC
Posts: 5,585
|
That's some great work/thinking. Do you feel like you get better steering?
|
|
| |
|
04-12-2009, 03:46 PM
| #5 | |
| I wanna be Dave Join Date: Aug 2007 Location: santa monica
Posts: 3,687
|
thanks guys. this should be fun. Quote:
However, just moving the servo horn manually or grabbing the wheels and turning them manually there is minimal slop. there is a bit of bumpsteer on the non-drag linked side but its acceptable to me in exchange for the lack of slop. check it out for yourself http://www.youtube.com/watch?v=Bb0CGy0BaEk and http://www.youtube.com/watch?v=voHyM...eature=related | |
|
| |
|
04-14-2009, 12:18 AM
| #6 |
| I wanna be Dave Join Date: Aug 2007 Location: santa monica
Posts: 3,687
| 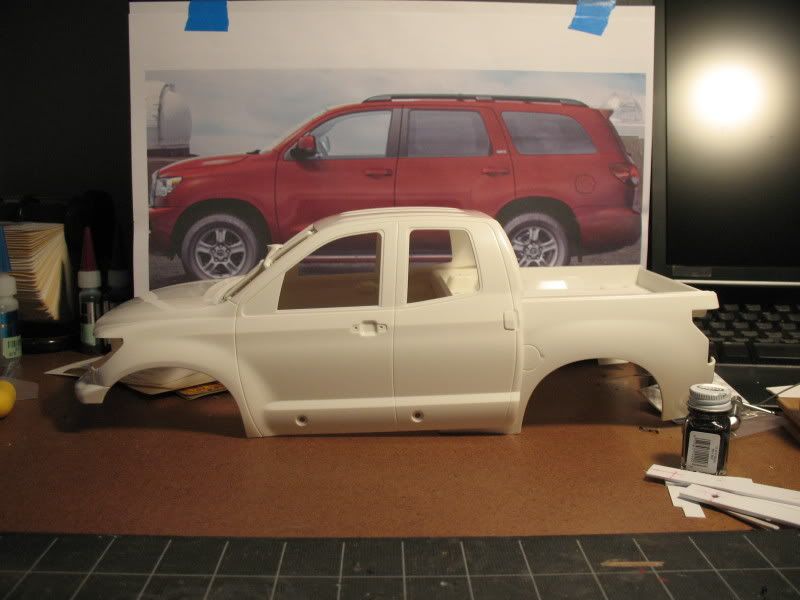 I'll have to check the proportions but it appears I'll have to take 1" or slightly less out of the bed/cab junction and add some of it behind the rear wheel. the rear overhang is longer on the sequoia. If I fake the wheel base a bit (maybe less than 1/8") I can get it to work directly on the cc-01 chassis without adjusting the rear axle location. 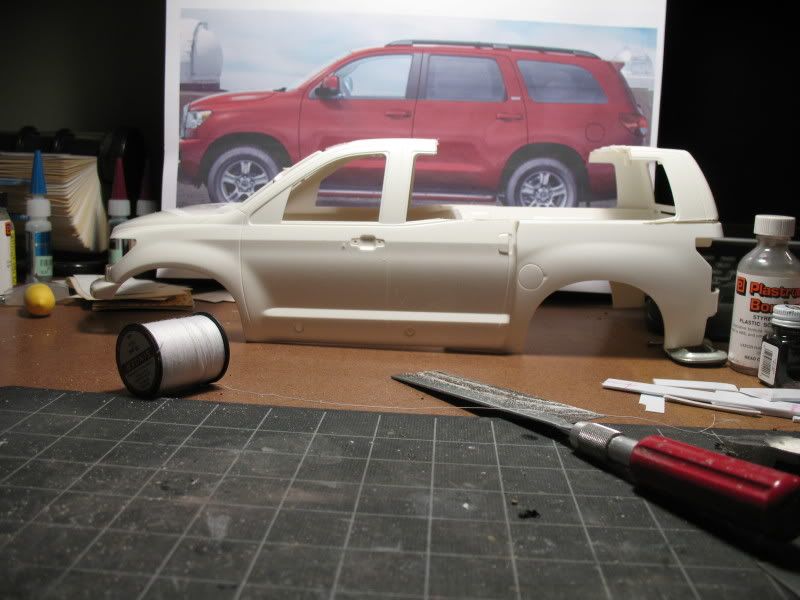 window sills will have to be reworked on rear two windows. rear pillar and rear glass will slope more forward, like the 1:1. The tamiya bed makes the proper transition from the body lines to the bubbled out fender so I'll cut the rear door away at the cab, about 7/8" and mate it with the front of the bed to keep the lines right. Sequoia rear taillight looks like same shape as headlight so I'll look at making the taillights out of headlights. Can't seem to get the cc-01 chassis working right. problems with the pinion. first the set screw hit the gear when pinion placed in proper location. then got it to work but when I test the chassis outside it dies at first rock, as soon as it has to work against the rock to get the wheels moving up. I'm thinking this is a esc issue. after that it wont work unless I turn it off and on again. then too, the motor stops if I try to turn. am charging the battery again to eliminate that as a reason. |
|
| |
|
04-14-2009, 12:30 AM
| #7 |
| I wanna be Dave Join Date: May 2006 Location: FOUR 8 OH
Posts: 4,913
|
I say just make it a two door wagon.  |
|
| |
|
04-14-2009, 01:18 PM
| #8 |
| Rock Crawler Join Date: Feb 2007 Location: weather sucks ,mn
Posts: 680
|
i'd hate to nit pick but are you going to move fuel door lol
|
|
| |
|
04-14-2009, 03:13 PM
| #9 |
| I wanna be Dave Join Date: Aug 2007 Location: santa monica
Posts: 3,687
|
lol.
|
|
| |
|
04-15-2009, 04:48 AM
| #10 |
| Quarry Creeper Join Date: Mar 2005 Location: The 2one7
Posts: 259
|
holy crap this is going to get interesting!
|
|
| |
|
04-15-2009, 06:26 AM
| #11 |
| RCC Addict Join Date: Jun 2008 Location: Monroe, NC
Posts: 1,547
|
I was wondering how long it would take someone to build one of these. It should be good. Justin |
|
| |
|
04-15-2009, 04:55 PM
| #12 |
| I wanna be Dave Join Date: Sep 2008 Location: behind the wheel of a monster truck...
Posts: 2,878
|
Yah I was wondering about this too... Nice build so far man,keep it up! Keep posting pics and updates! Can't wait to see it done. |
|
| |
|
04-15-2009, 09:01 PM
| #13 |
| 0 0   Join Date: Jul 2006 Location: FT. Thomas
Posts: 1,830
|
you come up with the most random variations of the stock bodies. i love it |
|
| |
|
04-15-2009, 10:34 PM
| #14 |
| Quarry Creeper Join Date: Jan 2008 Location: Calabash, NC
Posts: 348
|
True that. I've been a fan for a while. I'm waiting on his '48 Ford/Supra/Chevy Celebrity Wagon 6-wheel crawler hybrid. Just kidding. Although I'd love to see that Jeep Commander crew cab pickup again! |
|
| |
|
04-15-2009, 10:43 PM
| #15 | |
| I wanna be Dave Join Date: Aug 2007 Location: santa monica
Posts: 3,687
|
oh man thats funny! could happen.... Quote:
 gave it to someone who is refurbishing it and will give it new life, although I think its on the deep backburner at the moment... that thing was so cool, and so poorly build, lol...  tonights update: body cab and bed are mated and first round of rough styrene filling and sanding done. still lots of futzing with this to do. 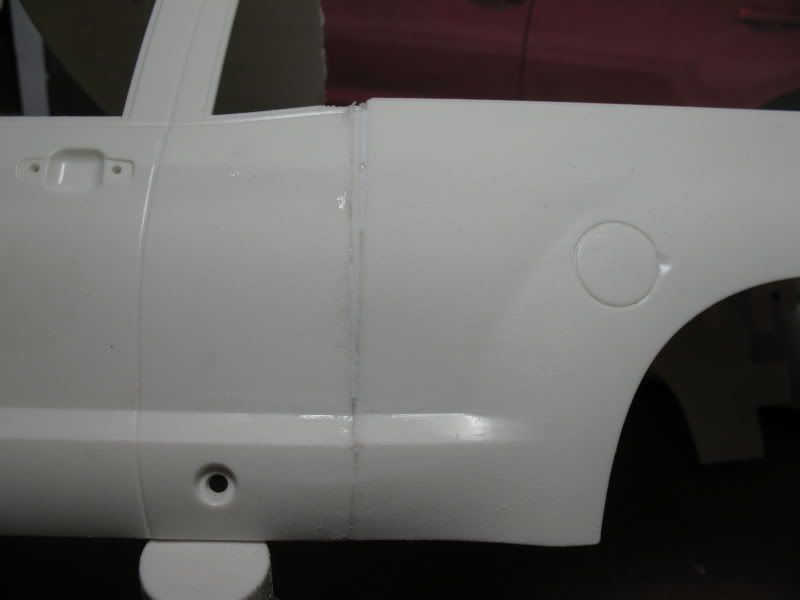  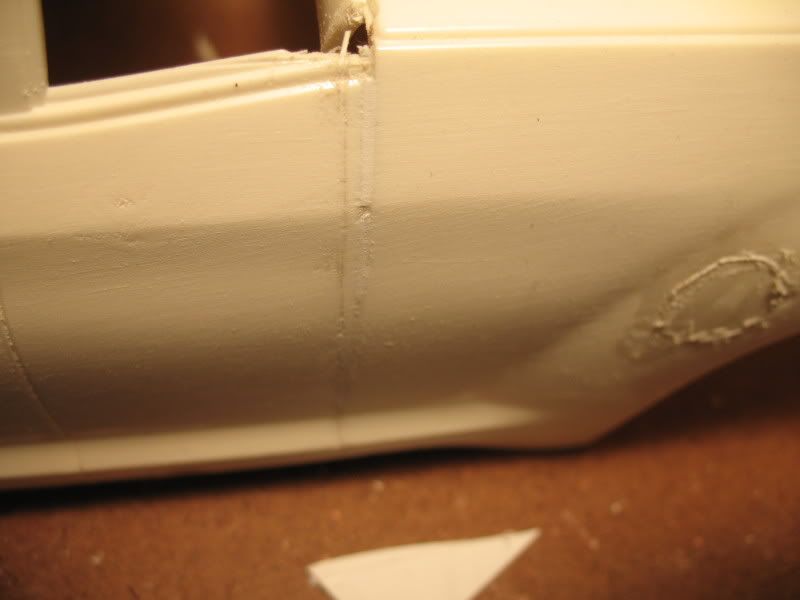 on the cc-01 chassis (lwb) 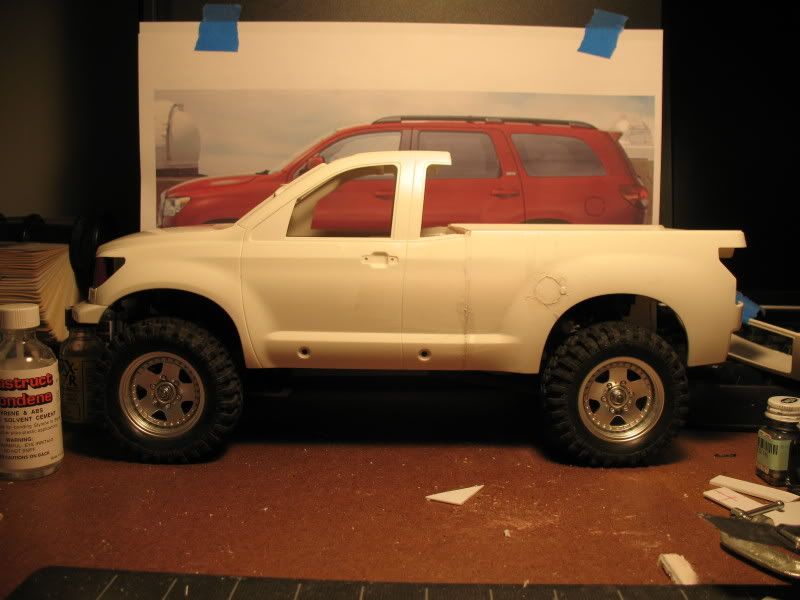 Last edited by pantablo; 04-16-2009 at 12:25 AM. | |
|
| |
|
04-16-2009, 02:34 AM
| #16 |
| Quarry Creeper Join Date: Jul 2006 Location: Look outside your window 0.0
Posts: 399
|
Looking good Pablo The rear looks like it is missing a little junk in the trunk......:-P
|
|
| |
|
04-17-2009, 05:57 PM
| #17 |
| I wanna be Dave Join Date: Aug 2007 Location: santa monica
Posts: 3,687
|
tires dont stick out much. flares would probably cover them. we'll see if I end up with any cash to buy some flares though, lol. 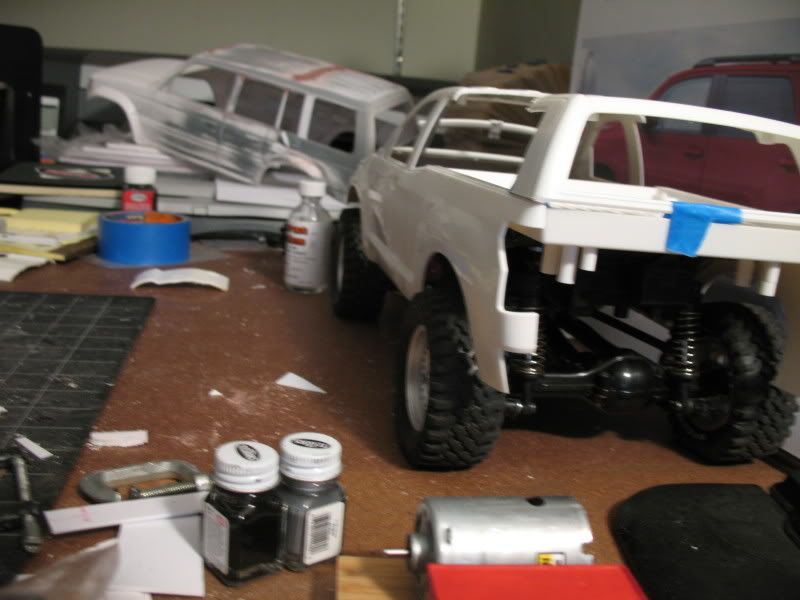 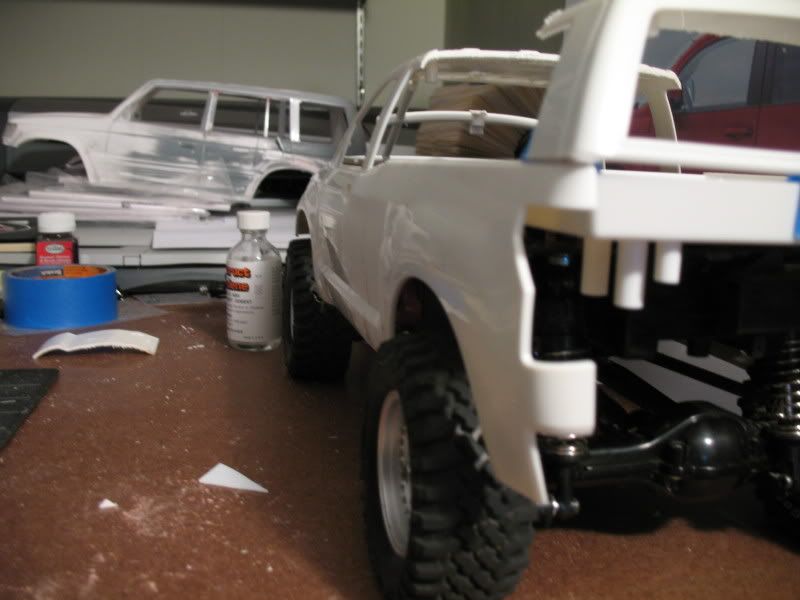 always save your scraps. pajero bumper, meet mr tundra 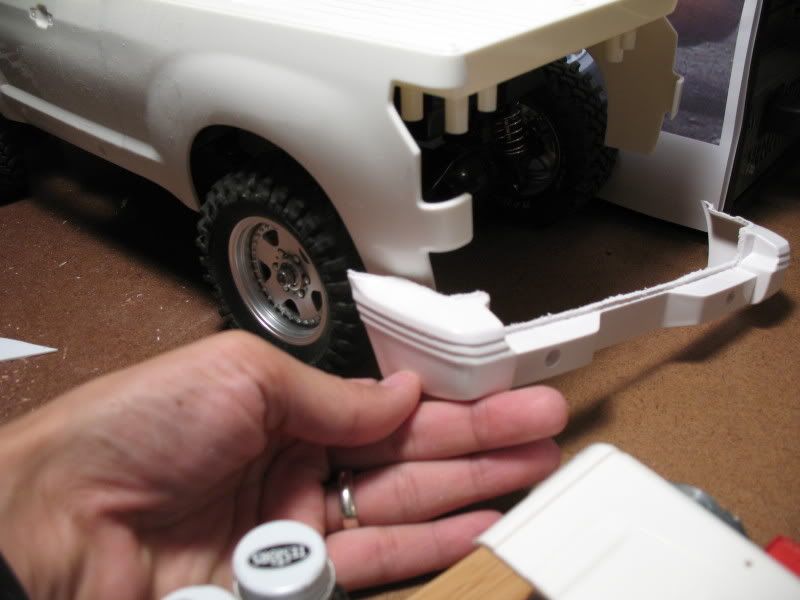 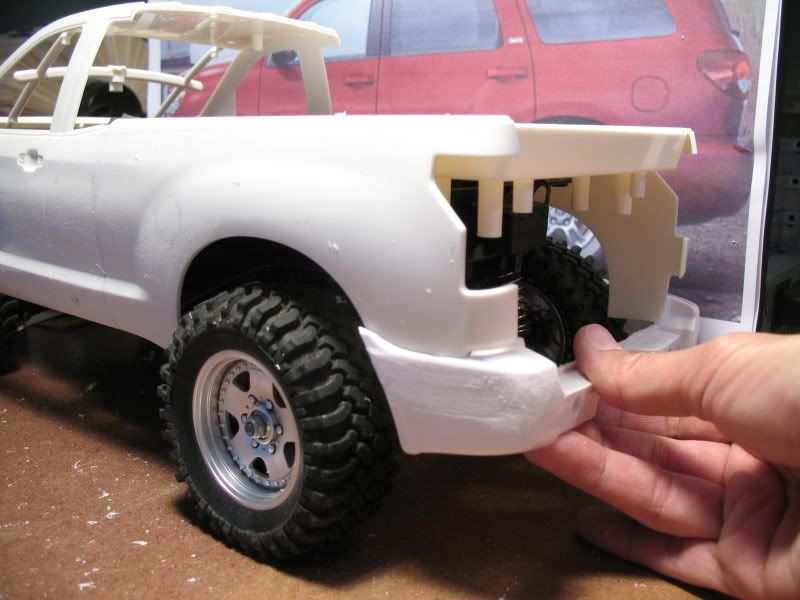 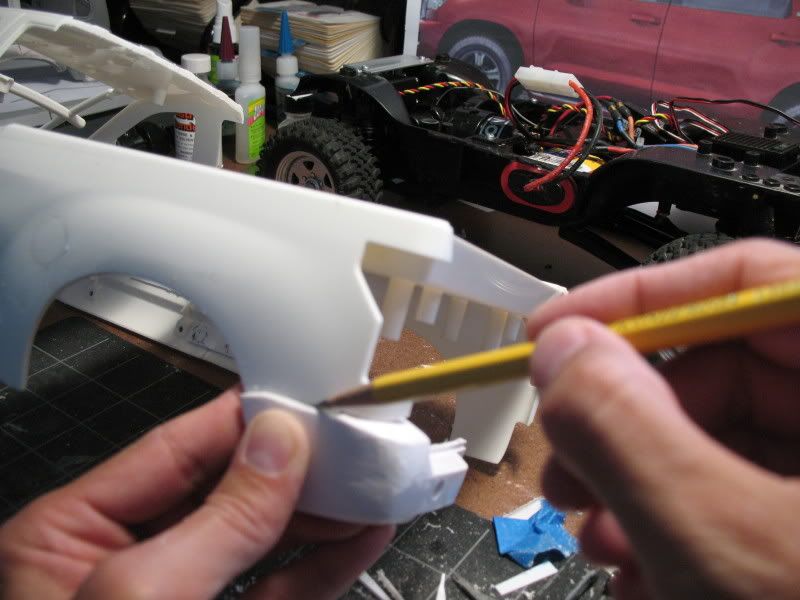 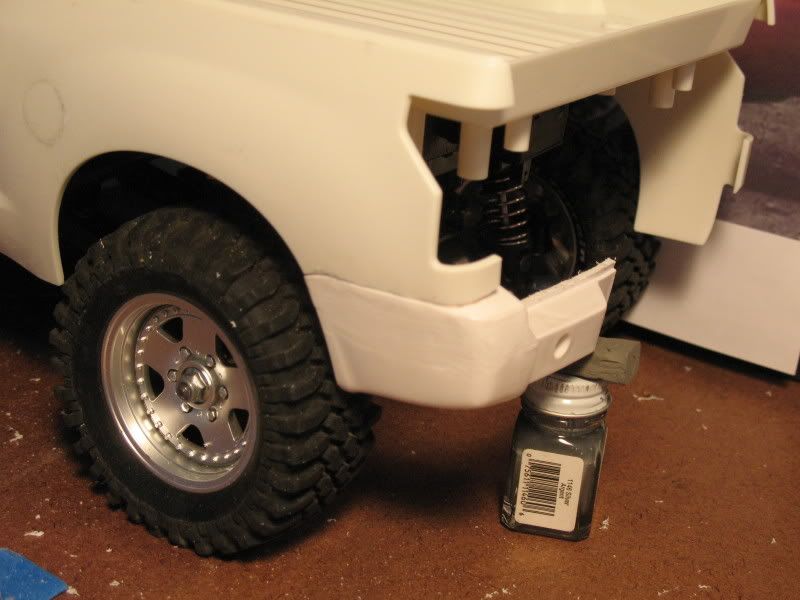 |
|
| |
|
04-17-2009, 06:29 PM
| #18 |
| I wanna be Dave Join Date: Sep 2007 Location: San Tan Valley
Posts: 4,267
|
I can smell the glue from here. Always like your builds...very creative! |
|
| |
|
04-17-2009, 09:43 PM
| #19 |
| Quarry Creeper Join Date: Oct 2007 Location: KC
Posts: 369
|
Pablo are you using Plastruct Bondene to glue the tundra body together? I was just wondering if the solvent would work with the tamiya plastic body and I saw your pics....
|
|
| |
|
04-17-2009, 09:47 PM
| #20 | |
| I wanna be Dave Join Date: Aug 2007 Location: santa monica
Posts: 3,687
|
thanks guys. Quote:
| |
|
| |
|
| |


 Linear Mode


