| |
| |||||||
 |
| | LinkBack | Thread Tools | Display Modes |
 09-29-2009, 07:42 PM
| #1 |
| Rock Crawler Join Date: Jan 2007 Location: monson
Posts: 651
|
So I ran my SCX last weekend and was quite impressed with its ability, however one thing that bugged me was seeing that steering servo on the axle... fine for a comp style rig but just bothered me to see on a "scale" truck. So I figured I'd better do something about it that night when I got home from the mountain. Goal: To create an inexpensive 3 link conversion for the SCX-10 to convert the front to a true 3 link and place the servo on the frame with minimum or no bump steer. 1st parts list: Links: 1- Axial 91mm (3.58in) ( upper 3rd link) 1- custom 2.955in (75mm) (panhard rod) 1- custom 2.52in (64mm) (drag link) mounts: 1- Axial 3rd link axle mount (with ball) 3- Axial servo mounts Ballends: 1- Axial offset link end 2- Axial straight link end hardware: Self tapping: 3- .570 (14.5mm) screws 2 to 4 .390 (10mm) servo screws 2- .390 (10mm) screws 1- .47 (12mm) screw machine screw: 1- .55 (14mm) screw 2- .63 (16mm) screw 1- M3 nylon lock nut Step 1: Parts: 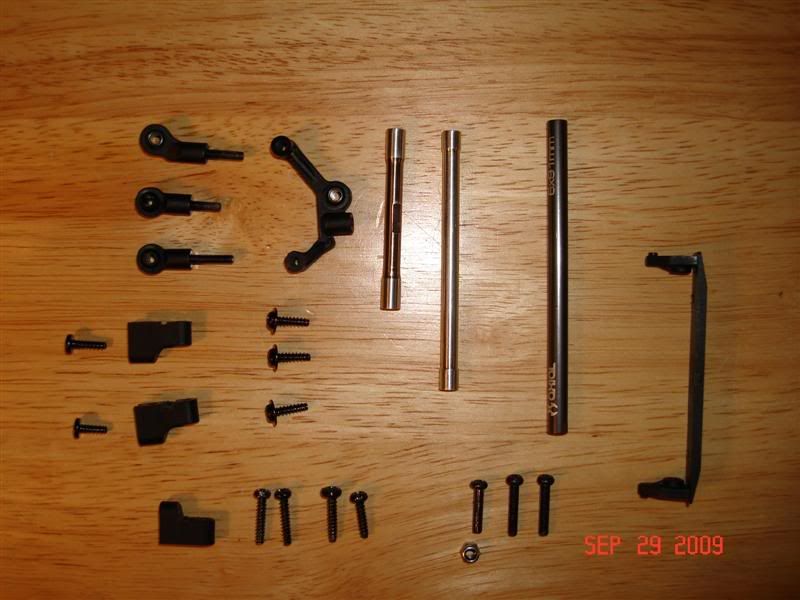 Step 2: remove front cross brace and drill two holes as shown, roughly 1.83in (46.5mm) apart just below center (see pic) 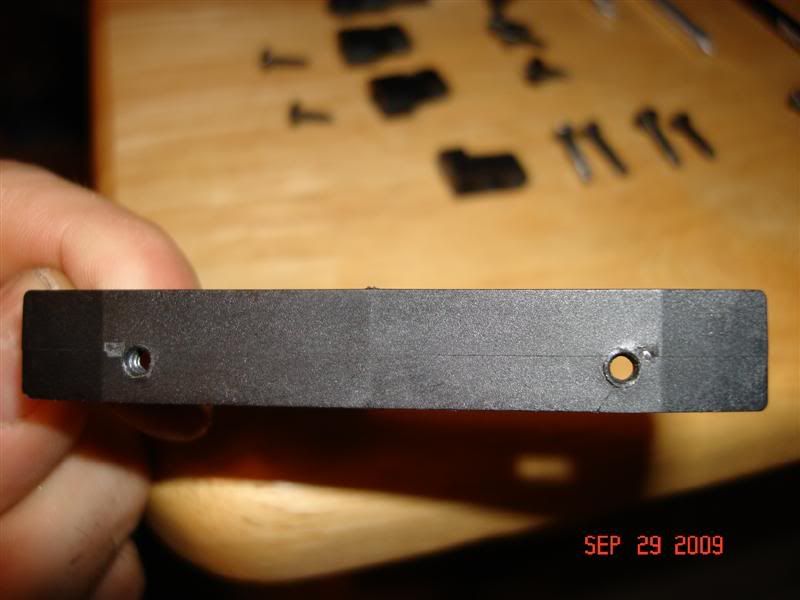 Step 3: heat short end and bend to 1.32in (33.5mm) match holes in frame (see step 10 and 11) 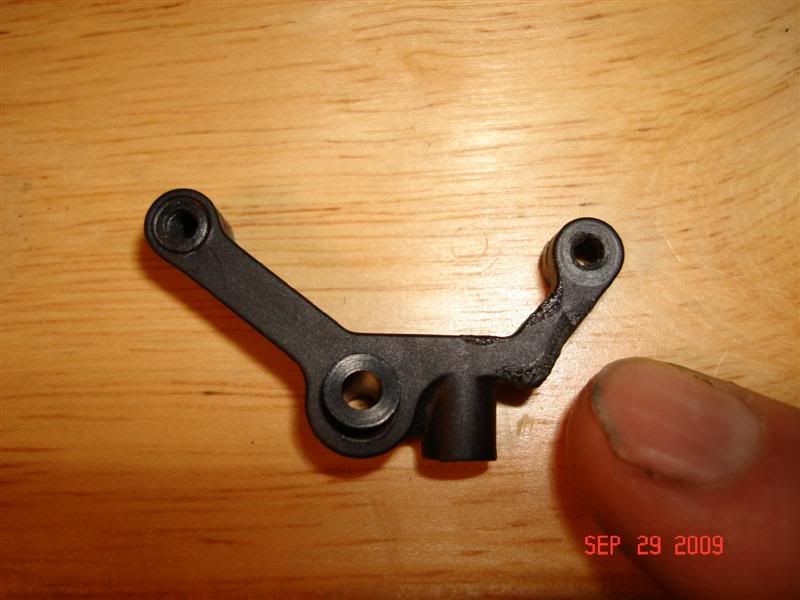 Step 4: cut boss on short end, remove .080in (2mm) (cut side toward frame) 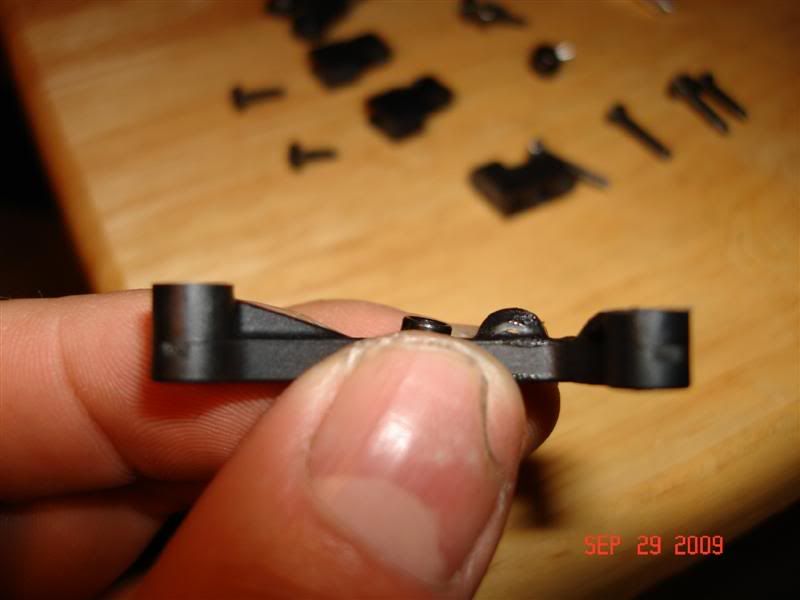 Step 5: remove upper 3rd link assembly. remove bent link end on driver side (don't forget to replace screw) attached Axial 91mm (3.58in) link to passenger side link end on frame.  Step 6: attach 3rd link to axle with .63 (16mm) M3 screw 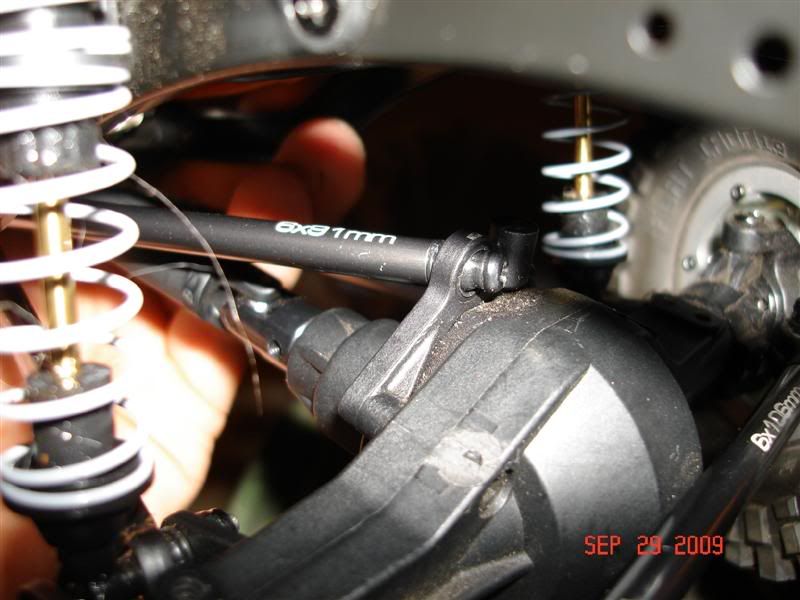 Step 7: take 1 Axial servo mount block and remove radius corner so it is a sharp inside corner 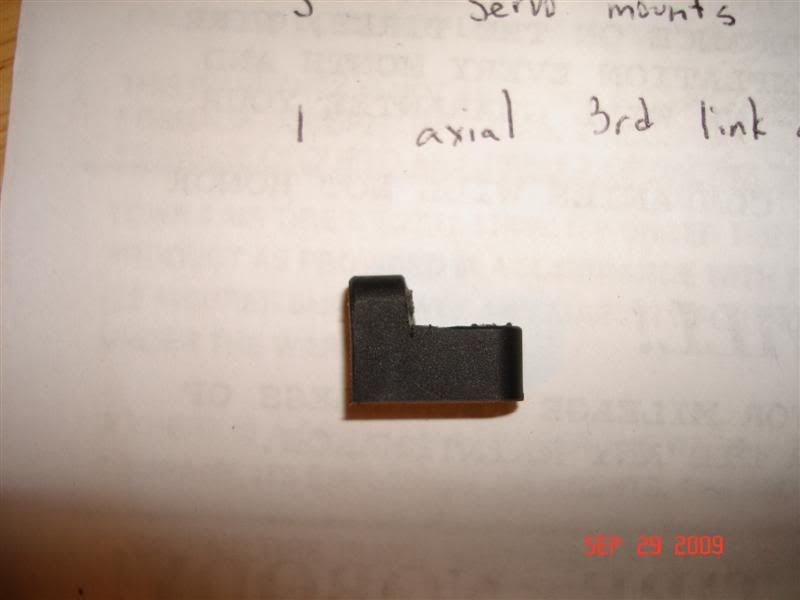 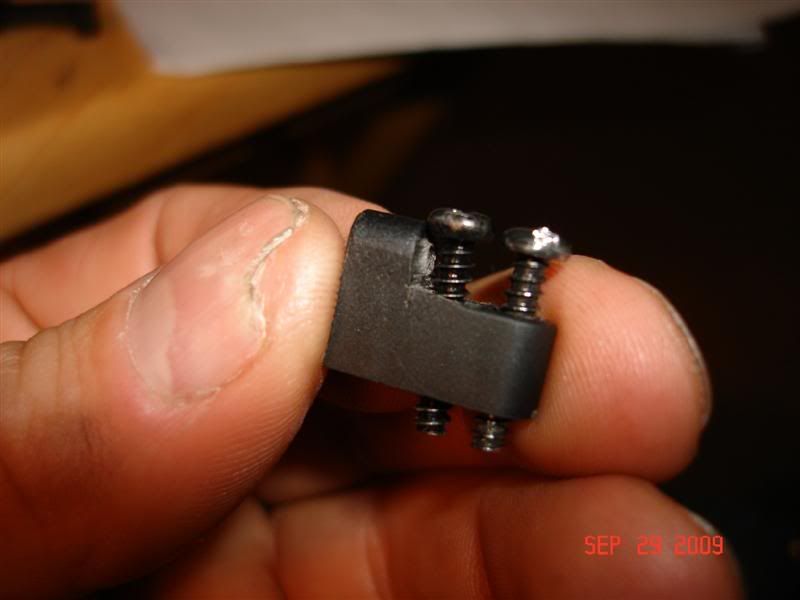 Step 8: cut side of mount 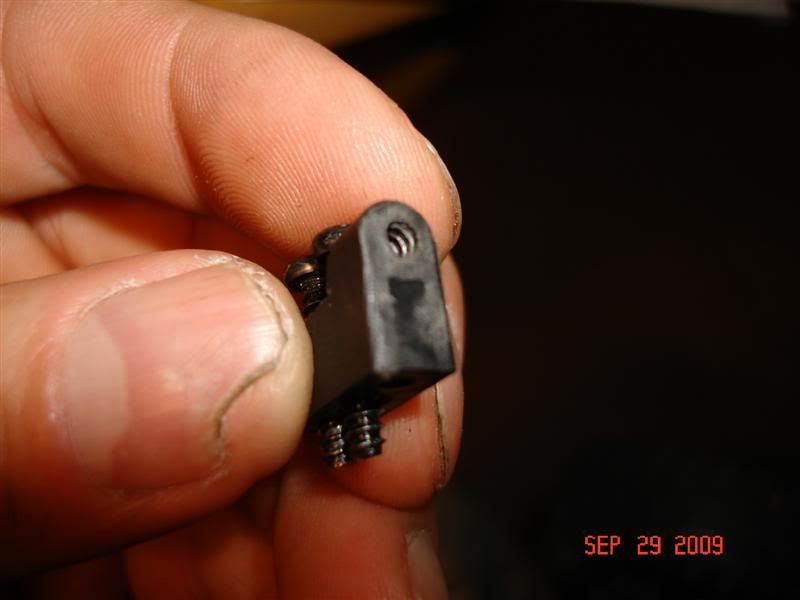 Step 9: attach servo mount block to passenger side axle with 2 .57in (14.5mm) self tapping screws 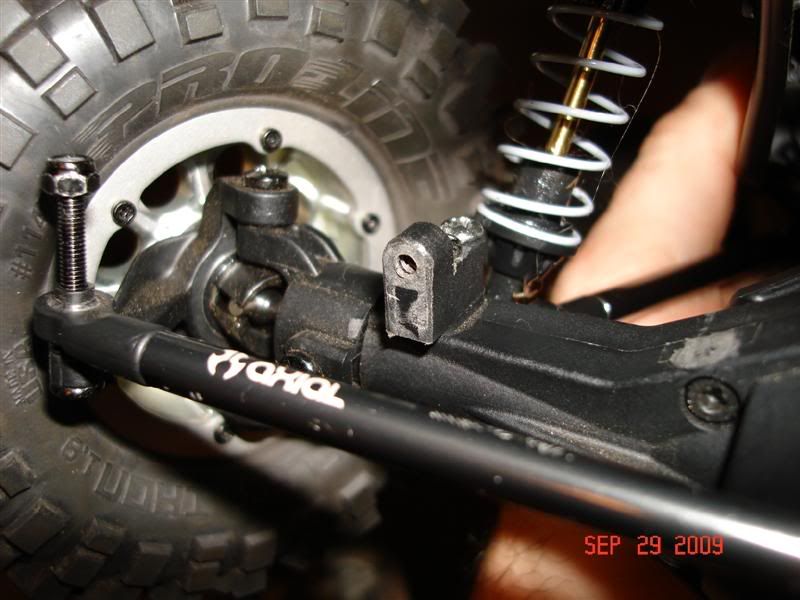 Step 10: attach Axial 3rd link axle mount to side of frame use .57in (14.5mm) self tapping screw in rear hole 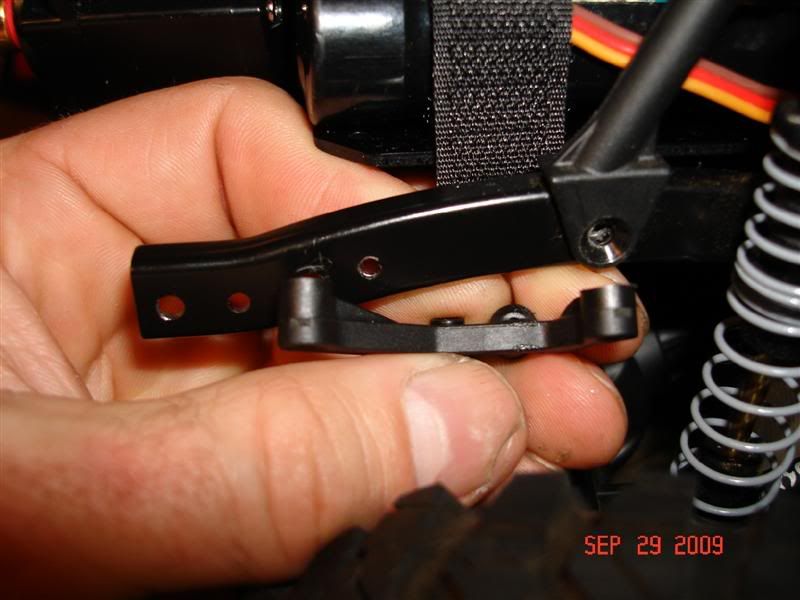 Step 11: attach to front part of frame rail with .55in (14mm) M3 screw and lock nut 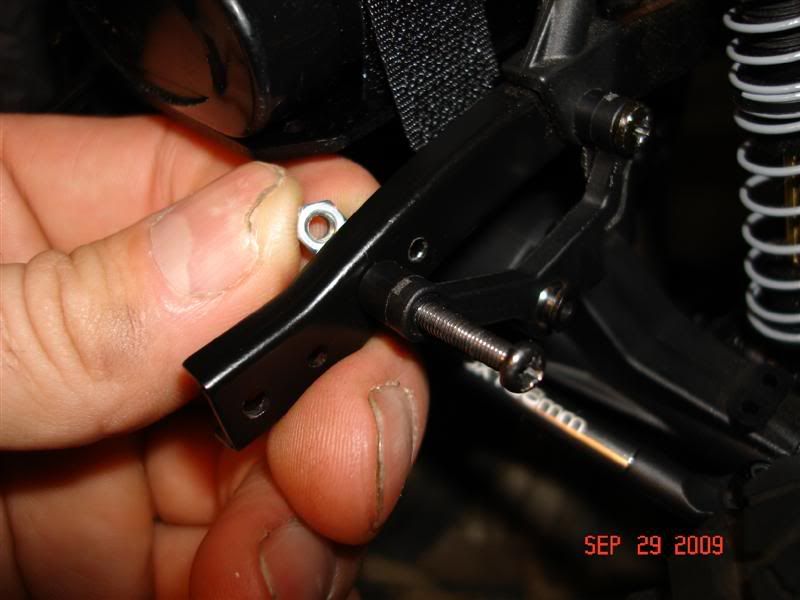 Step 12: attach Axial straight link end to 2.955in (75mm) link 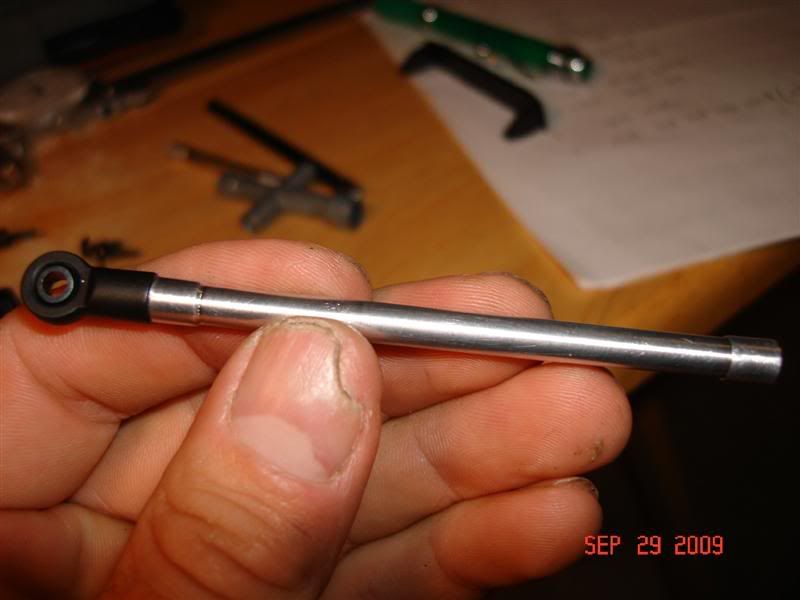 be sure to use standard non-flared ball 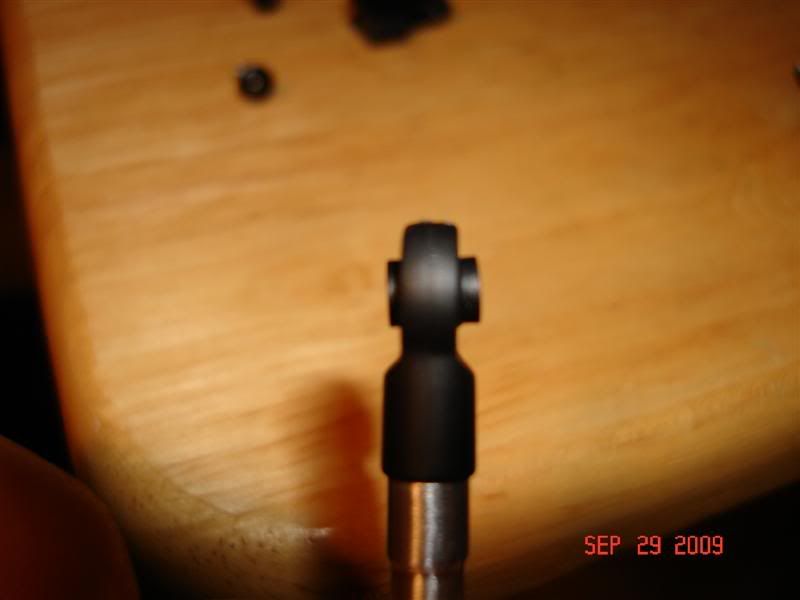 Step 13: attach panhard to axle with .47in (12mm) self tapping screw  Step 14: attach panhard to frame with .63 (16mm) M3 screw 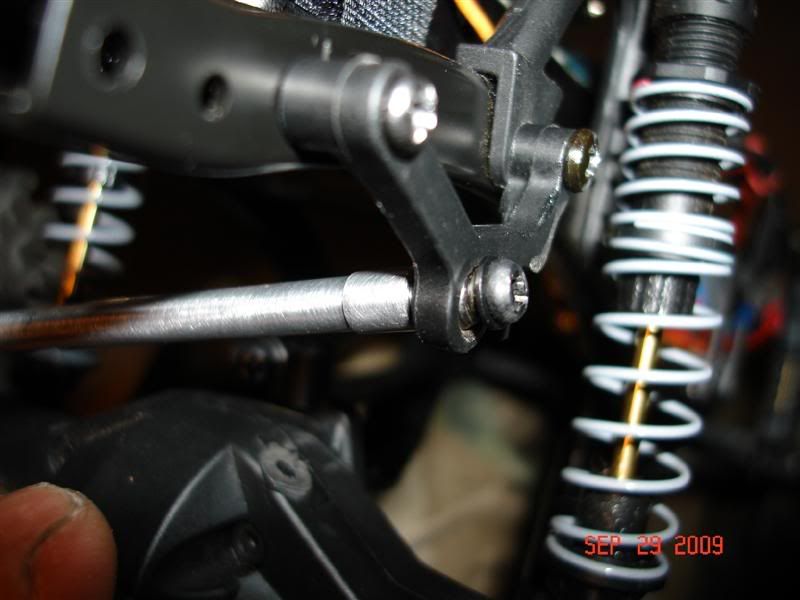 Step 15: remove material on 2 Axial servo mount blocks to clear ridge on servo mount tabs 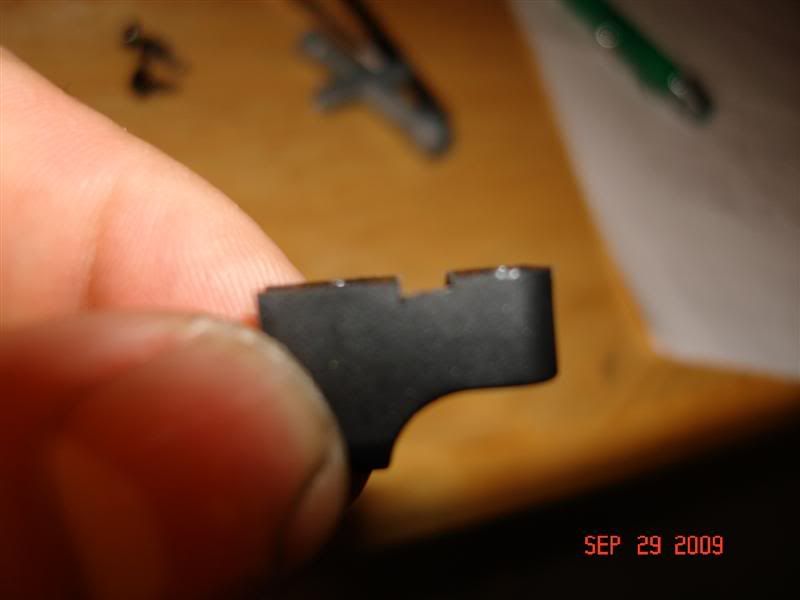 Step 16: mount 2 servo mount blocks to frame cross member with .390 (10mm) self tapping screws 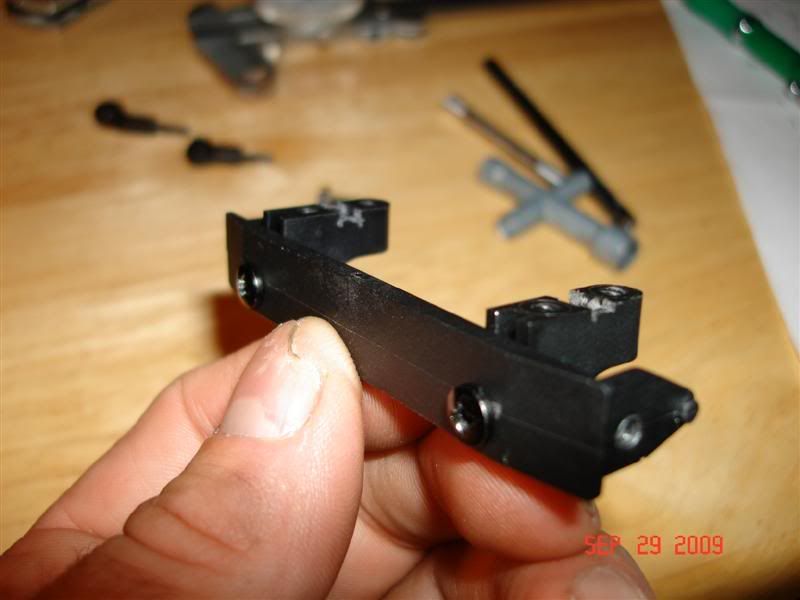 Step 17: mount to frame 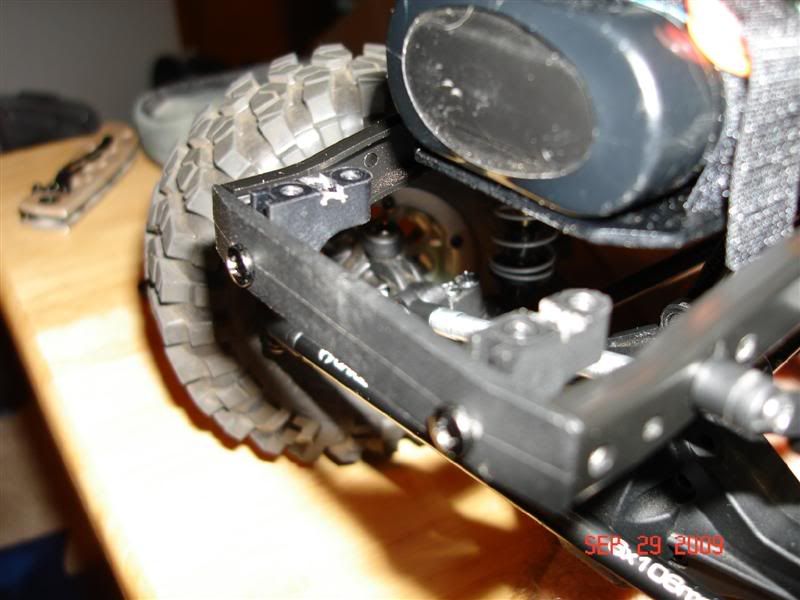 Step 18: assemble drag link as shown with offset link end and straight end 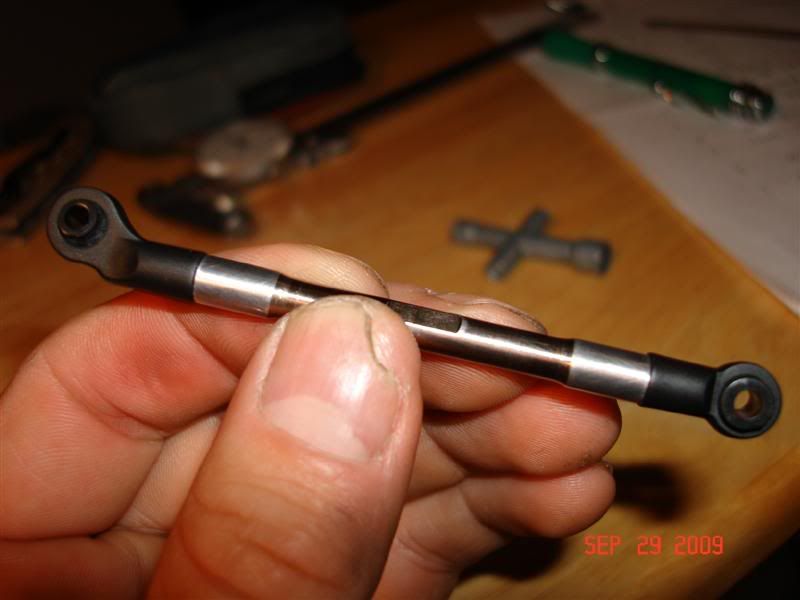 Step 19: attach offset link end to passenger side steering knuckle  Step 20: mount servo to front mounts and attach drag link to servo arm. Done! 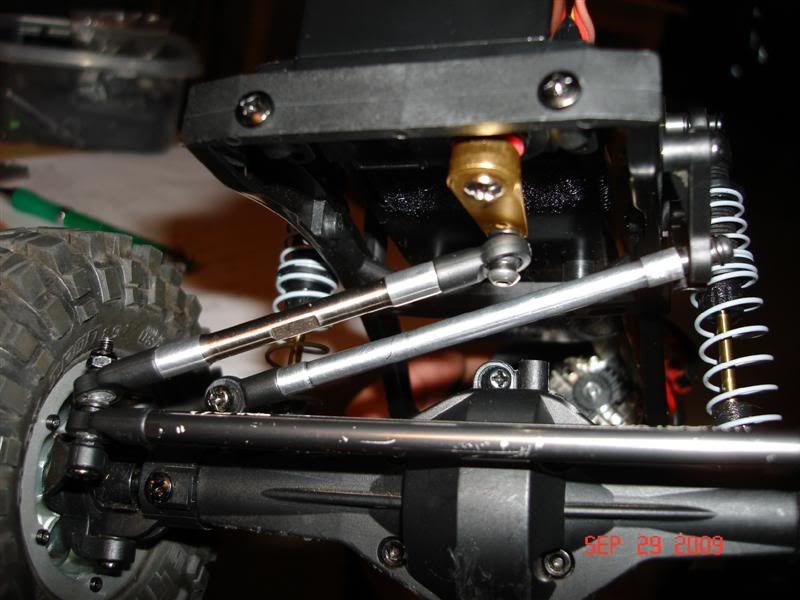 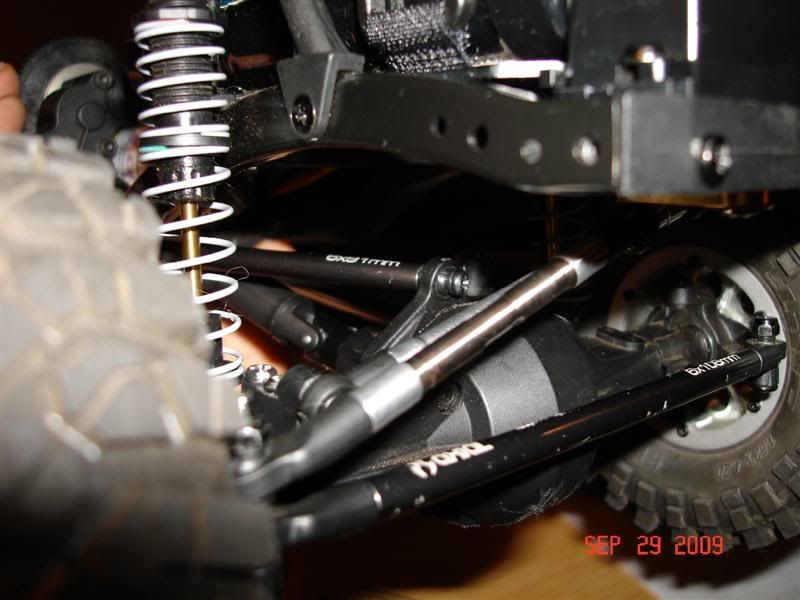 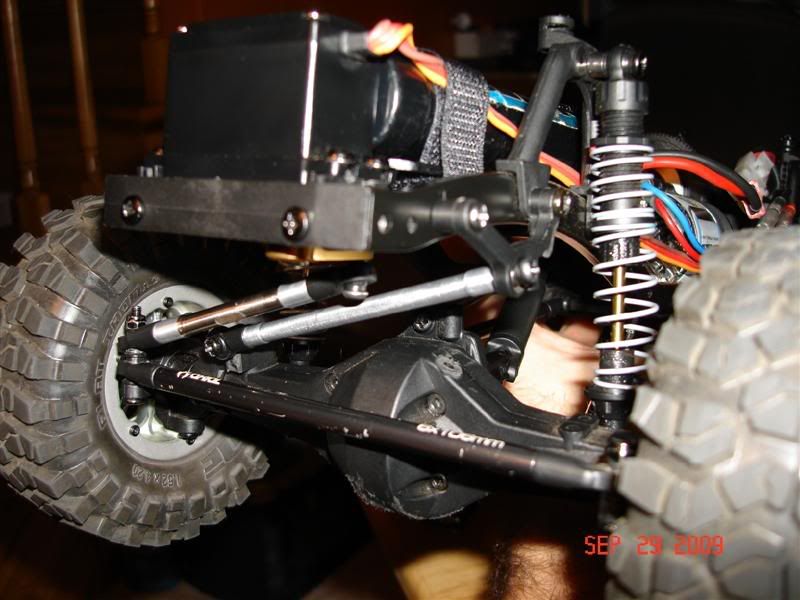 Last edited by 500swmag; 10-01-2009 at 07:13 PM. |

|  |
| Sponsored Links | |
| | |
|
09-29-2009, 08:43 PM
| #2 |
| Quarry Creeper Join Date: Feb 2009 Location: Orangevale
Posts: 223
|
Bitchen! How does it perform? Looks like all the angles are correct on the Pan hard and steering arm. I might have to follow suit with something like this. I also have a scaler that has the servo on the axle...Fabricating and making things work is half the fun anyway...I know the HandBros Kit is supposed to be a great mod, but it's pretty expensive. Good work! JB |
|
| |
|
09-29-2009, 08:48 PM
| #3 | |
| Rock Crawler Join Date: Jan 2007 Location: monson
Posts: 651
| Quote:
I agree messing around trying to make something work IS half the fun. It was Sat. night after I got back from the mt. and I just could't wait for something to be shipped. I notice no bind or bump steer, I can't see it with my eyes. And it looks a lot better than axle mounted servo, IMHO. | |
|
| |
|
09-29-2009, 09:49 PM
| #4 |
| SCALE PERFORMANCE PARTS   Join Date: Oct 2007 Location: Cedar Park
Posts: 5,453
|
Nice work.  You may want to slip a nut inside the axle housing to help keep the axle bracket on in rough situations. Check the suspensipn section: Locked Up's SCX10 - Trail Ready H2 |
|
| |
|
09-29-2009, 09:57 PM
| #5 |
| Hateraide   Join Date: Dec 2008 Location: Mission BC
Posts: 1,538
|
great job and great write up, im gonna have to keep this in mind |
|
| |
|
09-29-2009, 09:57 PM
| #6 | |
| Hateraide Join Date: Dec 2008 Location: Mission BC
Posts: 1,538
| Quote:
he shouldnt have a prob with that he used both holes on the diff | |
|
| |
|
09-30-2009, 07:33 AM
| #7 |
| Rock Crawler Join Date: Dec 2008 Location: Fortuna Calif.
Posts: 997
|
Nice work, way to think out-side of the box |
|
| |
|
09-30-2009, 05:10 PM
| #8 |
| RCC Addict Join Date: Nov 2008 Location: never been
Posts: 1,317
|
great fab work on the steering and panhard |
|
| |
|
10-01-2009, 04:51 AM
| #9 |
| RCC Addict Join Date: Aug 2007 Location: Marshalltown
Posts: 1,003
|
built not bought, i'm completely into it.
|
|
| |
|
10-01-2009, 09:32 AM
| #10 | |
| SCALE PERFORMANCE PARTS Join Date: Oct 2007 Location: Cedar Park
Posts: 5,453
| Quote:
You can strip out anything if you try hard enough so I try to make things bullet proof. ;) | |
|
| |
|
10-01-2009, 09:47 AM
| #11 |
| Powered by Awesome   Join Date: Sep 2004 Location: Parker, Colorado
Posts: 3,622
|
This reminds me of "the old days" when rigs were built and couldnt be bought. Awesome work bro! cant wait to see the review of the mod.. video is always nice!
|
|
| |
|
10-01-2009, 10:05 AM
| #12 |
| RCC Addict Join Date: Jul 2008 Location: Fox Valley WI
Posts: 1,691
|
I mounted my servo and battery the same way on mine, minus a panhard setup. I would think that you'd get more accurate steering with that arrangement, nicely thought out and documented .Troy. |
|
| |
|
10-01-2009, 07:24 PM
| #13 |
| Rock Crawler Join Date: Jan 2007 Location: monson
Posts: 651
|
well between work and rain I haven't got back to the rocks but here is a lame video of the suspension.  |
|
| |
|
10-02-2009, 08:23 AM
| #14 |
| Rock Crawler Join Date: Feb 2007 Location: Simi Vly
Posts: 818
|
SLick idea man. I like it. Swampdawg did his own chassis steering upgrade as well using Axial parts. His turned out good as well. Nice job. |
|
| |
|
10-02-2009, 09:11 AM
| #15 |
| N.E.R.C.C Uncle Blinky  Join Date: Dec 2008 Location: RUKDNME...
Posts: 976
|
killer idea grate post...thanx for the set up it works uber good and the price was rite GSRCC Drail
|
|
| |
|
10-03-2009, 04:41 PM
| #16 |
| Rock Stacker Join Date: Feb 2006 Location: Sugarland, TX
Posts: 64
|
Props man great write up! im tring to figure something out like this on my scx chassis with tlt axles. Cant wait till i do.
|
|
| |
|
10-04-2009, 09:16 PM
| #17 |
| Rock Crawler Join Date: Jan 2007 Location: monson
Posts: 651
|
Hey guys thanks for all the props. I figure the same could be done with the rear if one was so inclined. So far I am pleased with the results, full articulation with no binding and no servo on the axle to ruin the "scale" look of my ramcharger. Hope some of you could get some use from this, post up pics if you use this or have your own mods. |
|
| |
|
08-18-2010, 05:23 PM
| #18 |
| Rock Crawler Join Date: Jan 2007 Location: monson
Posts: 651
|
changing the ride height with this conversion creates some small issues, namely serious axle steer. I decided I wanted to add some new shocks, problem was/is I only have longer 110mm shocks so the ride height gets a lot higher. With this comes axle steer, the lower triangulated links steered the axle about 10 degrees at full droop so next came a custom set of link mounts for the lower links to make them more of a parallel link setup. 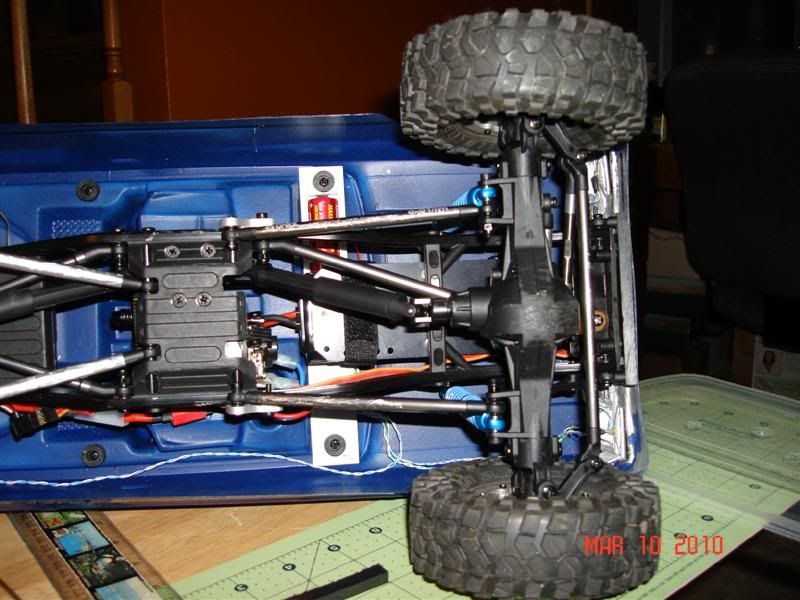 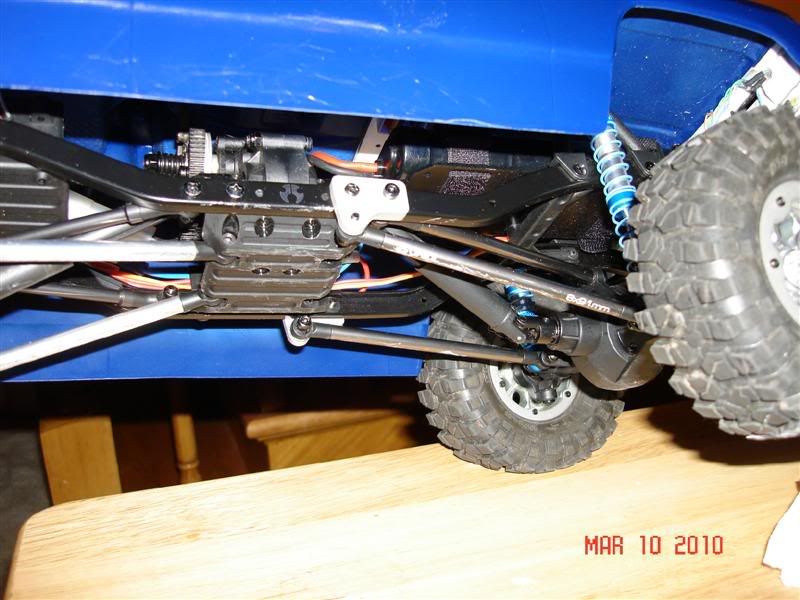 |
|
| |
|
08-23-2010, 05:27 AM
| #19 |
| Quarry Creeper Join Date: Jun 2010 Location: 801 El Capital
Posts: 434
|
That looks good how has the new setup worked out for ya? Jason |
|
| |
|
08-23-2010, 08:15 AM
| #20 | |
| Rock Crawler Join Date: Jan 2007 Location: monson
Posts: 651
| Quote:
| |
|
| |
|
| |


 Linear Mode


