| |
| |||||||
 |
| | LinkBack | Thread Tools | Display Modes |
 01-21-2005, 10:33 AM
| #1 |
| Quarry Creeper Join Date: Oct 2004 Location: vegas
Posts: 310
| VMG TO CRAWLER! by Sean lv crawler Hi there, Ok i got sick of posting so many times over and over on how to make a VMG into a crawler. So i am making a tech article for all you people out there. VMG to Crawler! Here's a list of everything you need. Tools needed - Dremel, JB weld, hot glue, screw driver.... The dreaded CLICK CLICK CLICK This noise is GOOD! it happens because there is a gear inside the tranny that has a sring attached to it. When there is too much tension it slips. It is like a slipper gear. If you want to get rid of it. There is a gear that came with your vmg. All you do is open the tranny up and replace the similar looking gear. Be careful you have a chance of striping your gears now but i havent yet :-P. Articulation The most arc you will need is about 70 degrees. 70 is perfect. You do not need 90+ degrees of arc, that is just stupid. 70 - 80 is good for crawling. Gear Reduction - Click (to mount the reduction - Click Mini Metal Gear Servo - Click The Servo Saver (need to use screw from hs81 and grind down the sides of the screw to make it fit) - Click Everything to Get the Servo Mod Done - Click Click Click Click Swami Servo Mounts (or you can fab up your own)- Click Heres a pic of my mounts with everything on. To Stretch it - (WARNING - YOU WILL NEED 20 CUPS AND BALLS FOR THIS CONEVERISON! and 22 for 4ws) 4-40 Full Threaded Rod (of course you dont need this many) - Click Balls - Click Cups - Click Metal tubing 5/32 - Click jb weld - Click Get Your COG Low! COG- center of gravity So what you want to do. Get your battery pack on the rear axle if your not doing 4ws. Then take your reciever/esc unit and put it under the upper plate. Here are some pics. i Hot Glued my Battery and Esc so it would stay. If you want four wheel steering - Click Also will need another servo and swami mount and you will need to use your rear axel diff gears and axels and bearings. Heres a pic of the way i did my upper link mounts. All i did was take a length of tubing. flatten it with a hammer. Then drill 3 holes. 1 on the left 1 in the middle and 1 on the right. Then use the old screw from the red triangle link to hold it down. pics say a thousand words. IN ORDER TO DO THE DRIVE SHAFTS YOU WILL NEED TO CUT THE DRIVE SHAFT IN HALF AND THEN USE THE METAL TUBING AND THE JB WELD. JB IT INTO THE METAL TUBING. If you want 2.2 wheels. Click Click Click Make sure to lock your diffs. open them up. take out the diff gear. open the diff gear up. take out all the little gears.(SPIDER GEARS) clean off all the grease. then put the little gears back in. Then hot glue the ends shut. Make sure you use alot of hot glue. Then trim if necessary. some people say that locking just the front is better than locking both. i have both locked and i am happy with it. its up to you. hot glue is real easy to undo. just take a flat head and pry off each end of the diff. then peel away. some pics. Look my toe ^^^ If you want to mount a different body - http://www.carttonic.com/catalog/ind...10,89002,90247 Here is how i mounted my mini t extended body posts. Average price that you will pay to get it to a crawler? The truck will cost around 100 depending on where you buy it. And all the parts to get it to a full blown crawler will put a whole in your pocket of around 100-150 depending on the 4ws or 2.2's. Total cost = $250 usd Here it is all finished. And one heck of an awesome crawler. Wheel base = 8 1/2 in center clearance = 2 3/4 in under axle clearance = 1 in Here are some comparrison pics from stock and mine. Here are some vids of my mini giant in action Click Click I want to thank TeamFSU, BlackMagic, and all of www.rccrawler.com and www.one18th.com for helping me. Hope this gets you far. anything else i think of i will post back up here. Good luck! God Speed! Last edited by badger; 11-15-2005 at 04:29 PM. |

|  |
| Sponsored Links | |
| | |
|
01-21-2005, 11:02 AM
| #2 |
| I wanna be Dave Join Date: Jan 2004 Location: Flagstaff, AZ
Posts: 2,399
|
Stickied |
|
| |
|
01-22-2005, 01:28 PM
| #3 |
| I wanna be Dave Join Date: Jun 2004 Location: Centennial, CO
Posts: 2,129
|
Thanks for the article. All the links should now work. As with the TLT FAQ, anyone with some good mods/info on the VMG, post it in here, preferably with links/part numbers. I will routinely clear out all non-tech responses. Last edited by Plays_with_Toys; 01-24-2005 at 10:56 PM. |
|
| |
|
05-24-2005, 02:32 AM
| #4 |
| RCC Addict Join Date: Apr 2005 Location: Seattle
Posts: 1,437
|
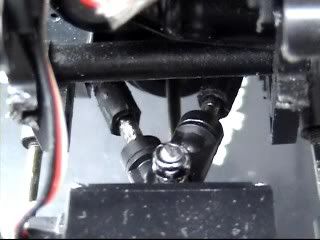
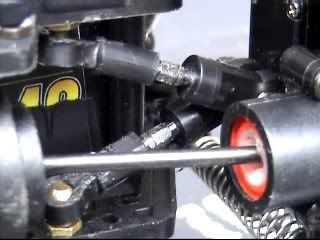
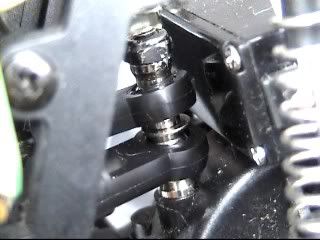
I thought I would add my build-up to this thread rather than starting another one. There are a lot of similarities, but some things are different. I hope seeing two different trucks converted will give others more of thier own ideas. The truck in the original post was the fuel for this build. Thanks! In the "My Vehicles" link on my site (in my sig at the bottom), there will always be an up-to-date report on the truck. This info is accurate as of 5-22-05. At this point the status is: - Chassis trimmed - Diffs locked - Bearings installed - Oil shocks installed - Wheels narrowed - Tires shaved - Shocks relocated - 4 link suspension installed - Shaved Hummer body - Clod-style steering set-up - HS-85MG steering servo - Airtronics ES-01 ESC - Airtronics MX-3 FM radio - Stainless steel screws installed on all mods - Custom body posts - Kimbrough mini heavy duty servo saver - Stretched to 8.5" wheel base - Custom 7.2V 1100Mah battery spread out over chassis Here is the first pic, seeing what it was capable of. It runs extremely quiet, which is nice, and is fairly capable, although prone to tipping due to a high center of gravity.  A common crawler trick is to remove treads from a stock tire to improve flexibility and traction. I did it here as well, and it turned out very nice. You'll notice in further pics that the treads are facing "backwards" on the truck. I seems to be the thing to do. I did it because I saw it done, I can't verify if it makes any difference.  The stock steering is problematic. Truthfully, it sucks. I removed the stock system and followed some descriptions I found to improve the setup. It's basically a Clod setup on a smaller scale. The only downfall, the captured ball ends contacted the tires in the front.  I narrowed the wheels by removing one lip from the inside edge. This narrows the tire and clears the binding with the steering linkage.  Here is the difference, after narrowing the wheel.  The linkage now clears the tire perfectly.  This is fast becoming my favorite ESC. The Airtronics ES-01. This is the second small project I have used it in, and it works great. I can get them for around $25, so they are even more attractive for that reason!  As with all my RC's, this is also controlled by my Airtronics MX-3 radio.  I destroyed a Stampede front body mount to make the rear body posts for the VMG. The Hummer body required taller rear posts, and this works perfectly.  Here is a shot of the steering. I am running a Hitec HS-85MG servo, a Kimbrough mini heavy duty servo saver and all custom links.  I made new lower links from HPI purple aluminum parts. I have no idea what they were meant for originally.  I used a Tamiya stand-off, cut in half, to raise the pivot point of the upper ink. As you may notice in the pics, there are no drivelines. I still need to lengthen them, but I am out of JB Weld. It actually sits a little higher now, which was not my intent. I will need to look at the link layout again to figure this out. I painted the wheels black as well, it looks much better...    About 45 degrees of articulation. I think the springs are too stiff, and the links are possibly too short. I'd like to see 70 degrees. I made and installed some new lower links, moved the purple lower links to the upper position, but it's not working out. I reworked the rear upper links. It looks better, but I am still lacking enough articulation. I made a custom link mount over the rear axle, but the servo on the front will dictate that a different method be used there.  I hacked up the body while I was at it. I always liked tat look, and it will be needed when the articulation gets to where I want it, especially if/when I mount 2.2 wheels and tires.  You can see in this pic, the chassis sits really low. I don't know that I like that, and it seems that it is because of the shock position. When fully extended, they don't allow the chassis to raise enough, and when fully compress, they don't allow enough articulation.  Here is a crappy shot of the front, the flash didn't work out too well, but it's a decent reference pic for later.  Another reference pic of the rear setup. I removed the stock battery and installed this 1100Mah 7.2 volt pack I made.  Tonight I reconfigured the shocks. Lowered the upper mount and mounted the shock bottom directly to the lower links. I now have much better articulation and complete shock travel. I am much happier with this setup.  I picked up 6 1.2 volt sub-C Venom cells to make a new pack with, the cells will be spread out over the chassis, you can see 4 of them in the pics, I am still looking for a good spot for the last two.   I took some underside shots, I think it looks pretty good. The lower left pic is the rear, the lower right is the front. I am still wanting to get rid of the last two purple links, but need to come up with a way to mount the new links in a better way.    Here you can see the lower shock mount (the truck is flipped over in the pic). I carefully drilled a hole into the lower links and screwed the stock pivot directly into the link.  All that's left at this point is to wire up the battery cells, install a gear reduction, install some 2.2 hexes and pick out some 2.2 wheels and tires. Last edited by BlueMonster; 05-24-2005 at 02:36 AM. |
|
| |
|
07-16-2005, 04:02 AM
| #5 |
| Newbie Join Date: Mar 2005 Location: norwich UK
Posts: 2
|    i also recut the tyres to suit climbing more and offer more bite when needed 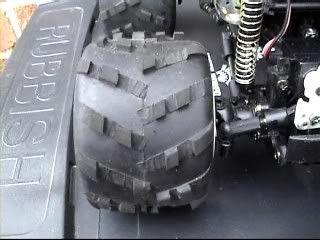 next i used tamiya servo blocks for a cheap change and a micro servo 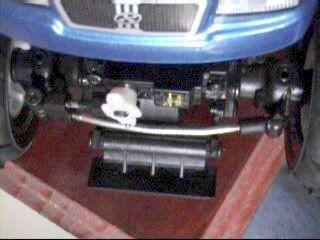 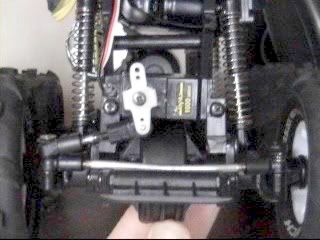 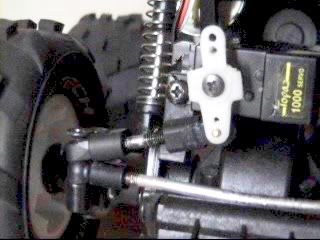 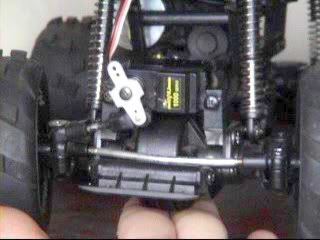       then i went mad and added longer links TC Last edited by TamiyaCowboy; 07-16-2005 at 04:09 AM. |
|
| |
|
12-21-2005, 06:58 PM
| #6 |
| RCC Addict Join Date: Nov 2004 Location: Redding, CA
Posts: 1,288
| |
|
| |
|
03-07-2006, 09:13 PM
| #7 |
| Quarry Creeper Join Date: Mar 2005 Location: THE WAING
Posts: 323
|
Dont no if anybodys done this but the front axel shafts make good drive shafts you dont have to cut them.
|
|
| |
|
03-30-2006, 07:23 PM
| #8 |
| Rock Stacker Join Date: Mar 2006 Location: Hanover
Posts: 97
|
How do I mount the ball cups onto the brass tubes?
|
|
| |
|
03-30-2006, 07:44 PM
| #9 |
| RCC Addict Join Date: Apr 2005 Location: Seattle
Posts: 1,437
|
I don't. I change the upper shock mounting position.
|
|
| |
|
03-31-2006, 05:08 AM
| #10 |
| Rock Stacker Join Date: Mar 2006 Location: Hanover
Posts: 97
|
Hey folks I just got all my parts to make my Mini Giant like the one in this faq, but I am unsure how to put the ball cups on the ends of the metal tubing. Anyone know how to do this?
|
|
| |
|
03-31-2006, 06:28 AM
| #11 |
| I wanna be Dave Join Date: Mar 2006 Location: One Legend.
Posts: 2,134
|
4-40 Full Threaded Rod - There's a link right above the ball and cups link!
|
|
| |
|
03-31-2006, 09:55 AM
| #12 |
| Rock Stacker Join Date: Mar 2006 Location: Hanover
Posts: 97
|
Thanks guys, I am not sure how I missed that.
|
|
| |
|
04-05-2006, 12:06 AM
| #13 |
| Newbie Join Date: Apr 2006 Location: australia
Posts: 19
|
thanx for the thread on how to build a crawler !!! It has help abit !!!! |
|
| |
|
04-05-2006, 11:48 PM
| #14 |
| Rock Stacker Join Date: Mar 2006 Location: Hanover
Posts: 97
|
I have a couple questions for those that did this project. #1 Can you post pics of the side of your VMG showing how you have your shocks set up? #2 What type of shocks are you guys using? #3 How long did you cut your threaded rods to make the 4 bottom linkages? Thanks in advance folks. |
|
| |
|
04-08-2006, 06:47 AM
| #15 |
| Rock Stacker Join Date: Mar 2006 Location: Hanover
Posts: 97
|
Hey whats up guys? Well I just met a new friend that has a mill and can make his own aluminum parts. He can also aniodize (i hope i spelled that correctly). What I wanted to know is, does anyone know the specs on the Swami Servo mounts? I am gonna have him make a bunch and color them. Maybe some more parts if you guys know the specs. Maybe even a chassy. He said he is pretty cheap. He told me if I could get the specs of the chassy of the VMG he could make it for me for $25 which is a steal. We all could have some kick *** OEM looking VMG's. I want a complete orange chassy and servo mounts. So what you guys think? |
|
| |
|
04-24-2006, 08:12 AM
| #16 |
| Rock Crawler Join Date: Sep 2005 Location: IDK
Posts: 852
|
start a new topic but maybe im intrested if thats what u mean ooow btw u didnt spell it right hahaha |
|
| |
|
05-20-2006, 06:59 PM
| #17 |
| Rock Stacker Join Date: Mar 2006 Location: Hanover
Posts: 97
|
What type of 2.2 rims are those?
|
|
| |
|
05-21-2006, 04:48 PM
| #18 | |
| Quarry Creeper Join Date: Oct 2004 Location: vegas
Posts: 310
| Quote:
| |
|
| |
|
05-31-2006, 10:05 AM
| #19 |
| RCC Addict Join Date: May 2006 Location: USA
Posts: 1,043
|
umm i never heard of a vmg. where do i get one and who makes them. thank you.
|
|
| |
|
06-22-2006, 04:12 AM
| #20 |
| RCC Addict Join Date: Jun 2006 Location: Maryland
Posts: 1,255
|
The link to one18th looks pretty old. I dont think he is making the 2.2 adapters anymore. Where can I get these adapters now? |
|
| |
|
| |


 Linear Mode


