| |
| |||||||
 |
| | LinkBack | Thread Tools | Display Modes |
 03-28-2011, 11:10 PM
| #1 |
| Rock Stacker Join Date: Mar 2011 Location: Parker
Posts: 82
|
So I'm new to RC Crawling and have heard good and bad about the mad torque.. But for under $200 bucks its a heck of a good time Heres what I started with 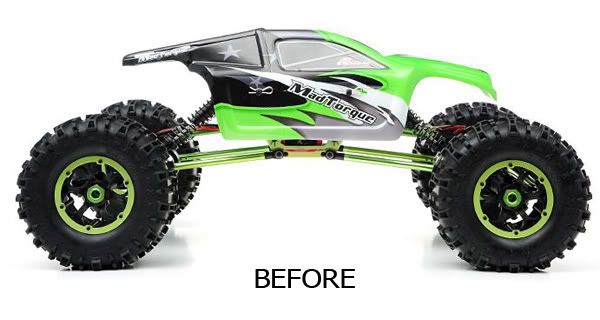 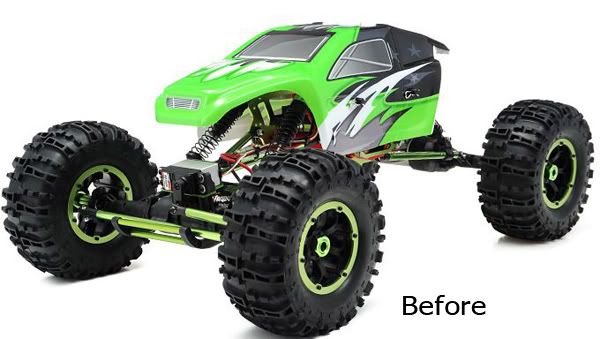 And heres how she sits as of now 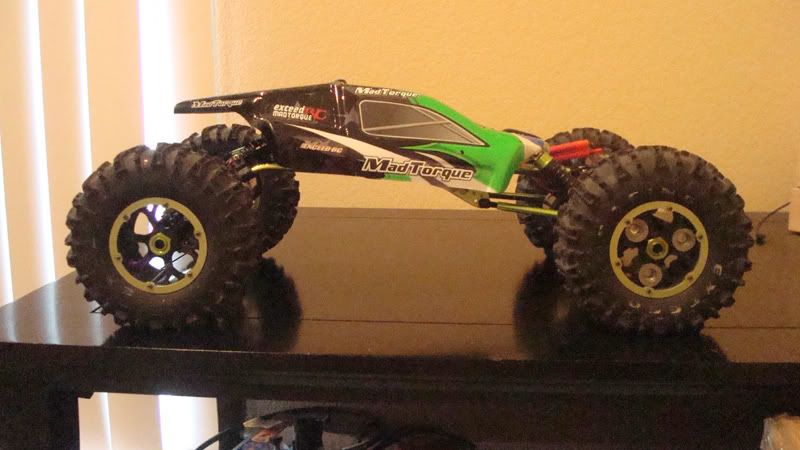 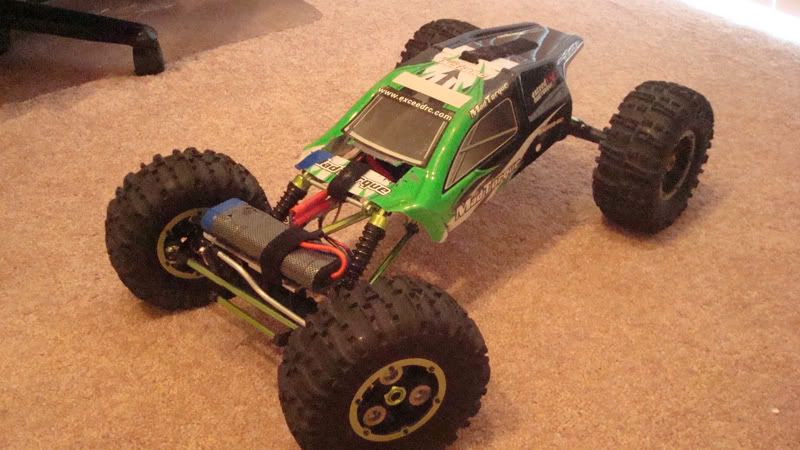 So where to start.. I ran it stock for I'd say 20mins and soon noticed I needed to change a few things. First off the COG I started with the frame |

|  |
| Sponsored Links | |
| | |
|
03-28-2011, 11:18 PM
| #2 |
| Rock Stacker Join Date: Mar 2011 Location: Parker
Posts: 82
|
The frame.. First off I wanted to narrow the frame.. Stock it was close to 4" wide.. mine ended up just over 3" Heres what I did 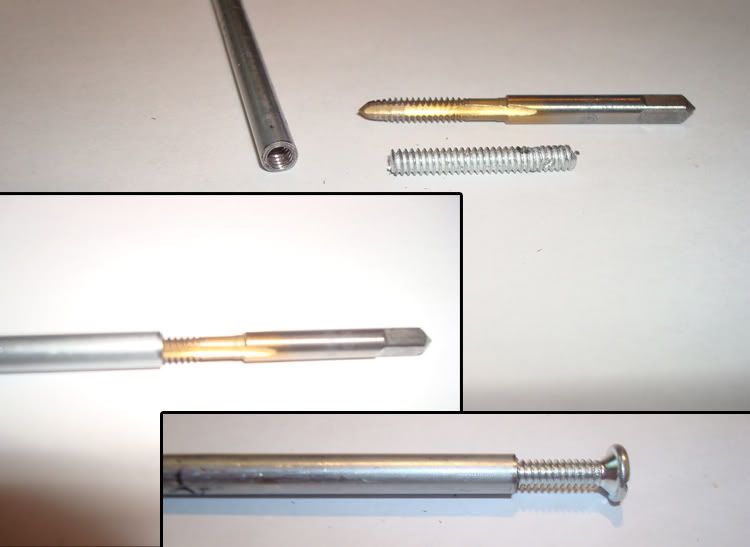 Taking steel brake line, if I remember its like 3/16" ( I had a piece laying around, forgot what size it was) but its almost the perfect size to Tap for 6mm without drilling. So heres how it looks 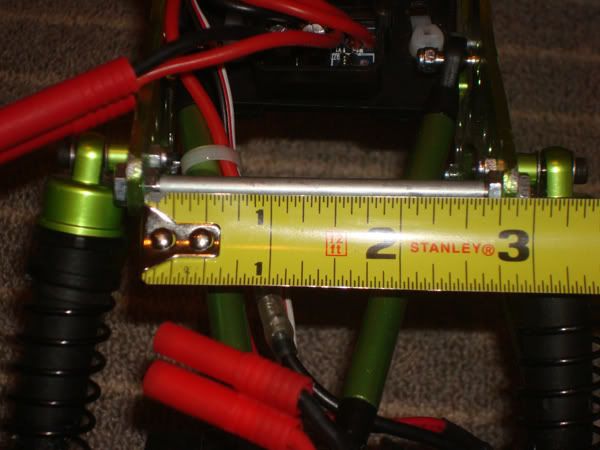 I think I might narrow it alittle more but for not it looks good.. Next I wanted to take some of the height out of the frame.. So out came the saw 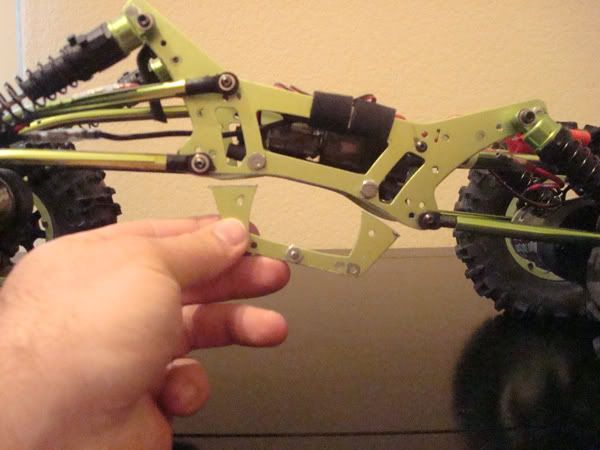 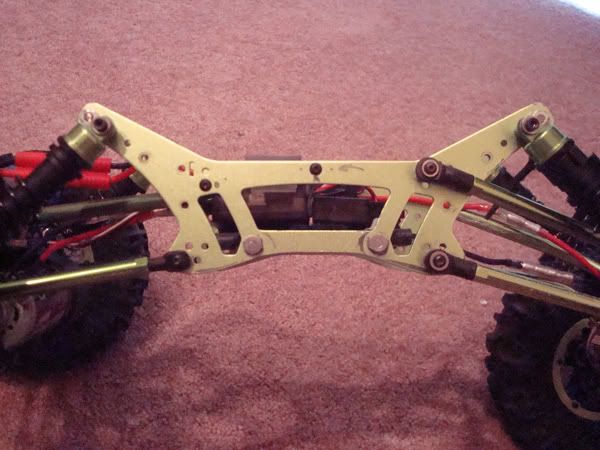 |
|
| |
|
03-28-2011, 11:29 PM
| #3 |
| Rock Stacker Join Date: Mar 2011 Location: Parker
Posts: 82
|
Next The suspension.. I wanted the front to be a cheap drop suspension, so I cut the spring to where the it would sit with only 1/4" of downward travel before the shock bottomed out.. I quickly learned that unless to wire the spring cup and spring down the cup with slip off.. the rear spring are stock in fact I forgot to wire one of the cups and after wheeling noticed I lost one and the whole truck was leanin.. and of course they dont sell just the cup, .. So the links 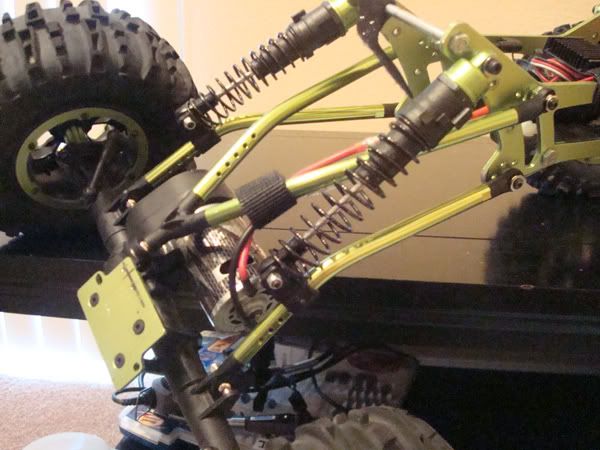 The rear link are really both the front and rear stock lower links.. I bent both of them. One set more them the other.. I was looking for ground clearance. The set with the tighter bend became the lower links. the other the upper. I used the 3 link "Y" piece. because they are close to the same link it clocked the axle quite a bit moving the motor up and out of the way.. another reason for the upper links to be bent to get anround the motor .. This is fine untill I plan on rear steer.. Then back to the drawing board Next the front end.. Yeah scratched my brain alot on this one.. |
|
| |
|
03-29-2011, 11:03 AM
| #4 |
| Rock Stacker Join Date: Mar 2011 Location: Parker
Posts: 82
|
As you can see in the photo I also swaped the knuckles so the lock out links would be forward facing to protect them.. I'll have to get some more pictures of the front suspension. I took the stock upper links and took out the 3 link set up. I fabed up a 4 link mount out of some alum. Also bought some Traxxis link ends to get rid of the 3 link "Y"... My goal was to get the whole chassis to sit with an extreme rake. forceing the COG forward. Also because of the frame mod and suspension I was left with no place to put the battery, and I wasn't going to mount it up top thus messing with my Whole COG concept.. So I needed to find away to remount the servo to aloow me to place the battery on the front axle. The way I have it now Is I ran a piece of alum. from the stock servo mount over to where the steering lock out attach to the axle. I used a piece of brake line as a spacer and ran a 4mm bolt down. this made the bracket level with the stock servo mount.. This gave me enough room to slid the servo under the braket betwen it and the axle. I had to mod the steering link. as well as the front bumper mounting bracket. Im not to happy with my ateering set up now.. would like to do away with the whole bumper.. but as scratched up as the bumper bar is, its better on that then the steering linkage.. I did cut the top bar off the bumper giving less crap hanging off the front of the axle.. Trying to figure out a way to do a behind the axle steering set up.. so that'll be down the road.. I'll get some pictures up to show better the front end mods Next the wheel and tires.. found a cheap easy way to put weight in the stock rims and they look cool too |
|
| |
|
03-29-2011, 04:53 PM
| #5 |
| Quarry Creeper Join Date: Feb 2011 Location: Vancouver Wa, USA
Posts: 209
|
Great write up ! Thanks !  Keep it coming, giving me tons of ideas ! Keep it coming, giving me tons of ideas !
|
|
| |
|
03-29-2011, 06:38 PM
| #6 |
| Rock Crawler  Join Date: Jan 2011 Location: bridgeport
Posts: 738
|
Good start with what you brought.keep up the good work,its fun and a great hobby but gets pretty expensive(if u let it,lol)...i started off with the maxstone 8 but completely stripped her down and rebuilt her ground up.
|
|
| |
|
03-29-2011, 06:52 PM
| #7 |
| Rock Stacker Join Date: Mar 2011 Location: Parker
Posts: 82
|
So had an interesting day.. Stoped by a local hooby shop, the guy was put off that I had a cheap crawler.. I was pricing out a new body and some servos, guess he wont be getting my business.. Anyways heres some pics 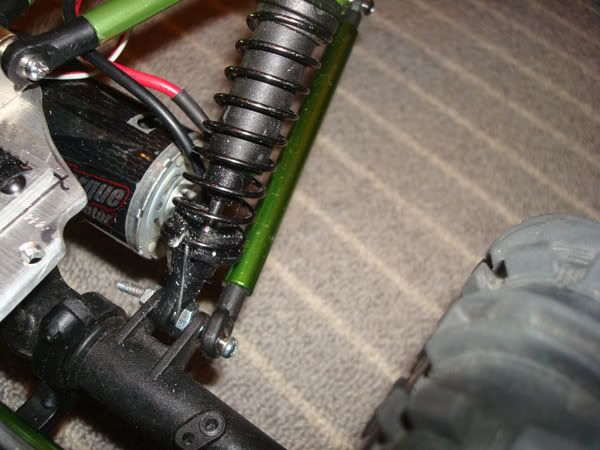 This shows how I mounted my front shocks, I forgot to mention the top links are the stock upper links, and the bottom are the stock chassis support rods... also if you look close you can see where I wired the cup and spring, those cups like to jump off when wheelin.. also the cut spring I mentioned earlier 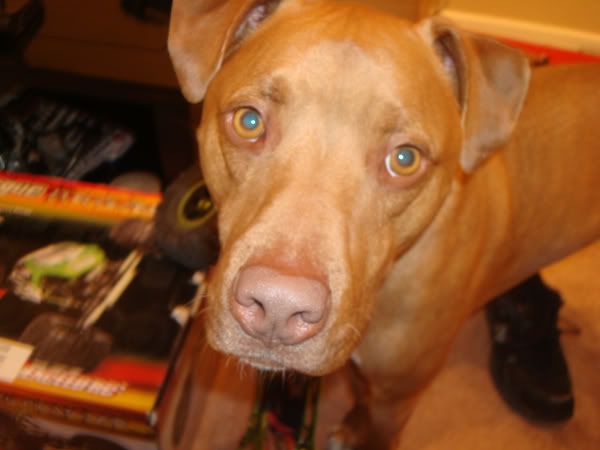 I guess my dog was wondering what I was doing 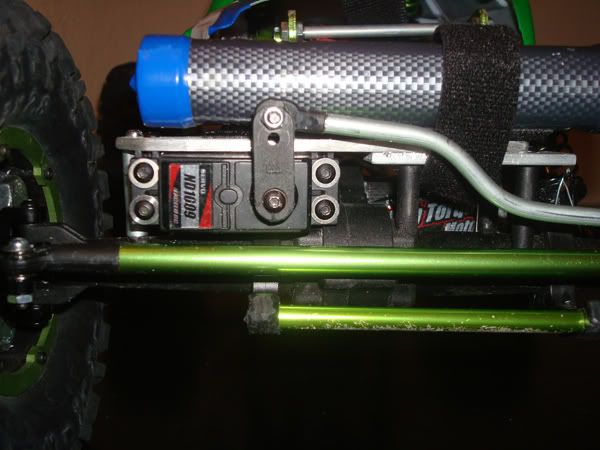 Heres the servo placement |
|
| |
|
03-29-2011, 07:02 PM
| #8 |
| Rock Stacker Join Date: Mar 2011 Location: Parker
Posts: 82
|
Tires.... So I hate the stock tires.. found out today a friend of my wife passed away so sending her out of state.. there goes my tire and wheel funds.. But heres what I did to the stock rims and tires to get them some what effective  I had a memory foam pillow laying around the house that was for guests.. I never have guests over so some sissors and razor cuts later.. new foam for the rig.. The biggest issue with the stock foam is they just bent a flat piece into a circle. giving you a stupid glue line to fight with and ridged foam.. notice how much the tires conform to the box in the pic.. also be sure to drill holes in the rims to let out the air in the rim.. 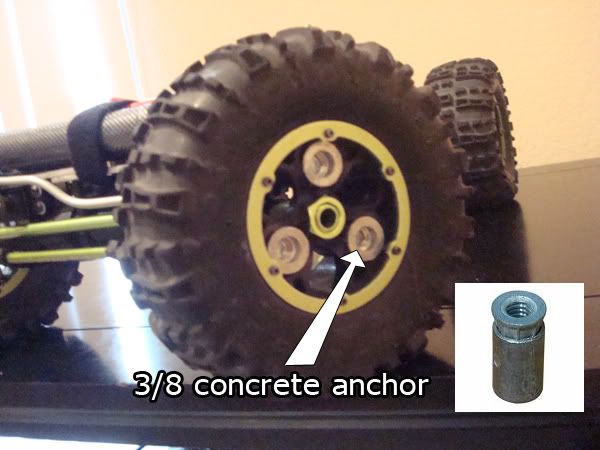 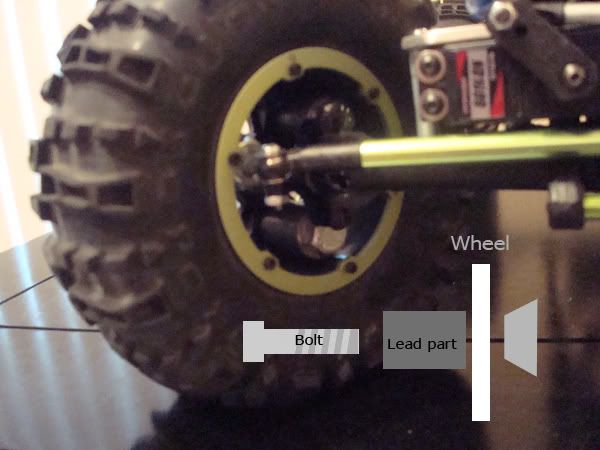 heres a cheap way to add weight.. found some concrete anchors that would fit into the spokes of the rims.. its great to have crap laying around.. they are made out of lead so you get a good amount of weight. |
|
| |
|
03-29-2011, 07:06 PM
| #9 |
| Rock Stacker Join Date: Mar 2011 Location: Parker
Posts: 82
|
thanks for the support guys.. this hobby is way too addicitive..
|
|
| |
|
03-29-2011, 10:35 PM
| #10 |
| RCC Addict Join Date: Jan 2011 Location: Wheat Ridge
Posts: 1,315
|
Dont sweat the haters man. A guy at the hobby shop near me scoffed at the fact I had a "cheap" crawler. Lame. Your build looks great and the blur collar mods get better and better. I totally dig the concrete anchors for wheel weights, I use them everyday and didn't even think about it. As long as you're having fun that's all that matters Cheap is a broad stroke term my friend, keep up the good work |
|
| |
|
03-30-2011, 05:46 AM
| #11 |
| RCC Addict Join Date: Mar 2010 Location: Colorado Springs, Co
Posts: 1,441
|
IMO if you don't have the $ to go big, it's a great place to start. I'm going to comp with mine and as long as theirs replacement parts I'll keep it. you cant beat average $2.50 per part if you break, not to mention if you want aluminum knuckles, the ax10 knuckles fit perfect. The only mod I haven't figured out yet is how to clock the axles... I have some spare one's on the way to mess with and destroy if I screw it up. |
|
| |
|
03-30-2011, 06:15 AM
| #12 |
| RCC Addict Join Date: Mar 2010 Location: Colorado Springs, Co
Posts: 1,441
|
I ment to ask you, whats your wheel base?
|
|
| |
|
03-30-2011, 05:33 PM
| #13 |
| Rock Stacker Join Date: Mar 2011 Location: Parker
Posts: 82
|
Yeap the ax10 fit perfectly.. most $$ I've spent on this thing was for alum knuckles.. My wheel base is just under 16" probably in the near future going to extend it out a bit... Go big or go home... Need some ideas on cheap wheel and tire upgrade.. I was looking at the MaxStone parts and saw the beadlocks are cheap "premounted tire set" $27.. not sure what size they are. but for 30 bucks, keep the sidewalls on the tires and glue up some good bottom rubber.. Also It looks as though these hubs from the Maxstone should fit on the Torque.. and for $9 for all 4 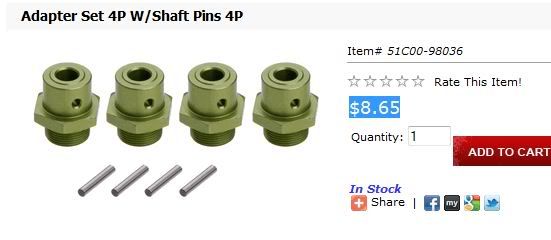 |
|
| |
|
03-30-2011, 06:29 PM
| #14 | |
| Rock Crawler Join Date: Jan 2011 Location: bridgeport
Posts: 738
| Quote:
| |
|
| |
|
03-31-2011, 08:53 AM
| #15 |
| I wanna be Dave Join Date: Oct 2008 Location: Golden
Posts: 2,588
|
What is a little funny is the local crawling guys have been impressed with my Mad Torque. A lot of them say it has potential and that this might bring back supers in this area. Well we've got igrind808, you, abavuso, and myself with these things. If not for anything else, we can have a mad torque only comp. BTW which hobby shop scoffed at you for your crawler? |
|
| |
|
03-31-2011, 11:11 AM
| #16 |
| Rock Stacker Join Date: Mar 2011 Location: Parker
Posts: 82
|
Oh I would rather not say karma is a bitch.. but if your in lakehood its nowhere close to you.. Is there any super class comps around?
|
|
| |
|
03-31-2011, 12:31 PM
| #17 |
| RCC Addict Join Date: Jan 2011 Location: Wheat Ridge
Posts: 1,315
|
I'm totally down for a mad torque comp I think it would be a blast.I went to a comp a red rocks this past month and couple guys had supers but I didn't have time to stick around and watch the superclass comp sorbet do have them here. |
|
| |
|
03-31-2011, 09:53 PM
| #18 |
| Rock Stacker Join Date: Mar 2011 Location: Parker
Posts: 82
|
The Mile High Troque run.... Nice
|
|
| |
|
04-02-2011, 09:36 PM
| #19 |
| RCC Addict Join Date: Apr 2010 Location: Ringwood
Posts: 1,233
|
how about getting some vanquish zero ackremen knuckels for it and maybe some creepr knuckles will fit
|
|
| |
|
04-02-2011, 10:55 PM
| #20 |
| Rock Stacker Join Date: Mar 2011 Location: Parker
Posts: 82
|
Well I'm trying to find a way to put some bigger shoes on her.. But I'm broke.. So any ideas would be great..
|
|
| |
|
| |


 Linear Mode


