| |
| |||||||
 |
| | LinkBack | Thread Tools | Display Modes |
 02-07-2008, 02:13 PM
| #1 |
| I wanna be Dave   Join Date: Feb 2005 Location: Burnsville
Posts: 3,096
|
Well actually it's more like finally catching up to 2007. 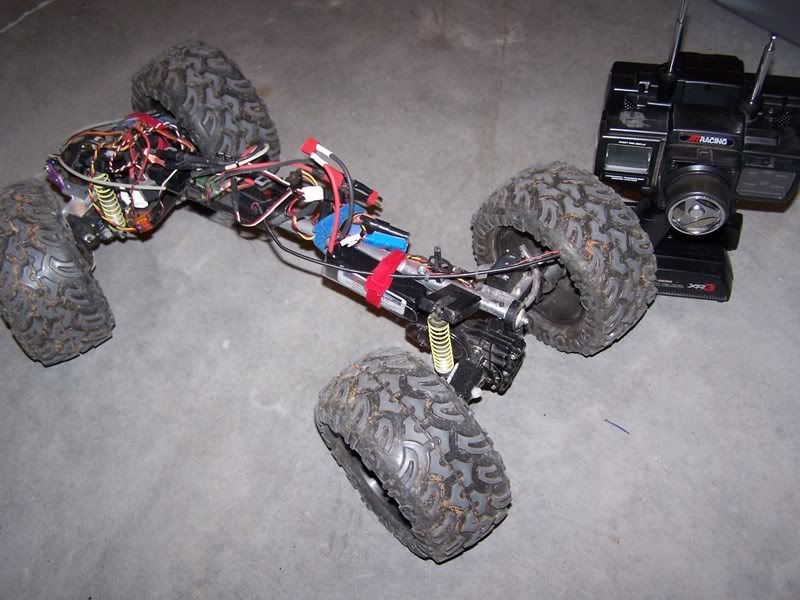 New for 08: MaxAmps 11.1 volt batteries 3100 and 1550 These things are sweet, I was previously running some old 6 sub-c cells under the knuckles. There is just no comparing the two. The lipo is lightweight so I mounted it alongside the backbone in the front of the truck. Now I just need to put some weight on the knuckles to replace the weight of the sub-c's I was previously using. 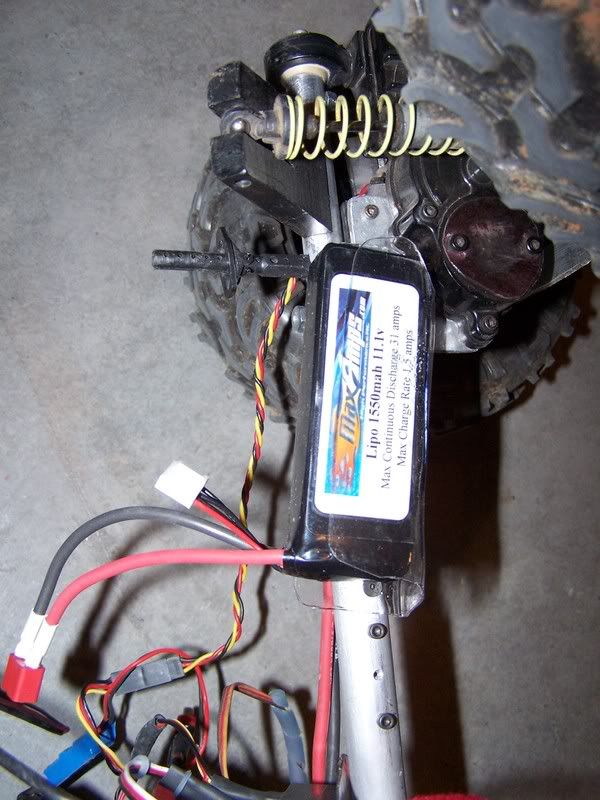 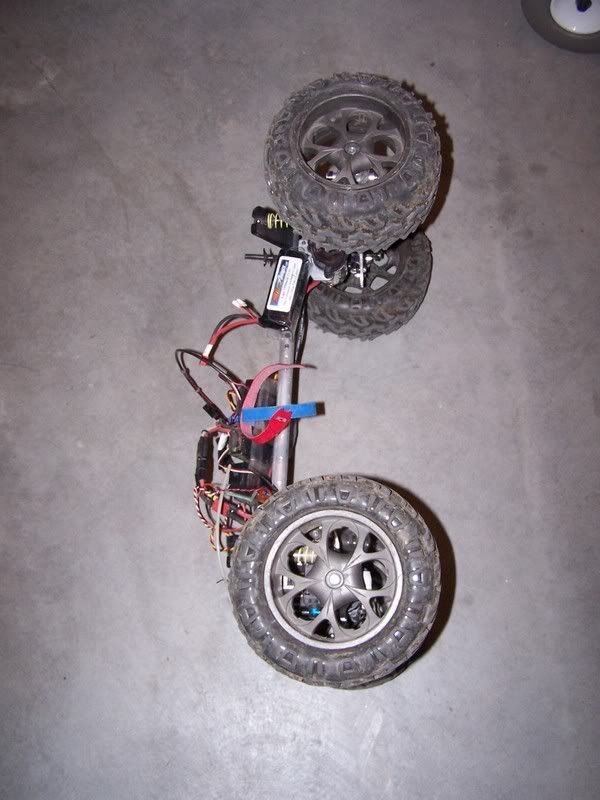 Castle BEC I made a wiring harness that sends power to the two Hitec 5995 servos and sends signal only to the receiver. I tried to just plug everything straight into the receiver, but it wouldn't power on. Proline Moab XL's I haven't got these totally dialed in yet, as they are bouncing a lot right now. I don't think that will be a problem once I cut the foams. Dig....yea! I'm using 2 clothes drier switches to actuate the dig by cutting power to the front or rear motor. So I only need 1 esc (mamba max) to control the rig. I only have one mounted up so far, but it's not hard to do and the other one will be on very soon. 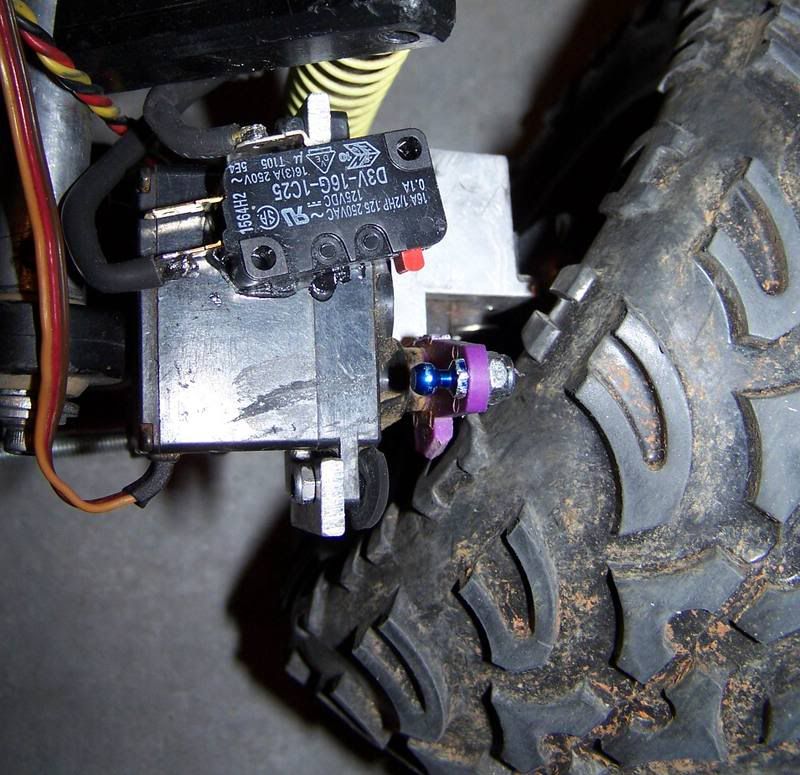 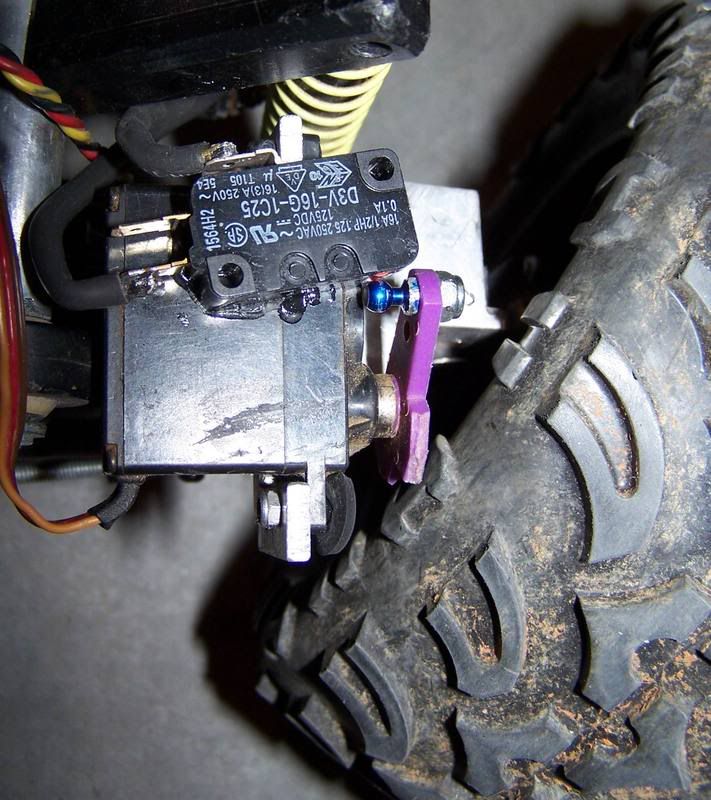 It requires a little bit of extra wiring. 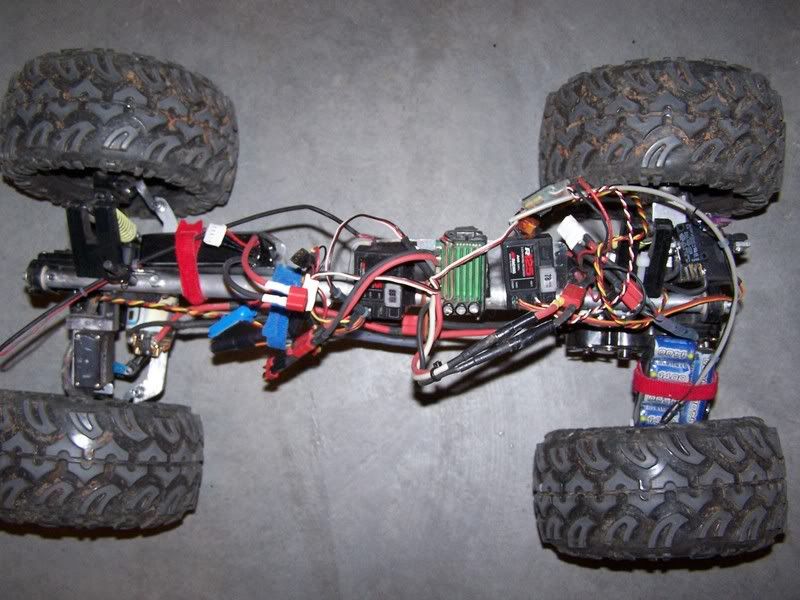 short video  Custom Transmitter....for the dig Basically I put a JR XR3 and XR2 together. The 'dial' on the grip of the XR3 is actually the throttle channel for the XR2. So now I have independent front and rear steering as well as front and rear dig. I would like to use a 3 position switch, but haven't figured how to replace the potentiometer with a 3 position switch. I tried just soldering the switch up like the pot, but it didn't function correctly. 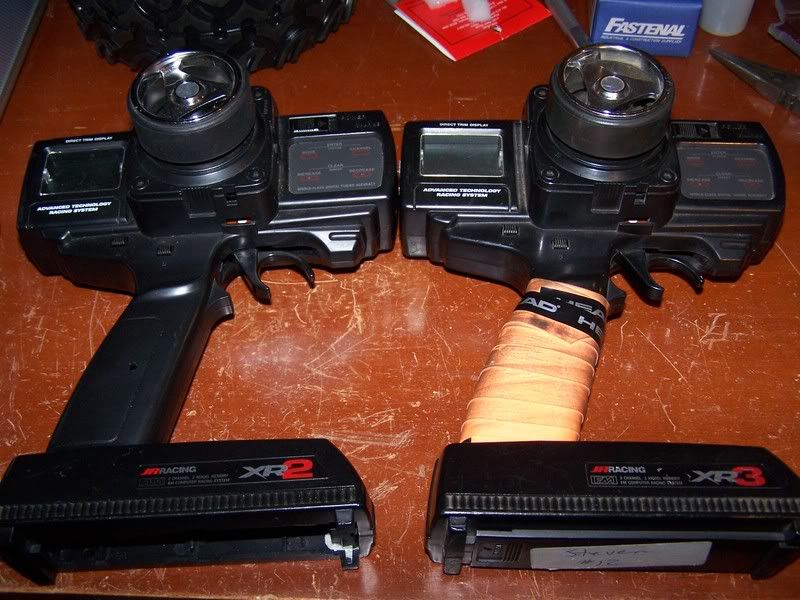 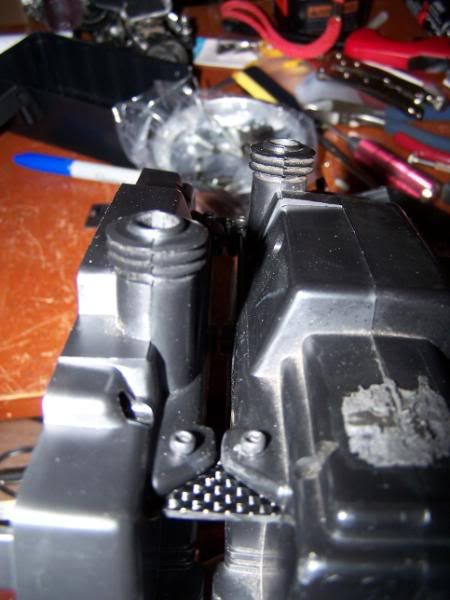 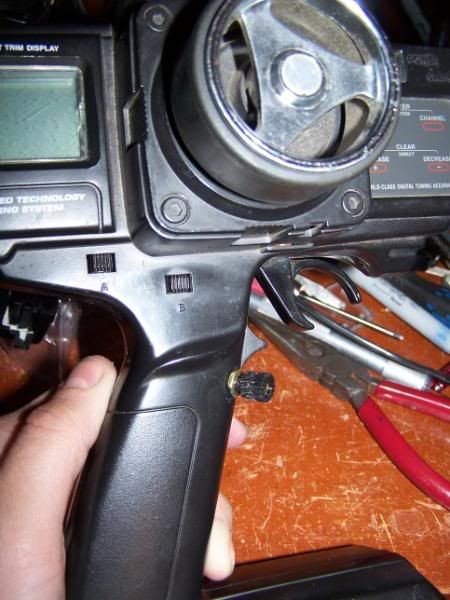 Adjustable wheel base Credit goes to Kevin Guhman for the idea.  The wheelbase is adjustable from 16 to 19 inches in half inch increments. I have it set to 17.5" right now, because that seems to work well for me. But you never know when someone might build a course with an extreme vertical requiring a longer wheelbase. The wheelbase is adjustable from 16 to 19 inches in half inch increments. I have it set to 17.5" right now, because that seems to work well for me. But you never know when someone might build a course with an extreme vertical requiring a longer wheelbase. I used steel tubing to sleeve the existing backbone. Then just drilled holes every 1" on one end and every .5" on the other. And then cut the backbone into two pieces. 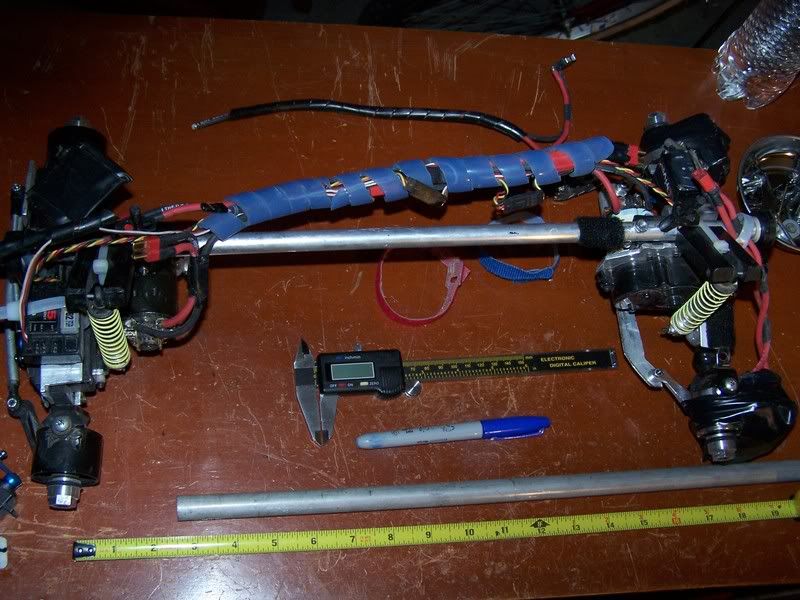 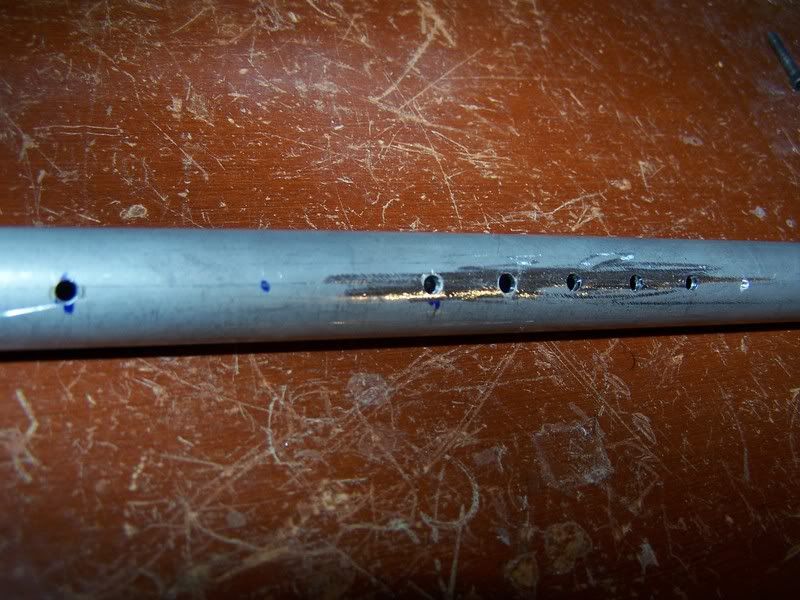 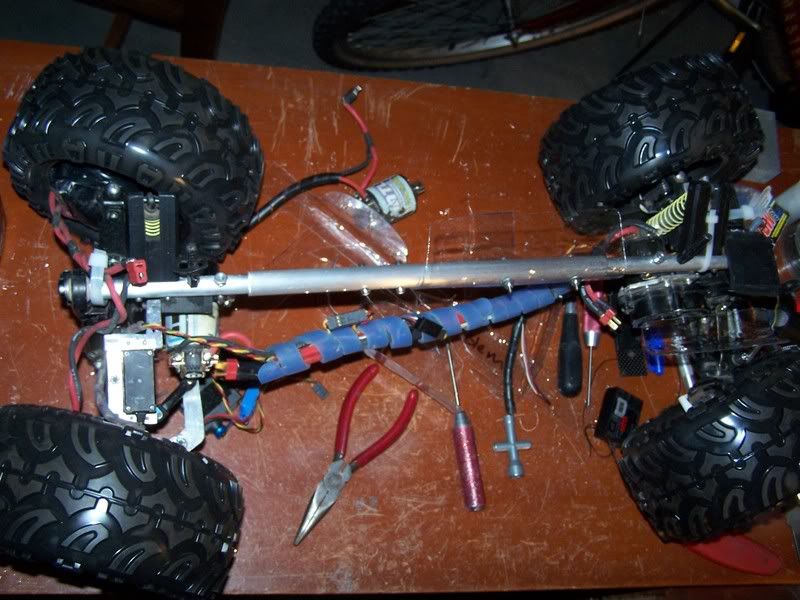 I still need to add the other switch for cutting off the front motor and I need to narrow the rims. I also have a new CJ8 body I am currently painting for the new season. This will be my second body I've ever had for this rig. The old one is just about shot. Last edited by SVEN; 02-07-2008 at 02:16 PM. |

|  |
| Sponsored Links | |
| | |
|
02-07-2008, 02:27 PM
| #2 |
| Moderator   Join Date: Apr 2004 Location: In my head
Posts: 2,744
|
Looks good Sven! Do you have air holes in the wheels? Mine bounced without them.
|
|
| |
|
02-07-2008, 02:28 PM
| #3 |
| Tire&Foam Extraordinaire  Join Date: Jun 2007 Location: C.I. Compound, Tyler, Texas
Posts: 5,601
|
Wow .
|
|
| |
|
02-07-2008, 03:04 PM
| #4 | ||
| I wanna be Dave Join Date: Feb 2005 Location: Burnsville
Posts: 3,096
| Quote:
Quote:
| ||
|
| |
|
02-07-2008, 04:34 PM
| #5 |
| Rock Crawler Join Date: Dec 2007 Location: Shreveport, La
Posts: 544
|
hey from the video it looks like your pulling through your dig (tires wont stay locked up). i have been having that same problem. didnt think it was gonna be a problem at first but there has been MANY MANY occasions where it has screwd me up. i found a thread on here about wiring it up so that the + & - posts on your motor you want to use for dig, are connected to each other when the switch cuts power to that motor. it almost locks the motor up. it will still turn but with major braking. i did this a couple nights ago and it is a HUGE improvement. i cant find the link right now. maybe someone else knows where it is. |
|
| |
|
02-07-2008, 05:22 PM
| #6 |
| I wanna be Dave Join Date: Feb 2005 Location: Burnsville
Posts: 3,096
|
Yeah, I've done that when I had a 2.2 clod. But the main reason I have it this way for the front dig is for climbing. In which case I don't want the rear to be locked up. I may do that to the front disconnect switch, since rear dig will be mostly for turning. Thanks for the input.
|
|
| |
|
02-07-2008, 08:41 PM
| #7 |
| I wanna be Dave Join Date: Feb 2005 Location: Burnsville
Posts: 3,096
|
Here's the new body. I just finished with the paint and now I'm waiting for it to dry to remove the window masks. Then it will get trimmed and plastered with stickers. I only did something different with the hood, because the rest of the body will be covered up by the stickers. 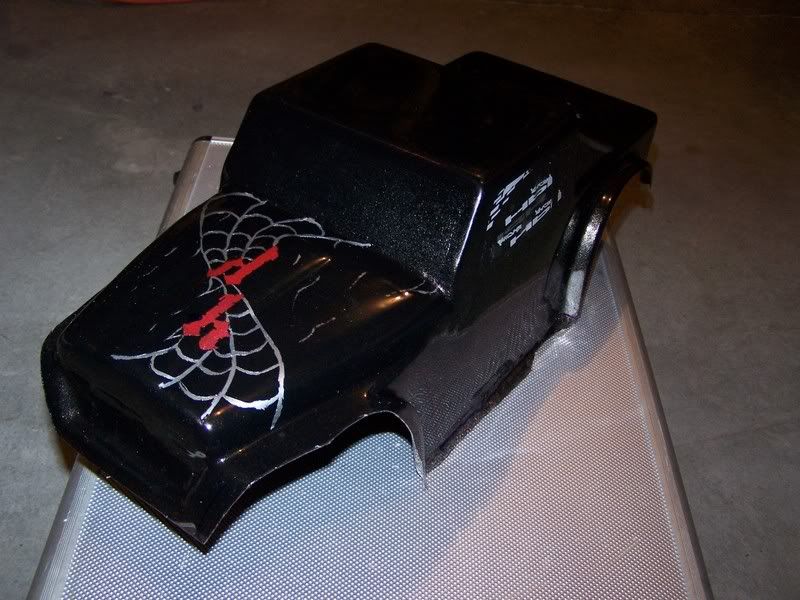 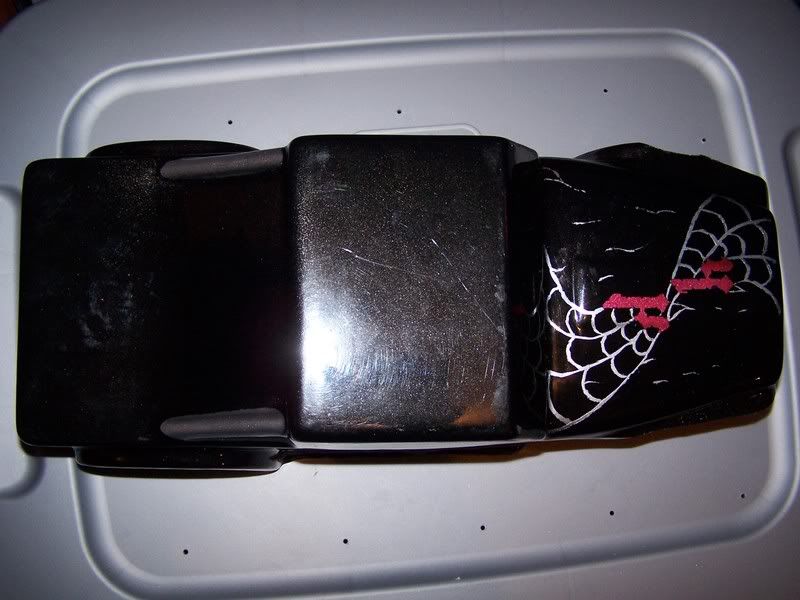 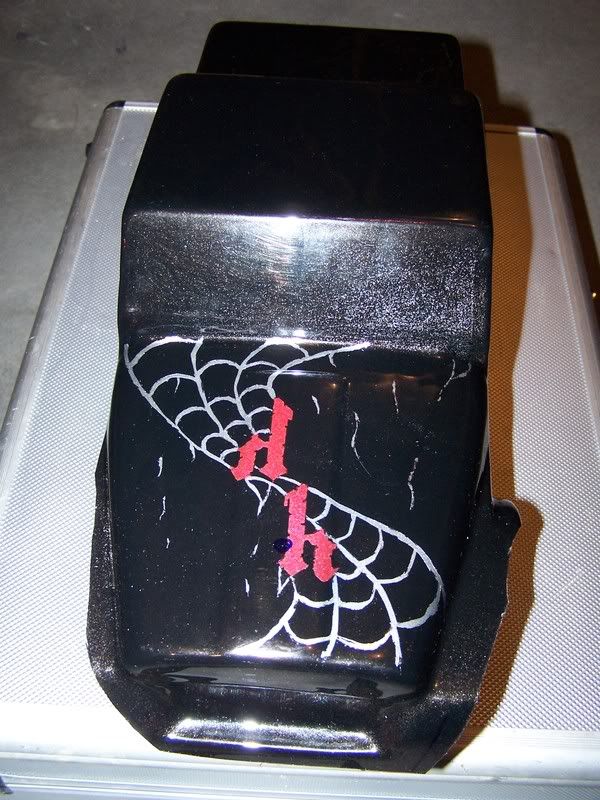 |
|
| |
|
02-11-2008, 04:08 PM
| #8 |
| I wanna be Dave Join Date: Feb 2005 Location: Burnsville
Posts: 3,096
|
Got the body mounted. 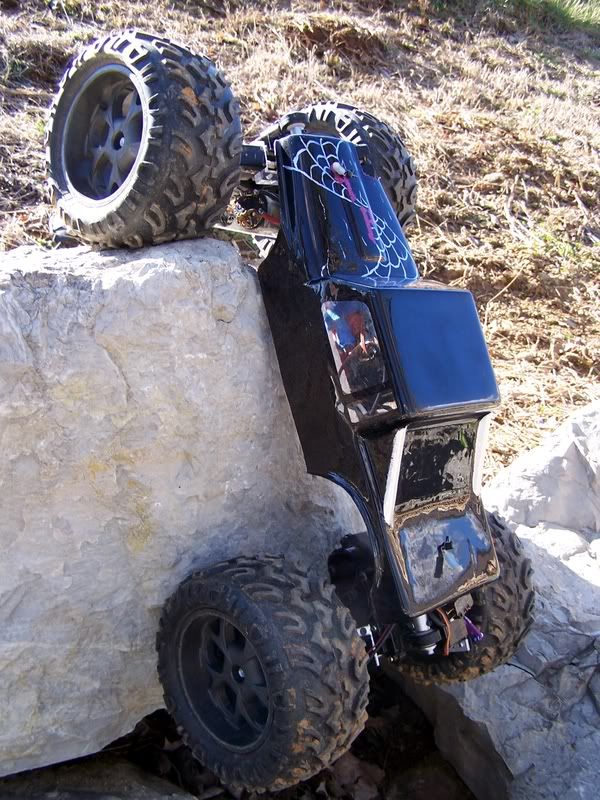 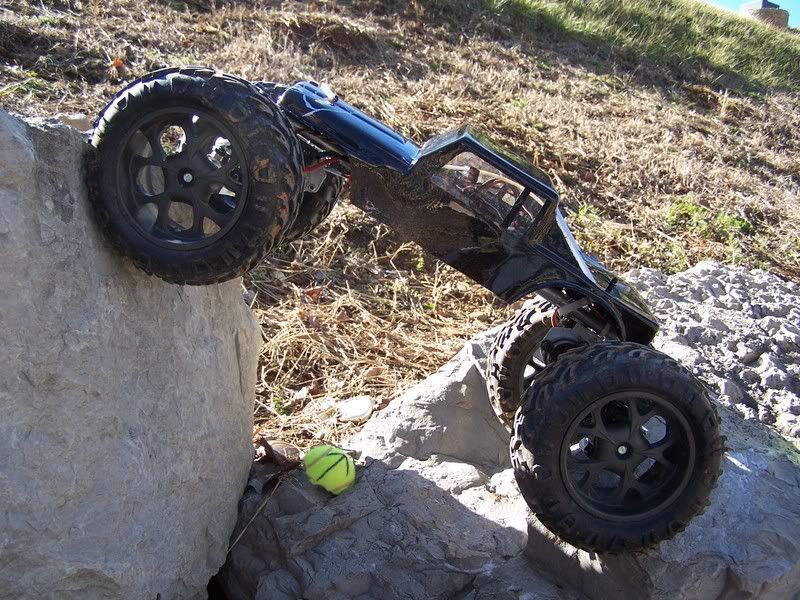 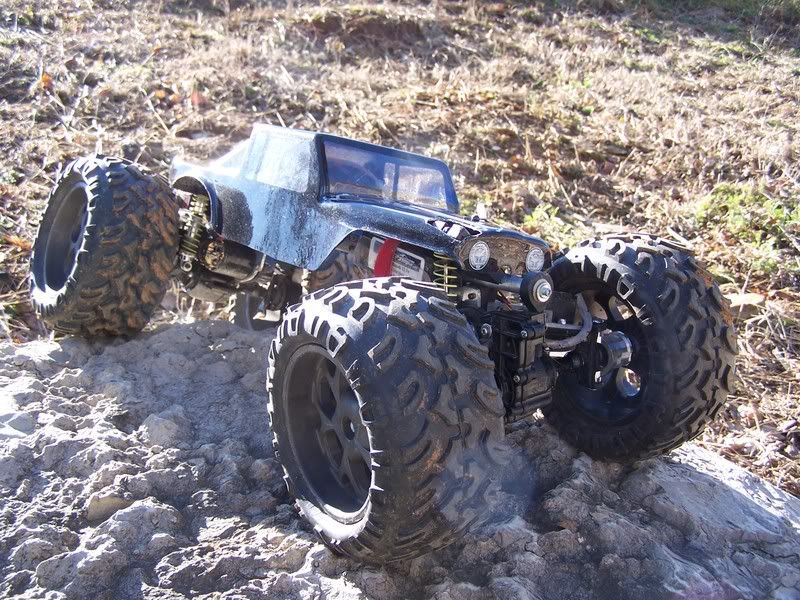 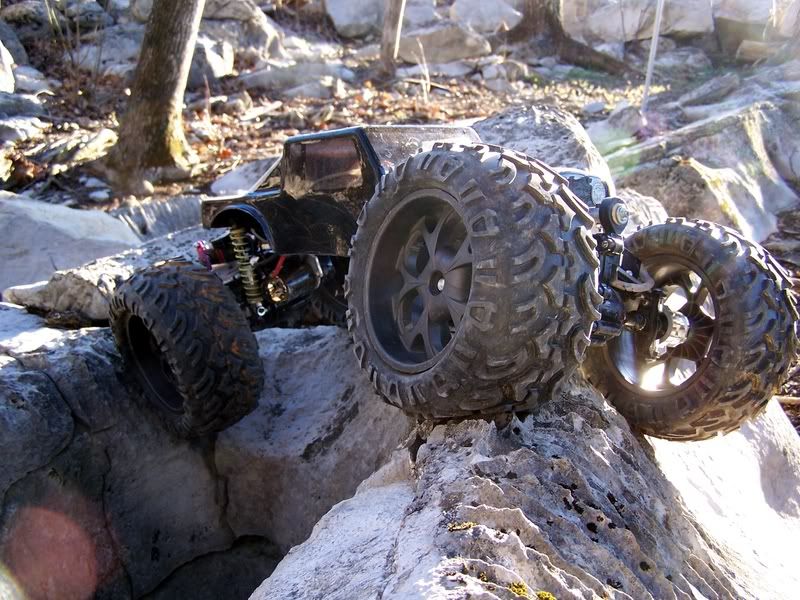 |
|
| |
|
02-29-2008, 10:24 PM
| #9 |
| I wanna be Dave Join Date: Feb 2005 Location: Burnsville
Posts: 3,096
|
Couple of updates Made some front wheel weights out of lead. I used this small skillet that I messed the handle up in Foundry class. I never planned on cooking with it anyways, so it worked perfectly.  I removed the bearings from the knuckles and then placed one face down in the skillet. Then added lead weights while heating with a MAPP torch, until I used all the lead for that weight. I then just waited for it to cool before removing it from the pan. Out comes a crude yet effective knuckle mounted wheel weight.    At our first comp of the 2008 season I was having an issue with my front left tire stuffing itself into the motor endbell whenever I turned left. This caused a major problem while trying to climb, as I could not get the front to pull the truck up while turning left. I never thought I could have too much steering. So to try to remedy this I narrowed the front wheels. This was my first time narrowing wheels other than the very simple traxxas stampede wheels. The objective of this is to pull the inner bead of the tire away from the motor, so that they do not come in contact during turning. I started out by chucking a fiber reinforced cutoff wheel in my rotary tool and putting it in the vertical stand. I then removed the inner bead groove from the XTM Thorns. Next I removed about 1/2 inch from the width of the wheels.  I lined the wheel and the inner ring up and tacked it in place with CA glue. Once that had cured enough to hold the pieces together, I added CA to the inside and outside of the seam. I then placed weight on the rim to be sure the two pieces bonded evenly.  The narrowed rim. About 2.25 inches wide. [img]  Narrowed on the left, full width on the right.    I believe this will fix the issue I had, but I will find out for sure when I take the truck out next time. |
|
| |
|
03-01-2008, 06:58 AM
| #10 |
| I wanna be Dave Join Date: Nov 2006 Location: spring hill TN
Posts: 2,959
|
You made a good move by narrowing the wheels in more ways than one. You gained the clearence that you needed and in my opinion the tires work better on the narrower wheel. |
|
| |
|
03-02-2008, 08:59 PM
| #11 |
| RCC Addict  Join Date: Oct 2005 Location: Trussville, AL
Posts: 1,762
|
lookin good sven, too bad i didnt get to see it run
|
|
| |
|
03-04-2008, 06:08 PM
| #12 | |
| I wanna be Dave Join Date: Feb 2005 Location: Burnsville
Posts: 3,096
| Quote:
Do any of you experienced wheel narrowers suggest any type reinforcement of the seam where the two pieces meet? | |
|
| |
|
03-04-2008, 06:15 PM
| #13 |
| I wanna be Dave Join Date: Oct 2005 Location: Columbia TN
Posts: 6,154
|
I glued mine butted together like you did, I have broken once in 2 years.
|
|
| |
|
03-04-2008, 06:24 PM
| #14 |
| RCC Addict Join Date: Oct 2005 Location: Trussville, AL
Posts: 1,762
|
talk to rxcrawler. i think he narrowed his axials with epoxy and fiberglass wrap.
|
|
| |
|
03-04-2008, 10:42 PM
| #15 |
| Pebble Pounder Join Date: Nov 2007 Location: alpharetta
Posts: 139
|
looking good sven |
|
| |
|
04-01-2008, 10:51 PM
| #16 |
| I wanna be Dave Join Date: Feb 2005 Location: Burnsville
Posts: 3,096
|
Did some more work on this truck trying to get it ready for the East Coast Champs. The last couple of times I had it out the slipper was kicking in in the rear axle, so I ordered a new set of gears. I got a set of integy metal gears from The Crawler Store and also a new 8 tooth pinion. I have no idea how my pinions have survived so long, they are old Bolink pinions that I have used since I started crawling.  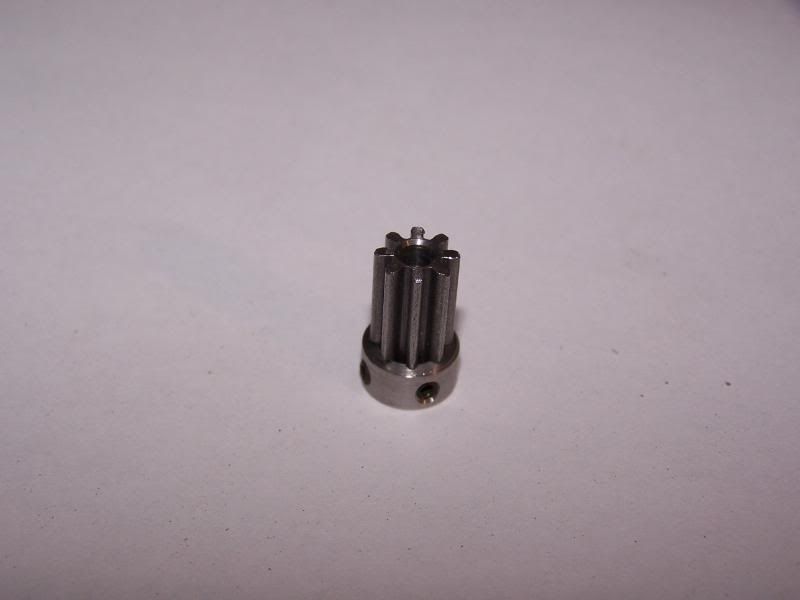 I have not been too happy with how my truck has been handling off cambers and I think moving some of my weight lower will help, so I am going to try a Lipo knuckle pack. In order to do this I made some battery trays to clamp onto the front knuckles. I made one set that is just the trays and another that will accept lead slugs (still need to make those) for added weight down low. I called MaxAmps and had them make a parallel saddle pack out of two 800HV 3S packs. The saddle pack will have 1600mah and a 32amp discharge rate. With out weight. 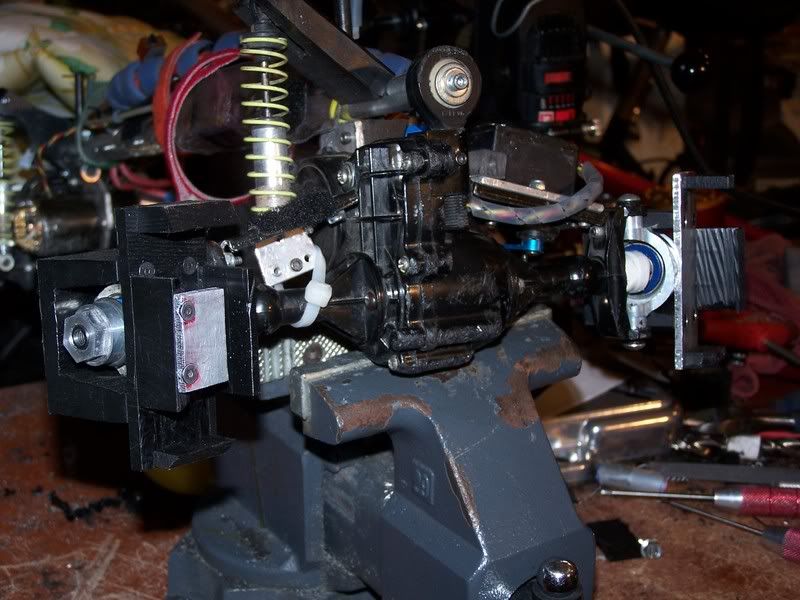 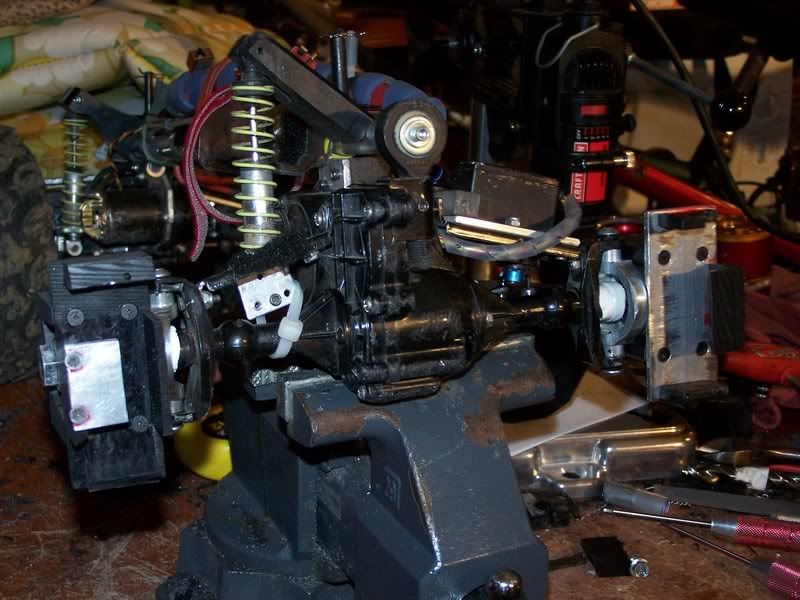 With weight. I can fit some more holes in there, I just didn't get around to it. 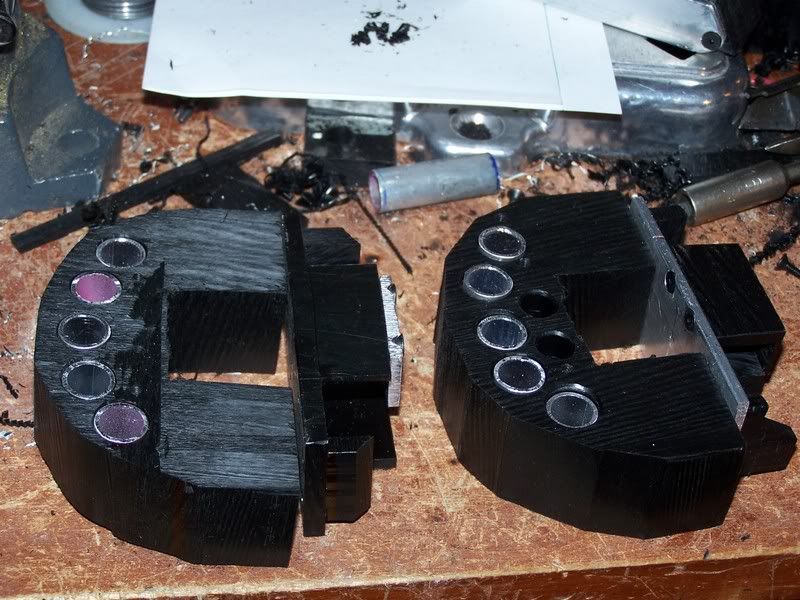 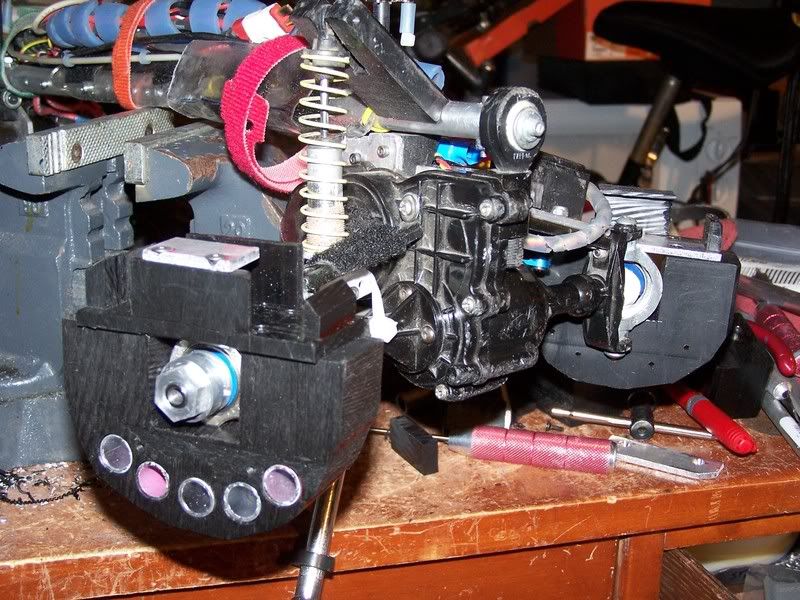  I could probably stuff a pillow with all the delrin shavings I made.  I picked up a castle BEC from Holmes Hobbies to replace the receiver pack I had been using. That should shave a good deal of weight. I made a new switch panel that keeps it more secure than the previous version. As the switches are now screwed to the aluminum plate rather than glued to the servo. 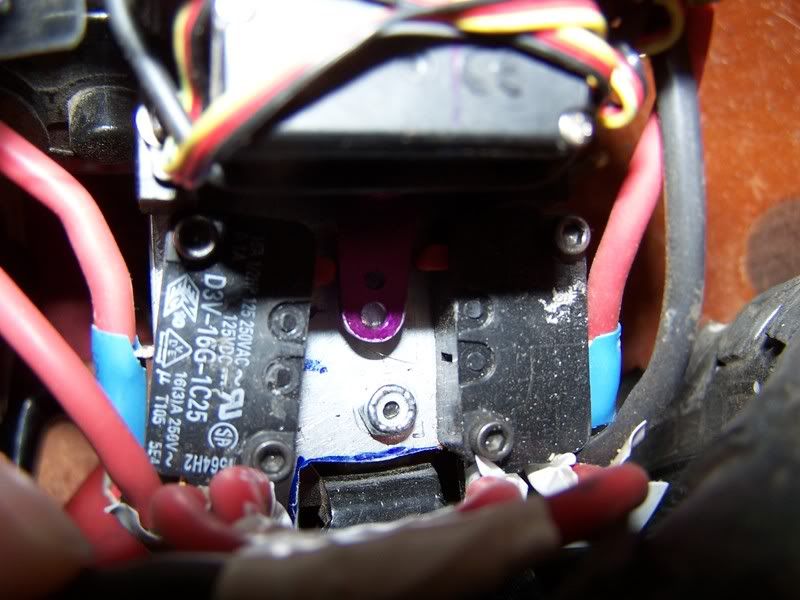 To make it easier to do the digs I replaced the toggle switch on my transmitter with two push buttons. Now I can just tap the button to do a dig, it is soo much easier. Last edited by SVEN; 04-01-2008 at 10:56 PM. |
|
| |
|
04-02-2008, 07:36 AM
| #17 |
| I wanna be Dave Join Date: Nov 2006 Location: spring hill TN
Posts: 2,959
|
Looks good. One thing for sure no one can say your scared of work. It looks like you have put in a lot of effort in getting tour rig ready for the E.C.C. Caint wait to see you there. |
|
| |
|
10-05-2008, 03:04 PM
| #18 |
| I wanna be Dave Join Date: Feb 2005 Location: Burnsville
Posts: 3,096
|
It's been quite a while since I've updated this. Some of the new stuff on board: -Nomadio React...no more dual radios -Tekin FX-R speed control. Still running a single, I like the dig switches. -Holmes Hobbies 55t pro hand wounds -The front 5995 finally gave up the ghost after 2.5 years of hard labor, it will be sorely missed. I replaced it with a JR 8711. -Added another Castle Creations BEC. So now each servo has it's own. -Thanks to Mr. Kamikaze I am now running some Panther Plowboys, which I must say are no comparison to Moabs. Pure traction . The "lower links" got some added beef. I went from 4-40 hardware to 10-32. In 2 1/2 years I broken 2 of the small ball joints and multiple 4-40 screws that attach them to the axle. If these break I've got bigger issues. Comparison shot. I think you can tell which one is which. 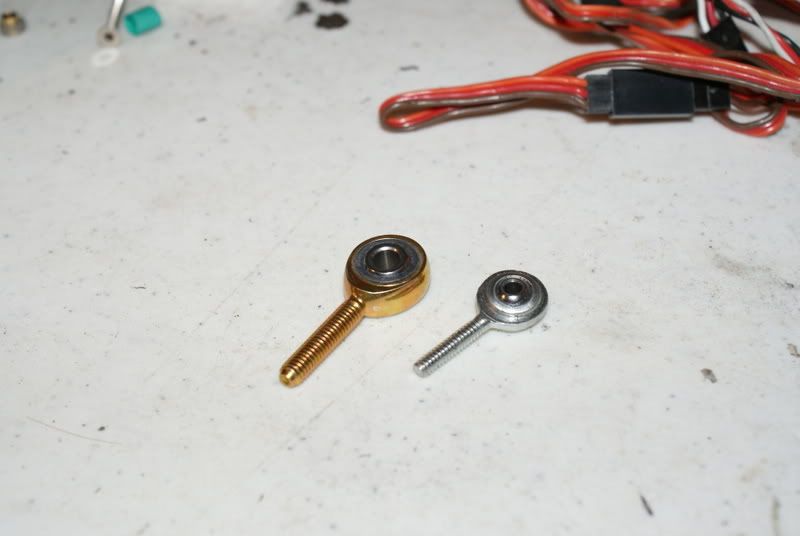  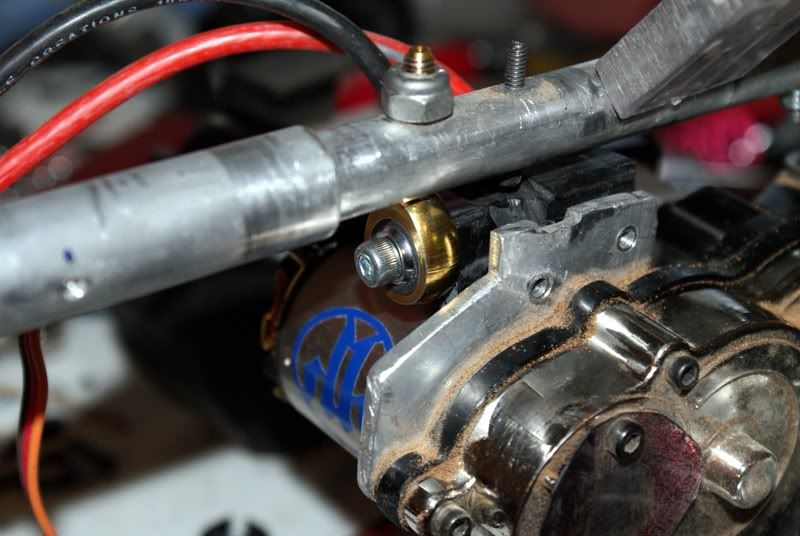 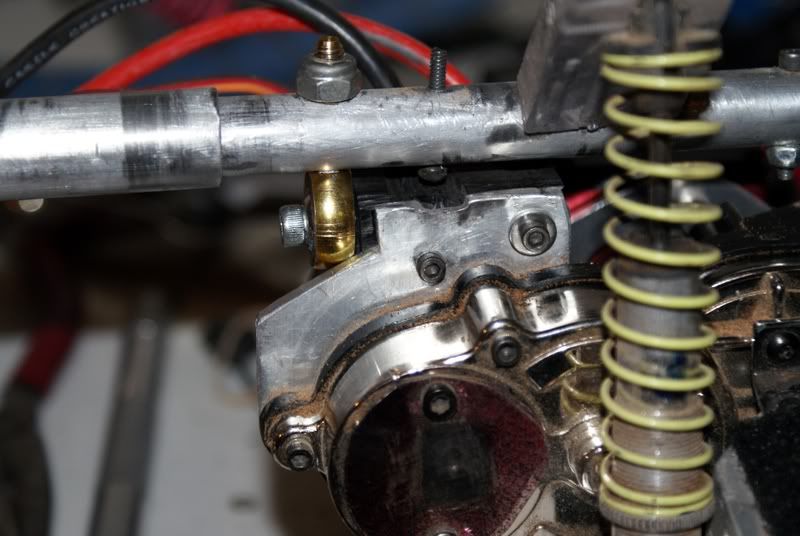 |
|
| |
|
10-06-2008, 07:33 PM
| #19 |
| Newbie Join Date: Sep 2008 Location: san luis obispo
Posts: 29
|
The new mods turned out nice. Got any side by side pics of the plowboys and xl's?
|
|
| |
|
10-06-2008, 09:41 PM
| #20 |
| I wanna be Dave Join Date: Feb 2005 Location: Burnsville
Posts: 3,096
|
I don't have any xl's mounted, but here's Kamikaze's build thread. Check out the 4th picture down, it shows both on his truck. Panther Super Tires Are Here!!!!!!! |
|
| |
|
| |


 Linear Mode


