| |
 05-09-2009, 10:49 PM
| #1 |
| Rock Crawler Join Date: May 2009 Location: Welderville just south of benchviseland
Posts: 634
|
Hey what's up? I'm Travis. I'm new the the R/C Crawler scene/website, but I've been into r/c on and off for a while. I like things that crawl, and scale is really cool and all, but I HAD to build a super. With my full-scale project wearing me out, I kind of wanted a little break...And with my Clod(zilla?) looking a little lonely and beat down, it was time for a change. I did a little research, got some 1/4" metal rod, fired up the welder, and got down to buisness... 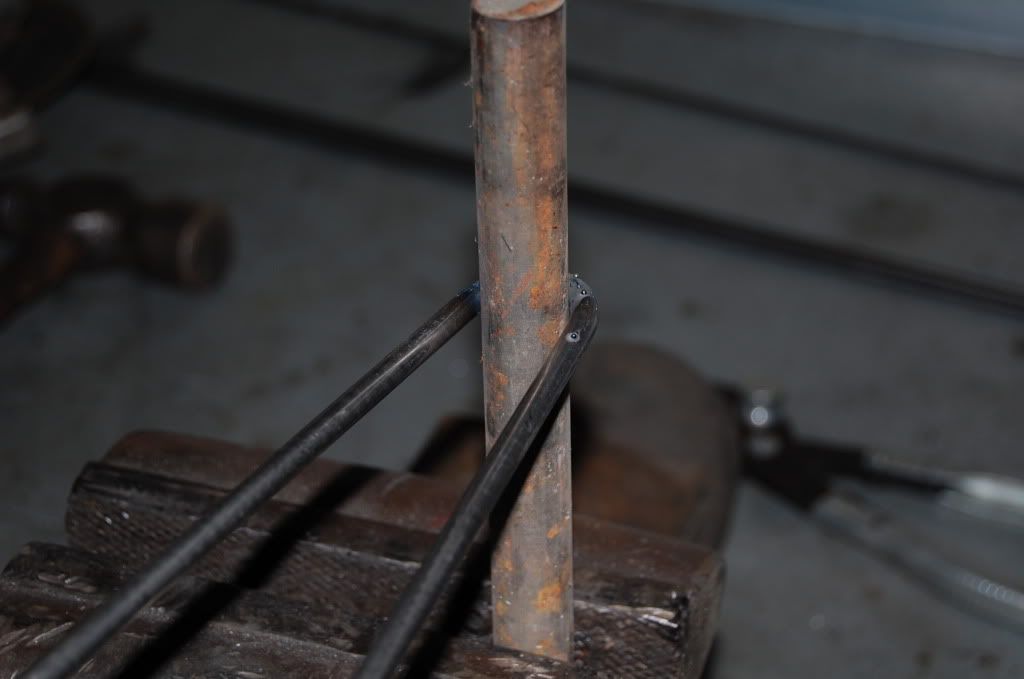 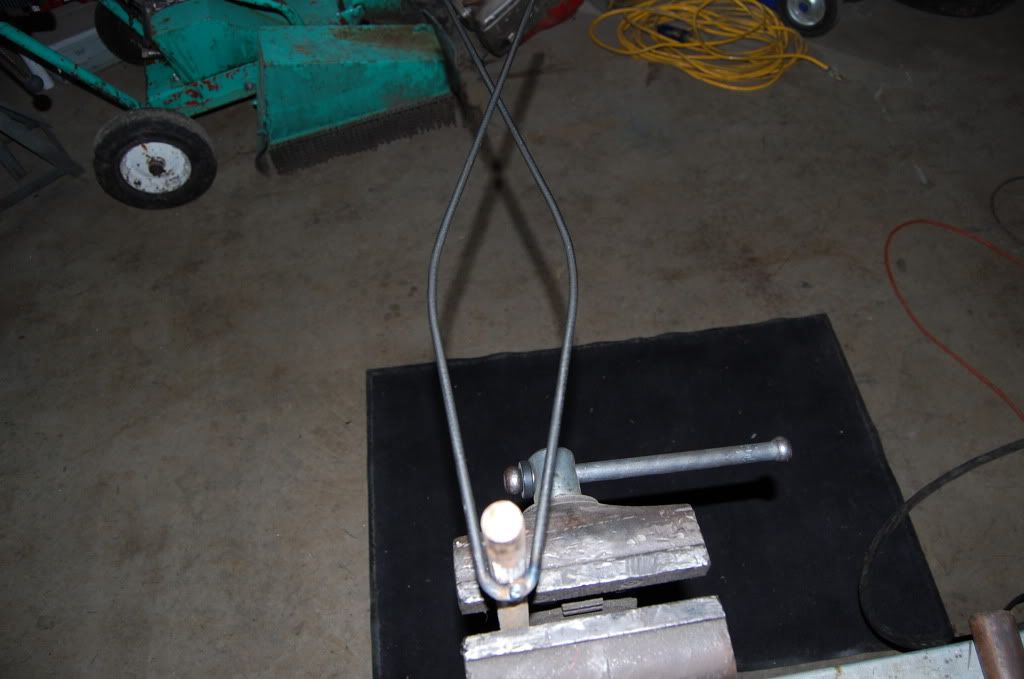 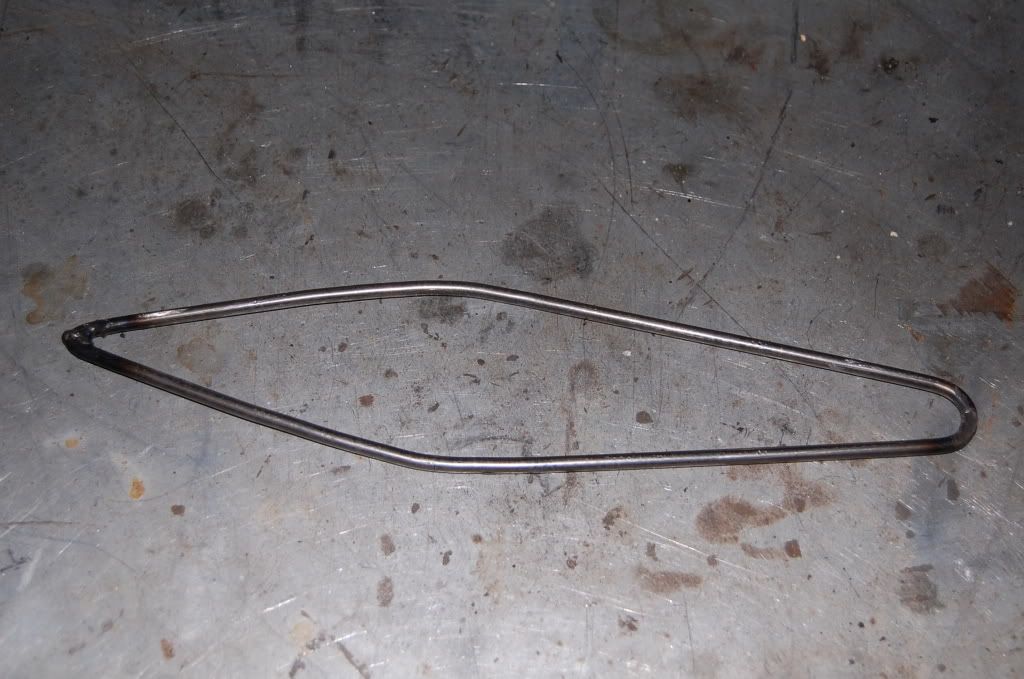 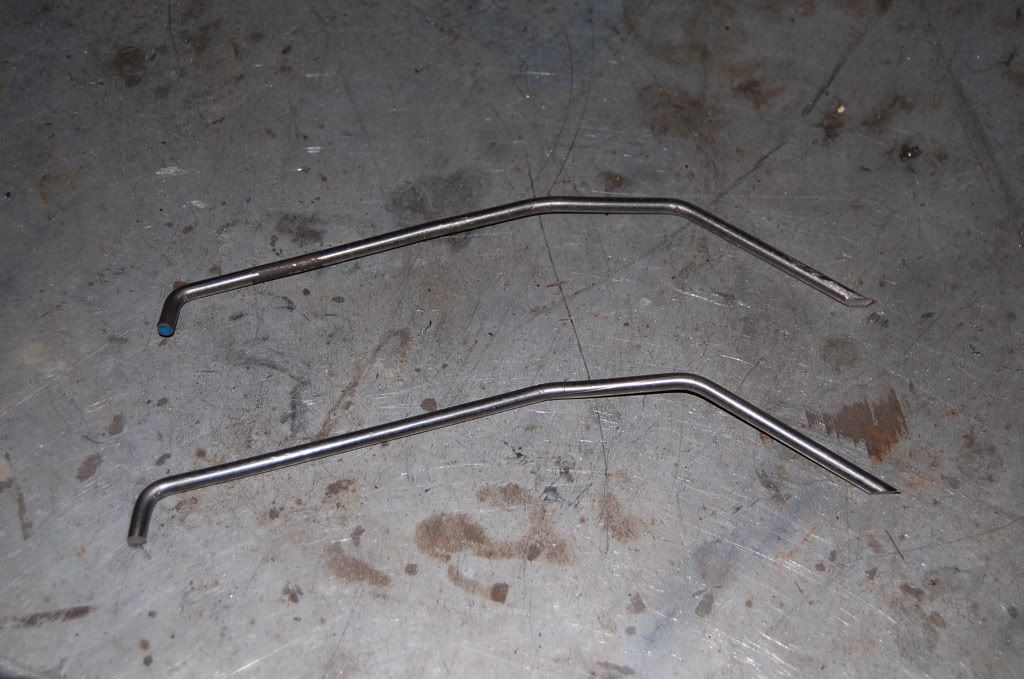 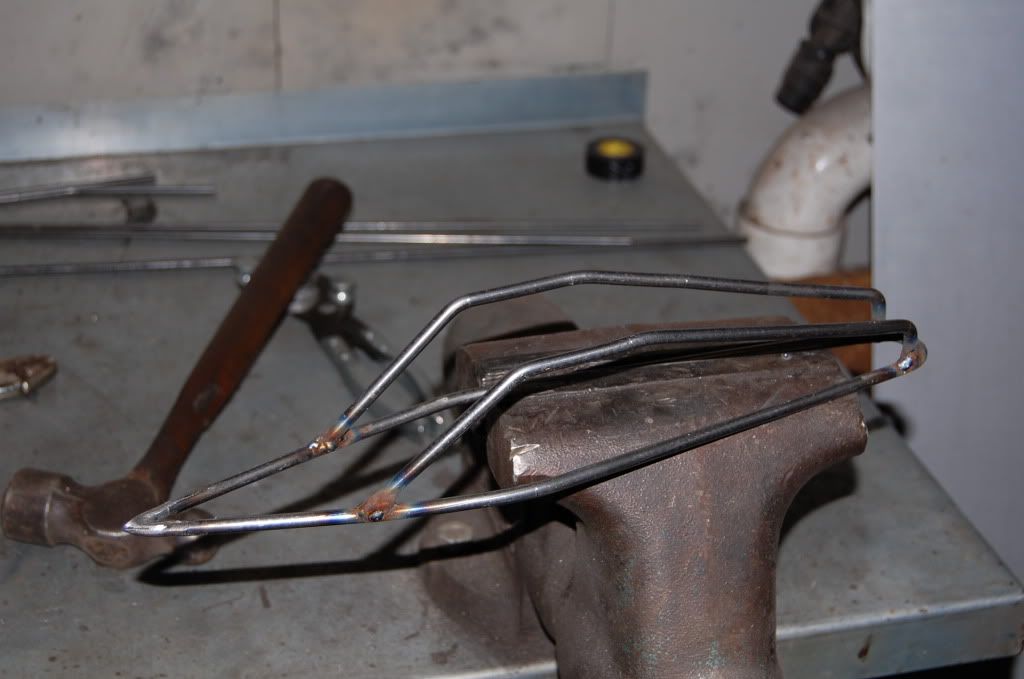 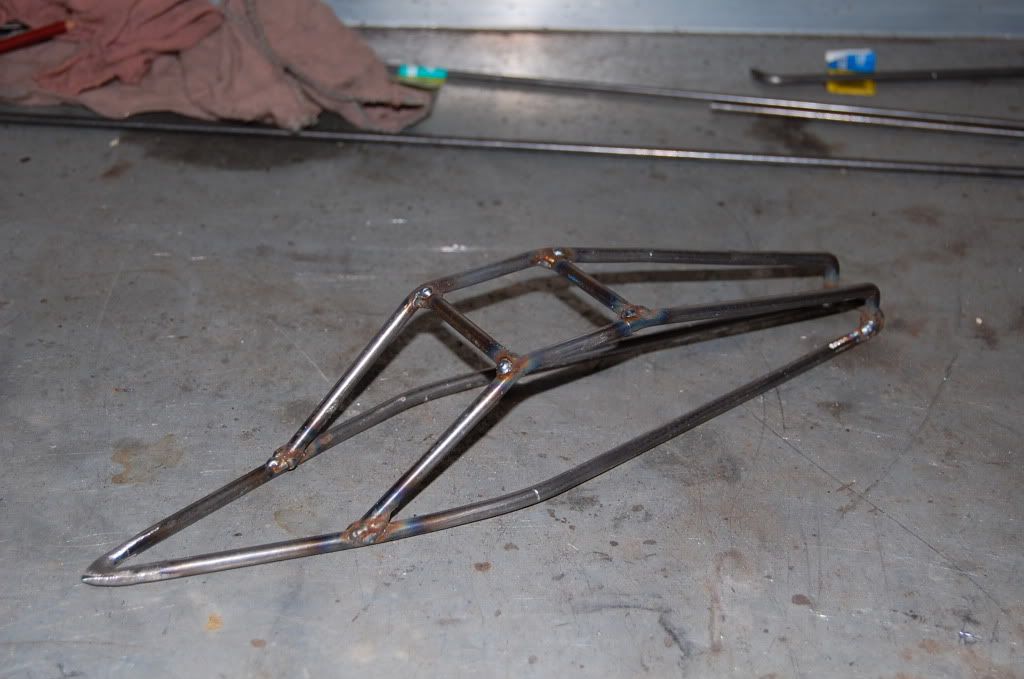  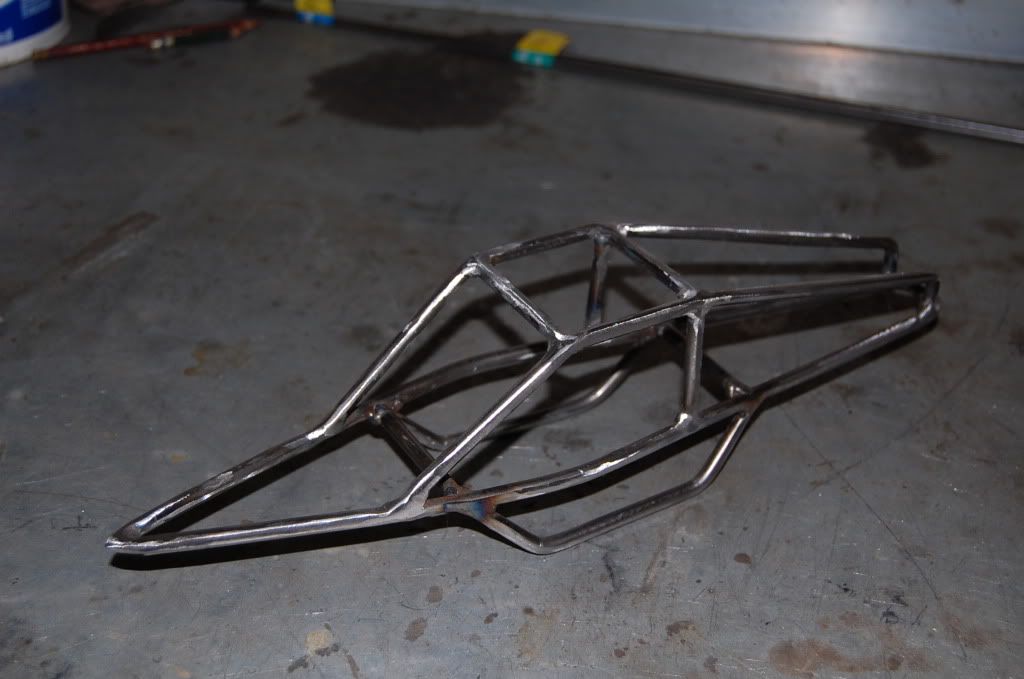 I'm still waiting on some parts from r/c4wd, then I can make my shock mounts, link bars, and get the axles hooked up. 'til then, I may work on making my body panels. I'm thinking polished stainless... |

|  |
| Sponsored Links | |
| | |
|
05-10-2009, 01:02 PM
| #2 |
| Rock Crawler Join Date: Feb 2008 Location: CHESAPEAKE, Va
Posts: 556
|
looks like a great start! keep us updated!
|
|
| |
|
05-10-2009, 06:29 PM
| #3 | |
| Newbie Join Date: May 2009 Location: G-Town
Posts: 27
| Quote:
| |
|
| |
|
05-10-2009, 06:35 PM
| #4 |
| Pebble Pounder  Join Date: Feb 2005 Location: The Aloha State....Aurite!
Posts: 123
|
NICE START  |
|
| |
|
05-10-2009, 10:03 PM
| #5 |
| Rock Crawler Join Date: May 2009 Location: Welderville just south of benchviseland
Posts: 634
|
Thanks for the feedback guys. I can't wait to get it rolling. I think the hardest part from here on out will be picking out a set of affordable anti-bling 40 series beadlocks and some sticky non-Moab treads lol. Quick question before I make my link bars, does anyone know the wheelbase limit for Super class?
|
|
| |
|
05-10-2009, 11:51 PM
| #6 | |
| RCC Addict Join Date: Nov 2006 Location: southaven
Posts: 1,934
| Quote:
18" max wheel nut to nut. looking good | |
|
| |
|
05-11-2009, 01:31 AM
| #7 |
| Rock Crawler Join Date: May 2009 Location: Welderville just south of benchviseland
Posts: 634
|
Sweet. Thanks a lot! 8" links it is. This thing is going to look sinister.....Let's just hope it crawls that way too lol!
|
|
| |
|
05-11-2009, 11:57 AM
| #8 |
| Quarry Creeper Join Date: Nov 2008 Location: morristown
Posts: 375
|
looks good keep us posted
|
|
| |
|
05-11-2009, 02:59 PM
| #9 |
| Rock Crawler Join Date: May 2009 Location: Welderville just south of benchviseland
Posts: 634
|
Thanks! Hopefully I'll get my shocks, metal rod-ends, and upper link mounts this week from r/c 4wd so I can get some more work done on this rig. Put that 'Zilla 4 chassis to rest... |
|
| |
|
05-21-2009, 10:52 PM
| #10 |
| Rock Crawler Join Date: May 2009 Location: Welderville just south of benchviseland
Posts: 634
|
I have to admit I did the happy dance today when UPS showed up with my tires and wheels. I decided to go with Plowboys and Axial Rocksters. Simply cannot believe how sticky these tires are! I knew the beadlock idea wouldn't work with the Plowboys, but I did like the look of the black Rocksters - Plus I couldn't find anywhere with HPI Blasts in stock. I have the tires mounted on the wheels, and the overall height is between 5-1/2" and 6". Which is roughly the same OD as a factory Clod tire. They're just a little lower-profile than the guys running cut and shut Plowboys, but I wanted to try something a little different to see how it would work. I'm not too worried about curbing them ; ). I'll get my link bars made this weekend and hopefully it will be a roller by Sunday so I can post some update pictures!
|
|
| |
|
05-25-2009, 09:31 PM
| #11 |
| Rock Crawler Join Date: May 2009 Location: Welderville just south of benchviseland
Posts: 634
|
Well it's been a while, but I have a few updates 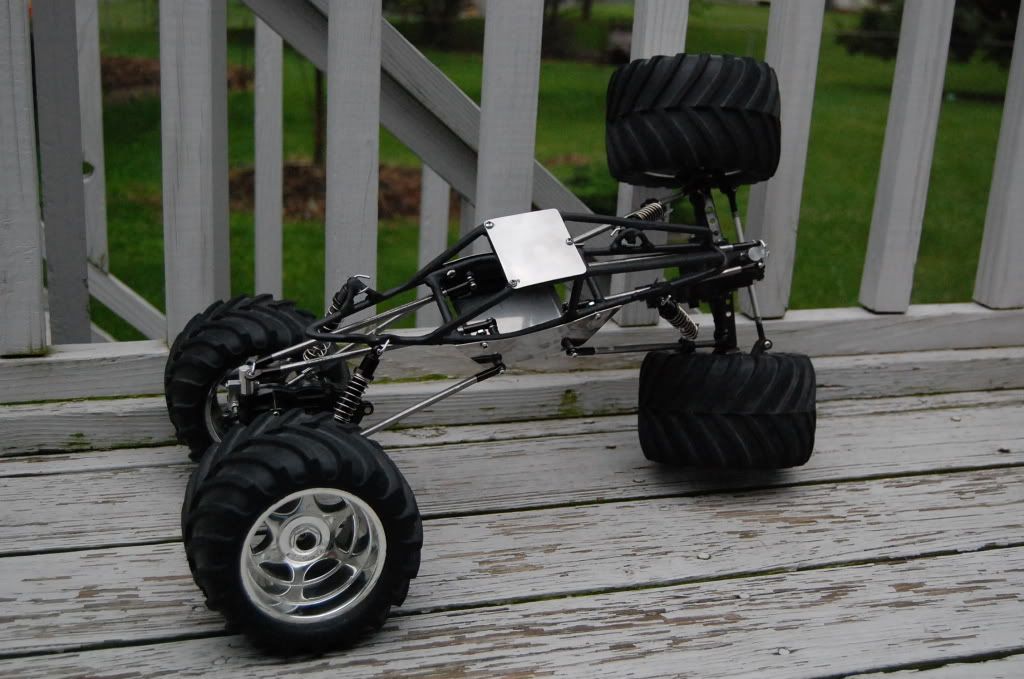 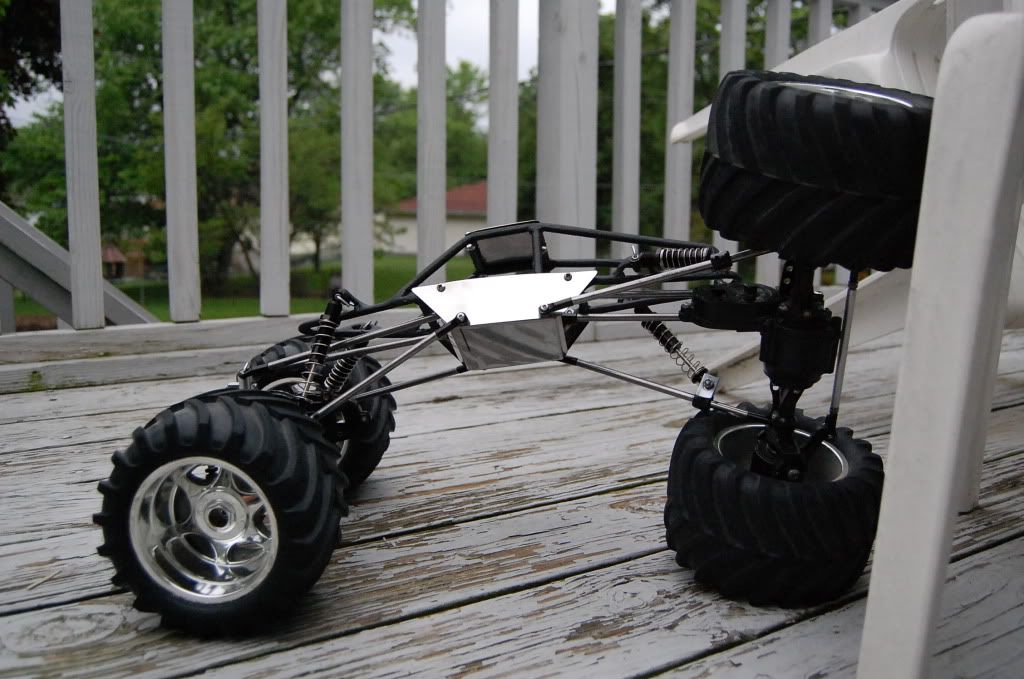 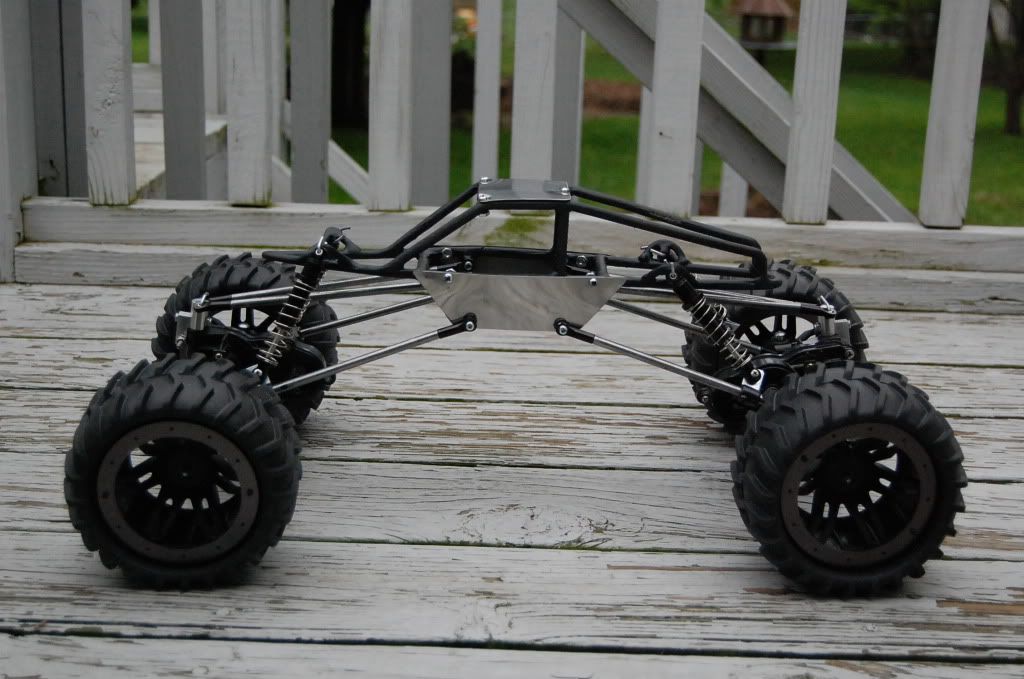 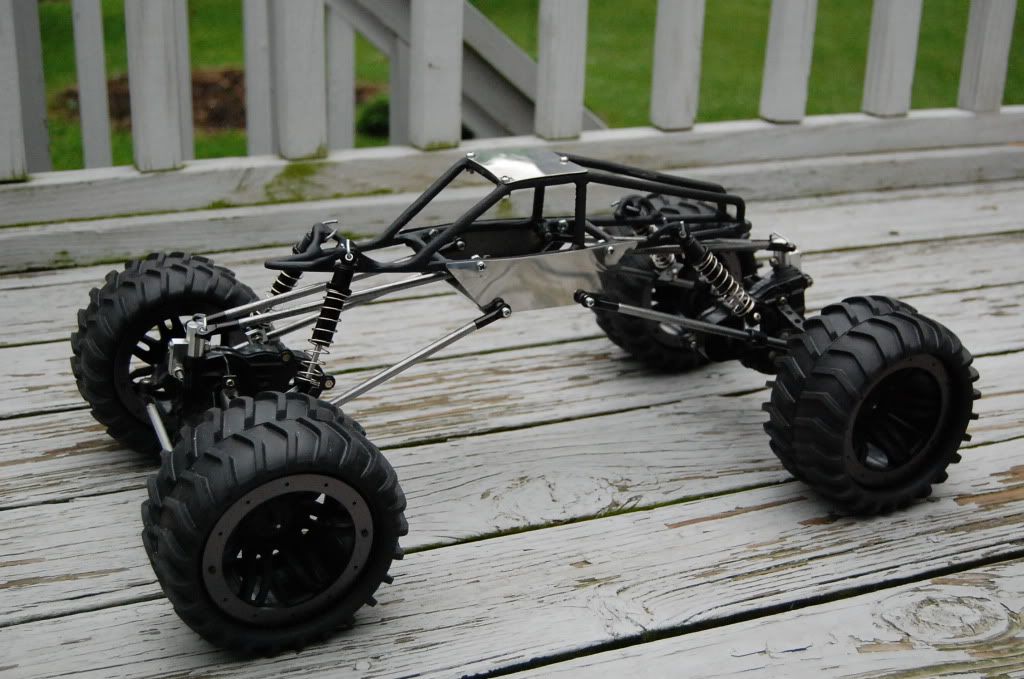 The shots with the plowboys and rocksters are just for kicks...Unfortunately I don't have my adapters yet...The chassis is just sort of mocked up for now. I'm still trying to track down a few more 3mm screws and locknuts, and I'm still working on a more permanent way to mount my shocks to my bars. I have to admit, I was a little worried with how things would turn out. I'm pretty stoked with the way it's going so far though. |
|
| |
|
05-25-2009, 11:39 PM
| #12 |
| Quarry Creeper Join Date: Aug 2008 Location: Yes yes, it is.
Posts: 209
|
thats so awsome. great job on the tube work. for shock mounts i have seen some people braze a bolt to their chassis. and that seems to work well. |
|
| |
|
05-26-2009, 12:36 AM
| #13 |
| Rock Crawler Join Date: May 2009 Location: Welderville just south of benchviseland
Posts: 634
|
Thanks for the props! For the upper mounts, I have holes drilled, I just have to find bolts to go through those holes lol. I made some tubular mounts for my link bars that are pretty nifty, they'd be stationary though. It could be used as a droop or with springs and work well either way. When I track down some little bolts, I'll hafta to use that piece of advice and try tacking one to my lower shock mount and see how that works.
|
|
| |
|
05-26-2009, 03:07 PM
| #14 |
| Rock Crawler Join Date: May 2009 Location: Welderville just south of benchviseland
Posts: 634
|
I ran to Ace Hardware to raid their metric bins and came up with exactly what I needed....A bunch of long 3mm machine screws, and whole lot of locknuts. So this thing's almost ready to rock n' roll. Pretty much all that's left now is electrical gear and wheel adapters for the rocksters. As she sits now with those clod tires, I think a cruise-ship would have a tighter turning radius lol.
|
|
| |
|
05-28-2009, 11:28 AM
| #15 |
| Quarry Creeper Join Date: Aug 2008 Location: Yes yes, it is.
Posts: 209
|
i understand on the turning radius. there is usually some "excess" plastic left after the molding. |
|
| |
|
05-28-2009, 06:23 PM
| #16 |
| Rock Crawler Join Date: May 2009 Location: Welderville just south of benchviseland
Posts: 634
|
All my excess plastic has been axed lol. My Clod hoops hit the link bars but that wasn't much of a surprise... The Plowboy/Rockster setup is narrow enough not to rub anything. I just have to get another servo and hook up my running gear. As of now, I'm limited to 540 motors, 1 esc, and 2 channels...But I'd eventually like to run a 4 channel so I can have independent motor and steering control. I've been looking at the Futaba 4EXA. Seems like a nice, no-frills radio. And the price is just right lol.
|
|
| |
|
05-28-2009, 07:41 PM
| #17 | |
| Rock Crawler Join Date: Mar 2008 Location: hillbilly illinois
Posts: 503
| Quote:
I really like mine. And on ebay buy it now for 79 bux don't hurt either lol. On a side note, That chassis is sick man. I really like the setup so far. The plowboys on the rockstars just sets off the whole thing. Keep up the killer work. | |
|
| |
|
05-28-2009, 08:48 PM
| #18 |
| Rock Crawler Join Date: May 2009 Location: Welderville just south of benchviseland
Posts: 634
|
Thanks for the kind words! I was going for sort of a menacing appearance...lol. I cannot wait to see how this one-off performs though. At full-droop, the wheelbase could not get any closer to 18" if Bob Barker himself said it was closest without going over. I am strongly considering a 6 channel though. I'll hafta check out that JR you mentioned. Found a Futaba 6exp setup on Tower's website for around $140. I love the idea of a stick-type. When I hold pistol-grips, I have to hold them backwards to feel like I have some kind of control - Even though I'm right-handed haha. I think the extra channels would eventually come in handy, seeing how there's an old Tamiya Mountaineer on my shelf that hasn't seen the light of day for about 8 years.
|
|
| |
|
05-31-2009, 02:02 AM
| #19 |
| Rock Crawler Join Date: May 2009 Location: Welderville just south of benchviseland
Posts: 634
|
I didn't really want to mess around with buying adapters, plus I wanted to get this thing moving under its own power by the end of the weekend.....So I did what any "built not bought" minded individual would do - I made my own adapters using the ones provided with the Rocksters....And here's how: I had this crazy idea of finding a bolt with the same size head as the factory brass Clod adapter, grabbing the thread-end with the vice-grips, heating the head cherry-red with a torch, then pushing it into the plastic adapter for the Rocksters - Thus making a perfect 12mm hex pattern in the plastic for me to poke the brass adapter into. I realize it may sound silly, and people will say "But why Travis? When adapters are so cheap?". I had nothing to lose really, because Axial gives you 2 sets of those plastic adapters lol. Here are the results: 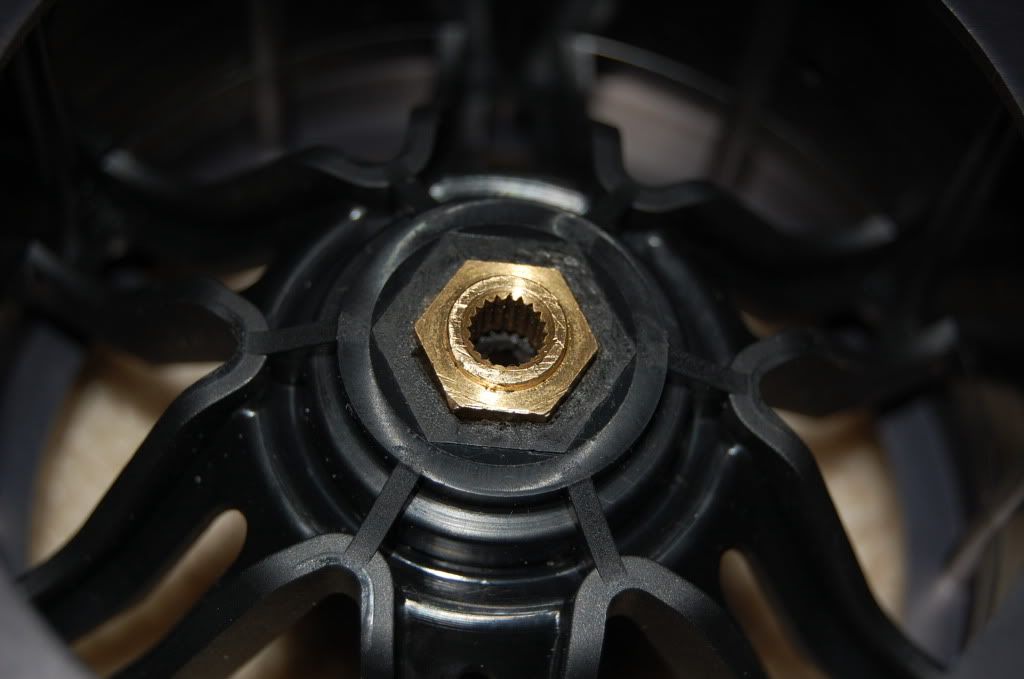 |
|
| |
|
06-01-2009, 10:57 PM
| #20 |
| Pebble Pounder Join Date: Jan 2009 Location: upstate
Posts: 111
|
Nice build like how you built the chassis. Clean welds
|
|
| |
 |
| |


 Linear Mode


