| |
 01-05-2006, 05:22 PM
| #21 |
| RCC Addict Join Date: Aug 2005 Location: Akron
Posts: 1,784
|
I'm not sure what color material I'll go with. Clear is cool but the gloss solid colors are cool too. Still undecided. As for the prototype. It'll make a nice paper weight at work I have all the aluminum cut. I'm still baffled as to how I'm going to put the holes in the ends of the rods..... I have no way to hold the rod straight up and down and centered under a drill press. |

|  |
| Sponsored Links | |
| | |
|
01-05-2006, 07:50 PM
| #22 |
| RCC Addict Join Date: Aug 2005 Location: Akron
Posts: 1,784
|
Yeh, i did the same thing. Searched around and found how people were making them. There is a pretty recent post on the board about drilling holes in the end of solid rod also. I ended up making up something pretty basic. Drilled a 1/4" hole in a 2x4. Slid the rod through the hole. Punched a divet in the top of the rod for a center point. Then used this drill press thing I found at goodwill for $5. Here's the drill press setup. 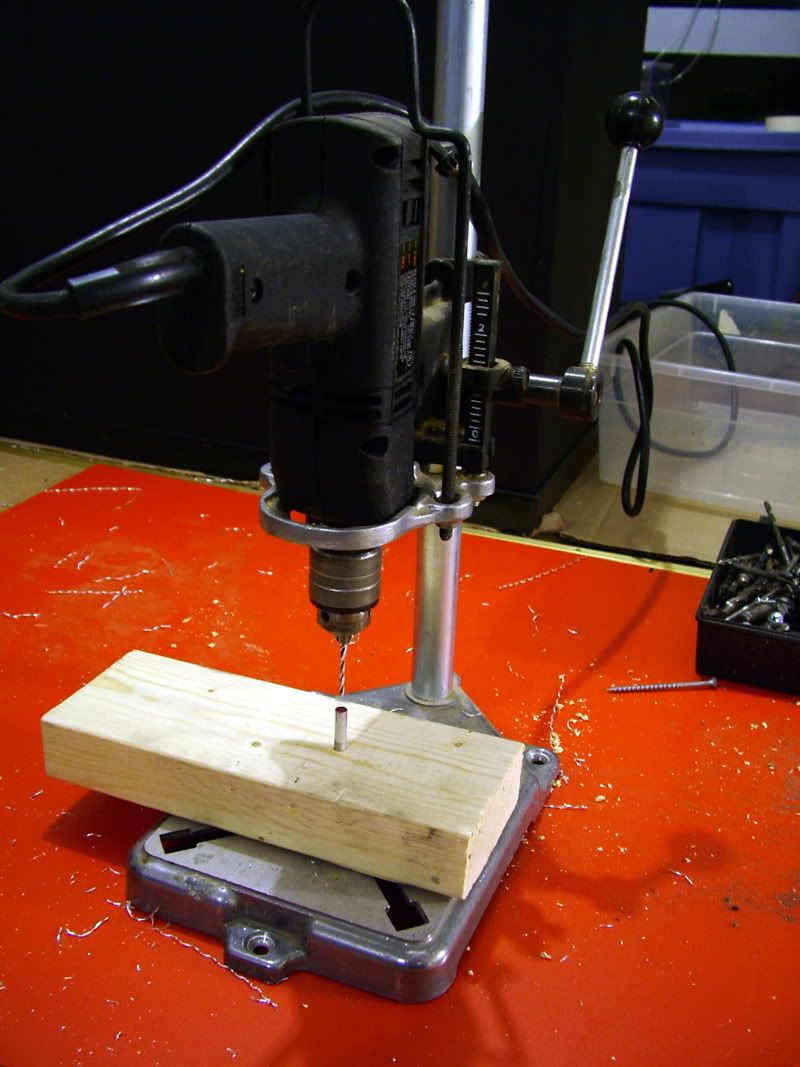 Here's a hole from the drill press in the end of the 1/4" rod. 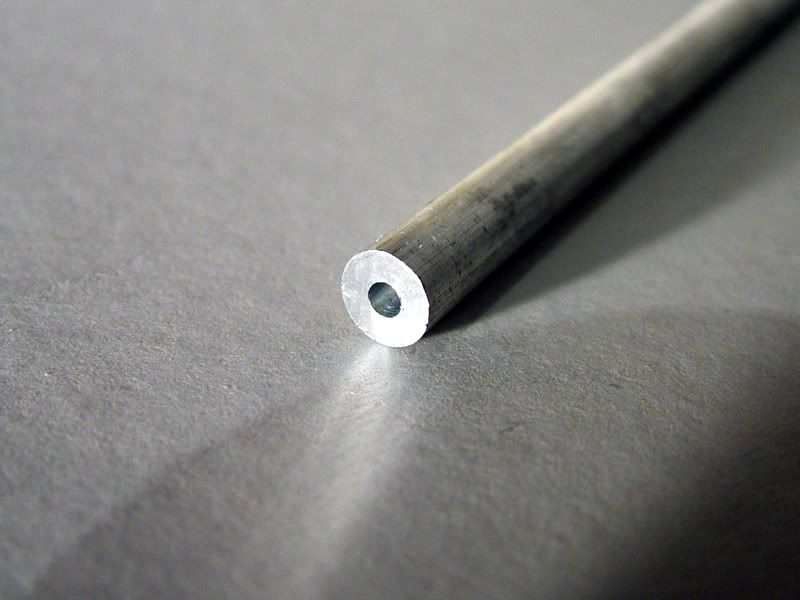 Here's that whole tapped. 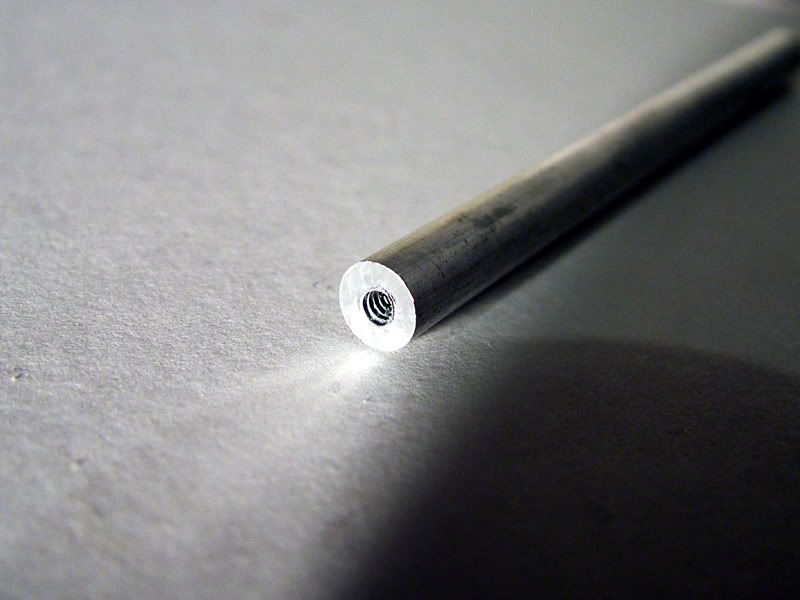 Here it is mounted up between the shocks. There will obviously be another on the back set of shocks, there will be two in the middle that will also be used to mount an eletronics tray and then one in the middle right over the battery pack.  Now to just buff them shiny |
|
| |
|
01-07-2006, 09:38 PM
| #23 |
| RCC Addict Join Date: Aug 2005 Location: Akron
Posts: 1,784
|
Have a little bit of an update. Got a full day to work on the truck. Finished up all the links and mounted them up (finally) Got some body posts and mounted those up. mounted the body to the chassis. The body is just cut to factory outlines for now. It's sitting higher than i wanted but the body lines were messing with where the body posts mounted. The good side is that it looks like there won't be much trimming to clear the tires. Going to start wiring tomorrow. 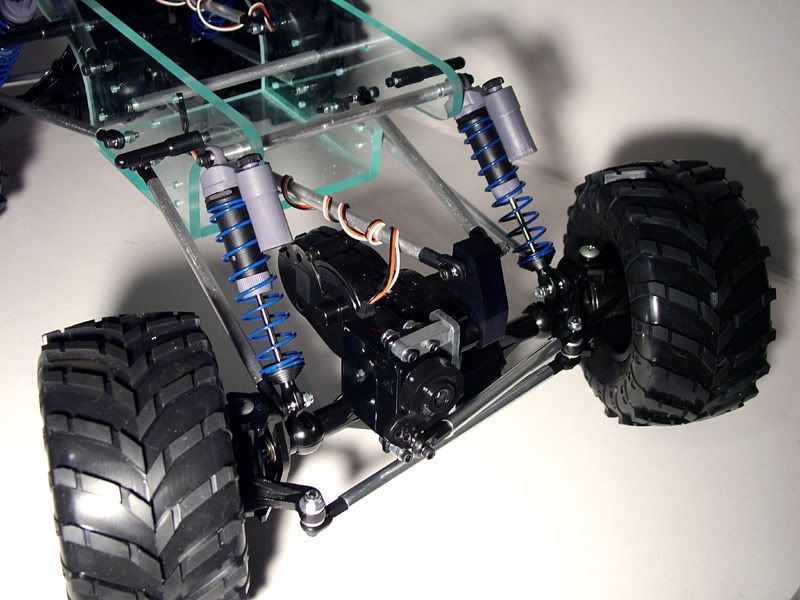 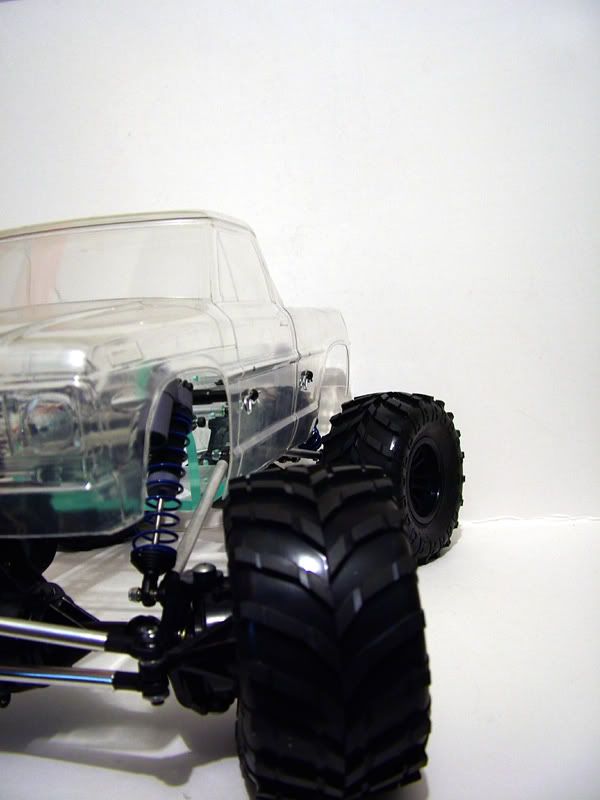 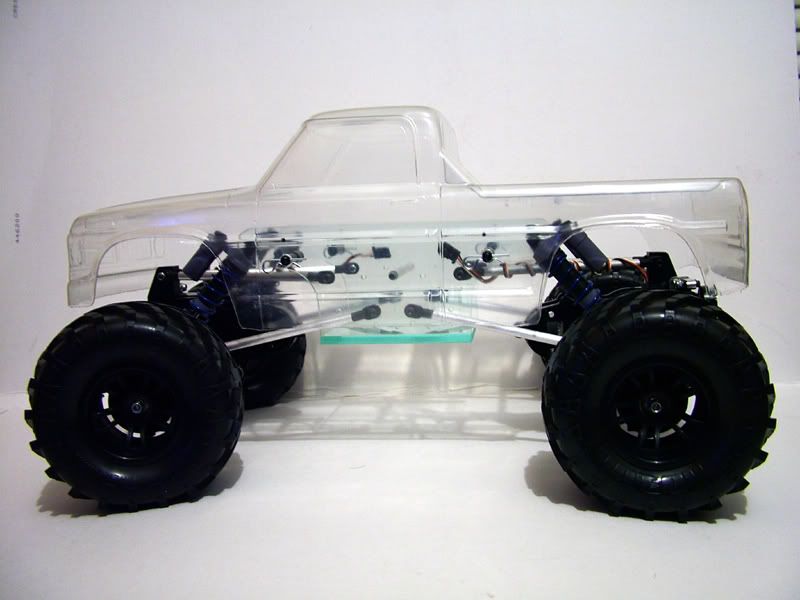 |
|
| |
|
01-08-2006, 08:26 AM
| #24 |
| Rock Crawler Join Date: Aug 2005 Location: Asia
Posts: 510
|
if it gets any clearer than that it'll be wonderwomans truck! like the clean look, but why remove the axel supports? |
|
| |
|
01-08-2006, 10:55 AM
| #25 | |
| RCC Addict Join Date: Aug 2005 Location: Akron
Posts: 1,784
| Quote:
As for removing the axle supports. After doing a lot of looking at 2.2 rigs not many people were using them. You don't have large tires and it doesn't seem to be needed. If i break something i'll put them back on | |
|
| |
|
01-08-2006, 06:09 PM
| #26 |
| Newbie Join Date: Dec 2005 Location: mountains
Posts: 6
|
are the shock mounts three peice pinching the sides or a straight bar. looks good i never figured out to easily hold the tube for the drill press so i turned the ends of the lins down and threaded them. i also never searched. looks good. still liking the green color. different.
|
|
| |
|
01-08-2006, 06:16 PM
| #27 |
| RCC Addict Join Date: Aug 2005 Location: Akron
Posts: 1,784
|
haha well i started wiring up sarge today. Ended up spending the whole day working on it and had everything finished. Decided.... Might as well take it for a spin. Temporarily mounted everything in the chassis. Battery was mounted 3" higher than the right location but at least I got to see it drive on its own I'm running 65t lathes, tekin rebel 2, (2) 2055 servos and a TQ3 with rear steer mod. Everything ran really smooth. The rear motor makes a slight ticking sound. Is it because it's wired in reverse? Also, is there anything I can do to help out steering? I cut off the bump stops from the knuckles but since the axles are locked the turning radius isn't that great. It's good with the rear steer but front steering only I'd assume would be better. One last comment. What tires are being ran, with or without foams? I have masher 2k's on it now. not glued just on the rims and they pulled off the rims with no effort at all.They would come off from turning. Is CA glue holding you guys' tires on good enough? |
|
| |
|
01-08-2006, 06:18 PM
| #28 | |
| RCC Addict Join Date: Aug 2005 Location: Akron
Posts: 1,784
| Quote:
| |
|
| |
|
01-08-2006, 09:02 PM
| #29 |
| RCC Addict Join Date: Aug 2005 Location: Akron
Posts: 1,784
|
It was dark outside so no pics.... I might take it to work tomorrow and mess with it at lunch. Seems like the springs are to stiff. I'll drive it around more to make sure. When are you going to start messing with those moabs? I'd be interested in seeing how that works out. I'm going to try running no foam first and see what happens. I'm supposed to be getting some bead lock rings to test run so this will be a perfect application. |
|
| |
|
01-10-2006, 12:52 PM
| #30 |
| RCC Addict Join Date: Aug 2005 Location: Akron
Posts: 1,784
|
Well it went out for its first run today at lunch time. Snapped a few pics. unfortunately it was just a little test run. Electronics were just temporarily mounted, battery is wire tied to the upper crossbraces so it's about 3" higher than it should be and the tires weren't glued to the rims. Oh and using full foams. It was the only thing i could do to keep the tires on the rims. And they still came off a lot. Anyway. I'm pretty happy with the performance. The rims slipping in the tires KILLED me. The suspension also seems stiff. I really think its the shocks. I took them apart last night. put on red maxx springs and 15wt oil. Put them back together and they didn't feel to smooth. You can see in the vid i'll be posting soon how stiff it seems. Anyways on to the pics. I've seen quite a few pretty poser pics. Had to outdo everyone. 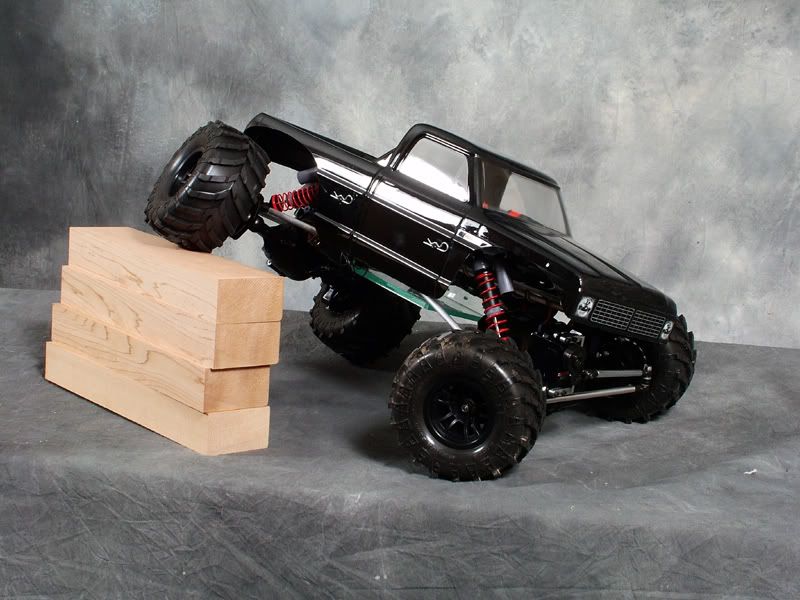 Outdoor poser pics. (driven to of course...) 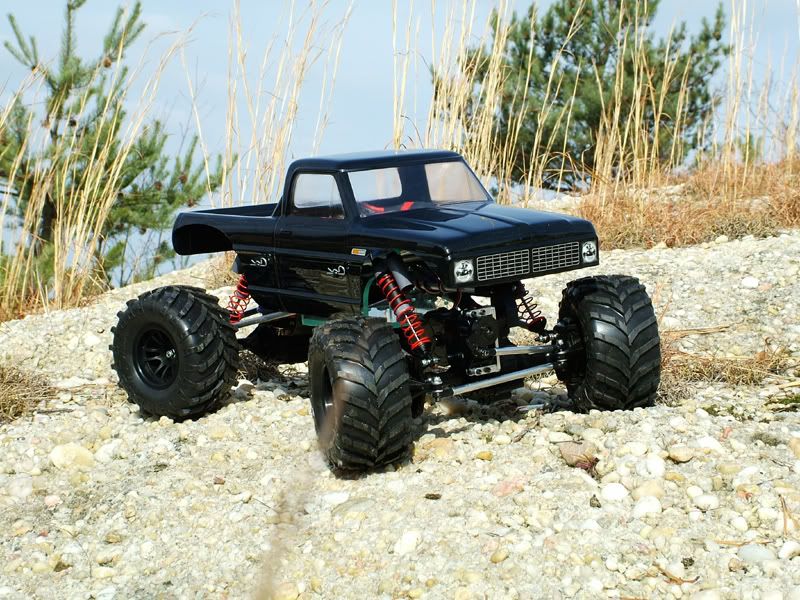 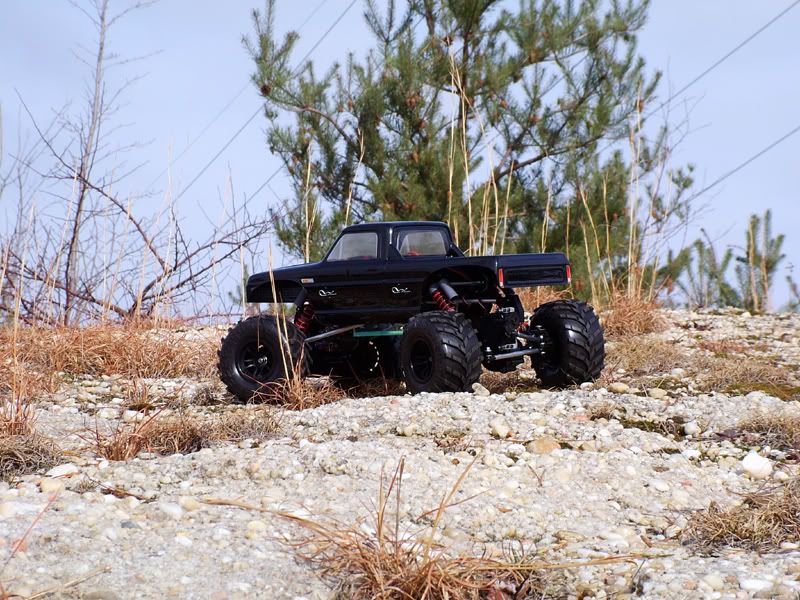 For a few action shots. All drivin in and out of (not saying much though) 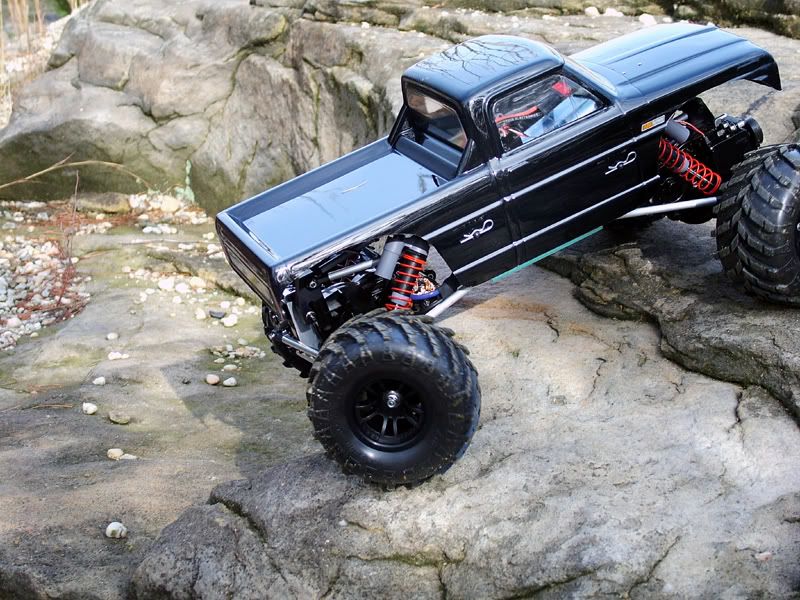 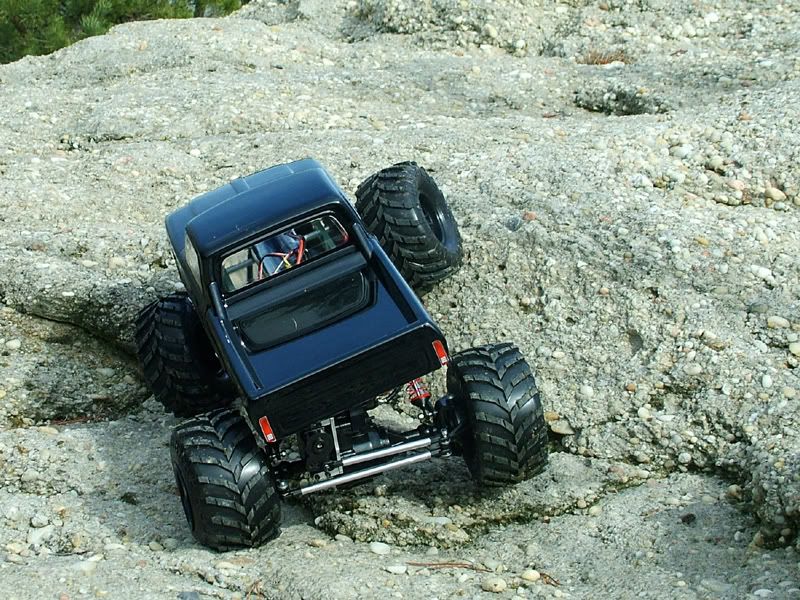 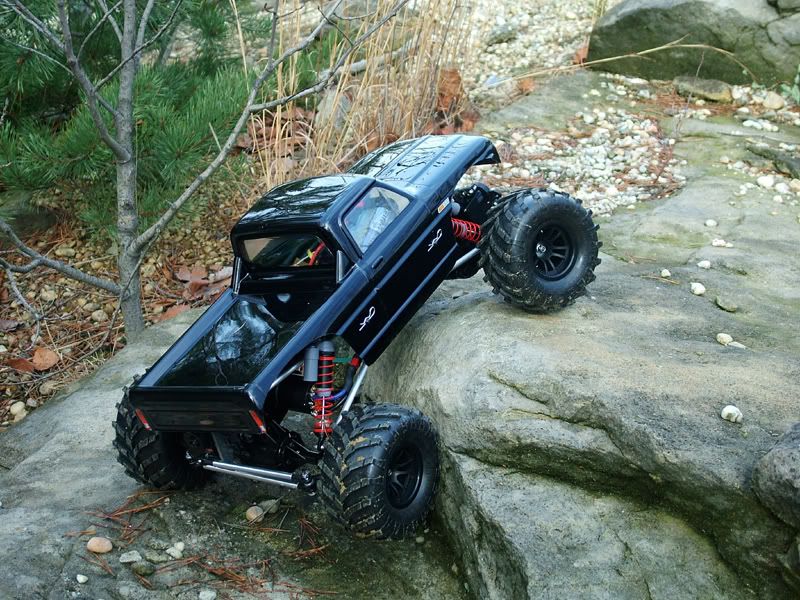 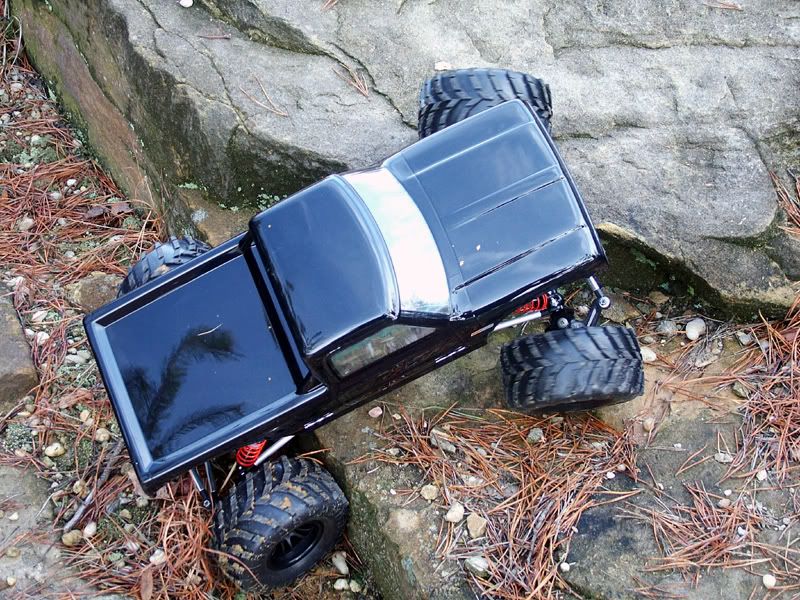 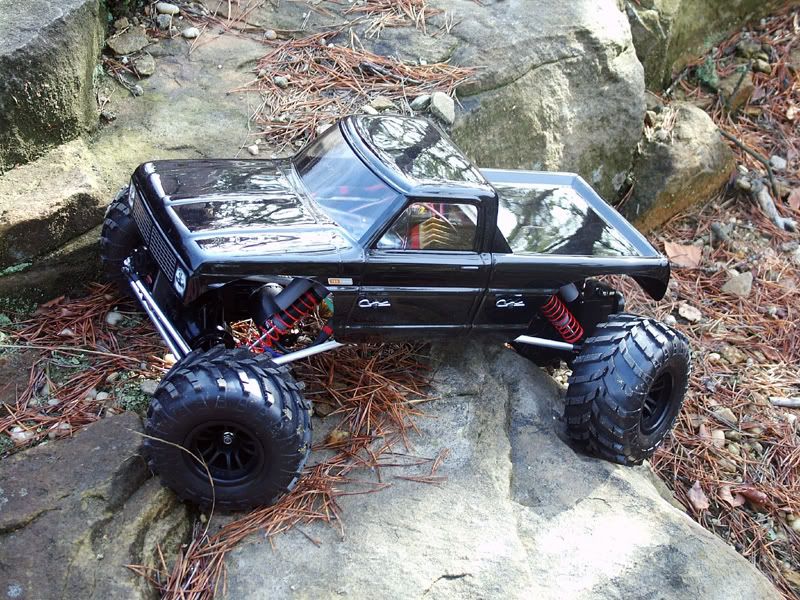 Here's a vid. http://media.putfile.com/1st-run85 any ideas on suspension? CSR, I know you have a similiar setup. |
|
| |
|
01-10-2006, 01:37 PM
| #31 |
| RCC Addict Join Date: Aug 2005 Location: Akron
Posts: 1,784
|
Oh there's locks. Just nothing holding the tire to the rim I'm either going to glue them tonight or sit it out until bigred sends me these lock rings to test. |
|
| |
|
01-11-2006, 06:07 AM
| #32 |
| RCC Addict Join Date: Aug 2005 Location: Akron
Posts: 1,784
|
Well I couldn't take it anymore. After knowing what I needed to do from the first test run I had to start tweaking last night. Found out a way to smooth out the MGT shocks. They were catching when they were fully extended. Fixed that by using a piece of fuel line under the piston. Help lower the ride height a tad to. Also trimmed off about 1/2" of foam from the inserts and glued the tires to the rims. I drove last night with the foams in two tires and what a difference. Worked really well. Hopefully I'll have time at lunch today to take it out and test the new suspension setup. This time all four tires should spin.....
|
|
| |
|
01-18-2006, 06:22 AM
| #33 |
| RCC Addict Join Date: Aug 2005 Location: Akron
Posts: 1,784
|
Had some videos in another thread. Probably should have posted them here. trucks running great. I really need new servos though. These 2055's suck. I'm not liking the MGT shocks either but they are working for now. Here's a couple vids from the park near work. truck2.mp4 - 12.25MB truck3.mp4 - 10.42MB truck4.mp4 - 2.79MB |
|
| |
|
01-18-2006, 09:44 AM
| #34 |
| Pebble Pounder Join Date: Dec 2005 Location: hertfordshire, uk
Posts: 99
|
loving it , the all black scheme looks great, how did you end up cutting the foams in the end?
|
|
| |
|
01-18-2006, 09:53 AM
| #35 |
| RCC Addict Join Date: Aug 2005 Location: Akron
Posts: 1,784
|
I ended up taking about 1/2" off the outter part of the foams all the way around and then kind of rounding over the edges. I think next time around I might take off some more. They shape to rocks well but harden up a little to soon. I just narrowed a set of wheels for it and will be trying no foams and minimal foam. I'll snap some pictures of what I try.
|
|
| |
|
01-18-2006, 12:00 PM
| #36 |
| RCC Addict  Join Date: Oct 2005 Location: Trussville, AL
Posts: 1,762
|
you should try cuttin the foams into stars. there was a thread in the tire section about cutting triangles. im running 40s moabs on the cheyenne beadlocks with foam cut like that. they work great. they are soft between each point but give a little firmness when needed at the points of the stars. i find that that works better than just trimming the foams down some
|
|
| |
|
01-18-2006, 12:27 PM
| #37 |
| RCC Addict Join Date: Aug 2005 Location: Akron
Posts: 1,784
|
yukon i did see that thread, they seem to work hell huh? I'll have to search for it again and read up on it. I just thought the pieces would scrunch up and not pop back out into the star shape and you would have a lop sided wheel.
|
|
| |
|
01-18-2006, 01:28 PM
| #38 |
| Rock Stacker Join Date: Oct 2005 Location: dallas tx
Posts: 68
|
damn good lookin rig there...
|
|
| |
|
01-18-2006, 02:58 PM
| #39 |
| RCC Addict Join Date: Oct 2005 Location: Trussville, AL
Posts: 1,762
|
in the thread i think that it shows four triangles but i did four bigger ones (top, bottom, left, right) and then smaller ones between those. if you take a new foam and draw the outline, then start cutting from the outside towards the inside but dont cut all the way to the center of the foam but about 1/4" away from it, you can have the triangles but they are all interconnected so that you don't have to worry about them going back into place and sliding around. i was thinking about cutting the smaller triangles out and just having four but it does well the way it is. i would post a pic but those beadlocks are a pain when you have 20 some odd screws on one side, just to get the foam in and out
|
|
| |
|
01-18-2006, 03:00 PM
| #40 |
| RCC Addict Join Date: Oct 2005 Location: Trussville, AL
Posts: 1,762
|
dezfan is right, i run the threaded shocks but i have team losi springs on mine because you can pic the rating of the springs, and there are a lot of them to choose from. also may want to change to a lighter shock oil. just some suggestions
|
|
| |
 |
| Thread Tools | |
| Display Modes | |
| |


 Linear Mode


