| |
 06-03-2010, 08:29 AM
| #1 |
| Pebble Pounder Join Date: Jan 2010 Location: Glenview
Posts: 129
|
I picked up a set of clod axles on ebay a while back and was kicking around what to do with them (super or 2.2 build). Since I've not yet put together the money to buy a 4 channel radio and have fallen a bit in love with the super bully axles, I decided to use these for a 2.2 build<EDIT> I've decided to go super with this build, updated post to follow</EDIT>. This is the beginning of that thread. I have an adequately equipped machine shop in my garage with a 4 axis bench top CNC mill, a 3 axis router bed, a 2 axis CNC mini lathe and a 12x36tool room lathe (as well as grinders, a brake, etc, etc) I have a couple of goals with this build: 1) minimize the stuff I buy and machine or modify wherever possible 2) build a competitive and comp spec legal 2.2<NOW SUPER> machine 3) build a highly adjustable and tunable chassis/suspension system to allow me to tinker with geometry and settings 4) build a machine that doesn't require me to take the body off to change batts and plug in (like my LCC) 5) build a machine that is also fun and can be used for screwing around on the rock piles or doing trail runs (but not be a scalar) Last edited by pbarsamian; 07-18-2010 at 09:00 AM. |

|  |
| Sponsored Links | |
| | |
|
06-03-2010, 08:36 AM
| #2 |
| ~THE SCALE SHOP~ Join Date: Apr 2006 Location: KILLEEN TX
Posts: 10,056
|
sweet! get to postin! cant wait. im building the same.
|
|
| |
|
06-03-2010, 08:38 AM
| #3 |
| Pebble Pounder Join Date: Jan 2010 Location: Glenview
Posts: 129
|
I pulled one of the Clod axles apart to get familiar with it, as expected from reading here, the stock steering really stinks. I considered buying CVDs but not only are they out of stock everywhere, they are 60 bucks for a pair and I want to put that money towards the M2 DIG I want to use for this project. I shaved the knuckles with a belt sander to get rid of the stops. I then pulled the out drives from the knuckles in front. After inspection I realized they have a lot of "meat" on them so I finally found a use for the tiny and VERY expensive boring bar I bought a couple of years back for my lathe. This first pic shows the outdrive chucked in my toolroom lathe 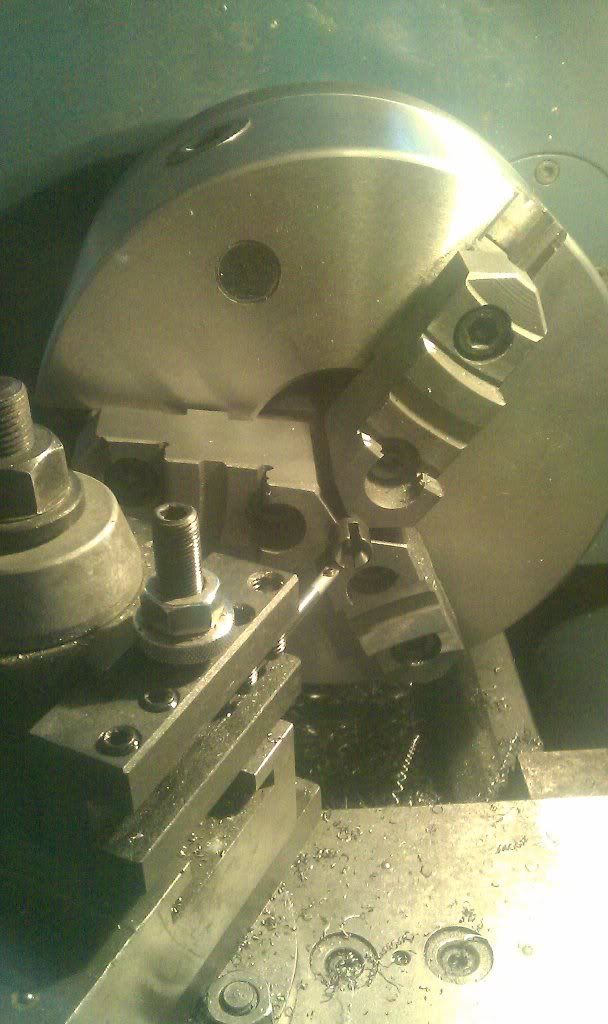 As you can see, I specifically setup a 45 degree angle on the cross slide and used the boring bar to bore a new taper into the outdrives. Last edited by pbarsamian; 06-03-2010 at 08:49 AM. |
|
| |
|
06-03-2010, 08:39 AM
| #4 |
| Pebble Pounder Join Date: Jan 2010 Location: Glenview
Posts: 129
|
Another pic of the boring operation 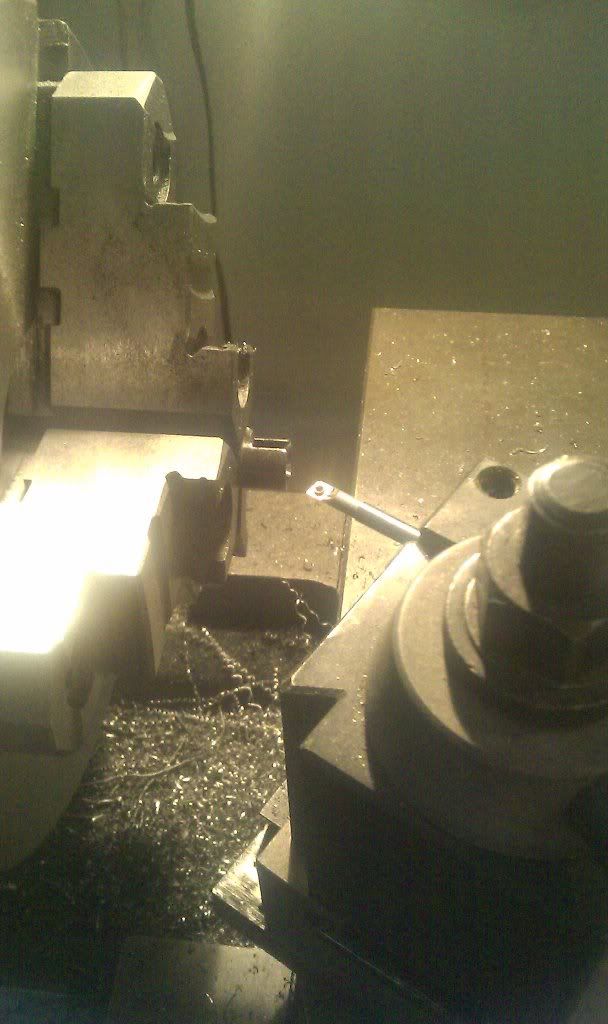 Last edited by pbarsamian; 06-03-2010 at 08:50 AM. |
|
| |
|
06-03-2010, 08:40 AM
| #5 |
| Pebble Pounder Join Date: Jan 2010 Location: Glenview
Posts: 129
|
Showing the stock and modified outdrives side by side 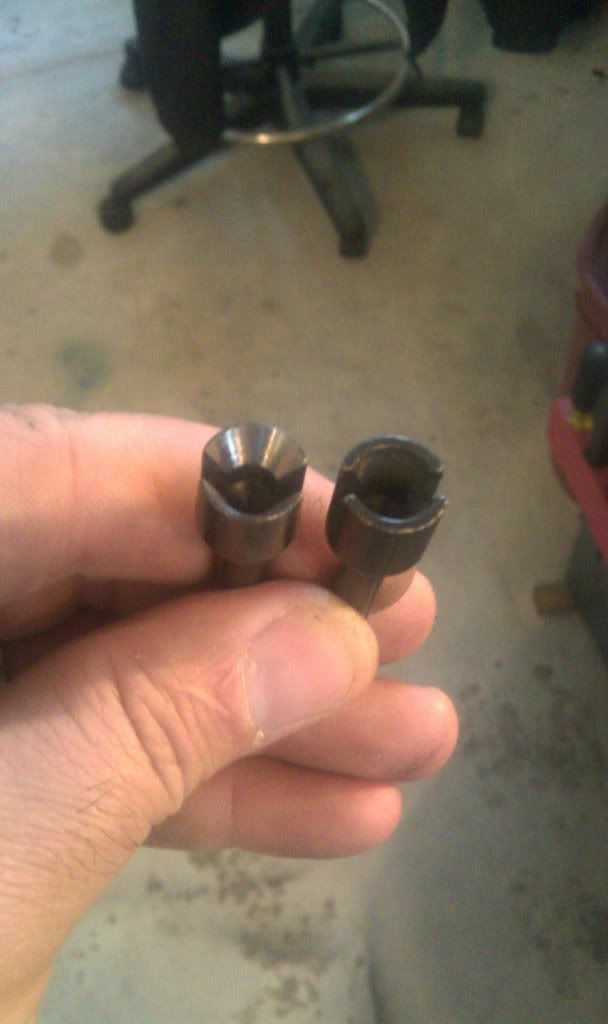 As you can see there's a huge difference in the bore which will allow significantly greater steering angles while still running smoothly. Last edited by pbarsamian; 06-03-2010 at 08:50 AM. |
|
| |
|
06-03-2010, 08:41 AM
| #6 |
| ~THE SCALE SHOP~ Join Date: Apr 2006 Location: KILLEEN TX
Posts: 10,056
|
yep did the same on my super. works great and its free. been running mine that way for 3 years.
|
|
| |
|
06-03-2010, 08:56 AM
| #7 |
| Pebble Pounder Join Date: Jan 2010 Location: Glenview
Posts: 129
|
Thanks Stang! Here's a pic of the fixed steering throw, showing the difference from stock. Everything still turns very smooth at this angle. 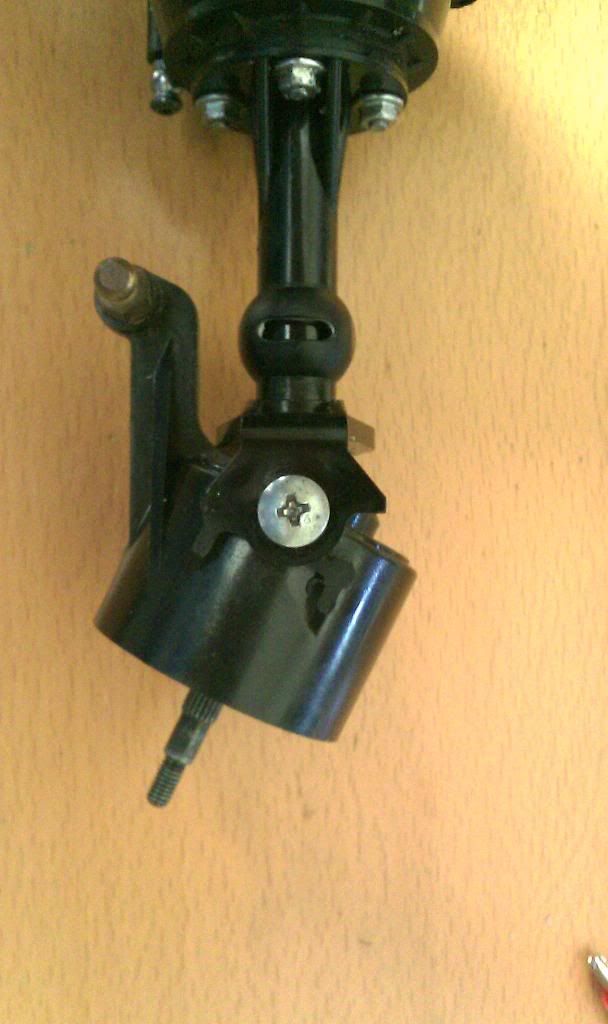 |
|
| |
|
06-03-2010, 08:58 AM
| #8 |
| Pebble Pounder Join Date: Jan 2010 Location: Glenview
Posts: 129
|
I also finished the first of two of the side frames last night. I've been kicking this chassis design around for a while and actually did a micro version for my Losi Micro crawler in carbon, this is going to be the scaled up version. 1) The specs will make this frame legal for 2.2 or super class as it was specifically designed to meet requirements for both 2) I wasn't happy with the way 6061 wears for this so I'm using 7075 aluminum sheet in 1/8" thickness. Some of the cross members will still be 6061 as well as the roof light/rack I'm planning enough talk here are some pics of it being cut and the final (unpolished) sideframe... 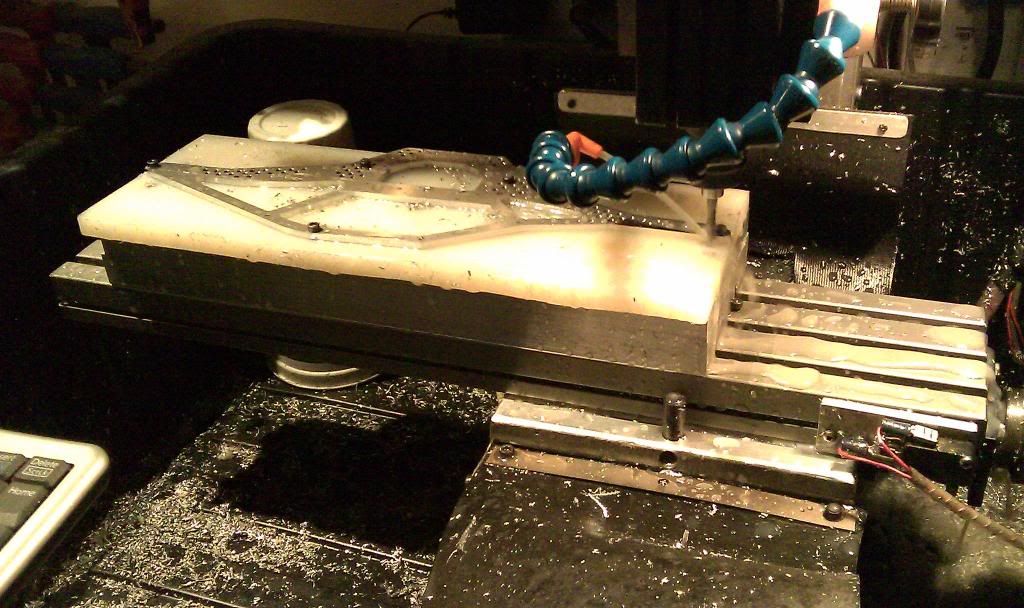 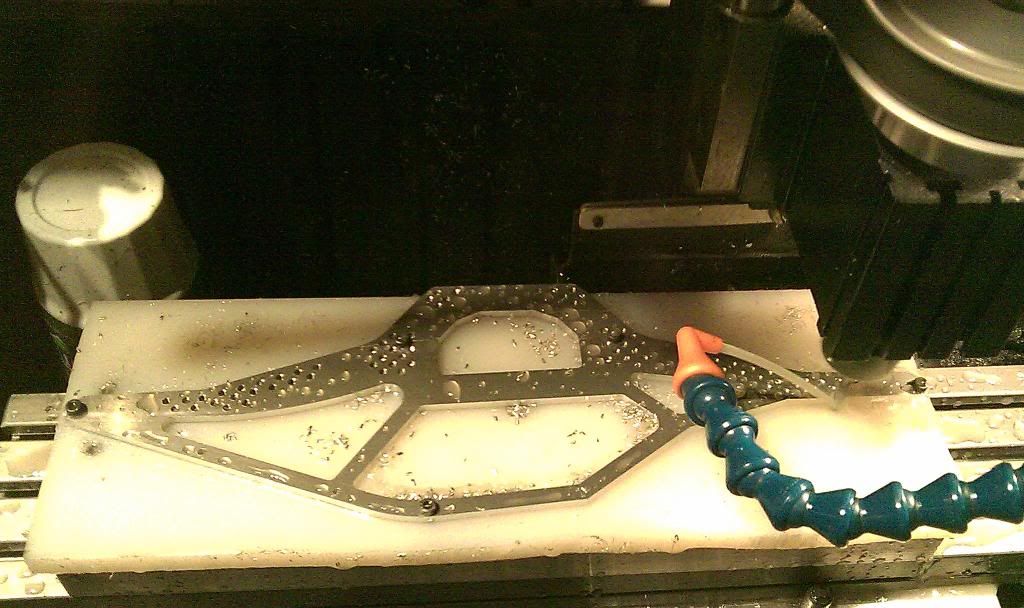 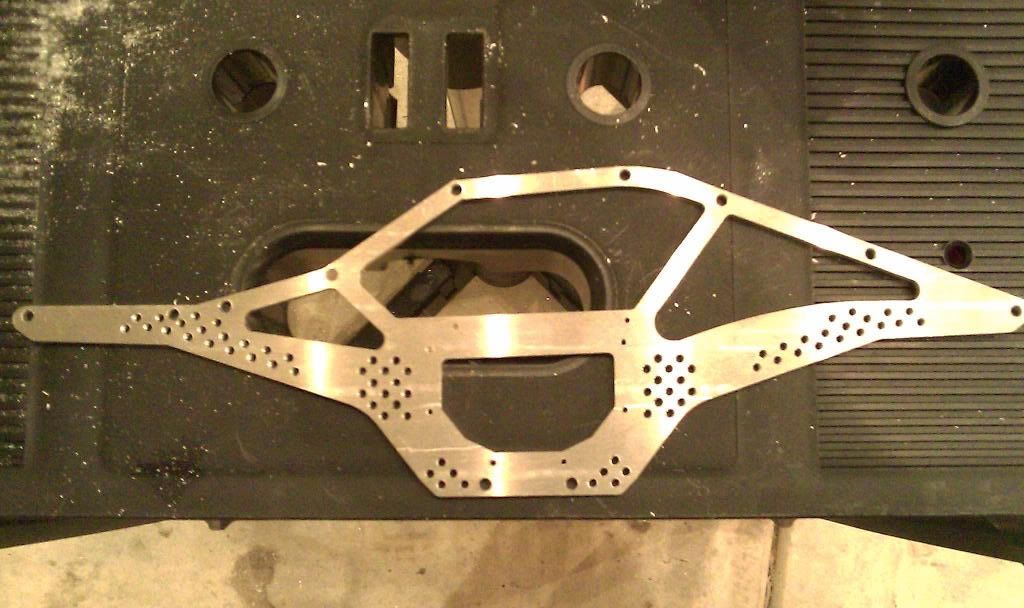 |
|
| |
|
06-03-2010, 09:00 AM
| #9 |
| Pebble Pounder Join Date: Jan 2010 Location: Glenview
Posts: 129
|
BTW all of the suspension link and shock mounting holes are 3mm tapped, so I can run with loctite instead of loc nuts on the other side. Intention was to make tuning and geometry changes less of a hassle.
|
|
| |
|
06-03-2010, 12:26 PM
| #10 |
| ~THE SCALE SHOP~ Join Date: Apr 2006 Location: KILLEEN TX
Posts: 10,056
|
btw if you remove 1-2mm from the end of the stub shaft (dog bone side) youill get even more steering. then the stock knuckles become the problem. particularly the arms for attaching the steering rods. you end up with a straight pull situation. this is how my super is maxed out. the knuckle arm shape and lenght is just "so" that it could turn more degrees. but the steering rod coming from teh servo is a straight pull. ie the arm is parrallel with the steering rod coming from teh servo, so it cant get any more angle. |
|
| |
|
06-04-2010, 12:08 PM
| #11 |
| Pebble Pounder Join Date: Jan 2010 Location: Glenview
Posts: 129
|
Made some more progress last night, got the second chassis plate done, and the 7 round cross members done, still need to mill a flat and drill/tap them for the body panel hold down screws. Wanted to test fit together tentatively, here's a shot... 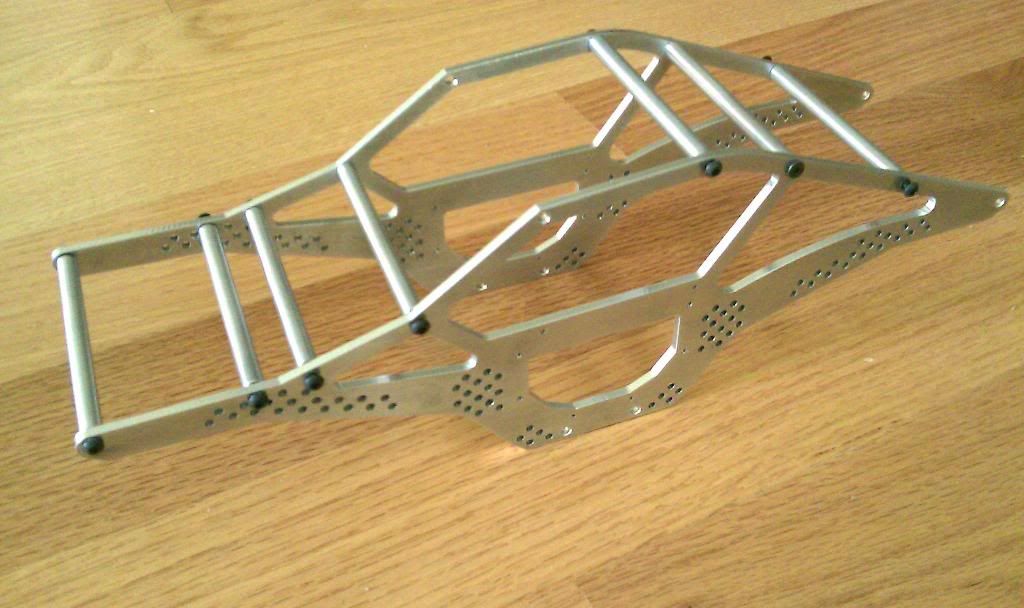 |
|
| |
|
06-12-2010, 04:39 PM
| #12 |
| Pebble Pounder Join Date: Jan 2010 Location: Glenview
Posts: 129
|
more progress, cnc cut lower arms and shock mounts, turned 3/8th upper links and center mount... 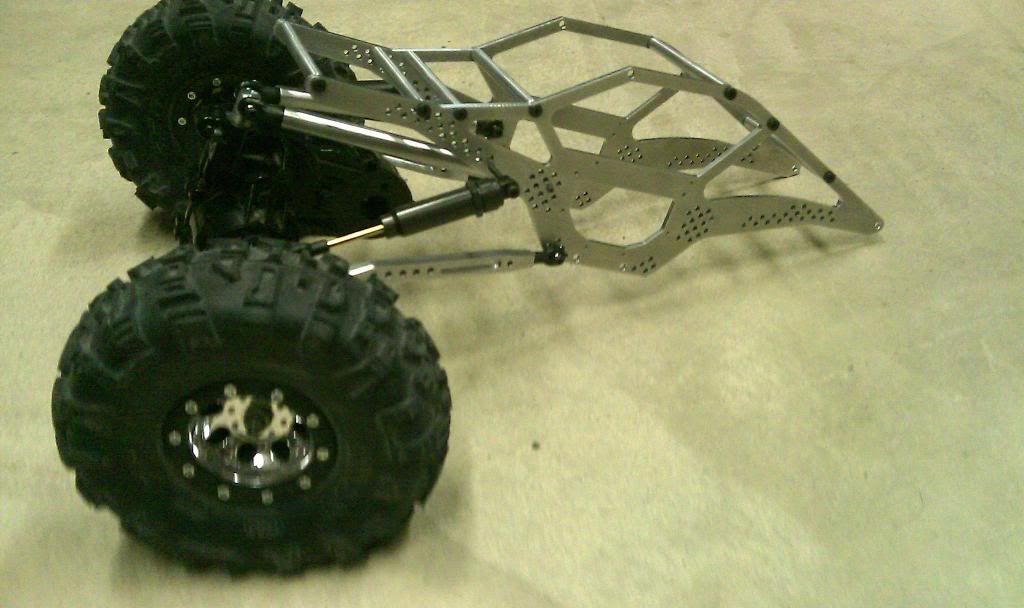 |
|
| |
|
06-16-2010, 12:45 AM
| #13 |
| Newbie Join Date: May 2010 Location: uk
Posts: 31
|
How's the project coming along?
|
|
| |
|
06-16-2010, 08:11 AM
| #14 |
| Pebble Pounder Join Date: Jan 2010 Location: Glenview
Posts: 129
|
Well I wasn't happy with the 2.2 suspension layout or length, I decided to try some longer links (14" wheel base, non comp legal) just for giggles. It setup much better, 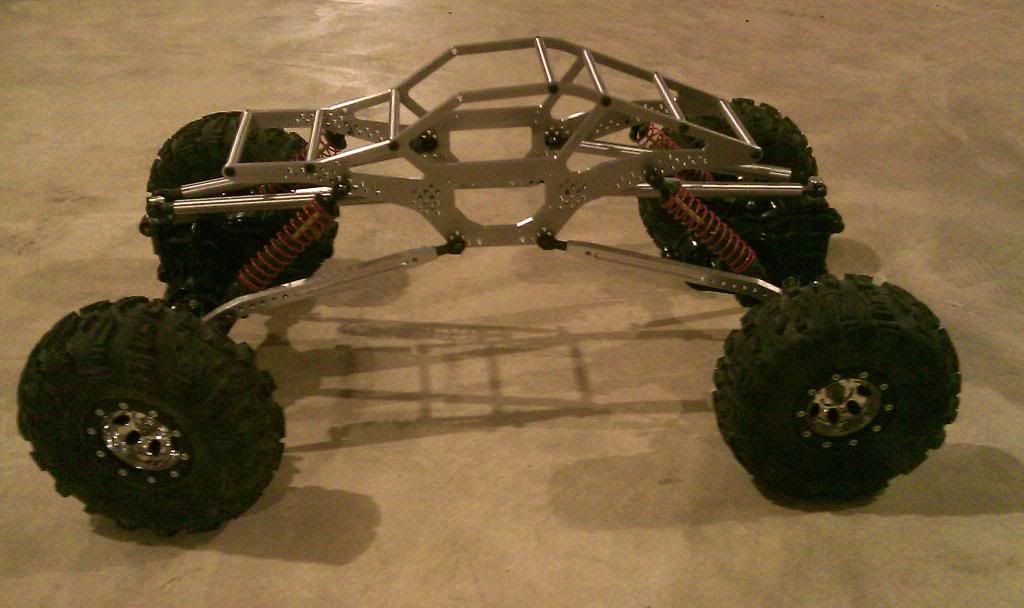 After consideration, I think I'm going Super/Unlimited on it. I've got a shopping cart with items I need, I think I'm going to narrow a set of the Axial 40 series beadlocks, and use a set of Proline Moab XLs. I also found a good deal on a Traxxas TQ2.4 4ch and I'm planning on making a custom mixer to allow multiple rear steer types as well as front/rear dig. Also probably going to use two Rooster crawlers instead of waiting for that M2 DIG to come out... more to come... |
|
| |
|
06-16-2010, 01:56 PM
| #15 |
| Pebble Pounder Join Date: Jan 2010 Location: Glenview
Posts: 129
|
I think the clod axles are too wide for my liking in the 2.2 setup, I still have the arms for it, if I run into a set of bergs or bullys, I'll probably cut another chassis kit and make a 2.2 as well.
|
|
| |
|
07-18-2010, 09:17 AM
| #16 |
| Pebble Pounder Join Date: Jan 2010 Location: Glenview
Posts: 129
|
More progress, finally cut a super length set of arms, 10 degree bent lowers are 7" long each without the ball ends (just about 8" effective length) and the uppers are the same but straight turned 3/8" alu with CNC turned tapers at the ends. Also narrowed a set of axial 40 size beadlocks with a set of Moab XLs on cut foams. I'm likely going to get a set of memory foams as I'm not happy with these yet. 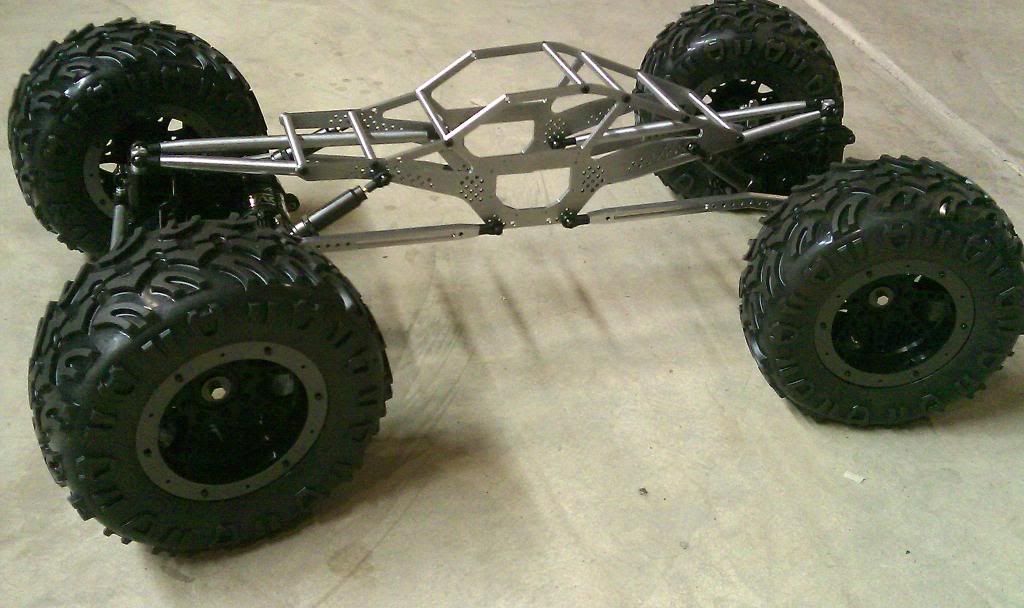 Working on servo mounts for front and rear steer, and going to do some electronics mods to at 2.4TQ 4ch to build a custom DIG and steering mixer to work with it. Also need to cut the delrin skid, the rear light pod and the integrated light bar for the top, more to come... |
|
| |
|
07-18-2010, 09:59 PM
| #17 |
| Pebble Pounder Join Date: Apr 2006 Location: Destin, Fl.
Posts: 109
|
Nice work looks good.  |
|
| |
|
07-19-2010, 08:58 AM
| #18 |
| I wanna be Dave  Join Date: May 2006 Location: HONDURAS...ROCK HEAVEN
Posts: 5,076
|
Very nice , how much did you narrow those wheels?
|
|
| |
|
07-19-2010, 09:31 AM
| #19 |
| Pebble Pounder Join Date: Jan 2010 Location: Glenview
Posts: 129
|
Thanks Guys! Wheels: I cut them with a bandsaw, lathed each end to get them flat and reglued. That narrowed them about .5 - 5/8" effectively. I didn't measure exact because I cut between the ribbing and took out one of the rib sections on the inside on each wheel. I assumed the ribbing was consistent (and it seemed to be). I'm going to try as is, and if I get annoyed that they aren't narrow enough, I'll pull them and repeat the process to remove a second rib.. More to come... |
|
| |
|
07-19-2010, 12:39 PM
| #20 |
| ~THE SCALE SHOP~ Join Date: Apr 2006 Location: KILLEEN TX
Posts: 10,056
|
if i recall right i removed two sections narrownig them to just a hair over 2" wide.
|
|
| |
 |
| Thread Tools | |
| Display Modes | |
| |


 Linear Mode


