| |
 10-28-2006, 09:56 AM
| #1 |
| Rock Crawler Join Date: Feb 2006 Location: Easthampton
Posts: 747
|
just started on a new clod project homemade chassis 17.5 in wheel base silver cans( not sure on gearing yet) lsts on maximizer beadlocks homemade wheel adapters using sockets and nuts 645 servo hummvee body on to the pics 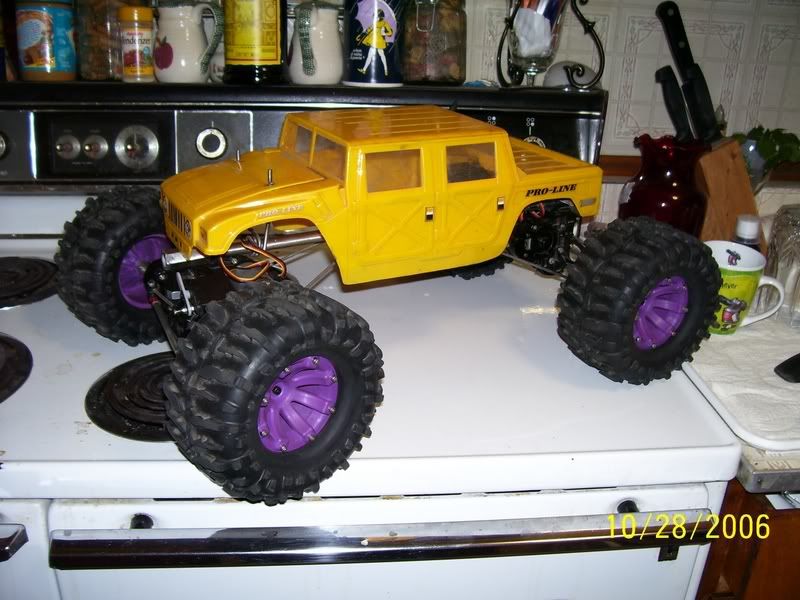 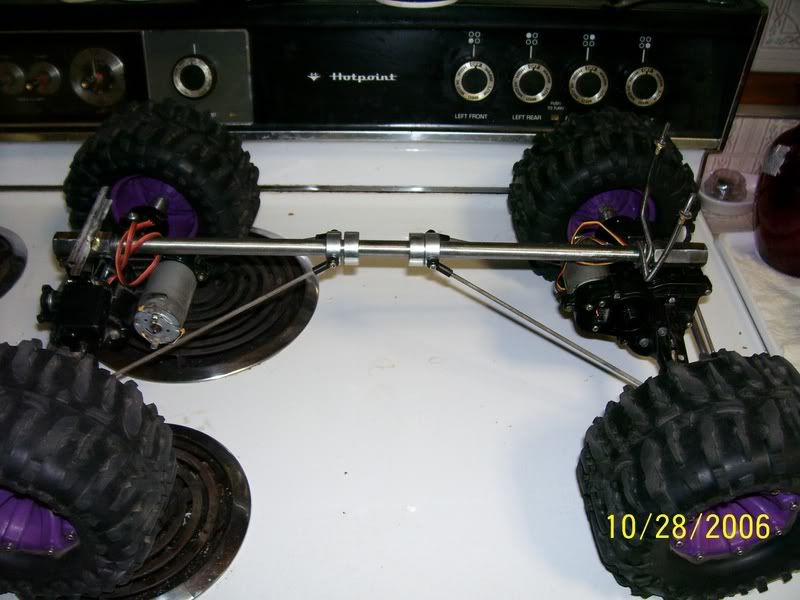 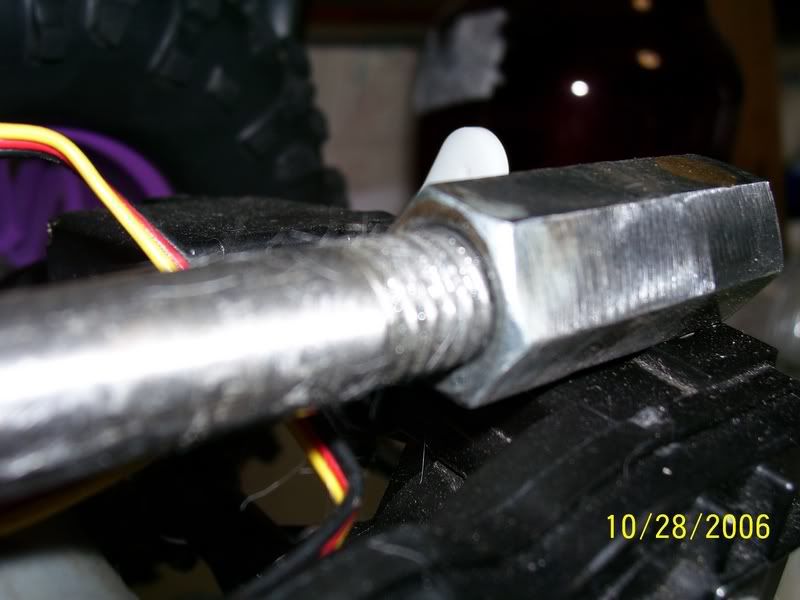 poser shot 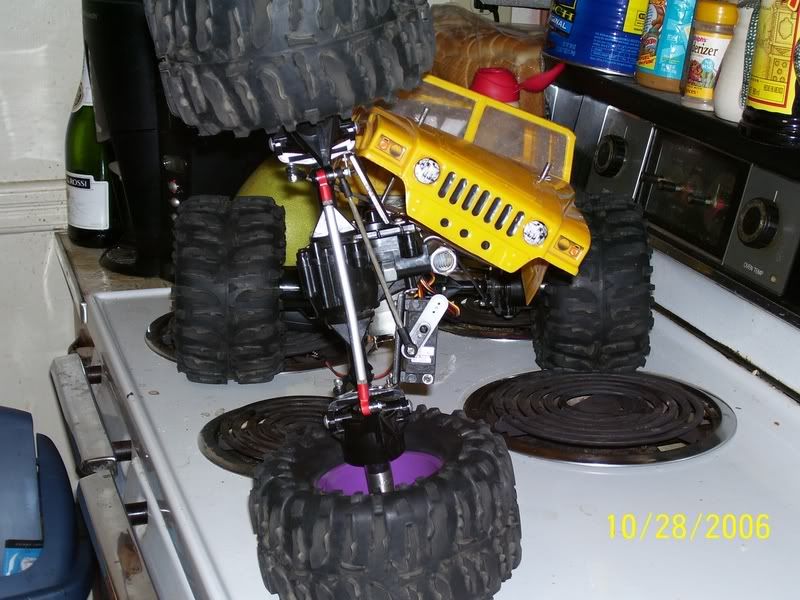 Last edited by '83 chevy; 10-28-2006 at 12:04 PM. |

|  |
| Sponsored Links | |
| | |
|
10-28-2006, 02:46 PM
| #2 |
| I wanna be Dave Join Date: Jun 2005 Location: KENNEWICK, WA
Posts: 2,513
|
Not to shaby!
|
|
| |
|
10-29-2006, 06:25 PM
| #3 |
| Rock Stacker Join Date: Aug 2006 Location: Cedar Park, TX
Posts: 80
|
Is that plate on the front of the back bone what keeps it from over articulating??
|
|
| |
|
10-29-2006, 07:58 PM
| #4 |
| Quarry Creeper Join Date: Oct 2006 Location: where fear and common sense don't get in the way
Posts: 451
|
From what I can see the inner rings limit the travel of the links, and the barrel nut gives your articulation. Looks like a transition between the "Stick" and "Torsion" style set up. Looks pretty good, any test runs on it yet....
Last edited by jagg; 10-29-2006 at 08:01 PM. |
|
| |
|
10-30-2006, 08:32 AM
| #5 |
| Quarry Creeper Join Date: Feb 2006 Location: Shillington
Posts: 462
|
I like it. How well does it work?
|
|
| |
|
10-30-2006, 01:46 PM
| #6 |
| Rock Crawler Join Date: Feb 2006 Location: Easthampton
Posts: 747
|
thanks guys, the plate in the rear is the body mount, and the collar in front of the links helps to keep the axles from twisting back,( the collar with the links on it has no set screw in it so it rotates with the axles), no no test runs yet need to order some pinions and wire it. yesterday i finished makeing my adjustable motor mounts. the way it works is that the rod down the middle is tightened into the rear nut, and the front part is screwed in the front loosely so that is rotates in the thread, simple yet effective(sp) oh and i thought i'd show the wideners i made, what cool about this design is that they can be made to go from 12mm to any hex size, using a nut for the wheel hex size. ex. for a 23mm wheel use a 7/8" o.d. nut, for 17mm wheel use a 11/16" o.d. nut, and for 14 mm use a 9/16' o.d. nut. all you do is buy four 12mm sockets and then whatever size nut you need, and center them together(i used a lathe) and either weld or braze the socket and nut together. the make a quick little pice of whatever, i used aluminium, drill a hole for a 4mm tap, tap it, and then put the 12mm hex on the axle, then the little piece, then the widener then the wheel and then a 4mm srcew 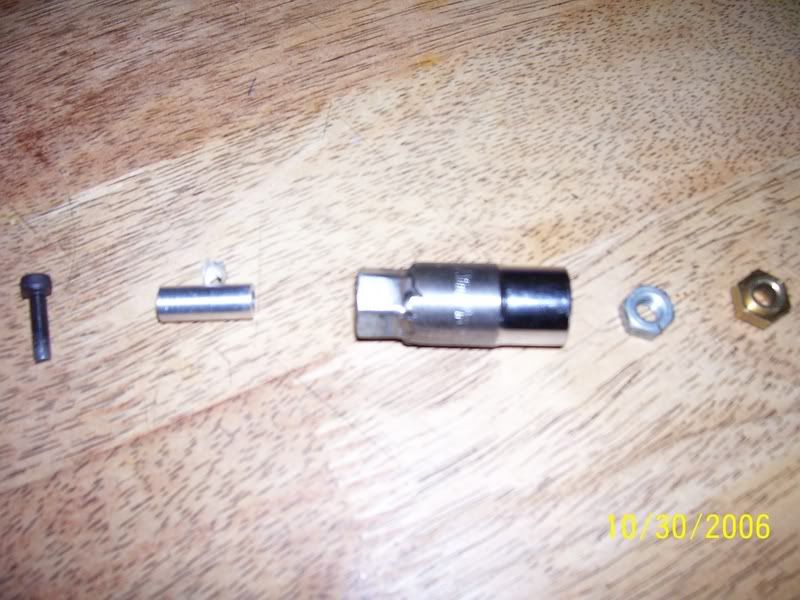 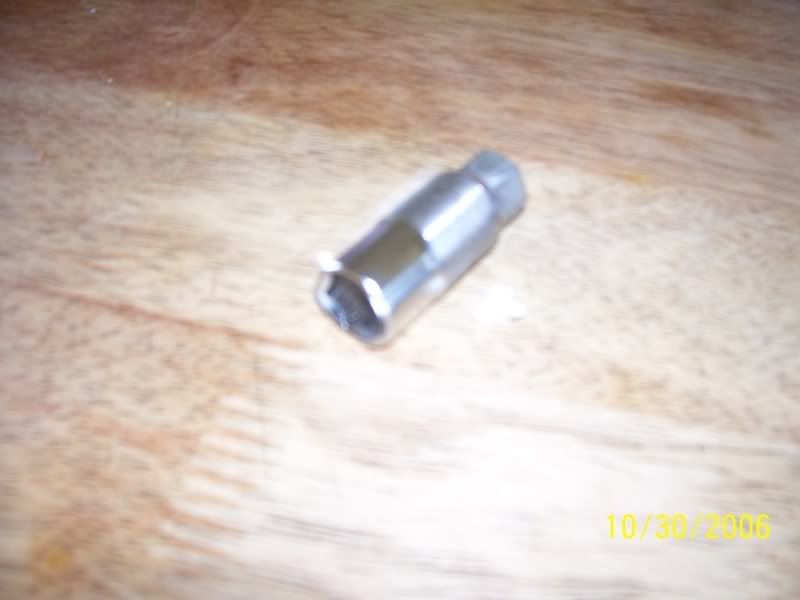 |
|
| |
|
11-03-2006, 03:45 PM
| #7 |
| Rock Crawler Join Date: Feb 2006 Location: Easthampton
Posts: 747
|
well ive got some more done on it, i finally wired it, weighted the tires, and rewound some silver cans(55 turn). im hoping to have it done this weekend |
|
| |
|
11-04-2006, 05:42 AM
| #8 |
| RCC Addict Join Date: May 2006 Location: In England, looking for the threadlock...
Posts: 1,150
|
Nice, tell us what you think of the LST claws, thinking of using some for my clod.
|
|
| |
|
11-04-2006, 07:31 AM
| #9 |
| Quarry Creeper Join Date: Dec 2004 Location: oxford
Posts: 274
|
Sockets for wheel adapters ,good job !! I love this place soo many people have soo many great ideas you might never come up with on your own...
|
|
| |
|
11-11-2006, 08:13 AM
| #10 |
| Newbie Join Date: May 2006 Location: hammertown ontario canada
Posts: 5
|
so i thought as well that the socket wheel adapters was a great idea so i tryed it heres what i did .i used a lathe as well but what i did was i turned the socket drive end down to fit inside the nut theads i did not tread the socket i just made it fit in the threads so it would stay center for the weld that was comin to it then , doing this made it about 1/4 an inch narrower ,i noticed u had a nut in the socket to take up space between the 12mm nut and the socket so i ground this down till i needed no spacer in there to take up the space . this made my adapter alot narrower then it would have been by about a 1/2 inch or more . so i welded on the nut no problem centering it mig welded it all the way around then cleaned the weld with a file for the flat sides of nut and the spun it on the lathe again to clean the rest on the socket .im goin to make a barrel nut to finish it but it worked out well great idea an it only cost me 20 bucks and some time o yea i went from 12mm to about 20mm they r a weird size hex rim i got for real cheap at a hobby show . |
|
| |
|
11-11-2006, 08:47 AM
| #11 |
| Rock Crawler Join Date: Feb 2006 Location: Easthampton
Posts: 747
|
glad it worked for you, ya i had to use the nut as a spacer because otherwise i had link clearence issues. oh, and if you used a screw to hold on the wheels your gonna notice that the rear axle screws will lossen and fall out, so make sure to put some blue loctite on them. on another note i finally drove it today, it seems to work really good with the 10 tooth front and 9 tooth rear, and rewound silver cans(55 turn). the tires hooked up pretty good on the goshen stone retaining wall, hoping to go to do some real crawling tomorrow 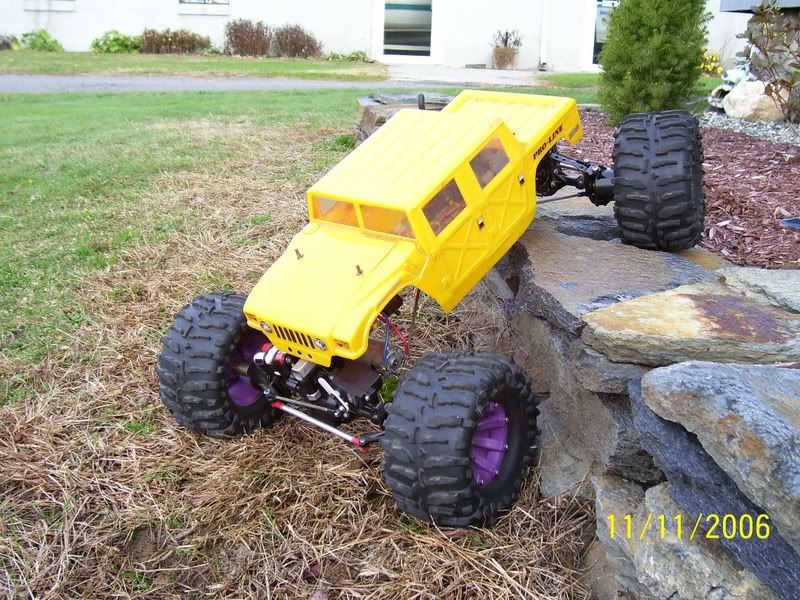 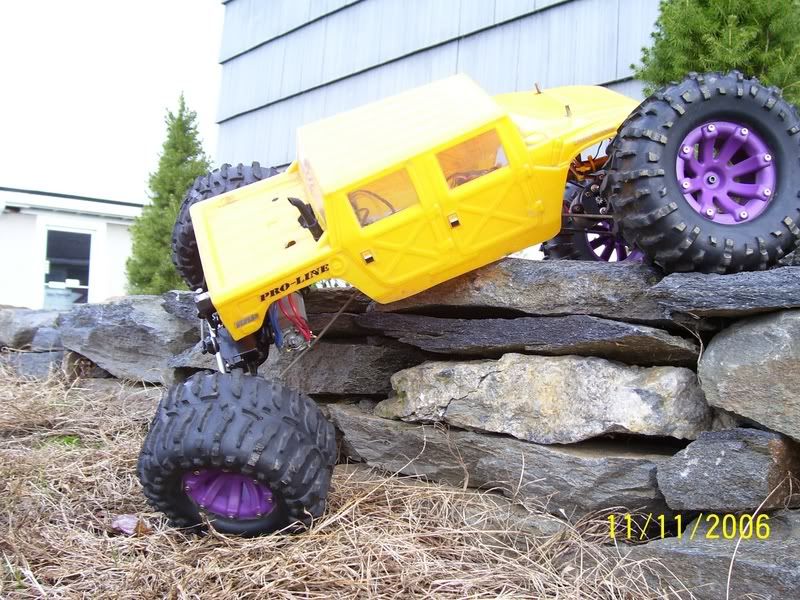 |
|
| |
|
11-12-2006, 09:50 AM
| #12 |
| Newbie Join Date: Oct 2006 Location: Essex
Posts: 39
|
what is that socket that goes inside the hex on the wheel itself? i wouldnt find them in my local hardware store or on sears.com. is there a specific name for it besides a socket? that setup is a great idea, im def gonna get started on that next! |
|
| |
|
11-12-2006, 11:24 AM
| #13 |
| Rock Crawler Join Date: Feb 2006 Location: Easthampton
Posts: 747
|
this part goes on the clods hex-http://www.sears.com/sr/javasr/produ...seBVCookie=Yes and the part that goes into the wheel hex are these-  at the hardware store look where they have bolts and nuts, if you cant find them there look where they keep the threaded rod and such and they should be there |
|
| |
|
11-13-2006, 05:22 PM
| #14 |
| Newbie Join Date: Oct 2006 Location: Essex
Posts: 39
|
sweet, i think im gonna use the socket part then make an aluminum or delrin part that fits in the 1/2 inch socket on one side and a 23mm hex that fits in the wheel on the other side. ill post pics when i get it done, it should be this weekend hopefully. maybe ill make enough to sell them
|
|
| |
|
11-13-2006, 06:03 PM
| #15 |
| Newbie Join Date: Oct 2006 Location: Essex
Posts: 39
|
heres solidworks pics, let me know what you guys think.   |
|
| |
|
11-14-2006, 02:18 PM
| #16 |
| Rock Crawler Join Date: Feb 2006 Location: Easthampton
Posts: 747
|
are you sure its not a 3/8 drive socket? because i've never seen a 12 mm 1/2 drive socket before
|
|
| |
|
11-14-2006, 02:43 PM
| #17 |
| Pebble Pounder Join Date: Apr 2006 Location: Cascade, Colorado
Posts: 118
|
i have seen just a few 1/2 12's they are kinda rare bc most 12mm head bolts dont hold enough wieght to need to be tightend by 1/2in
|
|
| |
|
11-15-2006, 04:09 AM
| #18 |
| Newbie Join Date: Oct 2006 Location: Essex
Posts: 39
|
yea that makes sence, then ill make them to fit a 3/4" socket
|
|
| |
 |
| |


 Linear Mode


