| |
 07-18-2014, 04:10 AM
| #21 | |
| Pebble Pounder Join Date: Mar 2011 Location: Wales,UK
Posts: 158
| Quote:
 | |

|  |
| Sponsored Links | |
| | |
|
07-21-2014, 03:12 AM
| #22 |
| Pebble Pounder Join Date: Mar 2011 Location: Wales,UK
Posts: 158
|
Well I'm still waiting on some parts , but I've made a start. I was hoping it would all be here by now, for one of those epic opening photos of all the add on parts alongside the kit contents, but the itch to get going was too strong So first job was to sort out the alloy upgrades - not all were available in the same colour so some stripping and repainting was needed. I did consider getting parts reanodized. but I've had mixed success dealing with compnaies in the UK - most aren't remotely interested in small jobs, some charge stupid money (think $120 for four shock bodies), and the ones who are realistic with the pricing are hit n miss with the results; partly due to the unknown alloys used. So these bling blue parts are no use as is.. 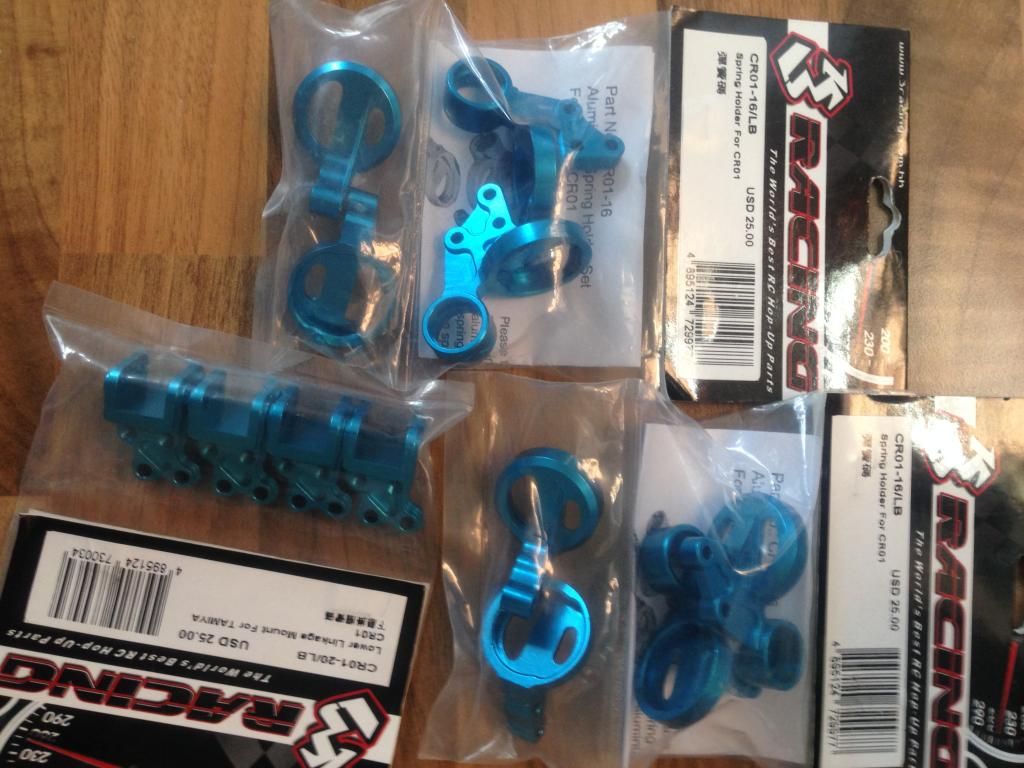 So into some oven cleaner (caustic solution).. 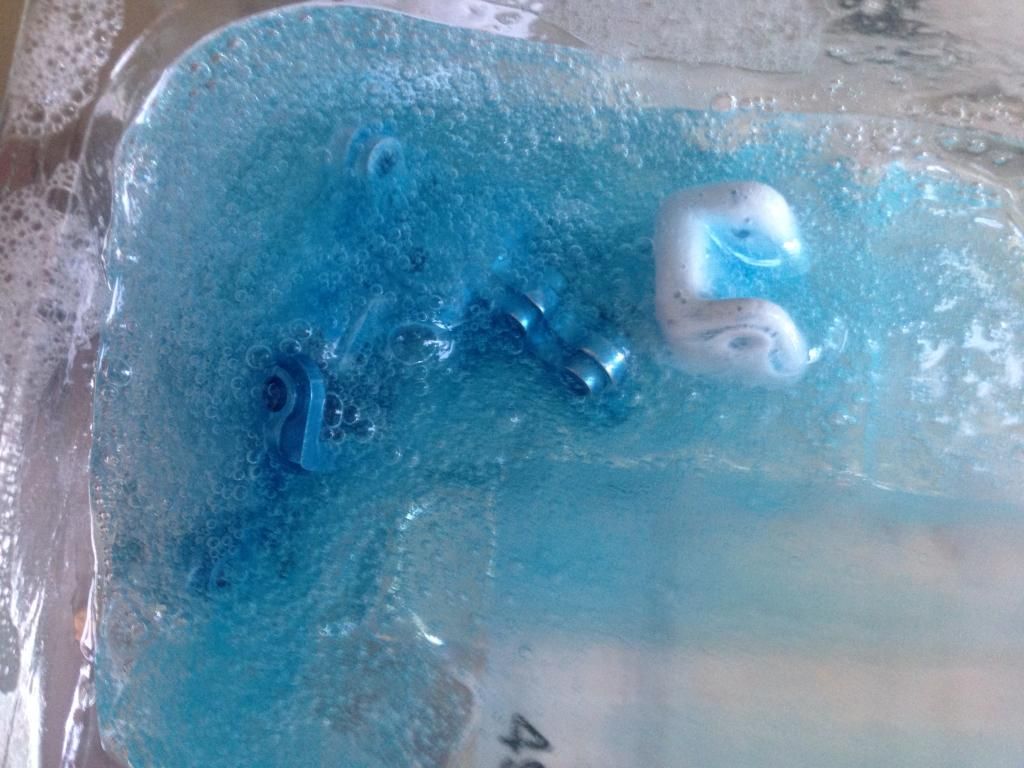 First time I've tried this so started with just one set of parts, just in case 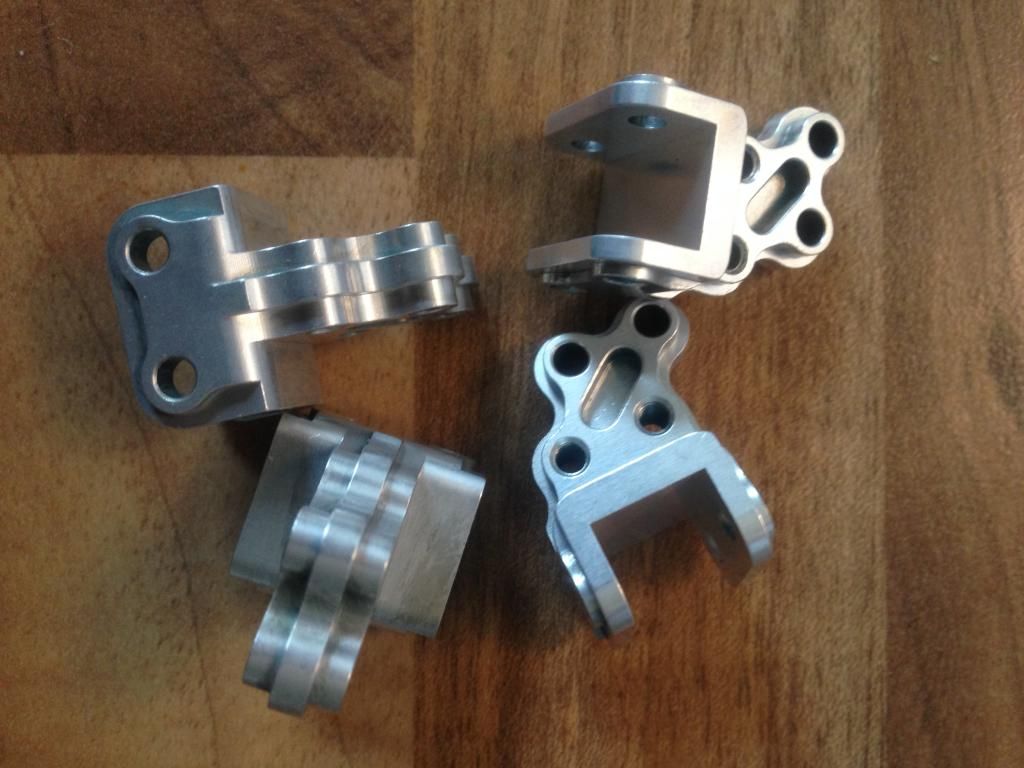 So onwards with the others, 30 minutes later, drying in the sun.. 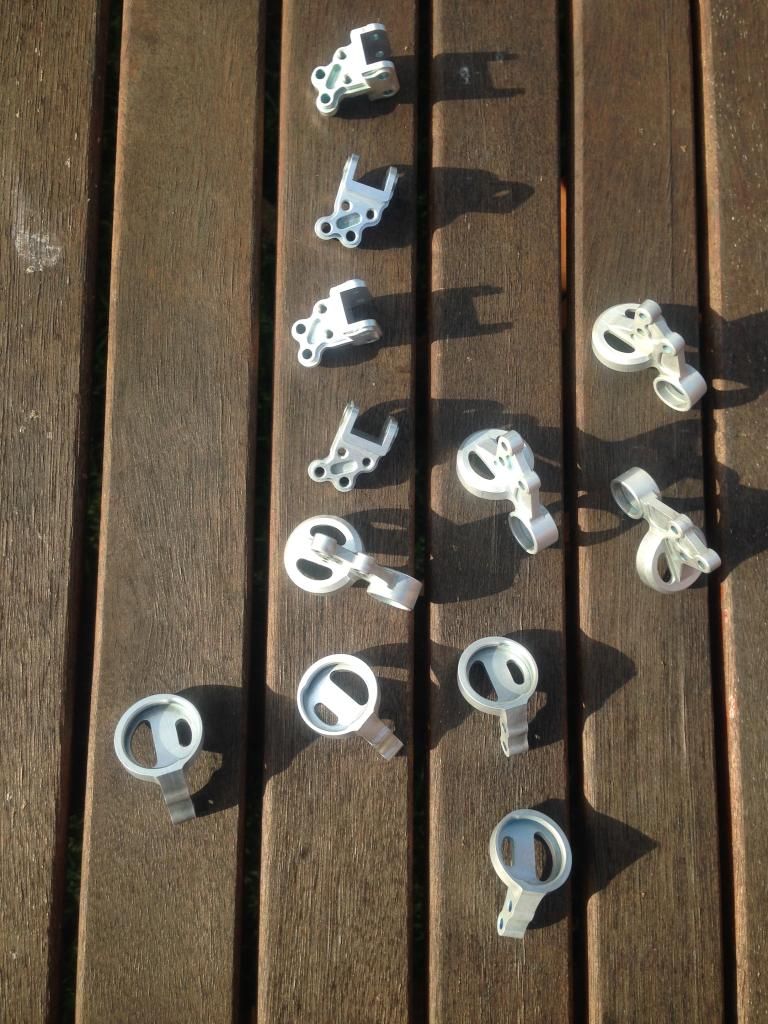 All these will be etch primed and then painted up with Ford Sea Grey auto paint - it won't be durable compared to anodized parts but for light trail running it should hold up for a while. |
|
| |
|
07-21-2014, 03:31 AM
| #23 |
| Pebble Pounder Join Date: Mar 2011 Location: Wales,UK
Posts: 158
|
Wheels aren't exactly the first item in the build manual, but they still need doing, so why not get them out of the way. I had some Cliff Crawlers tyres bonded to some Tamiya Mountaineer rims - I got them from eBay over a year ago and wondered why I'd bought them at the time; finally found a use for them Tyres were removed through various methods from the old rims and a few flakes of chrome plate removed from the beads before the tyres scrubbed clean. They were actually in pretty good shape under the dirt n dust. Wheels - not exactly high quality but I prefer the chrome rims to the black kit items in the FJ40... 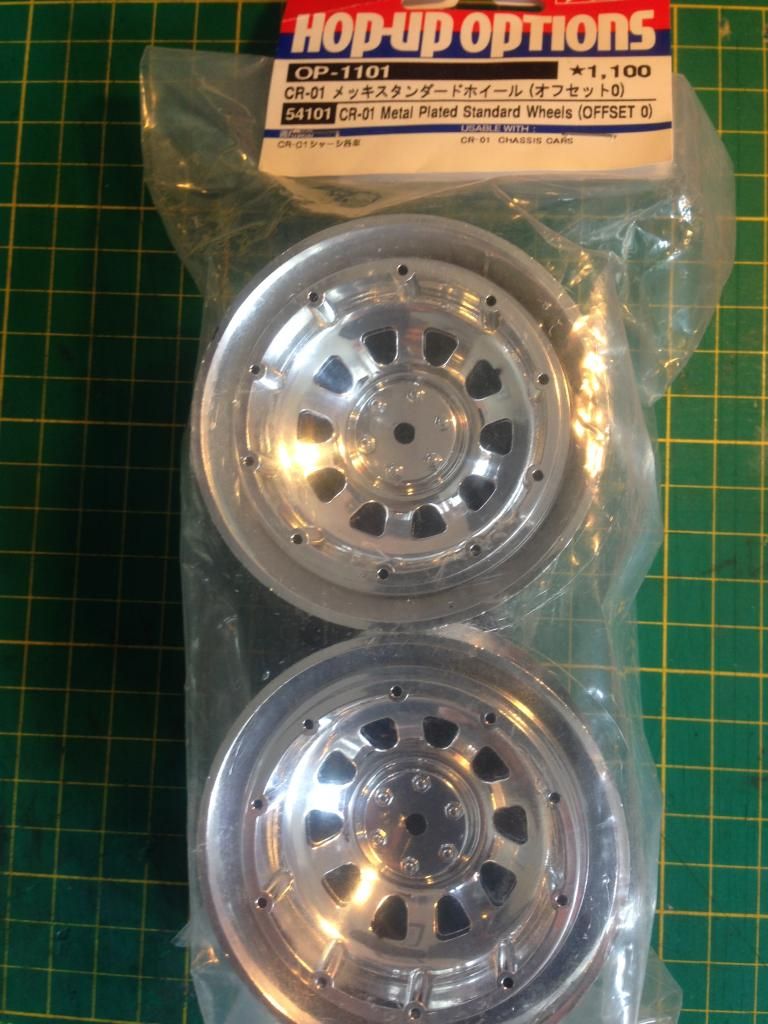 CR-01 beadlock wheels have a bad rep for not gripping the tyre sufficiently. I added a little UHU brand contact adhesive to the inside of the bead rings and also into the bead area of the rims - not so much for bonding the tyre, more to present a grippier surface to clamp against the tyre bead.. 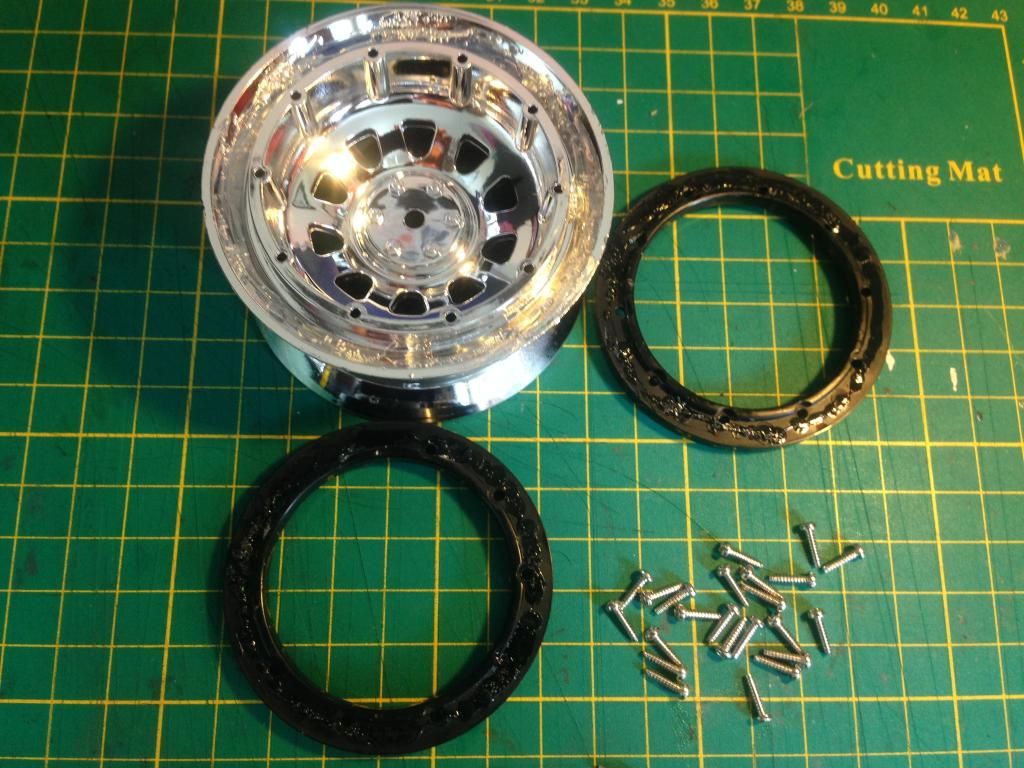 The kit wheels are very light plastic, weighing in at only 31g for the wheel part. Tamiya offer alloy beadlock rings which add a little weight over the plastic items, but not enough to be of any benefit. 75g of 1:1 stick on wheel balance weights.. 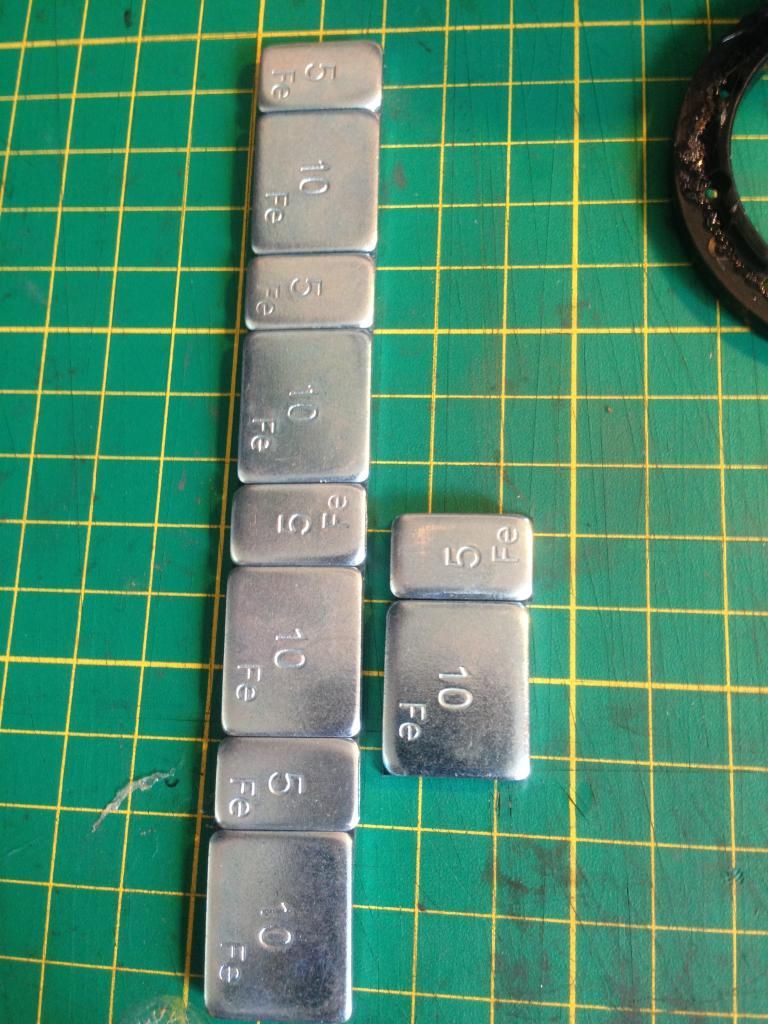 I've read of hard core crawler guys adding over 300g to each wheel - perhaps good for competition crawling, but a bit extreme for my use and so much extra weight can't do the drivetrain any favours. I'll try this for now, and gauge whether to add more if needed - an extra 300g of weight low down overall should counter the high mounted battery if nothing else.. Weights added.. 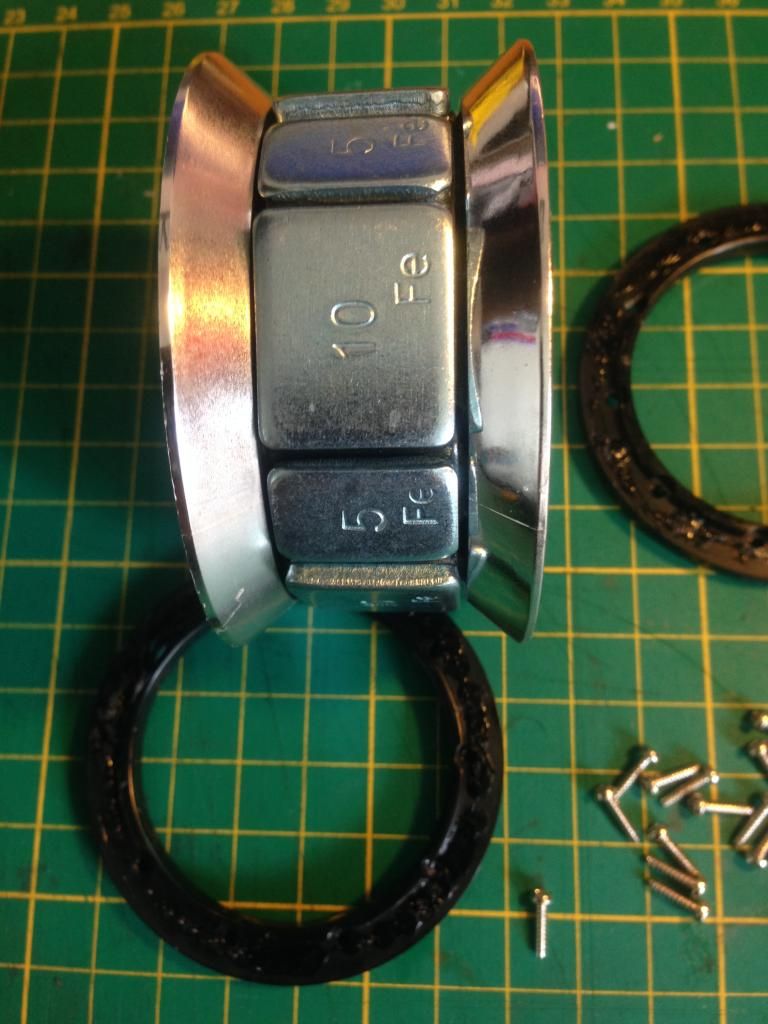 I added a couple of layers of electrical tape , just for extra security.. 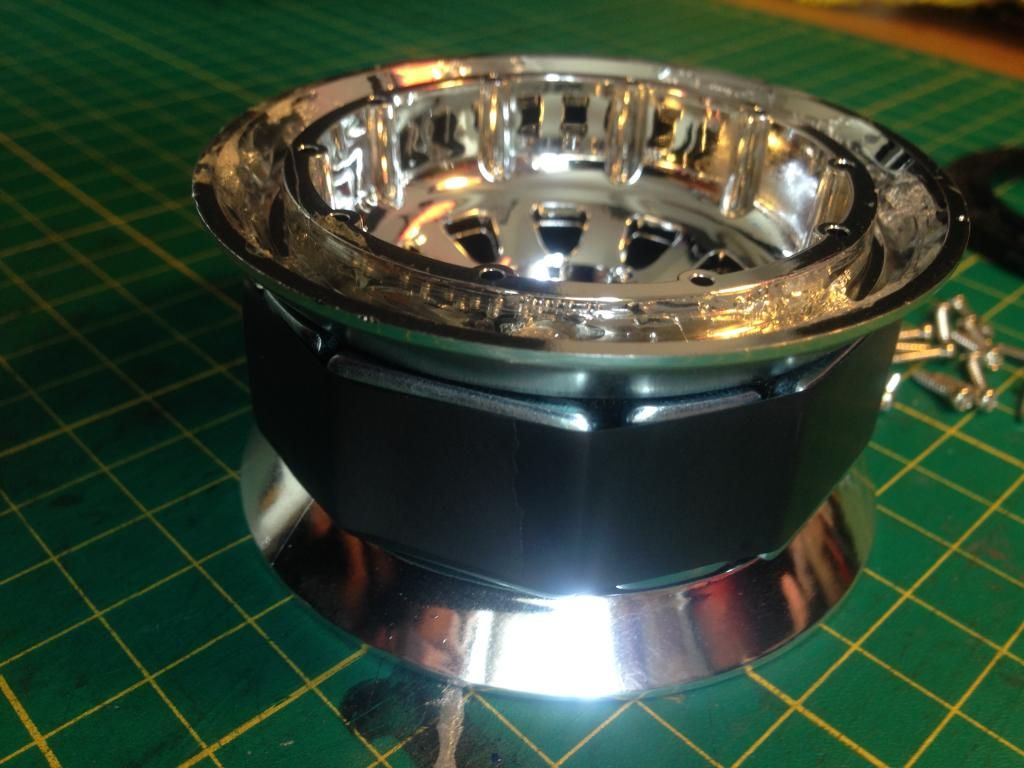 And with tyre mounted.. 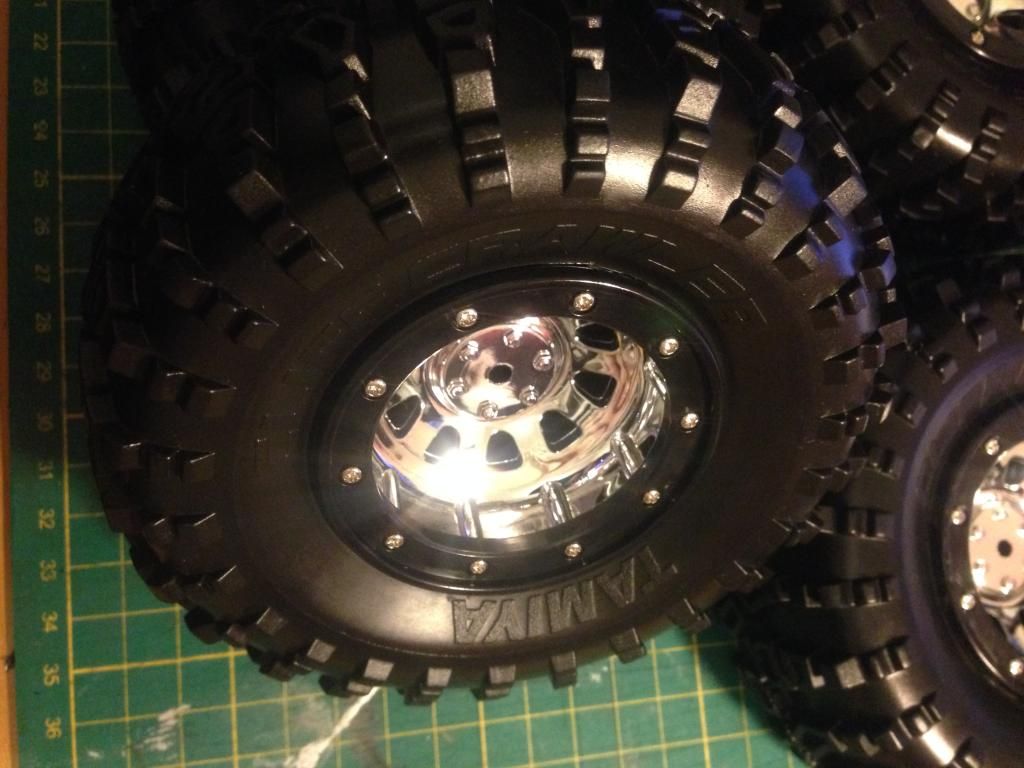 All four done 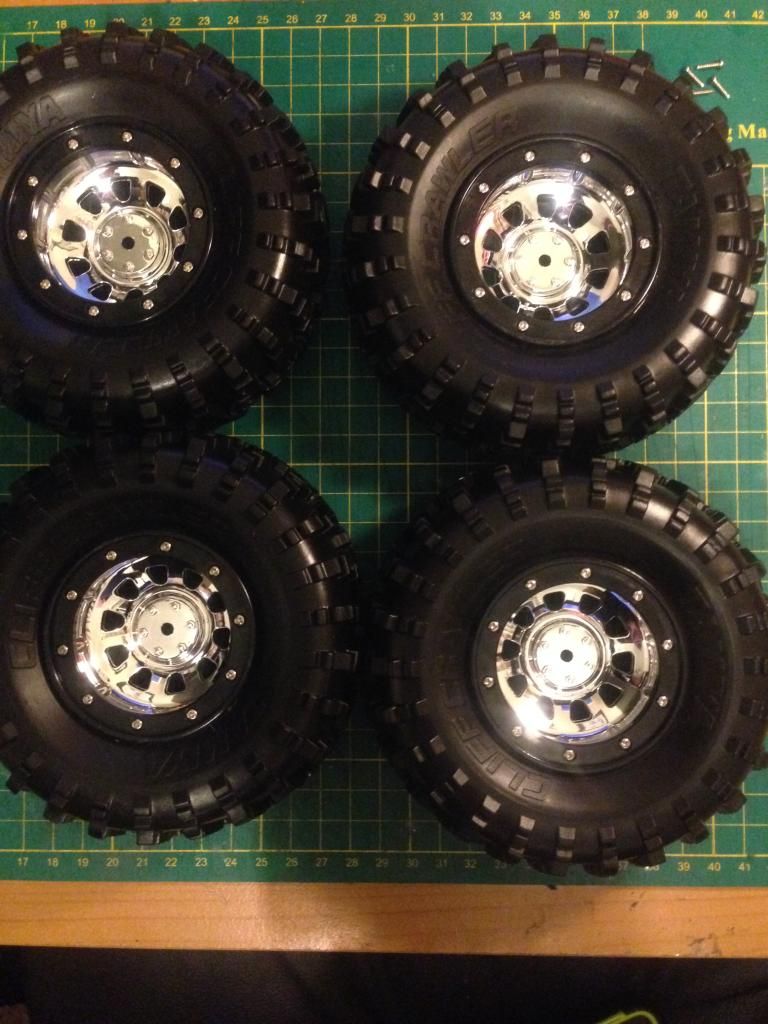 After 80 2mm screws my hands need a rest |
|
| |
|
07-21-2014, 07:01 AM
| #24 |
| I wanna be Dave Join Date: Sep 2011 Location: Douglassville, PA
Posts: 4,224
|
A little after the fact, but a small rubber band in those tire beads helps lock the tire in too. Works like a charm. I prefer those chrome wheels too, think they look 100% better than the black ones.. |
|
| |
|
07-21-2014, 07:33 AM
| #25 |
| Pebble Pounder Join Date: Nov 2013 Location: Bedford, Nova Scotia, Canada
Posts: 113
|
Good point about the tire weights. Some people double the weight of their truck with bloody tire weight! Don't get me wrong, tire weight, used within reason like you have, is a good thing. Some people expect their center of gravity to be 1mm off the ground, and thus add TONS of weight. I will be using some wheel weight on my project ruck, Mogfather, because I plan on buidling an exocage for it, which of course puts weight up high. But too much, as you said, is hard on the drivetrain, and also, imo, can reduce the scale appeal. A CR-01 (or any trail truck, for that matter) doesn't look scale climbing up an 80 degree incline. The extreme wheel weight is more appropriate for comp crawlers. So good call on your part to keep the wheel weight reasonable.
|
|
| |
|
07-21-2014, 04:01 PM
| #26 |
| Pebble Pounder Join Date: Mar 2011 Location: Wales,UK
Posts: 158
|
Well I've no idea on the best weights - i just went with 75g because it was convenient fitment and ''something'' had to be better than nothing. I just want enough weight to counter the electronics higher up, and give some ballast to stop an unloaded wheel popping up easily on rougher ground when at low speed. I ran my Gmade R1 with no weights until recently, I now have 60g in each wheel ! I tend to use that more like a buggy over rougher ground where a standard Tamiya / Kyosho 1:10 buggy would struggle with small wheels and lower ground clearance. |
|
| |
|
07-22-2014, 05:03 PM
| #27 |
| Pebble Pounder Join Date: Mar 2011 Location: Wales,UK
Posts: 158
|
Some build progress I'm still waiting on some parts; and I had to put an order in today for more stainless hardware (DOH - check you have enough a week before you start, not the week of the build Chassis rails etch primed and painted Ford Sea Grey.. 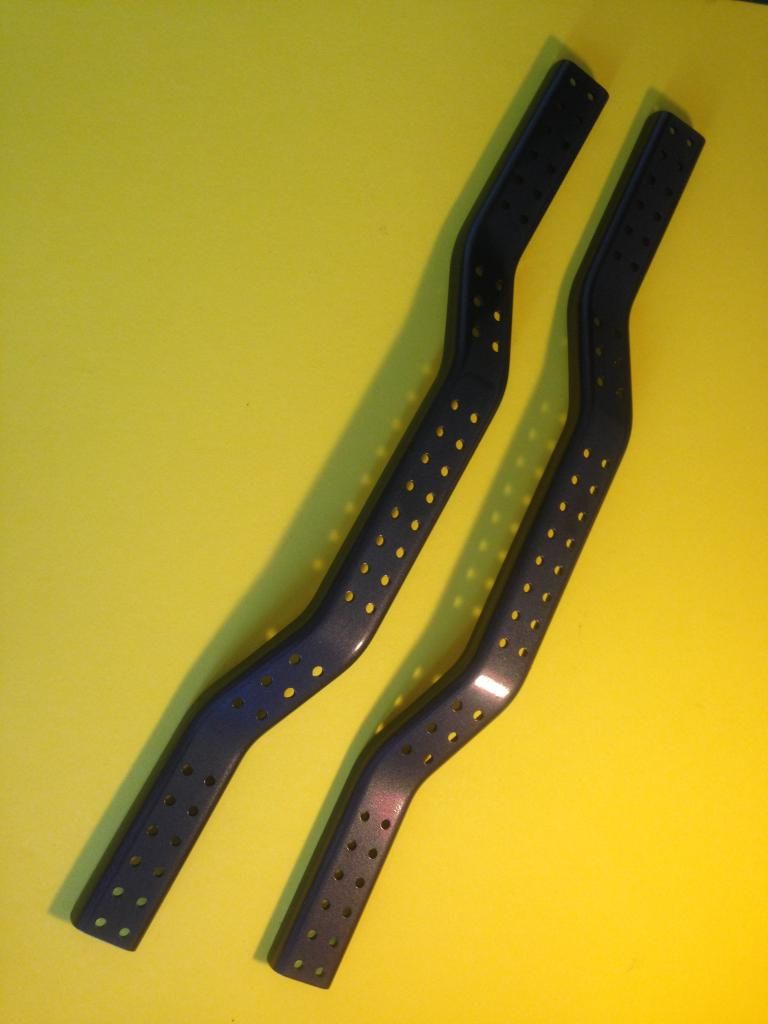 Similar treatment to the spring platforms and pivot linkage arms, so onwards..... Step 1 - building the pivot arms.. first add the ball nuts, I'm using stainless hex head domed screws rather than the tamiya items. Dont forget the threadlock.. 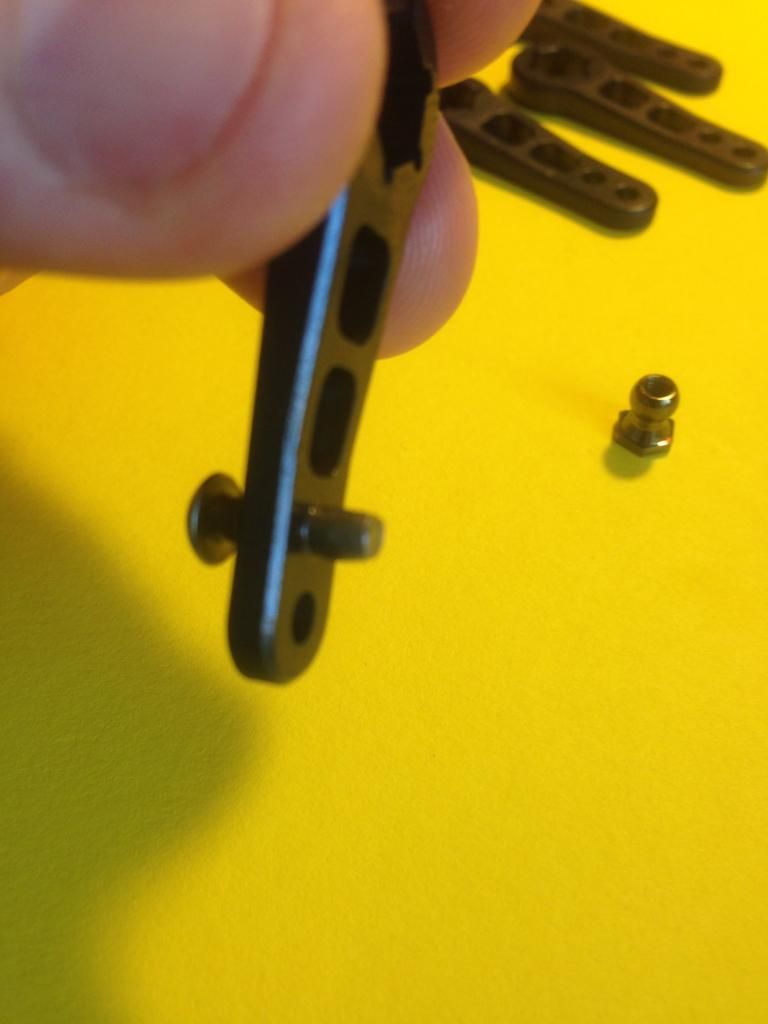 four done.. 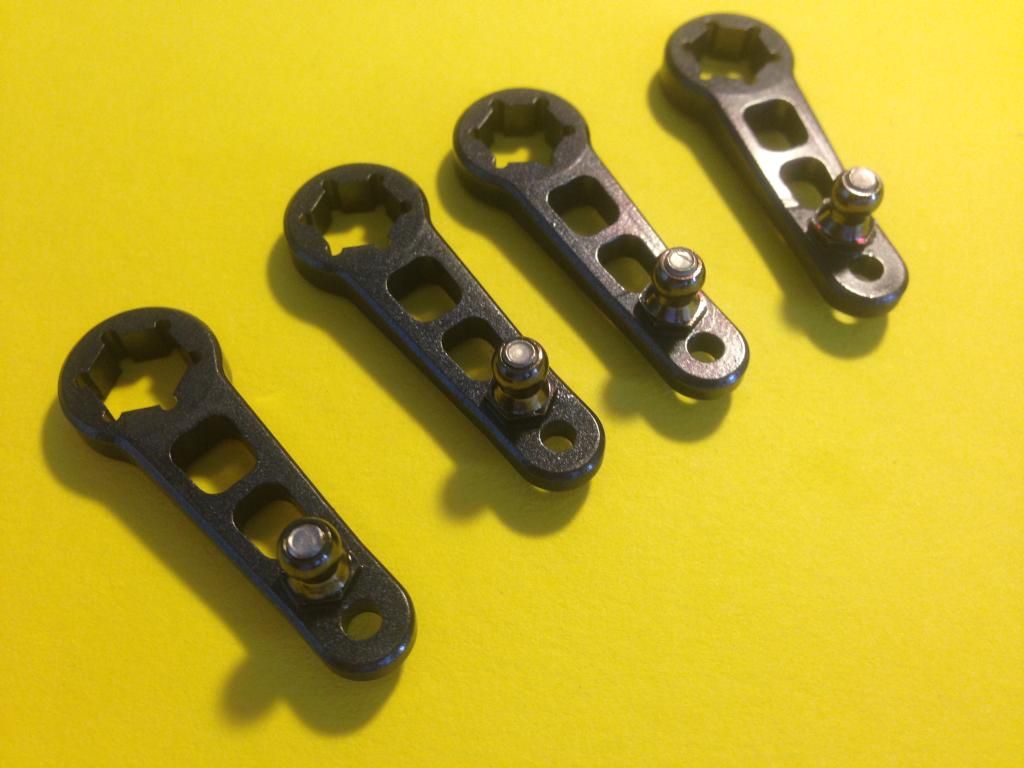 similar for the other link arms.. 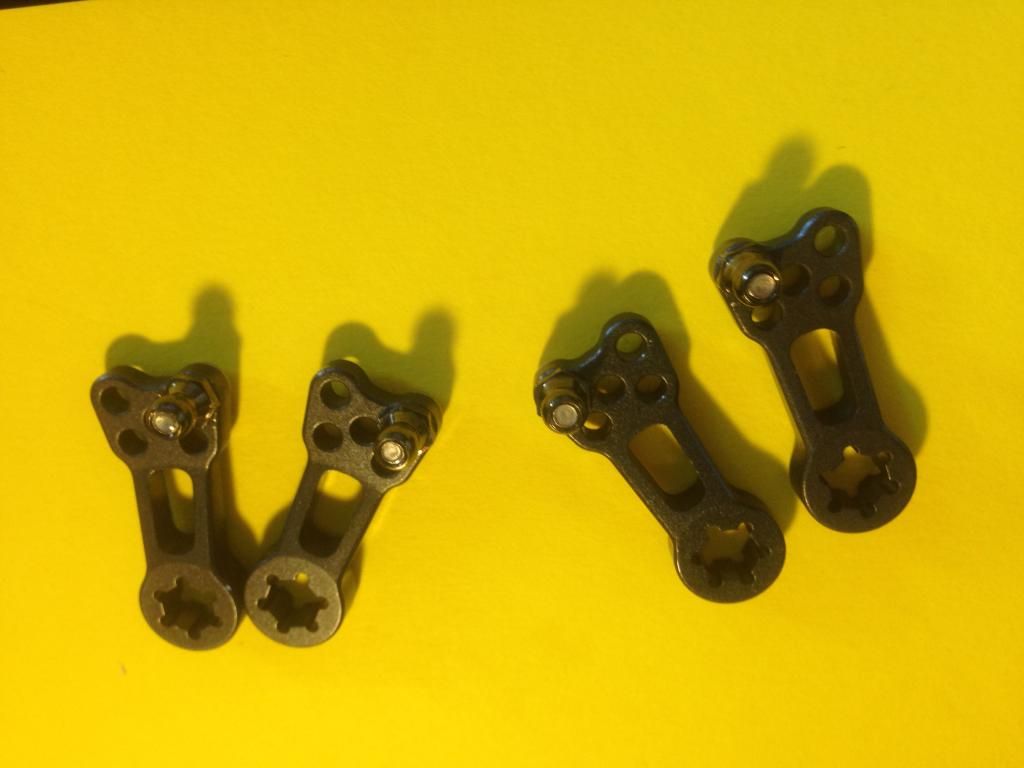 The supposed CR-01 rubber sealed bearing kit i bought didn't include the 1280 bearings for the pivot arms (WTF 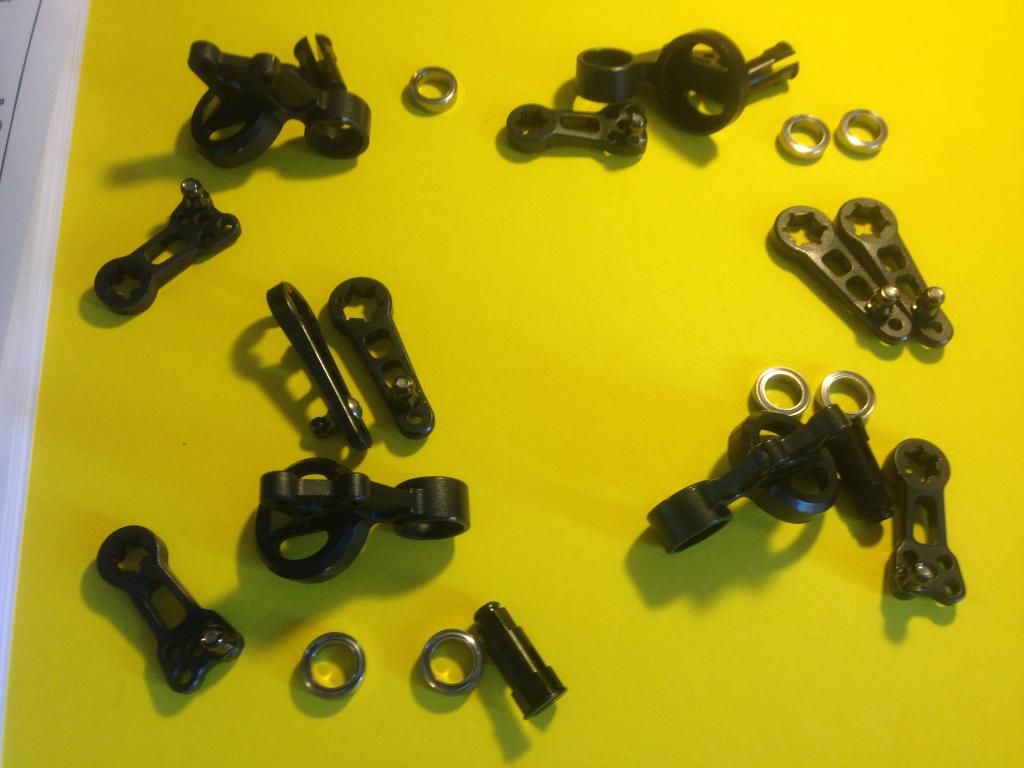 all four assembled.. 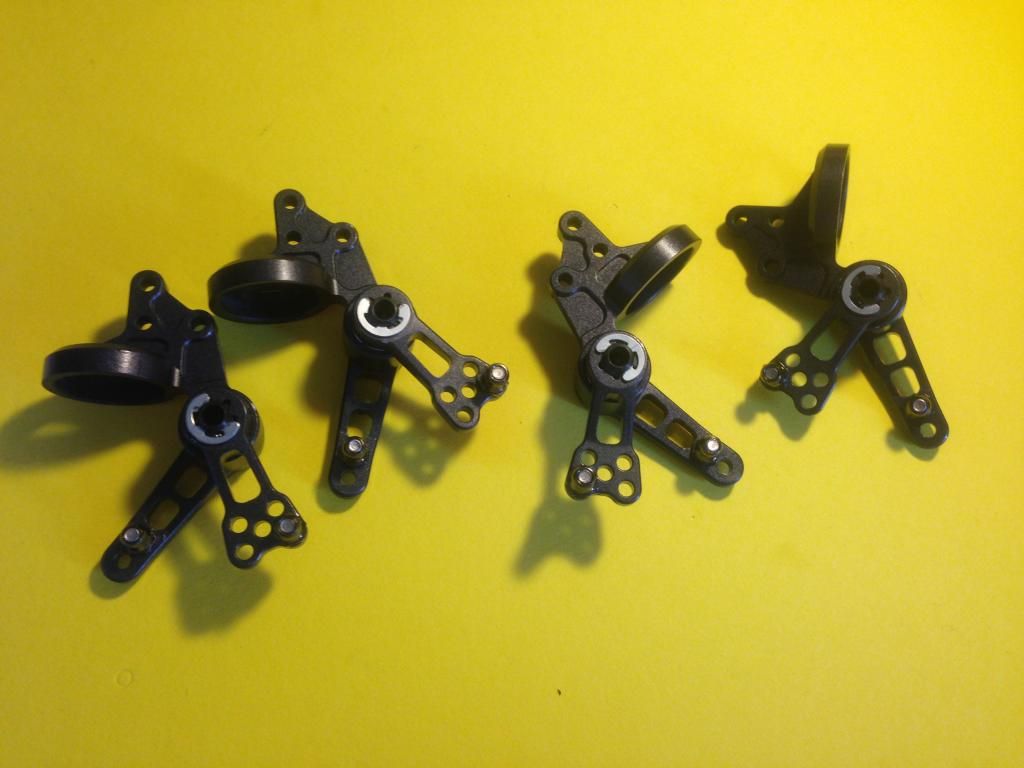 |
|
| |
|
07-22-2014, 05:17 PM
| #28 |
| Pebble Pounder Join Date: Mar 2011 Location: Wales,UK
Posts: 158
|
Step 2 - adding the pivot linkages to the chassis rails.. 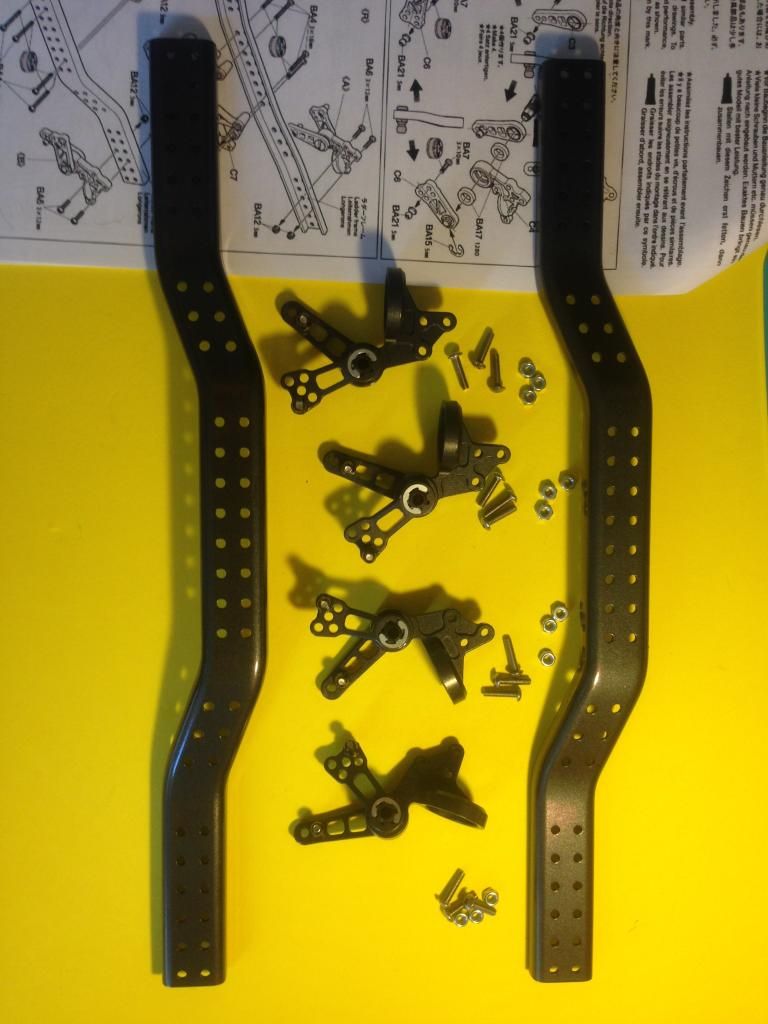 completed.. 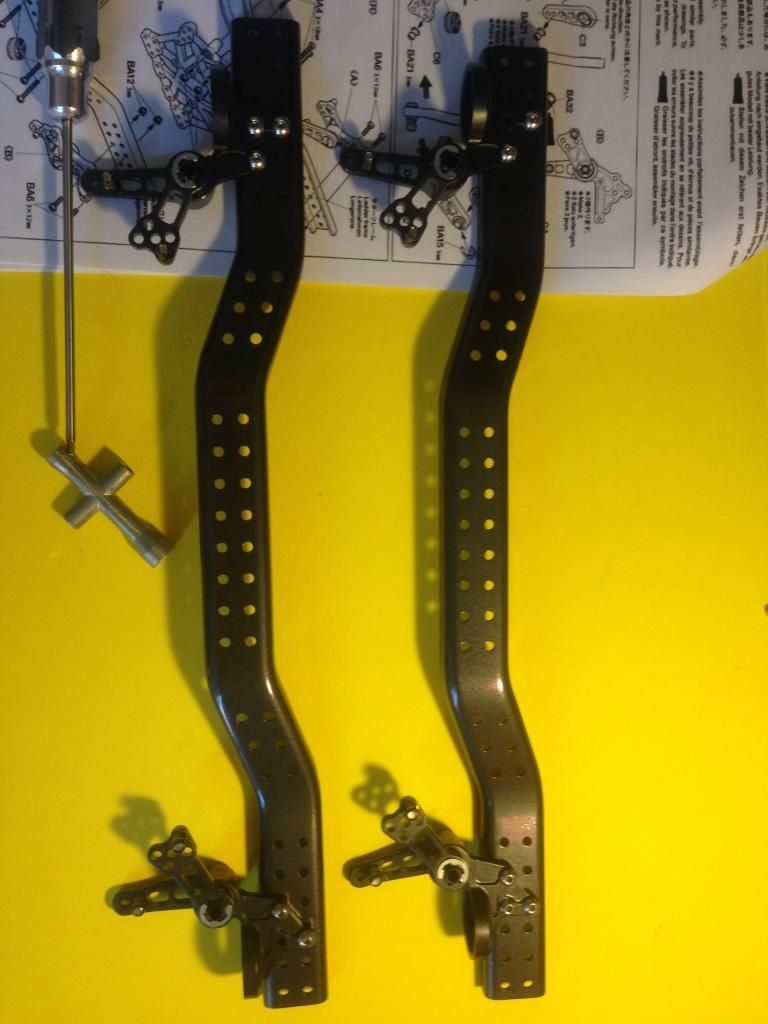 At this point I should be adding the chassis side cages, but the hop-up items are still on route, so for now the rails go to one side. Now onto the electronics trays - the carbon hop ups are rather pricey, I'm not convinced they are any lighter than the plastic items and they aren't seen once the body is on; so its boring plastic stock kit items .. 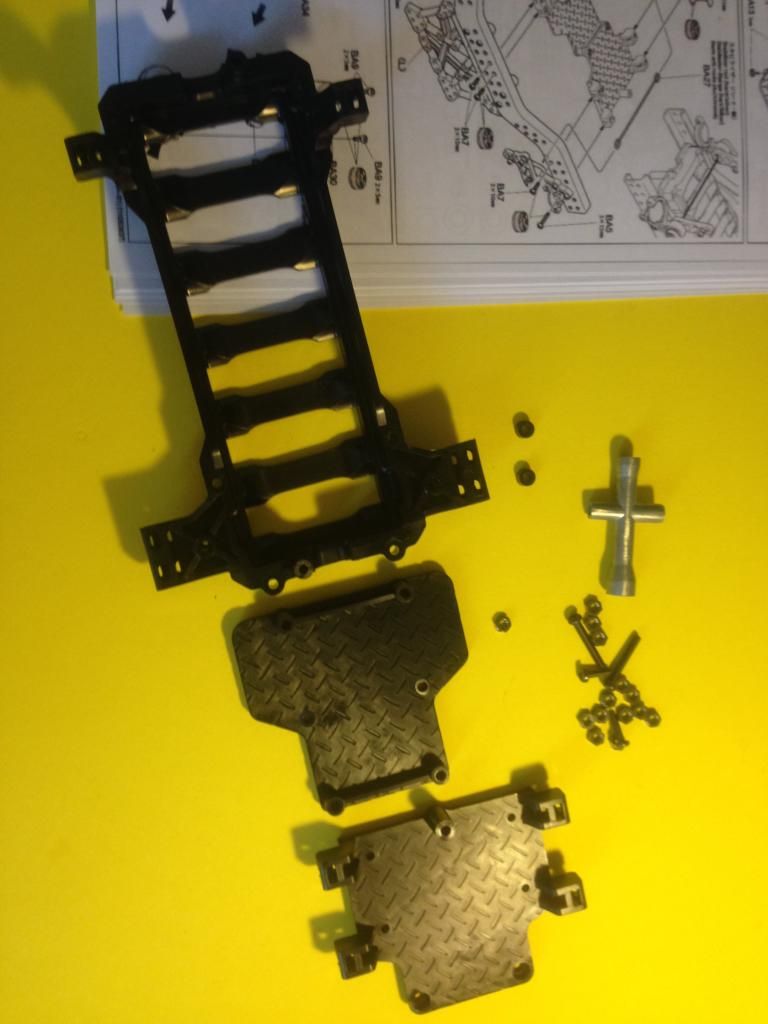 added battery clamp posts.. 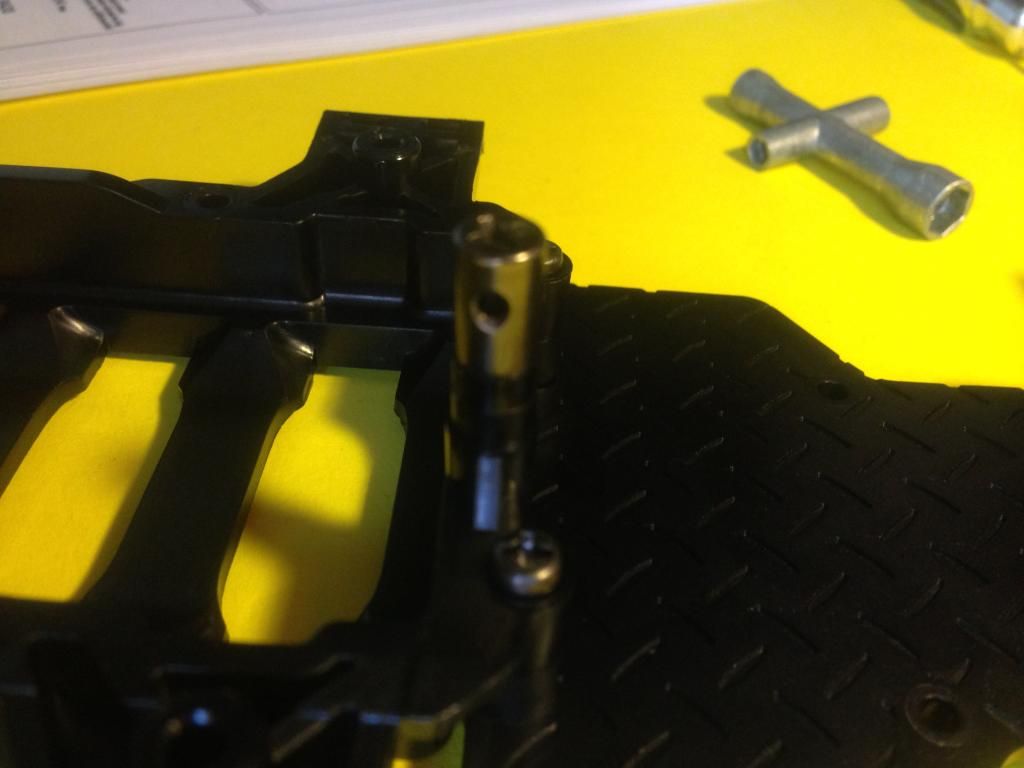 This one will sit to one side , as the tray gets added to the chassis rails once the side cages are fitted. So skip to the axles build.. Stock kit gear diff parts.. 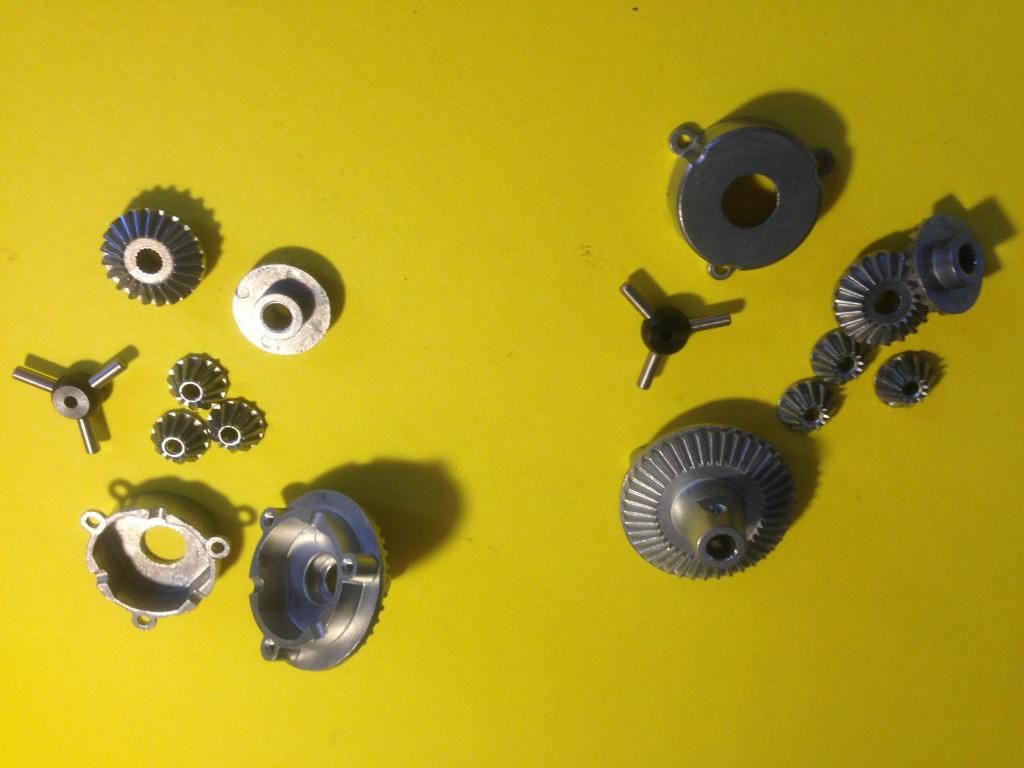 I've opted to use Tamiya Anti-wear sticky grease , as this will give a little resistance within the diff, as well as giving great metal/metal protection.. 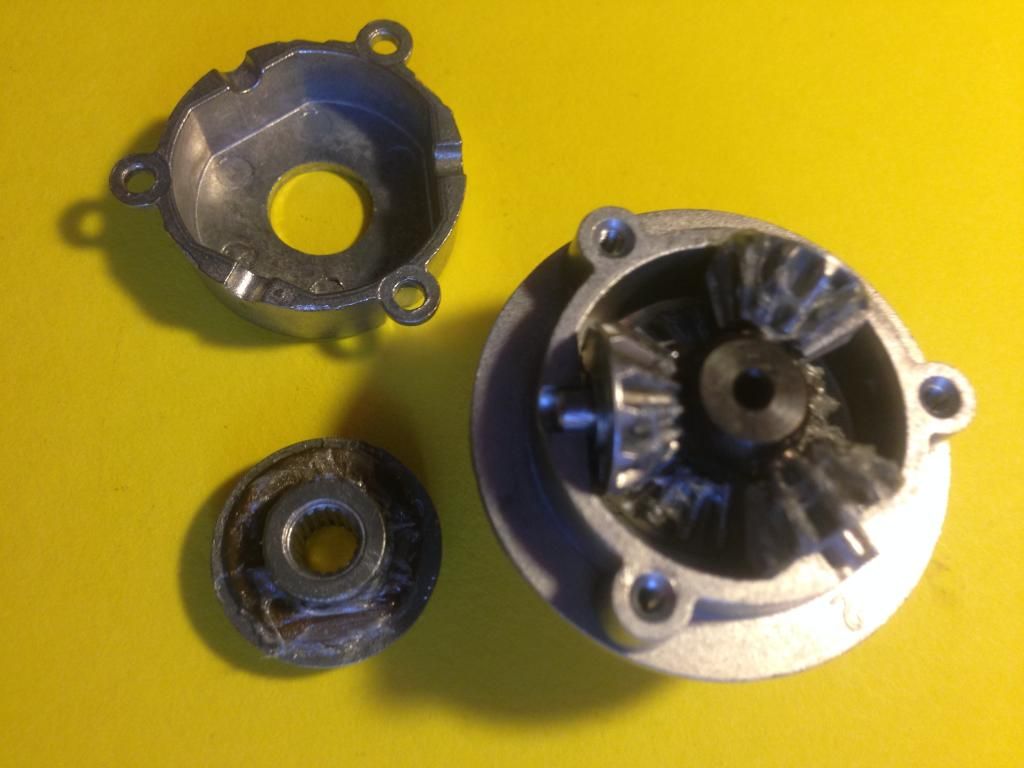 Two done, and onto the driveshafts.. 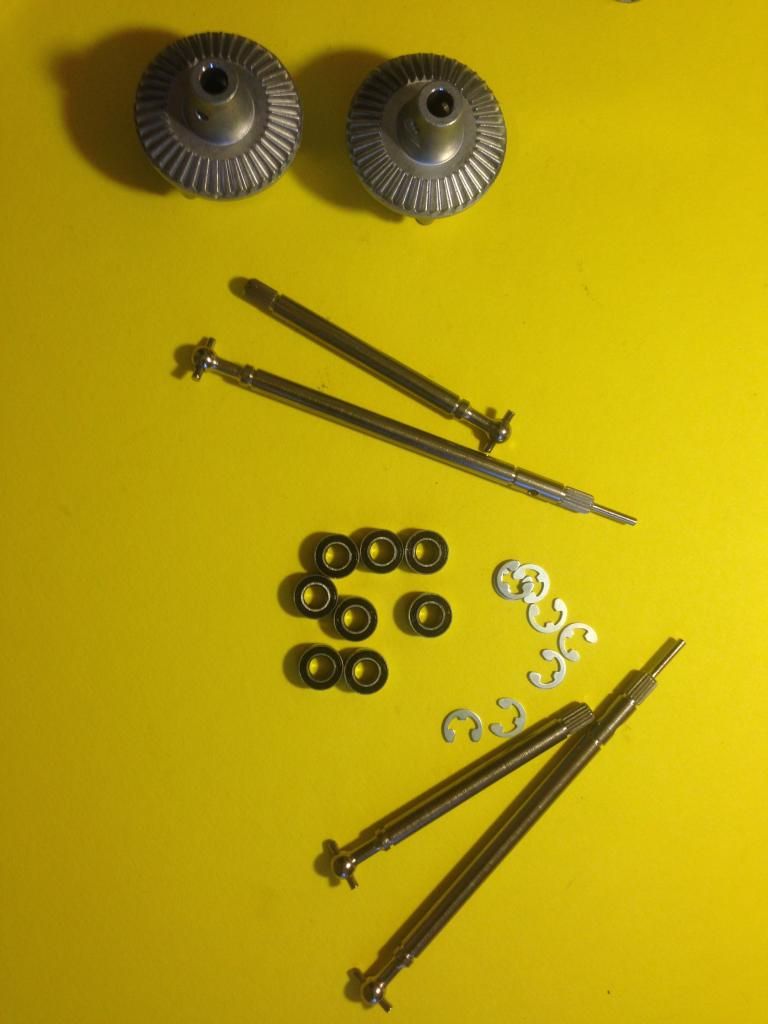 Test fit..  Note that part BA11 is not fitted as this is the screw pin that can be used to lock the diff.. 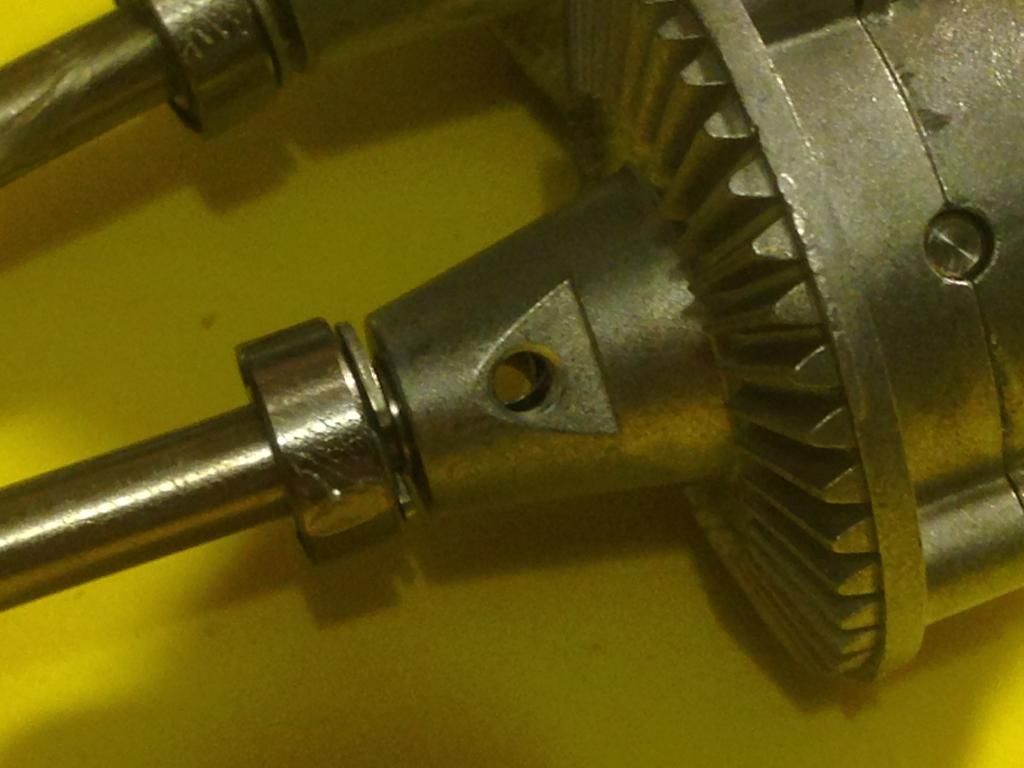 Installed in the stock plastic kit axle cases.. 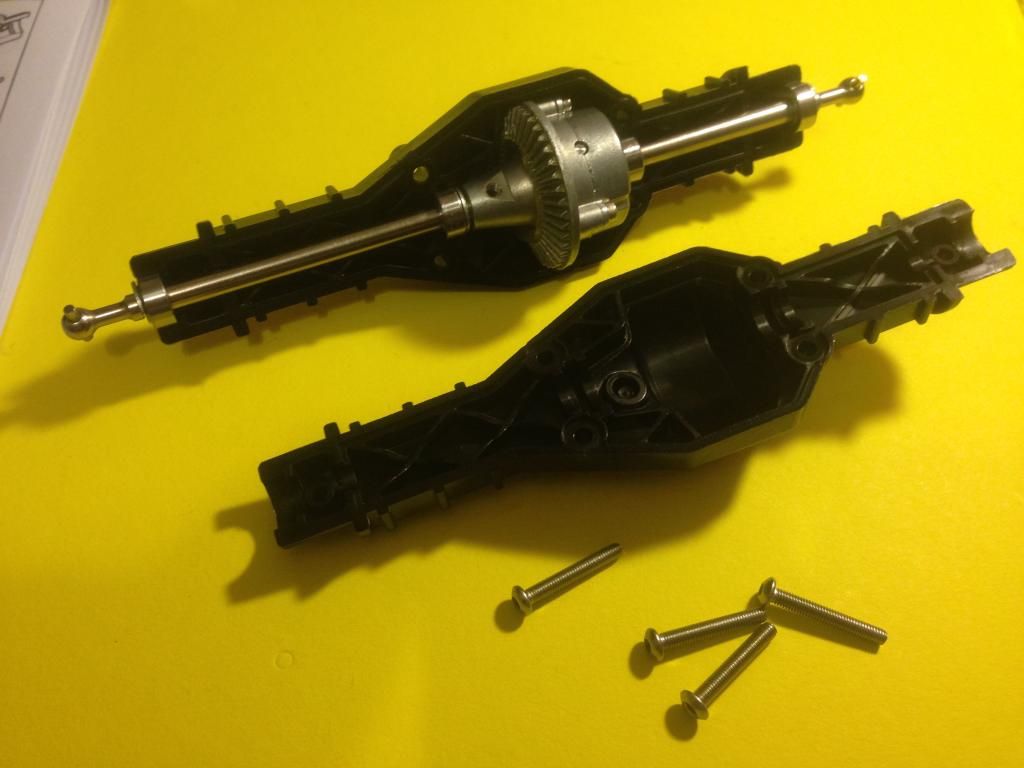 Don't forget the grub screw that seals the access port to allow BA11 screw pin to be inserted/removed without complete axle disassembly.. 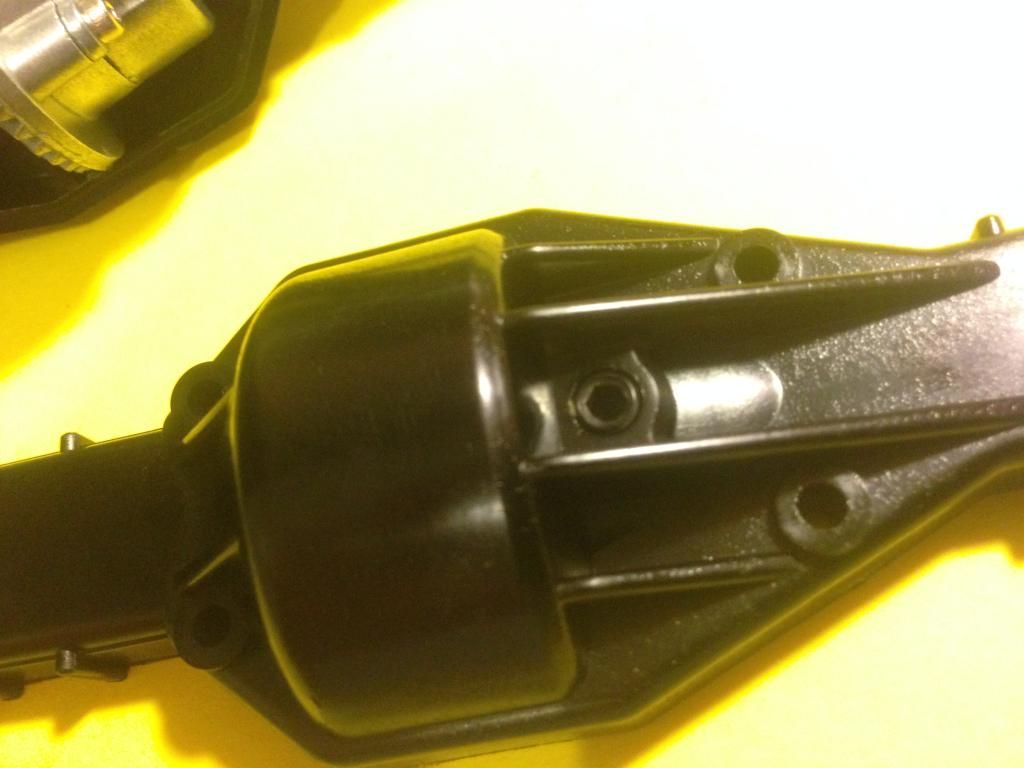 That's it for today. Hopefully tomorrow will see the axles sealed up and the lower spring perches added...... Last edited by Percymon; 07-22-2014 at 05:20 PM. |
|
| |
|
07-22-2014, 11:52 PM
| #29 |
| Quarry Creeper Join Date: Dec 2009 Location: Brackenfell, South Africa
Posts: 448
|
That's some good progress... Makes me wants to build a Tamiya Kit again.
|
|
| |
|
07-23-2014, 07:15 AM
| #30 |
| I wanna be Dave Join Date: Sep 2011 Location: Douglassville, PA
Posts: 4,224
|
Ditto...lol. Love the painted chassis, been dying to do mine.
|
|
| |
|
07-23-2014, 05:41 PM
| #31 |
| Quarry Creeper Join Date: Dec 2008 Location: NW ATL
Posts: 387
|
|
|
| |
|
07-24-2014, 12:56 AM
| #32 | |
| Pebble Pounder Join Date: Mar 2011 Location: Wales,UK
Posts: 158
| Quote:
Not the best comparison but here is a series of supposed 1/10 scalers. The tamiya pajero looks a little small but is probably the most accurate, the Gmade sawback is ludicrously off scale (more 1/8 than 1/10). The axial jeep is probably not too far off (maybe a smidgen oversize ?) and the wraith similarly although you can somewhat forgive it that for it's pumped up off road look..  If you are wondering about dimensions of the Pajero.. Tamiya Length 445 width 195 track 160 height 192 wheelbase 242 1:1 Pajero 3dr.. Length 4315 Width 1895 track 1560 height 1875 wheelbase 2545 Last edited by Percymon; 07-24-2014 at 04:09 AM. | |
|
| |
|
07-24-2014, 04:36 AM
| #33 |
| Pebble Pounder Join Date: Mar 2011 Location: Wales,UK
Posts: 158
|
A little more done Progress somewhat slowed by finding the correct screw lengths to use with the modded GPM/KMRacing parts. I wish now I'd stripped and repainted the GPM axle mounts as they are a lot lighter than the KM (STRC ?) Racing parts and the other comoponents i've painted myself. Not to worry, they can always be painted at a later date; they're not highly visible in the finished model anyway so will crack on for now GPM axle mounts added.. 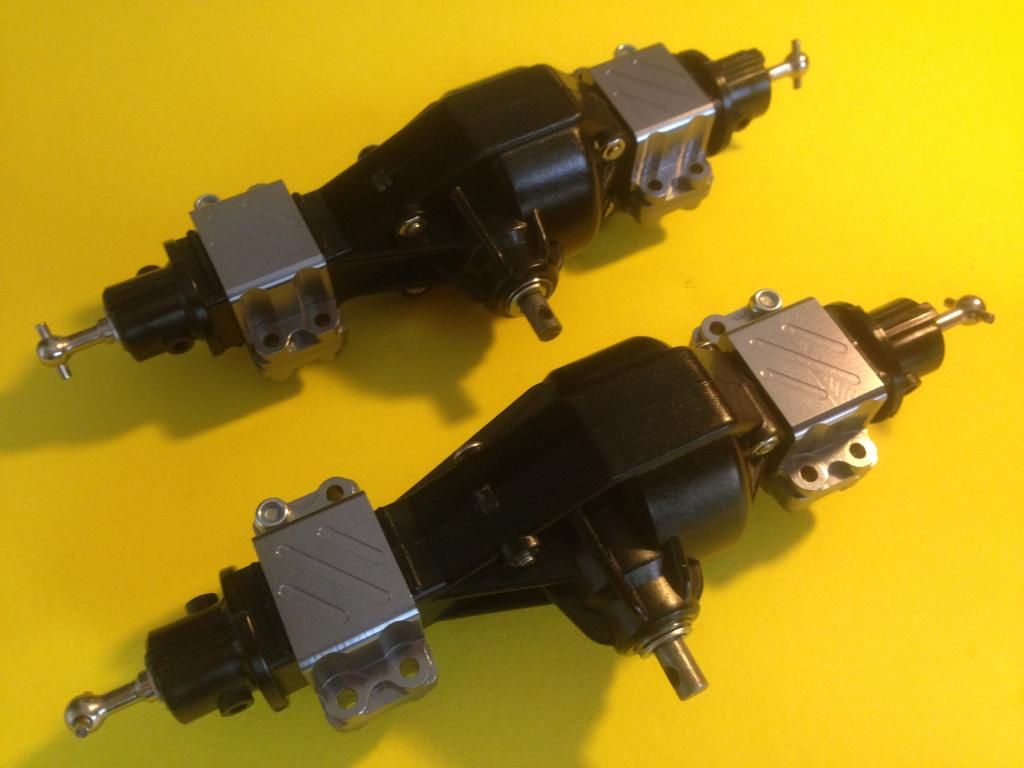 Lower link brackets added.. 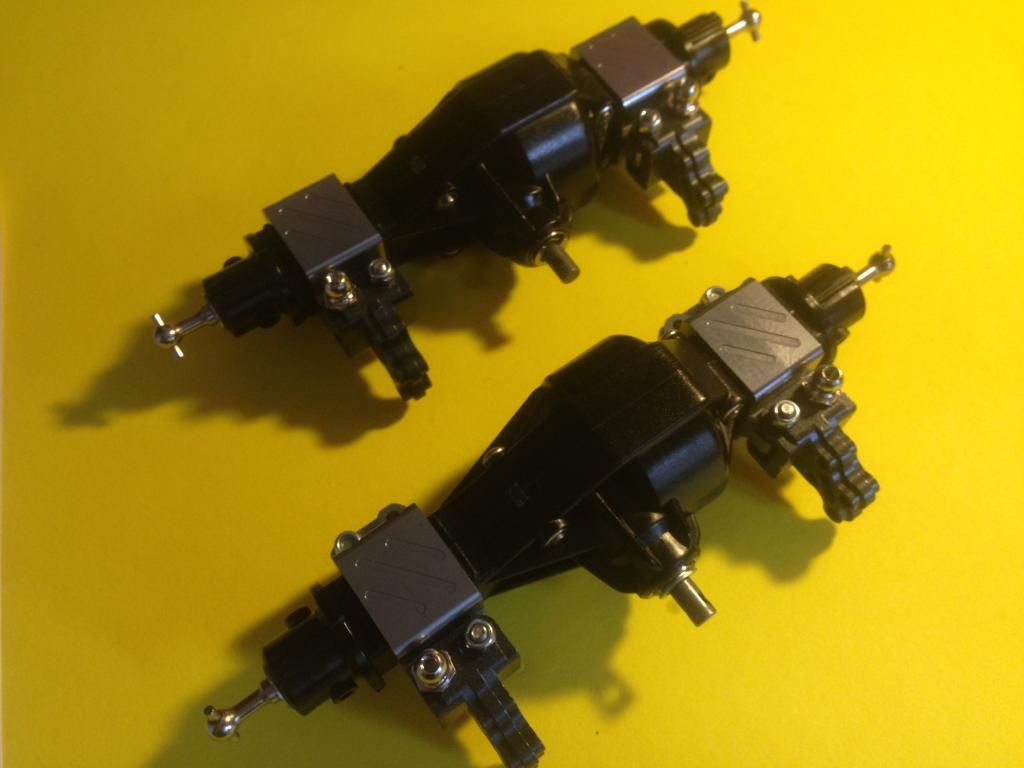 lower spring perches added.. 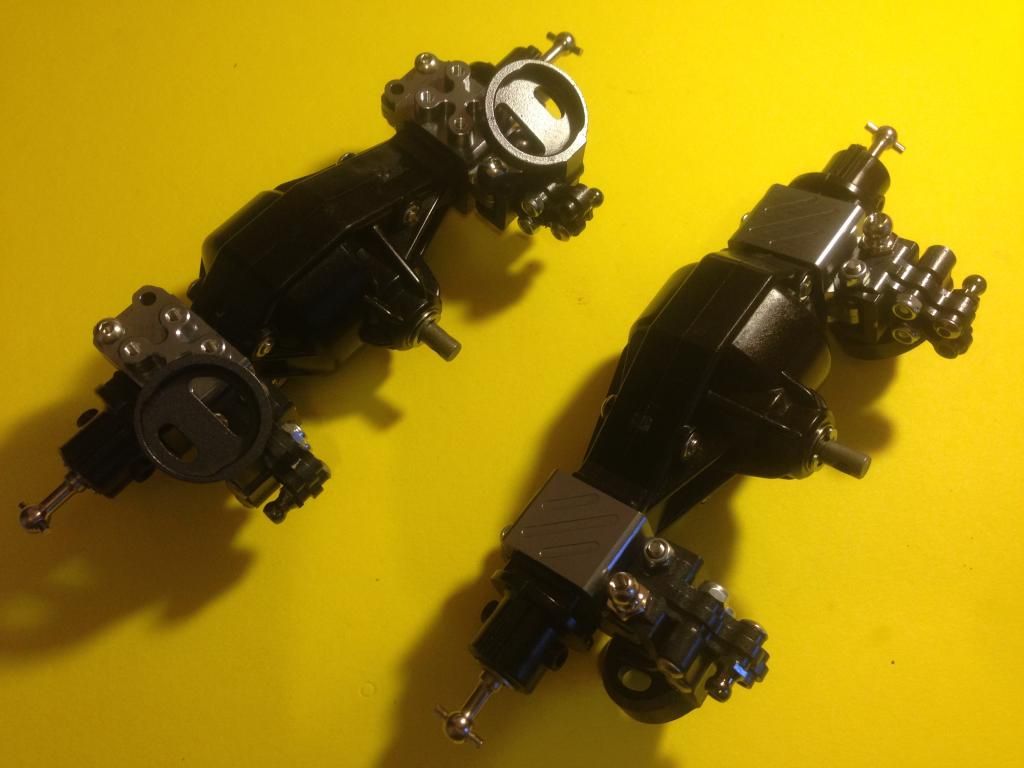 KMRacing knuckles and uprights.. 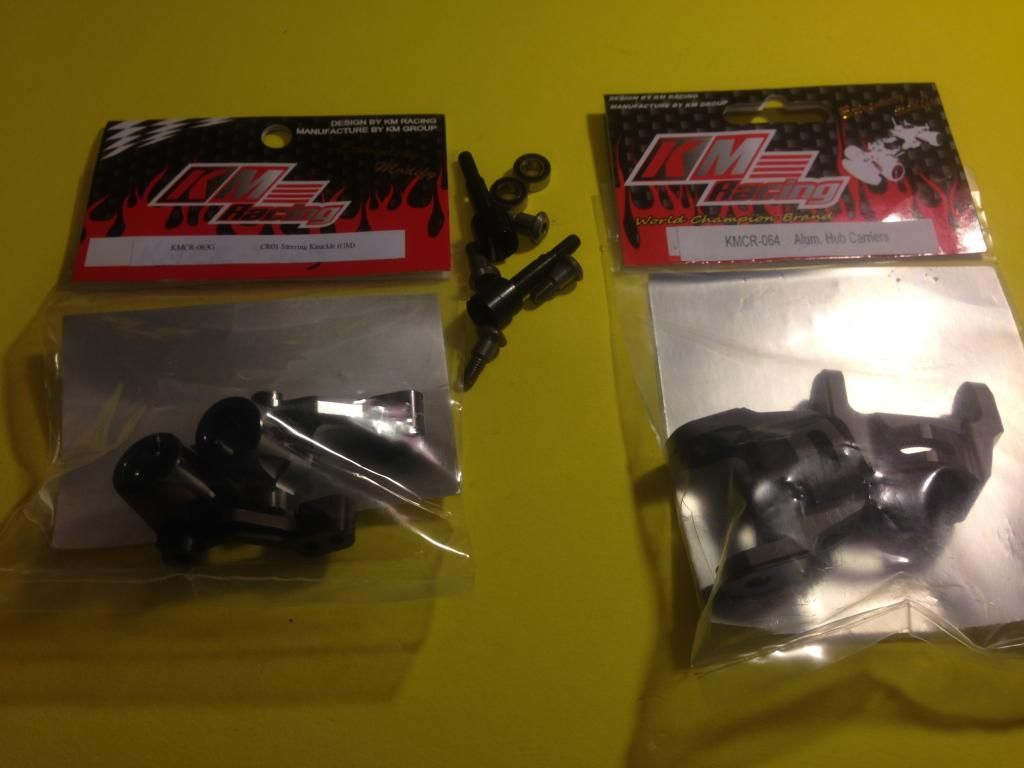 ready for assembly, along with the Tamiya reinforced king pins and strengthened axles.. 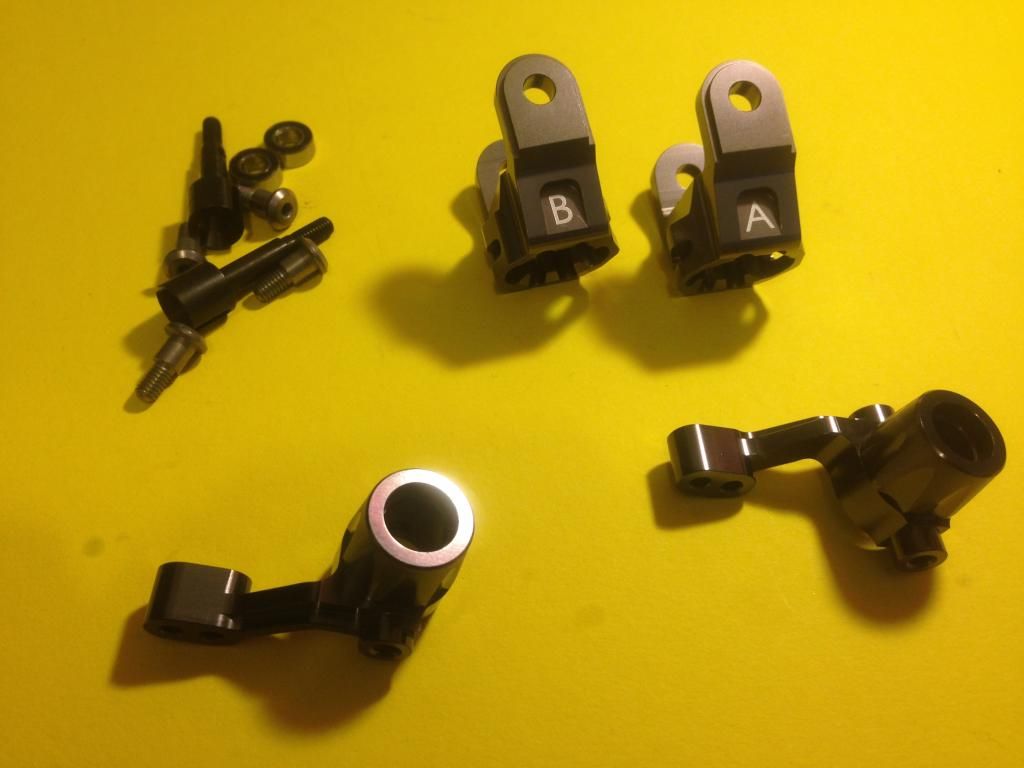 As the uprights only have the single 'steering arm', you have to concentrate a little more when assembling to make sure all components are the correct orientation. A little ceramic grease was added to the king pin shaft, and the treads loctited in place. There was a little vertical movement on initial assembly, so i added a 0.3mm shim between the bottom of the upright and the knuckle - perhaps 0.4mm would have taken all the slop out, but a little movement i can cope with; close tolerances are fine for race cars in clean enviroments but for an off roader its sometimes better to have a little freedom to cater for muddy deposits Now installed.. 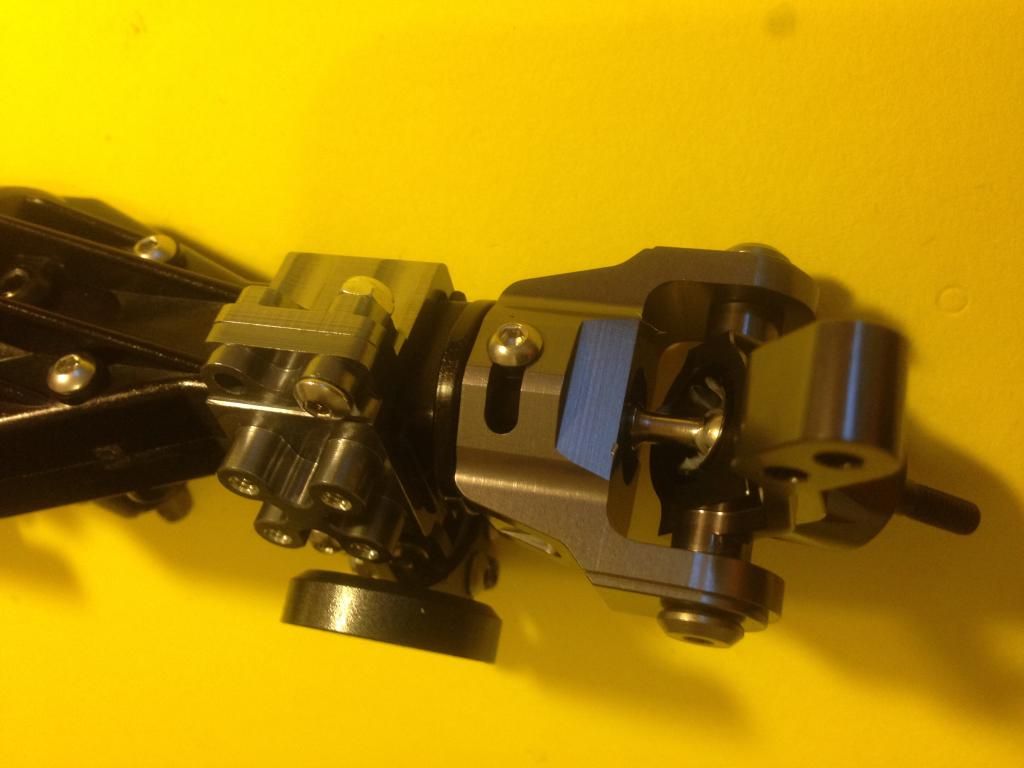 and the two axles now waiting for the servo beds and linkages... 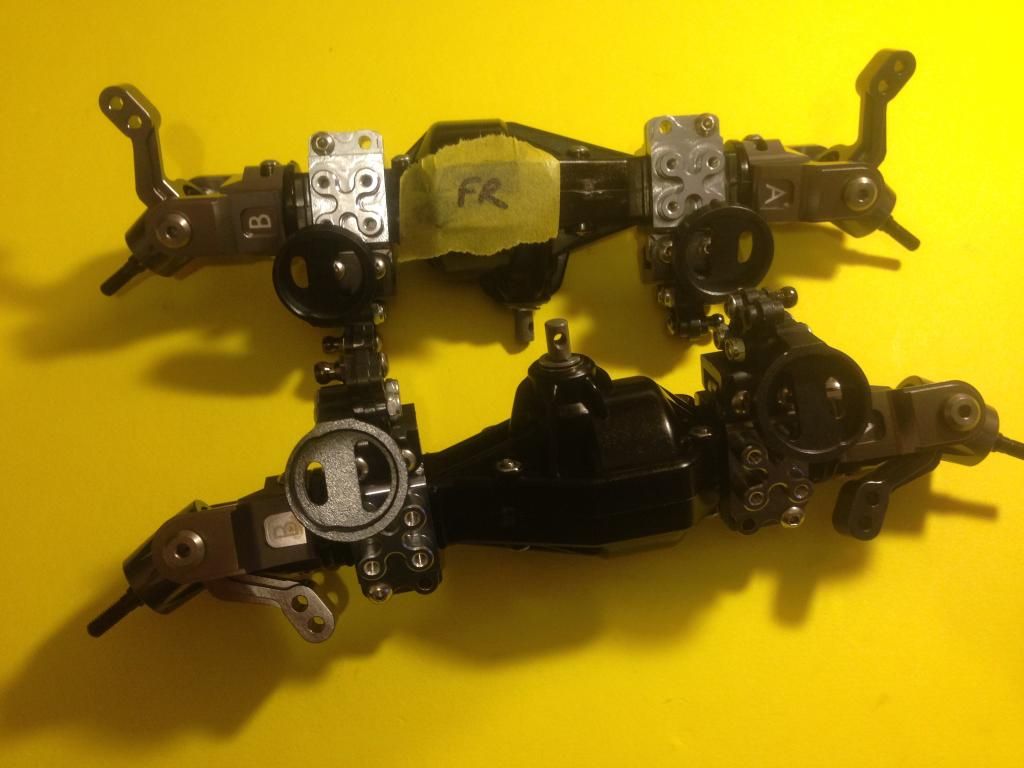 Last edited by Percymon; 07-24-2014 at 04:45 AM. |
|
| |
|
07-24-2014, 04:37 AM
| #34 |
| Pebble Pounder Join Date: Mar 2011 Location: Wales,UK
Posts: 158
|
photo links now fixed Last edited by Percymon; 07-24-2014 at 04:46 AM. |
|
| |
|
07-24-2014, 06:37 AM
| #35 |
| I wanna be Dave Join Date: Sep 2011 Location: Douglassville, PA
Posts: 4,224
|
Not familiar with the KMR parts, but they sure are nice looking!
|
|
| |
|
07-24-2014, 09:20 AM
| #36 | |
| Pebble Pounder Join Date: Mar 2011 Location: Wales,UK
Posts: 158
| Quote:
Tamiya - CR01 - KM Group | |
|
| |
|
07-24-2014, 03:45 PM
| #37 |
| Pebble Pounder Join Date: Mar 2011 Location: Wales,UK
Posts: 158
|
More stainless hardware arrived today so I could progress a little more. Rather importantly the upgrade aluminium shocks arrived too - they are nice shocks, but not worth the ludicrous prices European sellers want for them. More on the shocks in a later installment. Time to finish the axle assemblies. I'm running only front steering so the rear needs to be locked. KMRacing alloy servo bed and hop-up Tamiya turnbuckle set at the ready.. 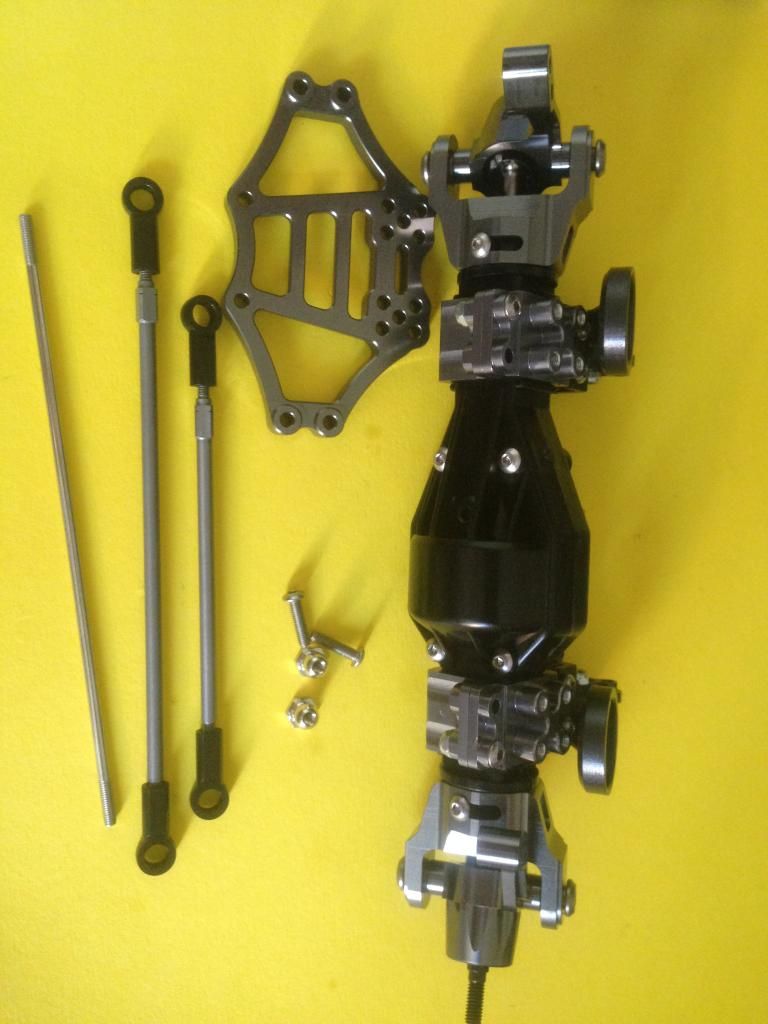 Note hoe much thicker the hop-up turnbuckle rods are compared to the kit rods.. 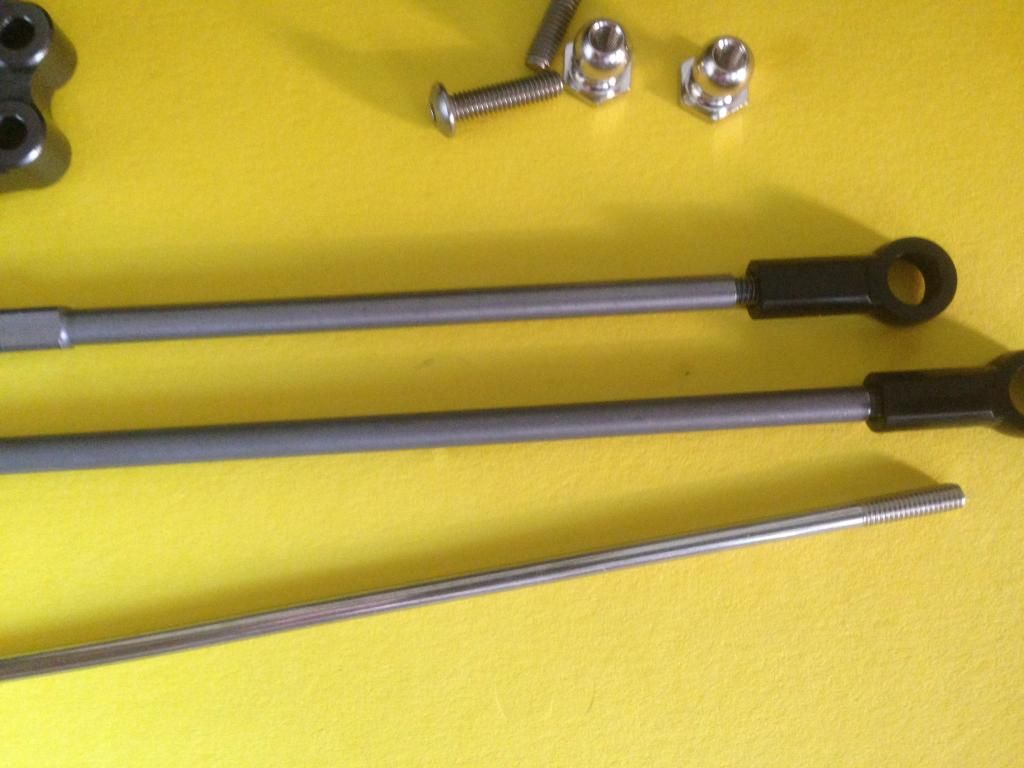 I was quite surprised at the kit supplied rods - given the rock crawling ethos of the model I would have expected something beefier, even if the parts were borrowed from a 1/8th buggy or one of their monster trucks. Installed and locked.. 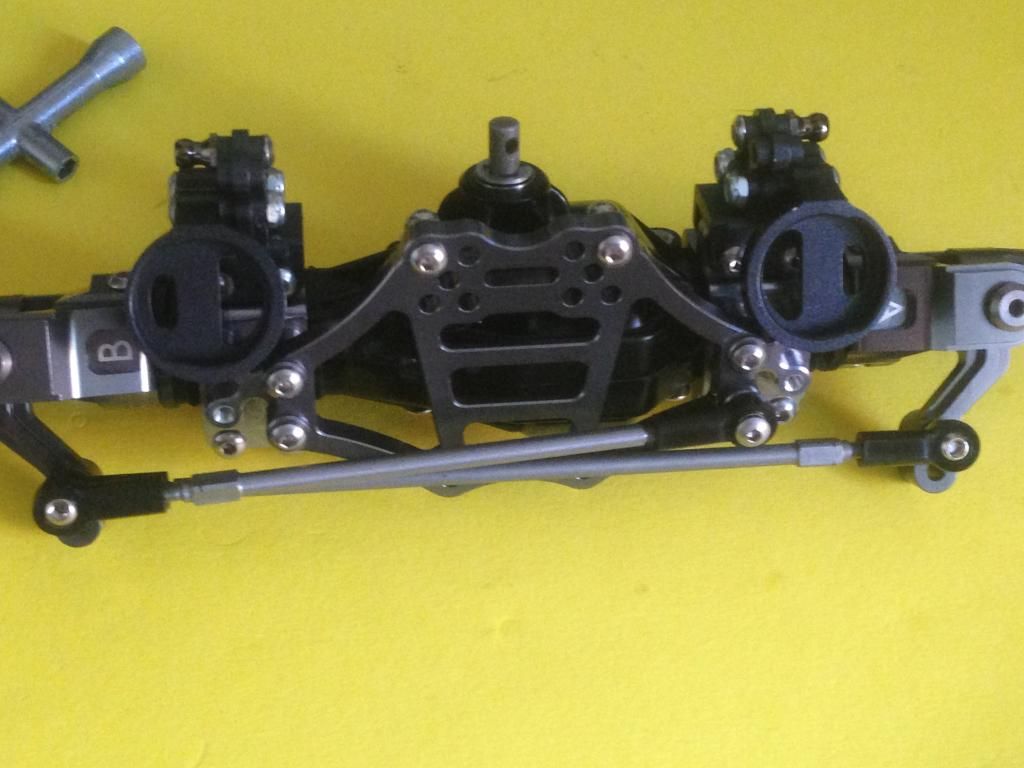 At the front its a similar story - KMRacing servo bed, GPM servo mounts and the Tamiya hop-up turnbuckle rods. My choice of servo is a Bluebird BMS616DMG+HS which at 10.8Kg and 0.12s speed at 6.0V should be strong enough for my needs. 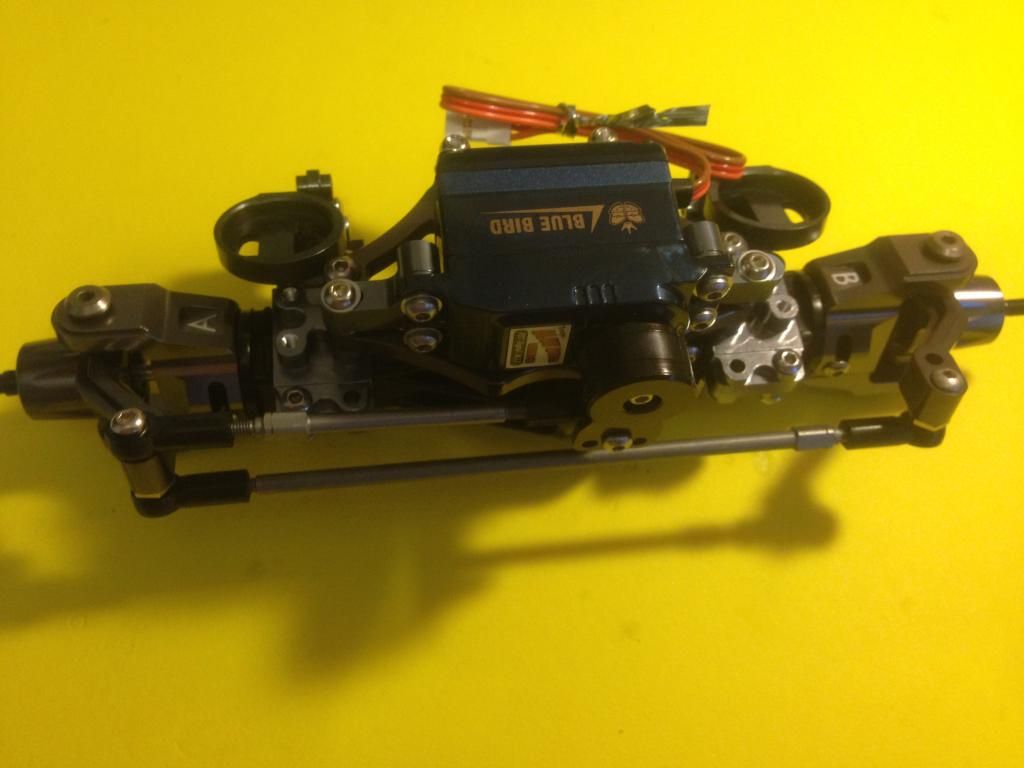 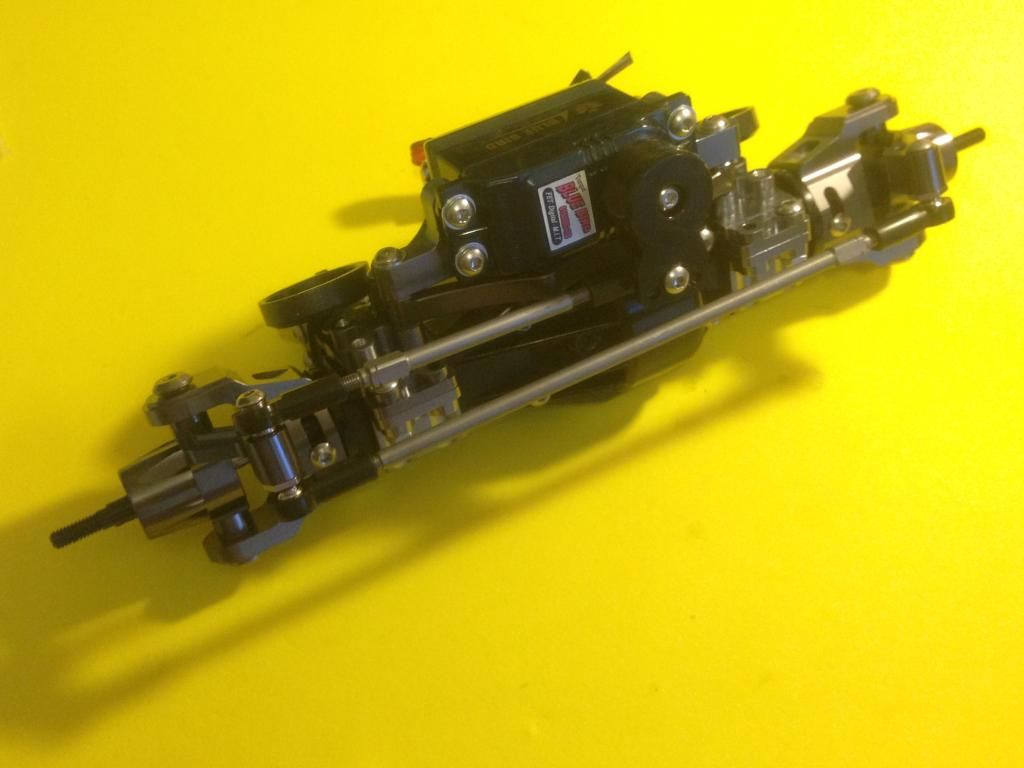 Moving onwards the next step is to build the 4 link arms - rather monotonous step with 16 threaded rods to screw into the ball ends and then loctite into the metal rod sections.. 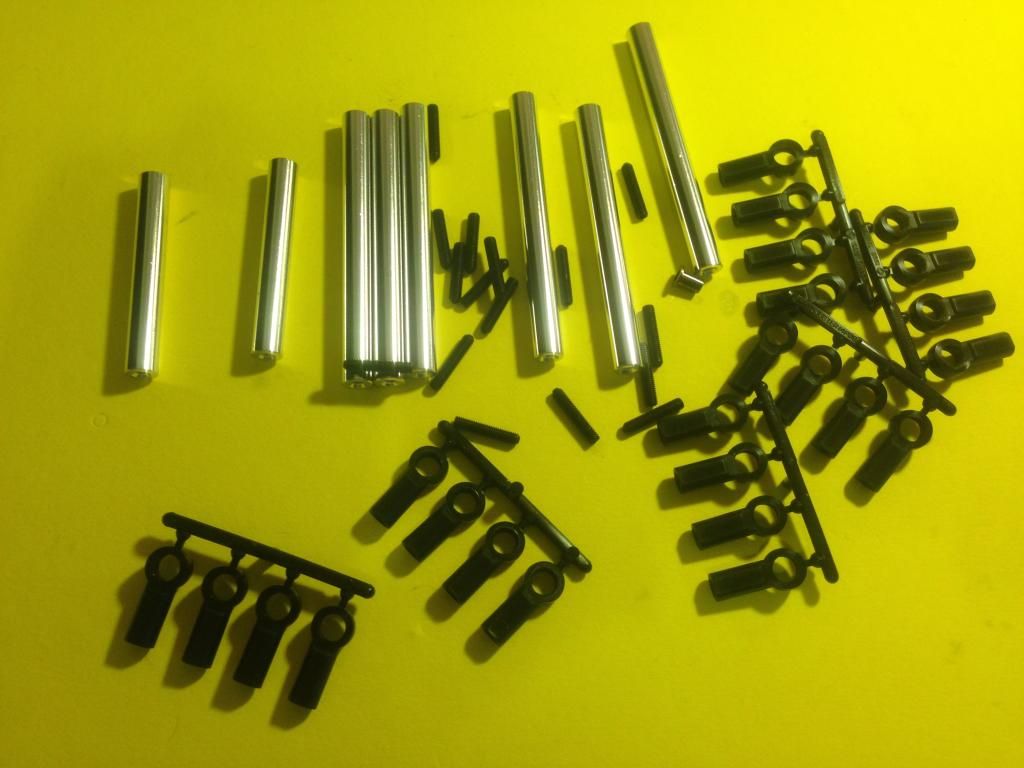 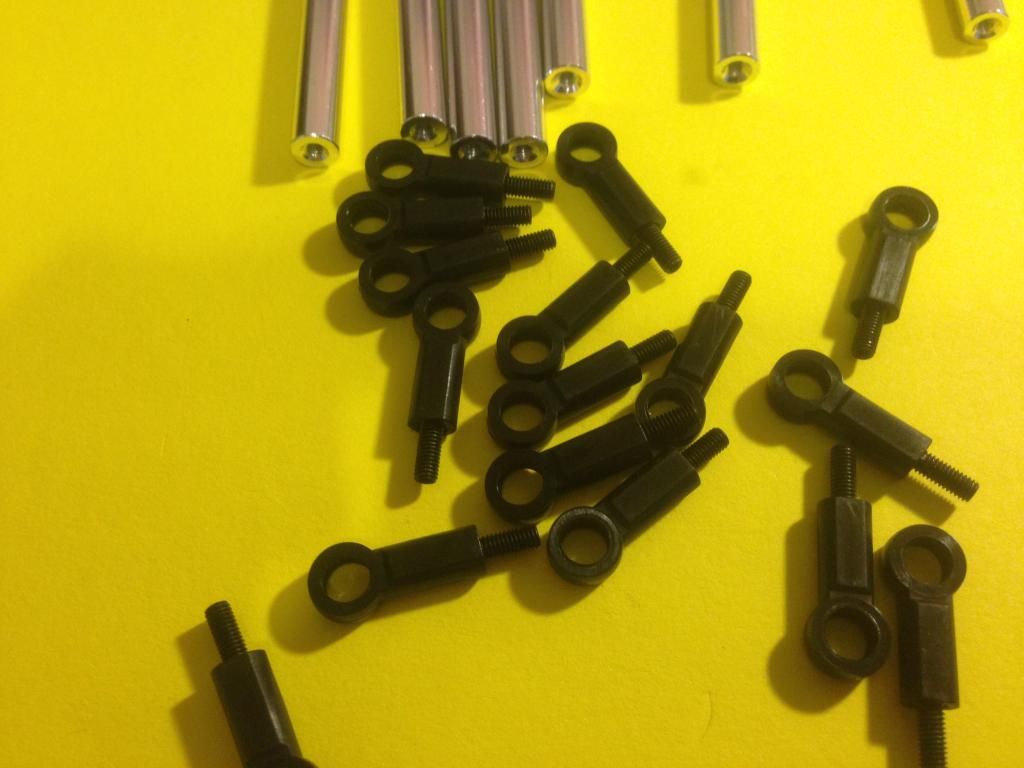 done.. 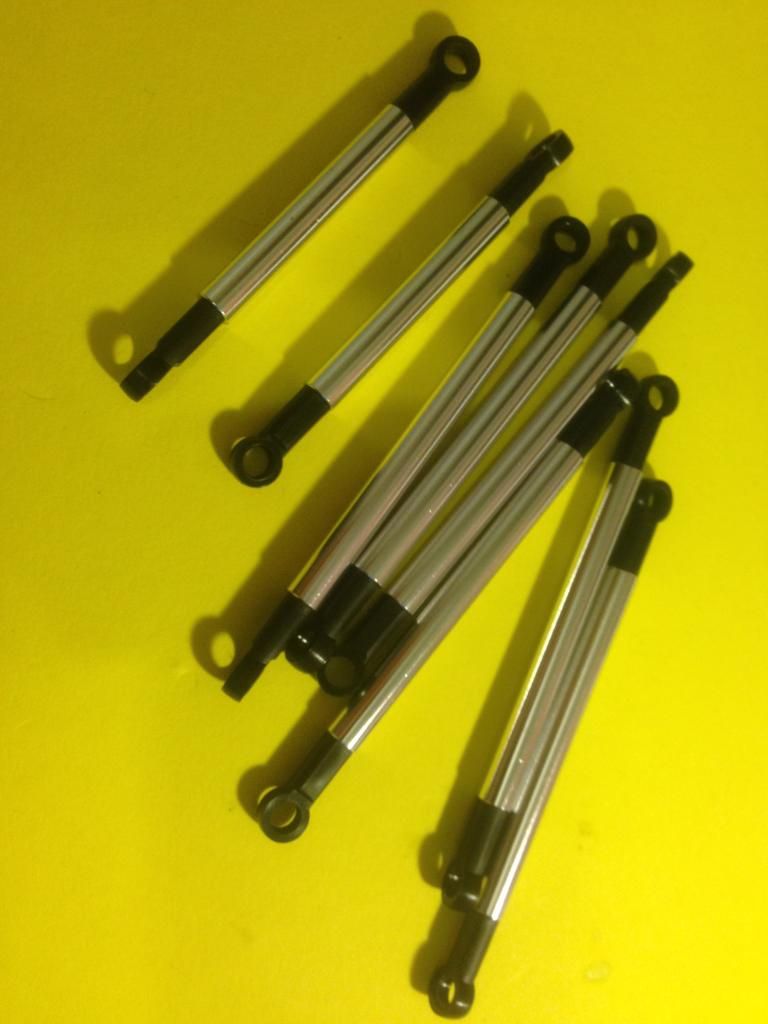 and fitted to front axle.. 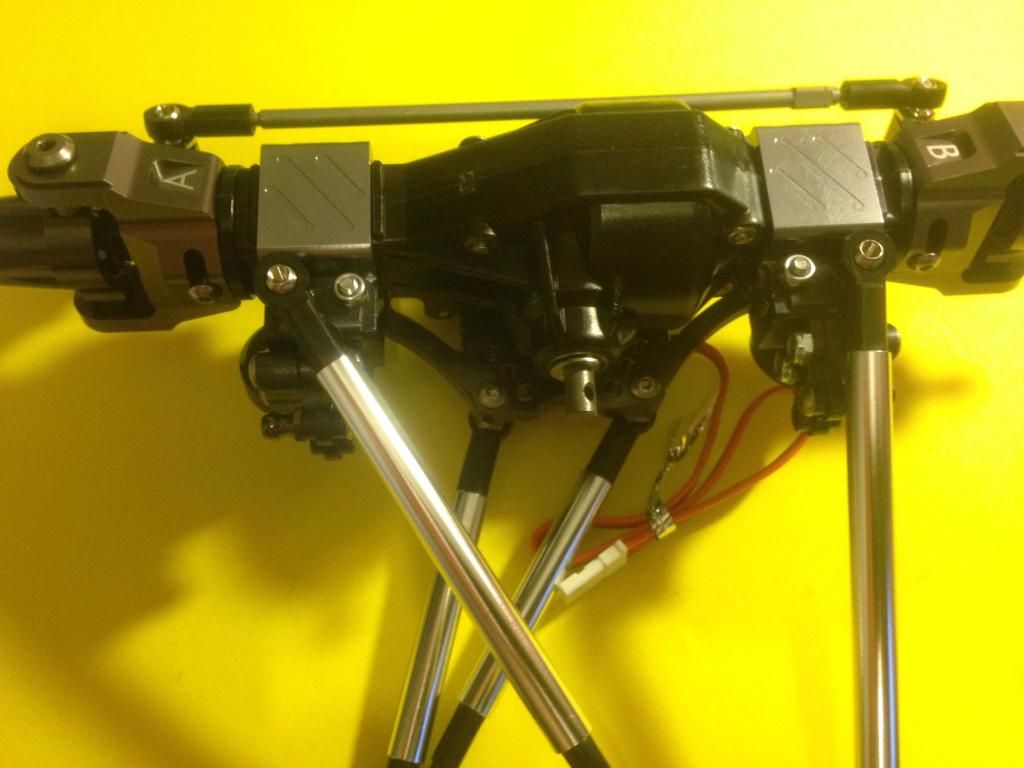 and rear.. 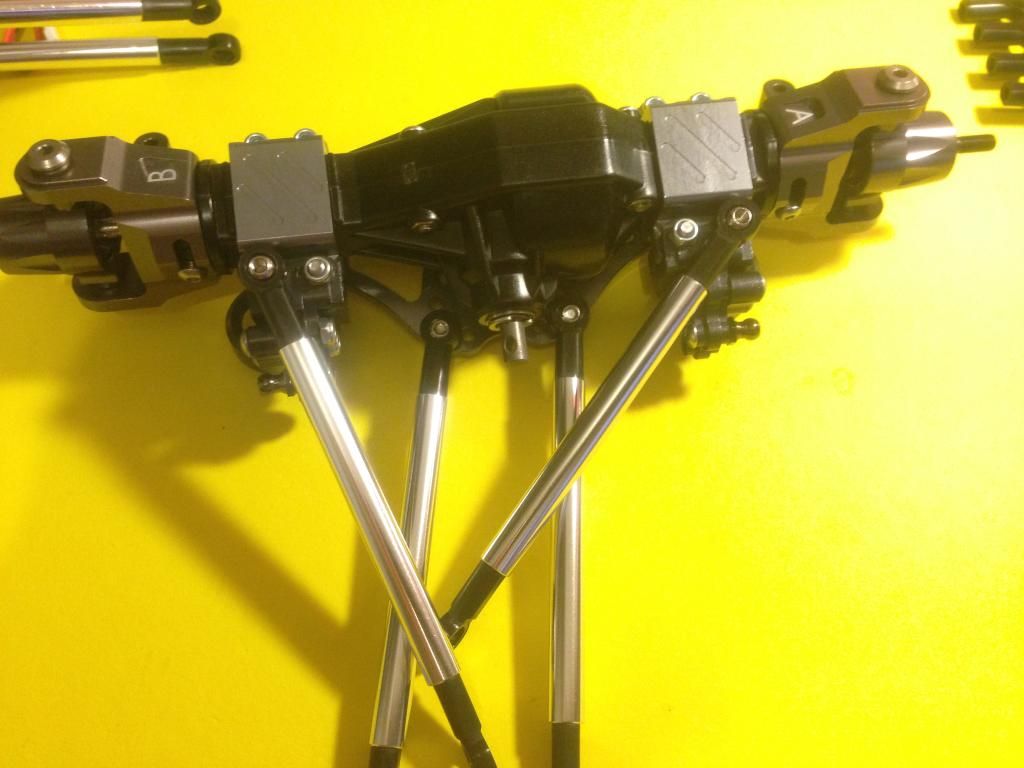 With the arrival of more stainless screws i could complete one of the early build stages, adding the alloy side frames to the chassis rails.. 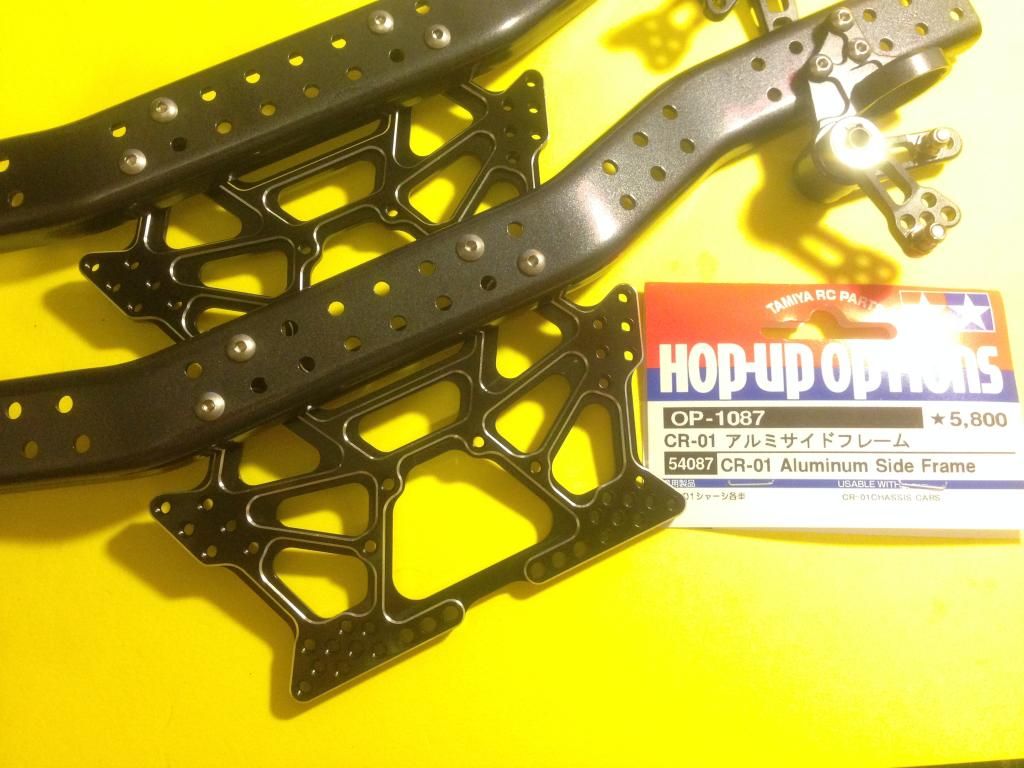 and once they were complete i could start to join it together with the radio/battery tray.. 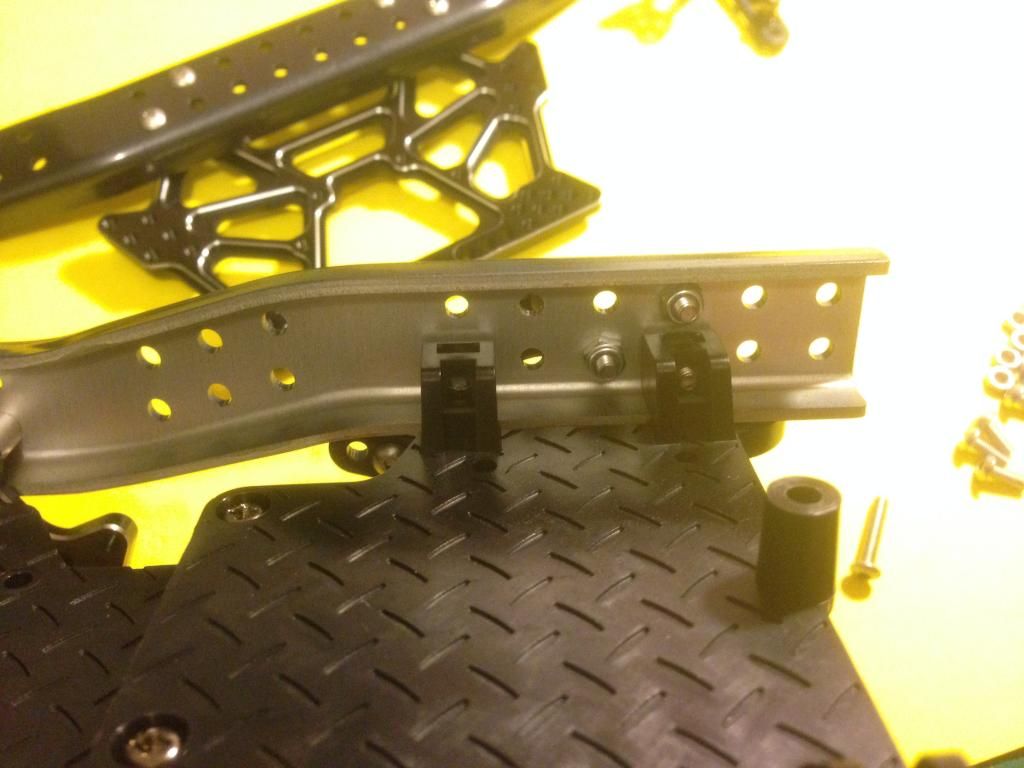 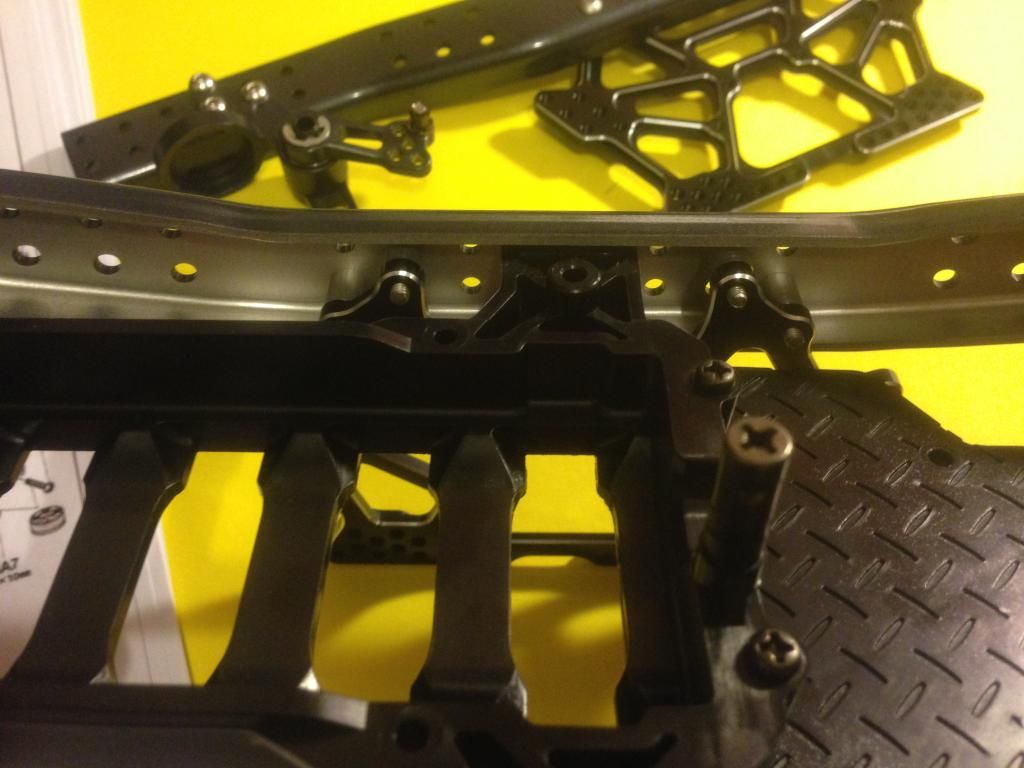 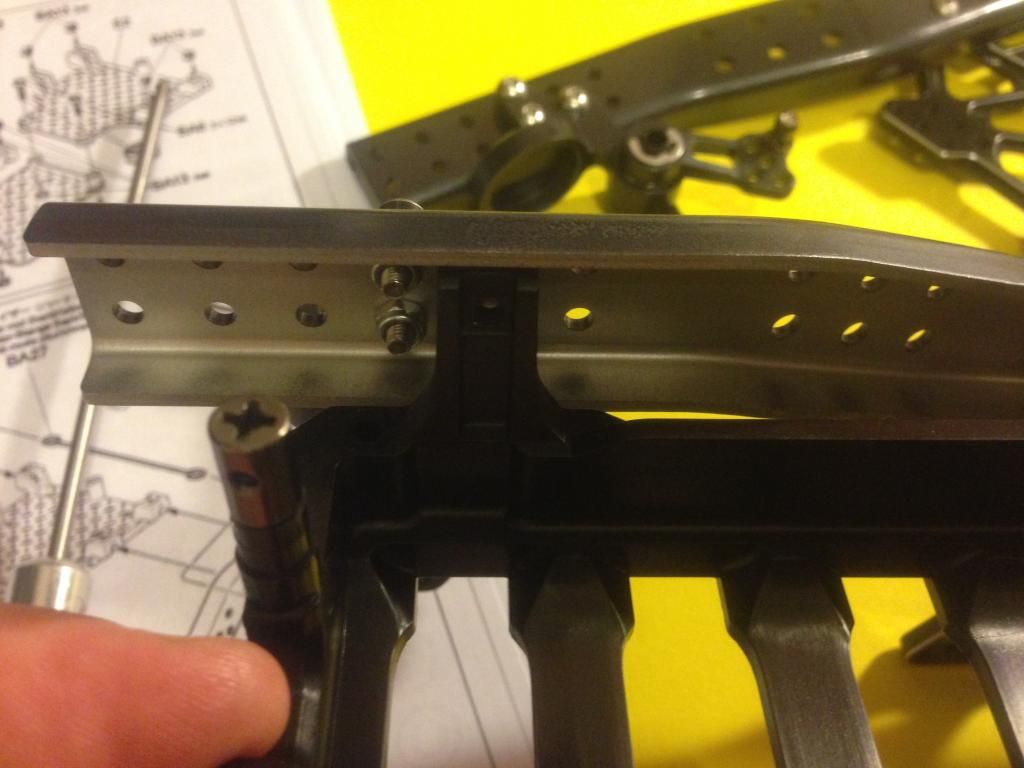 During this stage its important to add the stabiliser bars across the upper suspension arm pivots. The manual calls for gold (medium) at the front and hard (silver) at the rear. I've opted for gold at the rear... 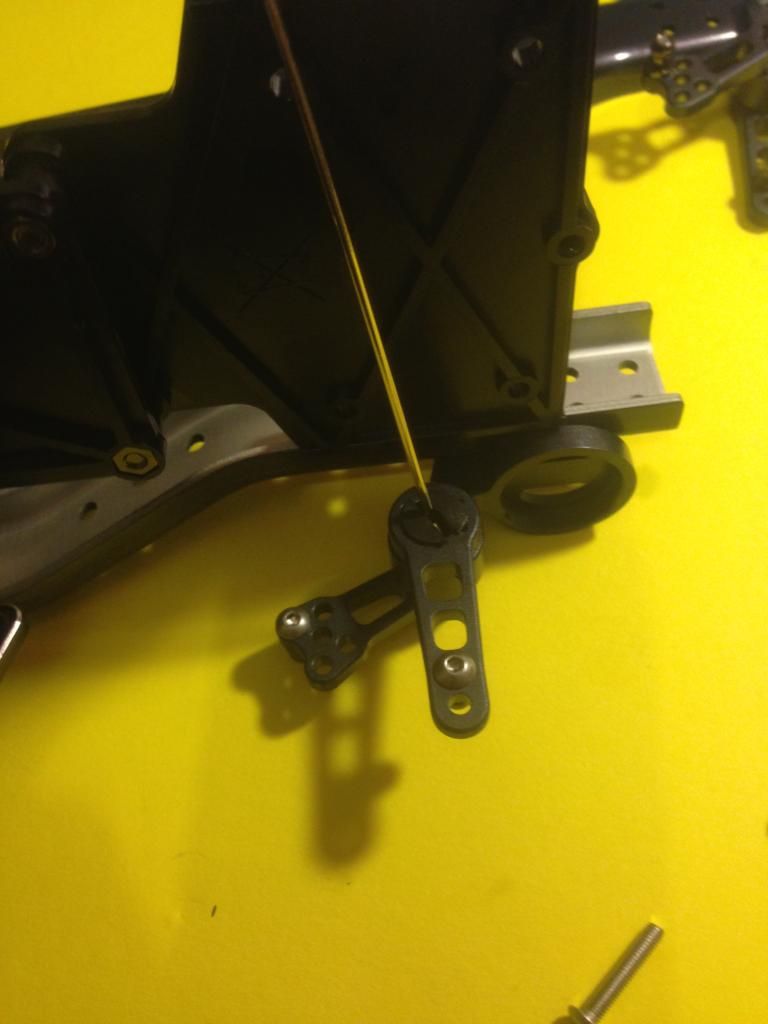 As for the front my optional stabiliser bars haven't arrived so for now there is no bar at all, but a black (soft) will be going in when they finally arrive - if that isn't soon then the chassis build will get delayed, if i start connecting the four links to the axles there may be a lot of disassembly to manoeuvre the stabiliser into position For now an almost complete upper chassis.. 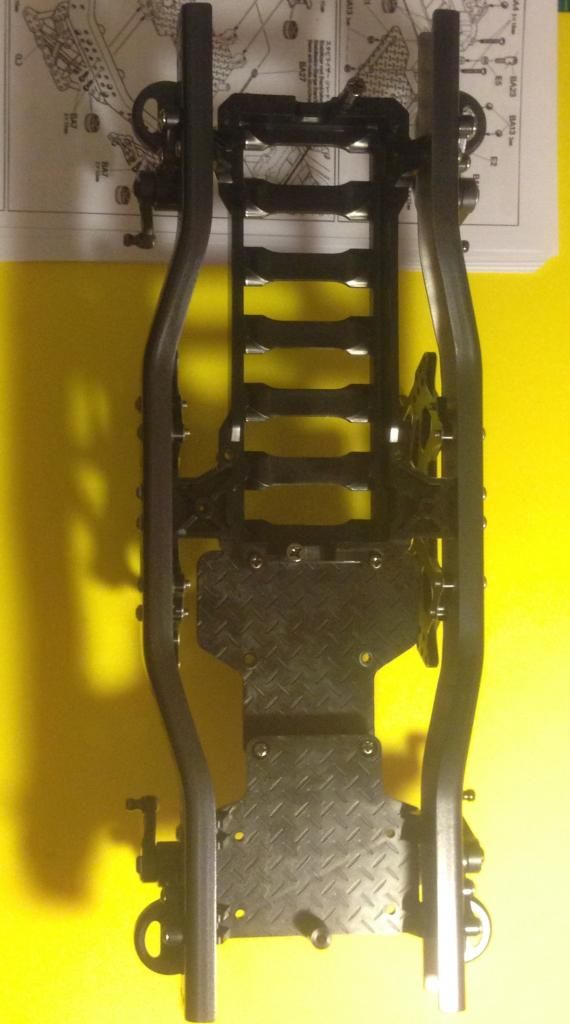 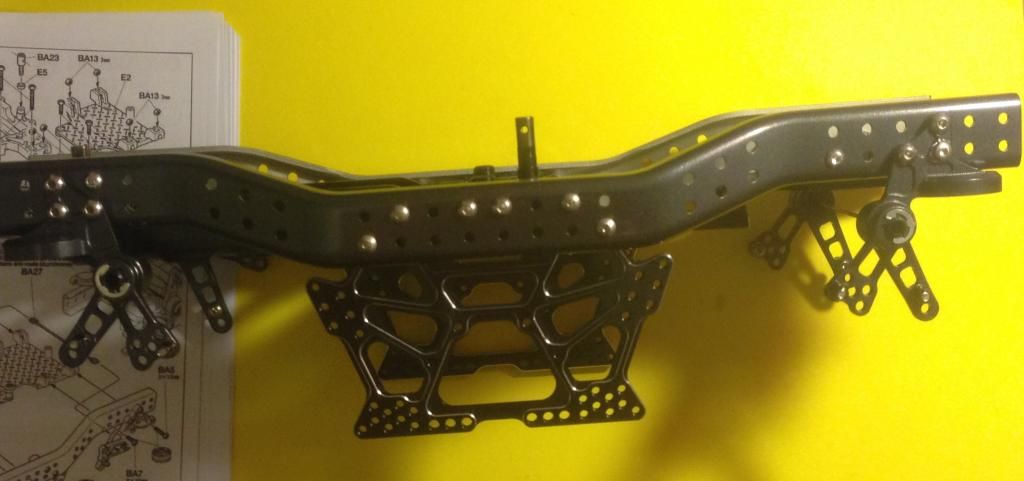 Last edited by Percymon; 07-24-2014 at 03:51 PM. |
|
| |
|
07-25-2014, 07:47 AM
| #38 |
| Pebble Pounder Join Date: Mar 2011 Location: Wales,UK
Posts: 158
|
Ordered a set of short barrel springs today - I hope they arrive tomorow, otherwise I'll be stuck with the chassis build :( Whats the general opinion with springs - softer in the rear to level out the ride height ? |
|
| |
|
07-25-2014, 03:22 PM
| #39 |
| I wanna be Dave Join Date: Sep 2011 Location: Douglassville, PA
Posts: 4,224
|
I run hard/med front and rear. Looking good! |
|
| |
|
07-26-2014, 01:27 PM
| #40 | |
| Pebble Pounder Join Date: Mar 2011 Location: Wales,UK
Posts: 158
| Quote:
Thanks for the info - much appreciated | |
|
| |
 |
 Another CR-01 build - Similar Threads
 | ||||
| Thread | Thread Starter | Forum | Replies | Last Post |
| Tamiya Bronco Kit Build; 1st Build | Boxcarcustoms | 1.9 Scale Rigs | 2 | 07-29-2013 07:37 PM |
| Jeep scaler build and comp micro crawler build | droopmodmrc | Losi Micro-Rock Crawler | 1 | 12-25-2012 12:34 PM |
| ~53 Willys 2010 Comp Rig Build~ RC4WD MOA Worminator Build~ | 53 willys | General Crawlers | 108 | 11-28-2011 12:42 AM |
| RcBros LCC Build, Hi-Res pics & More Build!! | RcBro | Team Losi Comp Crawler | 30 | 06-03-2009 07:26 PM |
| Thread Tools | |
| Display Modes | |
| |


 Linear Mode


