| |
 02-04-2008, 12:38 AM
| #1 |
| Pebble Pounder Join Date: Oct 2007 Location: South Africa
Posts: 115
| TLT Rockcrawler Build Thread by a newby rockcrawler builder for Newby Rockcralwer builders. When i saw what certain RC rockcrawlers could do i wanted one and so started the search and the research. After doing research to find a suitable base for my crawler as I didnt have the funds to buy a RTR crawler and being a bit of a Tamiya Nut, I decided on giong for a Tamiya LIttle Gear TLT Rock Buster, these were on sale at that time and a member of TamiyaClub offered to ship one to me as you could only buy from Tamiya USA if you stayed there. 3 Weeks later and my TLT arrived. In the beginning I didnt have huge plans for the car buy as I stared at it the feelings toward a all out 12.5 inch crawler started to grow. First off: To get accustomed to the parts and means of the TLT i built it as per manual spec and it stood there doing nothing for a while. 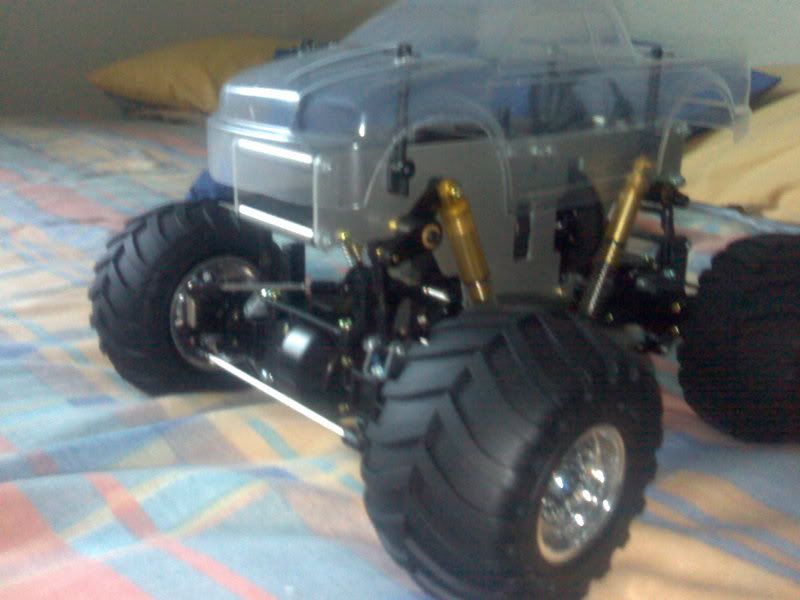 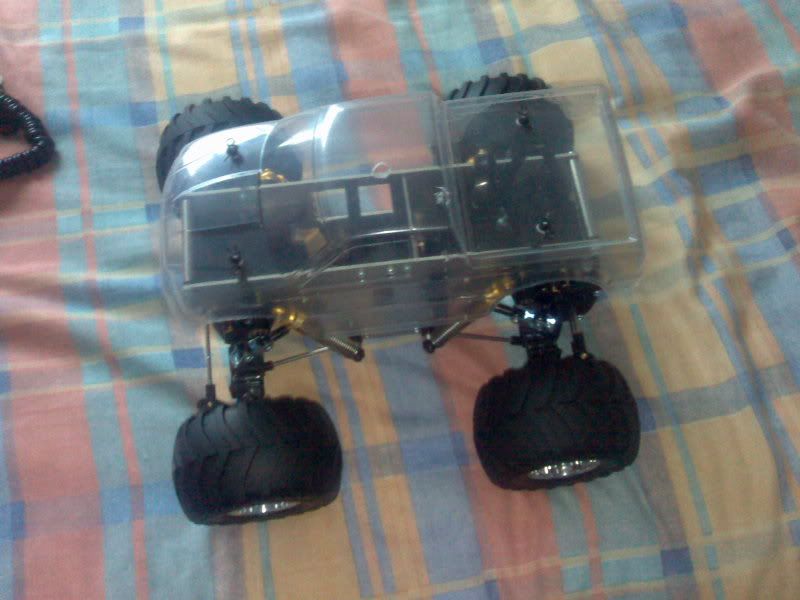 As per Big Mike (HERO!) from RCcrawler I then decided to go wider on the wheel base by using Tamiya Part 50808 (Black foot stub axles) whic would give me a total of 2 wheel hub (hex thingy in wheel) extra width. I was advised that this was the correct amount of widening, due to the TLT being low in any case and wider could mean more problems getting caught on rocks etc. Also as per Big Mike from RCCrawler bought a HPI Nitro RS4 Rear Drive Belt as it is roughly the same size as the original belt but the same width (stronger and less likely to slip), but to use it I needed to fit a tensioner (later more on this). Chassis: Tamiya TLT (maybe importing a Junfac Tracer Kit) Dampers: Stock until i can find Emax or Tmax or Clod Stock Dampers Axles: TLT Locked axles using extra gear inside diff 4 Links: Custom using arrow shaft etc. (Will recieve new if using Tracer Kit) Dogbone: Custom made (unless using Tracer Kit) Motor: Dont know yet, might go for a Yokomo D1 Zero 35turn or a Integy 55T Lathe motor running a 15T Pinion on stock 83T Spur (might go 85T Spur) Gearbox: Stock TLT with tensioner on belt with stock ball diff. Wheels: JunFac Mudlock Beadlock 2.2 Rims in Black (awaiting delivery) Tyres: Undecided Foam: Stock Tyre Foam, fronts will have extra BB inside to increase CG but not add to spinning weight (more on this later) ESC: Schumacher ESC or Novak GTX or LRP V 7.1 Battery: Standard Stick Pack mounted on rear Axle *So Far parts gathered or used to finish truck: Tamiya TLT, BlackFoot Stub Axles (the one which go into the wheel), RS4 Belt, Sport Tuned motor, ESC's, Arrow Shafts (for 4links), Arrow Inserts (for 4links),3mm Threaded Rod (for 4links). Motor Bearings (4mm inner Diameter, for belt tensioner), Various Screws and nuts for everything, wheels (mudlocks in the post). *Making your new four link suspension: First off you need some idea of how long you want the wheelbase to be. You need to make four of each lenght, two different lenghts are needed. I had some carbon arrows lying around and then went to the hunting store to buy insert which the threaded rod could go through. I had cut the arrow shaft to 98mm and 84mm respectively because this gave me a level axle with the standard TLT Eye ends (those rod ends with little round holes in them which can click into the ball ends)  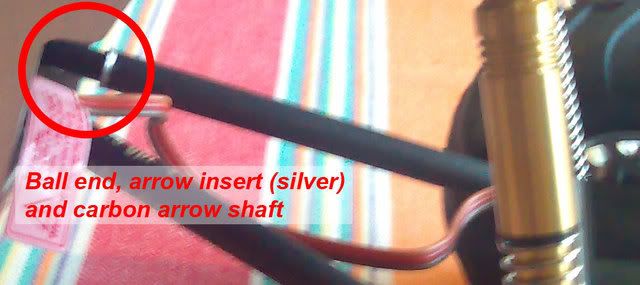 Note: Use the stock EYE ends from the TLT kit as they are stonger than the aftermarket ones. I then added the arrow inserts and used Tamiya CA Glue to make sure the were fixed into place. Pushed threaded rod through and cut about 1.4 cm longer than shaft. then trimmed the threader rod until the eye ends sat tight against the arrow shaft. *Now to the rearranging of the suspension mounts etc on the axles: These need to be rearranged due to the fact that I wont be using the existing cantilevel setup on the suspention. What I did was move the bottom mount to the top of the axle and the top to the inside. See pic for details. 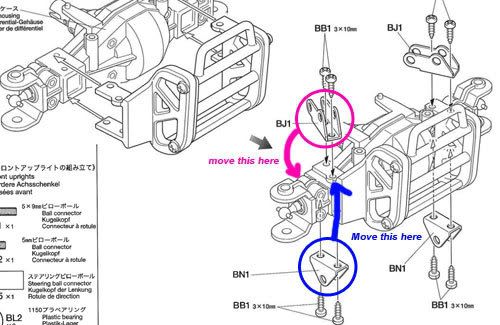 *Stub (wheel) axle modification: Problem with the Tamiya 50808 Wheel axles are the have a long cup which limits steering radius and they are longer (which is the point). With makes it longer I mean the hole for the pin is far away from the upright meaning youll have to fill that gap for the wheel to sit flush and remove slop from the steering or driving. For this part you will need a Dremel or drill with a cone shape grinding bit and a cutting disc (or hacksaw). Remove +-2mm from the cup of the 50808 Stub axle to shorten it and allow for more steering limit. Then re-do the bevel inside the cup using the cone shaped grinding bit. Do it slowly and move it from side to side as you will reach the centre (back) of the cup with the grinding bits tip, which is a no no. Grind this slowly with no too much pressure untill the cup has roughly the same bevel as it originally had. On the outside where the little pin hole is you can use washers (metal or plastic) to will up the space. Benifits of either: Metal: Adds lower CG weight but needs to be a perfect fit otherwise slop my still occur or binding may occur which is a real bad no-no. Plastic: Not much weight addition, but more forgiving in terms of slop and binding due to it bending and stretching. 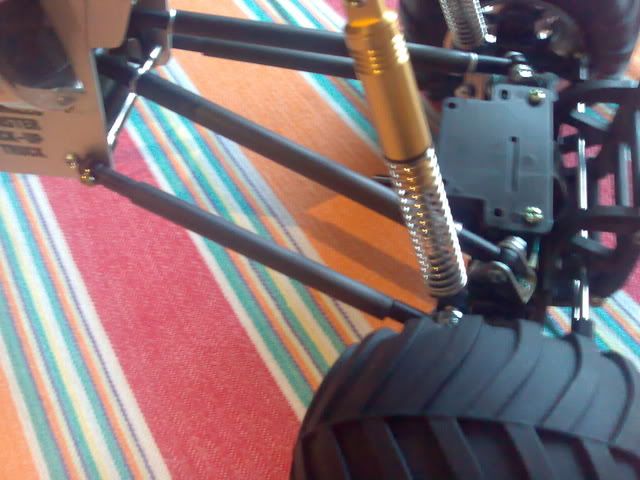 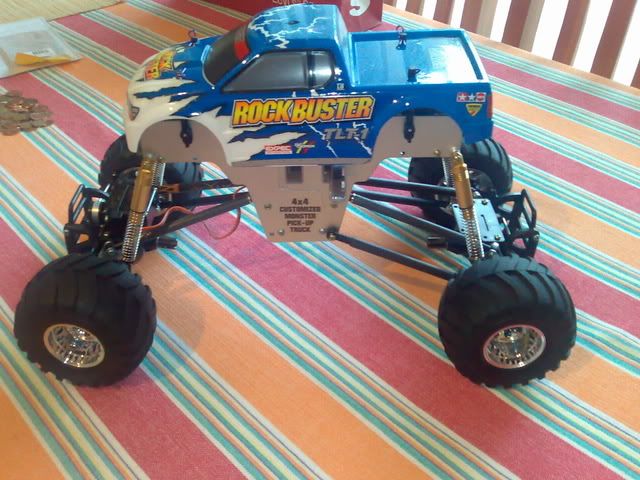 This is all so far. Will update as i build more: *Still on the table. 1. Mod Dogbone by splicing a tamiya mini dogbone and welding (bracing) it to a metal pipe for correct length. 2. Mod damper mounting for better damper responce. 3. Make Tensioner 4. Fit RS4 Belt MORE PICS WILL BE ADDED Last edited by infernox; 02-04-2008 at 04:09 AM. |

|  |
| Sponsored Links | |
| | |
|
02-04-2008, 08:57 AM
| #2 |
| Quarry Creeper Join Date: Oct 2007 Location: Pennsyltucky
Posts: 265
|
Ditch that body and get a 1/10 scale body,and also some new tires.
|
|
| |
|
02-04-2008, 09:05 AM
| #3 |
| Rock Crawler Join Date: Aug 2006 Location: Pinedale, WY
Posts: 873
|
Great start! when you go to buy a tranny grab a Ax-10 or R2D or even a Pede tranny  |
|
| |
|
02-04-2008, 10:42 PM
| #4 |
| Pebble Pounder Join Date: Oct 2007 Location: South Africa
Posts: 115
|
1/10 scale body coming still. Deciding on which one. Bear with me Update for today: First off, I would like to remind you that this is a budget project so the tracer chassis kit (if i get it) will be last thing I import, except for the motor. Please keep in mind I got a limited budget and shipping is a nightmare (in money terms and our postal service stealing everything) Secondly, tried to completely finish the 4links last night. Ran into some snags... not enough threaded rod and no stock at LHS, will wait till the weekend. one link the rod is not long enough, so need to recut rod longer. Will havta wait as per above. Superglued the inserts into the arrows decently. Checked on clearance for tensioner. Trying to find the right washers, but so far no luck. So stock tlt wheel axles still installed. Filled Front TLT tyres with bb's to see effect untill new rims and tyres (undecided which tyre) arrive. Some pics of the progress: 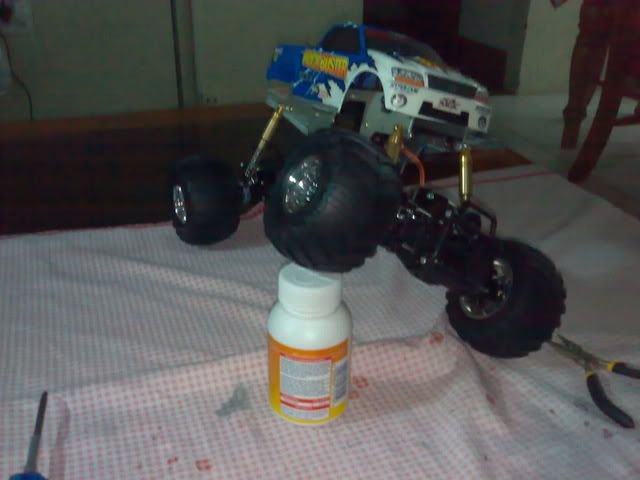 So far so good. 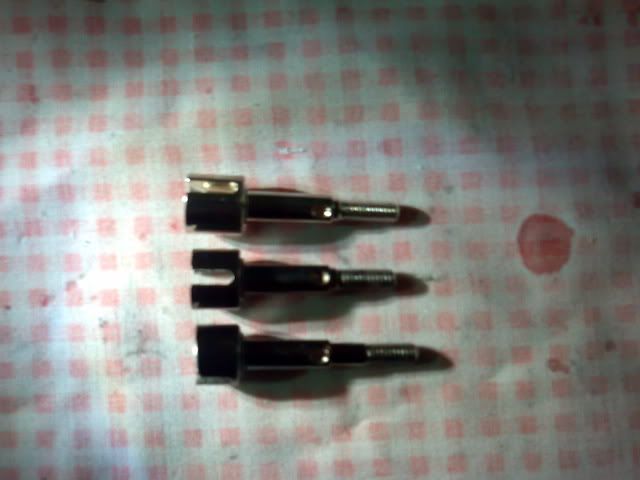 Top: Stock Mini Wheel Axle Middle: Stock TLT Wheel Axle Bottom: Cut and beveled blackfoot axle 50808 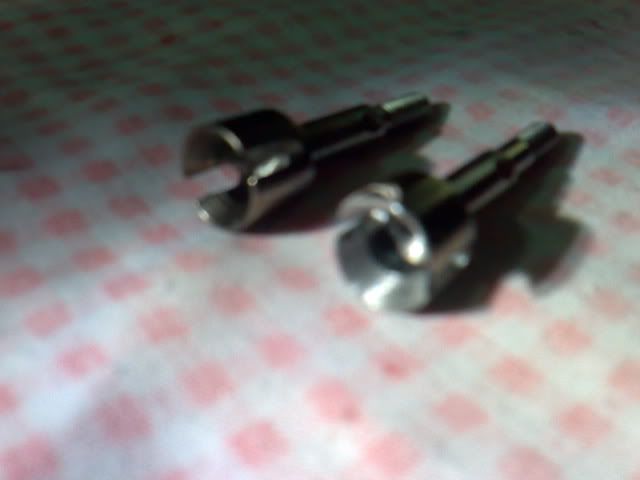 Left: Stock Blackfoot Axle Right: Beveled and shortened cup from the Blackfoot Axles 50808 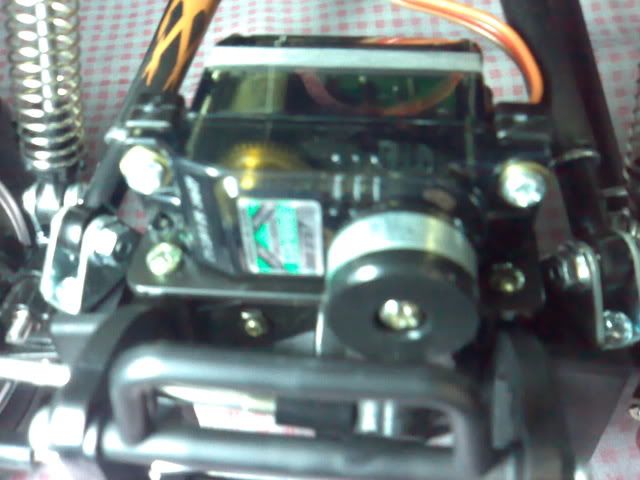 Bluebird High Torque Servo |
|
| |
|
02-05-2008, 10:04 PM
| #5 |
| Pebble Pounder Join Date: Oct 2007 Location: South Africa
Posts: 115
|
I dont know if i should get a high (tall tyre) or what? What would be best. Im looking at the following: -Losi rock claws (no stock no where so im actually giving up) -Imex Swamp Dawgs -MOAB 2.2 I just dont know..... And which dampers must i get, im looking for used, Emaxx or Tmaxx or Clod dampers, but I cant find any. Keep in mind in on a budget. The body is going to cost me R365, then paint at 40-60 rand a can. Gawd!! |
|
| |
|
02-06-2008, 02:48 PM
| #6 |
| Rock Crawler Join Date: Aug 2006 Location: On the trail
Posts: 668
|
nice start man!, and awesome paint job for tires depends or where you run the truck ... if you want a good all around tire get proline mashers 2000 2.2 ... they are awesome! for shocks you can use the stock ones, then some maxx shocks! i want to see those custom dogbones!! good luck with the build... i live in brazil an here they arent crawlers stuff and the shipping is also a pain in the ass |
|
| |
|
02-06-2008, 09:59 PM
| #7 |
| Pebble Pounder Join Date: Oct 2007 Location: South Africa
Posts: 115
|
thanx man. havnt gotten anything done the last two nights, with SouthAfricas wonderful poweroutages and me waiting on parts and communication from sellers i just could not do stuff. dont the stock dampers give problems? where can i get used maxx dampers? or must i look for GPM dampers? custom dogbones mmmm... those are not going to be my favorite to do, need to get a bench drill to drill holes into solid metal rod, because i need to weld it so metal on metal..... damn the scientists who havnt figured out how i weld aluminium to metal!!!! that body's gonna be put inside a box soon as i get the defender. By the way is it a good crawling tyre? on tower it says truck pulling tyre? Last edited by infernox; 02-06-2008 at 10:11 PM. |
|
| |
|
02-07-2008, 02:46 PM
| #8 |
| Newbie Join Date: Jan 2008 Location: Archdale
Posts: 16
|
not bad for what you have to work with good job
|
|
| |
|
02-07-2008, 10:28 PM
| #9 |
| Pebble Pounder Join Date: Oct 2007 Location: South Africa
Posts: 115
|
thanx man update: getting rod today or tomorrow and will finally finish 4links. also found a new awesome product called easyweld which is a aluminium weld using only a propane torch!!!!! to weld metals together!!!! i will more than likely be using this to attach my dogbones to the aluminium piping im gonna use to make the custom length dogbones. will let you all know how it goes. other wise if that doesnt work, i have a friend who drill out some metal rod and fit and weld the dogbones into that. |
|
| |
|
02-07-2008, 10:45 PM
| #10 |
| Rock Crawler Join Date: Feb 2007 Location: weather sucks ,mn
Posts: 680
|
why is shipping so freaking high to you im taking collections from friends to send the tracer your way man i just hate to see a guy that wants to be in a hobby and no means to do so ....so pm me your whole address and we get it done will work it out and i'll include a 65 turn lathe motor also
|
|
| |
|
02-08-2008, 12:25 AM
| #11 |
| Pebble Pounder Join Date: Oct 2007 Location: South Africa
Posts: 115
|
thanx man i really appreciate it. just PM'd you, just tell me what I need to pay. its just so much fun building this thing, and i really wanna climb my first rock!!! |
|
| |
|
02-08-2008, 01:38 AM
| #12 |
| Quarry Creeper Join Date: May 2007 Location: Montucky
Posts: 254
|
Building is the funnest part
|
|
| |
|
02-08-2008, 01:50 AM
| #13 |
| Pebble Pounder Join Date: Oct 2007 Location: South Africa
Posts: 115
|
yeah, but i really wanna reap the rewards of my loin.... (?) and CRAWL up something not flat and not my dining table. btw, this car has never driven.... so my back end is itching to drive it. btw who can tell me a cheap awy of making it four wheel steer, keep in mind i havnt got a 3ch radio... |
|
| |
|
02-08-2008, 03:29 AM
| #14 | |
| Quarry Creeper Join Date: Oct 2007 Location: Pennsyltucky
Posts: 265
| Quote:
| |
|
| |
|
02-08-2008, 04:24 AM
| #15 |
| Pebble Pounder Join Date: Oct 2007 Location: South Africa
Posts: 115
|
easyweld does, believe it or not. check their website for details, + one of the guys at work has used it before for that purpose. by the way what is a real cheap way of getting dual servo steering? without a 3rd channel radio UPDATE: BAD BLOW!!! rod not instock so ill go hunting tomorow at the other LHS's in my area. |
|
| |
|
02-08-2008, 06:26 PM
| #16 |
| Rock Crawler   Join Date: Feb 2006 Location: sunny acres
Posts: 621
|
I guess you could splice 2 servos onto one channel but your rear steer would not be independent.
|
|
| |
|
02-10-2008, 10:37 PM
| #17 |
| Pebble Pounder Join Date: Oct 2007 Location: South Africa
Posts: 115
|
will that be a bad thing redrustbucket? because from what I can see the steering is bad on the tlt without 4 wheel steering. Anyone know of a tutorial on adding the other servo? Update: Realized this weekend that the bottom links are too long so will have to shorten them tonight by 3-4mm. Tried to make the dogbones this weekend, but didnt get it right.... and no its not the products (easyweld) fault, its me for not really being a good DIY guy. I will now give the task of the dogbones to a work collegue who can do it. I already designed some stuff for him, so he owes me Will also have to rebuild the gearbox tonight, i realized that i forgot the thrustbearing.... its lying in my one little toolbox. (oopS :0) pics of what ive done... easyweld product: 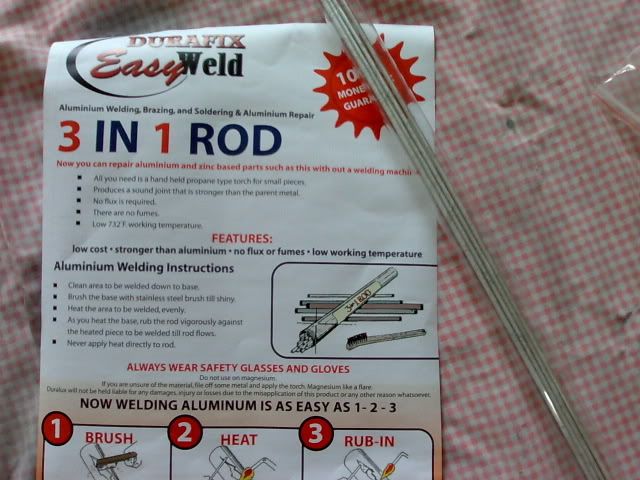 safety first: (not alot of money spent) 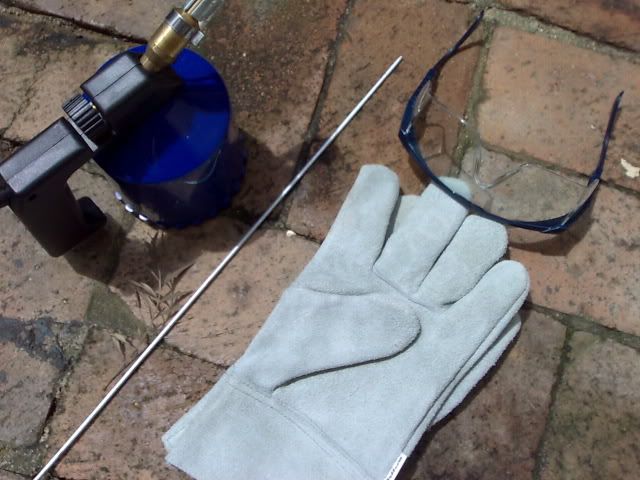 halved dogbones cut with dremel: 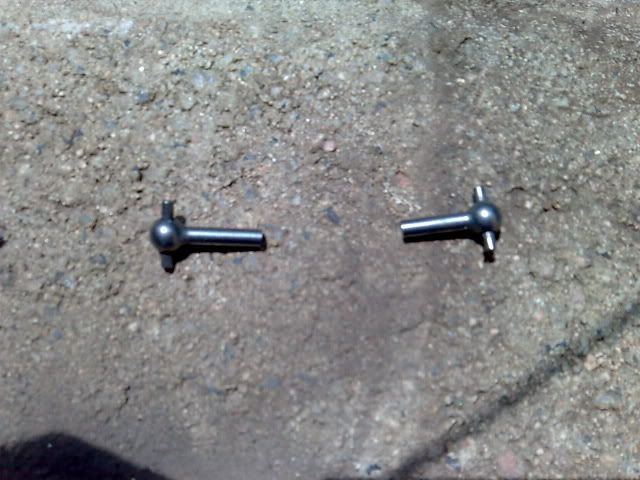 |
|
| |
|
02-10-2008, 10:59 PM
| #18 |
| Rock Stacker Join Date: Jul 2006 Location: all over
Posts: 66
|
Your doing some awesome work!! keep it up.
|
|
| |
|
02-11-2008, 12:34 AM
| #19 |
| Pebble Pounder Join Date: Oct 2007 Location: South Africa
Posts: 115
|
thanks for the support, really is appreciated. this is going to be one kick-arse crawler when im done.! |
|
| |
|
02-12-2008, 11:02 AM
| #20 | |
| Quarry Creeper Join Date: Apr 2006 Location: Pittsburgh
Posts: 412
| Quote:
http://www3.towerhobbies.com/cgi-bin...?&I=LX0954&P=7 | |
|
| |
 |
| Thread Tools | |
| Display Modes | |
| |


 Linear Mode


