| |
| |||||||
 |
| | LinkBack | Thread Tools | Display Modes |
 08-25-2006, 09:15 PM
| #41 |
| Newbie Join Date: Feb 2006 Location: clemmons
Posts: 7
|
damn that looks cool as hell...........as for a name.....ummm orange crush? that was the name of an orange soda we used to have back home in hawaii
|

|  |
| Sponsored Links | |
| | |
|
08-26-2006, 07:07 PM
| #42 | |
| I wanna be Dave Join Date: Dec 2005 Location: between heaven and hell.
Posts: 3,367
| Quote:
It has a name.... General Crawler. I do like orange crush though. I've been a Denver Broncos fan forever, but it's no longer mine and the new owner has named it. | |
|
| |
|
08-28-2006, 08:55 AM
| #43 |
| I wanna be Dave Join Date: Dec 2005 Location: between heaven and hell.
Posts: 3,367
|
Updated photos... It's now a full roller and I just need to add the electronics. Narrowed the front rims to 1 3/8" I'm not sure if I'm doing the backs or not. I'll see how it performs and go from there. On to the pics. this has one associates axle stub and the other side has the stock.  Rear 4 link is done 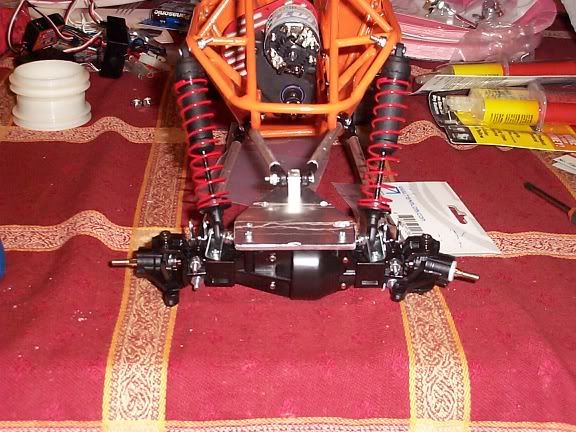 Side shot with the 4 links done 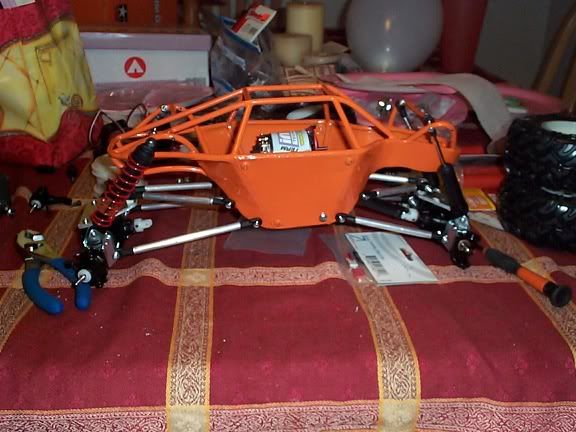 Top Shot 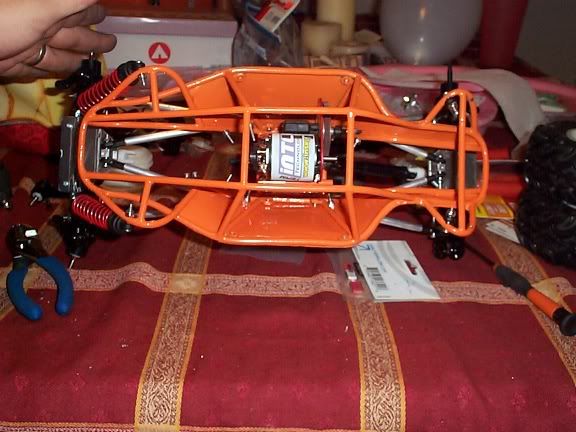 Front axle with the associated 3/16 axle stub.  rims narrow with the unnarrowed.  tires on. 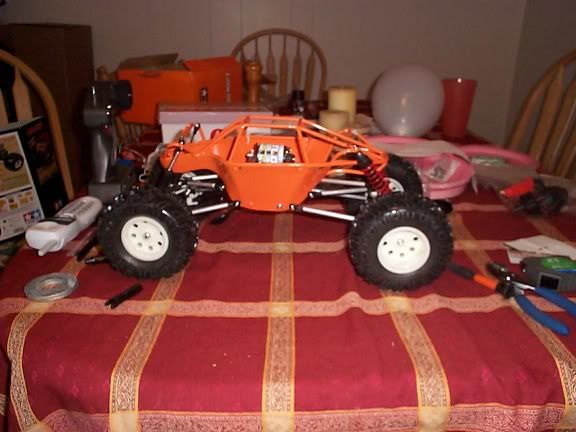 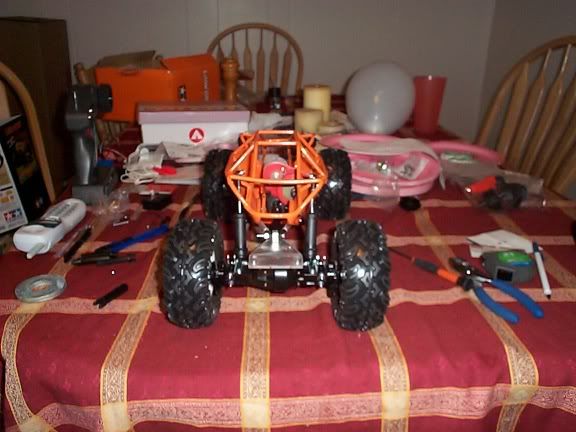 Articulation shot 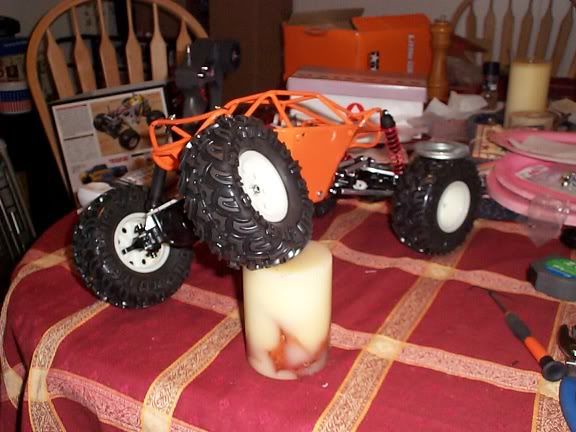 Side shot 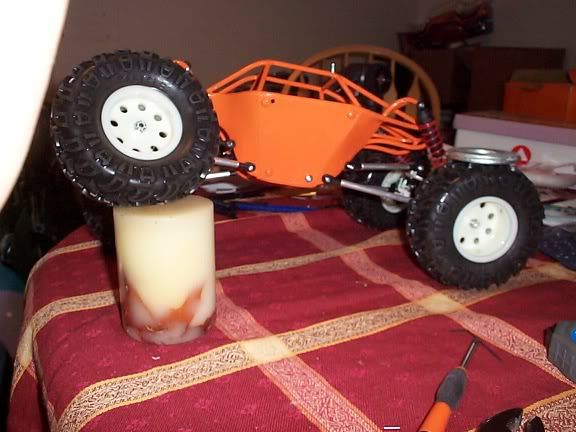 Top 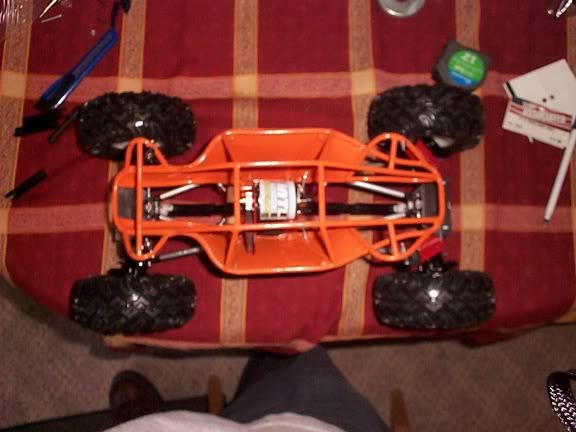 Bottom 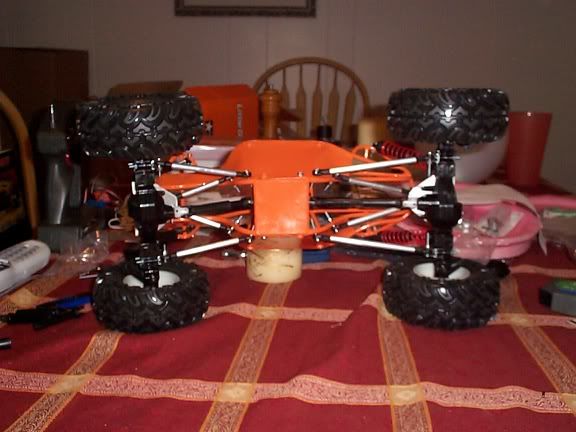 |
|
| |
|
08-28-2006, 09:27 AM
| #44 |
| RCC Addict Join Date: Sep 2005 Location: ...Here & There
Posts: 1,590
|  |
|
| |
|
08-28-2006, 09:32 AM
| #45 |
| Newbie Join Date: May 2005 Location: Sicamous BC
Posts: 41
|
Looks great! I'm looking at all the builds and getting anxious to do mine! Just need the slow a** postal service to get me my axles!
|
|
| |
|
08-28-2006, 09:37 AM
| #46 |
| I wanna be Dave Join Date: Sep 2005 Location: USA
Posts: 11,196
|
Looks real good. Great job. How much does it weigh now?
|
|
| |
|
08-28-2006, 09:42 AM
| #47 |
| I wanna be Dave Join Date: Dec 2005 Location: between heaven and hell.
Posts: 3,367
|
Not sure, but I'm adding 1" washers to make rock rings out of for added wheight to the wheels. If I had to guess I'd say around a pound or two at the most. It really isn't that heavy at the moment. I'll weigh it when I go home for lunch. I was hoping to have it running today but have some electical or transmitter problems. So I'm going to address those today. |
|
| |
|
08-28-2006, 11:19 AM
| #48 |
| Quarry Creeper Join Date: Aug 2006 Location: Spring,TX
Posts: 206
| !!!SWEET!!! |
|
| |
|
08-28-2006, 04:02 PM
| #49 |
| I wanna be Dave Join Date: Dec 2005 Location: between heaven and hell.
Posts: 3,367
|
Made a rock ring at lunch but forgot to take a pic. I'll update you all tomorrow. I'm going to set this up with rings in front and back of the rim. Not a "real" functioning bead lock but looks sweet and adds weight without useing BB's. I'll weigh one tire compaired to the other give you all the info.
|
|
| |
|
08-28-2006, 04:46 PM
| #50 |
| I wanna be Dave Join Date: Dec 2005 Location: Orlando
Posts: 7,420
|
I like how you trimmed the foams.Nice work on the chassis.
|
|
| |
|
08-28-2006, 05:13 PM
| #51 | |
| I wanna be Dave Join Date: Aug 2005 Location: G6'N
Posts: 7,391
| Quote:
second that! | |
|
| |
|
08-28-2006, 07:46 PM
| #52 |
| I wanna be Dave Join Date: Dec 2005 Location: between heaven and hell.
Posts: 3,367
|
Thanks.. For a bit of a lighter rig I would have put "pivot" points under the pad area on the foams as it allows for movement inside the tires. You can see the test ones I did for Microgoat in the wheels and tires section on how to cut foams. |
|
| |
|
08-29-2006, 08:49 AM
| #53 |
| I wanna be Dave Join Date: Dec 2005 Location: between heaven and hell.
Posts: 3,367
|
Pics of the rings. It looks like I wont be able to put them on the inside because the nuts hit the axle where the knuckle bolts on. Still looks good and when powder coated orange.... just sweet. The 1" washer weights about 2.75 ounces. that will give a total of 5.5 ounces added weight to the wheels. Sounds about right. Pics 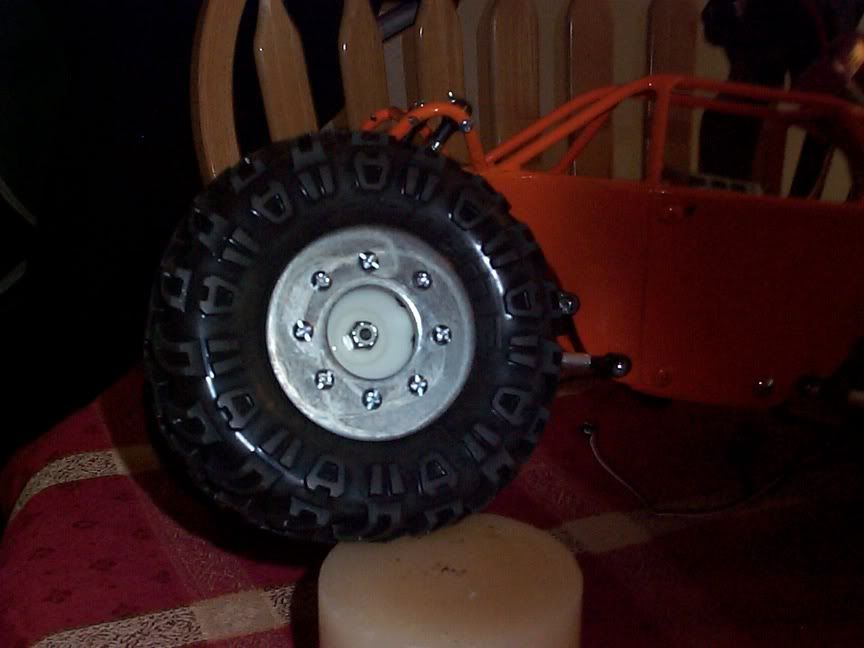 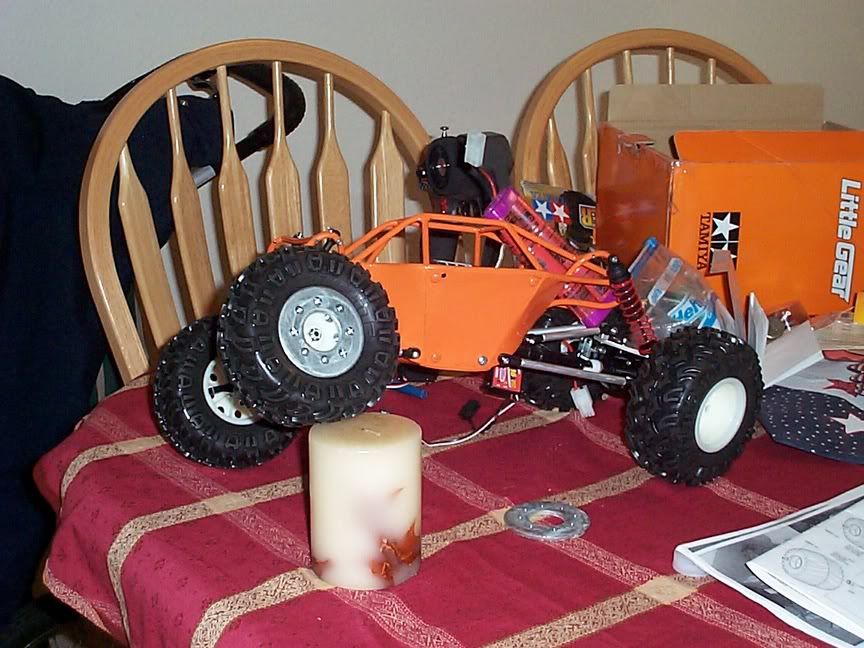 |
|
| |
|
08-29-2006, 12:02 PM
| #54 |
| Quarry Creeper Join Date: Aug 2006 Location: Spring,TX
Posts: 206
|
the rock rings look great
|
|
| |
|
08-29-2006, 02:56 PM
| #55 |
| Quarry Creeper Join Date: Aug 2006 Location: Spring,TX
Posts: 206
|  what about this sticker on the side of it what about this sticker on the side of it
Last edited by RustyCrawler; 08-29-2006 at 03:01 PM. |
|
| |
|
08-29-2006, 03:16 PM
| #56 |
| I wanna be Dave Join Date: Dec 2005 Location: between heaven and hell.
Posts: 3,367
|
Put the 01 behind the skull but in front of the flag. see what everyone else thinks. |
|
| |
|
09-04-2006, 04:13 PM
| #57 |
| I wanna be Dave Join Date: Dec 2005 Location: between heaven and hell.
Posts: 3,367
|
UPDATE:: I finally got all of my electronic problems fixed and this baby is a runner. Still need to glue the tires to the rims cause just driving it around the house the tires come off the rims. But it drove up the wall just fine. I'll be getting the pics on the computer tomorrow and give you all a visual update as well. I have the TQ3 modded for independent rear steer with a part from radio shack that gives me proportional rear steer and used a 24T spur for the steering wheel. Only one problem is you have to find the center spot but just driving it around will get you use to it. I'll give the parts in the Electronics section. The electronics only took me 3 tq3's, 2 mopeds and 2 new batteries. Just to find out all the original stuff worked so I have extra (woo hoo for more builds). I read enough info on the internet and here to know a bunch more about the electronics, so I wont feel so retarded (de da dee) next go around. Now I just need to find a good place for the batteries. Get the wires cleaned up and take some more pictures. |
|
| |
|
09-05-2006, 08:38 AM
| #58 |
| I wanna be Dave Join Date: Dec 2005 Location: between heaven and hell.
Posts: 3,367
| Here are the pics I promissed. Let me know what you think. Painted the word "GENERAL" on 3/16 tube. Yeah difficult. 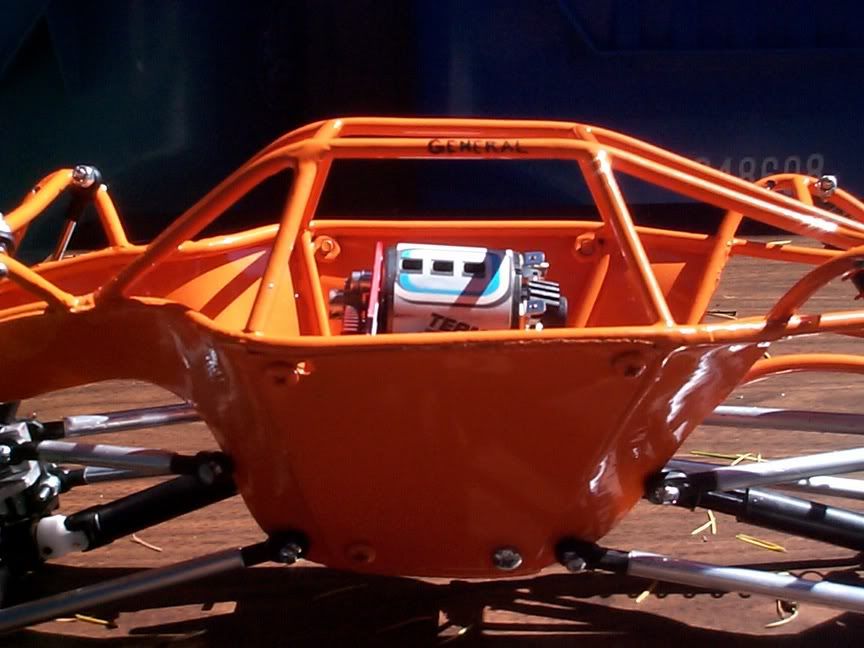 On the front of the rig as well. 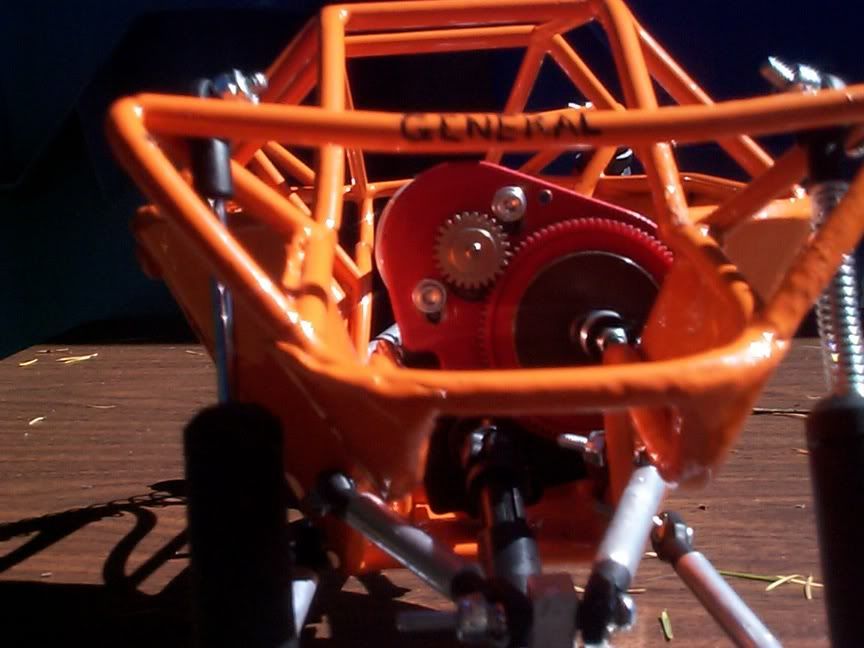 GOTTA REPRESENT!! 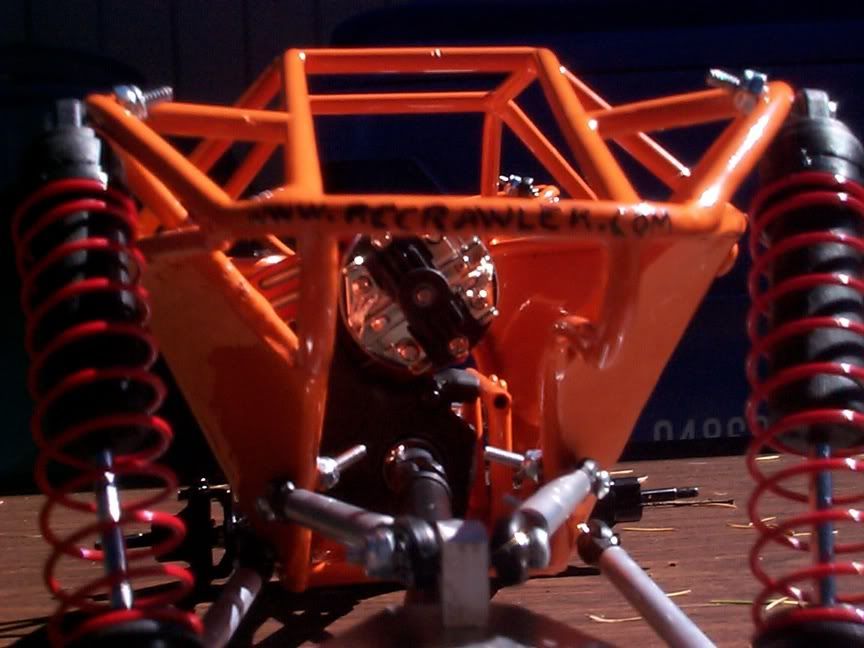 The all important POSER shot in the back yard. At this point I didn't have any electronics in it. 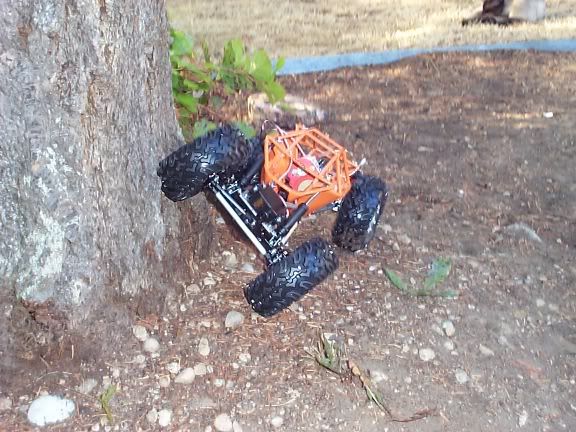 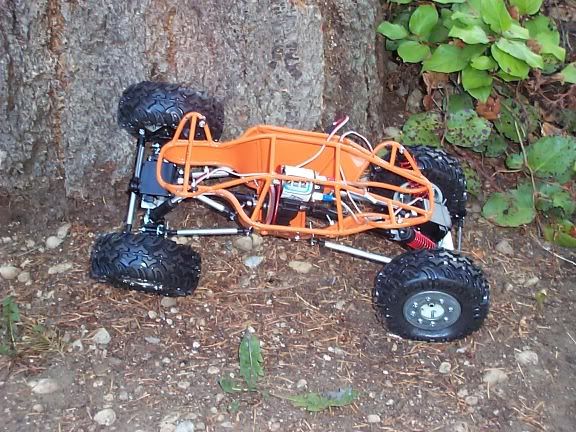 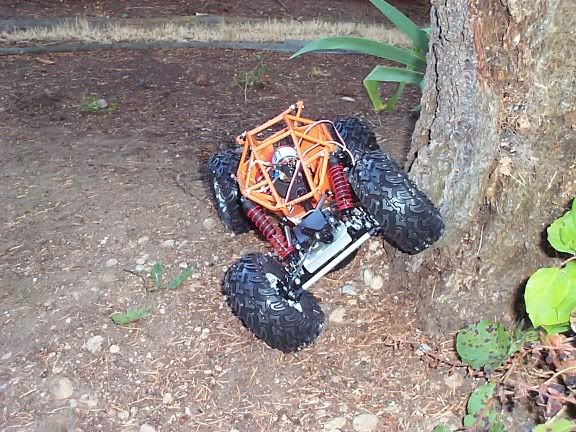 |
|
| |
|
09-05-2006, 08:44 AM
| #59 |
| I wanna be Dave  Join Date: May 2006 Location: HONDURAS...ROCK HEAVEN
Posts: 5,076
|
very nice, like the color very much, are you going to paint the rings?
|
|
| |
|
09-05-2006, 08:47 AM
| #60 |
| I wanna be Dave Join Date: Dec 2005 Location: between heaven and hell.
Posts: 3,367
|
This is what it looked like trying to fit the electronics in it. And getting it to run correctly. 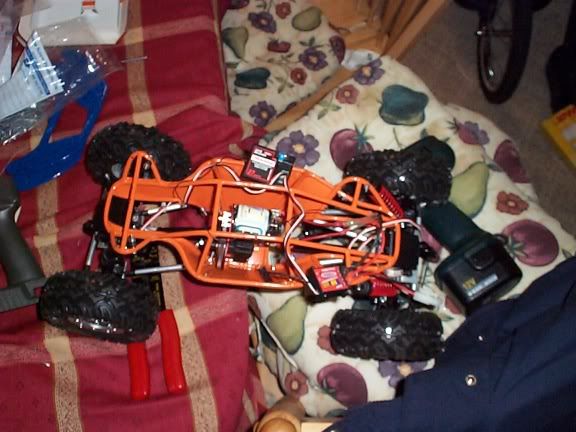 NOw that I know the TQ3 works. I need to make it rear steer.  Part I found that works at Radio Shack. 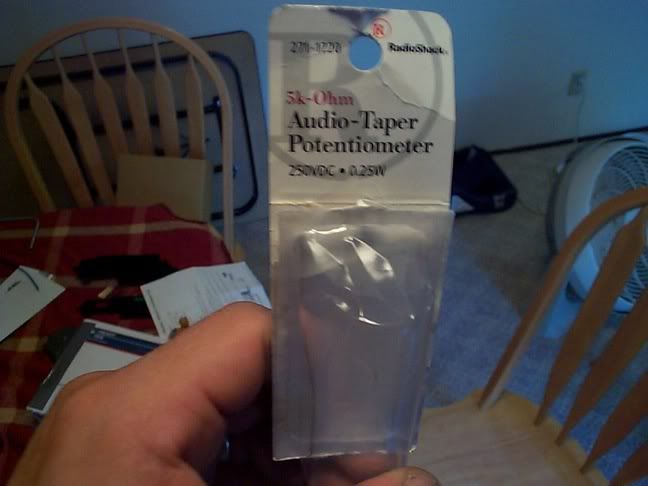 Adding my own touch to the rear steer mechanism. I was going to swap it out with something else but I like the end look so it's staying. 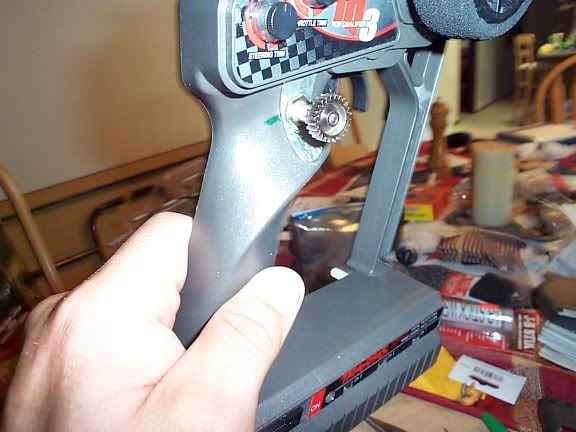 It drives. 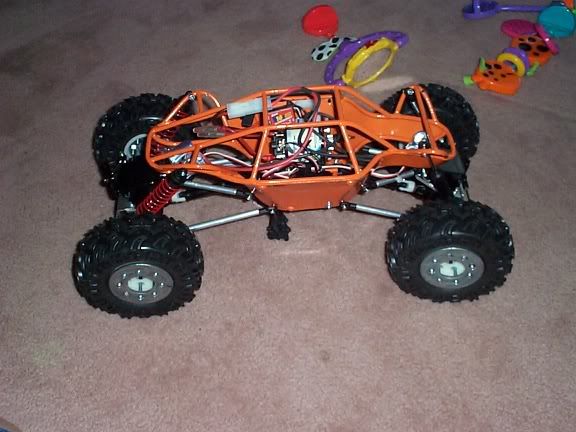 woooooohooooo 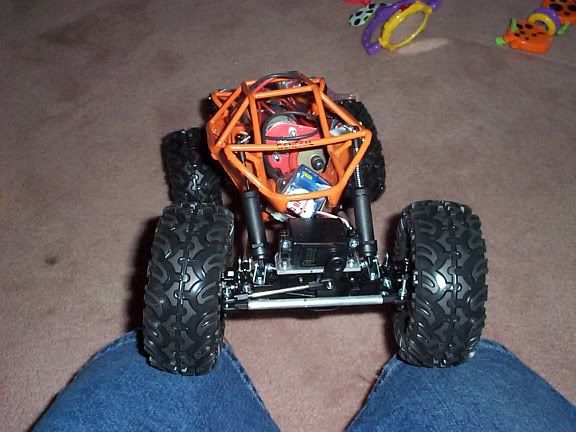 I actually drove it up the couch. Here it was teetering but didn't tip. backed up it. 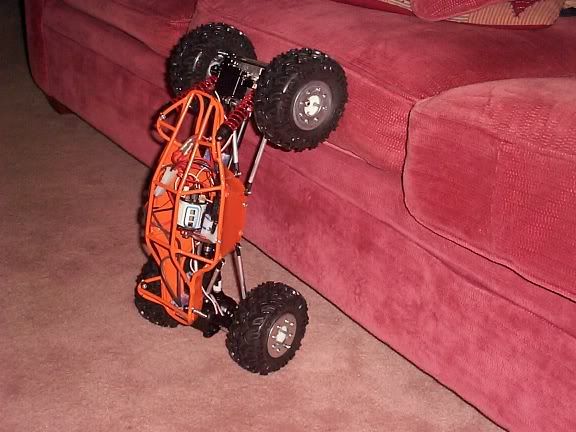 and forward. 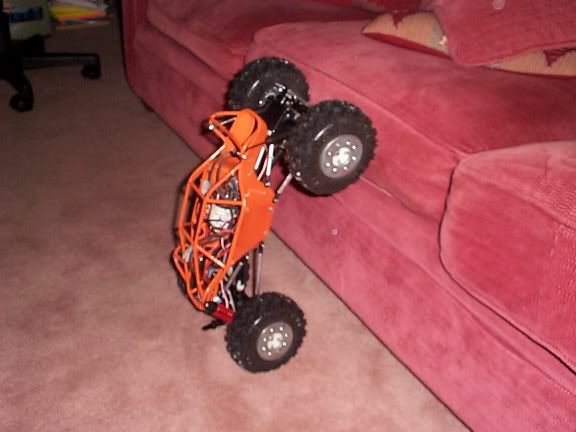 That it for now. Today I go and try it on the rocks at 4 Season RC. They have added a bunch of concrete rocks to climb on.   I'll give you alll updates later. |
|
| |
|
| |


 Linear Mode


