| |
 05-25-2005, 03:54 PM
| #21 |
| Rock Crawler Join Date: May 2005 Location: omaha
Posts: 858
|
for my tlt I had to have a 11 3/4" wb for the bronco body to line up  The jeep body is the same as far as wb |

|  |
| Sponsored Links | |
| | |
|
05-25-2005, 05:50 PM
| #22 |
| Im Brandon  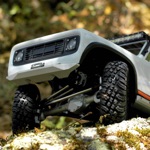 Join Date: Feb 2005 Location: Colfax, CA
Posts: 8,156
|
Wow that bronco body is shorter! Im at 12" with a rock pleazer and its still too short |
|
| |
|
05-26-2005, 03:32 PM
| #23 |
| Quarry Creeper Join Date: May 2005 Location: Auburn
Posts: 360
|
OK stuff arrived yesterday, -_-; tower waits till I make my order then adds this 199$+ 25$ off coupon!! gahh 1 I think these sliders I got are WAY too short. Hell I couldnt strech it with stock tranny cause the dogbones I had laying around are um way too short lol SO here we go Some piccies of a slightly ajusted tlt. I do need to figure out how to widen it either by those adapters or some other goofy way. I definetly think a set of axels off another tamiya chassis to extend the threads to fit the hpi rims, I knew this would be a issue just went for it anyhoo >_< Images Set up on the rear makes for some serious articulation, much more than the front. So, I will be attempting to ajust this today. As well As getting off my ass and designing my chassis. cause I want it streched NOW   BTW bigger pics will be up on my website later. |
|
| |
|
05-28-2005, 12:31 AM
| #24 |
| Quarry Creeper Join Date: May 2005 Location: Auburn
Posts: 360
|
Oh no comments, I bet I dissapointed may of you :-P I was myself couldnt extend here in the stage process, no dogbones even the lhs was useless in providing. Got a set of tg10 drive cups but rest are on order, everyone else is out too seems like the tg10 parts are being phased out since the mk2 has released. ANYHOO here are some templates to test shape and that sorta thing. I wanted to do something diffrent um, well heh I got lazy and did the bulu clone look. I might rearange things as I go since I think I will do this in illustrator. Then print it out and glue to the Ti I got laying around. I hope its thick enough about as thick as the stock chassis. I hope I am allowing for decent height and stuff. heh. I do plan on cutting out some design in the solid areas maybe to lighten it up or make it look better but formost is function, to hell with looks. Though it wont be ugly hacksaw marks all over, I hope ;p Im planning on applying this and maybe getting the rough cuts made tomorrow. In alu or kydex ( well I think its kydex) Thats if I can find the stuff!! heh here are the piccies let me know if Im forgetting stuff. or leaving stuff out. Im hoping to cram either the esc or the RX inside the chassis batteries sideways in the nose and esc or RX on a platform on top. I am going for a central weight biais. From my onroad exp central weight is better than wide low weight.     maybe Ill try ome other shapes tonight . . . . . .oops lol I kinda bent up the template for the last pic |
|
| |
|
05-28-2005, 04:13 AM
| #25 |
| Quarry Creeper Join Date: May 2005 Location: Auburn
Posts: 360
|
OK, I couldnt find my stupid kydex. . . . its somewhere waiting to be used. However I found a sheet of plexi/lexan, not sure which. Smelled like lexan on the drill but cut like plexi so who knows , and well who cares its allowing me to do what I want before I take to the ti. Not sure yet if I want to ajust the shape any. Obviously it has to be something simple IE I can duplicate it on both sides. Basicly Ill glue the 2 pieces together then cut grind and shape. Anyhoo idea is Ill finish the pede mounts for the chassis. I cant decide if I want to use a adapter to the pede then to the chassis. My particular case has a slight warp so I am tempted to mount a piece of alum to it to close up the back side then mount it to the chassis. It will widen the chassis, unfortunetly. Or I could rely on the chassis to pull those parts together ( the stress point bothers me) Either way I think the flanges for the suspention arms on the pede have to be lobbed off in order to clear the lower links. Anyhoo pics tell all so on with the pic  |
|
| |
|
05-28-2005, 04:51 PM
| #26 |
| Quarry Creeper Join Date: May 2005 Location: Auburn
Posts: 360
|
Ok It was late when I made that other not thinging about the shock length of 4" I needed to extend the top more than I had in that last example. SO, I recut a new dummy chassis.this one though is a bit too wide. I think Ill shorten it by .5 in to a inch. The articulation shot is a bit bogus since I have no second links yet. Ride height bothers me some. Just using those tmaxx links so things arnt exact but its a start. I should have this nailed by the end of the week I think. I really should measure everything then get to it on the pc but heh things like the openings for the pede are guesses and can only be done in the psycial enviroment. Well can be done faster. . . . lol Question is I have a rubicon body should I try to center the wheeles between its wheelbase?? Or just go nuts and make it as long as I can? Right now it sits at about 13" so if I shorten the chassis by a inch ill be right back in the rubicons wheelbase which is about 11.5 to 12" Any comments or suggestions?? Are there any things I should know about the links or some thing?? heh just going by the seat of my pants. Hope they dont fall off ;p   |
|
| |
|
05-28-2005, 04:54 PM
| #27 |
| Quarry Creeper Join Date: Jan 2005 Location: Crafty mexicans and your glass candy...
Posts: 216
|
shocks look a little low to me and way to much flex but other than that good job |
|
| |
|
05-28-2005, 05:04 PM
| #28 |
| Quarry Creeper Join Date: May 2005 Location: Auburn
Posts: 360
|
lol yeah the plexi is krap but its just for mock up not to mention I have no cross pins just screws and bolts spacing it apart XD Shocks will stand up more as I bring in the lower links. I plan on doing the final chassis in Titanium. I have some pieces laying around. |
|
| |
|
05-28-2005, 06:04 PM
| #29 |
| Quarry Creeper Join Date: May 2005 Location: Auburn
Posts: 360
|
Ok more pics Body for scale refrence. I shortened the lower links and I think that has it. So I will definetly shorten the chassis by about .75" maybe a full inch. I just nee to cut up and fab the above servo mounts for the upper links. And then fab a no rear steer mount as well, I want to have rear steer for fooling around and remove it for comp. Oh yes shocks will be swapped for losi 4" units yanked from my poor stadium truck. I havent found a 4 set only of maxx shocks so heh till someone wants to do halfs on a set itll be these or something else. I looked at the tmaxx at the lhs and the losi shocks are the same length or close to.   |
|
| |
|
05-28-2005, 08:05 PM
| #30 |
| Quarry Creeper Join Date: Jan 2005 Location: Crafty mexicans and your glass candy...
Posts: 216
|
lookin good
|
|
| |
|
05-30-2005, 01:10 AM
| #31 |
| Quarry Creeper Join Date: May 2005 Location: Auburn
Posts: 360
|
Ok todays update I got her all together. Im still so so about the mounts for the upper links I think I might have something set funky. It crawls pretty good even with the motor wired backwards lol the red dot on the old motor isnt positive ;p I managed to get it up the rock planting out my front yard. Something the stock truck could only dream of. Ill snap up pics of it on the rocks tomorrow. SO< now to clean the chassis up decide how to mount the electronics and battery within the geometery of the suspention then transfer that pattern to the Ti or alu, I have yet to decide which I will go with. Any comments tips or corrections to anything are welcome. Or if I missed some info ask away. PS the tyres are krap but they are the only thing I have thats glued right now!! Oh yeah the motor is a old ass stocker I had laying around, trucks super slow lol.   is this enough articulation?? Springs seem a bit stiff at times but it does articulate alot when it finds rocks or bumpy stuff. (bricks stairs people small mammals) neonyellows losi springs |
|
| |
|
05-30-2005, 06:09 AM
| #32 |
| Quarry Creeper Join Date: Feb 2005 Location: Indy-Westside
Posts: 306
|
I think thats plenty of articulation!!!! Looking GOOD!!!! |
|
| |
|
05-31-2005, 01:40 AM
| #33 |
| Quarry Creeper Join Date: May 2005 Location: Auburn
Posts: 360
|
damned escape btn wiped my entire post OK first the bloody questions. 1: I need to know about what hell sliders everyone uses!!! I can only manage 11.5" anything longer the shafts arnt long enough!! I have a set of maxx sliders issue is those are HUGE in all fittings. IE the pede outshafts wont connect to the tmaxx bits. I have seen a few people run maxx sliders but how the hell do you get them connected to the outputs??? the pede output area is way too small for the tmaxx yokes. Is there a longer slider set in pede dimentions??? I would really like to have this thing about 12 to 12.5" Not to mention my shafts look nothing like other peoples. Only other way I can think of is to use 2 slider kits and glue em up to make one unit. 2: links, Im not sure about my links a careful eye can see how many holes I dug out in the prototype chassi as I changed my mind on where the uppers are in relation to the lower links. I seen some mount the uppers to the same plase as the lowers on the chassis or right above and others offset. Which is best?? I am also reconsidering how wide the chassis will be in its final version. Right now the pede is sandwiched between the plates. Im thinking of widening it to allow the battery to sit between the chassis. I originaly planned to put the battery in sideways but with the cross links and other things that looks screwed. Any opinions on this?? I know allowing a wider chassis will allow me to get that battery in much lower. and possibly get some more of the gear inside the chassis instead of ontop. (upper links get in the way alot too lol )   Pic of current articulation with relocated and redone link set ups. I think Ill need to fab some shock links I want front and rear exact in layout but right now I am using one of the link stays as a upper mount above the shock :p  |
|
| |
|
06-03-2005, 01:14 AM
| #34 |
| Quarry Creeper Join Date: May 2005 Location: Auburn
Posts: 360
|
Chassis cut and groundready for drilling and detail cuts. What Im stuck at is finish I dont think you can polish titanium like you do aluminum. So either a sanded finish or paint I suppose. Might hog out some holes inside unused areas of the frame. Prolly go lazy and do round holes lol. Wonder if my mill ends can take this material on without grabbing? who knows ;p  |
|
| |
|
06-03-2005, 02:34 AM
| #35 |
| Quarry Creeper Join Date: May 2005 Location: Auburn
Posts: 360
|
Ok here are a few pics of the chassis drilled for common holes. and mounted up for tests. Well to make sure I didnt screw up somewhere lol. Please ignore the angled axels since the upper links got relocated much closer to the lower links. So, they need to be changed out. More drilling and taping of krappy alu rod Enjoy C&C welcome tips as well!!!    |
|
| |
|
06-03-2005, 01:08 PM
| #36 |
| Quarry Creeper Join Date: May 2005 Location: Auburn
Posts: 360
|
~_~ wel the titanium was "laying" around. Reason I had it is i went to boeing surplus in the hunt for aircraft grade alum t6 or higher but only found thin ass .5mm to 1mm stuff for skinning. The had these bins full of ti and I think it was a flat rate by weight for everything that were in the bins. IE 1.10$ a lb so maybe I have 2 $ worth of metal on this project? The plexi/lexan was a prototype chassis only 2.5 to 3mm in thickness. I snapped it in half doing some tests wit the thing going over a planter in the house!! So plexi isnt all that cool. . .. lol I knew it wouldnt hold up youd need to run true lexan and have it be a minimum of 5 to 6 mm in thickness as well as brace the hell outta it. Not to mention it should be milled cause any minute tiny flaw in the outter finish will develop into a crack. Once that happens its toast. Lexan or plexi if your gonna use it make sure there are no squared corners!!! use a oh 1/4in bit or larger to do the corners then cut to them, more curved the inside corners the safer you'll be from stress fractures! And yes, I cut it with a coping saw! lots of up and down!! Now for something i dicovered in my lik set ups. NOW this may change in opinion when I do the correcetd width but it seems the left set up results in a more articulated set up. The right pic seems to stiffen in lateral movement and bind. just a observation.  |
|
| |
|
06-04-2005, 11:31 PM
| #37 |
| Quarry Creeper Join Date: May 2005 Location: Auburn
Posts: 360
|
Ok damned near complete here. I just gotta do finishing details on the chassis and maybe redo my upper links. I am thinking hollow tubes for uppers just tap the buggers out for rod since itll help in the weight department. Right now all links are solid alu with stainless threaded hardware. I plan on replacing the tamiya links with dubros or something with a little more articulation. The stock link ends are a bit limited in range of movement. I was well need to think about hogging out the unused parts of the chassis too. Mostly for the looks department there. Just a real pain since id have to hand file those for finish. First pics are of the chassis and pede tranny. This dipicts the mounting arangement. NO the tranny mounts arnt titanium. . . :p its plain old 6061 alu. heh I much prefer titanium heh doesnt burn you while you grind!! Alu will roast you if you dont take breaks or cool it with water. Anyhoo the mounting like this is to create room for the battery mounting. And as well to center the driveshafts. Im off maybe a few milimeters. I got the electrics in this and it crawls pretty good cept the unglued tyres. . . lol gets flats So now All I need to do is work on the body mounts and body. I have a few ideas beyond the plain rubicon. But Ill see how they work out. I think Ill have a "basher" bod and a shelf bod. ( or a looking good for photo ops bod) anyhoo enjoy comments crits welcomed OK I forgot to address a comment earlier. The hard anodising, well , um , heh it would cost way too much. I think it would cost more than the entire project did. So itll be either hand polish, satin ( 600grit wetsanding) or paint. on with the pics!     Last edited by Madkoifish; 06-04-2005 at 11:35 PM. |
|
| |
|
06-05-2005, 08:07 AM
| #38 |
| RCC Addict Join Date: Apr 2005 Location: Eden Prairie, MN
Posts: 1,202
| Lookin' good... Keeps getting better as the thread goes on! |
|
| |
|
06-05-2005, 06:08 PM
| #39 |
| Quarry Creeper Join Date: May 2005 Location: Auburn
Posts: 360
|
Ok here a short viddy of it going through the rock retainer of my maple then running over my flowers. . . douh anyhoo heh its a ugly digicam recording since I woud have to muck with the capture card and drivers on the other pc to cap better quality. Please excuse the driving I was filming and driving with one hand hence the running over of my cosmos and poppys. The video is compressed in wmv9 so if you have the latest WMP it should run. Audio I havent a clue the bitrate or sampling rate is wonk from the camera so I just used some microsoft garbage thing. I think its a stock codec. Either way sounds useless right? cause its just the rain pouring down and crows screaming thier stupid heads off. Oh ys the body is some old ass dhams body I had for my ancient LXT its dated 8 31 93 Enjoy, Ill try to get better stuff later. Gonna "convince" someone to hold the cam next time. And yes Ill try to use a more "normal" codec set as well. :-P http://Madkoifish.rr.nu/Through-the-plants.avi   hrmm I think I might need to clean up those clippings :? Last edited by Madkoifish; 06-05-2005 at 06:46 PM. |
|
| |
|
06-07-2005, 03:49 AM
| #40 |
| Quarry Creeper Join Date: May 2005 Location: Auburn
Posts: 360
|
Here is a body off pic. Too busy playing with it right now to do some of the smaller things that are next on the to do list!! :-P  I think I will do a brushed look finish. Or a satin look. shrug or leave it. heh I seriously need a new servo and charger. Hope I can sell off this rs4 Nitro mini. Last edited by Madkoifish; 06-07-2005 at 03:53 AM. |
|
| |
 |
| |


 Linear Mode


