| |
| |||||||
 |
| | LinkBack | Thread Tools | Display Modes |
 04-22-2009, 06:14 PM
| #41 |
| RCC Addict Join Date: Jul 2006 Location: Johnston SC
Posts: 1,562
|
whoa pablo nice job. looks awsome. lot of work going into this puppy.  |

|  |
| Sponsored Links | |
| | |
|
04-22-2009, 08:45 PM
| #42 |
| Newbie Join Date: Jun 2007 Location: Philly
Posts: 24
|
one of the best custom cc-01 bodies out there |
|
| |
|
04-22-2009, 08:47 PM
| #43 |
| Pebble Pounder Join Date: Jan 2005 Location: Minot
Posts: 162
|
The thought crossed my mine when i built the crewmax. Looking good pantablo nice work. |
|
| |
|
04-22-2009, 09:11 PM
| #44 |
| I wanna be Dave Join Date: Aug 2007 Location: santa monica
Posts: 3,687
|
thanks guys. No update yet as I ran out of .080 and .040 styrene, lol... |
|
| |
|
04-23-2009, 07:20 AM
| #45 | |
| Rock Crawler Join Date: Jan 2007 Location: Tuscaloosa
Posts: 855
| Quote:
| |
|
| |
|
04-27-2009, 12:55 PM
| #46 |
| I wanna be Dave Join Date: Aug 2007 Location: santa monica
Posts: 3,687
|
roughing stuff out. 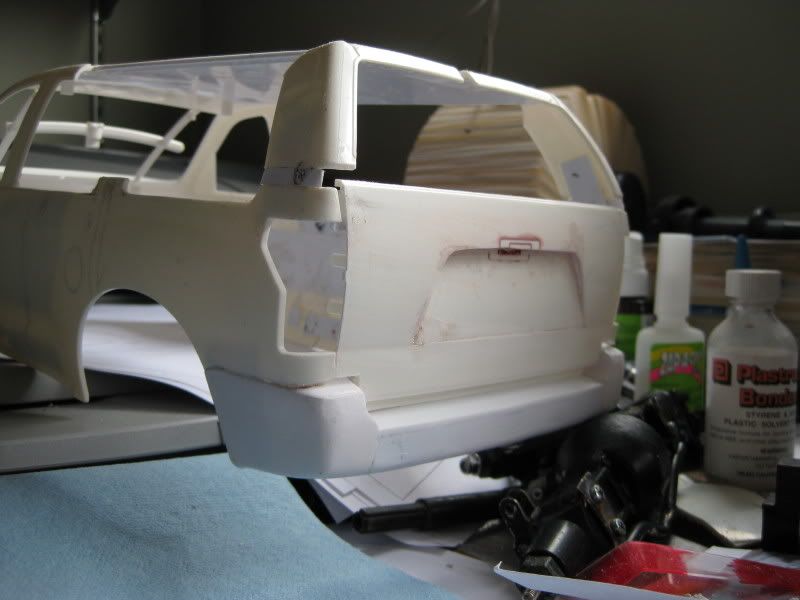 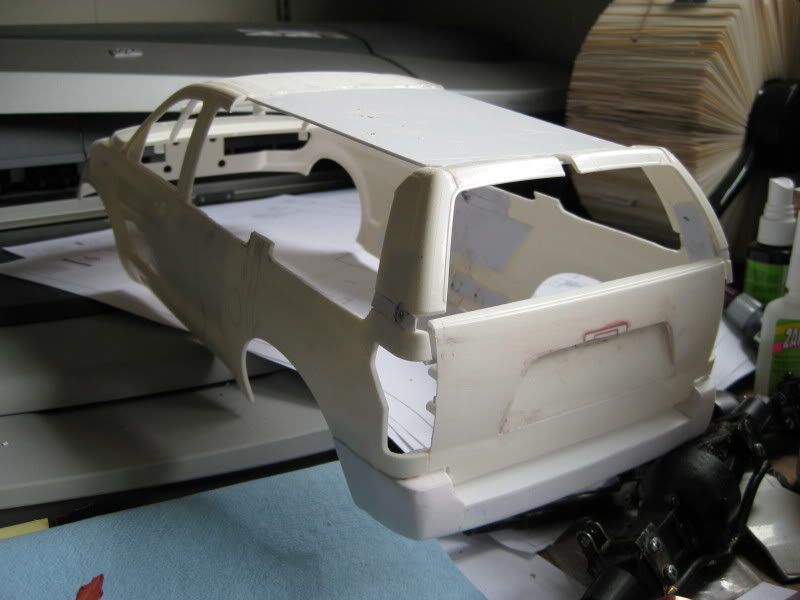 |
|
| |
|
04-27-2009, 01:14 PM
| #47 |
| RCC Addict Join Date: Jun 2008 Location: Monroe, NC
Posts: 1,547
|
You are the man at 4-door bodies Pablo. Keep it up.
|
|
| |
|
04-27-2009, 01:34 PM
| #48 |
| Rock Crawler Join Date: Jan 2007 Location: Tuscaloosa
Posts: 855
|
Slowly but surely ......... she's getting there. Its gonna look good.
|
|
| |
|
04-27-2009, 02:07 PM
| #49 |
| I wanna be Dave Join Date: Aug 2007 Location: santa monica
Posts: 3,687
|
slowly for sure, lol...I have too many things going on right now, in and out of RC. shortly I'll start a JK build for a friend and I need to continue dedicating some time to the charity montero build. I'm -><- this close to getting that running. once running I can shoot a video and start selling tickets. |
|
| |
|
04-28-2009, 01:21 AM
| #50 |
| I wanna be Dave Join Date: Aug 2007 Location: santa monica
Posts: 3,687
|
its starting to look like something... 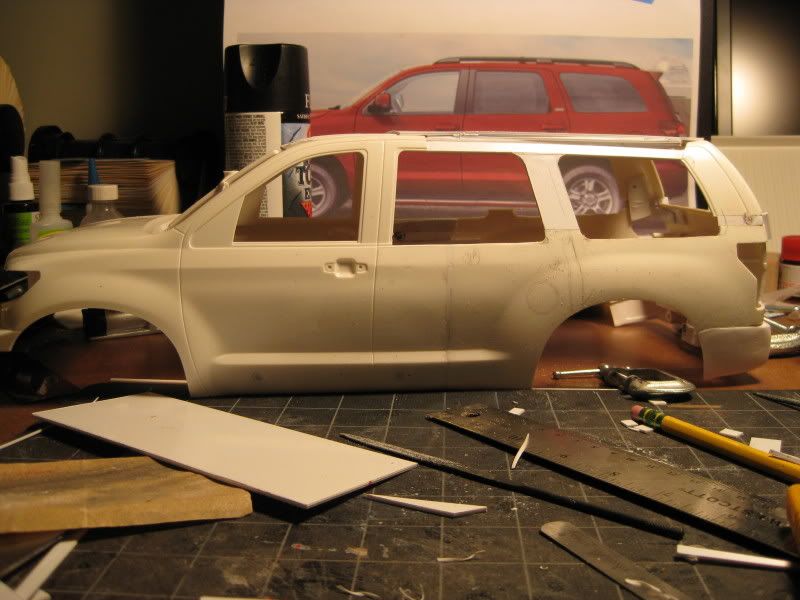 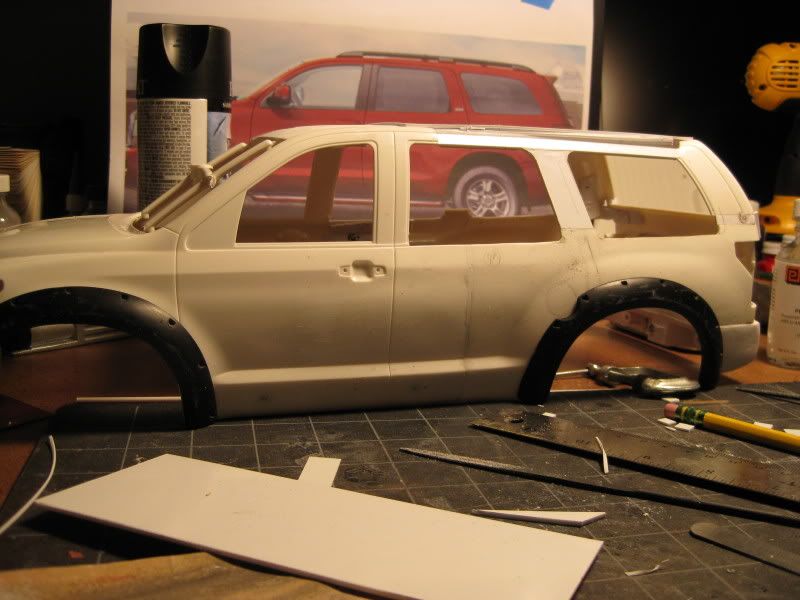  it does look like the B pillar needs to move back 5-10mm. damn. I'll have to think about whether or not I want to tackle that one, lol. |
|
| |
|
04-28-2009, 09:36 AM
| #51 |
| Rock Crawler Join Date: Jan 2007 Location: Tuscaloosa
Posts: 855
|
Its looking dang good if you ask me! Those fender flares are a great touch.
|
|
| |
|
04-28-2009, 01:43 PM
| #52 |
| I wanna be Dave Join Date: Aug 2007 Location: santa monica
Posts: 3,687
|
proportionally the tamiya is correct to the 1:1, ie the length of the door is about the same as the length of the front fender. the problem is that the A pillar is sloped farther back and goes higher proportionally. The C pillar is a little too far back proportionally in the same regard and moving the B pillar back will correct that. The 1:1 is a little longer from the rear wheel to back though. this will not be completely proportionally accurate to the 1:1 unfortunately. But neither is the Tamiya Tundra I started with... anyway, it looks better on the chassis: 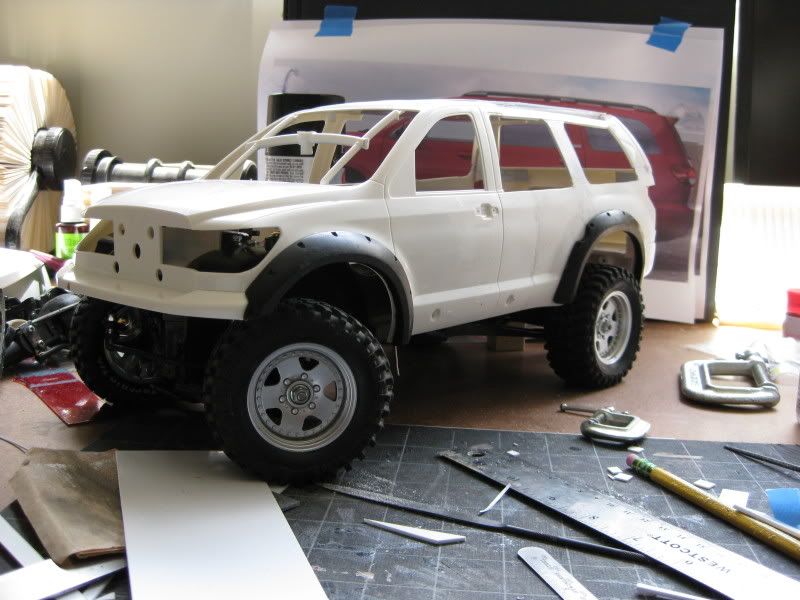 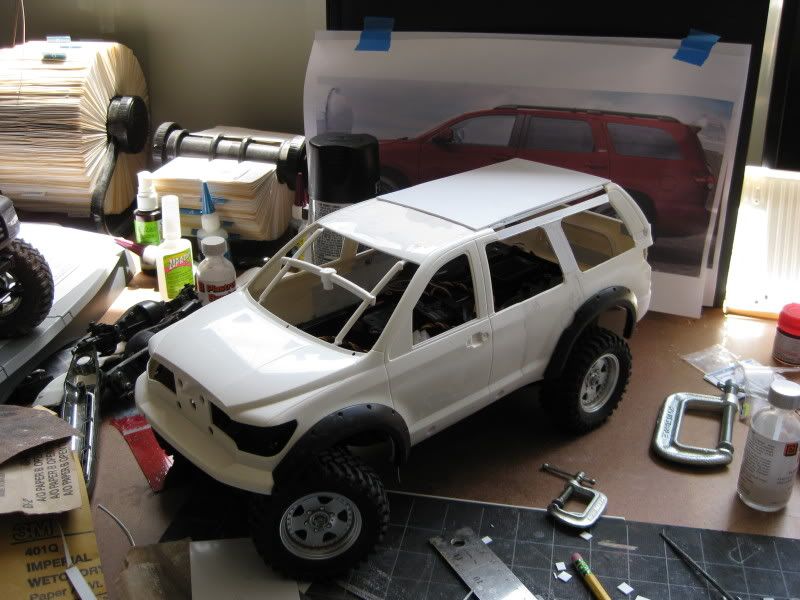 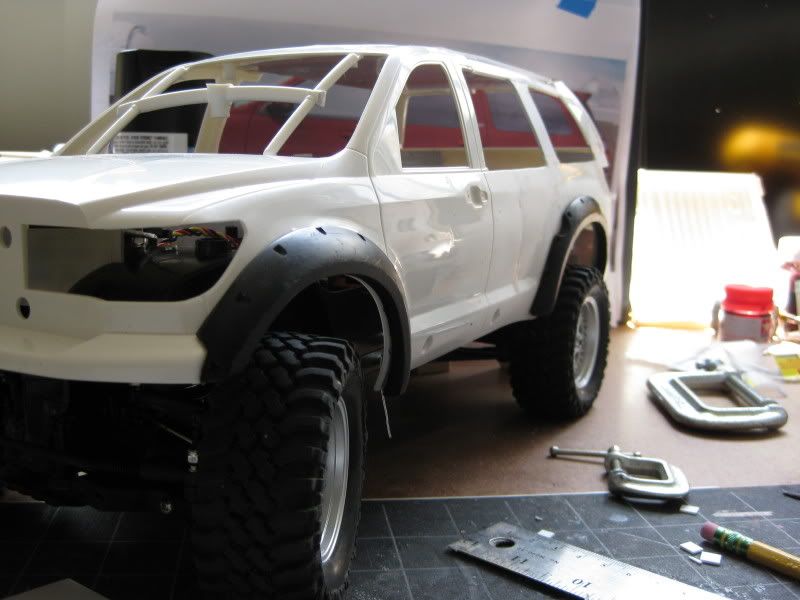 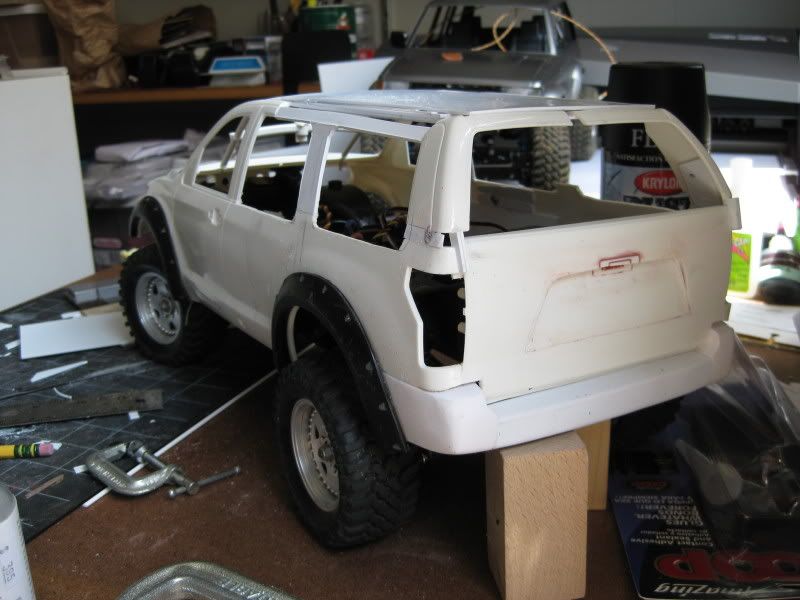 I still need to reshape the tail light and lower the top 2mm or so. Also need to cut the shape of the rear window out of the tailgate and a slew of other small things. On to the roof and the right side pillars though, lol. I like it, but still like the montero better. one possible option is that I sell this body and make a montero when I'm done. we'll see how I feel when I finish it. |
|
| |
|
04-28-2009, 02:05 PM
| #53 | |
| RCC Addict Join Date: Jun 2008 Location: Monroe, NC
Posts: 1,547
| Quote:
| |
|
| |
|
04-28-2009, 02:20 PM
| #54 |
| I wanna be Dave Join Date: Aug 2007 Location: santa monica
Posts: 3,687
|
I'm diggin it at the moment... not sure on color but my first thougth was the charcoal I used on the rover/montero. could also go metallic dark red like the rover #1, pajero and the 1:1 pic behind sequoia above. I seem to be partial to that color... I don't think anyone locally has a charcoal colored rig that I can remember so that might be the trick. black flares and tubework will look good against that too. |
|
| |
|
04-28-2009, 07:14 PM
| #55 | |
| RCC Addict Join Date: Jun 2008 Location: Monroe, NC
Posts: 1,547
| Quote:
| |
|
| |
|
04-29-2009, 12:00 AM
| #56 |
| I wanna be Dave Join Date: Aug 2007 Location: santa monica
Posts: 3,687
|
also thinking dark blue.  Update: bonded the lower bumper to the top since the 1:1 sequoia has a one piece bumper. filled the gap with styrene as well. so far no filler. will try to limit filler to small surface scratches only. 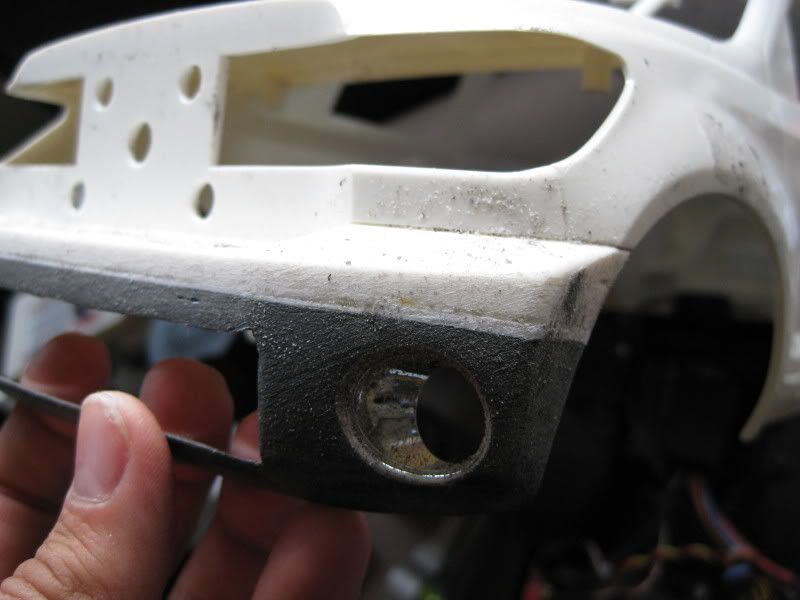 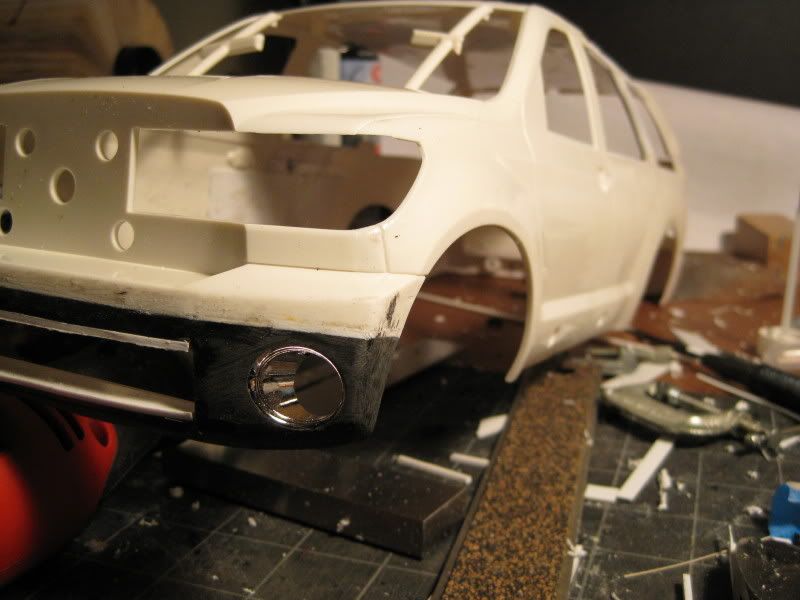 still a bit to do on it, especially around the middle lower opening. not sure I want to tackle the elongated openings at the corner lights. they're much bigger on the 1:10 than 1:1 so may leave it as is. ah yes, here we go again... 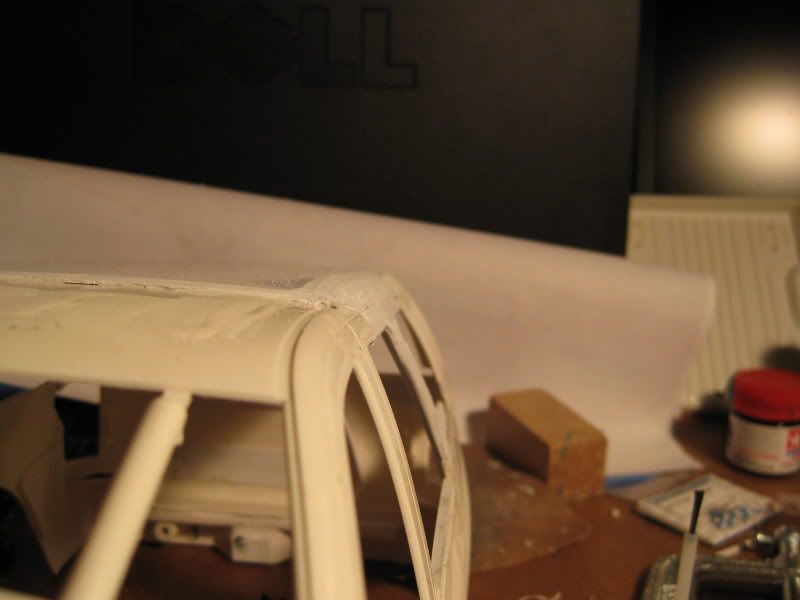  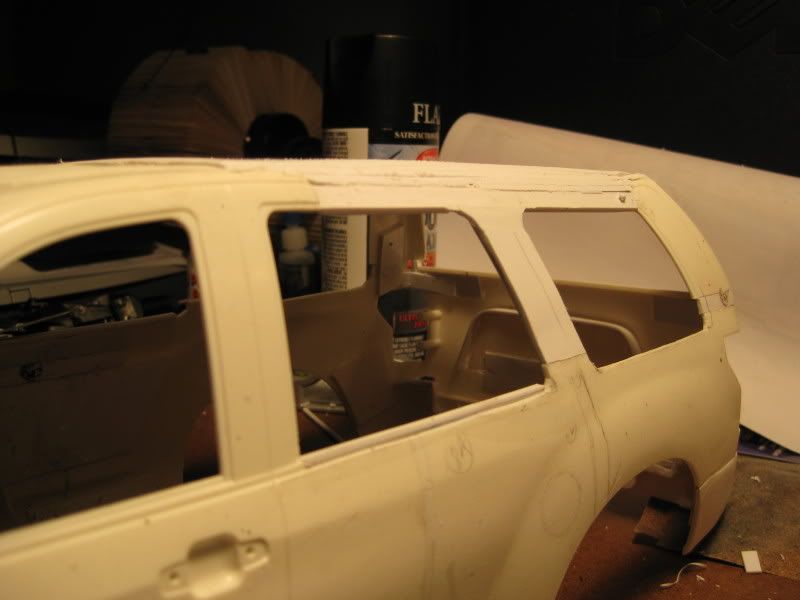 Started filling the big hole at the edges of the roof. layers and layers of styrene to be shaped. Its going to be a bit top heavy as the back half of the roof is 1/4" thick solid styrene... started window sills too. taking shape... |
|
| |
|
04-29-2009, 06:20 AM
| #57 |
| RCC Addict Join Date: Jun 2008 Location: Monroe, NC
Posts: 1,547
|
Nice progress. You are definately a glutten for punishment on your custom rigs. |
|
| |
|
04-29-2009, 07:20 AM
| #58 |
| Rock Crawler Join Date: Jan 2007 Location: Tuscaloosa
Posts: 855
|
If you are that unhappy with things not being exactly proportional you should just say to heck with it and send it to me. I will give you $5 and evenpick up the tab for shipping. You will be rid of the headache for good that way. |
|
| |
|
04-29-2009, 08:12 AM
| #59 |
| I wanna be Dave Join Date: May 2007 Location: Taylors Falls just hanging with the MNRCRC crew.
Posts: 7,843
|
That is so very cool Pablo nice work. |
|
| |
|
05-02-2009, 09:56 PM
| #60 |
| Quarry Creeper Join Date: Aug 2007 Location: Go Broncos!!!!!!
Posts: 425
|
Lookin' Good Jim. |
|
| |
|
| |


 Linear Mode


