| |
 08-26-2009, 01:46 PM
| #21 |
| RCC Addict Join Date: Mar 2007 Location: MS Gulf Coast
Posts: 1,949
|
Nice work so far! I was wondering when someone was going to get into this seeing as rc4wd came out with these great axles. I always thought that it would be better to try and attempt it on this chassis as opposed to just putting them on a custom rail chassis. Keep it up Pantablo...you always do great work!  |

|  |
| Sponsored Links | |
| | |
|
08-29-2009, 10:03 AM
| #22 |
| Sinking with the ship   Join Date: Mar 2005 Location: El Capitan...sole survivor and sinking fast
Posts: 8,864
|
Thread cleaned up...I'm not doing it again...next person to start a bitch fit over what a SAS is (which by the way stands for "solid axle swap" ) getting an infraction... Keep it on track...This thread is about pantablo's build, I don't care who else has done a SAS or built another rig where they swapped axles in or whatever it is.
Last edited by 1BadJeepBruiser; 08-29-2009 at 02:25 PM. Reason: grammar |
|
| |
|
08-29-2009, 12:34 PM
| #23 |
| I wanna be Dave Join Date: Feb 2004 Location: Columbia Gorge
Posts: 5,512
|
Awaiting more images of this build. Wondering how high it'll be sitting once it's completed vs. stock height IFS based rig. Keep building! More I see the more I want to cut into mine |
|
| |
|
08-29-2009, 02:21 PM
| #24 | |
| I wanna be Dave Join Date: Aug 2007 Location: santa monica
Posts: 3,687
| Quote:
Thanks 1BJB! | |
|
| |
|
08-29-2009, 03:40 PM
| #25 | |
| I wanna be Dave Join Date: Feb 2004 Location: Columbia Gorge
Posts: 5,512
| Quote:
| |
|
| |
|
08-29-2009, 11:20 PM
| #26 | |
| I wanna be Dave Join Date: Aug 2007 Location: santa monica
Posts: 3,687
| Quote:
| |
|
| |
|
09-01-2009, 01:36 AM
| #27 |
| I wanna be Dave Join Date: Aug 2007 Location: santa monica
Posts: 3,687
|
Got a couple simple things done today. Assembled the front and rear axle, made a front link/shock mount and installed the rear axle. Here'a a link mount I made. More on this fiasco later. 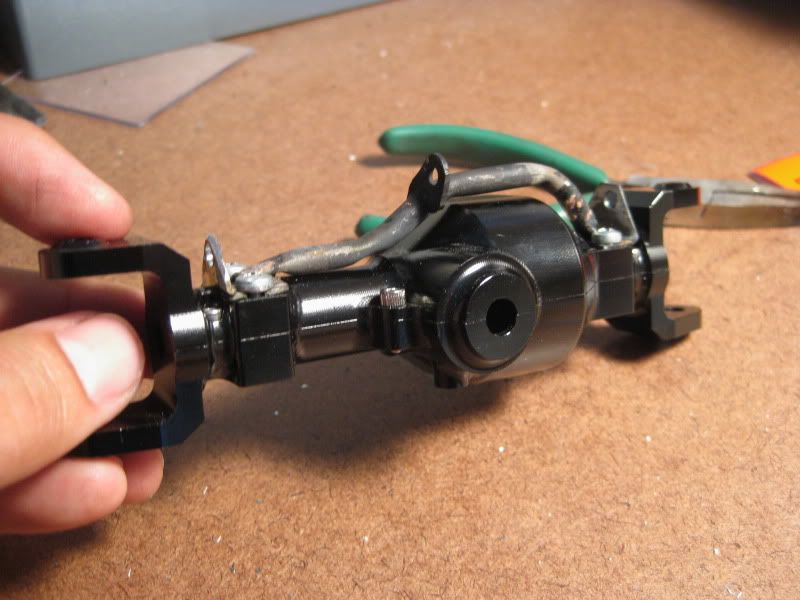 Less the link mount this is what you get with the package for the front axle. I also have new matching straight housing for rear axle. 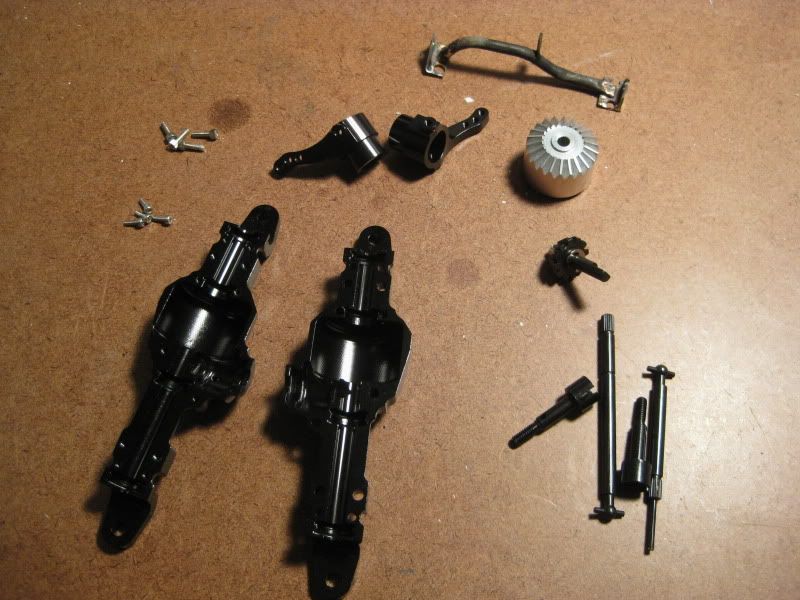 SOLID aluminum  Had some bearings so used them instead of the old bushings. 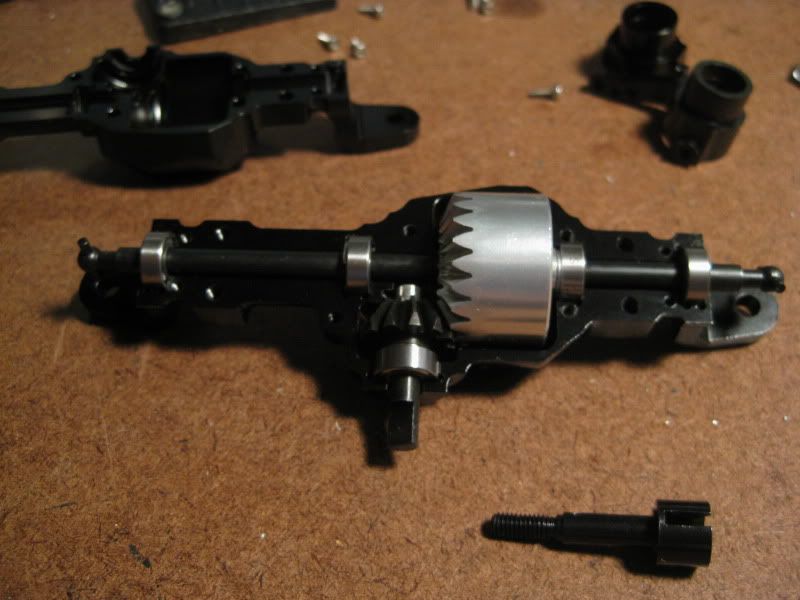 Hmm, missing a bushing on the pinion... 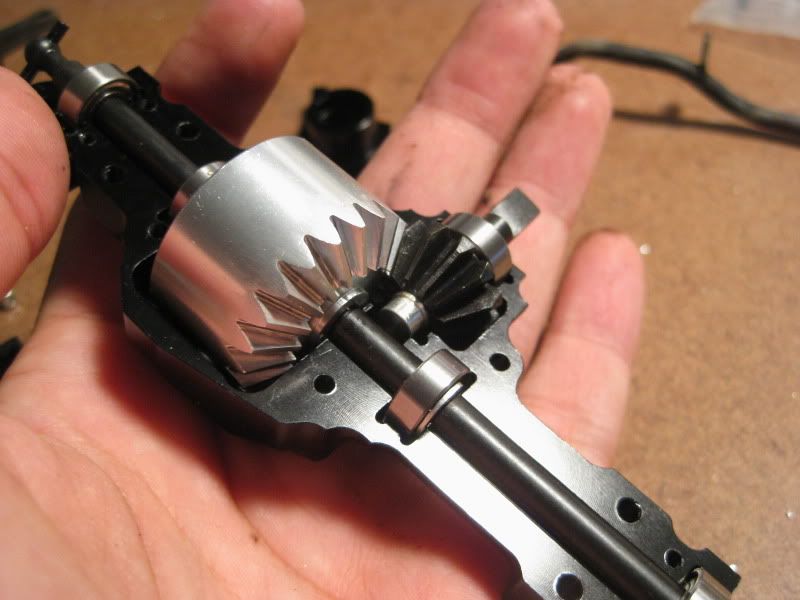 The rear axle internals drop right in. I literally picked it up by the ends and dropped in into these new housings.  The rear axle installed. I used MRC shocks but may need to change them. 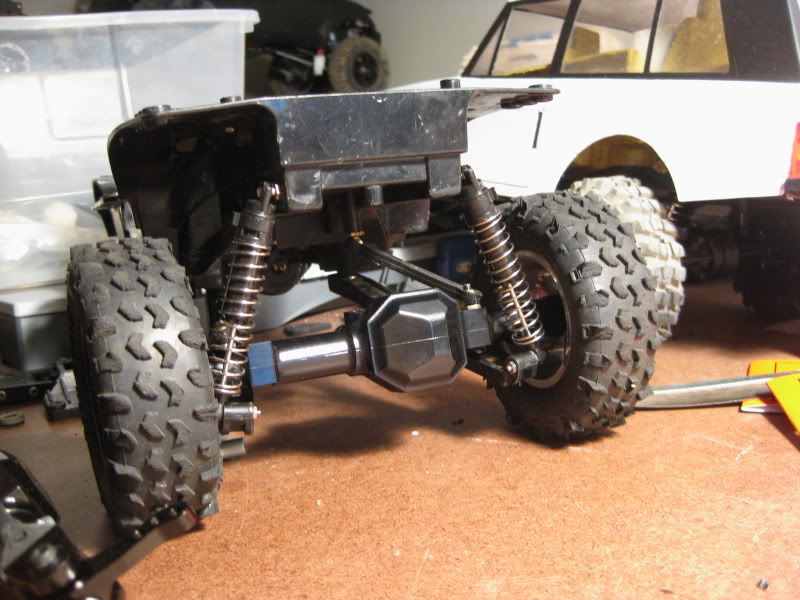 The axles completely assembled. Links and shock mounts need to be tweaked a bit as the current setup tilts the output drive a bit downward. 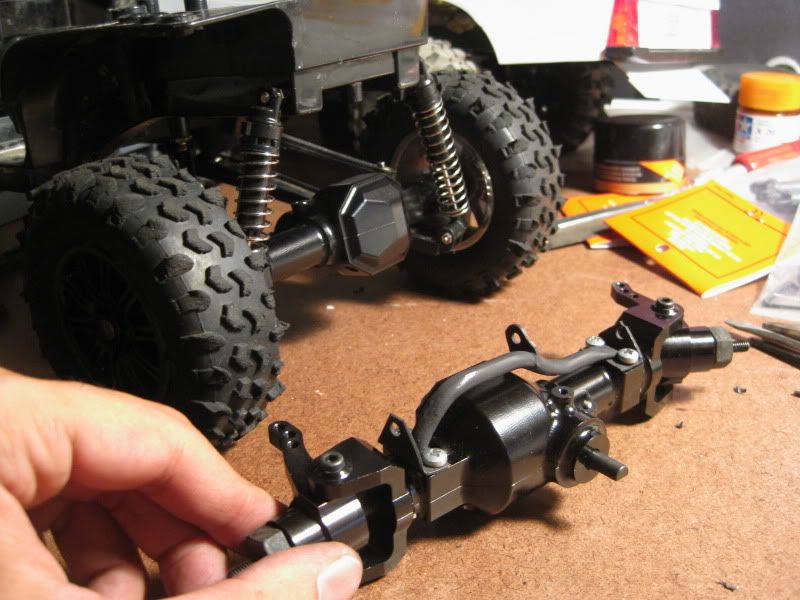 Notice something wrong with the link mount? Yes, the center upper link mount bracket is facing the wrong way. GRRR. Also, I first made it, cleaned it up and painted it, only to realize when I installed it I still needed shock mounting points. D-OH. Getting the little brackets to stay put while trying to rebraze that, and having the brake line come off the bracket...oh the joy. Finally cut a new one piece bent plate mount for one side. then installed it and realized when assembling the whole axle I did it facing the wrong way. You have to laugh...okay, I really wasn't laughing. I think I'm just going to abandon it and start with a new one... |
|
| |
|
09-01-2009, 10:57 AM
| #28 | |
| RCC Addict Join Date: Feb 2006 Location: Medford, Oregon
Posts: 1,261
| Quote:
| |
|
| |
|
09-01-2009, 11:01 AM
| #29 |
| I wanna be Dave Join Date: May 2006 Location: akron
Posts: 4,054
|
so can you use the stock diff in the front?? cause there aluminum and gears well you know the issue's..
|
|
| |
|
09-01-2009, 12:13 PM
| #30 |
| I wanna be Dave Join Date: Aug 2007 Location: santa monica
Posts: 3,687
|
it does look like the stock rear diff is the same as the provided solid front one.
|
|
| |
|
09-01-2009, 09:16 PM
| #31 |
| I wanna be Dave Join Date: Sep 2008 Location: four o six
Posts: 2,101
|
wow, that aluminum looks really solid...does it have alot of mass to it....think it will take alot to make it turn...I know its on bearings, but still... I like the look of that rear axle...very cool build so far.. |
|
| |
|
09-01-2009, 10:11 PM
| #32 |
| I wanna be Dave Join Date: Aug 2007 Location: santa monica
Posts: 3,687
|
it feels surprisingly light actually. I first had to reinspect it to be sure it was solid. I dont think there will be a problem turning it. got a bit done tonight. not liking how the link mounts at the chassis came out so may redo. 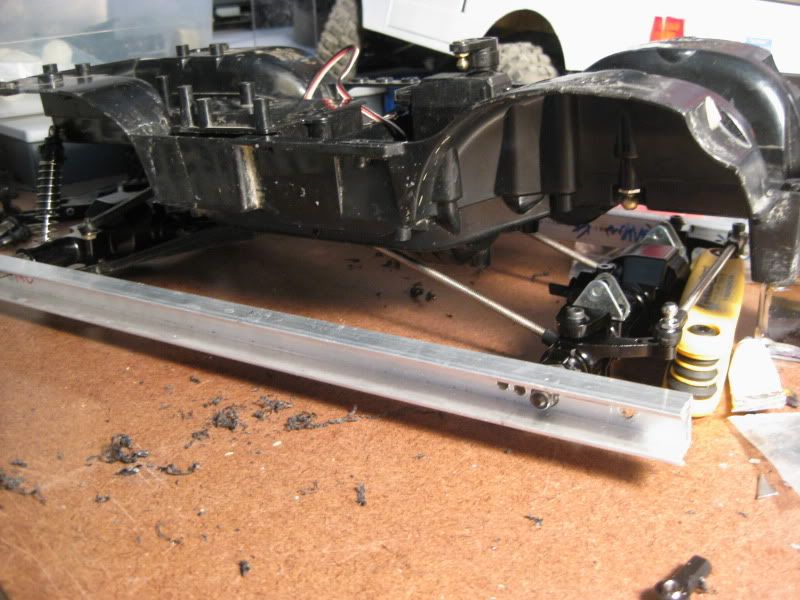 |
|
| |
|
09-02-2009, 01:40 AM
| #33 |
| I wanna be Dave Join Date: Aug 2007 Location: santa monica
Posts: 3,687
| BAM!  Got all the links and shocks mounted up tonight. Still need a bit of tweaking but its all there. 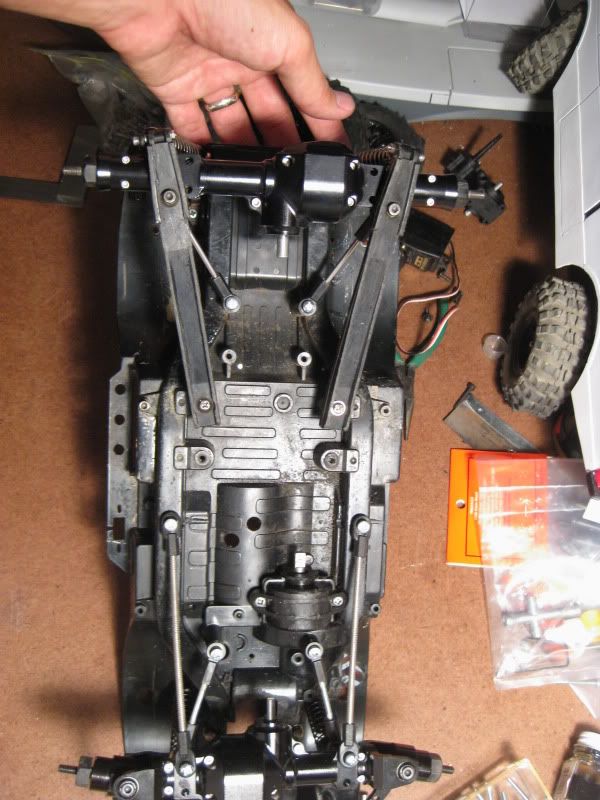 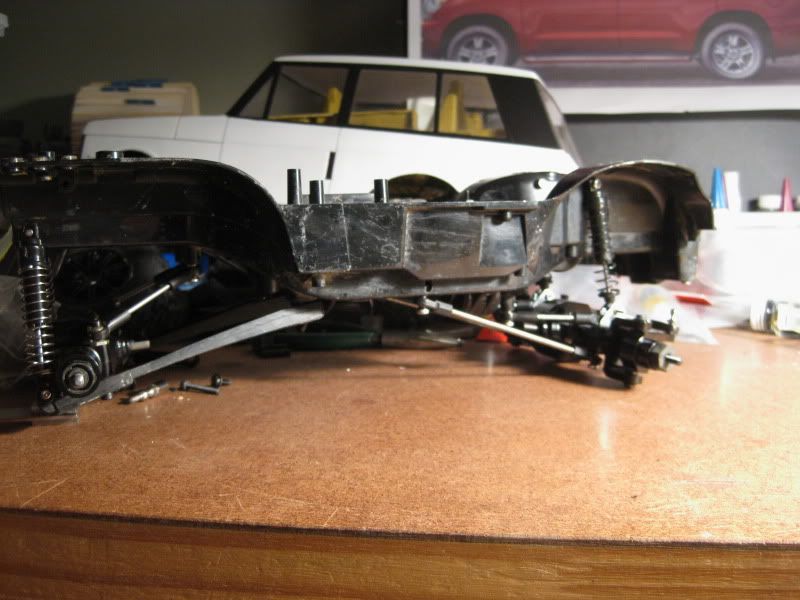 On the rear, I swapped out the plastic upper links with standard TLT links so I could have some adjustability. This allowed me to straighten the output drive. 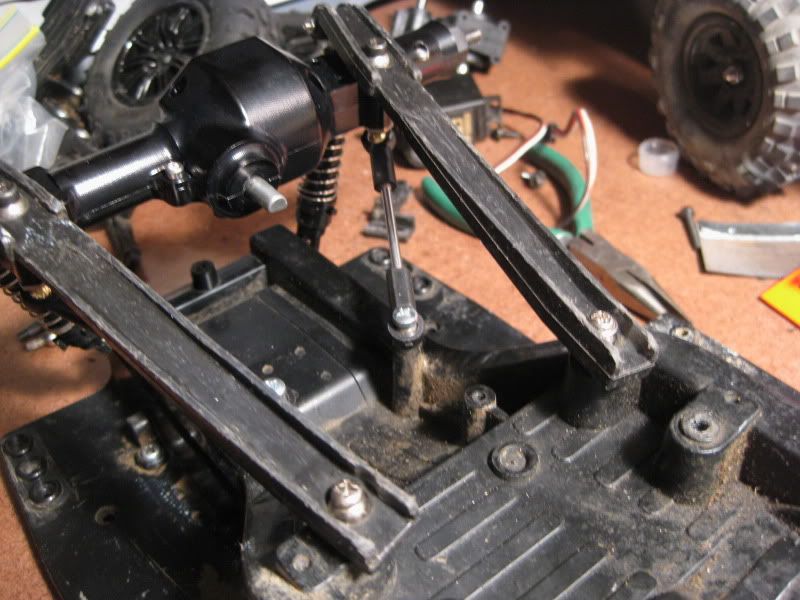 On the front, I used the stock CC-01 steering links, extended a hair, as upper links. Mounted them to the stock location where the two rear screws of the skid mount. 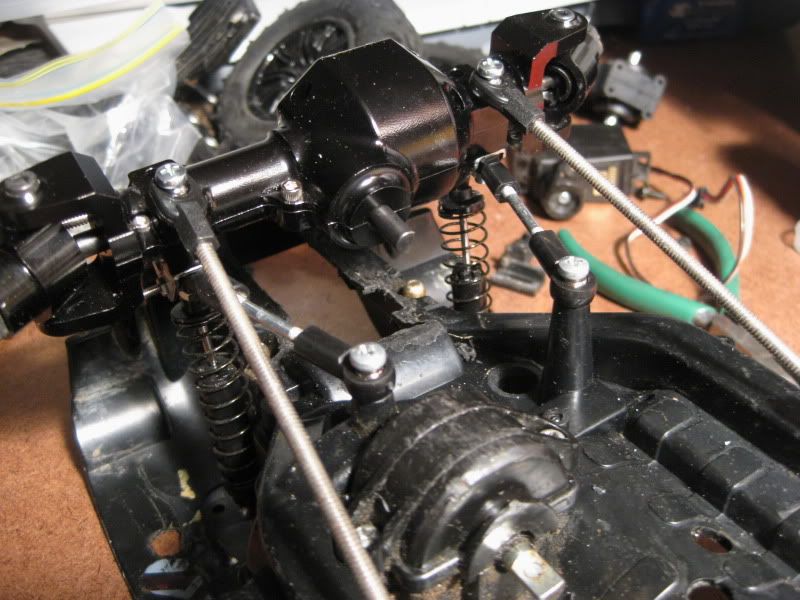 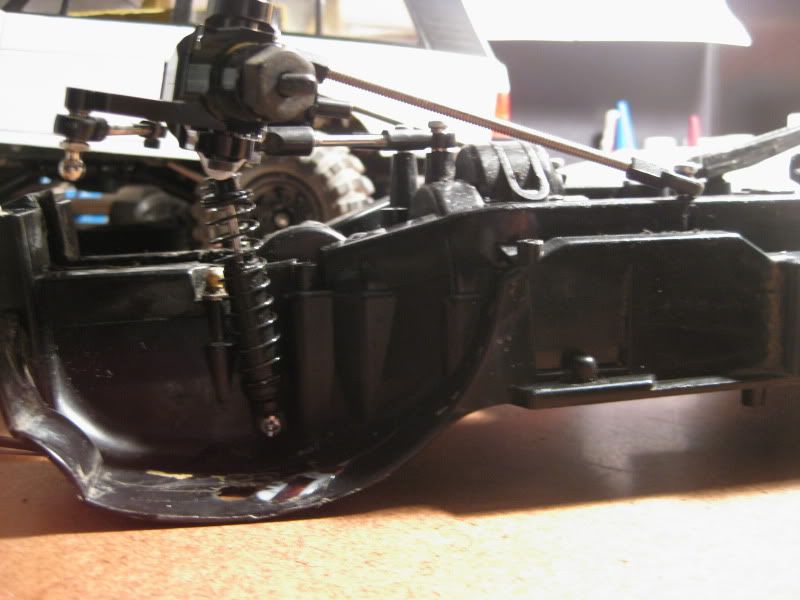 Looks a bit odd but seems to work at this point, without running it. I may cut the mounting point down about 1/4" to bring the uppers more parallel to the lowers. 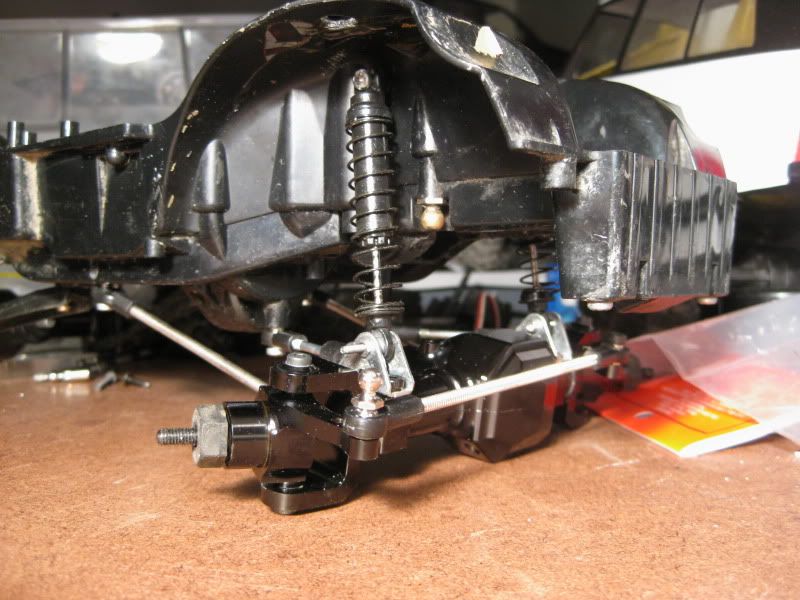  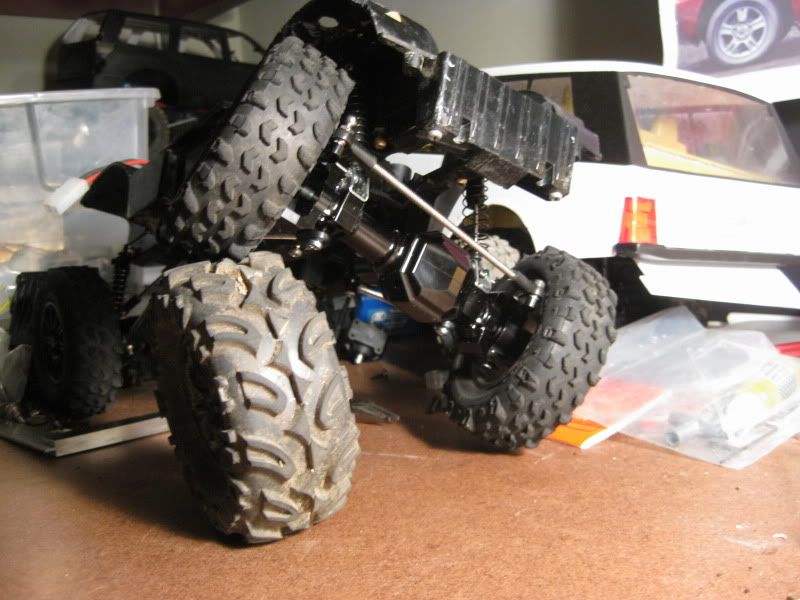 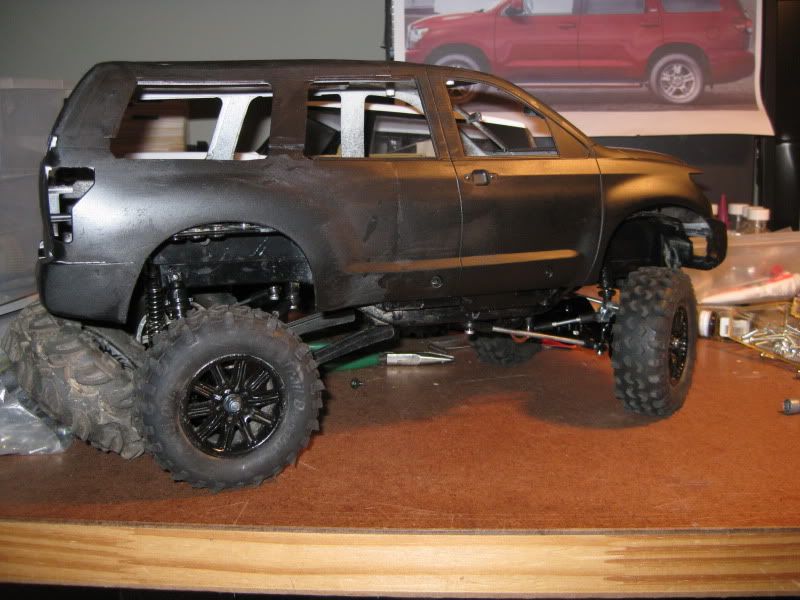 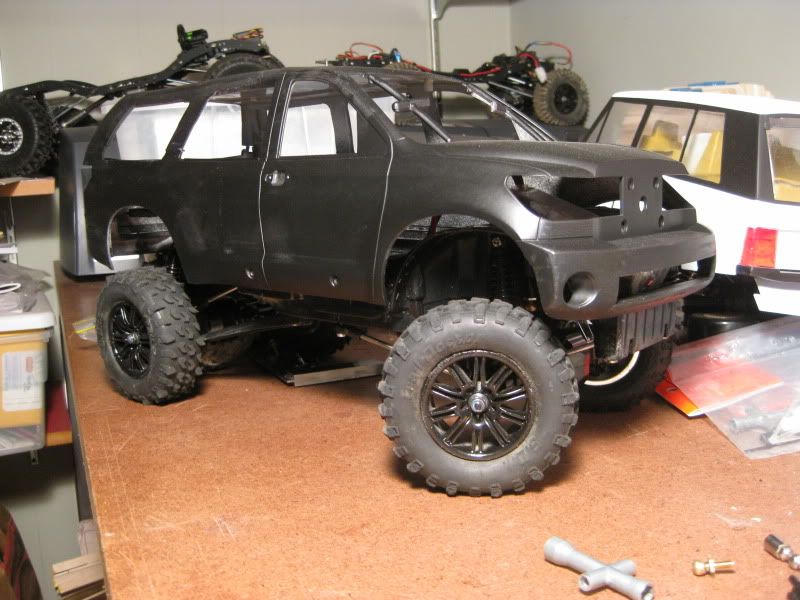 The front brick on the chassis can go completely at this point. The body sits flush with the bottom of the chassis rails. Body needs to come down 1/8" or so to cover the inner fender wells. This is not the final body at this moment. 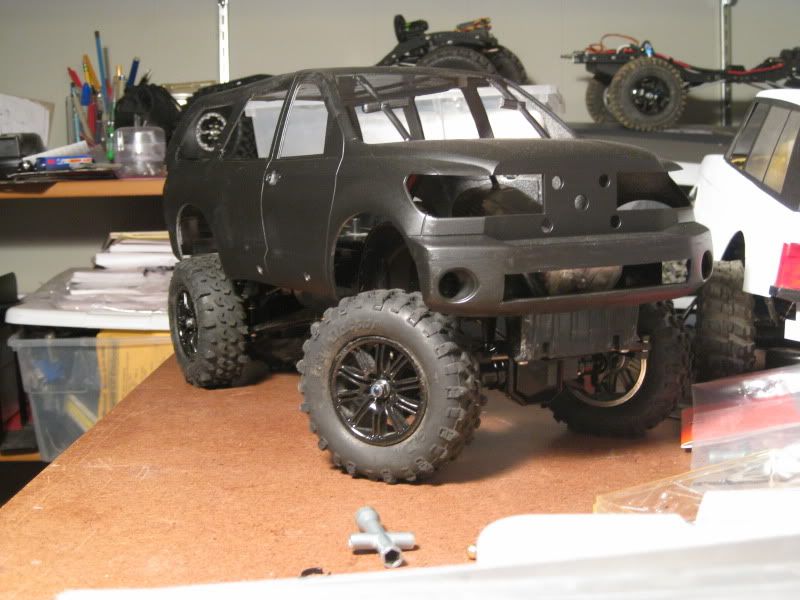 This is with standard 1.9 wheels and standard Trail Docs. NO modifications to tires or wheels. Clearance is 2-9/16" at the chassis rails. The trans gear housing hangs down 1/2" from there but is close enough to the front axle that I dont think it will hang up as often as on a stock cc-01. |
|
| |
|
09-02-2009, 08:47 AM
| #34 |
| RCC Addict Join Date: Sep 2005 Location: Behind the torch!
Posts: 1,360
|
It looks very good so far. How do you think the chassis will hold up?
|
|
| |
|
09-02-2009, 10:53 AM
| #35 |
| I wanna be Dave Join Date: Aug 2007 Location: santa monica
Posts: 3,687
|
Chassis is actually quite strong so I don't see any problems with it. Next step is to install the Team Raceway transfer case and get driveshafts in. |
|
| |
|
09-02-2009, 01:02 PM
| #36 |
| RCC Addict Join Date: Jun 2008 Location: Monroe, NC
Posts: 1,547
|
That thing has some serious flex. Very nice Pablo. |
|
| |
|
09-02-2009, 02:35 PM
| #37 |
| I wanna be Dave Join Date: Apr 2009 Location: Unnecessary Surgery Land
Posts: 3,406
|
Flexed out! That may not be the body you are using, but it appears the WB is perfect for that Sequoia. Good stuff.
|
|
| |
|
09-02-2009, 05:52 PM
| #38 |
| I wanna be Dave Join Date: Sep 2008 Location: four o six
Posts: 2,101
|
That is sweet, are you sticking with the MRC shocks...I can't stand mine..not stiff enough... can't wait till the report on those axles. |
|
| |
|
09-02-2009, 06:03 PM
| #39 |
| I wanna be Dave Join Date: Aug 2007 Location: santa monica
Posts: 3,687
|
Thanks. I'm really digging it. The Sequoia wasnt intended for this SAS but I did make it specifically for a cc-01. I was going to use this chassis before the axles came up. Now that I see it on there I'm somewhat inspired to finish it and use it here, lol...so torn, Sequoia hardbody or Nissan Hardbody lexan pickup... Going to stick with the shocks. I'll see if they're a problem once I do actual testing. |
|
| |
|
09-02-2009, 06:32 PM
| #40 |
| RCC Addict Join Date: Feb 2008 Location: tauranga north island new zealand
Posts: 1,786
|
Looking real good there Pantablo , i recon finish the sequioa body and go with that boby. It will be one unique scaler for sure.
|
|
| |
 |
 LinkBacks (?)
LinkBack to this Thread: http://www.rccrawler.com/forum/tamiya-xc-cc01/195354-sas-cc-01-build.html | ||||
| Posted By | For | Type | Date | |
| ALL about RC ADVENTURE - Kaskus - The Largest Indonesian Community | This thread | Refback | 10-07-2011 12:04 AM | |
| |


 Linear Mode


