| |
 09-11-2009, 08:52 AM
| #1 |
| Pebble Pounder Join Date: Jul 2009 Location: Windsor, UK
Posts: 141
|
Hi I've just started a CC01/Tundra build and thought I'd post my progress on here. First, I'll give you a noob warning - I've done a couple of kits before, but no major alterations or custom bits, so I'm heading out into uncharted territory here. Here's what I'm trying to do: I want to build a scale doublecab 4x4, based on the RNLI lifeguard vehicles:  Now, this is a Mitsubishi Warrior, and an ugly sod at that. So I'm using the Tundra, which looks much nicer and is a doublecab as standard. I'm still waiting on some screws and other smaller parts, but I have most of the big bits already. Using the CC01 chassis based on good comments about it on here and other forums. Don't want it to look too 'monster truck' like the standard high lift. (although I do like the standard high lift on its own merits, and I think I'll do a stock build with MFC after I've finished this) I'll post as I progress, but I expect it'll take a while - especially the rear frame and the wheelbase extension, and I'd appreciate your advice and experience as I inevitably get stuck. |

|  |
| Sponsored Links | |
| | |
|
09-11-2009, 08:57 AM
| #2 |
| Pebble Pounder Join Date: Jul 2009 Location: Windsor, UK
Posts: 141
|
Here is the CC01 built stock from a Pajero kit. Yes, its the SWB so I'm not doing myself any favours, but I'm not a fan of the Toureg and I know someone who'll take the Pajero body off my hands. 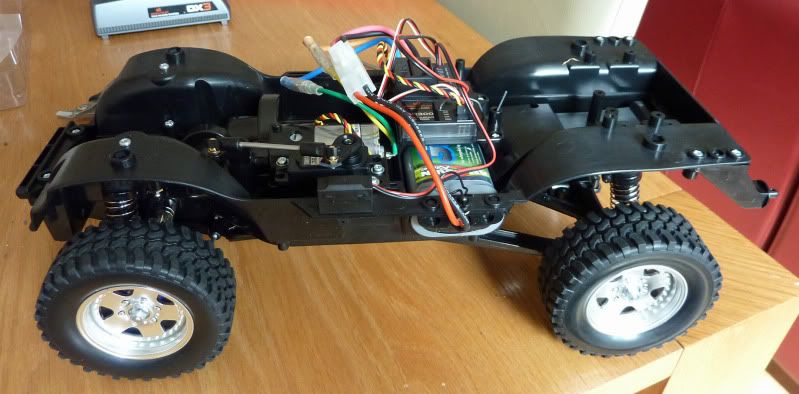 next, the Tundra shell. For now I'm just sticking the main bits together with masking tape to get an idea of the size. Mounted it on top of the CC01 to see how it sits. First, the good news. The width is pretty much spot on, with the wheels tucking under nicely 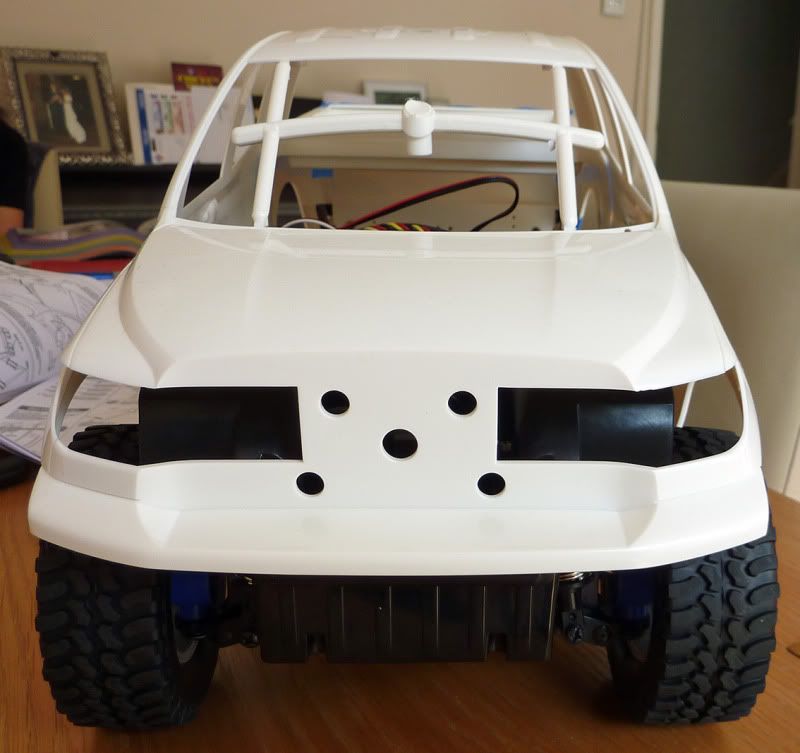 Now the bad news 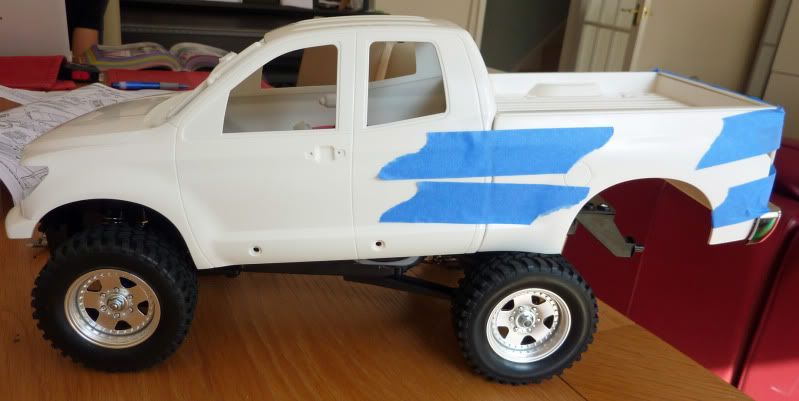 Look at that! Massive difference in wheelbase. This Pajero is the SWB version, and there are rear mounts I can use, but that'll only give me a 1" stretch 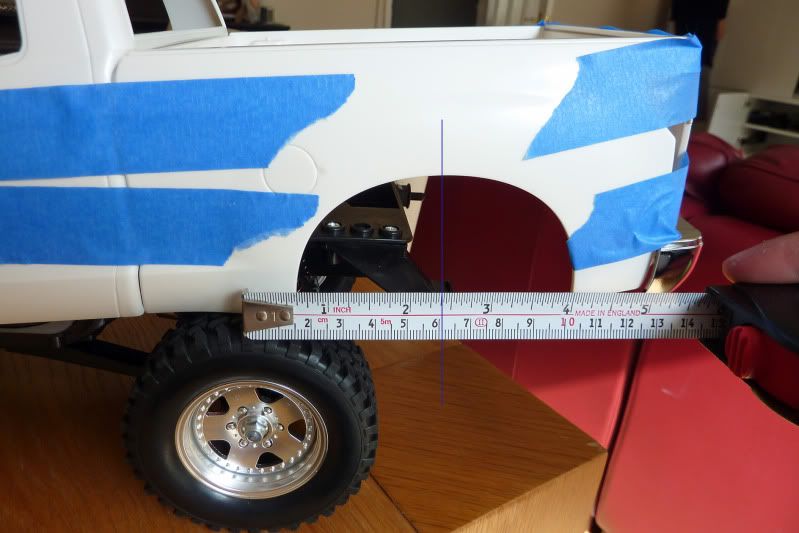 From a bit of basic measuring, I think I need around a 2 3/8" - 2 1/2" longer wheelbase. Thats seems a lot. I have some traxxas half shafts already, to make me a longer rear driveshaft, but I don't know if it'll go *that* long. I can also try and make some longer rear links, and they should be ok (if I can make them), but the rear shock mounts might be a challenge if they end up at an extreme angle. I have some longer 104mm losi shocks sitting around doing nothing if I need some more length, but I might need some help working out how to mount them Looking at the chassis, I might consider a chassis cut and extension. I think I could cut it just behind the motor mount, in front of the battery holder and it shouldn't affect any of the mechanicals except for the rear driveshaft (which I need to lengthen anyway). If I move the rear suspension to the rearmost positions, that should mean I only need a chassis stretch of about 1.5". Not sure how I'd keep it structurally sound, but maybe thats a decent alternative? Looking for advice on this while I'm waiting to decide next steps, I can carry on with designing and printing the custom stickers, and start on the rear frame. |
|
| |
|
09-11-2009, 10:05 AM
| #3 |
| I wanna be Dave Join Date: Apr 2009 Location: Unnecessary Surgery Land
Posts: 3,406
|
If it was me, I would cut the chassis in half and stretch it with some aluminum. That way you would have all of the rear suspension and axle as a unit. All you would really need to do is make a longer drive shaft.
|
|
| |
|
09-11-2009, 10:16 AM
| #4 |
| Pebble Pounder Join Date: Jul 2009 Location: Windsor, UK
Posts: 141
|
thats the way I'm leaning too. Only problem is limited space on the inside to work with (although there are two square channels which might take some square aluminium tubing), and the outside is a complex shape which makes it awkward.
|
|
| |
|
09-11-2009, 02:31 PM
| #5 |
| I wanna be Dave Join Date: Aug 2007 Location: santa monica
Posts: 3,687
|
just make some square plates on the back to extend all the link mounts and make new shock upper mounts. you can make that work easily. nice project.
|
|
| |
|
09-11-2009, 07:50 PM
| #6 |
| RCC Addict Join Date: Feb 2008 Location: tauranga north island new zealand
Posts: 1,786
|
Or, cut down the body and make a 2 door tundra ????????????????????
|
|
| |
|
09-11-2009, 08:43 PM
| #7 |
| I wanna be Dave Join Date: Aug 2007 Location: santa monica
Posts: 3,687
|
thats what I contemplated for the SAS.
|
|
| |
|
09-12-2009, 01:56 AM
| #8 | |
| Pebble Pounder Join Date: Jul 2009 Location: Windsor, UK
Posts: 141
| Quote:
| |
|
| |
|
09-12-2009, 12:05 PM
| #9 |
| Pebble Pounder Join Date: Oct 2007 Location: O-town
Posts: 191
|
I saw in the cc01 picture thread that sasquatchbagger extended his to fit the hilift body.... idk if he had a build thread, i would ask him to see what he did it looks really good: CC01/XC picture archive - no talking |
|
| |
|
09-13-2009, 11:52 AM
| #10 |
| Pebble Pounder Join Date: Jul 2009 Location: Windsor, UK
Posts: 141
|
My rod ends still haven't turned up to make longer rear links, and I've had to order some yokes to extend the driveshaft (couldn't see a way to break open the Tamiya metal ones to get the stampede shafts onto it. In the meantime, I've mocked up the stickers based on different photos. RNLI also have some handy pdfs with vector graphics, and the proper colours 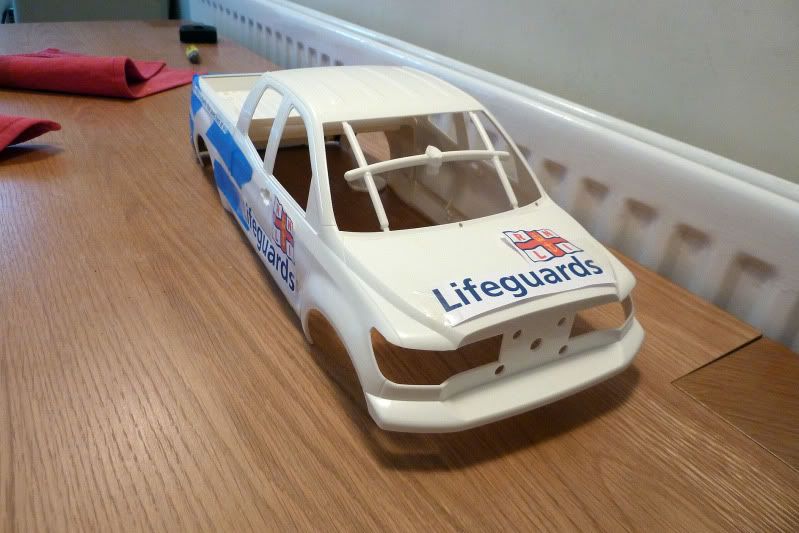 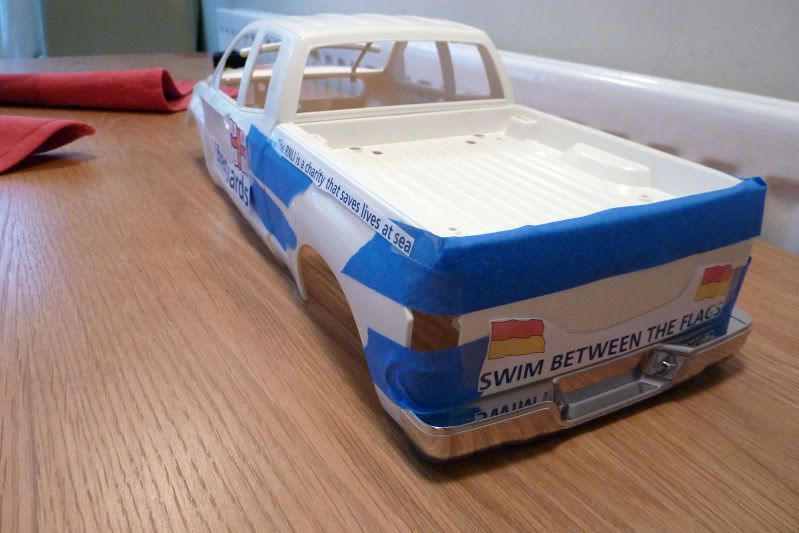 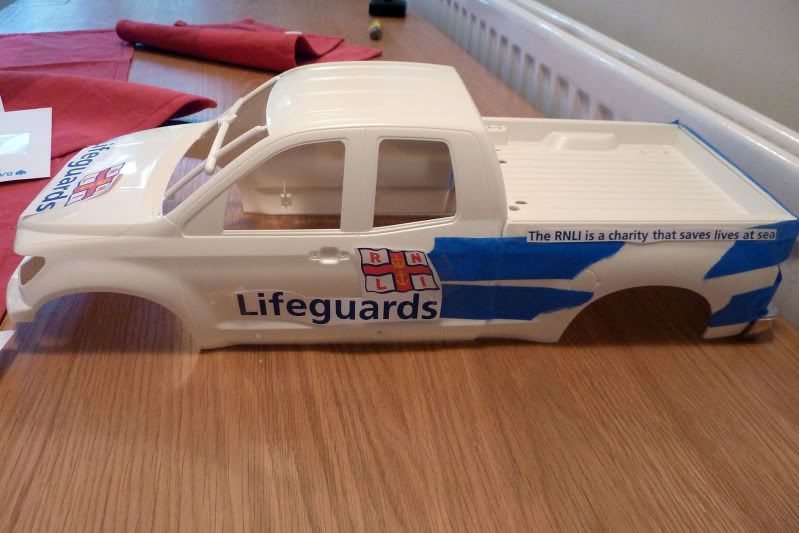 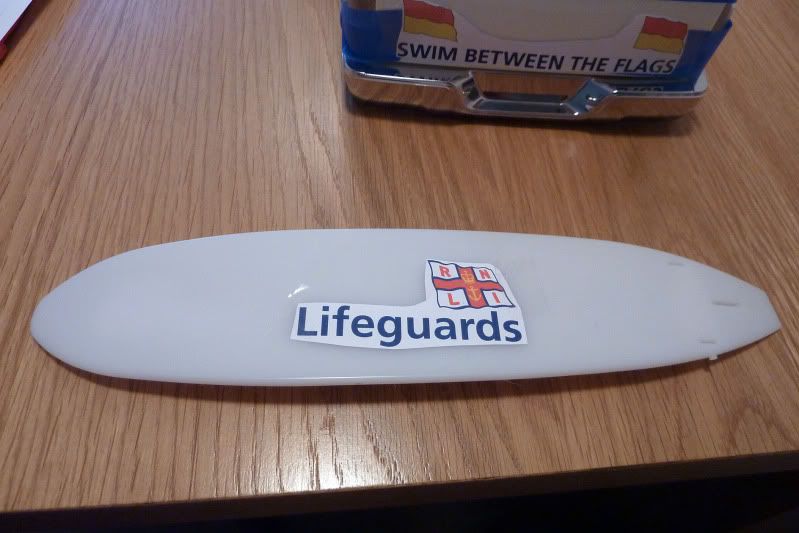  Hopefully the bits will be here for me to work on the chassis extension next weekend. If not I'll make a start on the rear frame and/or starting the prep for painting the body, which I'm guessing will take a while |
|
| |
|
09-14-2009, 11:22 AM
| #11 |
| Newbie Join Date: May 2009 Location: mahasarakham province / Thailand
Posts: 2
| very good idea sir  |
|
| |
|
09-17-2009, 07:01 AM
| #12 |
| I wanna be Dave Join Date: Sep 2008 Location: four o six
Posts: 2,101
|
I would second/third in cutting chassis. good looking rig so far... |
|
| |
|
09-17-2009, 08:11 AM
| #13 |
| Pebble Pounder Join Date: Jul 2009 Location: Windsor, UK
Posts: 141
|
DIY stickers (print on Avery clear labels, laminate with clear packing tape), or get custom printed? I'm leaning towards custom as they should be thinner and therefore more discreet when applied? |
|
| |
|
09-17-2009, 10:16 AM
| #14 |
| I wanna be Dave Join Date: Aug 2007 Location: santa monica
Posts: 3,687
|
The more I think about it the more I think these guys are right. Given the length you need to stretch it I would also cut the chassis and stretch it from within with alum or steel angle to connect the front and back parts. Also, if you go with vinyl for the graphics I would highly recommend elchupocabre on here. He has done several of my rigs and is very well priced as well as a great guy to deal with. He's a vendor here: http://www.rccrawler.com/forum/showthread.php?t=160071 he did these as well as my Brat and hilux ones too. Now he can print multi colors so yours will be easy. 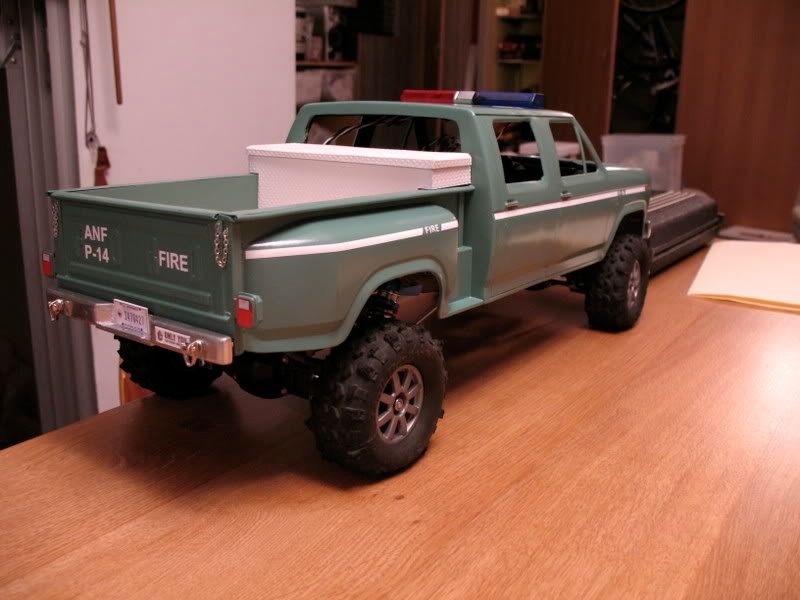 |
|
| |
|
09-18-2009, 01:50 AM
| #15 |
| Pebble Pounder Join Date: Jul 2009 Location: Windsor, UK
Posts: 141
|
and to think I was undecided I have all the material I need to make longer links, apart from some way to mount the links to the axles. I have some TLT brackets coming which hopefully will let me mount my links and shocks properly. I also have some 2mm aluminium sheet for mounting on the rear link points to extend them out. So I have both of those cases covered. I don't have material to extend the chassis. From the looks of it some square rod/tube would be good down the sides as there is a channel there that would take it, plus some sheeting. But right now I'm thinking of trying links as I've never made them before and it'll be a new experience. If that doesn't work I'll extend the rear link mount points and use the stock links. Although its a 2 3/8 inch stretch from the SWB point, its only 1 3/8 inch from the rear mount point. Links should handle that, although I'm a bit worried about where I mount my shocks. I'll have a hack around at the weekend and lets see where I am after that |
|
| |
|
09-18-2009, 08:21 AM
| #16 |
| Pebble Pounder Join Date: Aug 2009 Location: My House
Posts: 138
|
i was wondering, since i like this idea, that if the subaru brat chassis tamiya would be able to use the ford-f150 or toyota tundra body or even the hilux body
|
|
| |
|
09-28-2009, 01:20 PM
| #17 |
| Pebble Pounder Join Date: Jul 2009 Location: Windsor, UK
Posts: 141
|
update: took a while to get all my bits and bobs - was waiting for some TLT suspension mounts to see if I could get the shocks attached, but in the end I didn't need them. I made some longer links from M4 threaded rod (from B&Q) and put them on some traxxas rod ends. Then covered that with 6mm hollow rod (also from B&Q) Shocks were a pain. Because the old rear arms extended over the axles to mount the shocks, and they were now really long, I couldn't mount the shocks that way. so I threaded them onto the links and that seems ok so far - maybe the rear is riding a bit high, but I should be able to adjust that down a bit. With the repositioning of the shocks, the longer links didn't want to go back to their original location, they were fouling the shocks, so i've mounted them outboard a bit. Took a whilte to adjust - had to take them off a few times to lengthen them, and now I might need to recut the sleeving depending how I feel. But I think I'm there with the links. Just need to do the longer driveshaft and the chassis should be finished and I can move onto the body. I have all the bits, just need some epoxy glue. anyway, some pics: 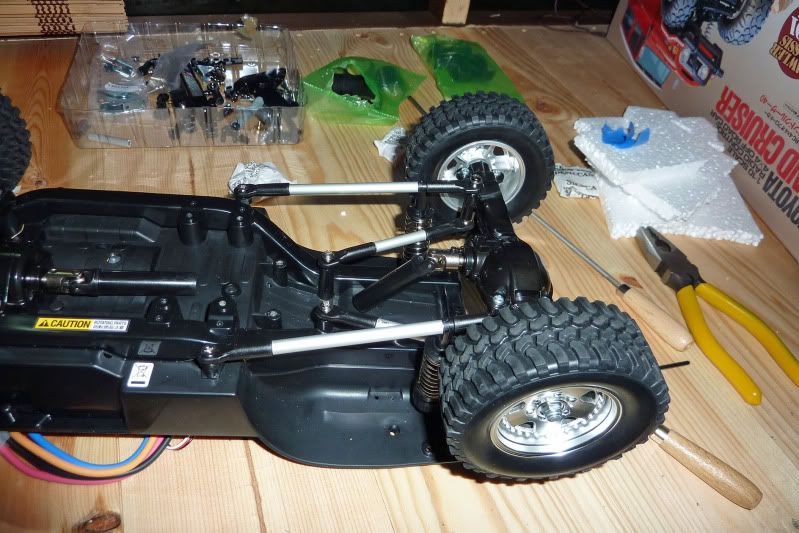  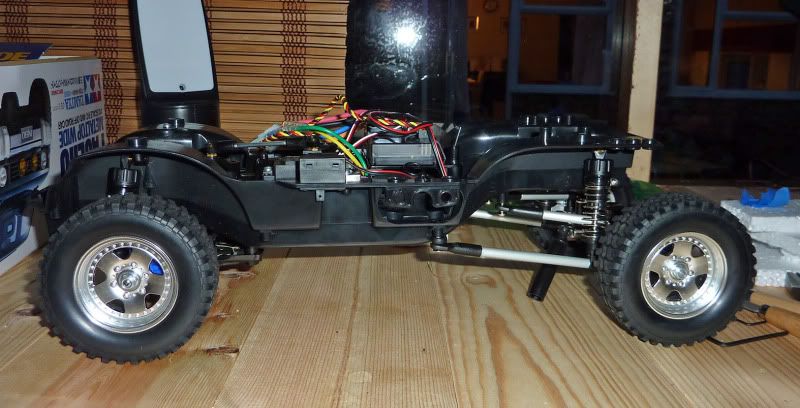 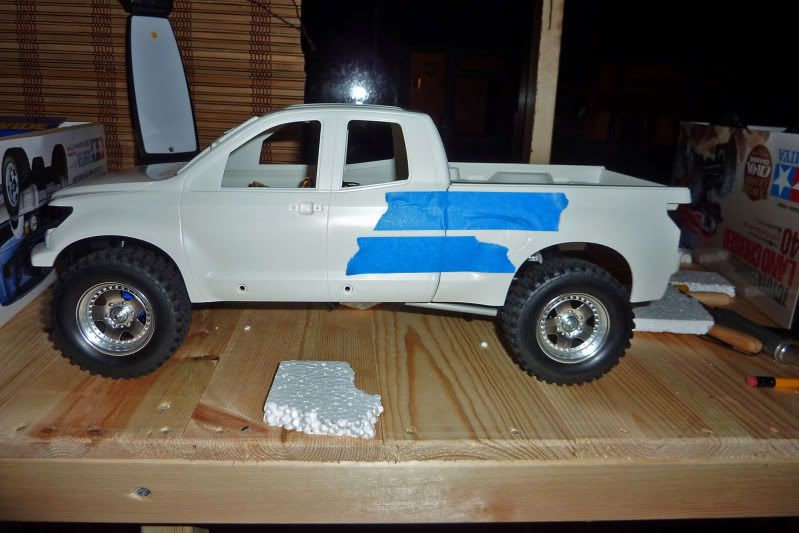 |
|
| |
|
09-28-2009, 02:44 PM
| #18 |
| Quarry Creeper Join Date: Jan 2006 Location: Wales
Posts: 417
|
thats just about dead on!! have you noticed any reduced suspension action with the links mounted like that?
|
|
| |
|
09-28-2009, 03:18 PM
| #19 |
| Pebble Pounder Join Date: Jul 2009 Location: Windsor, UK
Posts: 141
|
I'm not sure how much it had originally Its a little stiff as I reused some tamiya fixings and the traxxas rod ends are a little tight. The shocks are also quite close to the upper links so that will need watching. But overall it seems pretty ok I think. I'll know more once I've run it properly |
|
| |
|
09-28-2009, 03:23 PM
| #20 |
| Quarry Creeper Join Date: Jan 2006 Location: Wales
Posts: 417
|
you might want to watch for "axle Walk" (side to side movement) I had set up my lower links like that to clear the larger uppers I was using but found that even with the very small loss of triangulation that my axle tended to shift side to side. Of course I drive my little one pretty hard so it might not be a problem for you. |
|
| |
 |
 LinkBacks (?)
LinkBack to this Thread: http://www.rccrawler.com/forum/tamiya-xc-cc01/198923-cc01-tundra-build.html | ||||
| Posted By | For | Type | Date | |
| FÓRUM RC MODELÁŘŮ • Zobrazit téma - CC-01 Trochu jinak | This thread | Refback | 10-05-2011 10:56 AM | |
| |


 Linear Mode


