| |
| |||||||
 |
| | LinkBack | Thread Tools | Display Modes |
 09-10-2010, 09:23 PM
| #1 |
| I wanna be Dave Join Date: Nov 2009 Location: Houston
Posts: 2,004
|
This will be my first build thread and my first attempt at working with styrene. I will be putting a Tundra high lift body on a stretched cc-01 chassis. Please feel free to help me along the way! I started this build about 4-5 months ago so I didn't have any stock pics. First step was to gut the chassis as much as possible so I cut off the front bumper block and all the excess wheel wells. I also custom 3 linked the rear and changed the lower links. 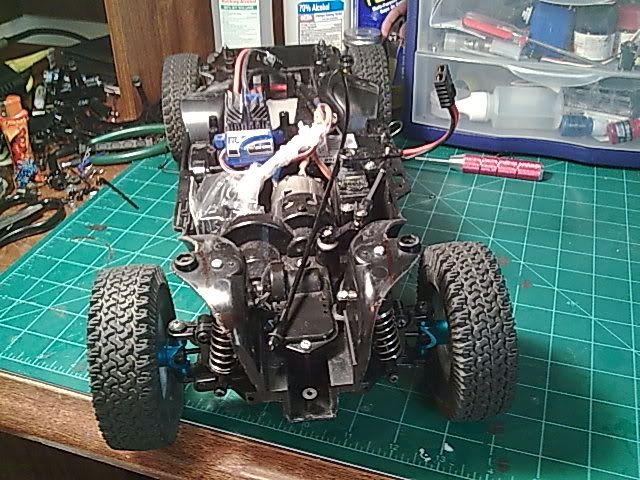 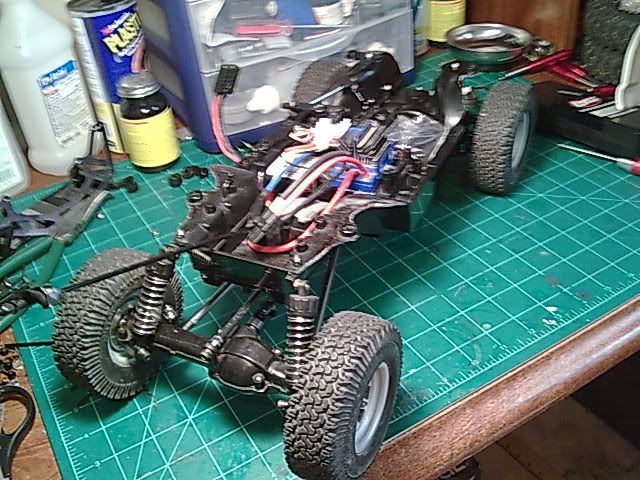 Second step was to change out the stock tamiya drive shaft as I needed a much longer shaft. I CA'd together a bunch of Traxxas half shafts to create an ugly Frankenstein monster shaft. 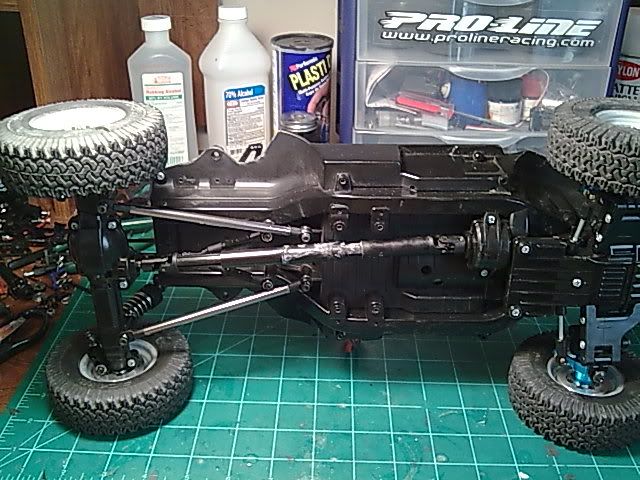 |

|  |
| Sponsored Links | |
| | |
|
09-10-2010, 09:33 PM
| #2 |
| I wanna be Dave Join Date: Nov 2009 Location: Houston
Posts: 2,004
|
I got all the electronics hooked up so now it's driveable. Third step are body mock up pics after a coat of primer: 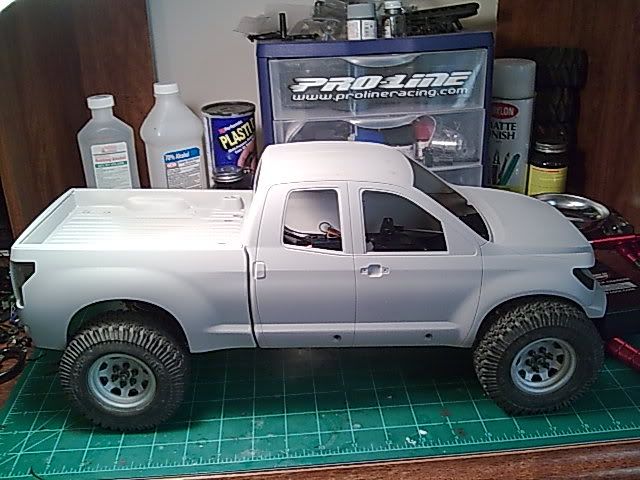 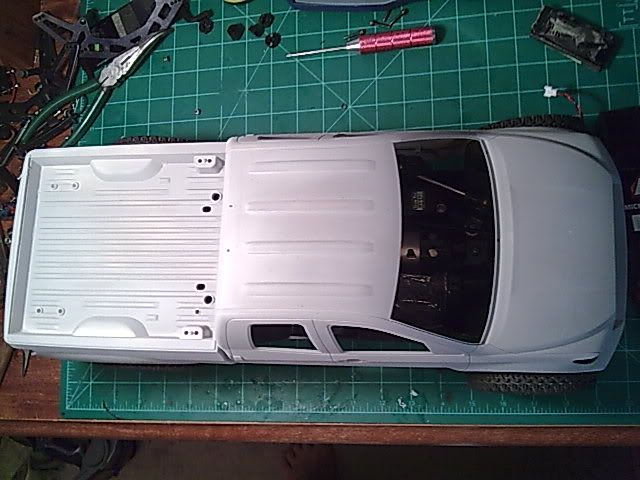 Fourth step will be figuring how to mount the body. After thinking about various ways to mount the body...I think joining the cab and the bed together would be the strongest. Then I will make some platforms into the chassis and velcro the body to it or use neodymium magnets. I will definitely need some help here. I will first styrene together some tabs off the cab so that I can join the tabs to the bed. I used the thickest styrene board I could find at the LHS. I think it was .060" 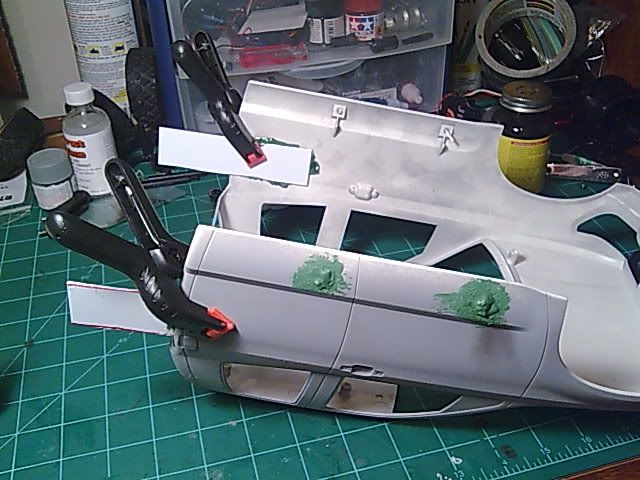 I also filled up the holes on the cab and fixed the tailgate to the bed. I had to use some filler styrene on the tailgate as well for some gaps. I will sand down everything later. 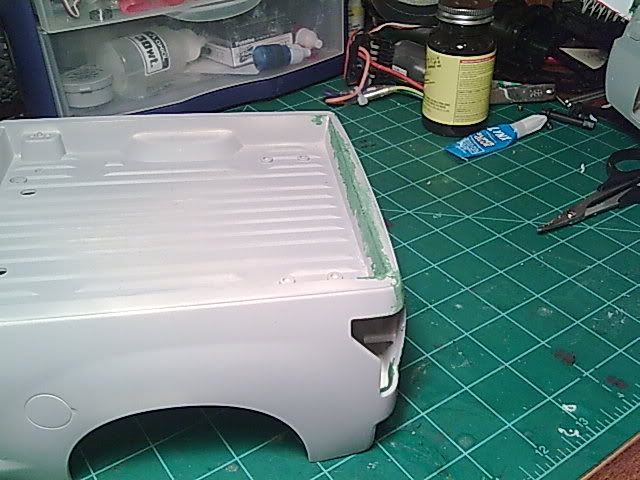 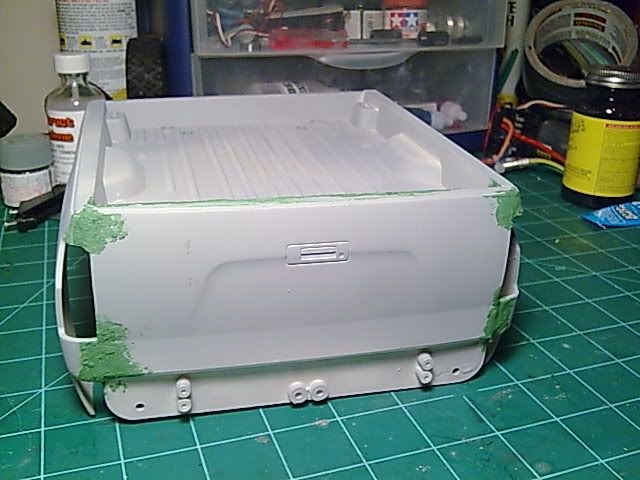 So yeah right now the tabs I made for the cab are drying. I will see how I can connect the tabs to the bed tomorrow. Any suggestions or tips will be appreciated! |
|
| |
|
09-11-2010, 04:43 PM
| #3 |
| Rock Stacker Join Date: Oct 2008 Location: Italy
Posts: 81
|
Very cool stance, it seems very stock!! But tyres are 1.9??! Maybe you need a 1.55 set of that grabbers.... |
|
| |
|
09-11-2010, 05:42 PM
| #4 |
| Quarry Creeper Join Date: Aug 2010 Location: Brisbane Australia
Posts: 268
|
Looking good. Would look more scale with the 1.55 but the 1.9 gives it a meaner stance. |
|
| |
|
09-11-2010, 08:49 PM
| #5 |
| Quarry Creeper Join Date: Jan 2009 Location: Pacific Northwest
Posts: 295
|
Your off to a great start! I think this is a cool project!  |
|
| |
|
09-14-2010, 12:06 AM
| #6 |
| I wanna be Dave Join Date: Nov 2009 Location: Houston
Posts: 2,004
|
Thanks! Yeah I was thinking about 1.55's I just had 1.9's for mock ups. Still haven't joined the cab and bed together yet. I think I will be drilling shock hoops into the chassis to support a platform where I can use to attach the body.
|
|
| |
|
09-21-2010, 07:47 AM
| #7 |
| I wanna be Dave Join Date: Apr 2009 Location: Unnecessary Surgery Land
Posts: 3,406
|
I wish I had time to work on my cc-01 Tundra  As for joining your bed and cab together, you should leave them separate. Bolt the bed to the chassis and only make the cab removable for changing batteries. Last edited by pardonmyn00b; 09-21-2010 at 07:50 AM. |
|
| |
|
09-27-2010, 02:05 PM
| #8 |
| Quarry Creeper Join Date: Jan 2008 Location: san jose
Posts: 293
|
starting to look good
|
|
| |
|
09-29-2010, 02:15 PM
| #9 | |
| I wanna be Dave Join Date: Nov 2009 Location: Houston
Posts: 2,004
| Quote:
Btw what shocks are you running? | |
|
| |
|
10-09-2010, 09:31 AM
| #10 |
| I wanna be Dave Join Date: Nov 2009 Location: Houston
Posts: 2,004
|
Sorry not a lot of time to work on the new rig especially with my anniversary coming up. Man I am in your exact same boat. The hinge system is easy on my HL Tundra just follow the freakin instructions! But on a CC-01 without extending the chassis it is extremely difficult. After hours of thinking the easiest way to do I still can't work out an effective solution. Here's the bottom line: the cab and bed NEED to be separate in order to match the body lines. 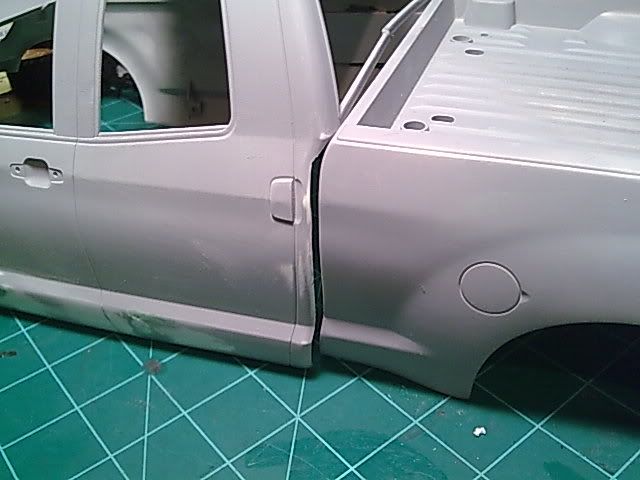 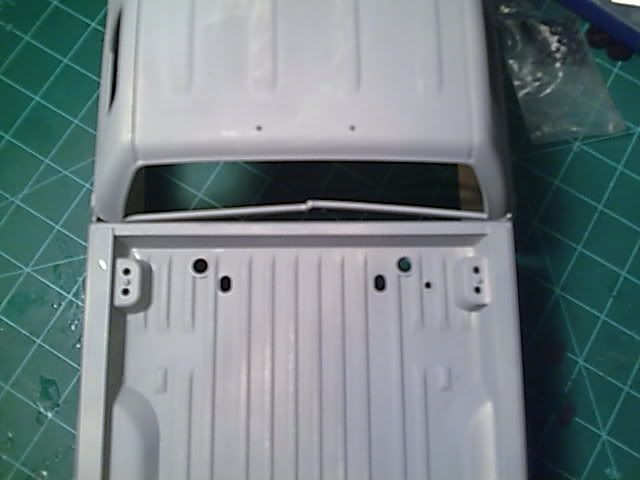 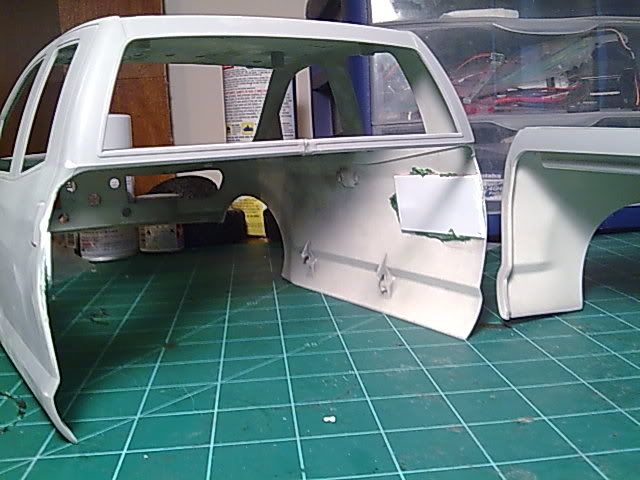 You can see what happened when I use .060 styrene to make some tabs. As soon as I tried the other side once one side cured SNAP there goes that idea. My new idea is to make connect both ends of the bed together into a wall. I join as much styrene as possible to make it sturdy enough to run a few screws. The cab back I will do the same. Then just screw each of the sides together. Tough part is I still got those tabs I made stuck on the inside of the cab that I am afraid if I cut it the body will be destroyed. I also got a rear rake to the truck since I am building it as completely scale as possible. I added my HL shocks over since I run GMade Zeros on my HL Tundra and had them laying around. Much softer than the stock CC-01 oil dampers. I'm worried about ground clearance on the rear axle though.. 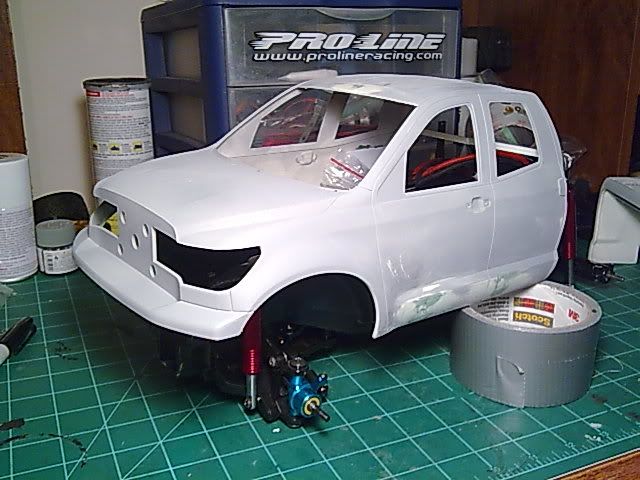 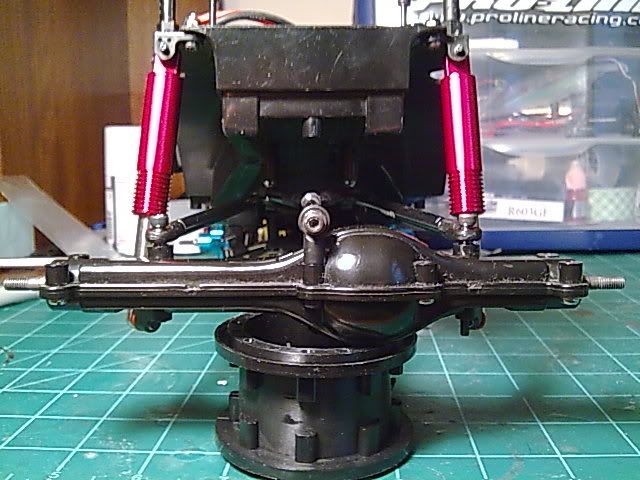 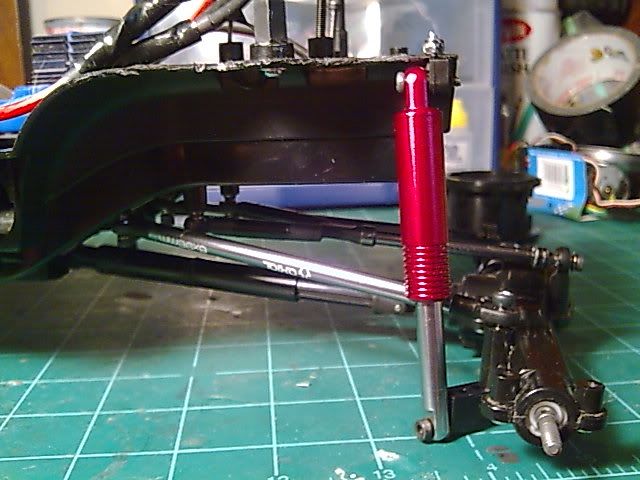 Let me know what yall think since this is my first full scale build! Definitely going to use those 1.55 dirt grabbers though! pardonmynoob what 1.55" wheels are you running with those dirt grabbers they look almost like the ones 1.9" RC4wd Jeep JK Stock wheels... |
|
| |
|
10-24-2010, 07:46 PM
| #11 |
| Pebble Pounder Join Date: May 2008 Location: in the shop
Posts: 155
|
Cool idea. Looks like the CC axle width is perfect for a stock Tundra build
|
|
| |
|
10-26-2010, 10:35 PM
| #12 |
| I wanna be Dave Join Date: Nov 2009 Location: Houston
Posts: 2,004
|
Yep progress kinda came to a slow hault. I just finished the new 2010 release of the Sand Scorcher. Working on a flip top sunroof and just finished an interior cover to hide all the electronics. Probably not going to do a dash setup. 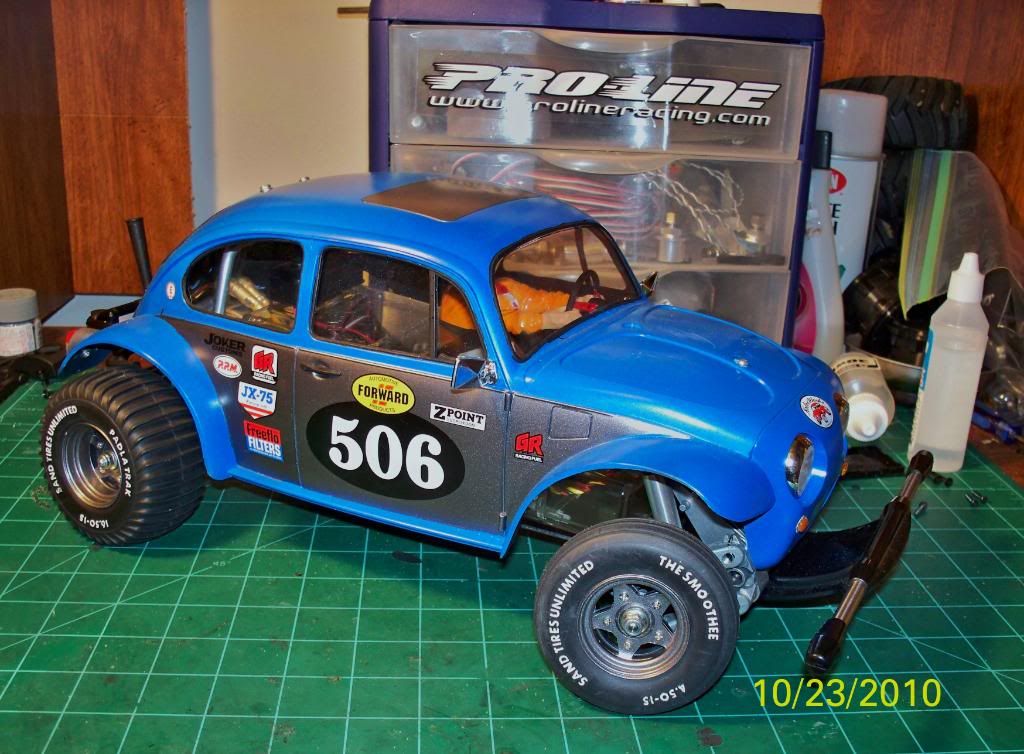 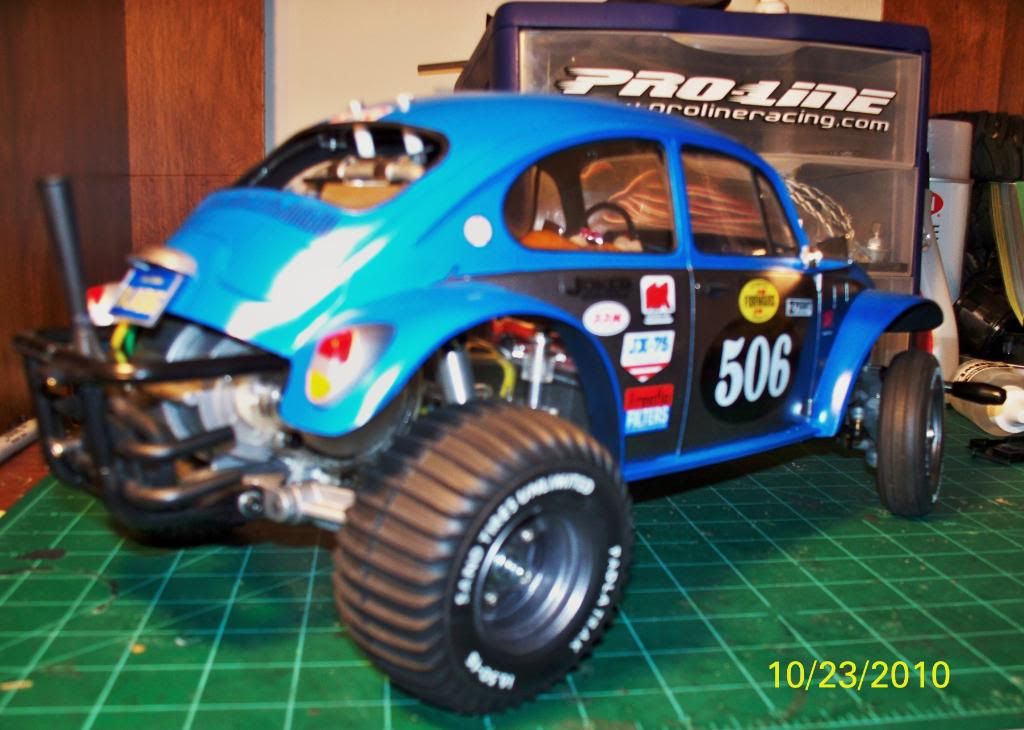 Going to try to do some aluminum paint on the rear engine cage to match the rest of the alloy. Also working on HPI's Mini Trophy Truck....getting it more scale. Got the light bar setup the way I want and finished the tail light bar....now I gotta think of something for the dash besides just lighting up the GPS screen. 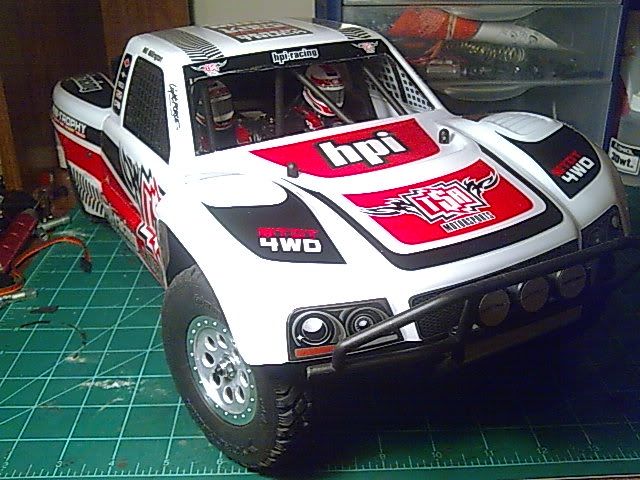 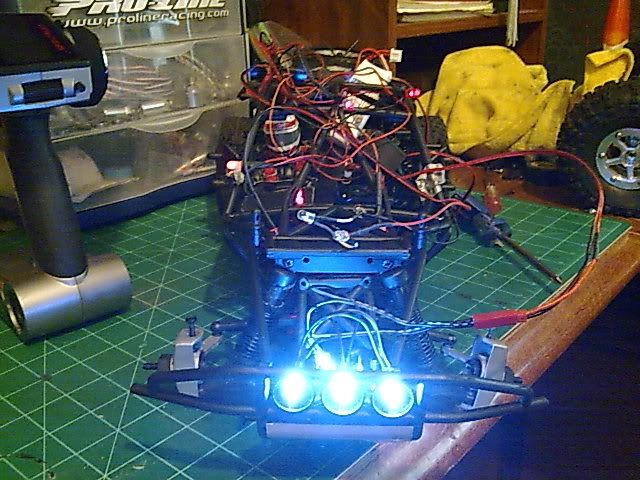 Don't know why the pics made the light bar look blue but they're the brightest whites you can pick up from RadioShack on a 7.4V and I have since used Tamiya clear orange on them. Interior I want to light up red gauges....GPS screen might be white though still thinking. |
|
| |
|
11-26-2010, 09:11 AM
| #13 |
| I wanna be Dave Join Date: Nov 2009 Location: Houston
Posts: 2,004
|
Sorry about the last post sort of got off topic with my other new project cars! Anyways back to working on the CC-01 Tundra. Updates: My dumb ass sat on the bed and snapped off the tailgate lol. Now I know that I can't use putty to support it. I went ahead and reattached it using Plastruct Bondene to melt it altogether. First lesson learned! My new idea is to make 2 panel walls .60" thick each underneath the cab behind the bed and to join it together either with screws and bolts or with Plastruct.... Problem is the lines again do not match up. Any other advice or ideas? 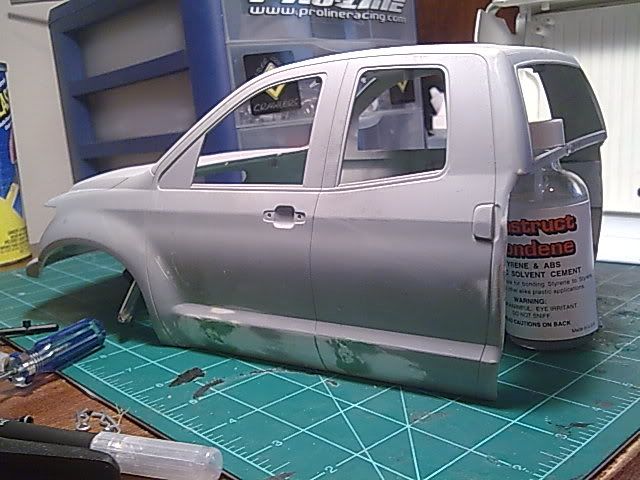 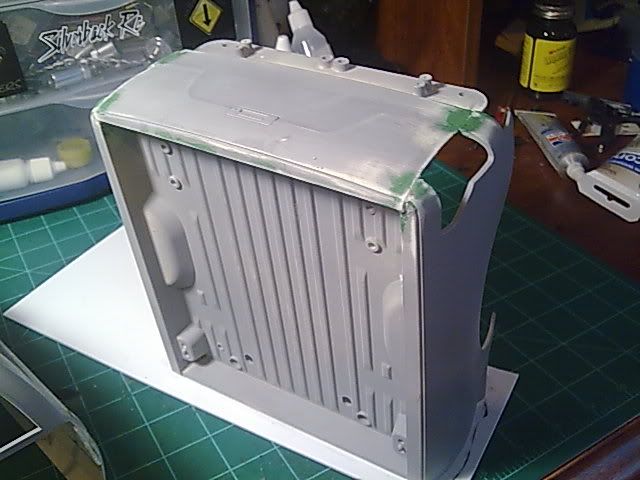 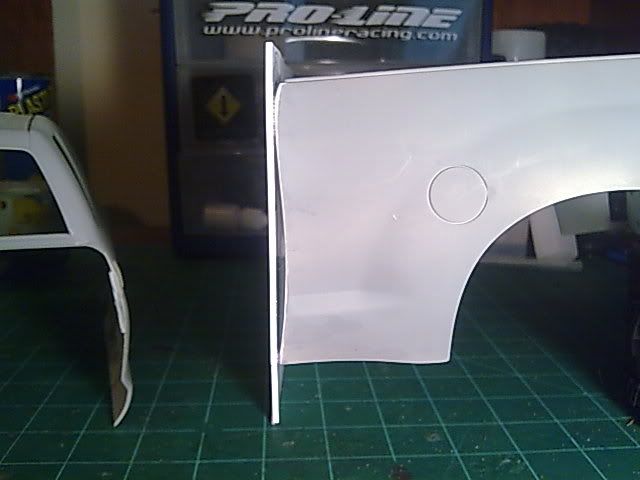 |
|
| |
|
12-09-2010, 10:02 AM
| #14 | |
| Quarry Creeper Join Date: Jul 2008 Location: Kaufman
Posts: 451
| Quote:
Where can I get these tires? | |
|
| |
|
12-09-2010, 12:49 PM
| #15 | |
| Quarry Creeper Join Date: Jan 2004 Location: Bend, OR
Posts: 245
| Quote:
| |
|
| |
|
01-23-2011, 10:36 PM
| #16 |
| I wanna be Dave Join Date: Nov 2009 Location: Houston
Posts: 2,004
|
WELL...super long time no post. Just finished up a KOH buggy so now I have time for my ultimate scaler CC-01 Tundra IFS. Since last update...used the thickest styrene I could find to mate the bed to the cab and will reinforce them with small screws and nuts. Filled in all the gaps in the body lines with styrene and construct. Next to do is to putty up the rough edges and clean up the extra styrene. Then onto sanding down the green putty. After that I'll shoot primer again...do I need to score the body with sandpaper before I do this? 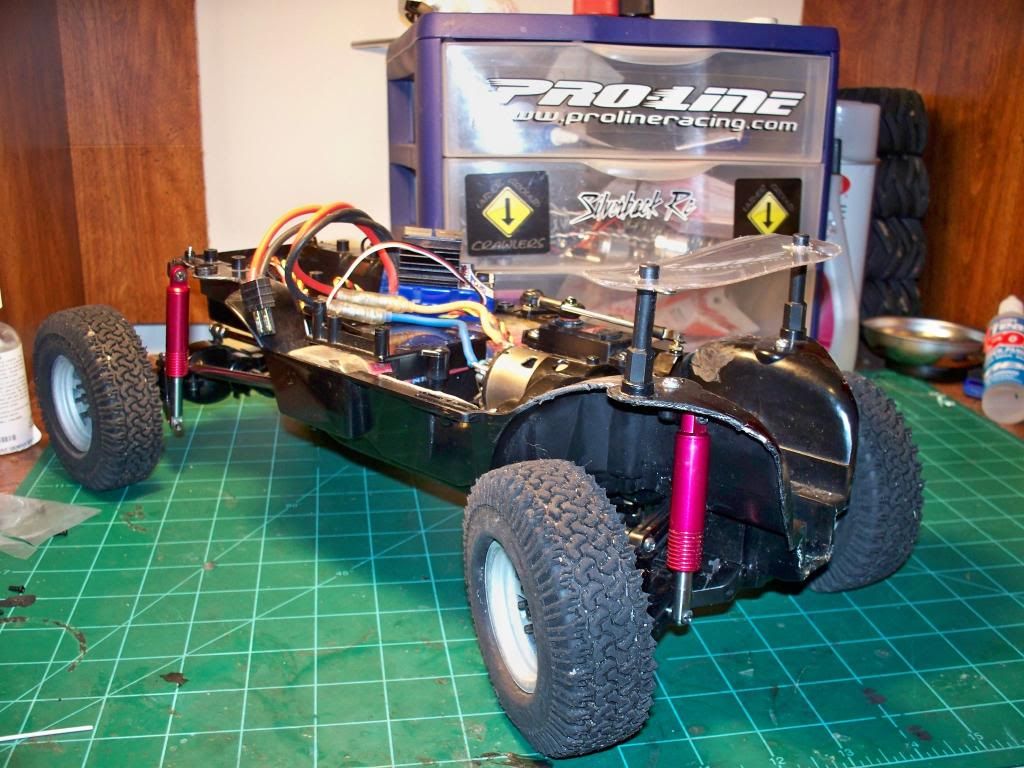 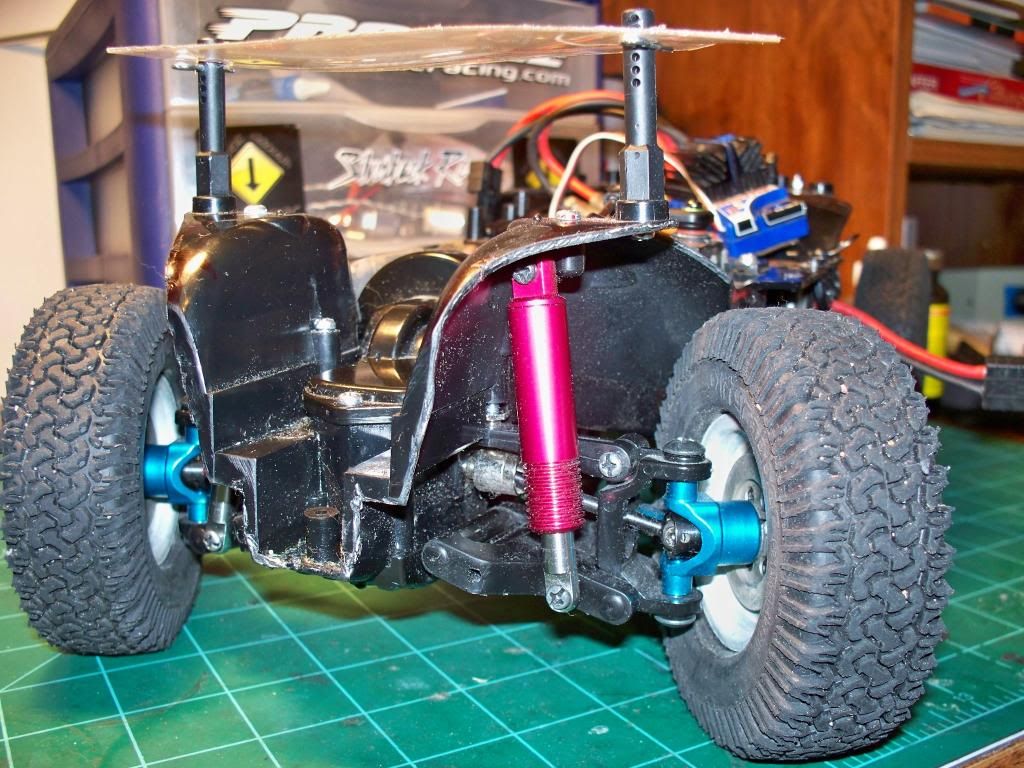 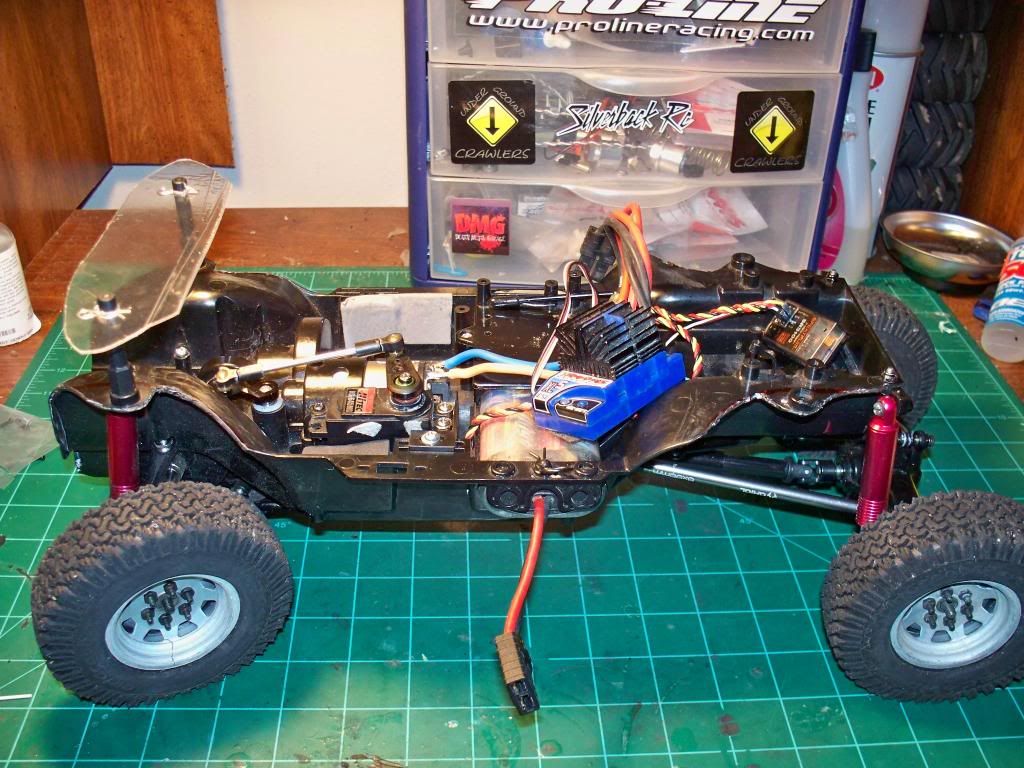 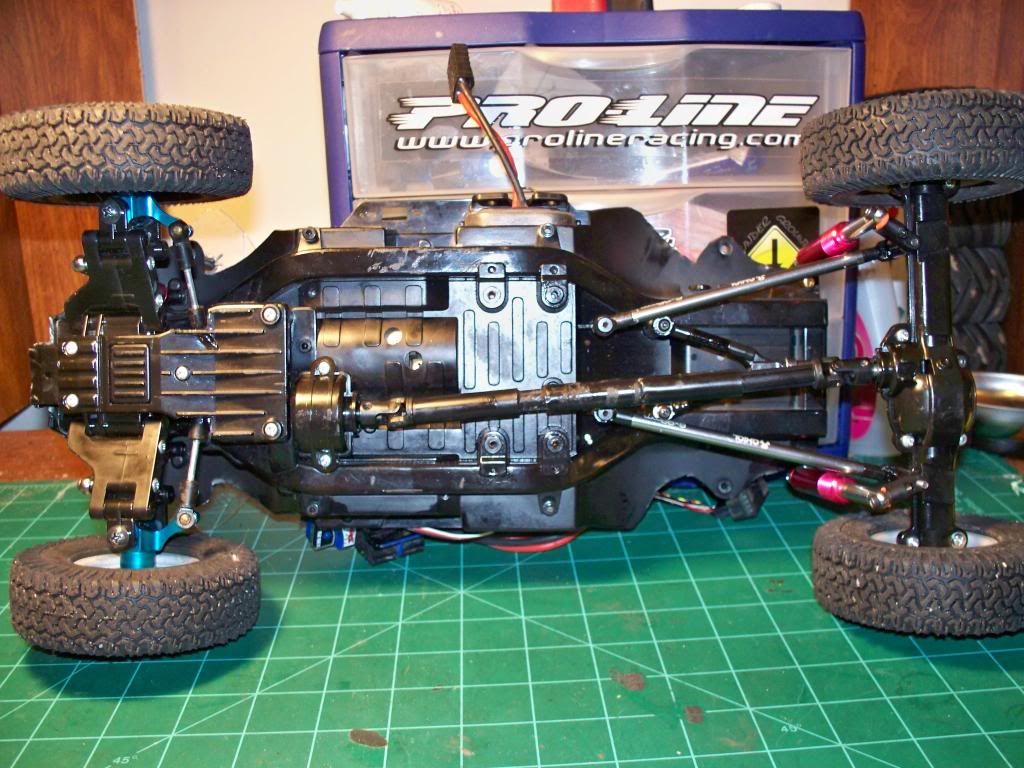 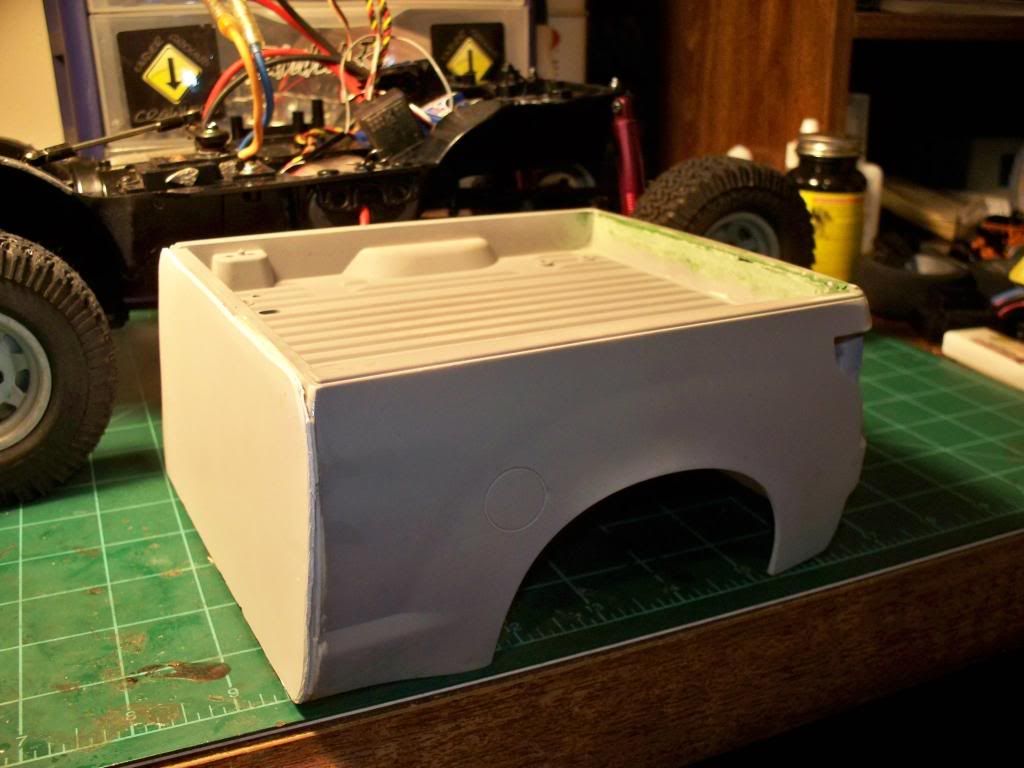 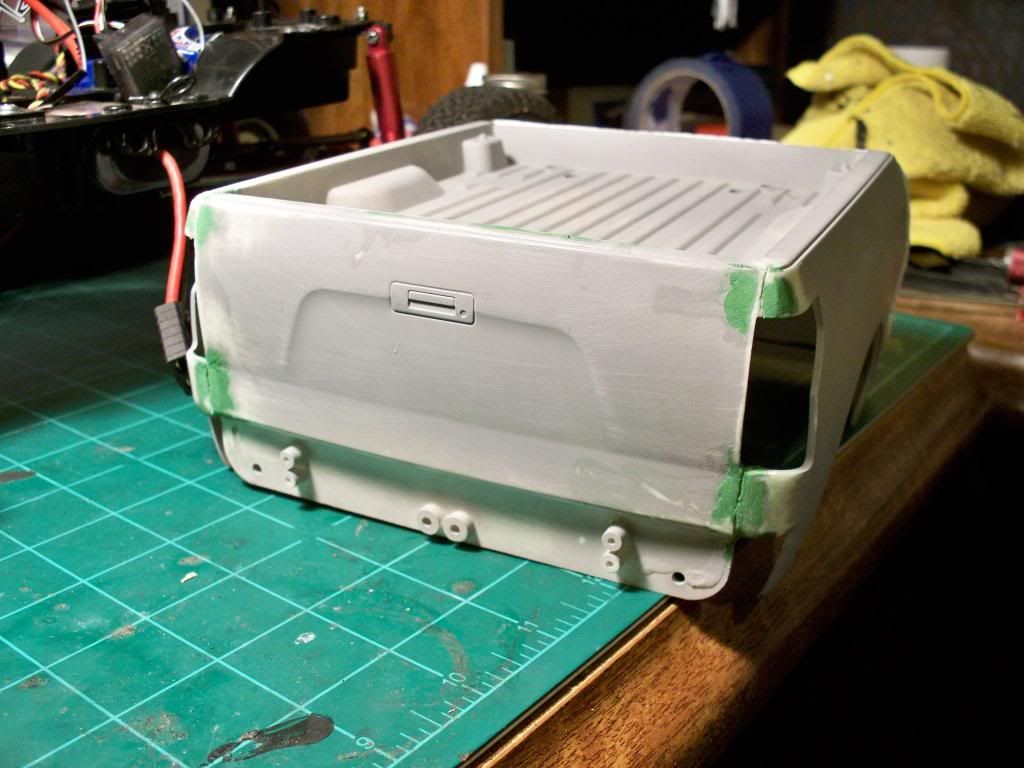 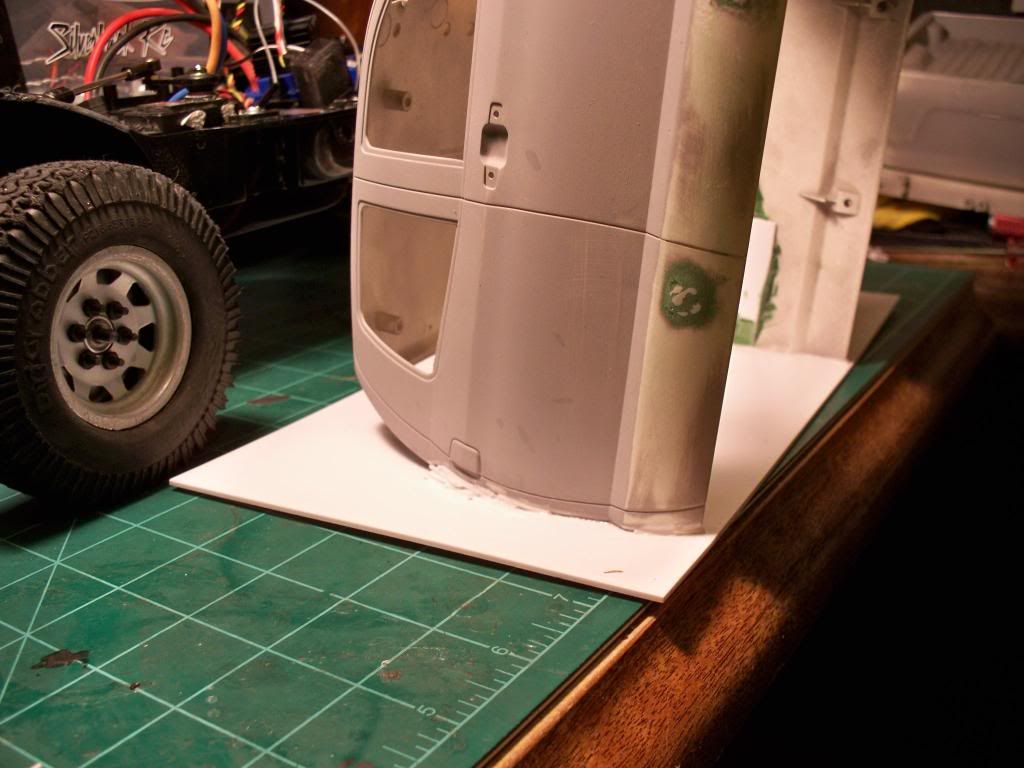 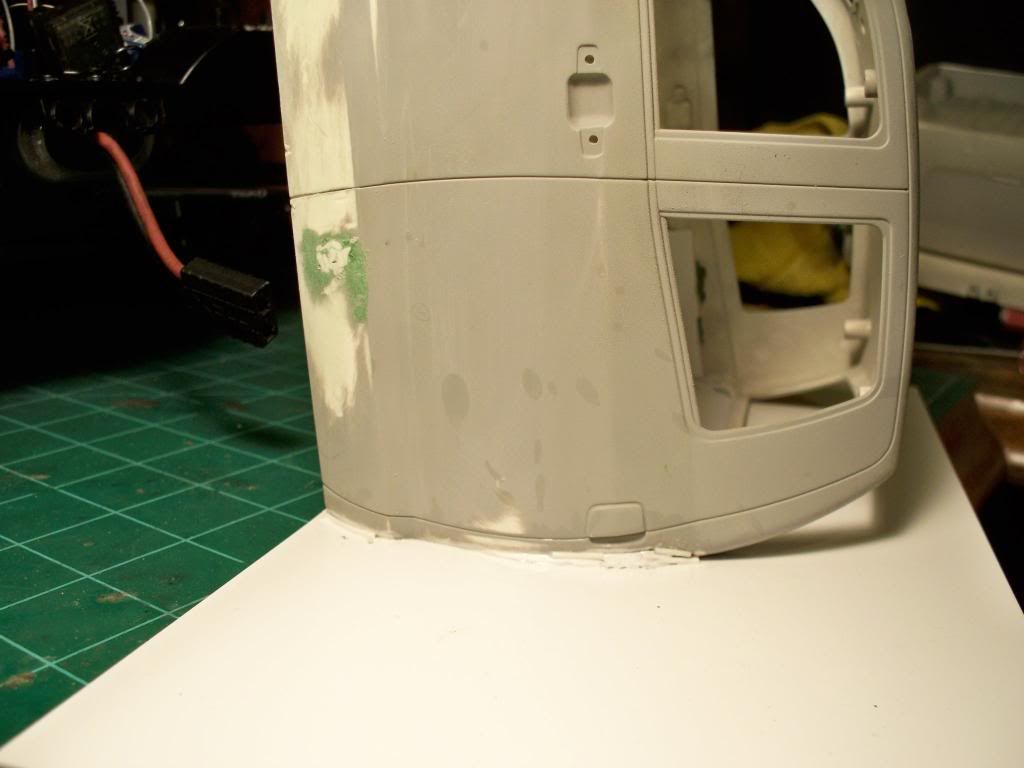  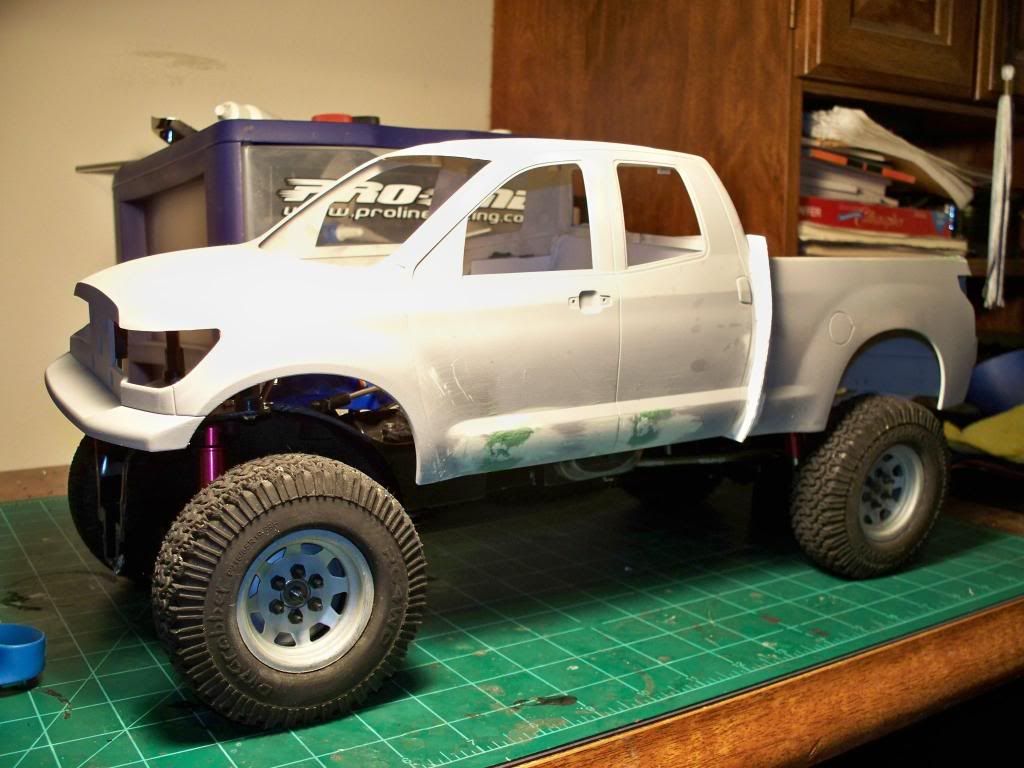 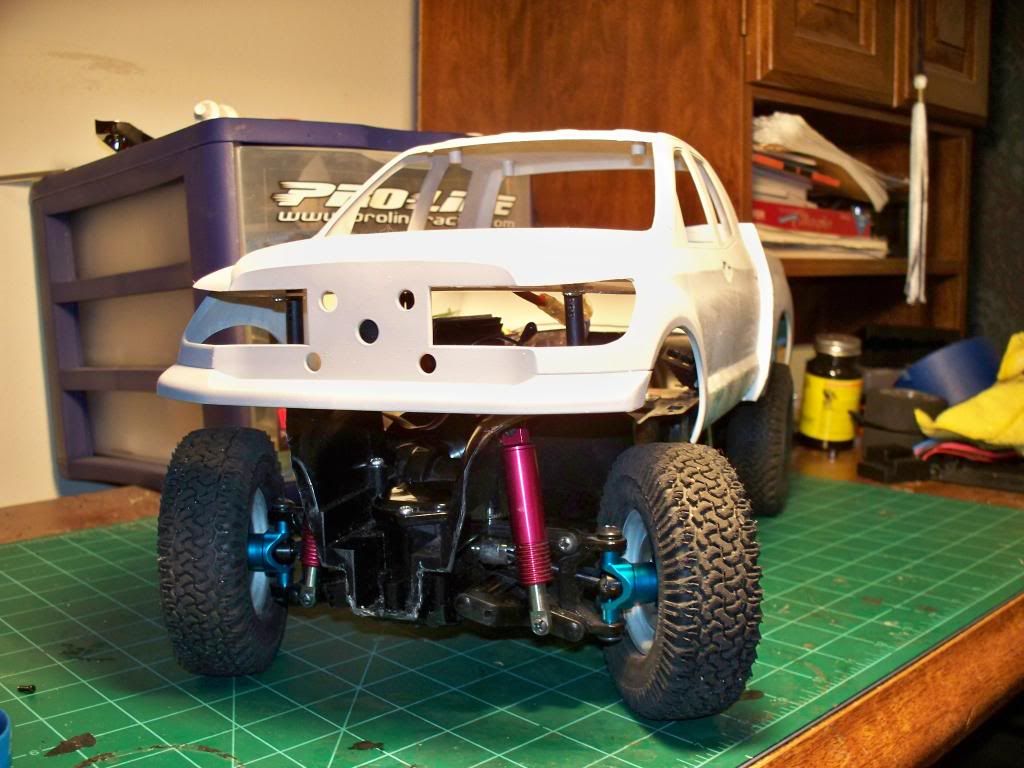 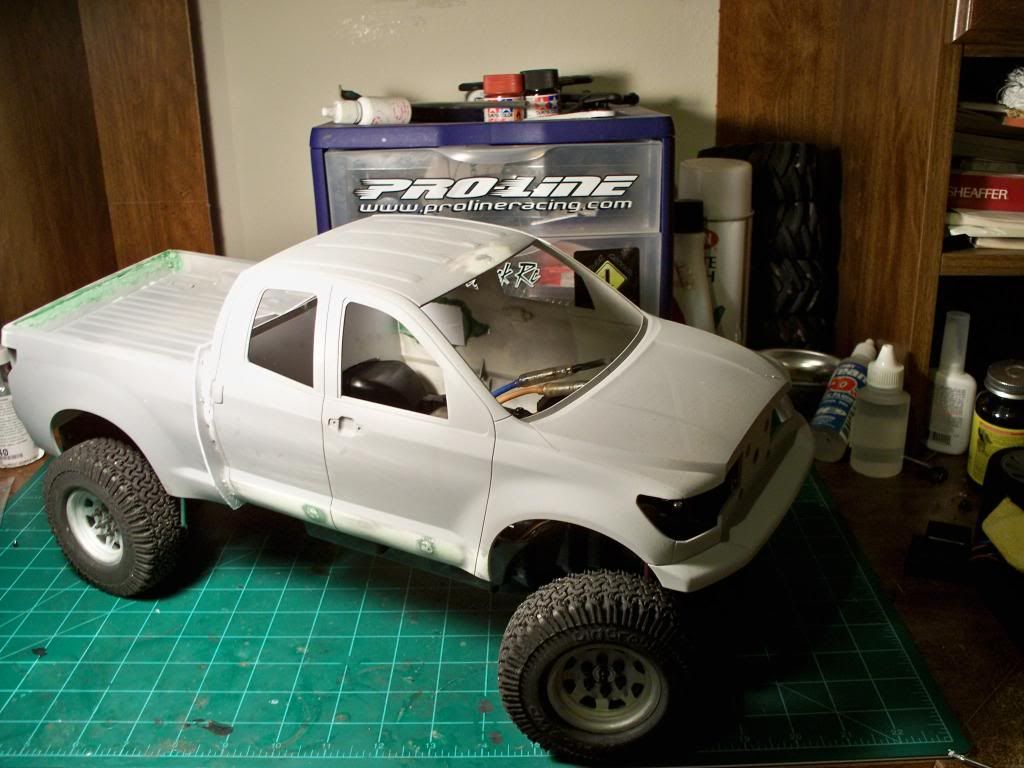 Bumpers, lights, roll bar, door handles will be added. Maybe and mirrors snorkel as well. |
|
| |
|
01-24-2011, 08:01 PM
| #17 |
| I wanna be Dave Join Date: Nov 2009 Location: Houston
Posts: 2,004
|
More updates: Mated the cab and bed together tonight while it cures...tomorrow I will bolt on the two inner styrene boards where I have the clamps on. Then followed by grill, lenses, etc... 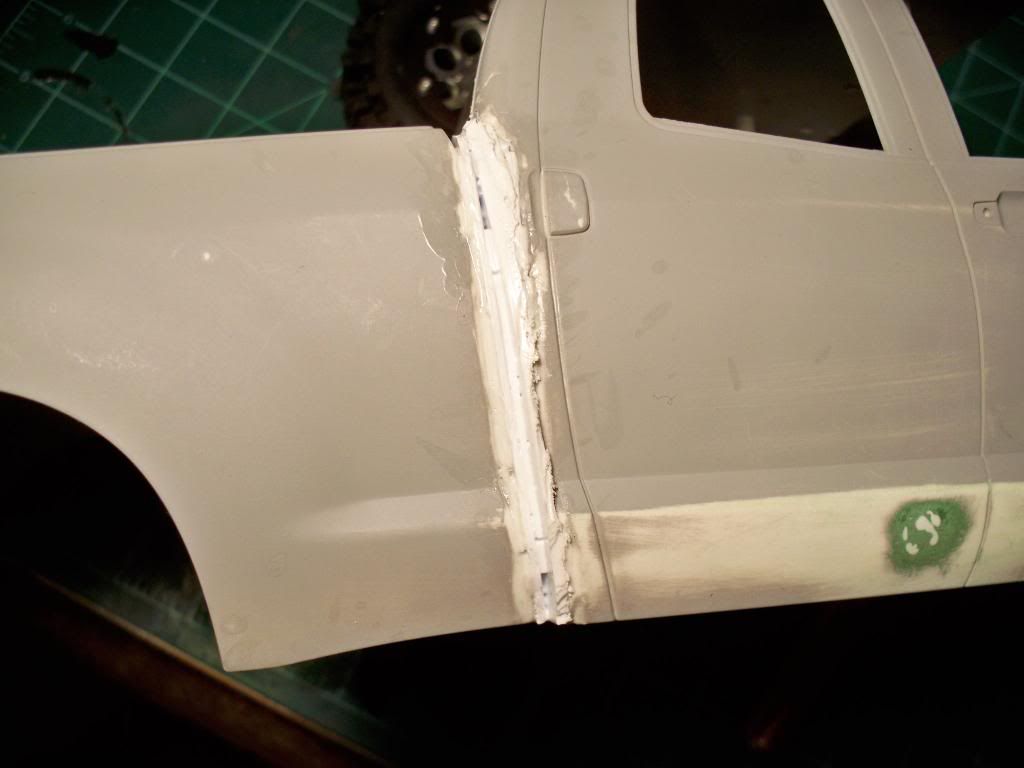 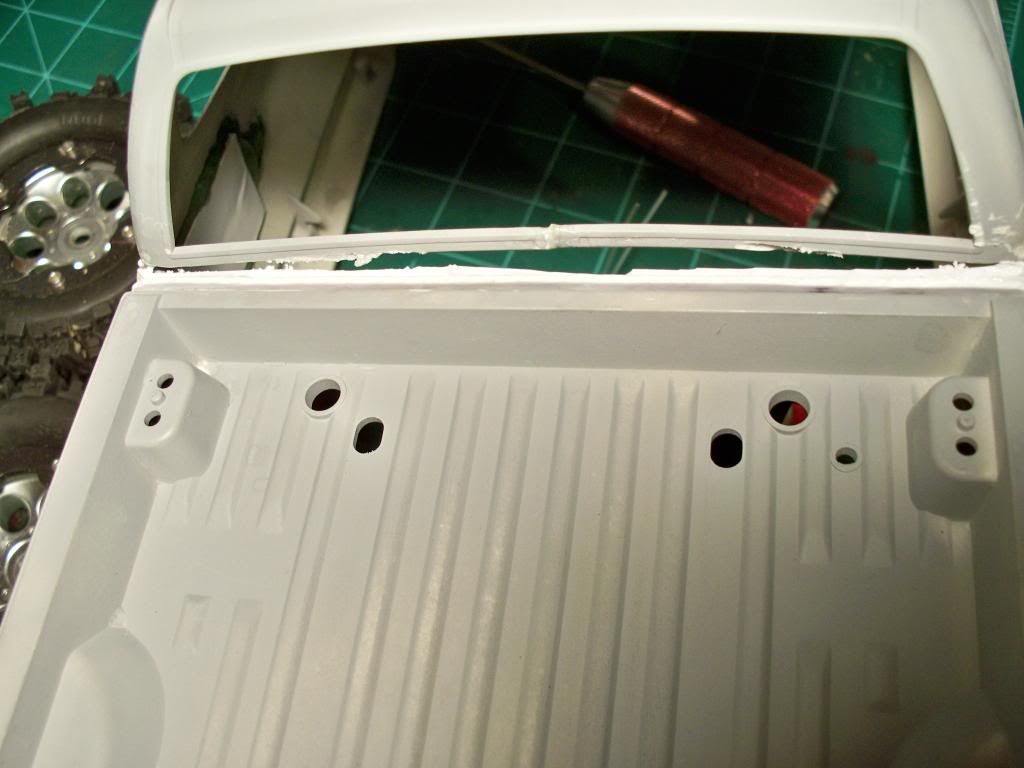 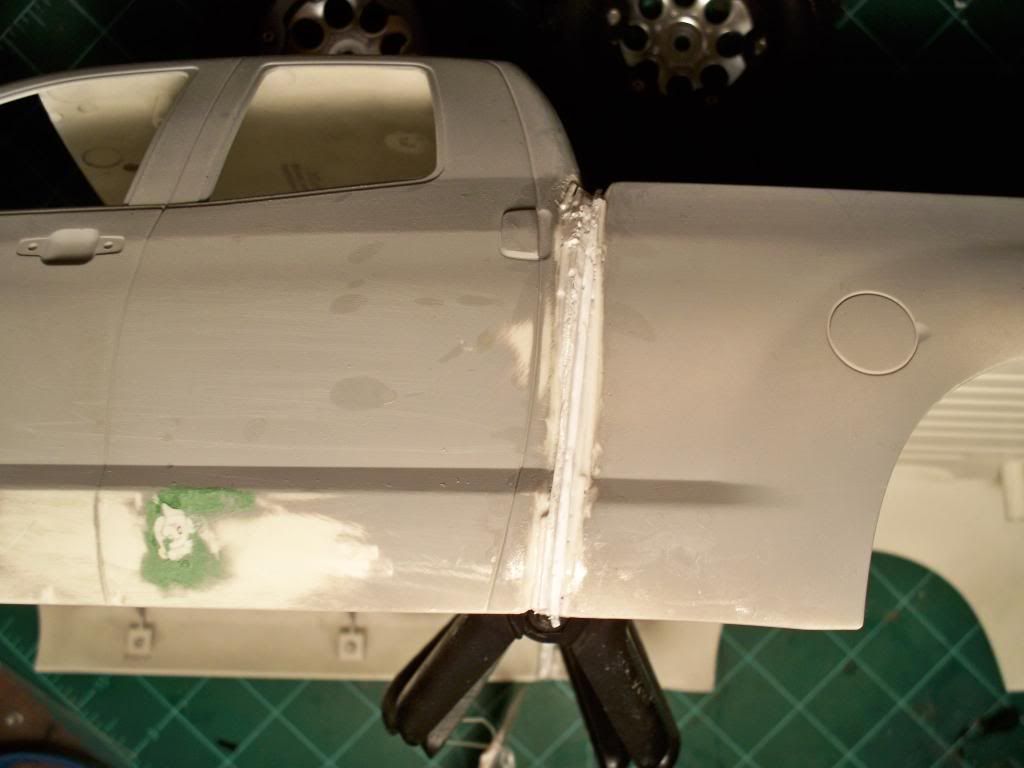 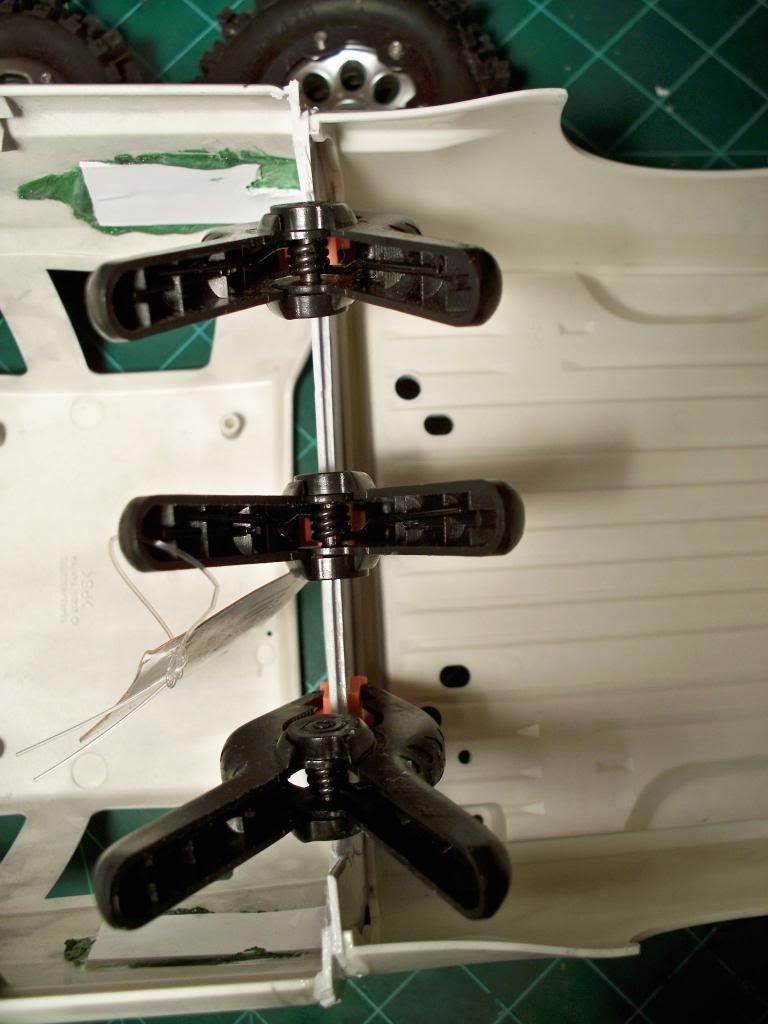 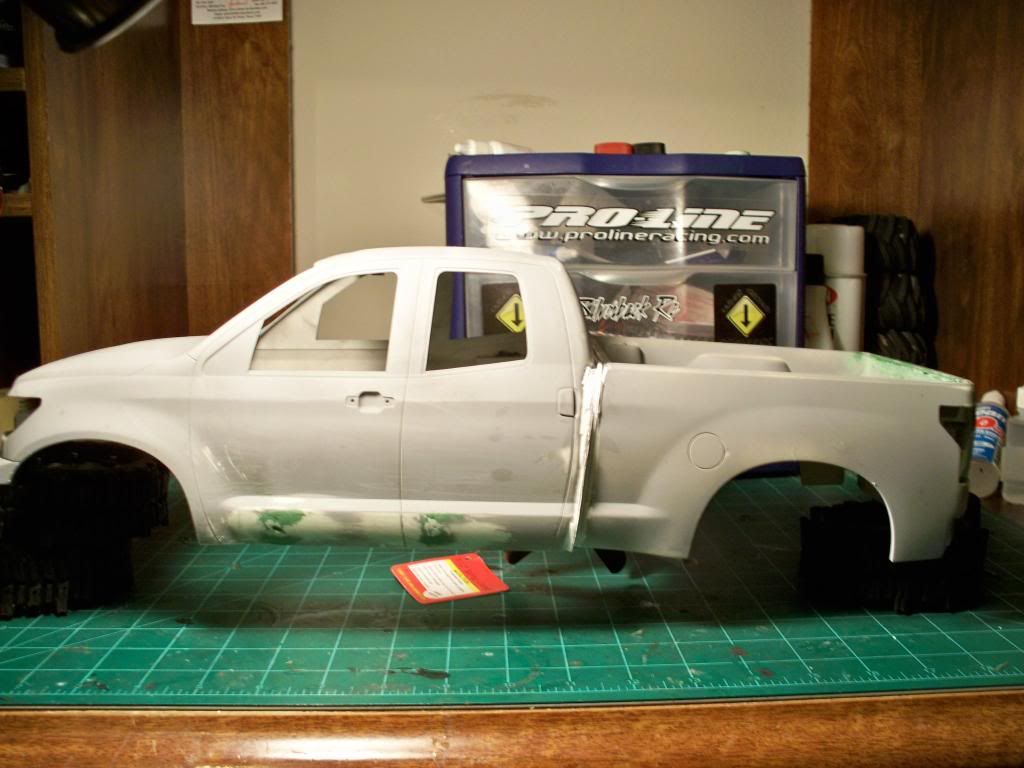 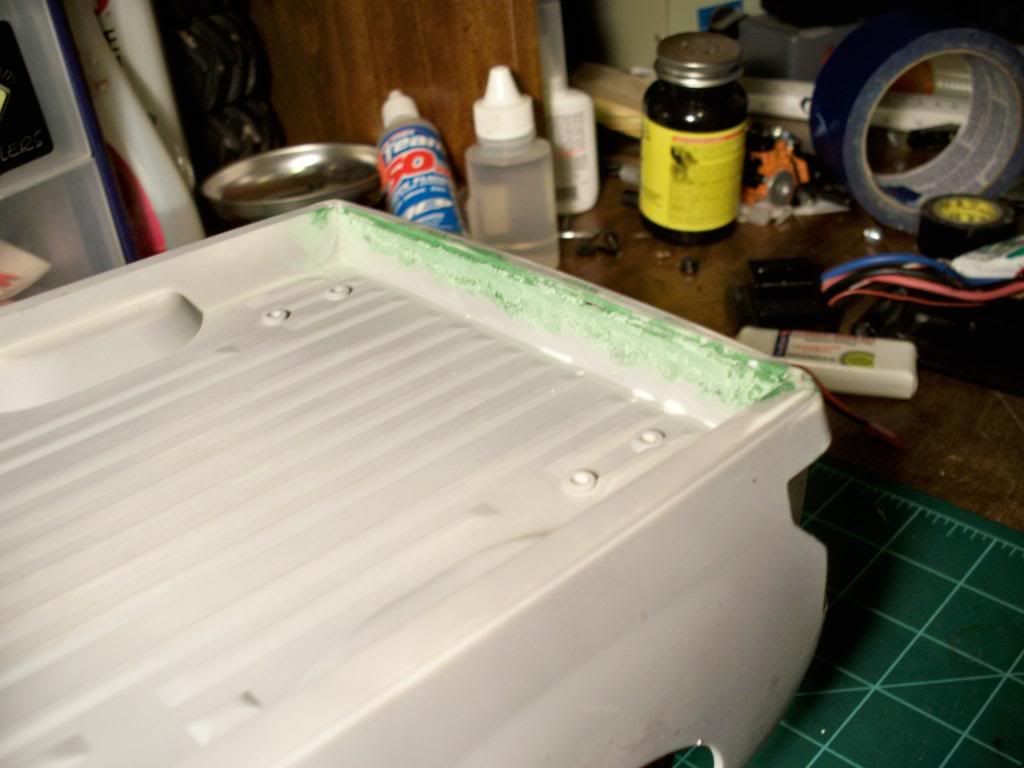 How to I fix that hideous broken gap between the bed and the cab when viewed from the top? |
|
| |
|
02-03-2011, 09:12 PM
| #18 |
| I wanna be Dave Join Date: Nov 2009 Location: Houston
Posts: 2,004
|
How should I blend this? I decided to mate the cab and bed together for structural integrity. There are two pieces of thick styrene bonded together which I will reinforce with nuts and bolts. Do I use little pieces of styrene followed by green putty then sand? Or can I just use green putty with no styrene? 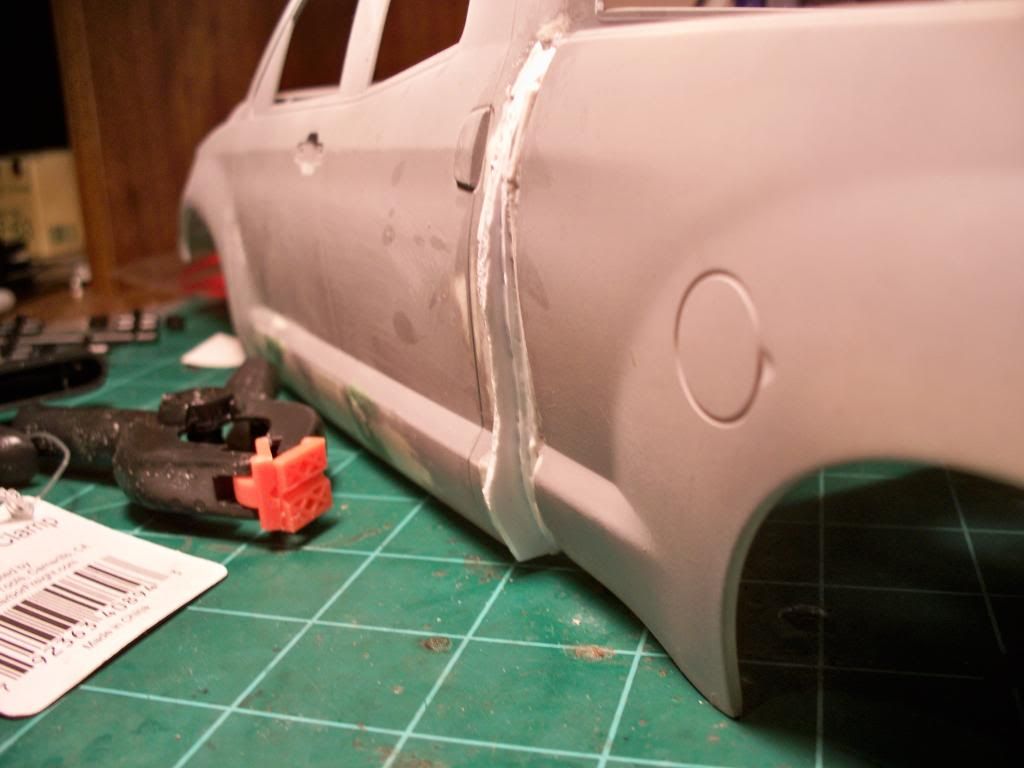 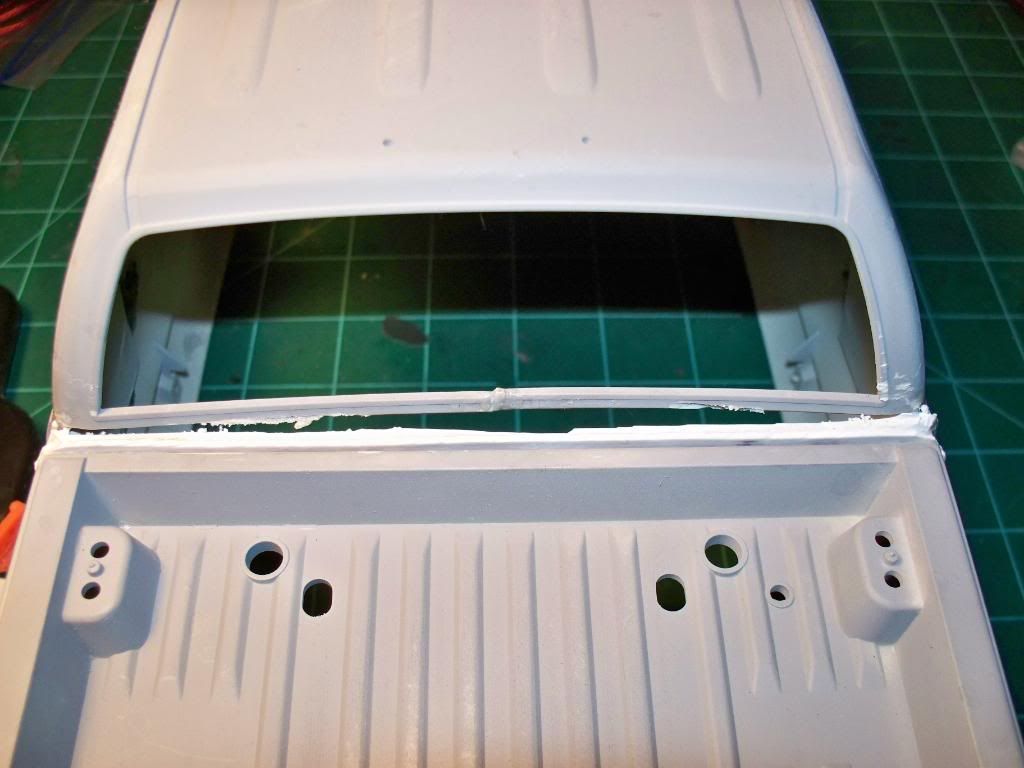 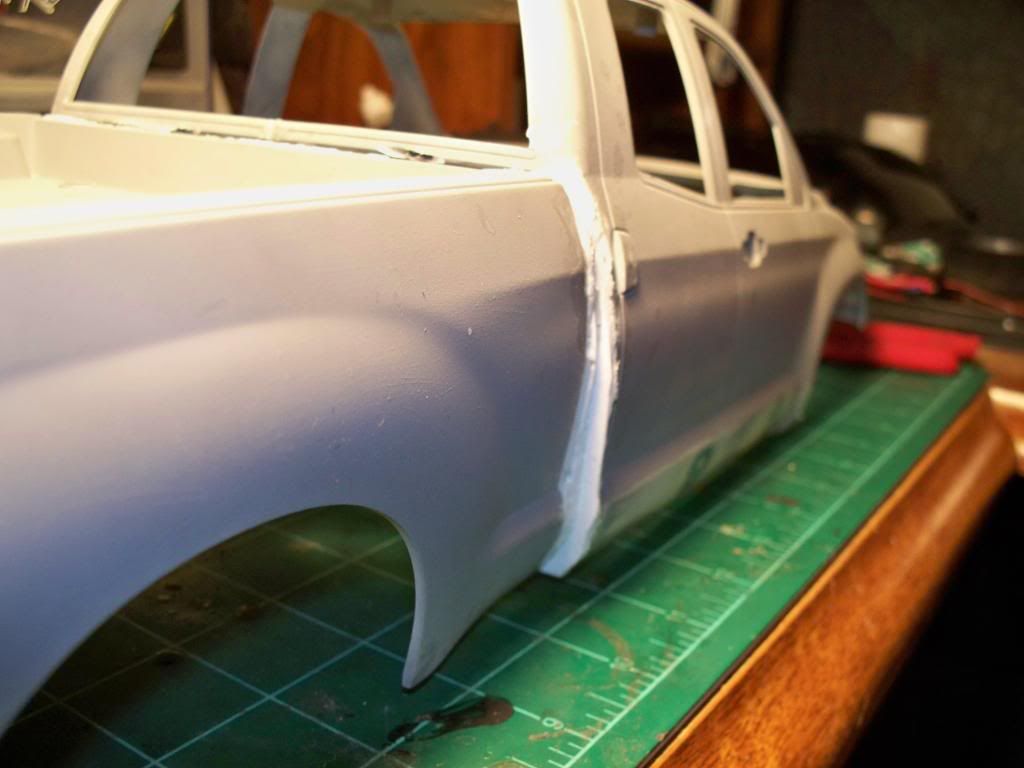 |
|
| |
|
02-07-2011, 10:52 PM
| #19 |
| I wanna be Dave Join Date: Aug 2007 Location: santa monica
Posts: 3,687
|
Sand what you have down flush with the body. You should fill as much as possible with styrene, but you may have enough there already. Then fill with the squadron (green or white). Then sand. and sand. and sand...  |
|
| |
|
02-08-2011, 05:36 AM
| #20 |
| Quarry Creeper Join Date: Feb 2008 Location: Oakdale, MN
Posts: 420
|
Looking good! I was wondering how you like the Highlift shocks on there. I was thinking of getting some to replace the stock shocks on mine. I'm just concerned they will limit the travel up and down.
|
|
| |
|
| Thread Tools | |
| Display Modes | |
| |


 Linear Mode


