| |
| |||||||
 |
| | LinkBack | Thread Tools | Display Modes |
 03-23-2015, 04:07 AM
| #1 |
| Newbie Join Date: Apr 2013 Location: United Kingdom
Posts: 37
|
So, as some of you may have already read on my other build thread, I have a little bit of a Jurassic Park obsession in the form of my Staff Vehicle from the movie. This time around I was going to make a Civilian-spec Pajero for general crawling stuffs. That didn't happen and things very quickly spiralled out of control!!  I sourced the CC01 from another member on Scalerc.co.uk (great UK community) which had already been finished to quite a nice standard.  The chassis needed attention, it had been fitted with GPM 4-link rear suspension and some longer shocks. The 'body lift' meant the front was nowhere near as high as the rear and it had some pretty extreme 'rake' going on!  It also had some GPM front lower arms, but was otherwise standard - 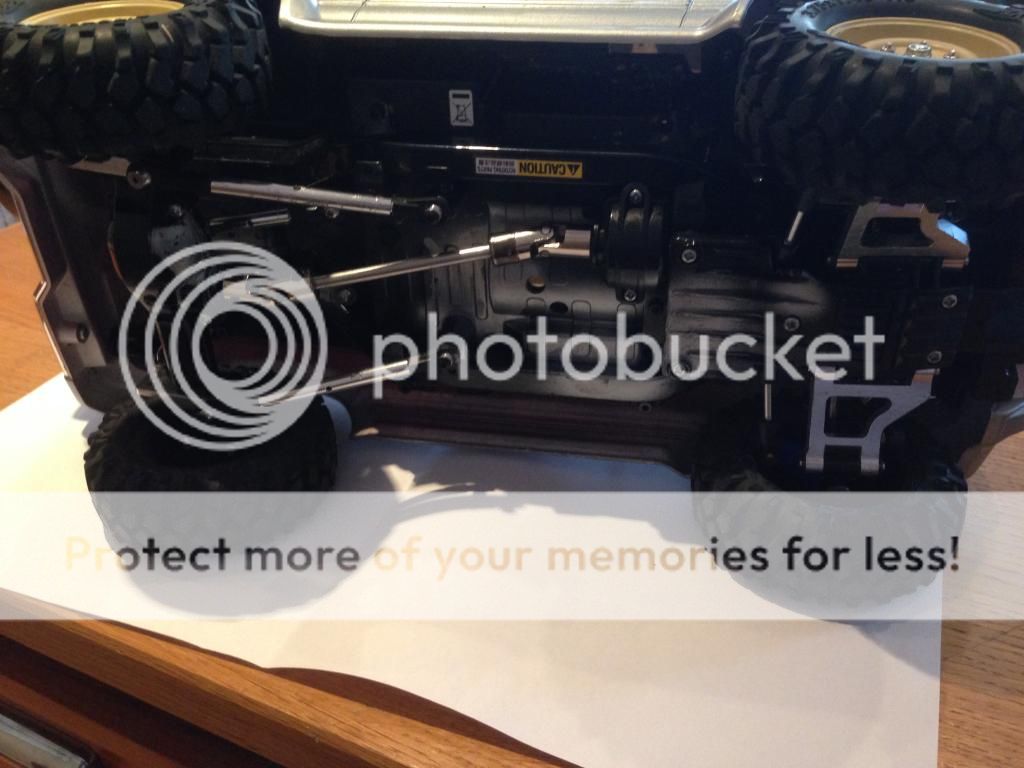 I fitted some Tamiya 54541 Aluminium Oil Dampers, but the only position they would fit on the rear link setup was second from the top, which made the car too high for my liking. A new 4-link setup was required!  Electronics dropped in, standard silver-can just for testing purposes while I waited on a rebuildable 55T motor in the post. ESC is a Hobbywing Quicrun 1060, amazing value for money and LiPo compatible out of the box... 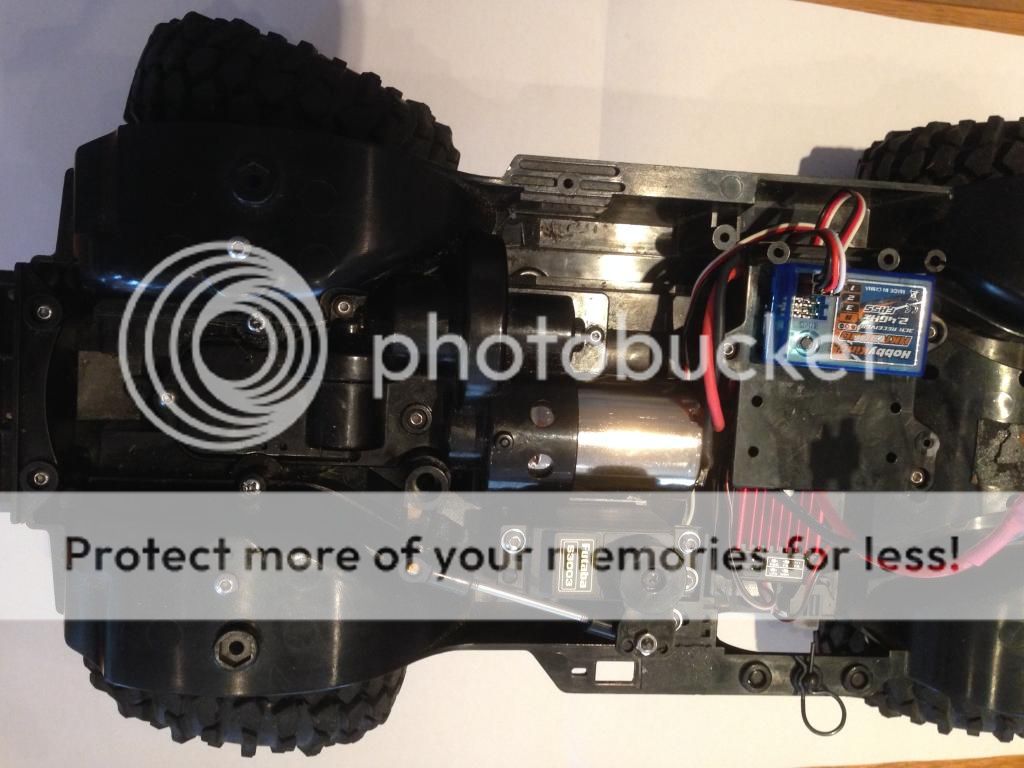 Used a leftover part from my FAV build to hold the battery into its' new location, works surprisingly well!  Experimenting with different wheels- 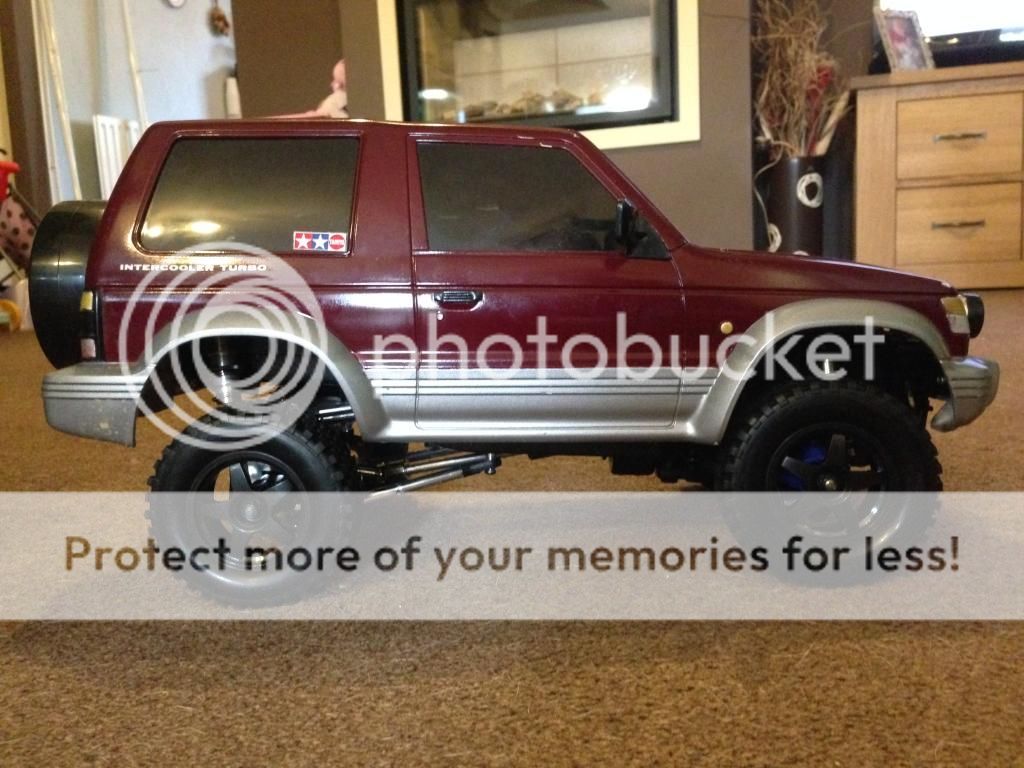  Then the biggest purchase, a roll-cage / roof rack from RCModelex.  It's very substantial, fits well (although don't ask how the rear hatch would ever open with the ladder welded on there!)  Primer; Chrome removed from bumpers using the dishwasher technique -  Next big purchase was a big disappointment. It's one of those alloy bumpers from eBay with the built-in 3Racing winch. Also pictured here is the sump guard / skid plate from Radshape RC. I also laid-down the base colour, a sort of 'Hunter Green'  The bumper is very crooked. I don't know what kind of template the guys welding these things together are using, but it needs looking at.  I just wasn't happy with it. I emailed the seller but never got a response, and I was busy moving house at the time. I side-lined the bumper for another project instead. Hello new 4-link setup-  And some new Junfac goodies too -  I also discovered what that funny grinding noise was in the rear axle...  Threadlock these screws on re-assembly guys! This is why I dislike buying used rigs, as I don't know how well everything has been assembled in the first place. You'll also notice the whole 'fully ballraced' thing didn't mean quite what it said it meant... The front bumper issue was resolved thanks to Shapeways.com in the form of a 3D printed animal guard. This thing was perfect, it's flexible and it fits like a glove. The only concern I had was the textured finish, but I might worry about that later - lets see how tough it is first!  After this I got pretty bad with taking pictures. I sourced some tyres from Hobbyking (Kong 90mm) and set about masking and spraying the bumpers in black...  Ta-da-  Trial-fitted-  Looking tough-  It needed some decals, so I kept it simple and clean. Nice JP roundel on the bonnet (hood, for you in America ;) ) and some InGen logos for the doors.    I still need to add some accessories. You'll notice the painting of the lights has been rushed, this is because I'm going to add light buckets and just wanted a temporary solution for photographing for now.  Should look really good with that hood scoop, just hope I haven't put the roundel in the wrong place for it :( It has lots of lights already this rig and the numer is only going up. I'm thinking of running a TLU-02 unit, I just have to stomach the cost! Any tips or feedback gratefully received! |

|  |
| Sponsored Links | |
| | |
|
03-23-2015, 02:24 PM
| #2 |
| Pebble Pounder Join Date: Nov 2005 Location: south jersey
Posts: 136
|
Paint came out very nice! I also dont like the "rake" look that so many of these trucks get. question, why do you mount the battery in the back?
|
|
| |
|
03-24-2015, 02:37 AM
| #3 |
| Newbie Join Date: Apr 2013 Location: United Kingdom
Posts: 37
|
The battery is unfortunately too big for the stock location and wouldn't fit without some serious modification. I'm thinking of filling the void where the battery used to be with some lead weight, because the body is now really heavy!
|
|
| |
|
03-24-2015, 02:59 AM
| #4 | |
| RCC Addict Join Date: Dec 2007 Location: Moncton, NB, Canada
Posts: 1,962
| Quote:
Nice looking Pajero though, I like what you've done to it, a hell of a lot better than when you got it. | |
|
| |
|
04-04-2015, 02:46 PM
| #5 |
| Newbie Join Date: Oct 2014 Location: Somewhere
Posts: 9
|
Nice job man. Looks good. Those light buckets and the brush guard really bring it to life. I have one on mine. Same thing. It's just the guard piece over the passenger side light that is slightly crooked. Thought about grabbing the inside (where it meets the upright) with a pair of vise grips while twisting the end of it. See if it can't be straitened out. Also, same happen with my rear diff. Ended up thread locking it after repairs. It being metal on metal I should have done that to begin with. One screw came out completely and jammed the whole thing up and bent the other two. |
|
| |
|
05-26-2015, 07:51 AM
| #6 |
| Pebble Pounder  Join Date: Apr 2015 Location: San Antonio
Posts: 115
|
so after i finish my build we should totally go trailing, like we should gather all the jurassic park builds and host a jurassic park trail run.
|
|
| |
|
05-27-2015, 05:58 PM
| #7 |
| Newbie Join Date: Jun 2013 Location: owosso
Posts: 14
|
Was planning to grab the Pajero just to get into scale rc.. with plans to toss the body aside. I see now it has ALOT of potential. Great idea, and execution. |
|
| |
|
 Jurassic Park Maintenance Pajero! - Similar Threads
 | ||||
| Thread | Thread Starter | Forum | Replies | Last Post |
| C/R Jurassic Park Edition v. Build Thread | chino | Axial SCX-10 | 9 | 06-08-2015 03:45 PM |
| The Jurassic Park Jeep | Debonair | Axial SCX-10 | 8 | 12-13-2013 08:32 AM |
| 1/6 Jurassic Park Jeep Build | iMan | Large Scale Rigs | 20 | 07-18-2013 05:27 PM |
| Jurassic Park YJ | mr.allthat | 1.9 Scale Rigs | 0 | 02-15-2010 03:06 PM |
| Jurassic Park Wrangler Project | stutheitguy | Axial AX-10 Scorpion | 16 | 03-16-2009 04:16 AM |
| |


 Linear Mode


