| |
 06-10-2009, 06:15 PM
| #1 |
| Custom Carbon Fiber   Join Date: Oct 2007 Location: Connecticut :(
Posts: 4,501
|
To start with: Futaba 3PM FASST Blue Bird Torque servo Losi MRC mini servo on dig Novak Mongoose (only 3S esc untill FXR comes in) Maxamps 3S BEC set @ 6V Losi Claws from the kit 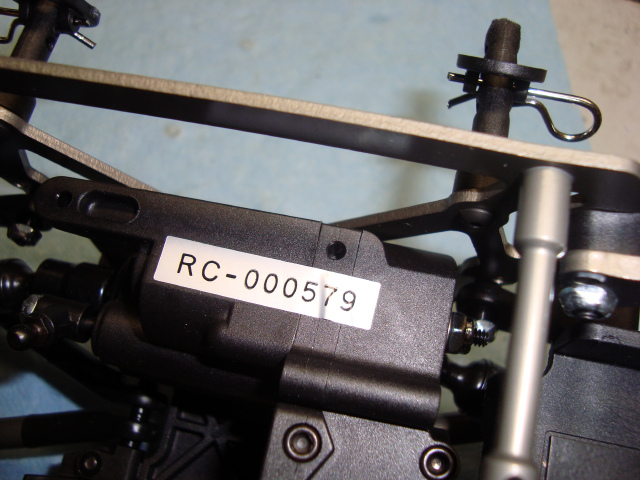 Changed: Rear springs to Losi pinks still 30wt with 1/2'' limiters inside Front springs kit whites changed to 40wt with 1/2'' limiters inside Stock valving left on both Lowered chassis shock mounts down one hole raising belly back to 3''  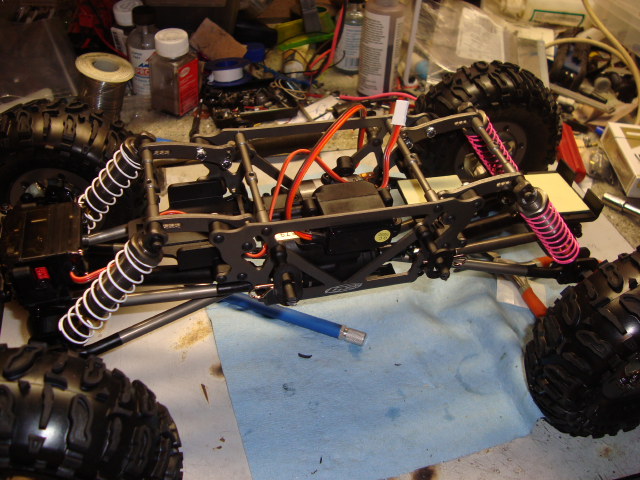  pulled the shims like everyone said and broke the gears in with Marine grease on a drill 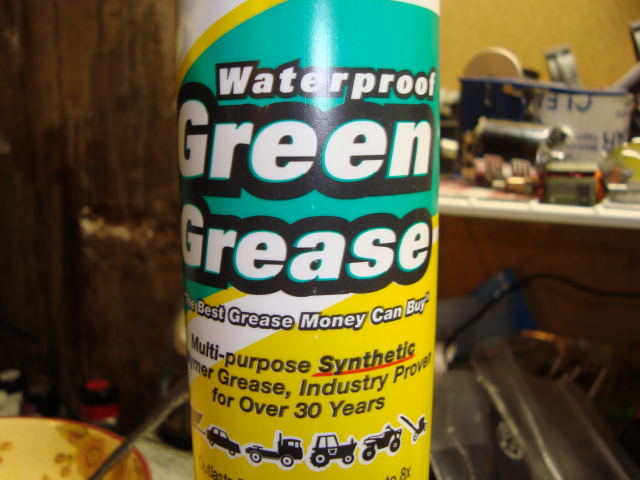  after 3 packs around the yard and basement i developed an instant slip in the slipper, locked it down and that became an instant stall on any climb. tore the axles apart and had grease still in there. 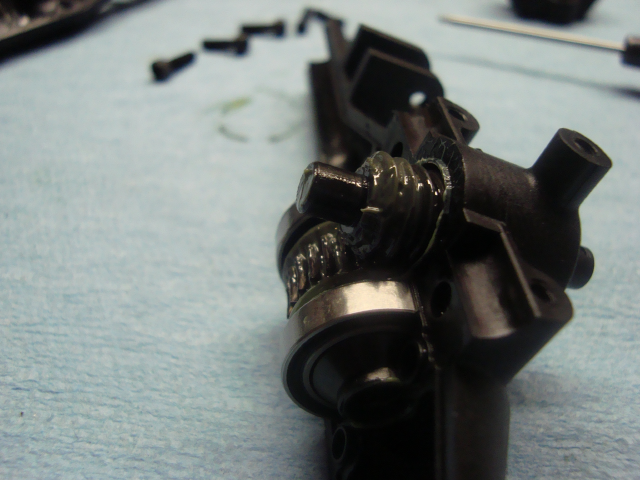 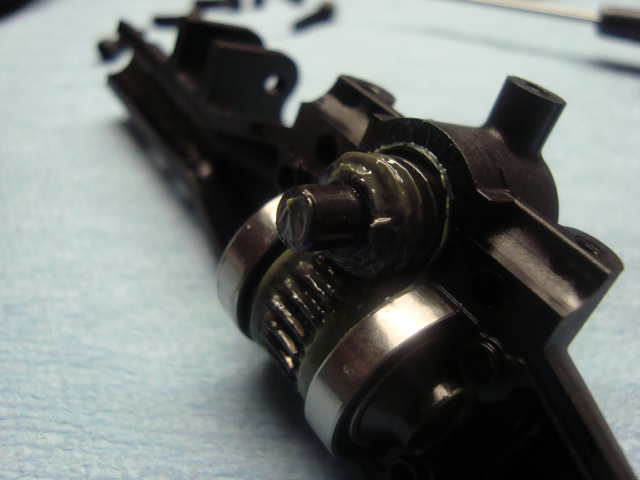 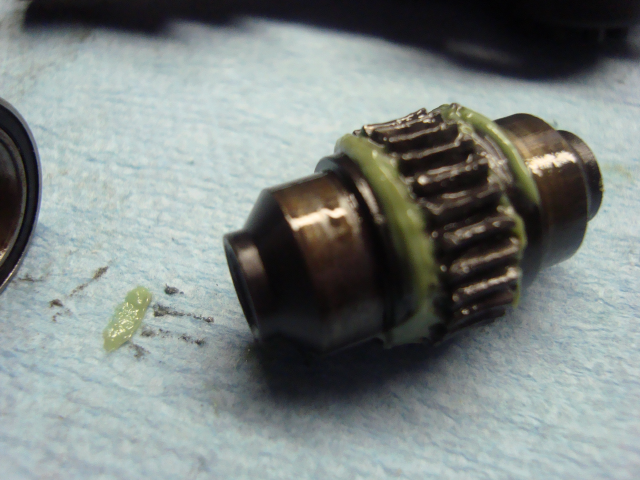 cleaned the gears and could see the wear pattern, its only on opposing corners :? would have thought id see even teeth wear 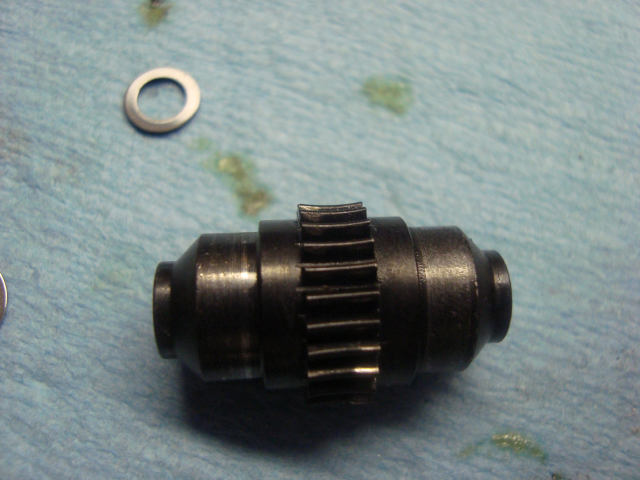 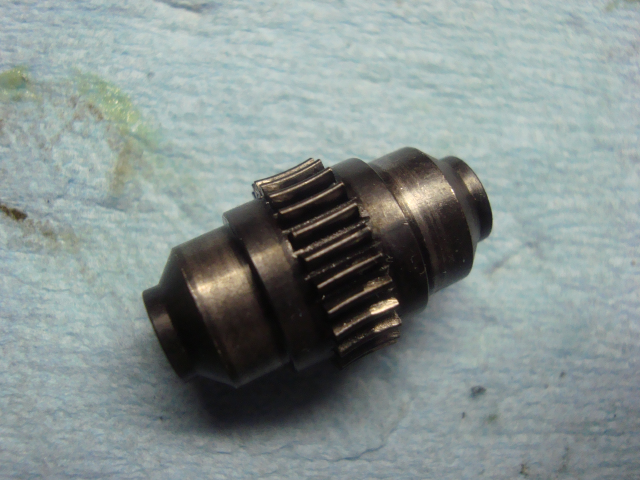 also noticed on the bearings and spools almsot like it started to rust from moisture. weird 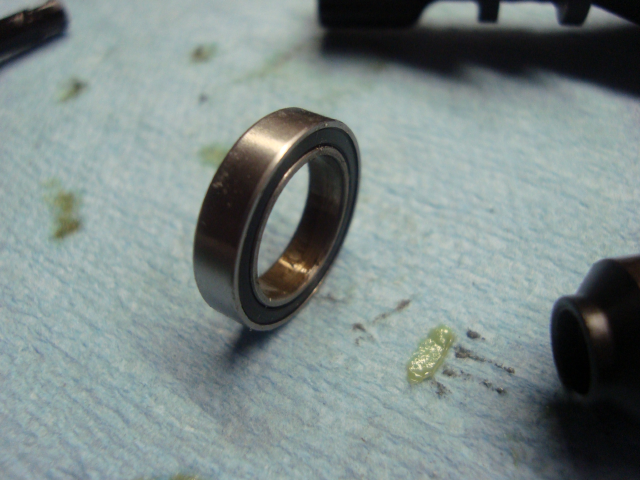 so i greased them using Lucas high tack red and tapped my own little grease hole 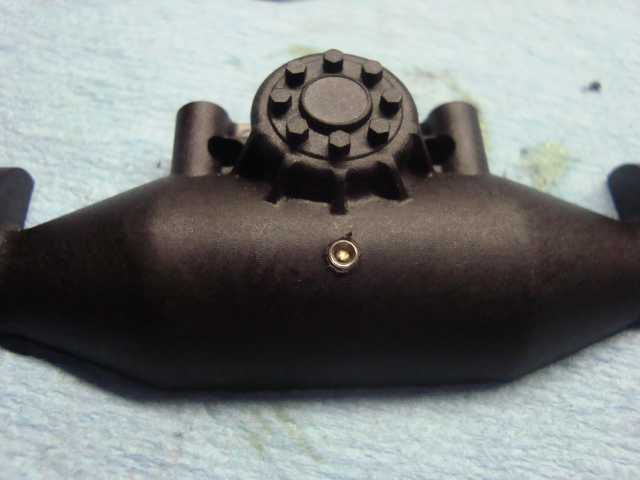 next i inspected the tranny and dig i used the dig from stop to half throttle and even while it was clicking. 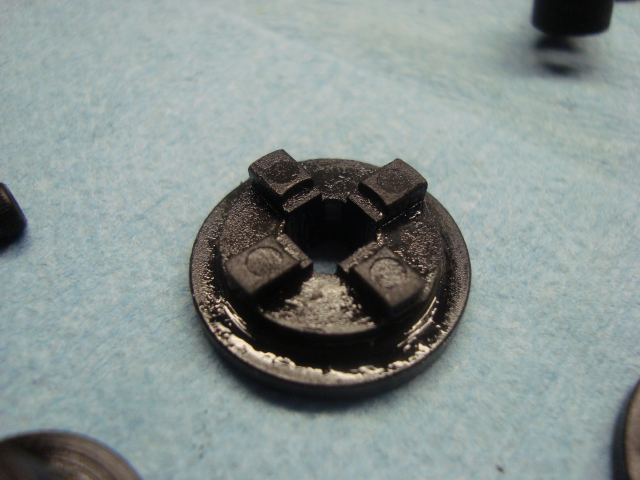 plastic looked pretty good to me - 3 packs and wasnt easy on the front or rear i wanted to beef up my slipper, it just seemed like it was either slip or lock it and stall. this is what i came up with 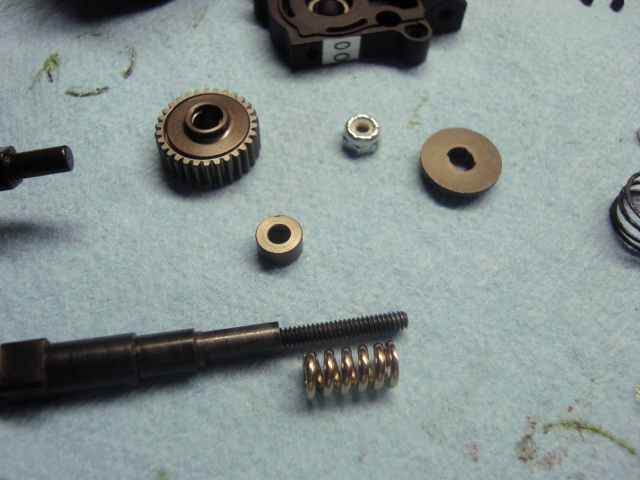 the longer slipper screw is out of a Losi XXT tranny. have to heat up the LCC upper shaft ( after removing the internal plastic gear ) to break the factory threadlock loose. I broke my .050 wrench first try. :-( thread lock the longer screw and tighten it down. 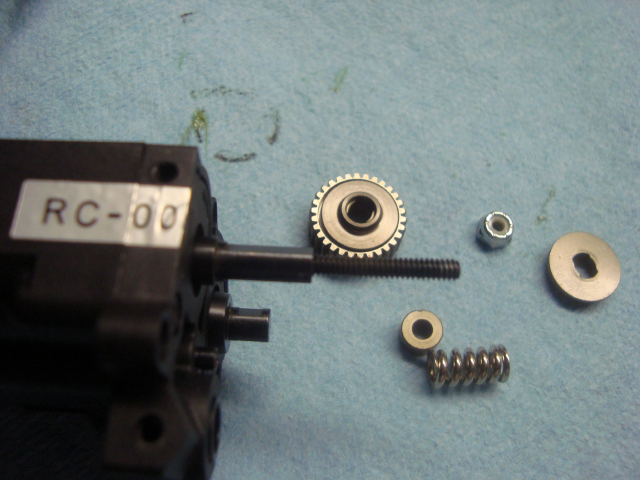 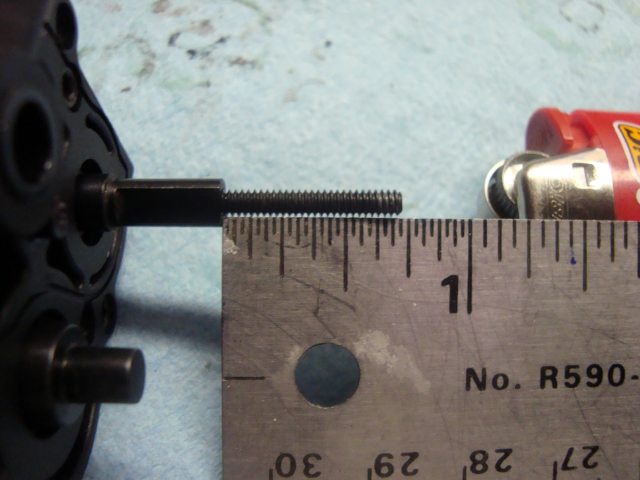 next I found a slipper spring from a 4th generation Associated to use. install the factory pieces they way they were, including the little collar the nut hit. then i used a small plastic washer, the Associated spring and finally nut. 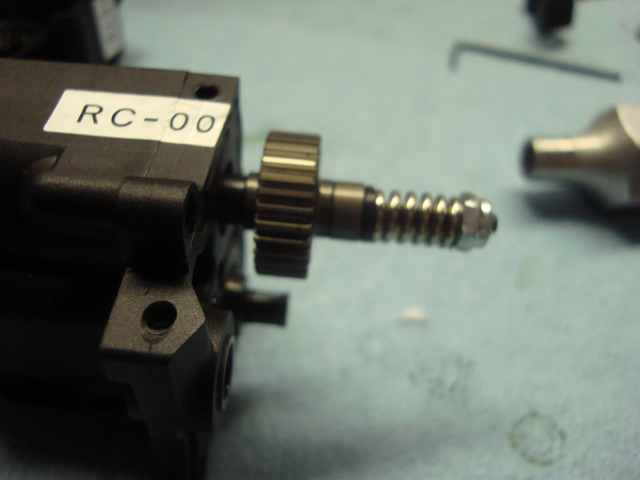 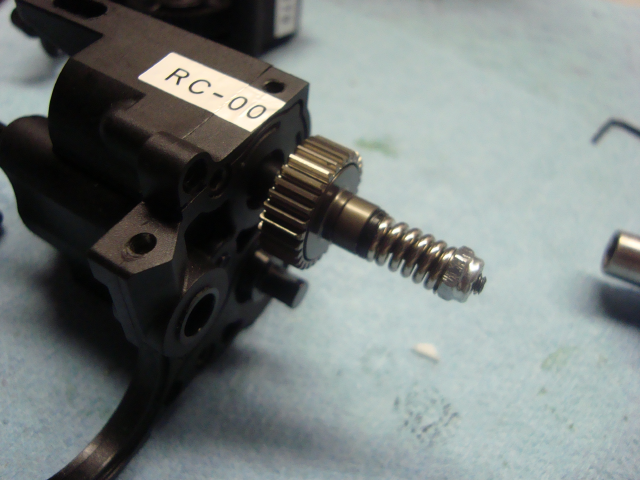 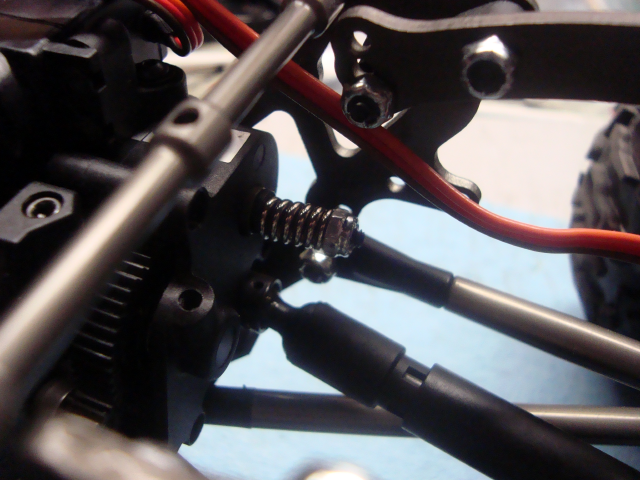 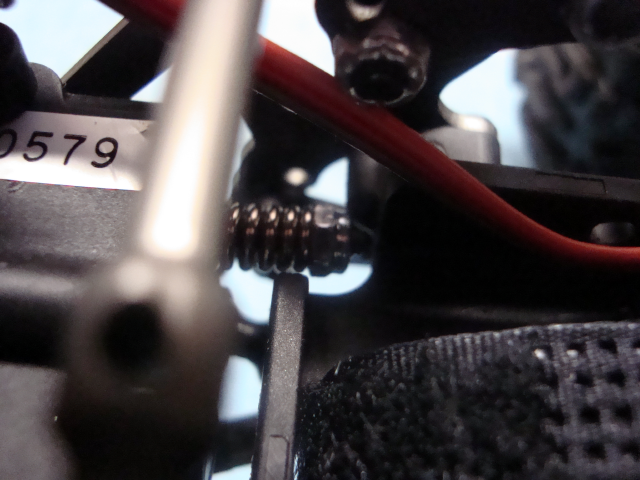 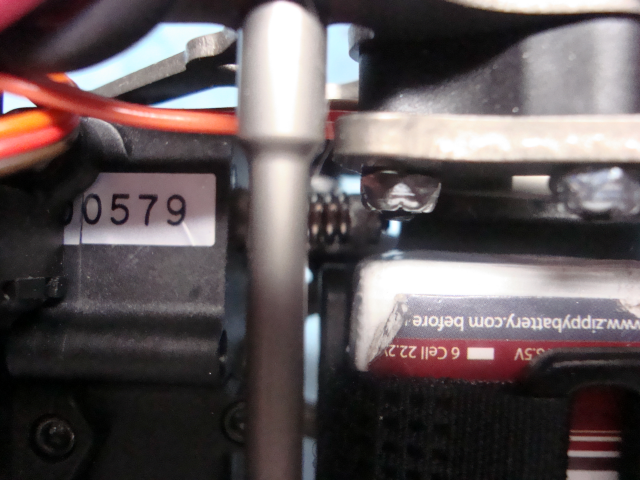 clears everything nicely and now it works how i like it, it only slips if i foot the truck and doesnt stall when i try to climb anything.  works like a slipper should, when bound up. works like a slipper should, when bound up.now its back to battle of the brushed ............ |

|  |
| Sponsored Links | |
| | |
|
06-10-2009, 10:18 PM
| #2 |
| Pebble Pounder Join Date: Dec 2004 Location: Farmington NM
Posts: 103
|
I also have a spool with a wear pattern like that. The other is more centered. Both had 2 shims on each side. Definitely want to try your slipper mod |
|
| |
|
06-11-2009, 04:44 AM
| #3 |
| Quarry Creeper Join Date: Nov 2007 Location: nanakuli
Posts: 301
|
Could we get part numbers for your slipper mod. Thanks. Good mod man!
|
|
| |
|
06-11-2009, 06:09 AM
| #4 | |
| Custom Carbon Fiber Join Date: Oct 2007 Location: Connecticut :(
Posts: 4,501
| Quote:
Slipper screw- Losi #A9932 (comes with the upper shaft for the XXX) Slipper spring- Associated #9605 from a RC10T4 the plastic spacer I used was actually a plastic piece from a TLT shock parts tree so anything smooth and durable will work. | |
|
| |
|
06-11-2009, 12:48 PM
| #5 |
| Quarry Creeper Join Date: Nov 2007 Location: nanakuli
Posts: 301
|
Thanks man. Will get those parts ordered. It just looks like it belongs there, like it should have been stock. Thanks again
|
|
| |
|
06-23-2009, 08:10 PM
| #6 |
| Custom Carbon Fiber Join Date: Oct 2007 Location: Connecticut :(
Posts: 4,501
|
Ok first something I found. I noticed the front worm was digging into the shim closest to the output side so I wanted to see how much pressure was there. I took out 2 of the 3 shims on the outdrive side of the worm and put 1 Traxxas teflon shim in place. after a weekend of comping 3 courses i took it out to check. 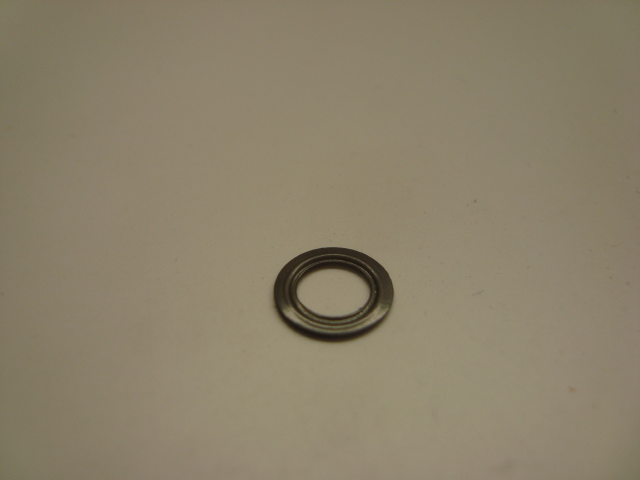 good idea of how much pressure the worm is putting on that one bearing. Another thing was mentioned about the lower links sliding off the ball ends and possible fixes. This was my solution without binding. 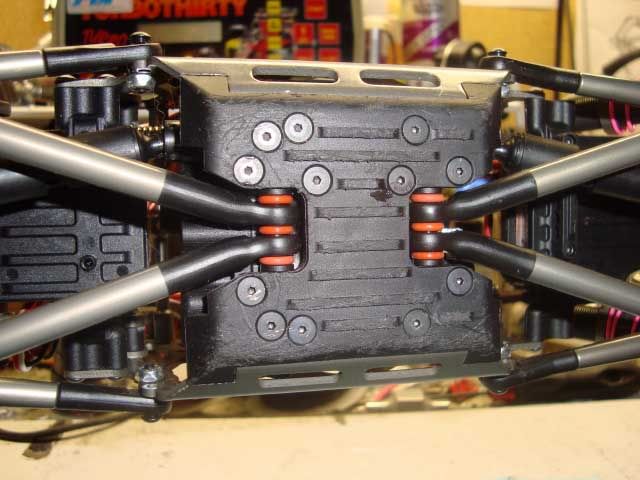 |
|
| |
|
06-23-2009, 08:14 PM
| #7 |
| Custom Carbon Fiber Join Date: Oct 2007 Location: Connecticut :(
Posts: 4,501
|
Well I wanted one of these frames back when CDW was selling them but didnt want to be switching my rig around while still trying to learn things so I never got one. Now with the LCC ...... I got nothing but reasons to get one. http://www.rccrawler.com/forum/showthread.php?t=173679 Red just seemed right for me, the finish on these are incredible. 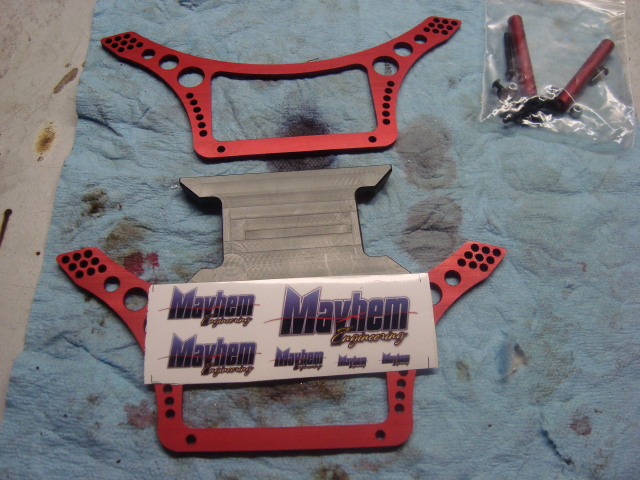 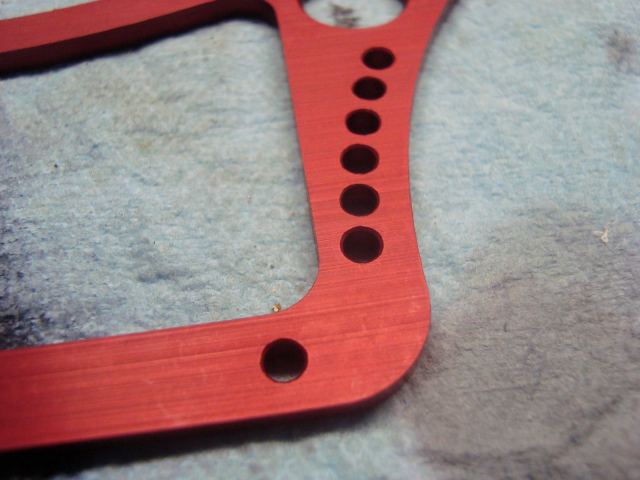 Tranny in with some room to move around a bit. 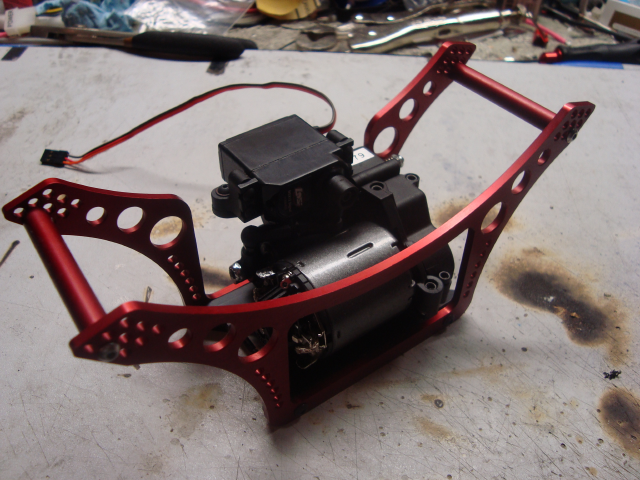 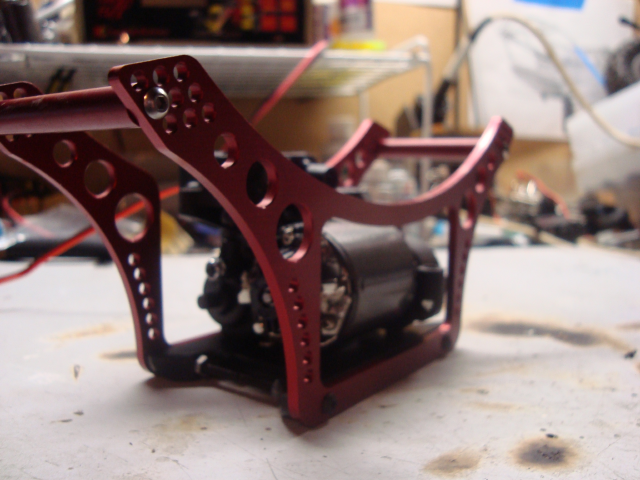 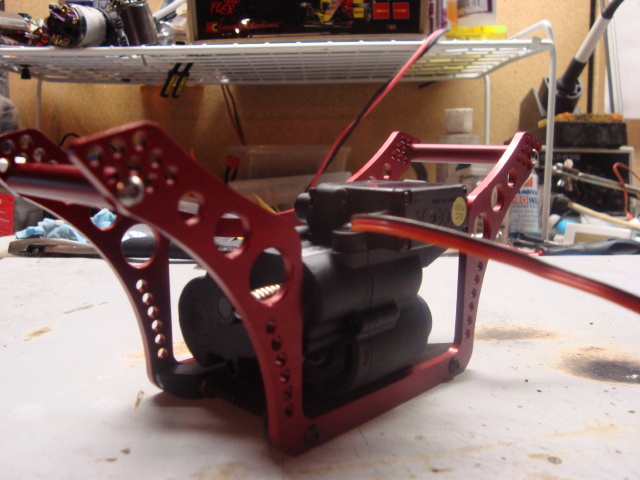 Close fit with my slipper mod 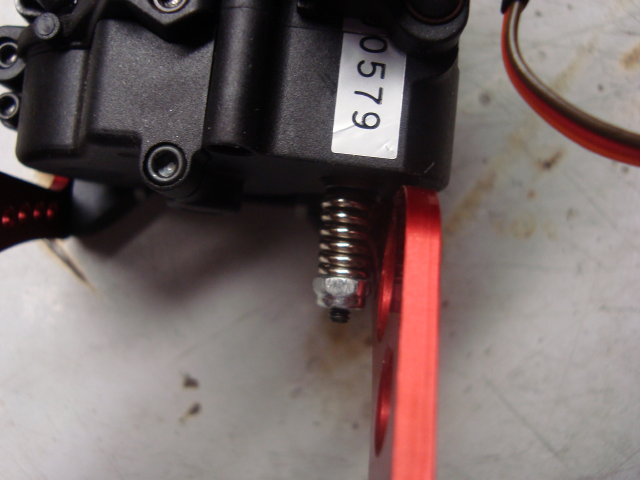 with a stock slipper and moved in a bit more you could fit a 550 or Puller. I chose not to worry about that and kept my slipper. 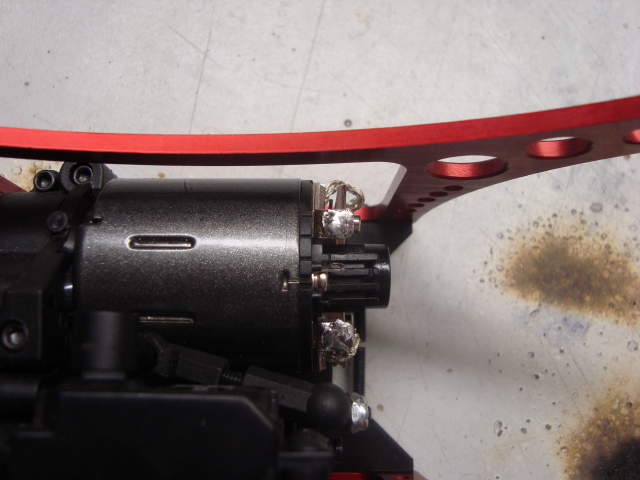 and for those wondering hex to hex 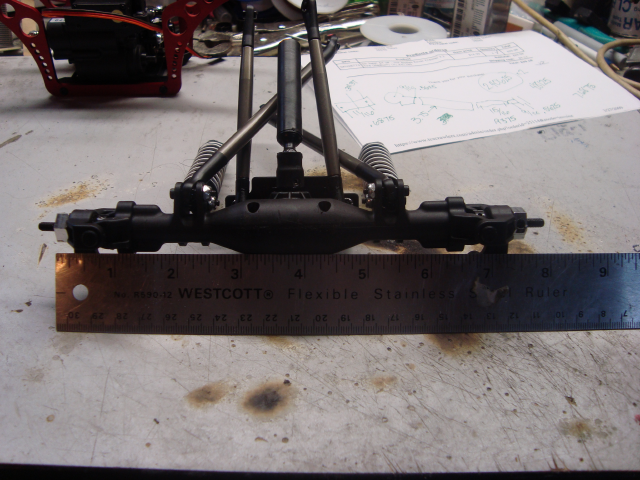 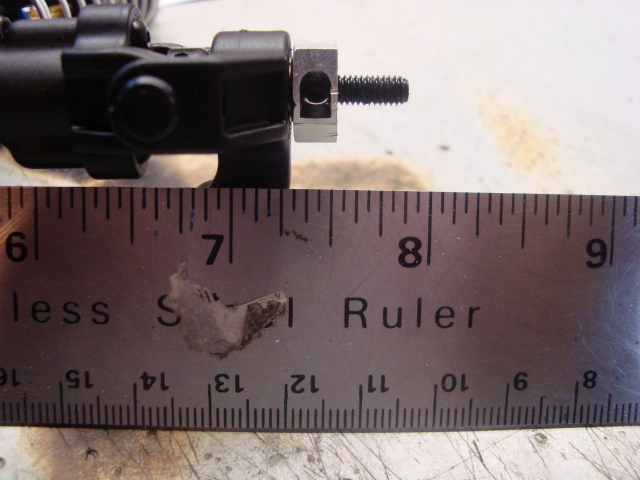 |
|
| |
|
06-23-2009, 08:21 PM
| #8 |
| Custom Carbon Fiber Join Date: Oct 2007 Location: Connecticut :(
Posts: 4,501
|
ok so heres the front with inboarded links. very straight like im use to from my CDW v1.0 but Ill show later why I couldnt keep them. I was able to use the stock lower links with 3mm spacers on each end and Traxxas link ends for upper links. 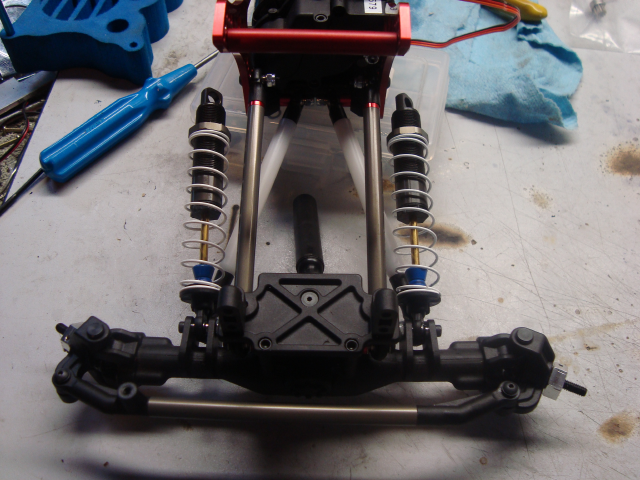 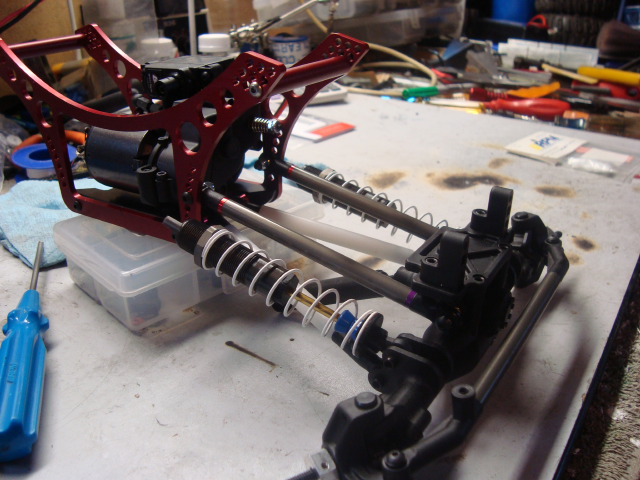 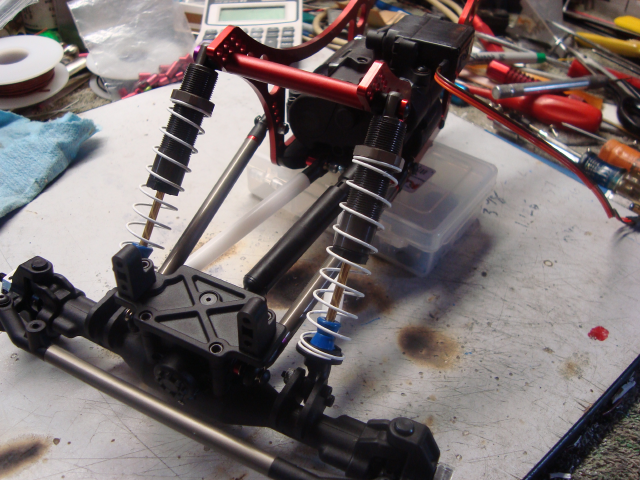 going to install the prop shafts i hit the snag 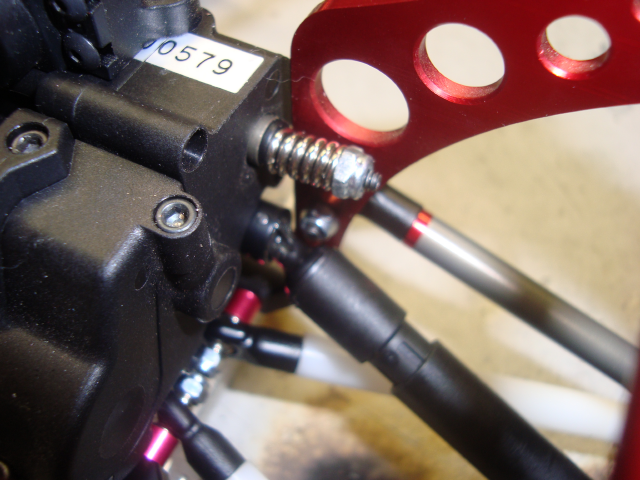 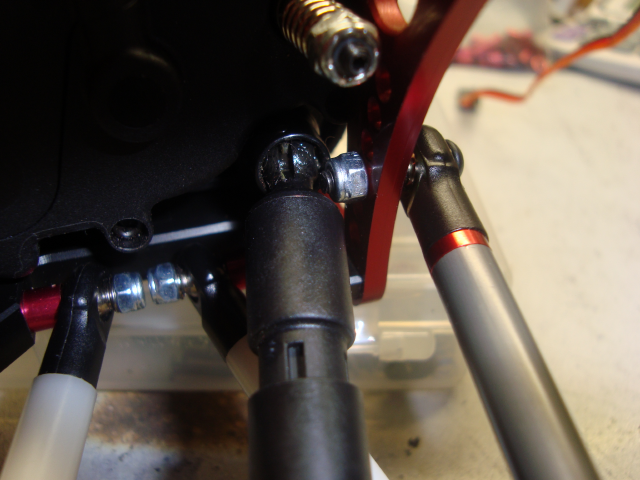 so outboard they went ...... :? again I could move the tranny over and have clearance for inboard links but then a 550 and puller cans are definately not gonna fit. |
|
| |
|
06-23-2009, 08:21 PM
| #9 |
| RCC Addict Join Date: Oct 2008 Location: Plainfield, IL.
Posts: 1,297
|
Nice build so far, ill have to keep my eye on this one. |
|
| |
|
06-23-2009, 08:31 PM
| #10 |
| Custom Carbon Fiber Join Date: Oct 2007 Location: Connecticut :(
Posts: 4,501
|
rear setup the same 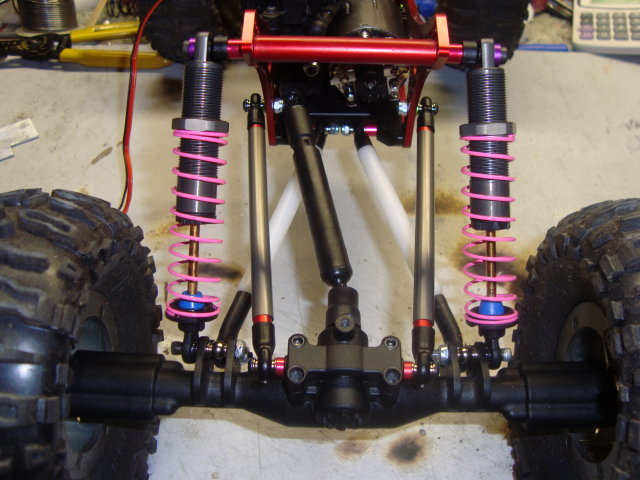 and belly where i like it 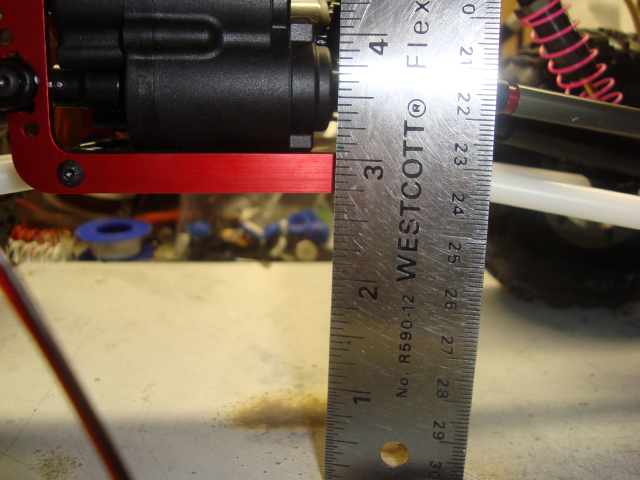 ESC tray - it would be great if I would use the Losi ones but the frame is narrower so a simple piece of Delrin rod and some 1/16 aluminum 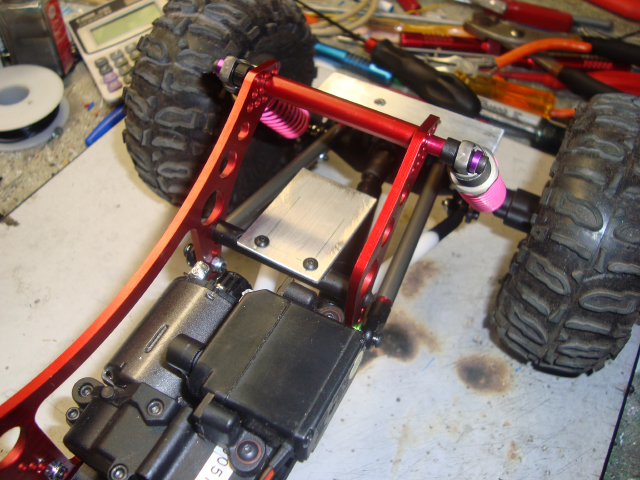 as well as my rear battery spot 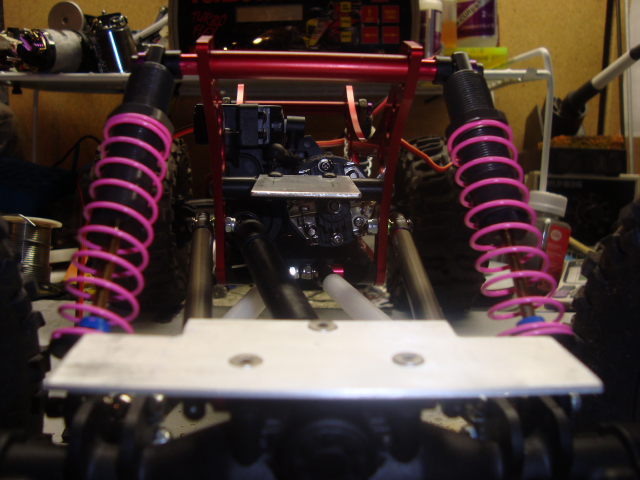 the front was a simple piece of lexan cut to avoid the propshaft from hitting 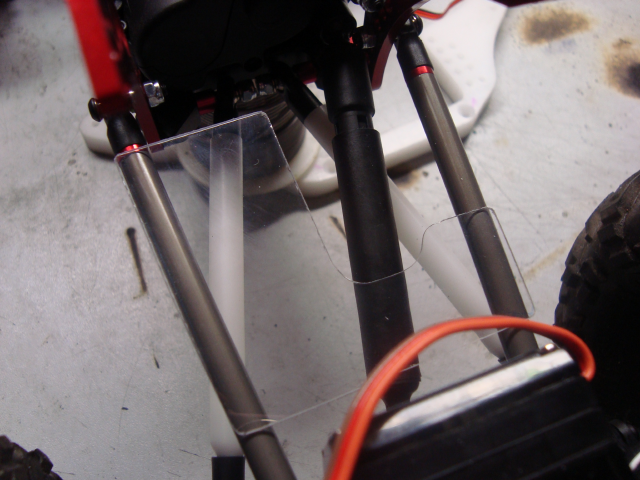 together  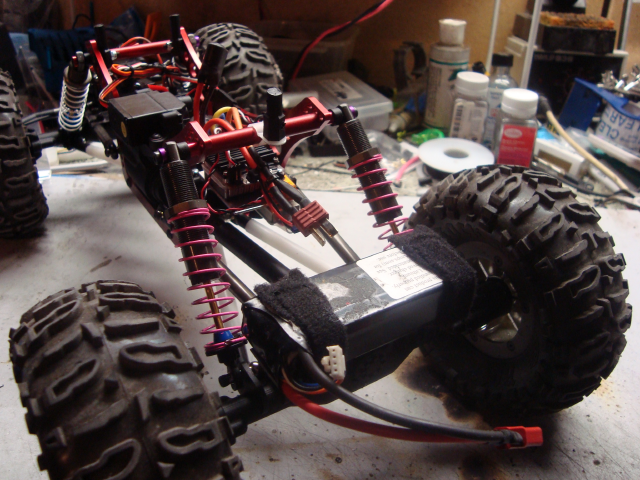 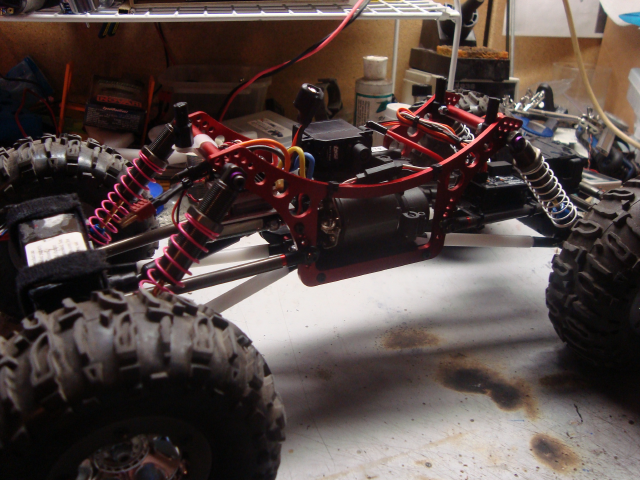 and some bottom triangulation 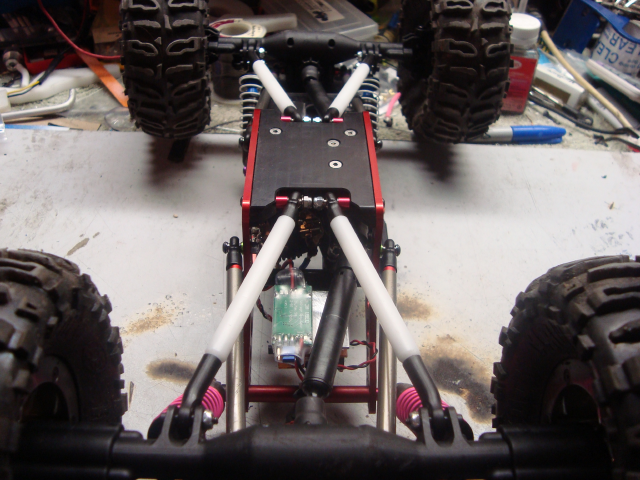 body and flex  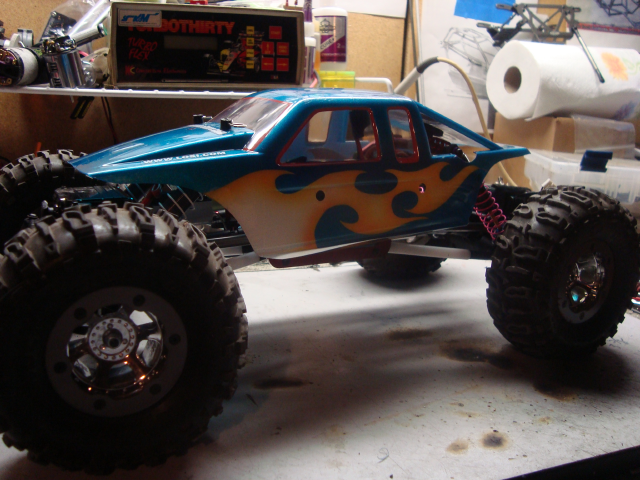 Im not use to this much flex and I even have 1/4 external stops on the shocks 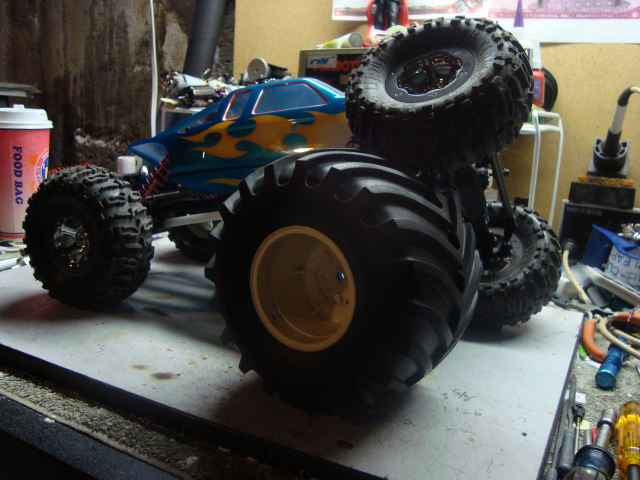 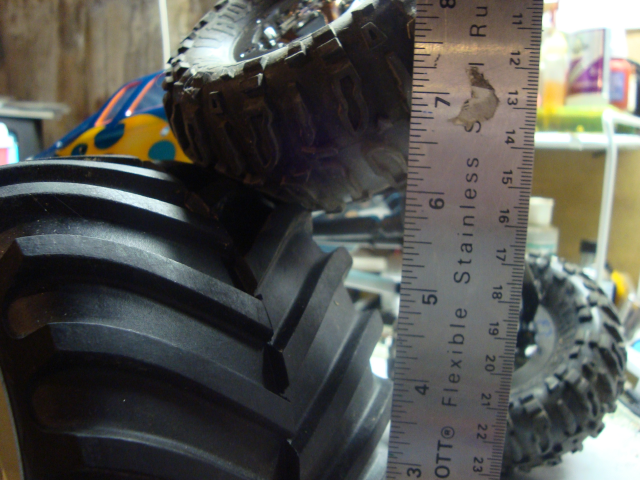 This shock setup worked well at my last comp but will be getting sme testing on this layout soon. Im also testing some motors this weekend, 30T, 19T hemi and a 19T regular wind. So far the little ive done in the basement have felt good with low heat and wheelspeed. Still got my original dogbones in, new spares waiting untill they break but steering is about 90%. Even with the steering turned down the LCC turns as tighter if not tighter then my CDW v1.0 and Ive put alot of work into getting that to turn on itself. Still just as happy as I was when I got the rig only a few weeks ago. |
|
| |
|
06-24-2009, 07:16 AM
| #11 |
| Rock Crawler Join Date: Sep 2008 Location: Utah
Posts: 691
|
Very nice looking rig. How is the 3pm working for you? Easy to setup? Thanks |
|
| |
|
06-24-2009, 07:32 AM
| #12 | |
| Custom Carbon Fiber Join Date: Oct 2007 Location: Connecticut :(
Posts: 4,501
| Quote:
Thanks Pretty easy to set it up, I used the button on the handle as my dig before so i was use to hitting it with my middle finger while driving. Took a little to get the Conditions and SW2 button setup to use the dual dig but now I can pretty much dig while driving. | |
|
| |
|
06-24-2009, 07:36 AM
| #13 |
| Rock Crawler   Join Date: Apr 2005 Location: Humble
Posts: 800
|
Looks great, Love the red, not big on the pink springs...LOL About the delrin lower links, did you us new treaded rod or did you use the studs from the Losi links, I can't get the damn things out of the aluminum rod, I'm about to go to 6/32. |
|
| |
|
06-24-2009, 07:44 AM
| #14 | |
| Custom Carbon Fiber Join Date: Oct 2007 Location: Connecticut :(
Posts: 4,501
| Quote:
yeah couldnt get mine out either and didnt want to heat the links up either. I just used normal 3mm thread, i have ones that are 1'' long and applied a little drop of CA to the threads that went into the factory ends. | |
|
| |
|
06-24-2009, 09:35 AM
| #15 | |
| Rock Crawler Join Date: Apr 2005 Location: Humble
Posts: 800
| Quote:
| |
|
| |
|
06-24-2009, 05:34 PM
| #16 |
| Rock Stacker Join Date: Feb 2009 Location: Canton
Posts: 67
|
Looks good Rob! I've been looking at that chassis, for the Axial tho. It looks right at home under your LCC. Can't wait to see it preform.
|
|
| |
|
06-25-2009, 06:08 AM
| #17 | |
| Custom Carbon Fiber Join Date: Oct 2007 Location: Connecticut :(
Posts: 4,501
| Quote:
Thanks. Ill bring it to work with me sometime, know any good practice spots out this area? Im still up behind VW. | |
|
| |
|
06-25-2009, 04:24 PM
| #18 | |
| Rock Stacker Join Date: Feb 2009 Location: Canton
Posts: 67
| Quote:
Our shop, ask one of your drivers how much stone is in our yard. Also, about 10 min. up the road is Beach Rock, it overlooks the Barkhamsted Resevoir. Beautiful view, and some fun crawlin. Even SSS has quite a bit of stone around their yard, in the drainage ditches n embankments. Thats close enough for you to walk to. | |
|
| |
|
06-25-2009, 05:02 PM
| #19 |
| Newbie Join Date: Feb 2009 Location: nederland
Posts: 1
|
Why delrin rods? I am a noob on crawling but these are on the bottom of the ride. I thought one whould want to shave weight on the top of his ride. Shaving weight on the bottom makes your cg go up. Sorry for asking I am a noob on crawling. Just ordered mine. |
|
| |
|
06-25-2009, 05:23 PM
| #20 | |
| Quarry Creeper Join Date: Feb 2009 Location: Rocklin, CA
Posts: 255
| Quote:
| |
|
| |
 |
| |


 Linear Mode


