| |
| |||||||
 |
| | LinkBack | Thread Tools | Display Modes |
 02-13-2010, 01:25 PM
| #1 |
| I wanna be Dave Join Date: Oct 2008 Location: Golden
Posts: 2,588
|
I like the idea of really narrow, lightweight wheels for my upcoming bully build, but I don't have the money to get VP's SLWs. I wanted to make a budget friendly narrow lightweight wheel. I saw this thread and decided to try it my self, but do it just a little bit different. To start, I needed to find a way to make a poor-man's wheel lathe: 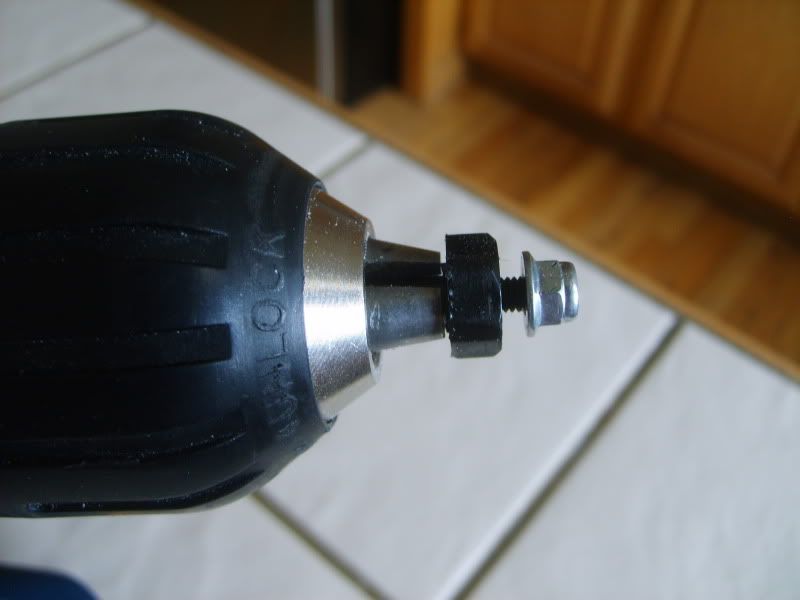 I took an extra stub axle, and cut of the dogbone cup with a dremel and cut of wheel. Add a pin and hex, and there you go, easy lathe. Next, I chucked the lathe adapter in my drill and attached the wheels. I spun them and used my hacksaw to cut through the wheel while it was turning. I cut the bead surfaces off first, then measured to where I could cut down to and carefully cut the wheel while spinning again with the hacksaw. Once the sawblade started to "hop" I stopped spinning the wheel and finished the last bit manually. For the front wheels, I narrowed them .05 more than the rears in an attempt to keep the most steering capability out of them. While still on the lathe, I sanded the surface of the wheel center smooth. Then I redrilled the beadlock holes. Once I had all the pieces cut, I "dry fitted" the beadlock screws so that when I put the glue on, the pieces would stay centered and lined up. To compare the width to stock: 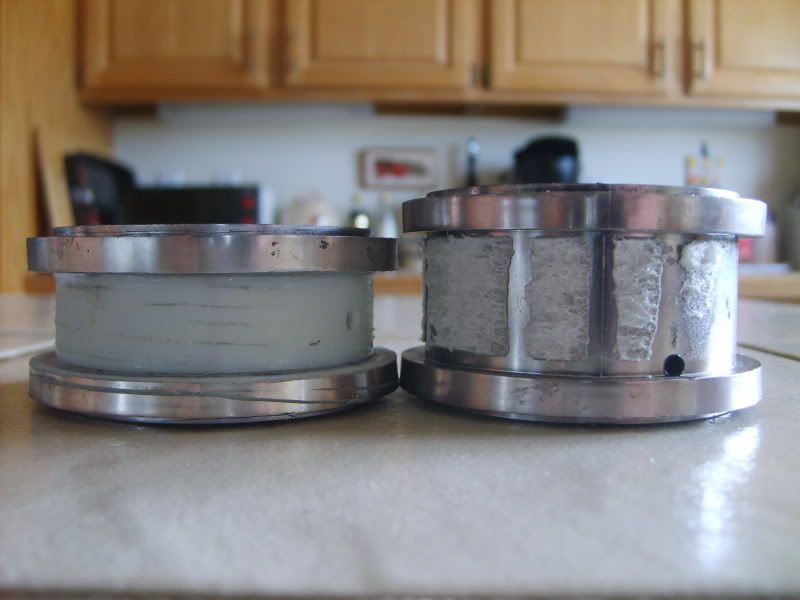 And to compare the narrow to extra narrow: 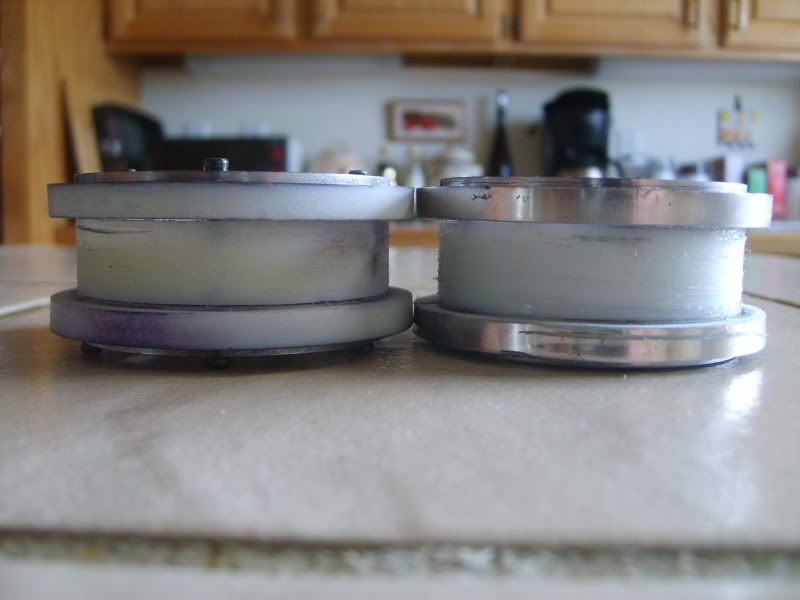 (Hard to tell but the left wheel is the extra narrow) Width: Stock - 1.25" Narrowed (rear) - 1.00" Extra Narrowed (front) - .95" Weight: Forgot to weigh the stock wheels Narrow without hardware - 1.0 oz Narrow with hardware and rings - 1.5 oz Narrow with hardware, rings, foams and Rovers - 5.1 oz Extra Narrow without hardware - 0.9 oz Extra Narrow with hardware and rings - 1.5 oz Extra Narrow with hardware, rings, foams and Rovers - 5.1 oz I let the glue dry overnight, and sprayed some paint down on the wheels, and here's what I came up with:  This mod was fairly easy to do, and it was essentially free. Soon, I want to get some flat head hex screws so they can be countersunk and flush mounted with the outside ring. If I need to add any weight, I still have a nice channel in the center of the wheel. Overall, maybe took me about 5 hours to complete (not including drying times.) Last edited by monkeyracer; 02-13-2010 at 01:28 PM. |

|  |
| Sponsored Links | |
| | |
|
02-13-2010, 01:55 PM
| #2 |
| RCC Addict Join Date: Jun 2008 Location: Nunya Idaho...
Posts: 1,559
|
Turned out great, nice job.
|
|
| |
|
02-13-2010, 02:17 PM
| #3 |
| I wanna be Dave Join Date: Oct 2008 Location: Golden
Posts: 2,588
|
Thanks! It's a fairly easy mod, maybe a 3 on a scale of 1-5. The hard part was keeping the hack saw blade steady while cutting the wheels; it wants to dance around until there's a good groove for it. |
|
| |
|
03-19-2010, 11:11 PM
| #4 |
| RCC Addict   Join Date: Apr 2008 Location: Sacramento
Posts: 1,210
|
Which side of the wheel did you cut off the inside or the outside? Do you have any more pics that break down the process a little more?Thinking about trying this but I don't want to mess upa set of $30 wheels just to go out and buy more. Thanks  |
|
| |
|
03-20-2010, 08:28 AM
| #5 | |
| Rock Crawler Join Date: Nov 2008 Location: Maple Ridge, BC, CANADA
Posts: 592
| Quote:
I cut off the back side..... Narrowed 2.2 axial rims...took 1/4" off width...trying for more steer! its really easy to do...... | |
|
| |
|
03-20-2010, 09:26 AM
| #6 |
| RCC Addict Join Date: Oct 2008 Location: Plainfield, IL.
Posts: 1,297
|
That looks cool, i want to try it one day.
|
|
| |
|
03-20-2010, 10:05 AM
| #7 | ||
| I wanna be Dave Join Date: Oct 2008 Location: Golden
Posts: 2,588
| Quote:
The rocksters can be much more narrow than the 8-holes, but the 8-holes seem like they will be stronger (there's more material holding the spokes.) I don't think I have any more process pics, but it is pretty simple, and you don't need any crazy special tools to do it. Quote:
| ||
|
| |
|
03-21-2010, 06:03 PM
| #8 |
| RCC Addict Join Date: Apr 2008 Location: Sacramento
Posts: 1,210
|
Thanks for the info, I tried my hand at narrowing some and they came out pretty good, mine are all 1" wide now, but instead of using a hacksaw blade to cut them I to my exato knife and turned it so that the sharp side of the blade was facing away from the cutting direction and all that was doing the cutting was the tip of the blade kind of like on a lathe, it gave me a really clean cut. I will post pics after I get them uploaded...Then I used some epoxy call plastic welder to reatatch the to parts back together.    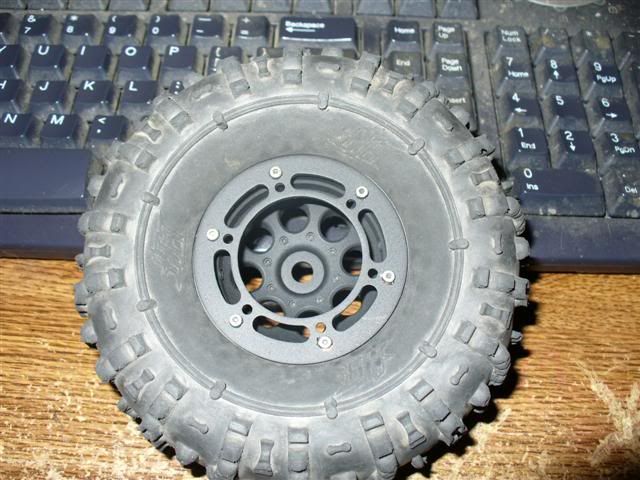 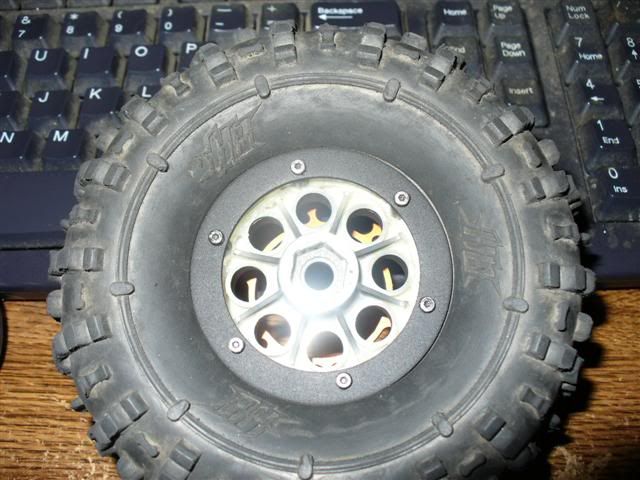 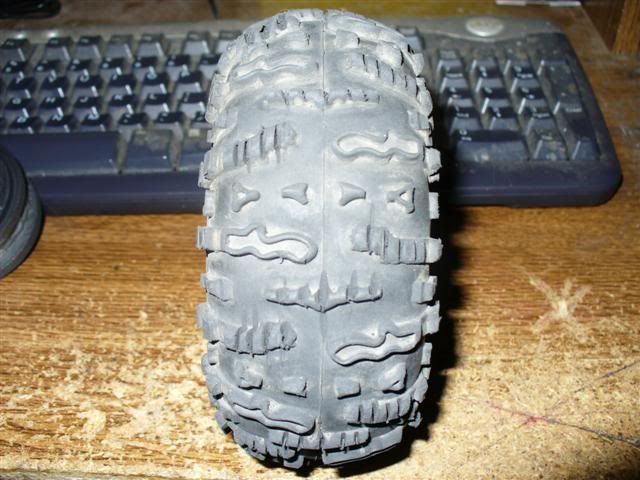 Last edited by abadk9420; 03-21-2010 at 06:40 PM. |
|
| |
|
03-22-2010, 07:20 PM
| #9 |
| Rock Crawler Join Date: Apr 2006 Location: Thorp WA, more sheep than men...
Posts: 543
|
"If they dont find ya handsome..." I like em' |
|
| |
|
03-22-2010, 09:30 PM
| #10 |
| Pebble Pounder Join Date: Mar 2008 Location: Amarillo
Posts: 181
|
ok, so, what is it that everyone's gluing these with? I've got a set of 40 series axial beadlocks that I'd like to get narrowed and save me the bread so I don't have to spend another $50 to buy a set of the new "narrowed" 40 series wheels, even though if I narrow these myself I'll probably go even narrower than what the new ones are....(I'd like to drop the 3+" wheels down to about 1.5" I think.....)
|
|
| |
|
03-22-2010, 10:19 PM
| #11 | |
| I wanna be Dave Join Date: Oct 2008 Location: Golden
Posts: 2,588
| Quote:
| |
|
| |
|
03-22-2010, 10:26 PM
| #12 | |
| Rock Crawler Join Date: Nov 2008 Location: Maple Ridge, BC, CANADA
Posts: 592
| Quote:
me too. I used heavy duty crazy glue and I used longer 3M screws on the back beadlock ring to go thru and also catch the second half of the rim. This way I know its not only the glue holding it together! | |
|
| |
|
03-22-2010, 10:30 PM
| #13 |
| Pebble Pounder Join Date: Mar 2008 Location: Amarillo
Posts: 181
|
I don't think the longer screws trick will work.....I've never seen any M3 55mm length screws ;) as far as the CA goes, is it really that solid? don't need to worry about cracking em apart on a hard impact? |
|
| |
|
03-22-2010, 11:01 PM
| #14 |
| I wanna be Dave Join Date: Oct 2008 Location: Golden
Posts: 2,588
|
If you are going to go down to 1.5" that's only 38mm... not sure where 55mm came from. You'll have screws from both sides right? so if you go to 1.5" on the 40 series, you should be able to use 20mm screws on each side to grab the middle section (including 1/8" (3mm) thick rings) If you are worried about it, then use some high strength epoxy, especially on a heavier super. I think though that for the 2.2 sized wheels, as long as the beadlock screw goes into the center section and it's glued somehow, they will be fine. For the 40 series, I don't have any experience with them, so you may have to be the guinea pig. Don't forget to post pics for everyone to see what you end up doing though. |
|
| |
|
03-22-2010, 11:13 PM
| #15 |
| Pebble Pounder Join Date: Mar 2008 Location: Amarillo
Posts: 181
|
55mm would be me estimating about 2"....which is where the narrowed axial beadlocks are now....
|
|
| |
|
03-23-2010, 06:13 PM
| #16 |
| RCC Addict Join Date: Apr 2008 Location: Sacramento
Posts: 1,210
|
I went to the hardware store and picked up some epoxy called plastic welder, I don't recall the brand name but it has a 3500PSI holding strength. I also narrowed a set of Axial's black spoke wheels here is a pic of my rig with the narrowed wheels and a pic of the spoke wheels, I did not use the screws to help hold them together, I just cut bead area far enough in that the screws won't bottom out on the other side of the wheel. 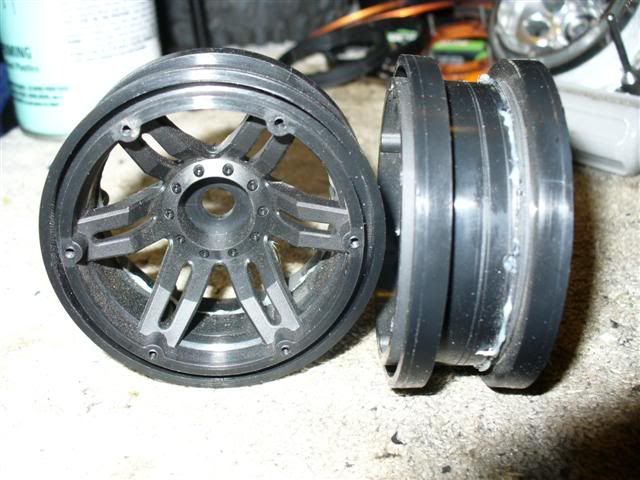  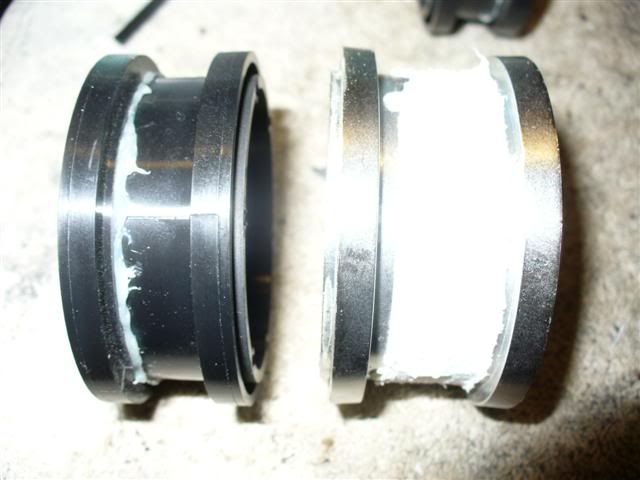 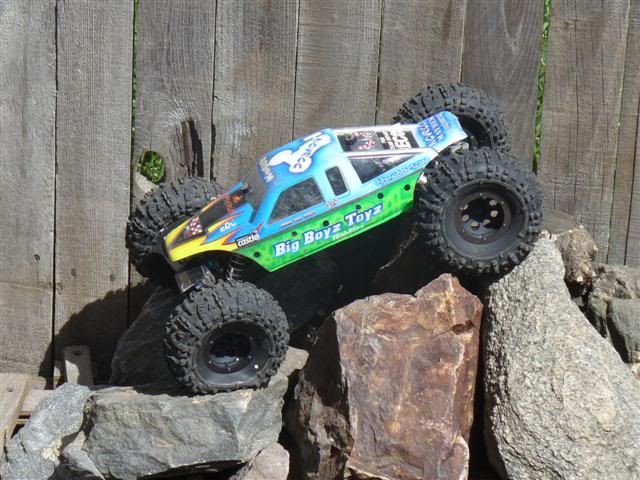 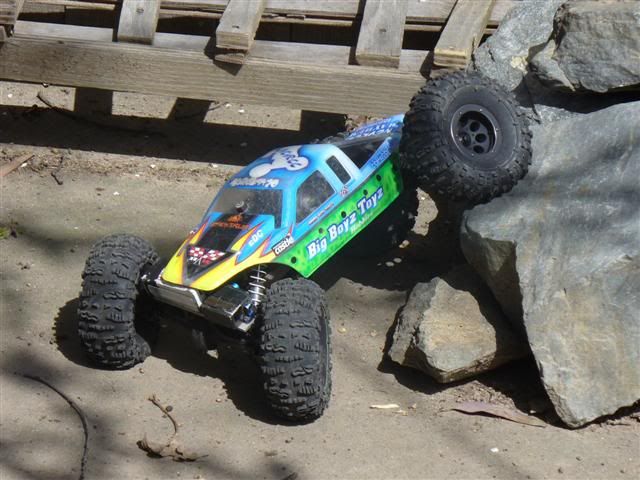 |
|
| |
|
03-24-2010, 07:43 AM
| #17 | |
| Rock Crawler Join Date: Nov 2008 Location: Maple Ridge, BC, CANADA
Posts: 592
| Quote:
looking good bro! | |
|
| |
|
03-24-2010, 11:53 PM
| #18 | |
| Rock Crawler Join Date: Dec 2009 Location: Ontario Canada
Posts: 511
| Quote:
"....they should at least find ya handy!" Red Green FTW and nice write up!! might try it some day if I ever come across a set of wheels i don't use anymore...actually...I may try it on my G-Made rims I have...and narrow the accompanying tire that are on them at the moment... | |
|
| |
|
03-25-2010, 03:56 AM
| #19 | |
| RCC Addict Join Date: Apr 2008 Location: Sacramento
Posts: 1,210
| Quote:
| |
|
| |
|
| Thread Tools | |
| Display Modes | |
| |


 Linear Mode


