| | #1 |
| Rock Crawler  Join Date: Jun 2015 Location: In the Sticks in the Ozarks
Posts: 940
|
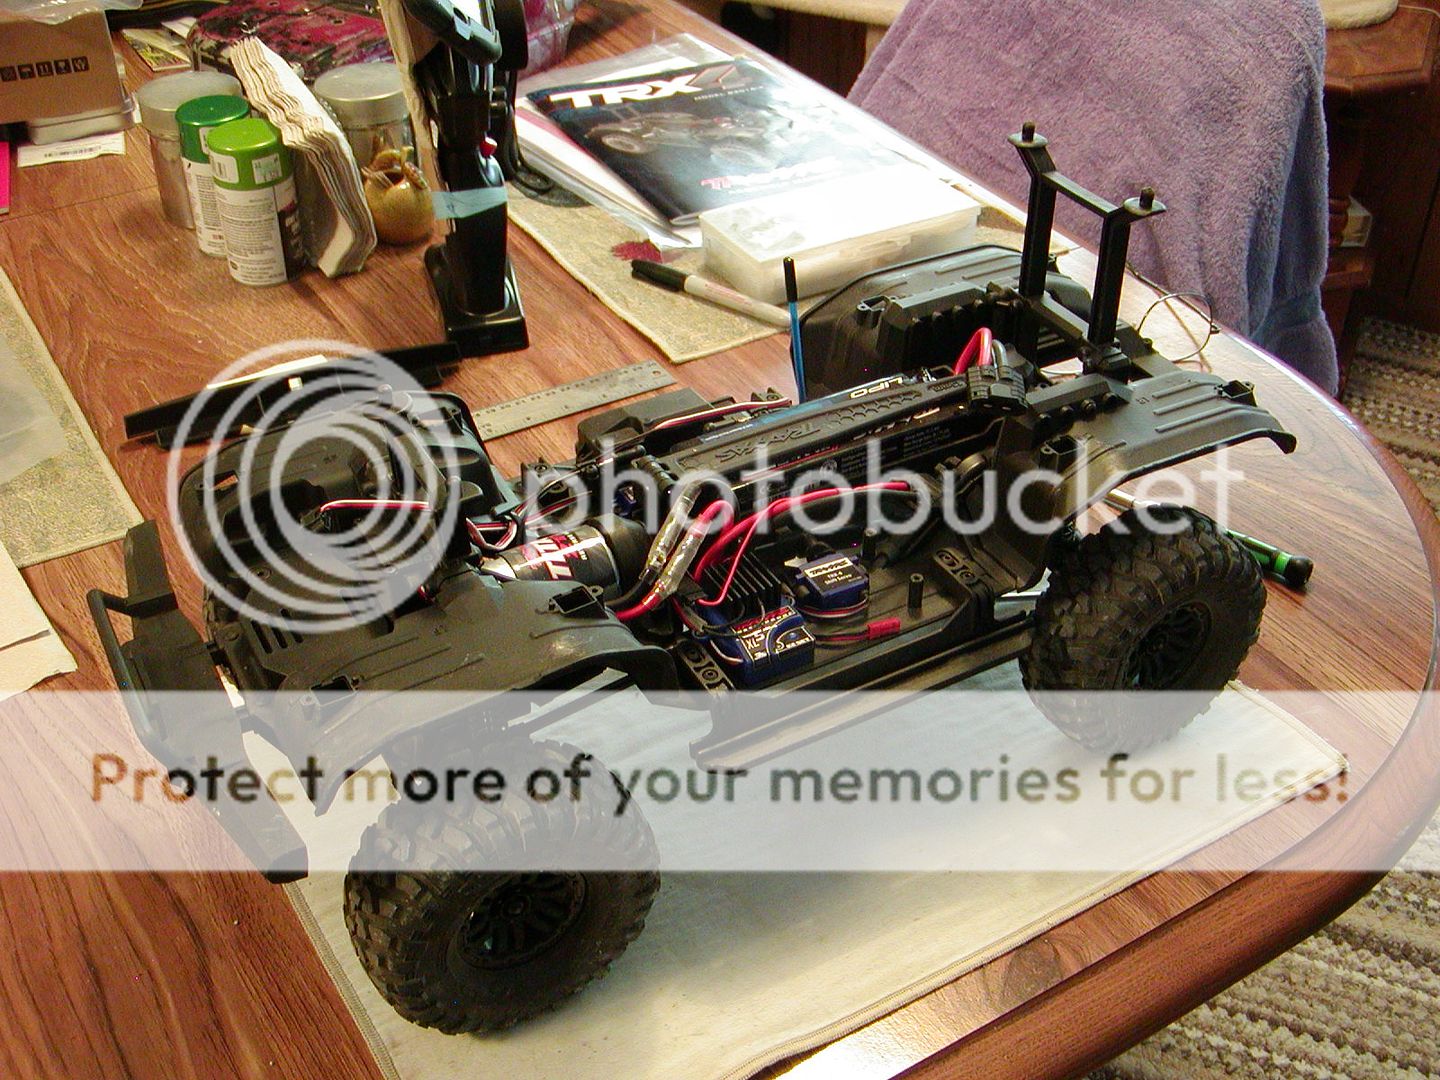
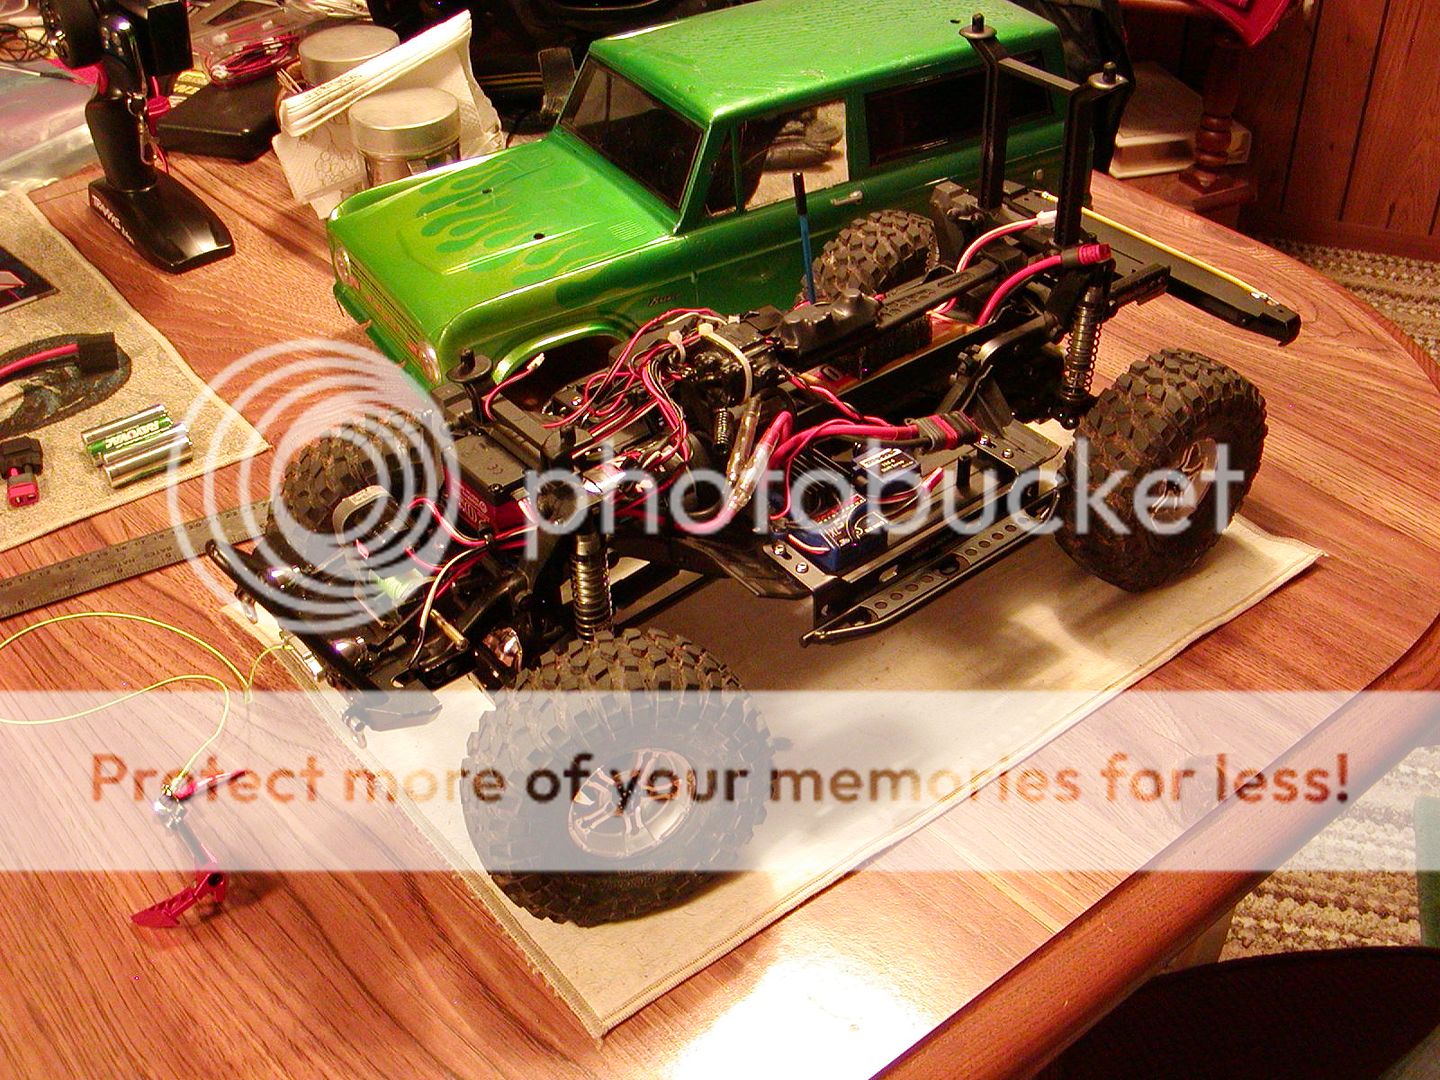
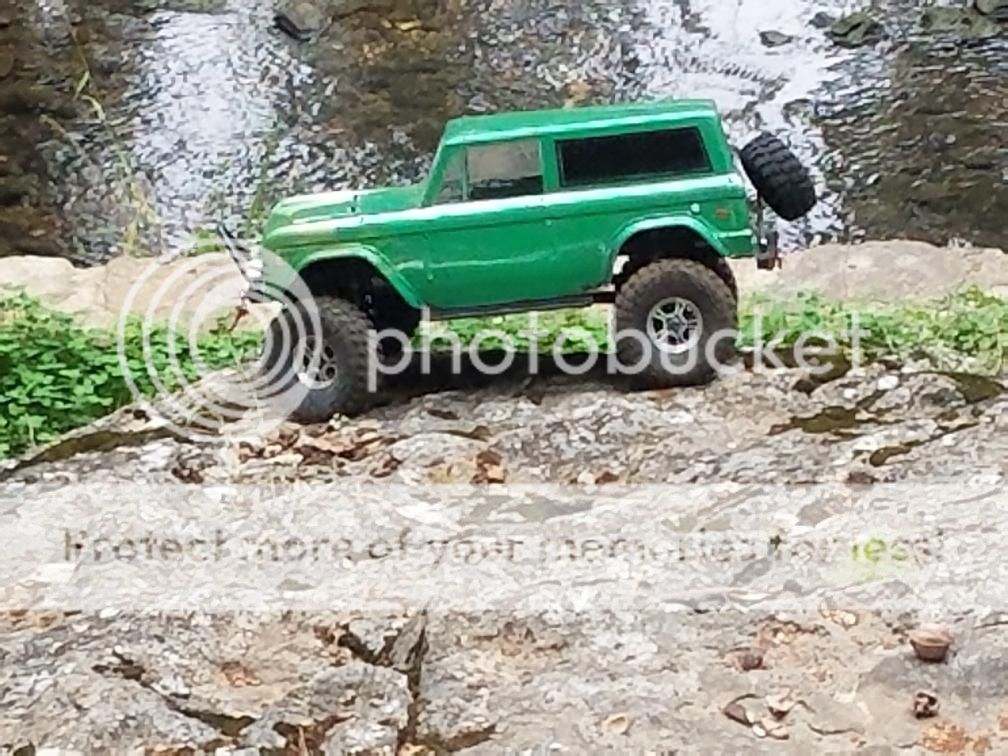
I got this kit a couple months ago and I've been meaning to post it up. I won't bore everyone with the basic build, only thing that stood out was the bad trans output gear. Mine split when I tried to install the bearing, but Traxxas warranty covered it with no problems. Then the steering servo burnt out on like the third time out, but they covered that too.  and after a few changes, it now looks like this.  I used the Defender shock mounts and eliminated the inner fenders. It has YR sliders and bumpers, but I milled a slot in the front one for my winch. I mounted one of the big warn's behind the bumper mount and fed the line out thru a RC4WD fairlead.  I'm running Xspede beadlocks and BFG Krawler T/A's. Right now it just has brass knuckles and portal covers all around, but I have alloy axle housings and I've got the rest of the metal axle parts on the way that should be here in the next couple of days. As always, I'll try to answer any questions about the build. Meanwhile, here's a couple action shots.   And a shot during my very first comp, with the SMRCRC guys. Lost a llittle paint too.   I'll be adding pic's and info, so check back. Thanks for lookin' and likin'. jim |
| |  |
| Sponsored Links | |
| | #2 |
| Rock Crawler  Join Date: Jun 2015 Location: In the Sticks in the Ozarks
Posts: 940
|
I want to give a big Thanks to Al at heyok. I got one of his new winch/light controllers and I love it! I'm running the 3W LED headlights, so Al set me up a regulator to go with my controller. That way I can run an occasional 3s without my headlights starting a fire. You can see 'em tied on the battery restraint for now. I pulled the light wiring back out to re-paint the body after last months comp, and haven't gotten them wired back up yet. Here's a better look at the winch setup.  I just made a simple bracket to mount behind and below the stock bumper mount, using it's screws to secure the winch plate. I had to pull the big side gear off of the Warn and even grind the case a bit to get the spool centered in the frame rails. I left the top and bottom rollers on the stock fairlead, but cut off the sides to tuck it snug into the bumper mount. I ground off some of the front of the mount and flipped it to get the bumper tucked back in for better approach angle. Then I cut off the bumper mounts to make room for the winch. Then I bent the RC4WD plate down at the ends and re-drilled it to mount right onto the new plate, at the right height to center the line thru the bumper and mount. I wanted to keep the "free-spool" feature, so I made sure to position the winch so that when I extended the shaft (release button) it would clear the frame rail and be easy to get to under the fender.  After milling the front bumper and polishing the new fairlead nice and smooth, It's ready to help out when needed. |
| |  |
| | #3 |
| Rock Stacker Join Date: Jan 2016 Location: US
Posts: 69
|
Hey Doc. Your rig is looking pretty tough. I really like that Bronco body. Keep up the good work. How do you like that winch? Been thinking about adding a winch to my truck, and I really like the looks of that one. Sent from my SM-G950U using Tapatalk |
| |  |
| | #4 |
| Quarry Creeper Join Date: Nov 2013 Location: alberta
Posts: 445
| |
| |  |
| | #5 | |
| Rock Crawler  Join Date: Jun 2015 Location: In the Sticks in the Ozarks
Posts: 940
| Quote:
[QUOTE=slickwill16;5873068]Hey Doc. Your rig is looking pretty tough. I really like that Bronco body. Keep up the good work. How do you like that winch? Been thinking about adding a winch to my truck, and I really like the looks of that one. Thanks, I know some were expecting the "other" Bronco. I call it "the Leetle Jalapeno". I always liked the late '60s - early '70s body more. I like the winch so far, but I haven't actually "used" it yet, so I can't give you much of a performance review. I'll post up whenever I do get a chance to try it. Thanks for lettin' me know. Glad to hear not everyone is having trouble.  And Thanks, to everyone, for lookin' and likin'. | |
| |  |
| | #6 |
| RCC Addict Join Date: Feb 2016 Location: Princeton, North Carolina, USA
Posts: 1,499
|
How can you stand to work on this with it so huge?? I'm surprised you even have full size tools after all the micro stuff!! lol Sent from my SM-G930R4 using Tapatalk |
| |  |
| | #7 |
| Rock Crawler  Join Date: Jun 2015 Location: In the Sticks in the Ozarks
Posts: 940
| |
| |  |
| | #8 |
| RCC Addict Join Date: Feb 2016 Location: Princeton, North Carolina, USA
Posts: 1,499
|
When you finish I'll expect to see a video on your crawling terrain coffee table.  |
| |  |
| | #9 |
| Moderator  Join Date: Sep 2008 Location: PA
Posts: 13,935
|
That body and wheels look good on the truck.  |
| |  |
| | #10 |
| Rock Crawler  Join Date: Jun 2015 Location: In the Sticks in the Ozarks
Posts: 940
| |
| |  |
| | #11 |
| Rock Crawler  Join Date: Jun 2015 Location: In the Sticks in the Ozarks
Posts: 940
| |
| |  |
| | #12 |
| Rock Crawler  Join Date: Jun 2015 Location: In the Sticks in the Ozarks
Posts: 940
|
A few more details .... Some of you prolly noticed the steering servo. After it smoked, as I waited for the Traxxas replacement, I found these 20kg servos listed on ebay for robotics. Same servos as the Rc truck ones, just $17 ea. They came with a new heavy duty aluminum arm, but when I installed it, the panhard link would hit it at compression. So I got out an old dead servo and cut the mounting horns off of it, and used them to shim the servo up about 2mm and presto. Oh, and I did have to get the "pro-line tire" rings for the beadlocks to fit. The stock tires need 'em too, I tried one. These came in today  ... and with these pieces that I got a couple weeks ago ....  I've got my next project. In the mean time, here's a couple more action shots.  comin' at ya  Thanks for all the looks an' likes. |
| |  |
| | #13 |
| Rock Crawler  Join Date: Jun 2015 Location: In the Sticks in the Ozarks
Posts: 940
|
Well, I started lookin' into the axles. I want to build the front first, partly because it'll be more difficult to tweak and set up, mostly because I have an idea to get just a little camber into the rear wheels and I'm waiting for screws.  ... but if I swap them around, they end up like this.  Goes from 1 or 2 deg to 11 or 12, here's one with the mark showing.  I've done lots of things backwards in the past, why stop now? The c-hubs also have about 10 deg of camber too.  As I assemble these, I'll post up pic's and info. I'll get to my ideas on the rear after the front one's together. Thanks for lookin' and stay tuned. |
| |  |
| | #14 |
| Rock Crawler  Join Date: Jun 2015 Location: In the Sticks in the Ozarks
Posts: 940
|
I got the front axle together today and tweaked it just a little. I wanted to know how much weight it was adding so I threw the stock housing and c-hubs on the scale ....  ... then tried the new alloy setup.  Nice hunk of fat, hopefully in the right place.  While I had the axle out I took a shot of the bottom of the winch mount set-up. You can see the bumper cross-member a little better.  The new c-hubs have shock mount holes in them. If I had mounted them with the L & R on the L & R sides, they would've been on the wrong side of the axle to mount the shocks so I'm still puzzled by the markings. Anyway they have a centered hole and a drooped hole, so I used the drooped. They also spread the bottoms of the shocks and angle them out a little. It also takes the strain off of the link mounts.  I like the look and it should improve performance a little too. The rear set I got has a similar set-up, but that'll be later.  Tune in next time. Thanks for lookin' and likin'. Jim |
| |  |
| | #15 |
| Rock Crawler  Join Date: Jun 2015 Location: In the Sticks in the Ozarks
Posts: 940
|
Went crawlin' with a buddy yesterday ...  ...and had a lot o fun.  Also learned a tough lesson. The new brass knuckles limit the turning too much. That outweighs  ... but losing the turning radius isn't worth it.  So today I put the stock knuckles back on, now my tight turns are back. front ...  and rear.  I really like 'em. They have lots of shock mounting holes, with 2 rows of drooped positions. I put mine in the middle row, then raised the lower mounts to the upper holes in the c-hubs. Also got these today.  They were listed for the Bronco too, but the rear shaft was Defender length. I say "was" because I cut it down a bit, and now it IS Bronco length.  So next time, maybe follow the leader will be the other way 'round.  See Ya's next time. jim Last edited by dr frankenstyle; 10-06-2018 at 09:05 PM. Reason: DOH!! and double pic'd |
| |  |
| | #16 |
| Rock Crawler  Join Date: Jun 2015 Location: In the Sticks in the Ozarks
Posts: 940
|
Well, the rain got here this past week and I was still waiting for parts for the rear axle, so I got out the dremel and worked over the c-hubs and knuckles again. Then I ground a little off of the drag-link ends, and bent the link at both ends to give a bit more clearance at the punkin. Ended up with at least 3 or 4 degrees tighter turning radius. Any gain is a gain.  I did get the alloy rear axle together. I ended up using the plastic/chrome diff covers on both ends. The metal ones that came with the housings have a thicker flange around the edges that binds with the cable end of the T-locks little crescent fork. The weight loss was well worth it to have smooth diff locks, and I like the look of the chrome ones better anyway. The rear c-hubs have shock mount holes, like the front. I just used the center holes for now, since I drooped the shocks one hole at the top. I like the spread stance of the shocks now, and it takes the strain off of the link mts.  A little something else you can see above ... when i cut the rear driveshaft, I cut off about 3 or 4 mm more than I needed. So to keep the center tube "centered", so the spline overlap stays equal at both ends, I removed the o-rings and cut 2 pieces of silicone tubing and slipped over the CV splines. I cut them just snug so they don't interfere with the shaft "shrinking", but I can compress them to remove or re-connect the shaft. And they help keep dirt out and grease in. I noticed that my stock rear axle set-up had just a slight negative camber at the wheels. :( It's not much, but it's there.  The parts i was waiting for were some stainless flat washers for m1.5 screws. I filed a little off the top of the housing ends, then I took a 2-stack of washers and placed them into the bottom of the back opening in the c-hubs. I stuck 'em in with a little marine grease, then when I put in the screws, I tightened the top first. The washers force the c-hubs to mount with a slight angle, and give a degree or 2 of positive camber.  That should help a little on side-hills and maybe even turn a LEETLE bit tighter. So far I'm really happy with the truck. It'll definitely climb a steeper grade, easier now. I also added 8 mm hexes, widening the track about 1/4 in. I trimmed the front of the front fenders a bit more. I may need to trim the back a little more, we'll see after some more crawlin'.  Thanks for lookin' n likin'. jim Last edited by dr frankenstyle; 10-12-2018 at 03:44 PM. Reason: wrong pic, doh! |
| |  |
| | #17 |
| Rock Crawler  Join Date: Jun 2015 Location: In the Sticks in the Ozarks
Posts: 940
|
Rain again today, so I've been fine tuning some more. I took some 1/8 in. aluminum plate and cut, drilled and threaded a couple of pieces 1.5 in. by about 3/8 in. I used those as extension plates to move the tops of the rear shocks forward.  They mounted nice and sturdy on the new hoops, and they allowed me to drop the shocks 2 holes in the axle. I moved the tops down to the bottom holes too, and dropped both front shocks down to the bottom holes too. That moved the weight of the shocks down 1/4 in.  It isn't much, I know, but anything that lowers the COG at all is an improvement. Right? I like the look of the angle of the shocks better too. Thanks again for lookin', jim Last edited by dr frankenstyle; 10-13-2018 at 03:08 PM. Reason: DOH!! |
| |  |
| | #18 |
| RCC Addict  Join Date: Sep 2010 Location: Apollo Pa
Posts: 1,650
|
Interested in hearing if you see improvement with that shock mod, looking forward to see how it goes. Sent from my iPad using Tapatalk |
| |  |
| | #19 |
| Pebble Pounder  Join Date: Oct 2012 Location: Harleysville
Posts: 115
|
"It's the ProLine '73 Bronco, for anybody wanting to know for sure." Thanks I was going to ask because I also live the older broncs. Bronco looks tough! Btw, did you paint that on the outside? I ask because the roughed up paint. |
| |  |
| | #20 | ||
| Rock Crawler  Join Date: Jun 2015 Location: In the Sticks in the Ozarks
Posts: 940
| Quote:
 I could really tell a difference on the side-hills too.  I'm sure most of the credit goes to the heavier axles and wider hexes, but the new shock angles prob'ly helped a little too.  Quote:
 All of the paint on (in?) this one is on the inside. Whenever I knock off too much, I'll just flake off any loose paint, mask off the damaged area and try to re-shoot the layers like the first time. I figure the scars show up and make it look like it spends the weekends on the rocks and the weekdays in the body shop. All of the paint on (in?) this one is on the inside. Whenever I knock off too much, I'll just flake off any loose paint, mask off the damaged area and try to re-shoot the layers like the first time. I figure the scars show up and make it look like it spends the weekends on the rocks and the weekdays in the body shop.  Thanks again for lookin'. jim Last edited by dr frankenstyle; 10-14-2018 at 11:27 AM. Reason: DOH!! | ||
| |  |
 |
 Dr. F's Kit Bronco - Similar Threads
 | ||||
| Thread | Thread Starter | Forum | Replies | Last Post |
| Traxxas Bronco light kit | HTFU Defender | Traxxas TRX-4 | 0 | 06-25-2018 09:06 AM |
| Bronco light kit? | HTFU Defender | Traxxas TRX-4 | 2 | 05-15-2018 04:56 PM |
| light kit for the bronco | m1009cucv | Traxxas TRX-4 | 4 | 03-27-2018 02:22 PM |
| Ascender Bronco Kit ??? | raceeng18 | Vaterra Ascender | 7 | 01-11-2017 04:45 PM |
| Eta on a Bronco Kit? | LoneRanger | Vaterra Ascender | 4 | 11-10-2015 05:28 PM |
| Thread Tools | |
| Display Modes | |
| |