| |
| |||||||
 |
| | LinkBack | Thread Tools | Display Modes |
 03-29-2019, 10:30 AM
| #21 | ||
| I wanna be Dave Join Date: Aug 2016 Location: Orange County, CA
Posts: 3,643
| Quote:
I'm wondering if we can just find the correct material and cut out our own slipper pads. Food for thought. Yes, I do stick to dry, so wet isn't an issue. I especially stay out of mud. LOL It's bad enough when my son's cleats are caked with mud from a soggy field.... if my RC was caked with mud.... The anti-seize I try to put little on and then spread it. I just need to remember to keep my hands away from the cv joints when handling the truck. Otherwise, so far it hasn't been too messy. Quote:
Thanks! I do it just as a way for me to remember what I did and what I was doing. It's nice too that if I come across something to watch out for I can document it so that I can reference later on. If it helps other people, then great! Or it can just be entertainment if I leave the parts where e-clips go flying in all directions... LOL (honestly though e-clips were OK on this kit. not having to build the shocks probably helps too. Some other kits have e-clips in nasty places that are hard to clip on) Last edited by soze; 03-29-2019 at 10:38 AM. | ||

|  |
| Sponsored Links | |
| | |
|
03-29-2019, 10:48 AM
| #22 | ||
| Moderator   Join Date: Sep 2008 Location: PA
Posts: 13,935
| Quote:
You can also go on eBay and get takeoff parts that include the spur with installed slipper pad, etc for less than $12. Quote:
| ||
|
| |
|
03-29-2019, 10:48 AM
| #23 | |
| Rock Crawler Join Date: Jul 2016 Location: Southern Oregon
Posts: 767
| Quote:
| |
|
| |
|
03-29-2019, 12:12 PM
| #24 | |
| Rock Crawler Join Date: Jul 2016 Location: Southern Oregon
Posts: 767
| Quote:
Also, sorry about the mini- thread jack Soze, lol Last edited by JSterrett; 03-29-2019 at 12:17 PM. | |
|
| |
|
03-29-2019, 12:31 PM
| #25 | |
| I wanna be Dave Join Date: Aug 2016 Location: Orange County, CA
Posts: 3,643
| Quote:
| |
|
| |
|
03-29-2019, 01:25 PM
| #26 |
| Rock Crawler Join Date: Jun 2017 Location: Land of burning couches
Posts: 932
|
in a bind a friend of mine used like cabinet anti slip padding stuff in place of a slipper pad in a brushless 3s powered yeti and its holding really well and is quite impressive haha
|
|
| |
|
03-30-2019, 12:02 PM
| #27 | |
| Go Buckeyes!   Join Date: Jun 2017 Location: Mid-Ohio
Posts: 4,135
| Quote:
| |
|
| |
|
04-03-2019, 12:25 AM
| #28 |
| I wanna be Dave Join Date: Aug 2016 Location: Orange County, CA
Posts: 3,643
| Section F: Suspension & Driveline It's continuing to come together! This part of the build requires these bags.  Step F1 uses these pre-built shocks. {commercial voice}Just add oil!{/commercial voice} 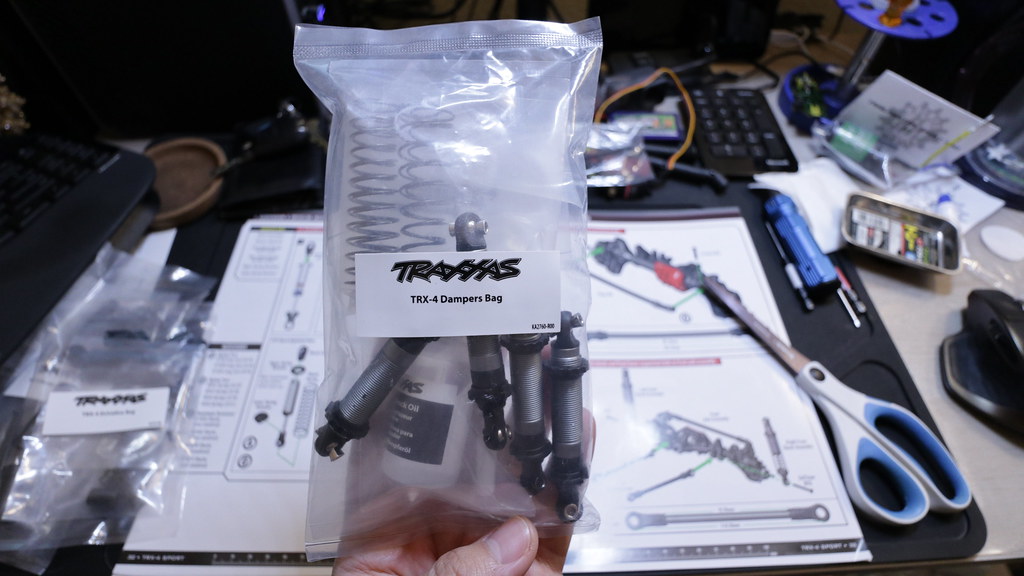 The only thing you need to assemble in this step is the oil nozzle for the shock oil bottle. 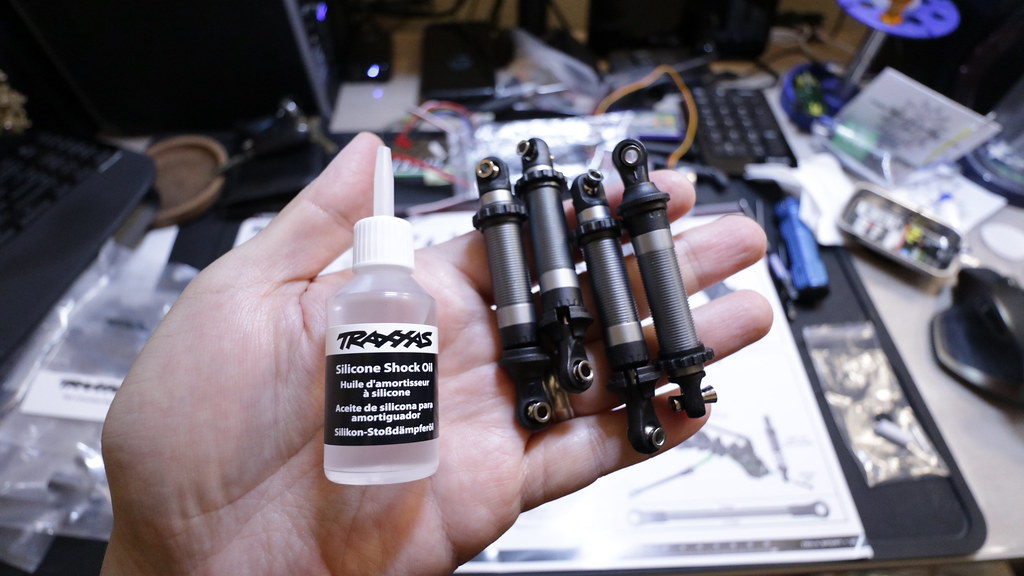 Getting ready to do some oil filling with my trusty ProTek RC Shock Pliers... 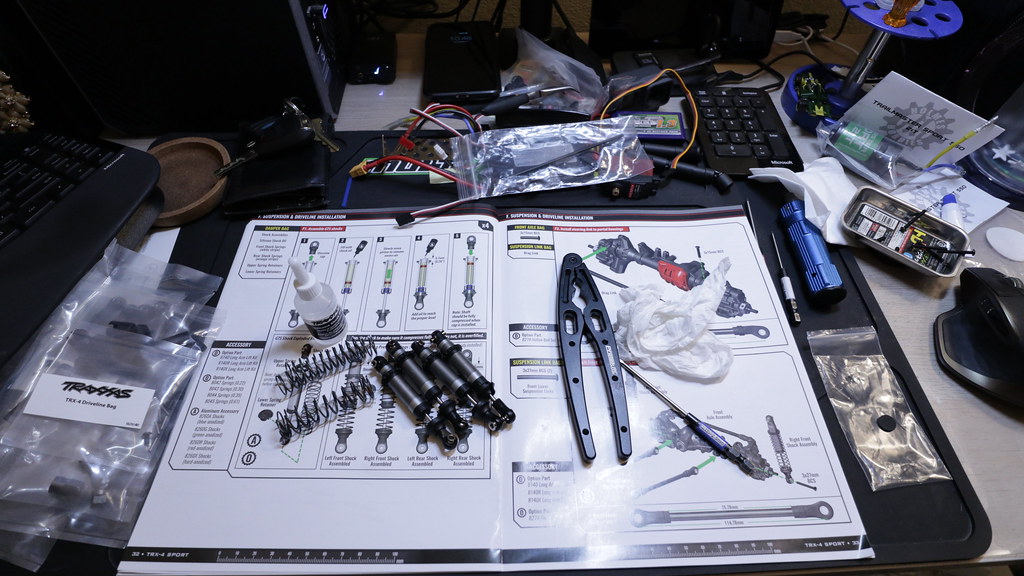 Step F1 complete....Doh! I forgot to take finished shock pictures... It's ok, you'll get to see them later. Time to move onto the links with this bag... with the pre-assembled links... 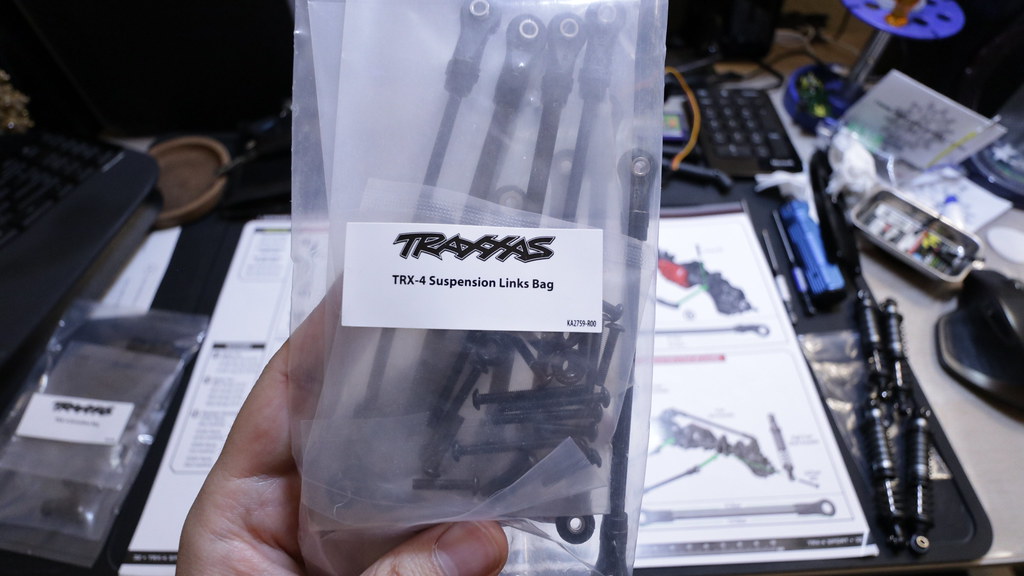 Step F2 Parts 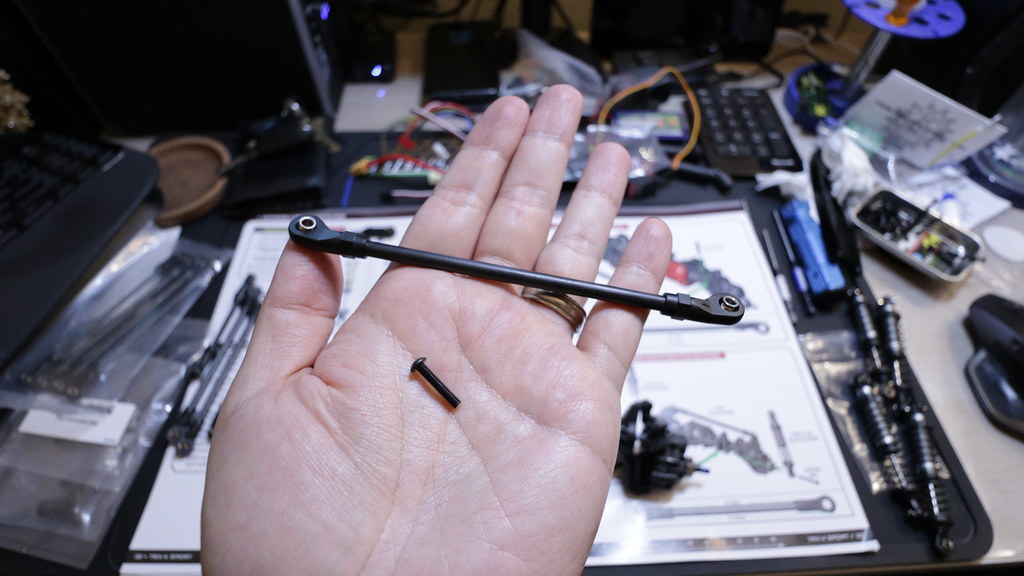 F2 complete  Step F3 parts... 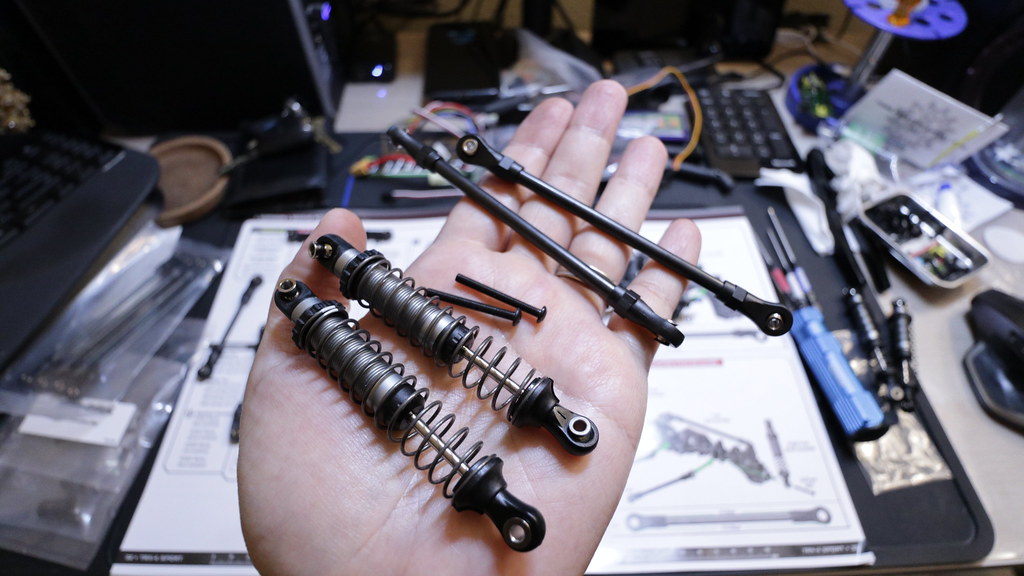 Step F3 complete 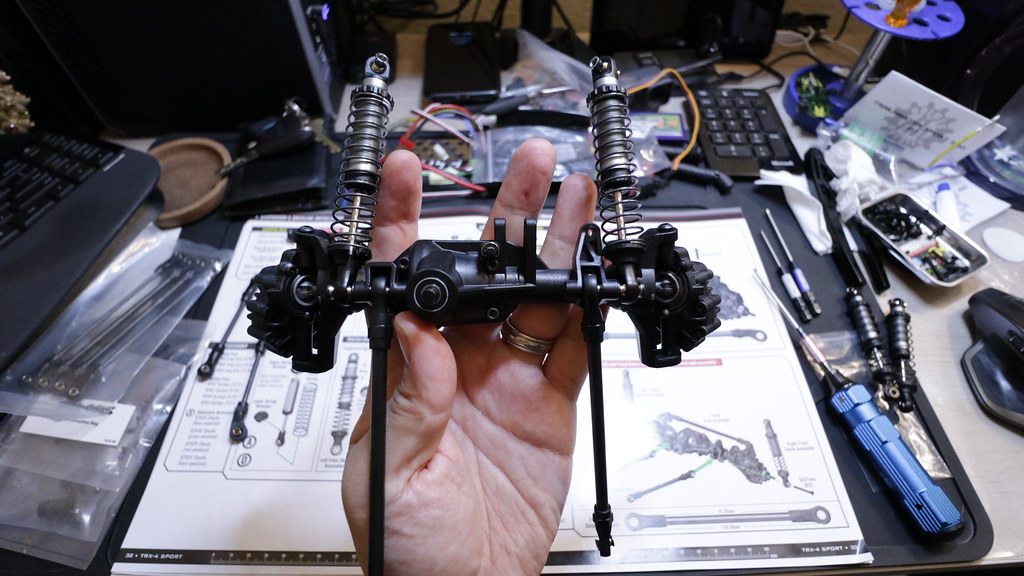 Lining up the proper links for step F4 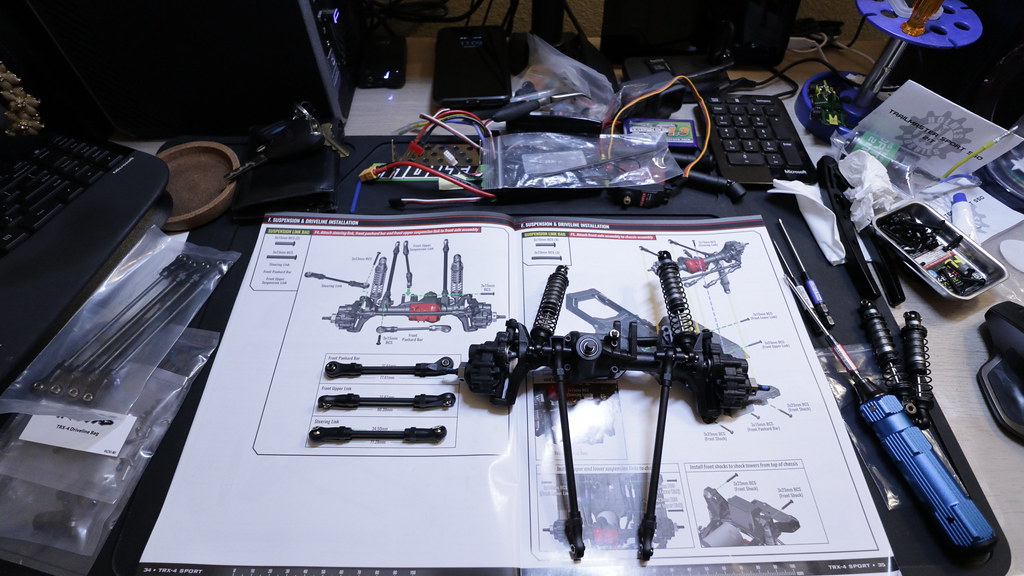 Also need these screws 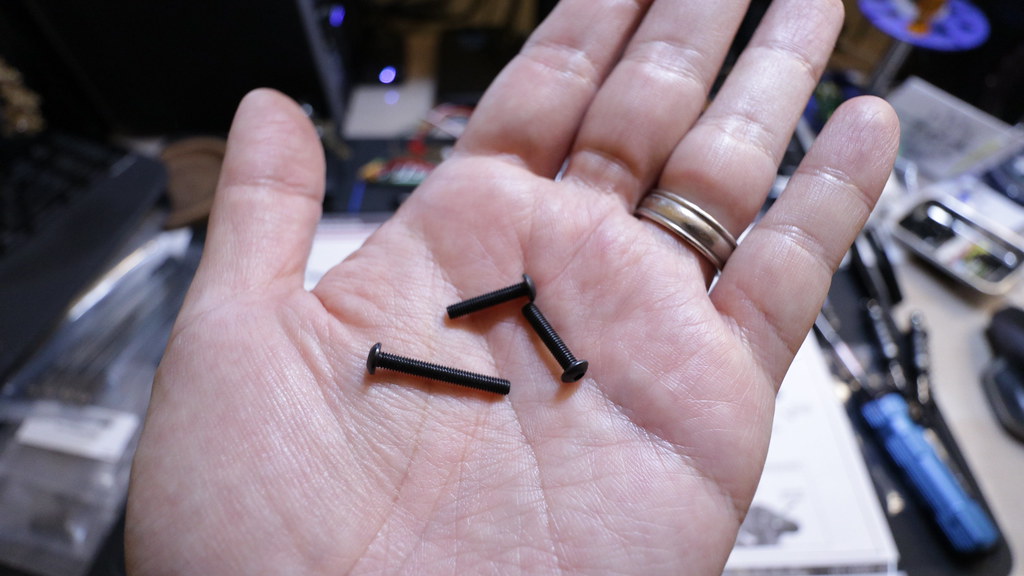 Step F4 Complete 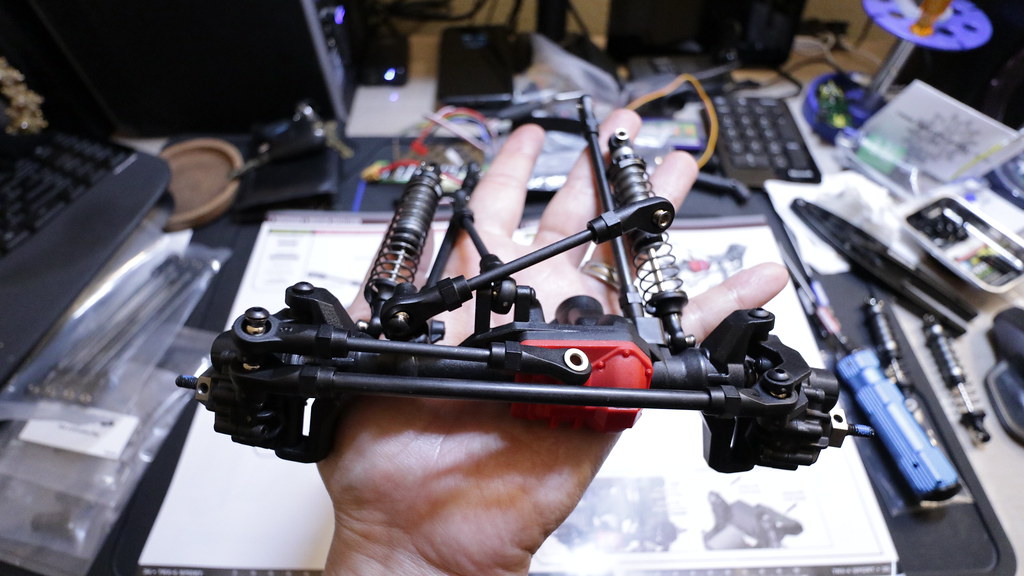 Step F5 parts 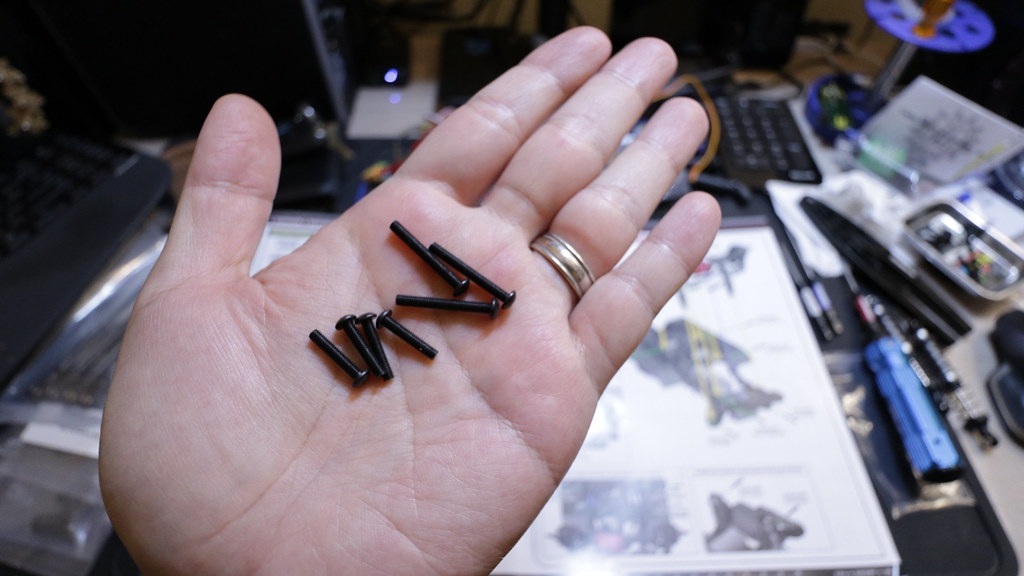 F5 complete  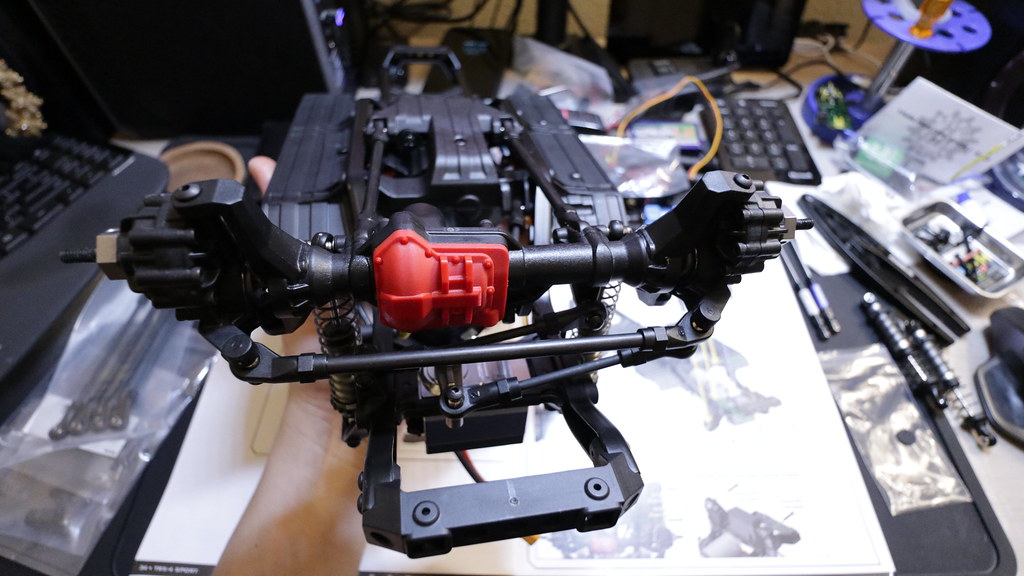 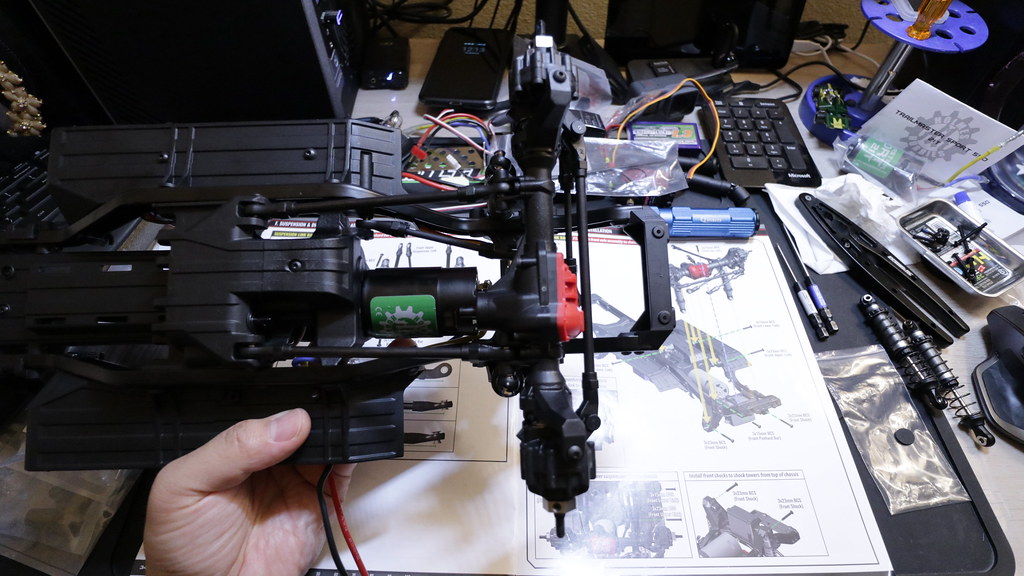 What we need for step F6 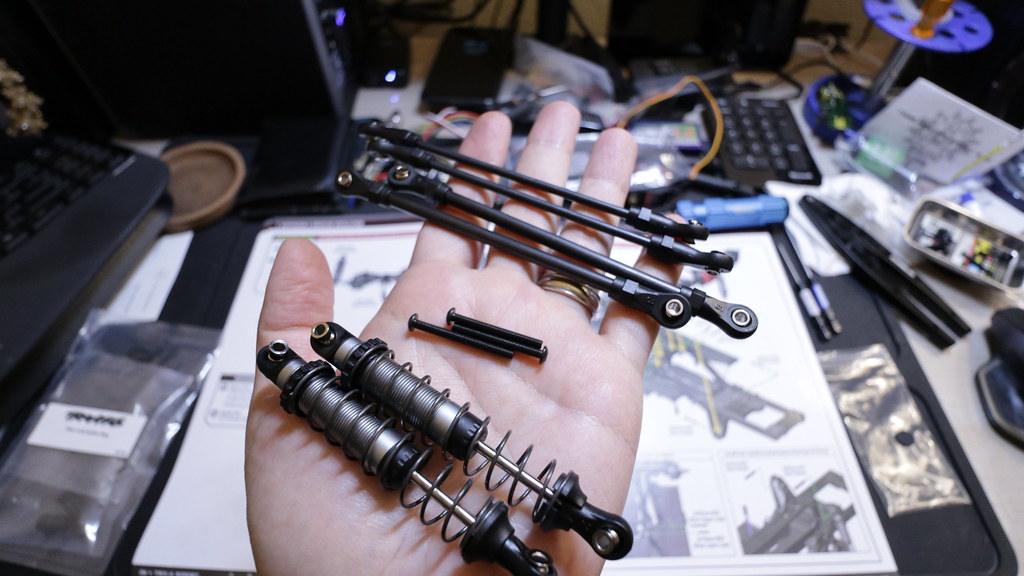 F6 complete. 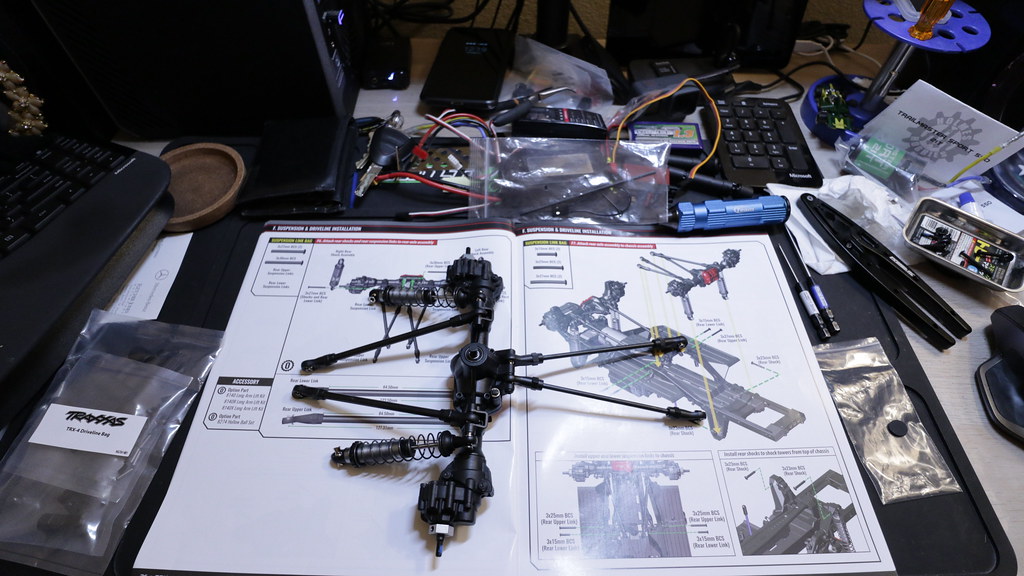 Screws needed for Step F7 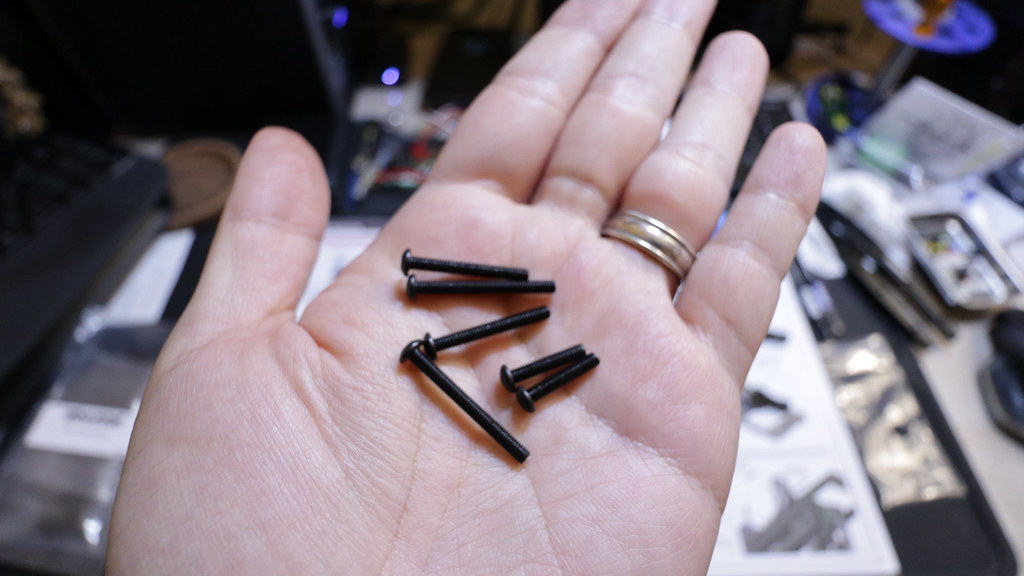 F7 complete 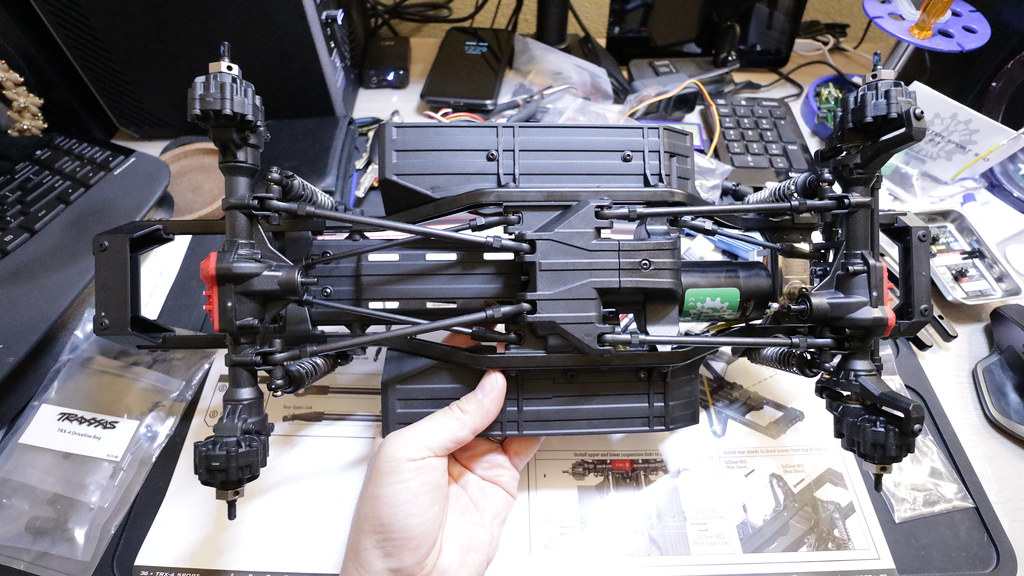 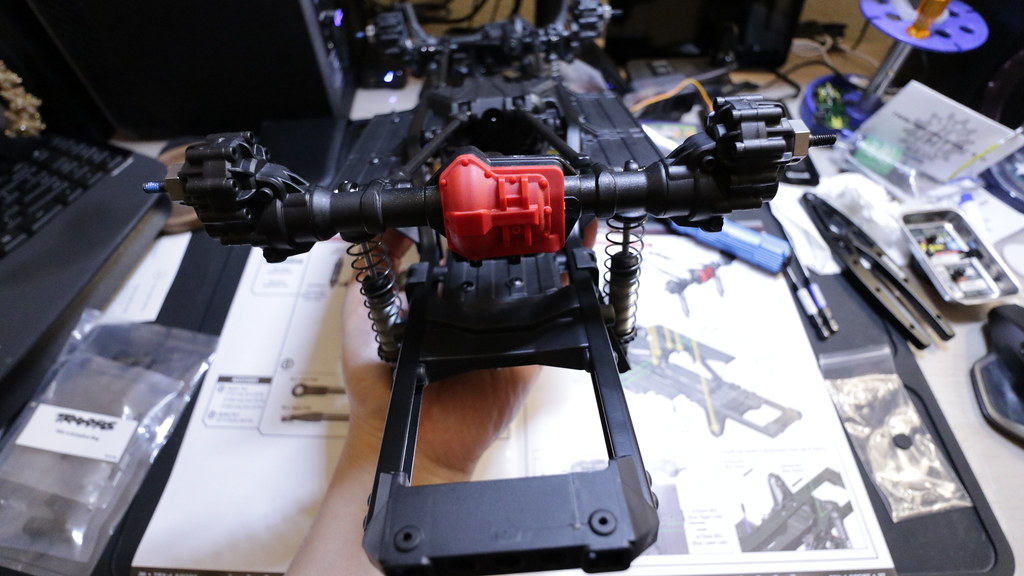 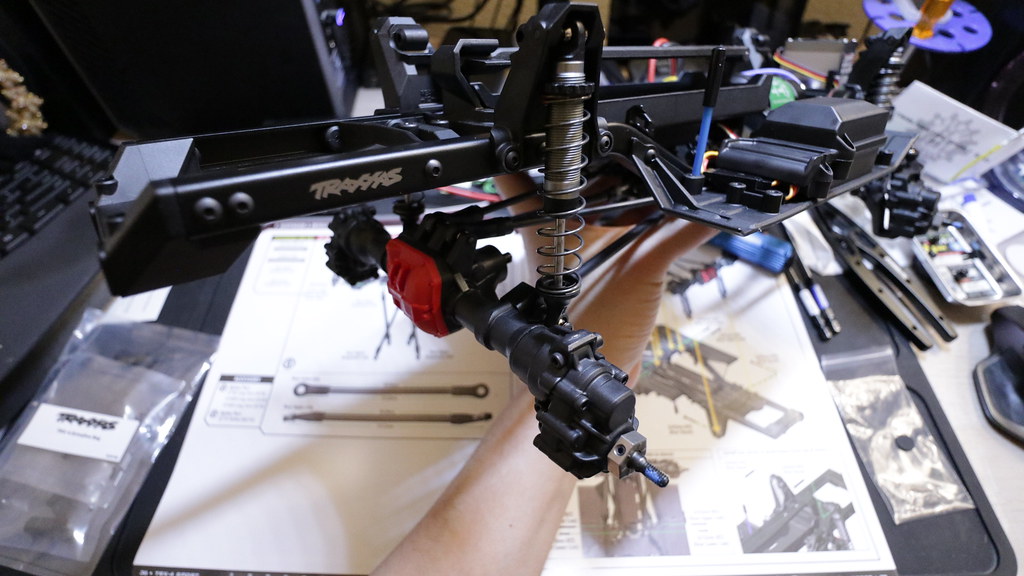 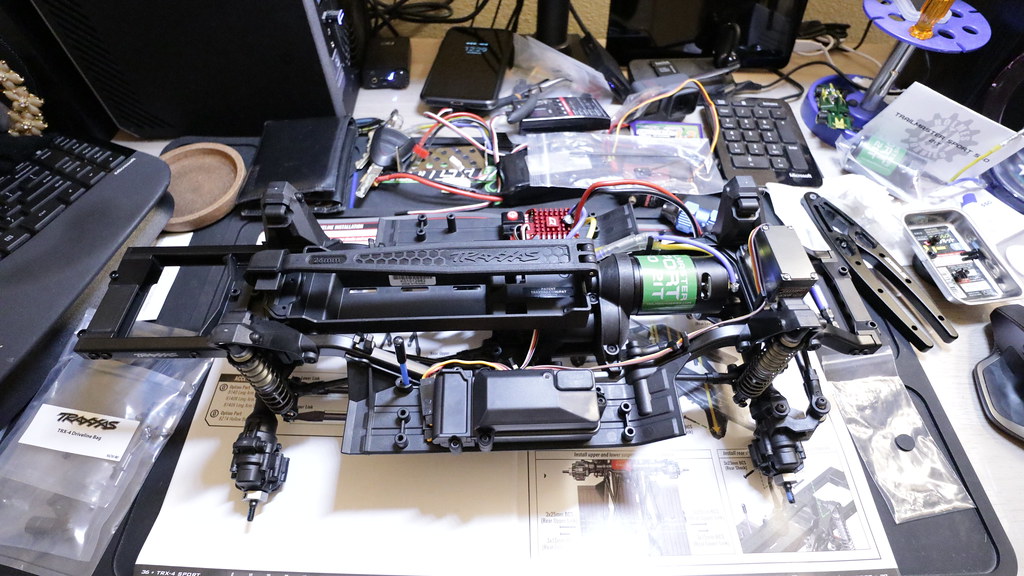 Final bag we need for this section Step F8 parts 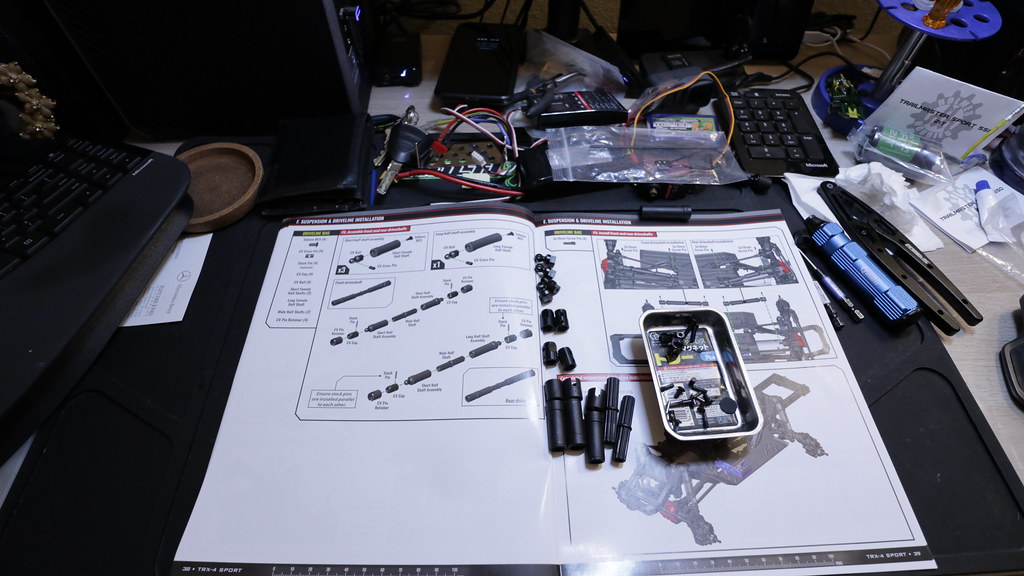 RED ALERT! One of the output drives is defective with the slots cut at an angle instead of straight up and down. This caused the driveshaft to bind. 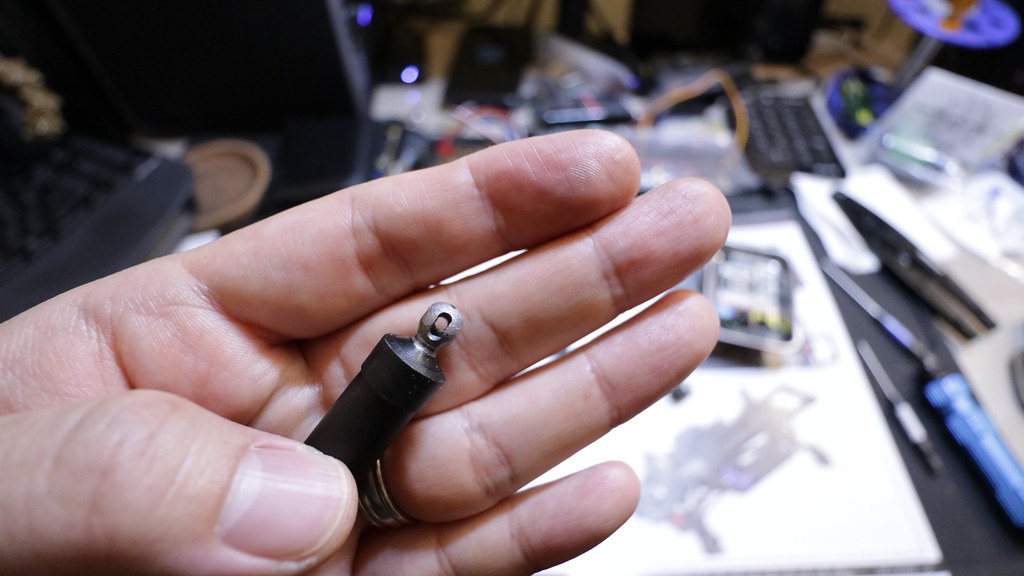 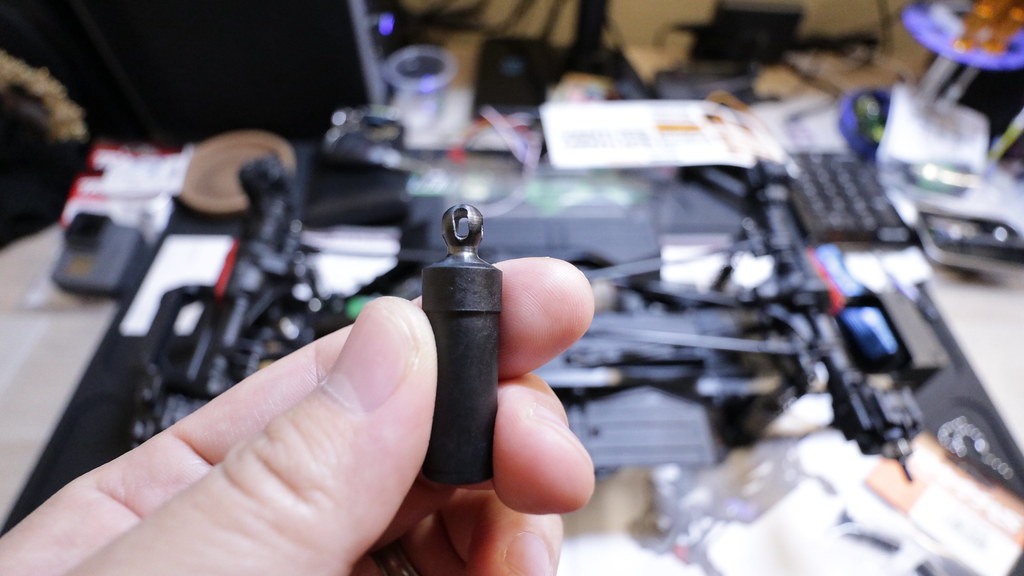 Called up Traxxas. me - "Hey, um... I just bought a TRX4 Sport kit, and one of the parts is defective." Traxxas - "what part is it, and what's the part number?" me - "It's the output drive that you can find in part# 8295" Traxxas - "what's your name and address?" me - "My name is #####, and my address is #####..." Traxxas - "ok we'll send one out to you right away" me - "That's it?" Traxxas - "That's it!" Few days later this showed up in the mailbox. Back in business! 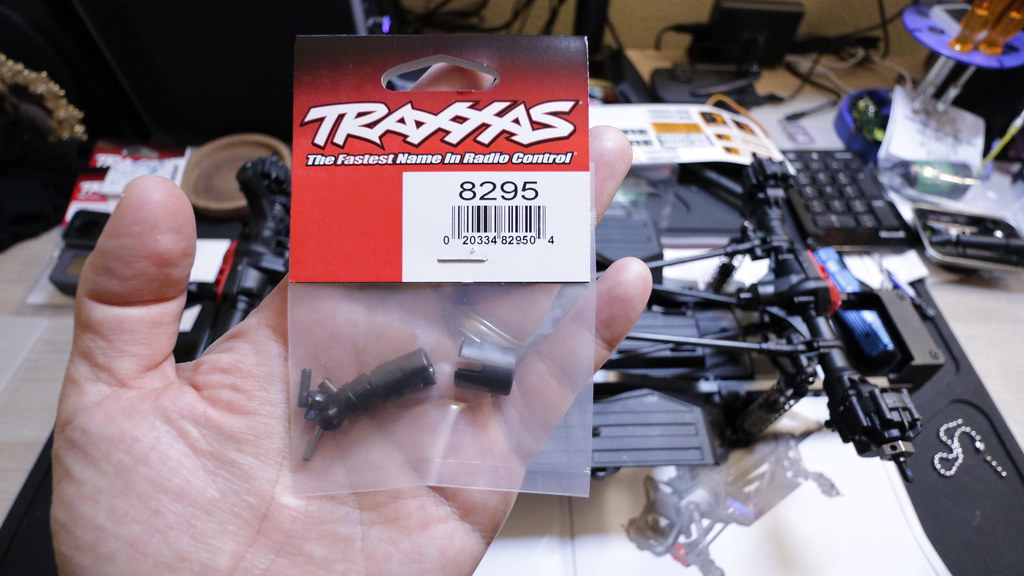 Old on left, new on the right. 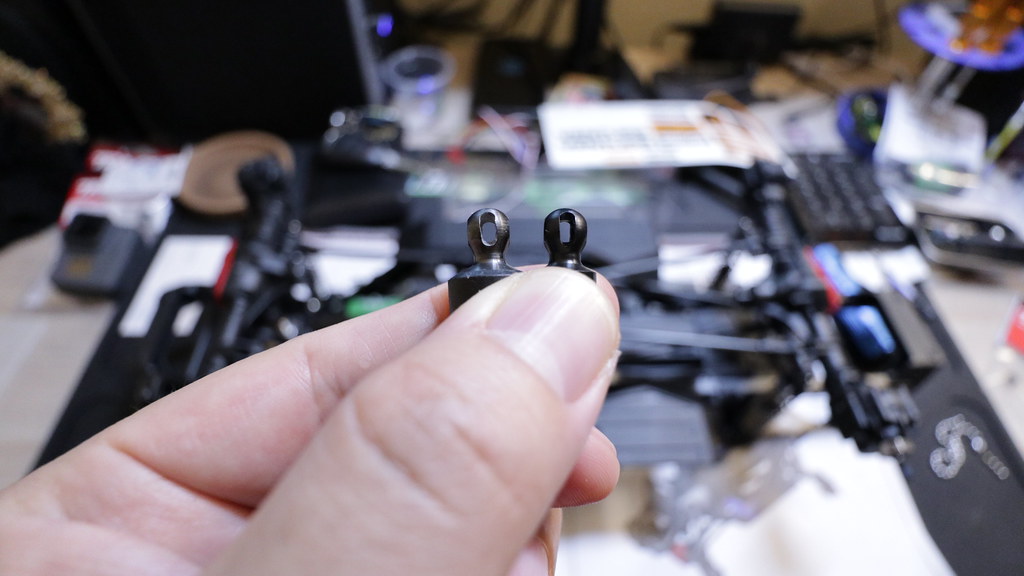 Due to technical difficulties... Step F8 took the longest, but it's now complete. 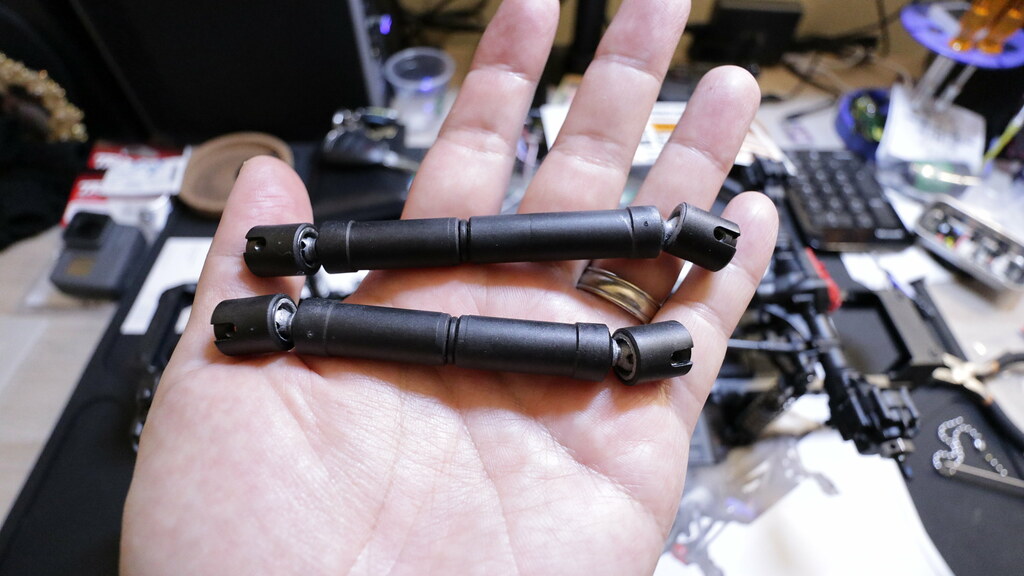 Parts for Step F9 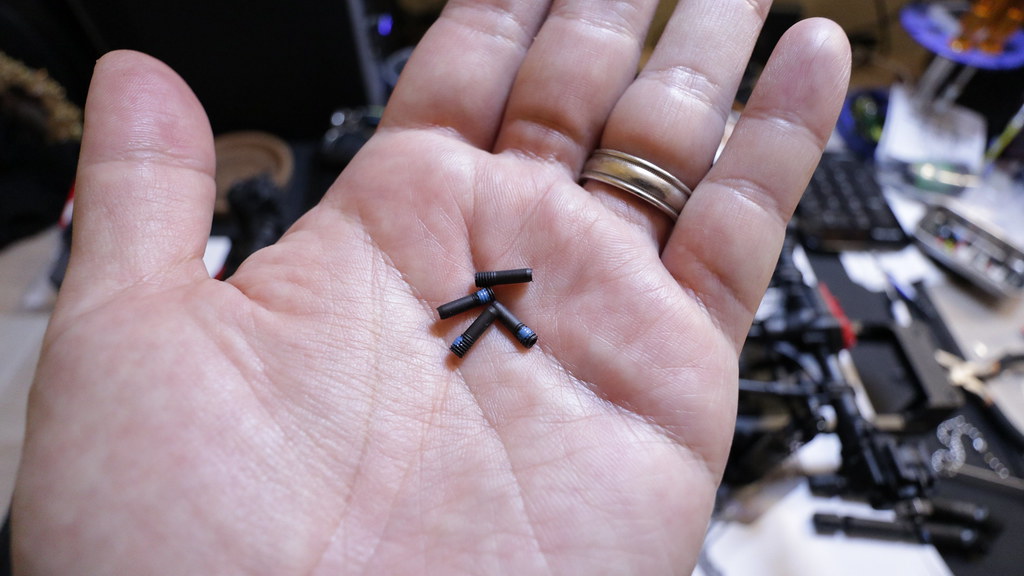 Step F9 complete. 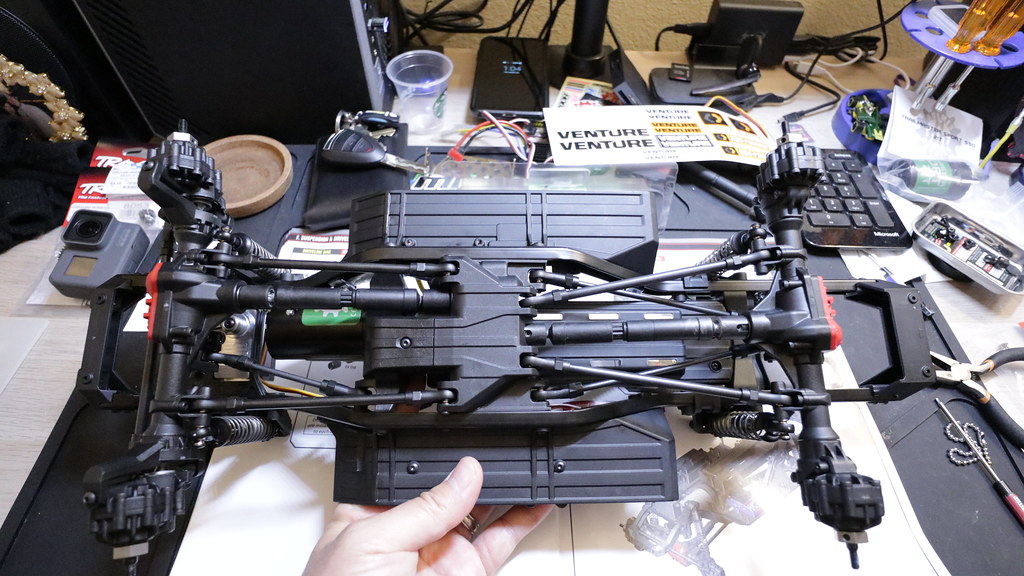 And with that we are complete with "Section F: Suspension & Driveline" Last edited by soze; 04-03-2019 at 12:28 AM. |
|
| |
|
04-03-2019, 02:40 AM
| #29 |
| RCC Addict Join Date: Nov 2010 Location: England
Posts: 1,603
|
That's great support from Traxxas!! I don't know if the same would happen in the UK though. Also bummed as I missed out on a used Sport on ebay last Sunday. They are rare in the UK though. |
|
| |
|
04-03-2019, 06:58 AM
| #30 |
| Moderator Join Date: Sep 2008 Location: PA
Posts: 13,935
|
It's a bummer the driveshaft was defective, but at least Traxxas was quick to respond.
|
|
| |
|
04-04-2019, 07:05 PM
| #31 |
| Newbie  Join Date: Mar 2019 Location: Bessemer
Posts: 25
|
This is like seriously a professional level build log/tutorial/walkthrough/etc! Awesome build!
|
|
| |
|
04-04-2019, 07:31 PM
| #32 |
| Slow is the new Fast  Join Date: Nov 2013 Location: Winterpeg
Posts: 2,906
|
Such a nice looking kit. Thanks for posting up your build in such detail. You are giving Jato a run for his money in that department.
|
|
| |
|
04-14-2019, 04:35 PM
| #33 |
| I wanna be Dave Join Date: Aug 2016 Location: Orange County, CA
Posts: 3,643
|
This build is still alive! 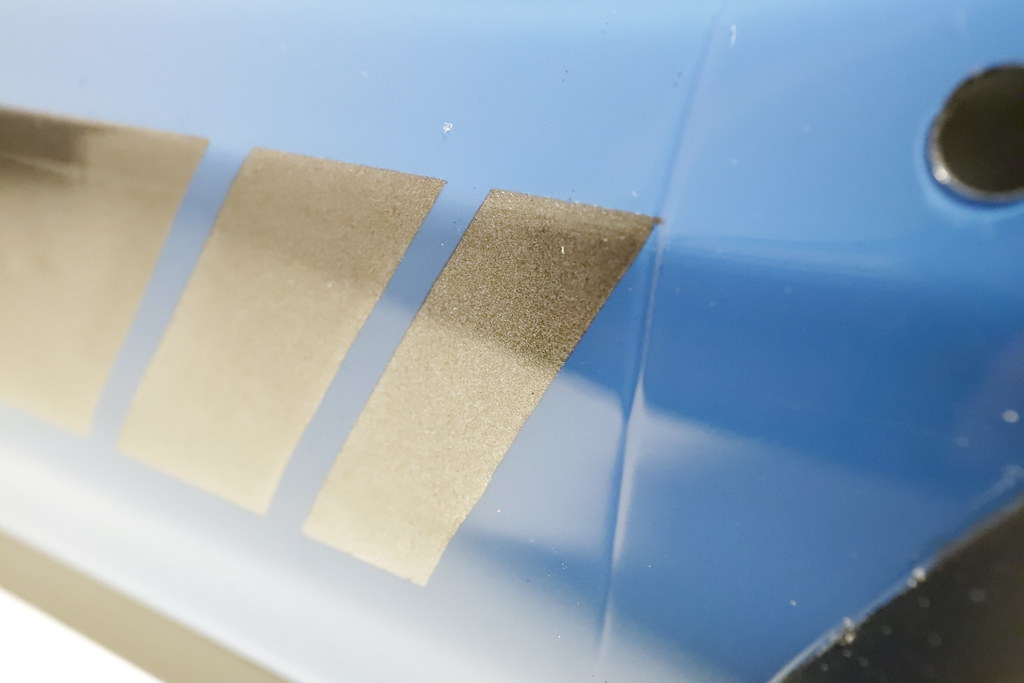 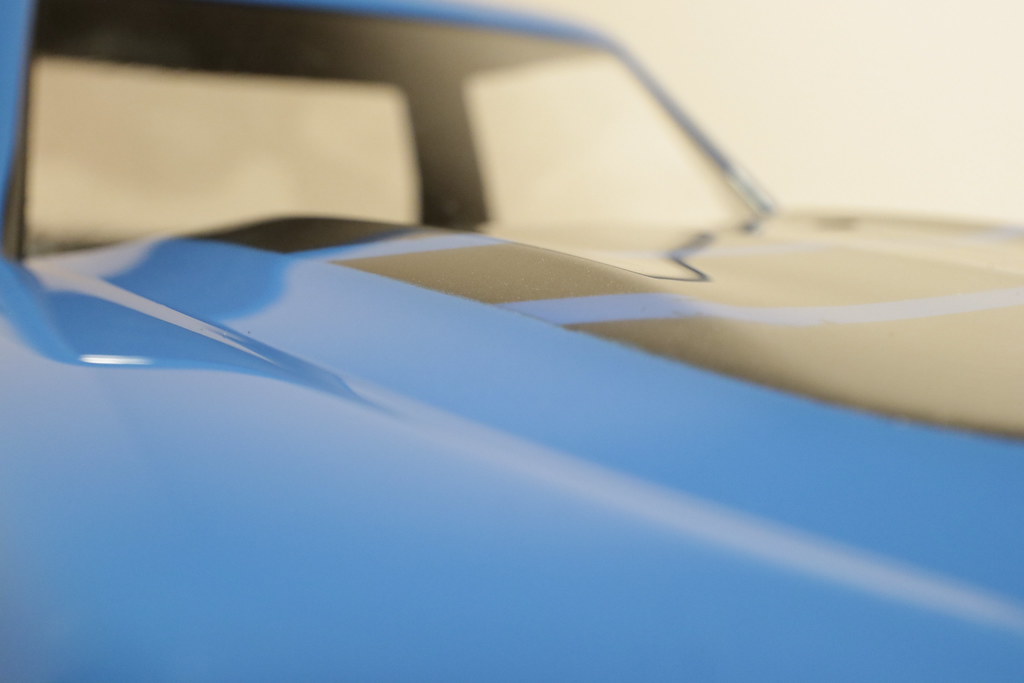 |
|
| |
|
04-15-2019, 04:51 PM
| #34 |
| I wanna be Dave Join Date: Aug 2016 Location: Orange County, CA
Posts: 3,643
| Section G: Final Chassis Assembly Coming to the home stretch of this build! These are the parts for Step G1.  Pay attention to the rotation direction for the tires as they are directional. I will not be gluing on the tires and using the wheels even though I think they look decent, because I much prefer using beadlock wheels. I'm going to give these tires a shot first stock, and modded with siping/cutting. 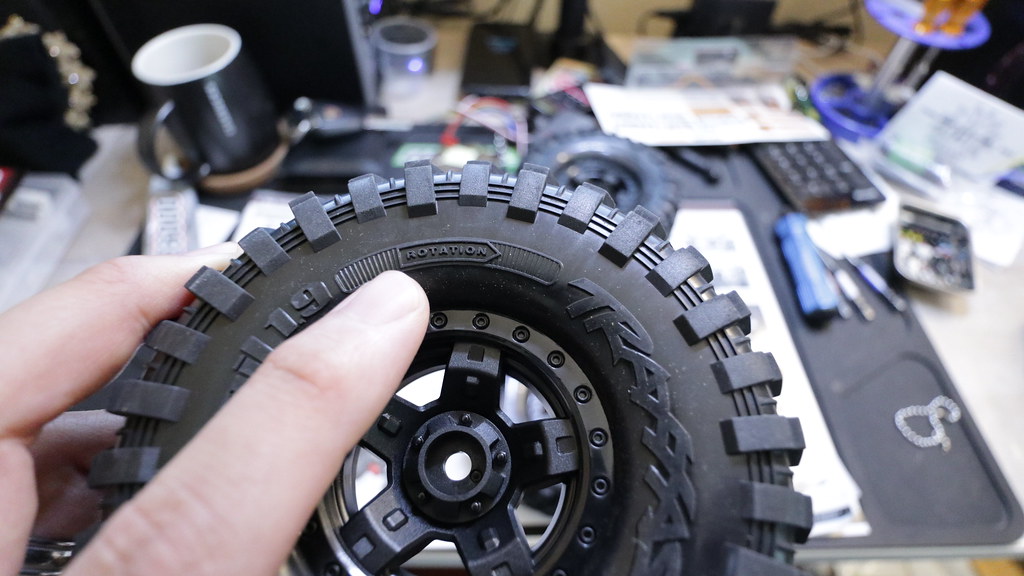 For the rest of this section you will need the "Body Mounting Bag"  These are the parts for step G2  Step G2 complete. Crossmembers mounted on.  You need these parts for step G3  Make sure you pay attention to the direction of the posts.  Step G3 complete    These are the parts you need for step G4   So, I encountered my second issue with this kit. I was missing a 3x10 screw. At this point of the build, I should have 12 total 3x10mm BCS screws. I had 11. This is where Traxxas probably should give some extra hardware in case they miscount. Putting together the front bumper assembly requires 2 3x10mm and 1 2.6x8mm. Luckily, I had an extra 3x10mm screw that I poached from my GMADE GOM box of parts. Step G4 Complete.   You need these parts for step G5  Step G5 complete. Eagle eyes will notice that I have the sliders on the wrong sides. Not to worry, they have since been correctly put on the correct sides (left --> right & right --> left).  This completes "Section G: Final Chassis Assembly"! Last edited by soze; 04-15-2019 at 05:03 PM. |
|
| |
|
04-15-2019, 06:00 PM
| #35 |
| I wanna be Dave Join Date: Aug 2016 Location: Orange County, CA
Posts: 3,643
| Section H: Body Assembly Let's wrap this build up in stock form and get this thread ready for upgrade and crawling updates. So, the weather finally warmed up, and I got around to painting the body. I used the following for getting this body done. Paint: Tamiya PS-5 Black Tamiya PS-30 Brilliant Blue Tamiya PS-23 Gunmetal Tamiya PS-55 Flat Clear Plasti-Dip Masking: Tamiya 5mm Masking tape for Curves Frog Tape (for general masking) Here's the end result for the body.   Here's the Tamiya 5mm Masking tape for Curves that I used.  Frog Tape for general masking duties.  You'll need these parts for Section H  These are the parts for Step H1   Step H1 complete  These are the parts for step H2.  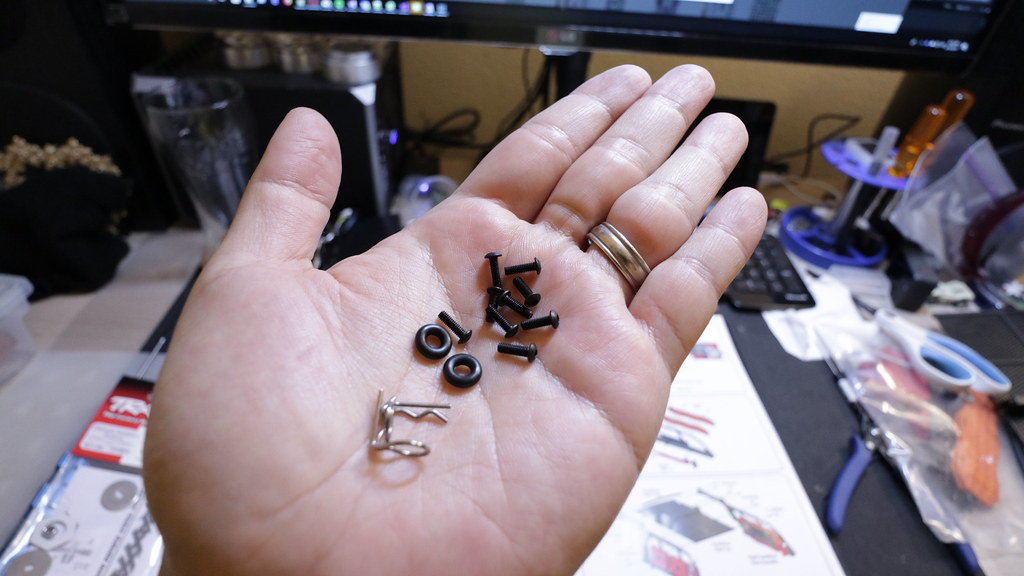 I encountered my 3rd Issue with the kit. You'll notice that one 2.5x8mm screw is missing. I should have a total of 10, but I only had 9 left during this stage of the build. Again, wish there was some extra hardware to cover. Luckily, I was able to snag yet another screw from my parts for other trucks. Step H2 complete        Here are the parts for Step H3   Eagle eyes will see in that picture above that I used the wrong 3x8mm FCS screws. There are actually 2 styles of 3x8mm screws with that big flat FCS head. One uses 2mm hex driver, the other uses 2.5mm. I will show the differences further below. I also took this opportunity to add a little sharpie + paint marker detailing to the scale parts. Not a perfect job by any means, but good enough to not look like 1 color plastic bits.  Step H3 complete   Again, I used the wrong screws on these rotopacks  These are the parts you need for Step H4   Step H4 complete 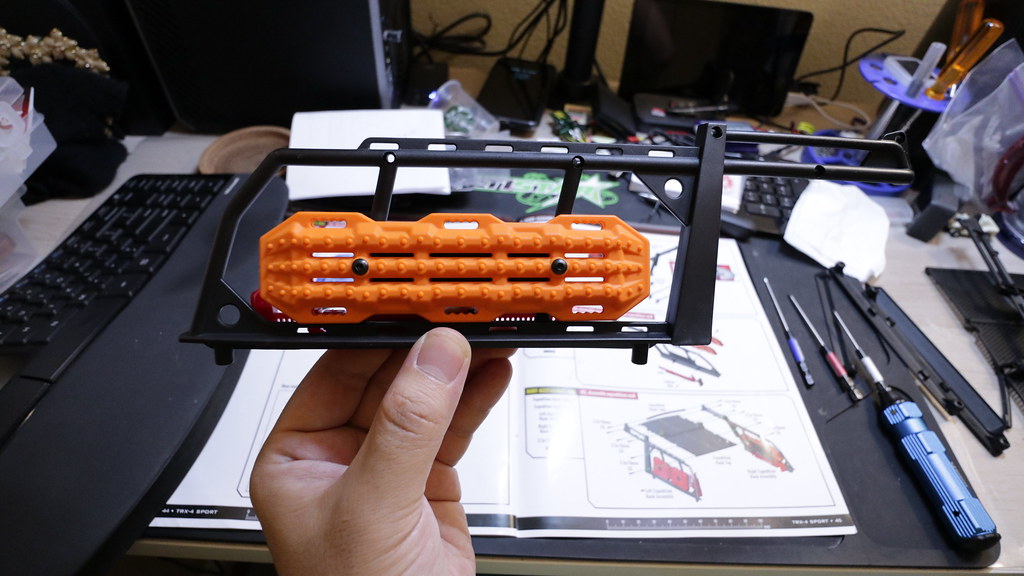  You need these parts for Step H5   Step H5 complete (still the wrong screws on the rotopacks)    So getting the final step H6.... I discovered I used the wrong 3x8mm FCS screws for the rotopacks. There are two types of 3x8mm FCS screws included in the kit. One type uses 2mm hex drivers and the other 2.5mm hex drivers. The one with the bigger flat head and 2mm fitting is used for the rotopacks. The rest are for mounting the Expedition cage onto the body. The top FCS screw is for the rotopacks.  The right screw is the correct one. 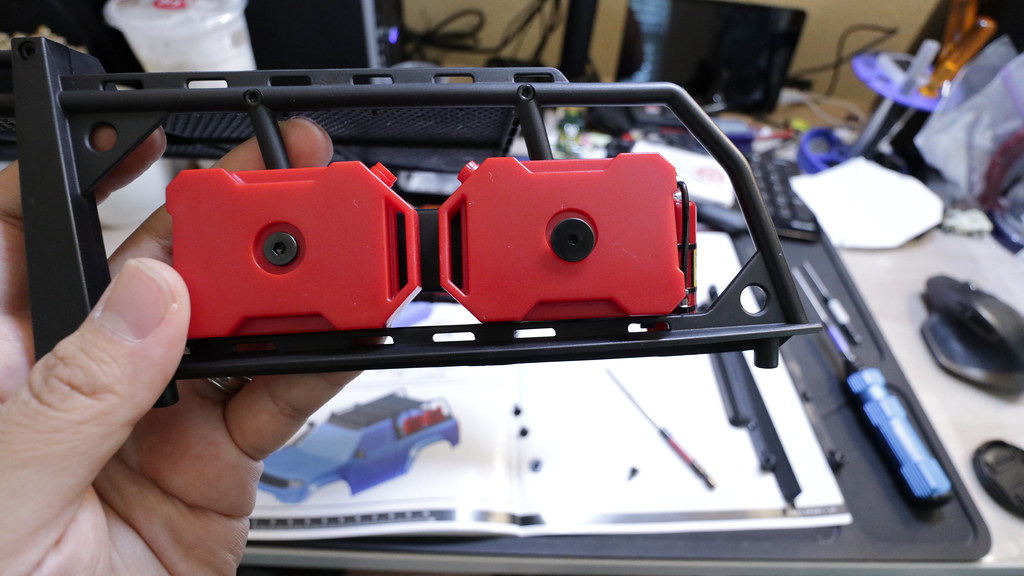 You'll need these parts for step H6 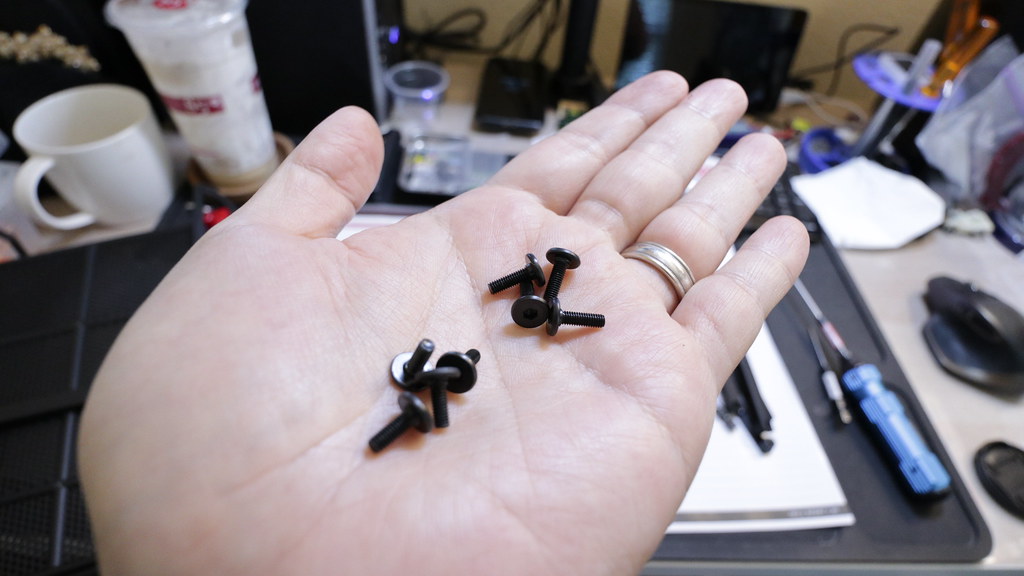  Step H6 complete 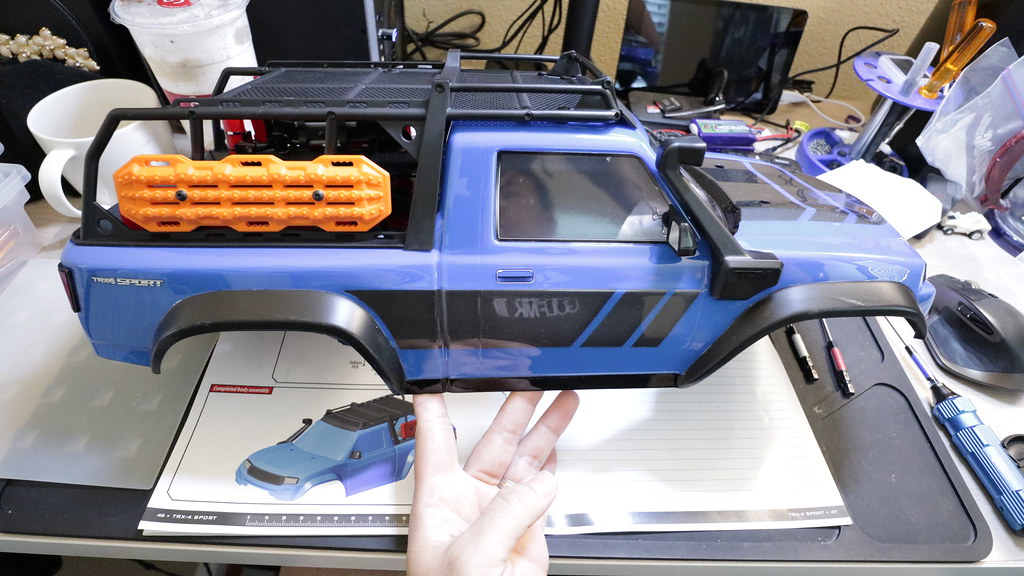   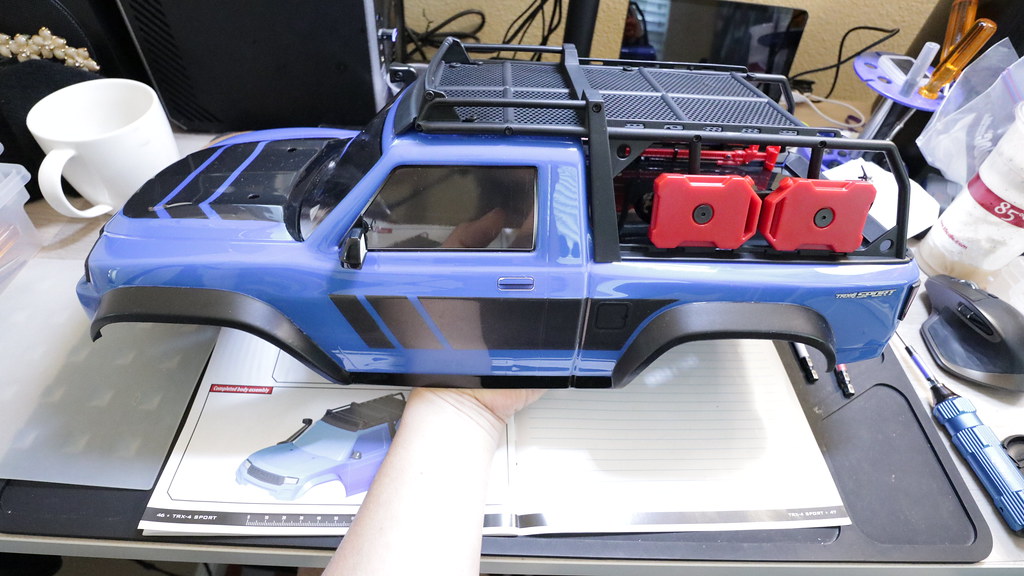 And that completes "Section H: Body assembly"! The build in stock form is now complete! |
|
| |
|
04-15-2019, 06:05 PM
| #36 |
| I wanna be Dave Join Date: Aug 2016 Location: Orange County, CA
Posts: 3,643
|
You didn't think I forgot to give you guys the complete finished look did you? I'll try to get some better pictures with better lighting up soon, but for now these will do. Here's some pictures of it all finished up.       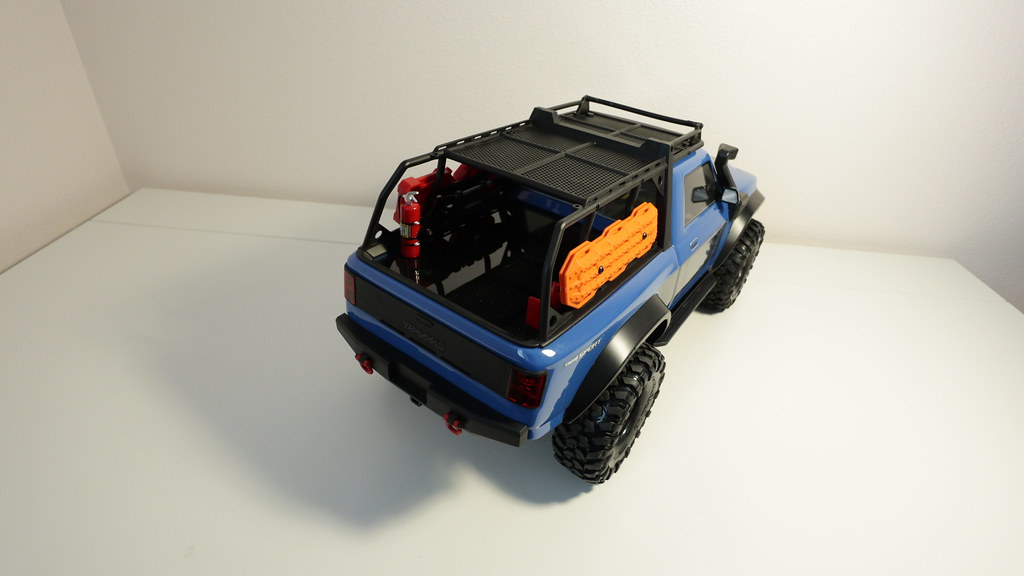    |
|
| |
|
04-15-2019, 06:20 PM
| #37 |
| Newbie Join Date: Jul 2018 Location: Australia
Posts: 10
|
Great job Soze , very clear detailed pictures and instructions, thankyou  what colour blue is that looked slightly purple in some of the pics? what colour blue is that looked slightly purple in some of the pics?
|
|
| |
|
04-15-2019, 08:09 PM
| #38 | |
| I wanna be Dave Join Date: Aug 2016 Location: Orange County, CA
Posts: 3,643
| Quote:
| |
|
| |
|
04-15-2019, 08:41 PM
| #39 |
| I wanna be Dave Join Date: Jun 2016 Location: Austin
Posts: 6,011
|
Really nice job, my man!
|
|
| |
|
04-15-2019, 10:05 PM
| #40 | |
| I wanna be Dave Join Date: Aug 2016 Location: Orange County, CA
Posts: 3,643
| Quote:
| |
|
| |
|
 Soze rejoices the Traxxas TRX4 Sport Kit - Similar Threads
 | ||||
| Thread | Thread Starter | Forum | Replies | Last Post |
| TRX4 Sport kit | svt923 | Traxxas TRX-4 | 265 | 06-27-2019 04:16 PM |
| Traxxas TRx4 sport bashing | F.i.M.S presents Rc. | Videos! | 0 | 01-13-2019 07:31 PM |
| Trx4 bronco with Sport body and traxxas lift kit | Exiwolfman | Traxxas TRX-4 | 0 | 10-13-2018 02:20 PM |
| Trx4 kit or trx4 sport | mebeknob | Newbie General | 10 | 09-26-2018 10:38 PM |
| |


 I'm still wondering how it looks after mud and water. You'll have to keep us posted. But I think somewhere else you said you stick to the dry.
 Linear Mode


