| | #21 |
| I wanna be Dave Join Date: Jan 2006 Location: Corruptifornia
Posts: 12,107
|
Nice parts Ben, your home made axle looks great and very heavy! Oh ya, like, Ernie said too. Motor lower is mo'better lol  Last edited by Natedog; 12-04-2016 at 06:48 PM. |
| |  |
| Sponsored Links | |
| | #22 |
| Quarry Creeper  Join Date: Jan 2016 Location: US
Posts: 401
|
Ooooh is that a homemade axle with off center diff??? Sent from my SM-G900V using Tapatalk |
| |  |
| | #23 |
| RCC Addict Join Date: Sep 2015 Location: Southern Maine
Posts: 1,024
|
Yup, you got it! Need it to clear the low mounted motor. Ben |
| |  |
| | #24 |
| RCC Addict Join Date: Sep 2015 Location: Southern Maine
Posts: 1,024
|
Not much progress but I did get my axles cut to length. Got lucky with the short side as I only had to cut about a mm so I can just file the remaining axial spline to fit the Vaterra diff. The long side not so lucky. I've got to build up the end and then file so it'll spline in the differential. Right now it will slide in the diff and spin freely. I'm waiting on some shims and king pin bolts as I'm having alignment issues with the C's and knuckles and axle shaft all steering smoothly. I think next time I'll try to lengthen a stock Vaterra axle shaft to avoid all of this fiddling around with mish mash of parts.  Ben |
| |  |
| | #25 |
| Rock Stacker Join Date: Aug 2016 Location: Northern AZ
Posts: 69
|
Nice! Anxiously awaiting pics of your custom mounts!
|
| |  |
| | #26 |
| RCC Addict Join Date: Sep 2015 Location: Southern Maine
Posts: 1,024
|
Hey guys, I've been waiting for a few parts from over seas to show up before I could do any more on the front axle. I must say that I'm about ready to scrap the axial axle mod. It is not just a simple buy ascender c-hubs, wraith knucles and bearings and you're golden. This is a major pain in the bag. Not even considering the offset pumpkin design. First thing I noticed was that the ascender c hub and wraith knuckle ball joint surfaces are not exactly the same angle, also, there is no room for the bushings to go between hub and knuckle. I couldn't deal with that, so I started filing by hand to try and make some room for both bushings and get everything at the same angle. Well, by hand that's about impossible, but I did make room for bushings on the lower pivot. That's where all the weight is anyway so I can live with that, but what to do with the upper pivot with no bushing. The hole in the knuckle is 4mm and the bolt is 3mm. No good. An e-mail to Mr. Codyboy and he turned me onto some tamiya king pin bolts. I found a slightly different set that were labeled "low friction" and had hex heads. Bought them and waited, and waited, and waited. Finally they showed up. But the heads were too big to fit in the slight recess of the knuckle. A quick trip to the drill and hand file lathe and the heads are now small enough to fit inside of the recess and also tighten down with no binding. 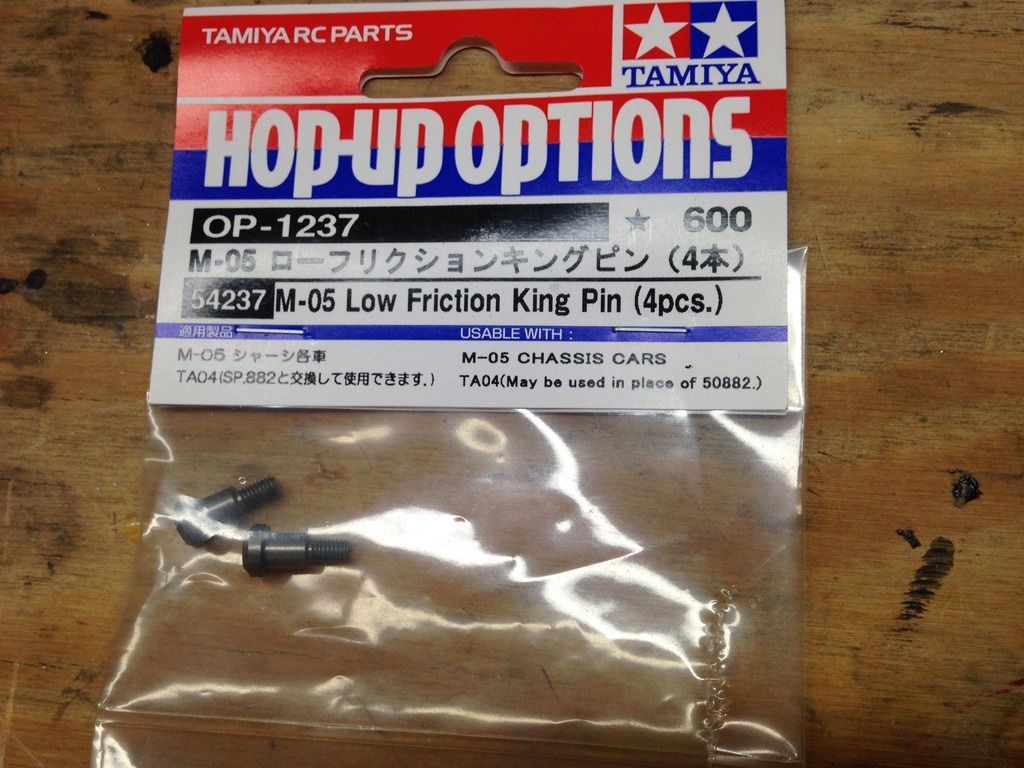 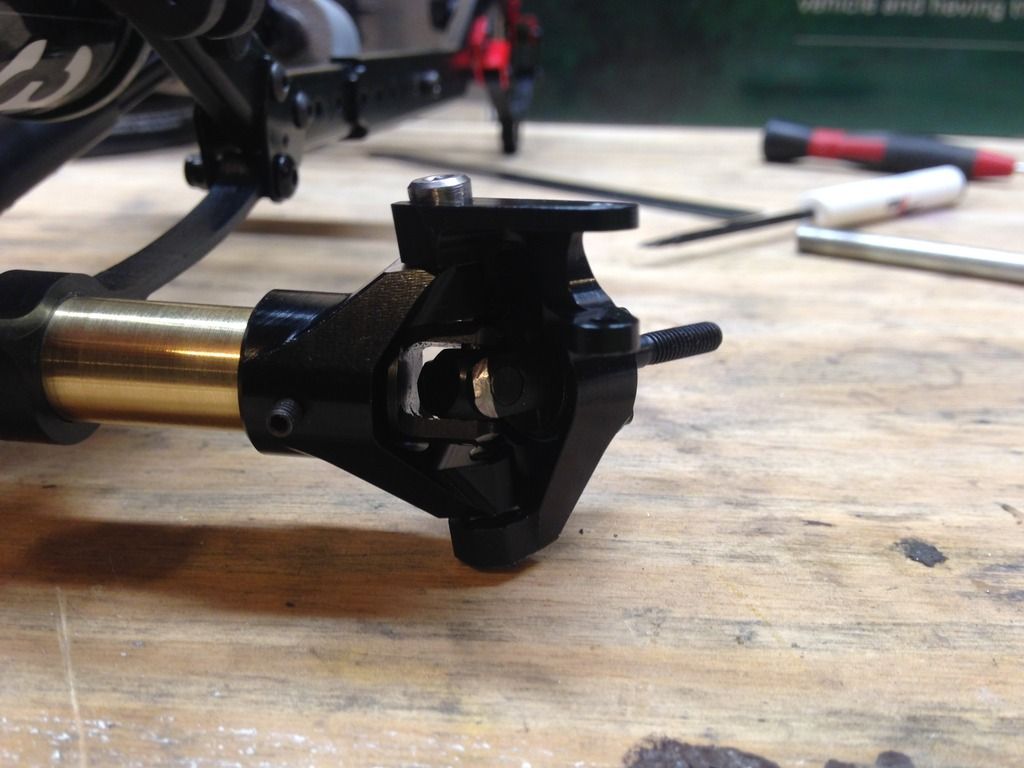 You can see how the head of the upper bolt is just sticking out of the recess in the knuckle. Don't mind the sticking out set screw for the c-hub. I haven't drilled the axle tubes yet for them. Still mocking everything up and deciding pinion angle then caster angle. Can also see where I did some filing to get the full steering angle of the knuckle/hub combo out of the u-joints. Now another problem with the mish mash of vaterra and axial parts. I found the the center line of the ball joints and axle u-joints are now not perfectly in line and the u-joint will bind even at slight steering angle. So, I had to get some shims to shim the axle and u-joint inward towards the differential. Got some 10mm shims to fit the axle bearing. Ended up using two 3mm shims per side to free everything up. Oh yeah, had to move the c-hub out about 2mm on the axle housing to leave a little room for the newly added shims. 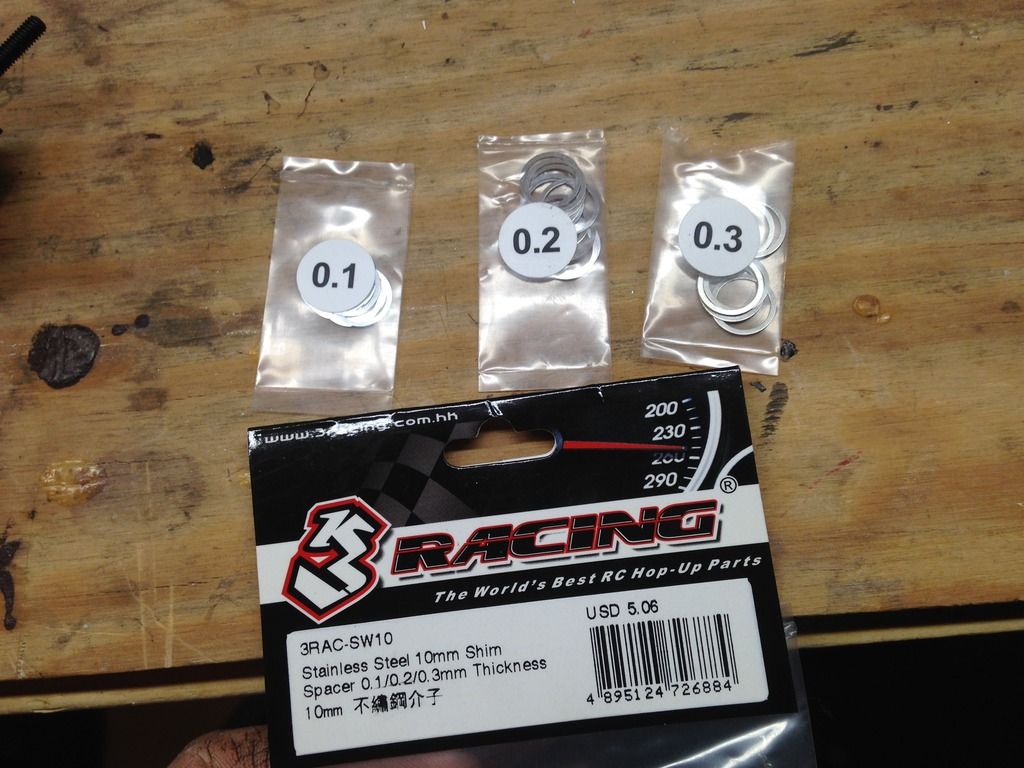 Another problem, the vaterra 12mm hex for the wheels will not work because the hole in the axle shaft for the pin is too close to the knuckle. WTF!!! Luckily I do have one set of axial axles and looked at them and saw how they do their 12mm hex and pin set up. So I have a set of axial 12mm hexes on order and I hopefully have enough axle shaft sticking out after the 6mm of shims I had to add to allow those to work. Following me? Clear as mud? All of this work to gain a few degrees of steering angle that I'm not even sure I can use because I'm running leaf springs!! I think I'm going to be making a set of custom vaterra axles to fit my offset diff front axles just incase. I'm not knocking Ernie or saying he misled me or anyone else who saw his axial axle mod. I'm saying that whatever he charges is totally worth it. This is not for the faint of heart and a total pain ass. There, I said it, IT IS!! 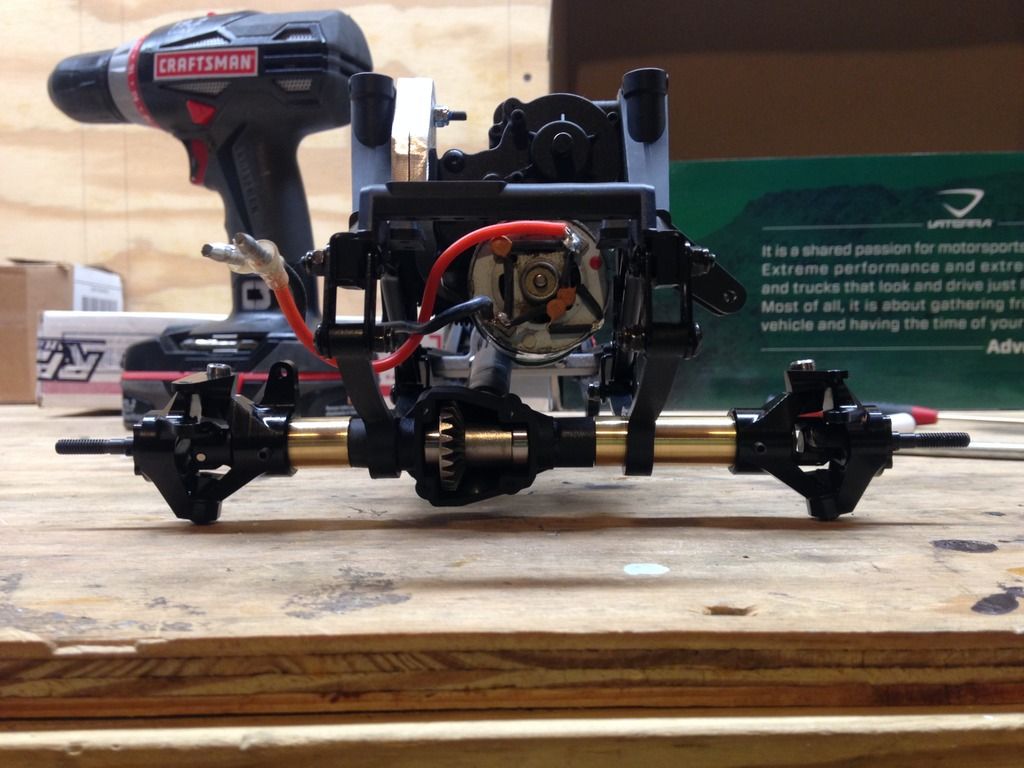 I am happy with the look of it mostly together sitting under the chassis. I just made hopefully my final order of parts for this truck. I've got a holmes hobbies crawlmaster expert 20t motor on its way with 90 degree leads already soldered on. Need that because there ain't much room at all between the front of the motor and the sideways steering servo. Still a TON to do but seeing the axle under the front is a little boost in motivation. I still have to turn some axle tubes for the rear axle but that's going to be simple and using all stock vaterra parts. Hope you guys enjoy my pain and Happy New Year!! Ben |
| |  |
| | #27 |
| I wanna be Dave  Join Date: Apr 2010 Location: Oakridge
Posts: 3,305
| Quote:  One of the things I do on the SSD chubs is drill out that set screw hole so a 3mm will pass through, makes lining things up a lot easier, and you don't have the set screw sticking out. Another things I found out the other day is that the SCX10ii uni knuckle joint is about 3mm shorter than the older axial unis. It makes a huge difference when I tried to use a old style uni in the SSD SCX10ii chub and knuckle. They don't fit at all. I'm glad you have it all figured out.  And it is almost a full day of work for me to put together a Codyboy Steering kit. Looks to me like you did a great job, with top notch machining. And it is almost a full day of work for me to put together a Codyboy Steering kit. Looks to me like you did a great job, with top notch machining.  . Be sure and ask if I can help with anything else. If you think that on is tuff go to the Losi Comp crawler section and see what I'm working on for the Losi guys. I probably have over 50 hours of R&D and machining! . Be sure and ask if I can help with anything else. If you think that on is tuff go to the Losi Comp crawler section and see what I'm working on for the Losi guys. I probably have over 50 hours of R&D and machining!Ernie |
| |  |
| | #28 |
| RCC Addict Join Date: Sep 2015 Location: Southern Maine
Posts: 1,024
|
Well that would explain the fitament problem since these are the old wraith axles and not 10-2 axles. Oh well. I'm working on a few ideas to just lengthen the stock Vaterra axle so I don't have to fart around with the steering. Just Lengthen one axle and the rest is bolt on. I forgot to mention how I made the square spline on the long axle. I got lazy and impatient and used Jb weld to build up the diameter then hand filed the square to fit the differential. I did grind grooves along the end of the axle so the jb weld has some rough material to bite onto then filed it. I was worried if I welded the end to build up material I'd melt the axle or be way off center and I don't have a soldering or brazing set up so I didn't do that. It does seem very strong and solid though. Ben |
| |  |
| | #29 | |
| I wanna be Dave  Join Date: Apr 2010 Location: Oakridge
Posts: 3,305
| Quote:
 Ernie | |
| |  |
| | #30 |
| RCC Addict Join Date: Sep 2015 Location: Southern Maine
Posts: 1,024
|
Made a little more progress tonight. I got a tie rod made up. I'm super tight on running it over the leaf springs. I first set my pinion angle to where I like it. Then, started to look at caster and am running it basically 0 degrees, straight up. Not really sure what is optimal for crawling, but, I can't run it negative, or back any because the tie rod will just get into the diff cover too badly at full turn. Especially with the extra turning angle. I can't run any positive or forward because the tie rod will be resting and rubbing on the top side of the springs. So. straight up and down is where it'll be unless you guys say that will suck out loud while driving. I had some 1/4" steel and aluminum stock laying around and was going to use the aluminum but it's pretty soft and bendy. So I went with the steel. I wanted to gain as much as possible for clearance between leafs and tie rod so I took it over to my father in law's lathe, and turned it down to a rough 5mm. Drilled and taped it for 3mmX.5 threads. I also used some of my rc4wd offset pivots to move the tie rod a little more away from the axle to prevent hitting it at full turn. It's all close but plenty of room both from the axle and leafs to make me happy. I will make a matching drag link just because. I will also space the draglink down from the pitman arm about 2-3mm to get it even with the tie rod at ride height to prevent bump steer. There's really not much now as it sits but I'm going to try spacing it down. Right not, I've got nothing hitting like there is in the RTR version between panhard and servo horn, or pitman arm top joint and tie rod so I'm happy. I also finally took the time to set my axle housing up in the bridgeport so I can try to get a centered and straight drill to make room for my brass axle tubes. I did do a better job than I've been doing by hand but the axle housings just aren't straight themselves so they still aren't perfectly centered when making on drill through both tubes. But obviously very close and totally fine for our little trucks. These pictures are for you Ernie, show you what I'm working with for tools.... 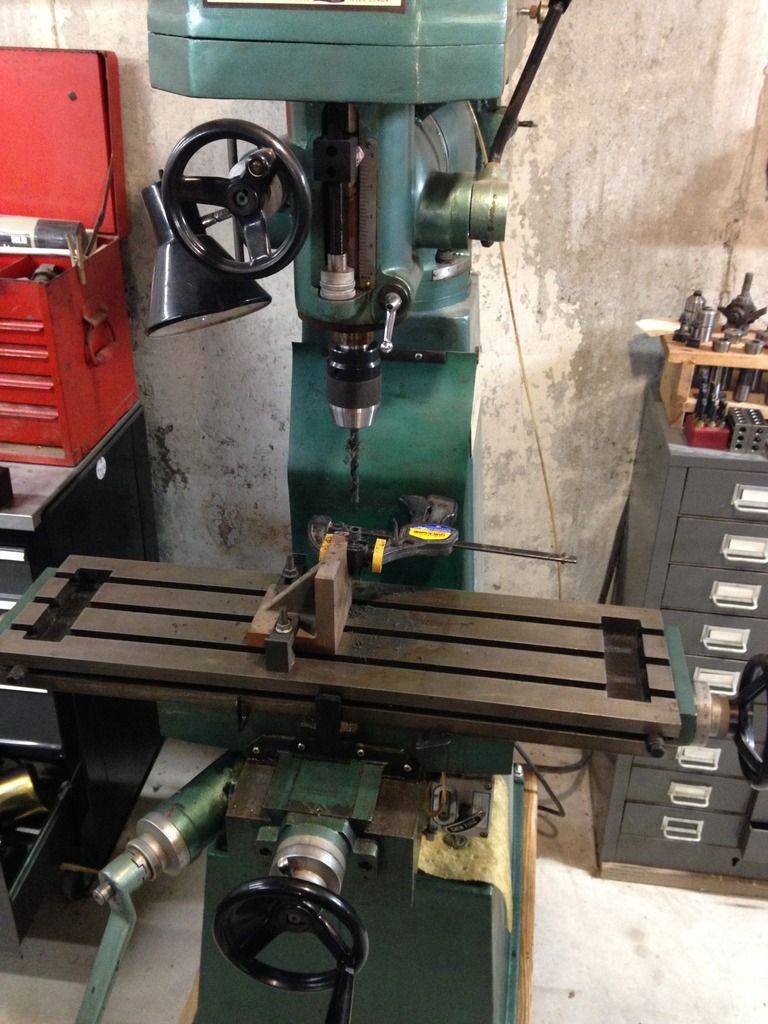 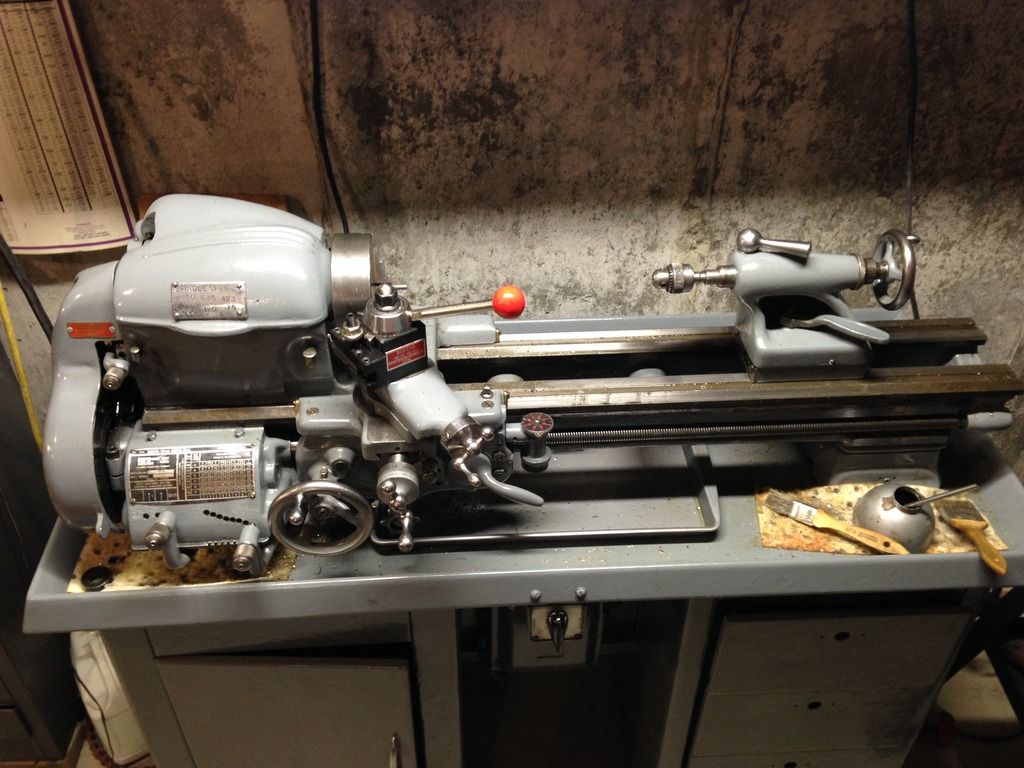 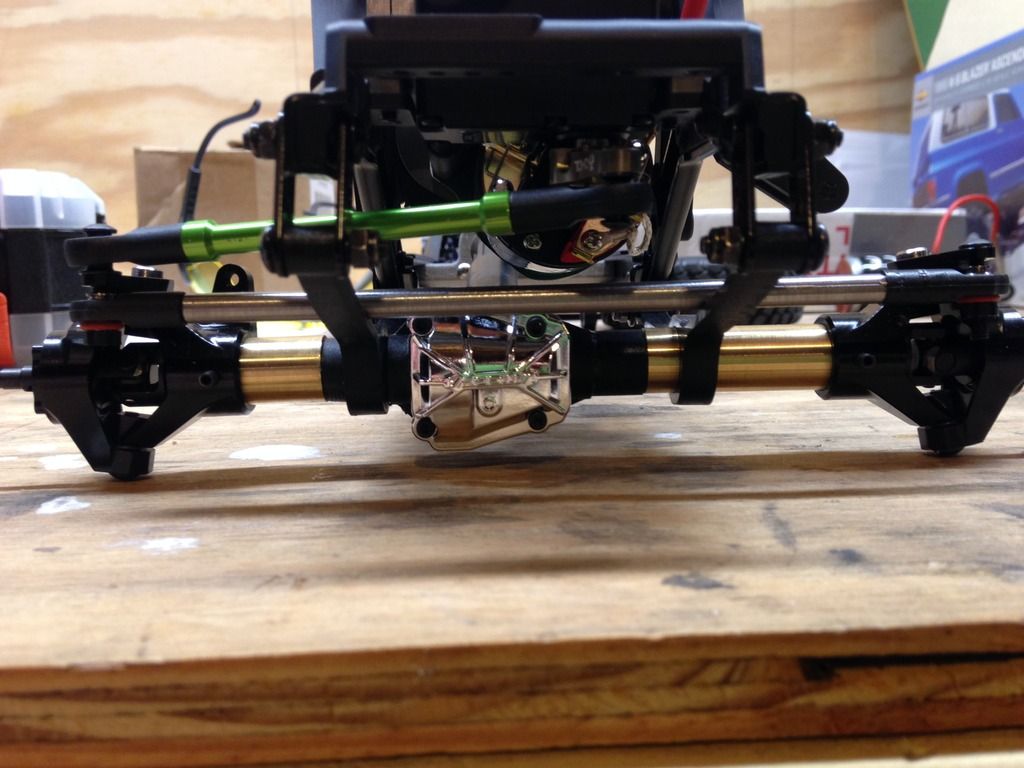 Here you can see my new tie rod, the offset pivots on the ends. Notice the orange o-rings on the pivots? They keep the tie rod up and centered since the tie rod is offset from the center of the pivot if looking at it from the side. 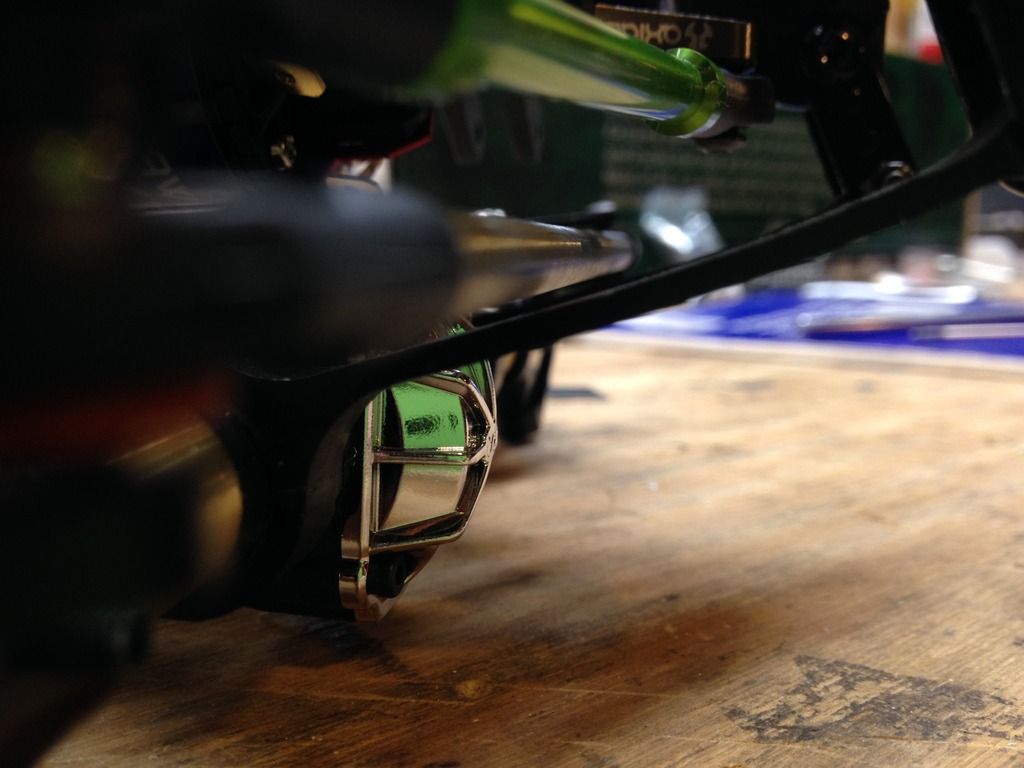 Not much room but juuuuuust enough. 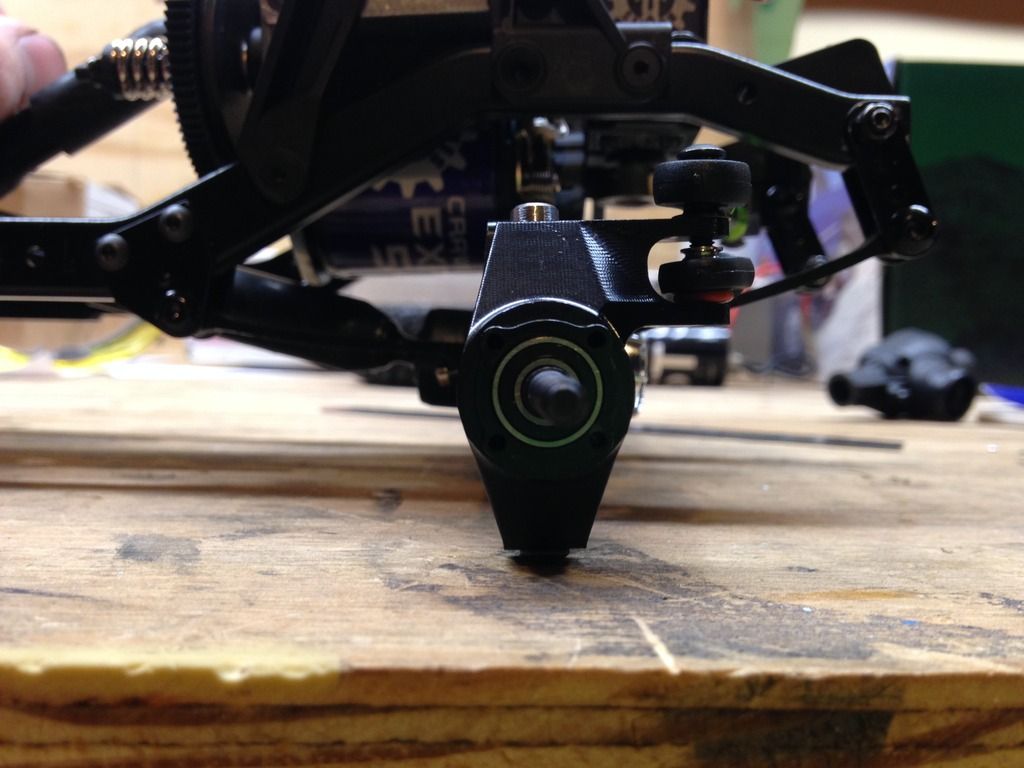 Caster angle should be fine right? Yes I know there is a gap between the tie rod pivot and top bracket for the pivot. I've got to make a 1mm spacer to take up the slack on the bottom side, that'll give me another mm of space between tie rod and leaf springs. See my pinion angle too. I wanted to go just a bit more but then I ran into drive shaft hitting the motor plate before full suspension compression. This would not be a problem if using a smaller driveline but I'm really trying to be cheap and use everything I already have on this build and not go crazy buying every little thing. Maybe I'll make my own drive shafts. Nah, too much work with splines and all. Hope you enjoy guys. Let me know what you think! Ben |
| |  |
| | #31 |
| Rock Crawler Join Date: Apr 2008 Location: pittsburgh
Posts: 536
|
Your front leaf setup is really sweet, im amazed you fit all of that under there... This is one of my fave threads in this sections because of the way you got all of the legos to just "snap" into place and everything clears. Great work!!!
|
| |  |
| | #32 |
| I wanna be Dave Join Date: Jan 2006 Location: Corruptifornia
Posts: 12,107
|
Very nice tools Ben, thanks for the pics, I've always wanted a lathe and mill. I prefer to run non-offset rod ends for strength and simplicity, hard to see the offset in the pics. Look at Lunsford 4mm titanium turnbuckles, they are a little thinner and Ernie lathed the center down for me on my first one. Really improves clearance around the diff cover and on suspension compression with frame and servo horn. Maybe put the tie-rod on top of the knuckles for more clearance, but that prolly creates other clearance problems, slimmer tie-rod would help. Behind the axle steering maybe? You've got so much useable steering that tierod hits diff cover? Pics? Lunsford Racing: Turnbuckles I prefer a good amount of caster in crawlers, it helps the front end lower down and lean into the rock especially on difficult climbs, also helps the tires edge lugs grab onto every little bit of traction ime. Ten degrees caster or a bit more would be my goal, but that is often difficult to achieve and still have it all work without clearance interference on links etc. Driveshaft angle is decent, but spend the money for Junfac or other slim driveshafts now, you've put so much into this great motor forward build don't compromise now, you'll kick yourself later. You're inspiring me to do similar but with linked front axle, love what you're doing with offset front pumpkin etc. |
| |  |
| | #33 | |
| RCC Addict Join Date: Sep 2015 Location: Southern Maine
Posts: 1,024
| Quote:
Ben | |
| |  |
| | #34 |
| I wanna be Dave Join Date: Jan 2006 Location: Corruptifornia
Posts: 12,107
|
You're welcome and I understand, just giving input to make it the best.  Can't wait to see it on the rocks! |
| |  |
| | #35 |
| RCC Addict Join Date: Sep 2015 Location: Southern Maine
Posts: 1,024
|
So I just finally had enough brains to look at my blazer to see how much faster that has as the axle is still stock. The top is set back to about 12:30ish. I'll have to see if I can set this one up like that without the tie rod really getting into the diff cover. Nate the problem is that with my pinion angle where it is, the top of the diff cover is now tilted farther forward than stock. So therefore it's closer to the tie rod. And with the axial unis, and steering conversion, I have more steering which brings the tie rod closer to the cover than stock. I know about the Lunsford turnbuckles but because of life, my budget is at about zero. I've already got pretty much everything I need to finish this and what I don't, I'm going to try to make so it's a no go on the turnbuckles. I just glued my axle tubes to my newly drilled housing. When the dries later. I'll set it all back up with some negative caster and see how things look. Thanks guys!! Ben |
| |  |
| | #36 |
| Pebble Pounder Join Date: Oct 2015 Location: Atkinson, ME
Posts: 188
|
Have you thought about a custom rod that is curved only in the center for extra clearance at the pumpkin but still straight on both ends to clear the front leaf springs? Not sure if there would be enough room to curve it out, but maybe up or down?
|
| |  |
| | #37 | ||
| I wanna be Dave  Join Date: Apr 2010 Location: Oakridge
Posts: 3,305
| Quote:
Quote:
 Ernie | ||
| |  |
| | #38 | |
| RCC Addict Join Date: Sep 2015 Location: Southern Maine
Posts: 1,024
| Quote:
Ben | |
| |  |
| | #39 |
| Rock Crawler Join Date: Feb 2007 Location: Simi Vly
Posts: 818
|
Bought myself a roller Ascender myself for Christmas. lol Put back together my Bronco body and such. Other Ascender is going with the RC4WD Blazer body.. Happy belated bday and have a blast! |
| |  |
| | #40 |
| Rock Crawler Join Date: Jul 2010 Location: Great Britain
Posts: 767
|
If your only keeping the chassis and body why didn't you save a bunch of money and only buy the chassis and body instead of a kit ????
|
| |  |
 |
 My little Jimmy... lol - Similar Threads
 | ||||
| Thread | Thread Starter | Forum | Replies | Last Post |
| Don't Touch My Jimmy: GMC Jimmy build by CFM | CarterFab | Vaterra Ascender | 31 | 11-01-2015 12:33 AM |
| Jimmy-Yeti | jrkilburn | Axial Yeti | 2 | 08-29-2014 06:36 PM |
| Jimmy Fallon | hotrodsonoma | Chit Chat | 1 | 06-10-2014 10:56 AM |
| can Jimmy do it THIS time? | emaxxjeremy | Chit Chat | 3 | 11-18-2006 12:28 PM |
| Wheel Chinamans..lol had Carnage..lol | UPNOVER | General Crawlers | 0 | 02-27-2006 08:03 AM |
| |