| |
| |||||||
 |
| | LinkBack | Thread Tools | Display Modes |
 03-26-2018, 07:27 PM
| #41 |
| Quarry Creeper Join Date: Apr 2017 Location: Melbourne Australia
Posts: 404
|
Thats a super clean mount solution!!!!!
|

|  |
| Sponsored Links | |
| | |
|
03-31-2018, 10:47 AM
| #42 |
| Rock Stacker Join Date: Aug 2005 Location: olyWA
Posts: 64
|
Nice work! Thanks for sharing that, I'll be sure to d/l and print one for mine.  |
|
| |
|
04-09-2018, 10:54 AM
| #43 |
| Moderator  Join Date: Aug 2017 Location: Readsboro, VT
Posts: 2,053
|
For my final upgrade, this week I tackled the vehicle electronics. This consisted of a new ESC, new rx/tx, new steering servo, and new shift servo. Details are below. For the ESC, I chose the Hobbyking X-Car 45a brushed ESC. I chose this for 2 reasons: One, it's stupid cheap (the cheapest esc with a drag brake that I'm aware of), and second, I already had one in my parts bin, so I didn't have to spend actual cash on it. Compared to the factory all-in-one ESC, the low speed startup is much better, with a much lower initial speed, and smoother at the startup speed. It works well. 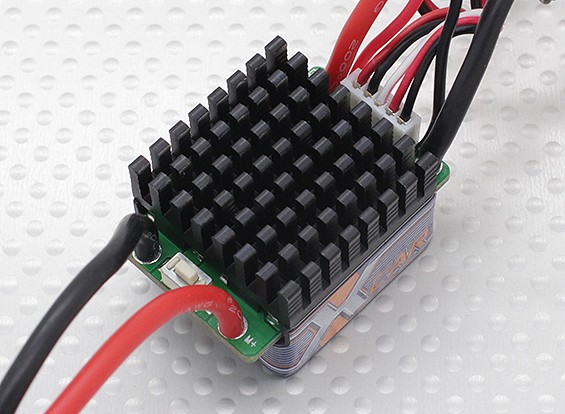 For the rx/tx setup, I needed a 3 channel controller that had adjustable end points for that 3rd channel. This limited my options, especially considering the dirt cheap price point I was trying to maintain. This essentially meant there was only one candidate: Flysky GT3B.  At the time I was buying, this was available for as little as $30 on eBay. The cheapest I can currently find it is about $33. the added benefit of this radio is that with the hack, you can control many more channels, which is a benefit because I want to be able to control the OEM lights, as well as an external LED light bar that I've designed for the truck. That said, I did end up cheating a little bit here. I decided to pony up the extra cash for the GT3C so that I could have the rechargeable battery option. I have that in the GT2B that's currently controlling my son's Circuit, and for me the convenience was worth the extra $15 that it cost me. I bought the GT3C for $45, but unfortunately the cheapest I can find it for now is about $56. I also ordered a 6 channel receiver that I'll be swapping in when I do the LED light installation. 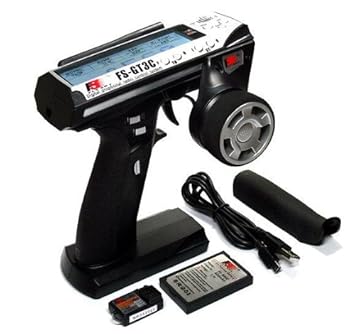 On to the steering servo. For that I went with the JX PDI-6221MG servo. This is a pretty slow servo at .16sec at 6V, but is relatively powerful at 20kg at 6V. The BEC on the X-Car ESC is 5.6v, so this servo will be slower yet, and a bit less powerful, but I'm happy with its performance so far. You can definitely tell that the servo is slow, and this is NOT a servo that I'd want to use on a higher speed vehicle, but the speed isn't really a big drawback here. In terms of the torque, I feel it's more than enough. Prior to setting the endpoints correctly, I was able to tweak the whole chassis when I reached the mechanical limits of the steering. In a situation where my steering is bound up, I'm confident that I'll either brake my printed bell cranks or tweak the chassis long before the servo gets upset. 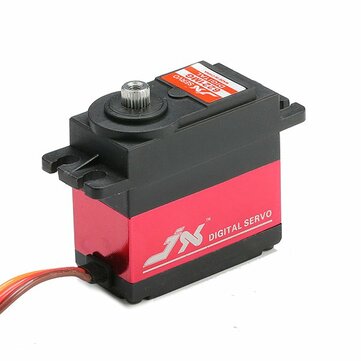 As for the shift servo, this one was more of a challenge. The servo that comes with the truck isn't a standard sized servo, and it's not a micro servo. It's somewhere inbetween, and there aren't many options available. The most common option for TH owners seems to be the stock TH servo, or the Hitec mighty mini. Neither of these really fit my target budget, so I had to get creative. What I decided to do was go with a cheap full size servo, and then figure out how to mount it. I chose the MG996R, which cost me a whopping $4 on Ebay. I had assumed that I would have to fab up some sort of mounting plate for it, but while I was searching for the servo on Ebay, I stumbled across a nifty aluminum servo mount for under $2, so I grabbed it. Two of the mounting holes happened to line up perfectly with the original servo mount holes, so all I had to do was grind a little bit off of the side of the mount to get it to fit where I needed. All of the factory linkage was able to be swapped over to the new servo, and everything works great. This servo has more than enough torque to do nasty things to the shift linkage, so as long as the end points are set correctly (which turned out to be about 5% on the controller!), it shifts perfectly. 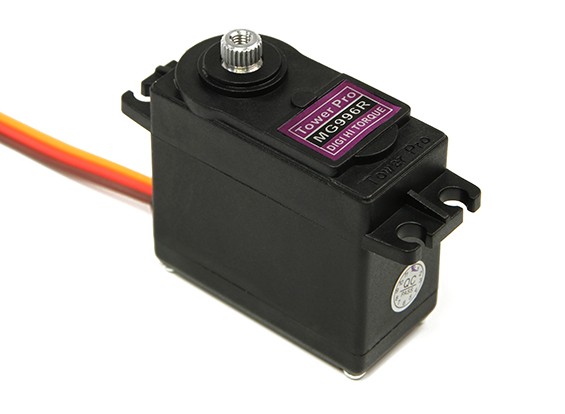 Overall, I'm quite happy with what a $60 investment in new electronics provided. The new hardware works great, and combined with the prior upgrades I made, the overall capabilities of the truck are drastically improved. I had a chance to take it out for a quick ride on Friday, and I was having an absolute blast right up until I got the truck bound up and managed to strip the transmission gears. I guess the slipper was a little too tight. Here's the video: Last edited by Jim85IROC; 04-09-2018 at 12:55 PM. |
|
| |
|
04-09-2018, 03:20 PM
| #44 | |
| Pebble Pounder Join Date: Mar 2017 Location: Southern Maine
Posts: 122
| Quote:
 Here is my 10428...has the 2 speed..esc let go so using a HW1080. Powered with permanent mount Lifepo4 4200 pack.  | |
|
| |
|
04-14-2018, 06:54 AM
| #45 | |
| Newbie Join Date: Mar 2018 Location: Terrebonne
Posts: 25
| Quote:
 Sent from my LG-H915 using Tapatalk | |
|
| |
|
04-14-2018, 06:19 PM
| #46 |
| Moderator Join Date: Aug 2017 Location: Readsboro, VT
Posts: 2,053
|
You can download the files for free from the Thingiverse link, and maybe you can find a buddy with a printer to print it. I could put it on Shapeways, but it would probably end up costing $70 or more from there.
|
|
| |
|
04-16-2018, 02:20 PM
| #47 |
| Newbie Join Date: Apr 2018 Location: Temple
Posts: 27
|
Do these have lcking diffs?
|
|
| |
|
04-16-2018, 03:06 PM
| #48 |
| Newbie Join Date: Mar 2018 Location: Terrebonne
Posts: 25
|
Rear yes , front no , you can get a peice to lock it but most use some sort of silly putty Sent from my LG-H915 using Tapatalk |
|
| |
|
04-17-2018, 07:39 PM
| #49 | |
| Newbie Join Date: Mar 2018 Location: Terrebonne
Posts: 25
| Quote:
Thanks Sent from my LG-H915 using Tapatalk | |
|
| |
|
04-18-2018, 12:28 PM
| #50 | |
| Moderator Join Date: Aug 2017 Location: Readsboro, VT
Posts: 2,053
| Quote:
| |
|
| |
|
04-18-2018, 12:43 PM
| #51 | |
| Newbie Join Date: Mar 2018 Location: Terrebonne
Posts: 25
| Quote:
Sent from my LG-H915 using Tapatalk | |
|
| |
|
04-18-2018, 09:33 PM
| #52 |
| Newbie Join Date: Mar 2018 Location: Terrebonne
Posts: 25
|
Well I took it apart and it is a 68 spur / 24 pinion Thanks again. Sent from my LG-H915 using Tapatalk |
|
| |
|
04-23-2018, 10:59 AM
| #53 |
| Newbie Join Date: Apr 2018 Location: Temple
Posts: 27
|
Anyone know if the rear swaybar kit will work on the clone? I’m lifting a front tire on turns at speed
|
|
| |
|
04-24-2018, 11:36 AM
| #54 | |
| Moderator Join Date: Aug 2017 Location: Readsboro, VT
Posts: 2,053
| Quote:
| |
|
| |
|
05-01-2018, 07:33 PM
| #55 | |
| Newbie Join Date: Mar 2018 Location: Terrebonne
Posts: 25
| Quote:
Sent from my LG-H915 using Tapatalk | |
|
| |
|
05-03-2018, 02:50 PM
| #56 |
| Moderator Join Date: Aug 2017 Location: Readsboro, VT
Posts: 2,053
|
no, not at all. I geared down so there should be less strain on the motor. The only exception is that if you gear it down and then find yourself at full speed all the time, the motor could heat up, but since I'm just trailing & crawling, I'm at low speed most of the time, so the lower gearing just took strain off the motor.
|
|
| |
|
05-03-2018, 06:17 PM
| #57 | |
| Newbie Join Date: Mar 2018 Location: Terrebonne
Posts: 25
| Quote:
Sent from my LG-H915 using Tapatalk | |
|
| |
|
05-07-2018, 07:31 AM
| #58 |
| Moderator Join Date: Aug 2017 Location: Readsboro, VT
Posts: 2,053
|
Just a quick update. Last week I started to take the truck apart to assess the stripped transmission gears, and discovered that I had stripped the spur, not the transmission gears. That's a good thing! For now I'm dropping another 48p spur in and will loosen the slipper a bit. Down the road I'm going to need to come up with a 32p pinion/spur combo.
|
|
| |
|
05-07-2018, 07:37 AM
| #59 |
| Newbie Join Date: Mar 2018 Location: Terrebonne
Posts: 25
|
What's the difference between 48p and 32 is it stronger ? Also how are you dealing with torque twist ? Sent from my LG-H915 using Tapatalk |
|
| |
|
05-07-2018, 01:07 PM
| #60 |
| Moderator Join Date: Aug 2017 Location: Readsboro, VT
Posts: 2,053
|
32p gears have much larger teeth than 48p gears, so they tend to be significantly stronger. The clone-hammers comes with some Mod .6 gearset which uses slightly larger teeth than 48P, but has crap for replacement parts available. When I decided to swap to a smaller pinion, it required that I switch to a more common gear size. Since I had an ECX spur laying around that would work, that's what I went with. I've converted some of my ECX vehicles from that very 48p setup to a Team Associated (I think) 32P setup, so I expect that I should be able to do the same on this vehicle when I get around to it.
|
|
| |
|
 WLToys Clone Hammers Budget Build - Similar Threads
 | ||||
| Thread | Thread Starter | Forum | Replies | Last Post |
| Twin Hammers clone | Brake Weight | Non Crawler RC's | 60 | 01-20-2018 04:42 AM |
| wltoys twin hammers clone 2 speed transmission will it fit vaterra ascender? | willygee | Vaterra Ascender | 1 | 12-24-2017 11:31 PM |
| My upgraded Clone Hammers (WlToys K949) | luminova11 | Vaterra Twin Hammers | 41 | 06-06-2017 01:24 AM |
| Twin Hammers Clone - WLtoys k949 - cheap build project | danvincent999 | Vaterra Twin Hammers | 6 | 03-28-2017 02:49 AM |
| Help in binding a clone hammers please. | luminova11 | Vaterra Twin Hammers | 3 | 01-09-2016 08:55 AM |
| |


 Linear Mode


