| |
| |||||||
 |
| | LinkBack | Thread Tools | Display Modes |
 11-17-2009, 03:56 AM
| #21 |
| Quarry Creeper Join Date: Sep 2007 Location: NE Ohio
Posts: 267
|
WOW!! turned out really sweet. I like the looks of the tuber with the Creeper. Maybe I might have to do a teardown later this winter or spring. Right now on the fence about getting the CKRC Rocket Chassis for the Creeper. I like my current set-up and have been doing good with the club comps or atleast getting comp time in. Once my DIG is in and get some more comp time under my belt theres a couple spring point series looking to hit. Chris |

|  |
| Sponsored Links | |
| | |
|
11-17-2009, 06:53 AM
| #22 |
| Pebble Pounder Join Date: Aug 2009 Location: My House
Posts: 138
|
i love being canadian b/c this guy is in canada too and i can get all of thematerials from the same stores.
|
|
| |
|
11-19-2009, 08:21 PM
| #23 |
| Rock Crawler Join Date: Sep 2005 Location: Duncan, BC, Canada
Posts: 750
|
got a little fartin' around time out at work. snapped a couple poser pics and shot a couple vids, the best one is really dark so you might have to crank the bright to see it well. I just piled op some spare crap and crawled it, pickins were pretty slim but it was fun none the less. garbage crawl 1 - dark Garbage crawl 2 - dark Gabage Crawl 3 Garbage crawl 4 - flop Garbage Crawl 5 - glitch run And yes there was some carnage ... one of the rear wheel nuts came loose and stripped the hex out of the passenger side rear axial wheel. Good thing I got more coming. Time for some antivibration washers and new Nuts The body panels on the other hand stood up very well. |
|
| |
|
11-20-2009, 07:05 PM
| #24 |
| Newbie Join Date: Jun 2009 Location: Cantonment
Posts: 8
|
i love the flex ramp great idea for testing flexing capabilities
|
|
| |
|
11-20-2009, 08:24 PM
| #25 |
| Rock Crawler Join Date: Apr 2008 Location: Greentown
Posts: 530
|
Nice bro! I saw some one use monster cans as side panels and it looked bad ass, the front looks to wide for a can though.
|
|
| |
|
11-20-2009, 08:48 PM
| #26 |
| Rock Crawler Join Date: Dec 2005 Location: Huntertown, In
Posts: 776
|
That turned out good as hell. I was looking into that body but a buddy of mine helped me build a steel tuber and used aluminum roof flashing for the body panel.
|
|
| |
|
11-21-2009, 01:18 PM
| #27 |
| Rock Crawler Join Date: Sep 2005 Location: Duncan, BC, Canada
Posts: 750
|
Thanks Guys! Well, got some more parts in and got it set up, moved the rear shocks so they do't sit at such a low angle (speeds up the rear suspension) and changed the upper link geometry. I added 65mm axial spacers to the rear uppers (replacing the stock 50mm's) and used 60mm's for the front uppers. The rear uppers mount to the most inboard hole of the four and the fronts mount to the third hole (if you count to outboard stock position as #1). Then I moved the rear shocks to the lower link mount, BUT, I put them outboard with a 3mm nut for a spacer. Still have the stock 20W (or was it 25W?) oil in it and the torque twist is almost gone. Then I changed the front drag link to a bent axial front lower link with a bend n it, used thestock axial offset tierrod end at the knuckle and a stock upper 20 degree rod end at the servo horn. I also bent the servo horn back a little so it wasn't so far out in front. I'll get soe update pics put up today, and hopefully a good crawl vid as well ....there' an asphalt pile close to me just begging for a real test run. Parts that arrived but still need to be put in - Aluminum Venom shocks Venom Dig unit |
|
| |
|
11-21-2009, 01:52 PM
| #28 |
| Pebble Pounder Join Date: Aug 2009 Location: My House
Posts: 138
|
now m having problems getting the hex pin into the hex pin hole!
|
|
| |
|
11-21-2009, 02:36 PM
| #29 |
| Rock Crawler Join Date: Sep 2005 Location: Duncan, BC, Canada
Posts: 750
|
??? Hex Pin? Grab your manual and use either the part number or the part name there so we are all meaning the same part. Are you meaning part VEN-8373b Hex adapter pin? If so there may be a little metal 'flashing/burrs' at the hole opening, use a drill bit to remove that and it should be good to go. Last edited by Rockfrog; 11-21-2009 at 02:42 PM. |
|
| |
|
11-21-2009, 05:43 PM
| #30 |
| Rock Crawler Join Date: Sep 2005 Location: Duncan, BC, Canada
Posts: 750
| quick and dirty asphalt crawl Taped my phone to the TQ3 and shot a quick vid in the rain. I need to get a cameraman so I can use my wife's HD vid camera. Last edited by Rockfrog; 11-21-2009 at 05:57 PM. |
|
| |
|
11-21-2009, 07:00 PM
| #31 |
| RCC Addict  Join Date: Oct 2009 Location: Nanaimo, BC (Vancouver Island)
Posts: 1,153
|
Yeah, I forgot about the fact that you only have 2 hands but great idea with the phone. Tubers looking great, did you get the shock bodies and dig installed? Are you going to set it for all three positions?
|
|
| |
|
11-21-2009, 07:07 PM
| #32 |
| Rock Crawler Join Date: Sep 2005 Location: Duncan, BC, Canada
Posts: 750
|
I'm waiting on setting up the dig as it'll mean a complete teardown, II'll swap to the venom AX-10 shocks then. I plan to use allthree positions but I hvn't decided on either a KO-propo EX5-UR or a Futaba PM3-MX ... saving coin as we speak for that move.
|
|
| |
|
11-21-2009, 07:22 PM
| #33 | |
| RCC Addict Join Date: Oct 2009 Location: Nanaimo, BC (Vancouver Island)
Posts: 1,153
|
I see, wasn't sure if you were going to mod your remote with a 3way switch or what, let me know how those shock bodies work for you, might do the same. Can't wait to see you hit that pile on a nicer day.....looks like lots of fun.  Quote:
| |
|
| |
|
11-30-2009, 06:00 PM
| #34 |
| Pebble Pounder Join Date: Nov 2009 Location: benton
Posts: 127
|
Thanks for all the good pics, getting ready to do the same thing but I going to try using AX10 chassis plates instead of the stock venom plates and see what happens...
|
|
| |
|
12-21-2009, 02:22 AM
| #35 |
| Rock Crawler Join Date: Sep 2005 Location: Duncan, BC, Canada
Posts: 750
|
Holy ... Page 5. How could I have gone so long without an update? So .... where to begin? Changes have included the mounting the Dig unit and servo, Futaba 3pm-MX 2.4Ghz system, relocated the electronics due to these changes, Ven4020 leaky shocks (yes, I kow how to fix them I just haven't gotten to that part yet). Made some incredibly humungous snow tires just in time for the snow to melt, added a Pro-Line lightbar which I intend to make work, shortened the front linkage (uppers and lowers) a teeny bit to pull the front axle back a bit. I simply used traxxas rod ends at the axle end for all four links probably going to add the to the lowers at the chassis as well (I did not use spacers to make up the difference in rod end lengths). Swapped the steering servo out for a hobbico CS-170MG, added a brass roller to the front tie rod, swapped to 65mm uppers in the rear (stock rod ends) with 60mm uppers in the front (ends swapped as above). Swapped in the 1pc skid plate. Had to remove the stock ESC plate, and shave the stock mounting bosses to be able to Goop seal the holes and Goop the ESC in place so the tuber body plate would fit over. Goop'd the dig servo under the tuber bodies rear electronics tray and mounted the tiny arse Rx for the 3pm-mx in the rear tray. Now all that sits aove the battery cover is a servo lead. This means possible interior mod in the future. stripped the red linkages of all anodizing (they were half way there anyway), Made a new Stinger bar out of 3/16" brake line (lost the old one somewhere), FLM locker in the rear axle. Next on the list is to pull the body again and paint it Olive Drab on the tubes, make a proper servo mount for the dig servo. get some update pics and vids once it stops friggin raining (which may mean spring time around here) ... I'm getting bored of counter shots. Decided I'm going to turf the hood and make a new one based on a 66-77 Ford Bronco (If my Cliff Climber body was only an inch longer in the hood that woud have been a no-brainer ... as is it will be the template for now). Last edited by Rockfrog; 12-21-2009 at 02:24 AM. Reason: 'cause I'm retarded, just ask my wife :D |
|
| |
|
12-24-2009, 05:30 AM
| #36 |
| Rock Crawler Join Date: Sep 2005 Location: Duncan, BC, Canada
Posts: 750
|
Well, I didn't get some beauty outdoors shots but these are pics of the recent updates all the same. added some color and some nets.
|
|
| |
|
12-24-2009, 08:39 AM
| #37 | |
| Quarry Creeper Join Date: Nov 2009 Location: Vacaville
Posts: 259
| Quote:
Last edited by HRDROKN; 12-24-2009 at 08:44 AM. | |
|
| |
|
12-25-2009, 03:16 PM
| #38 |
| Newbie Join Date: Nov 2009 Location: SLC,UT
Posts: 11
|
Looks really good! I love it. I have that same proline chassis on my axial, but i made some panels to cover the space above the front tires. I love that hood you did! and the light bar. Mine i made the body panels out of and old traxxas revo body i had laying around. 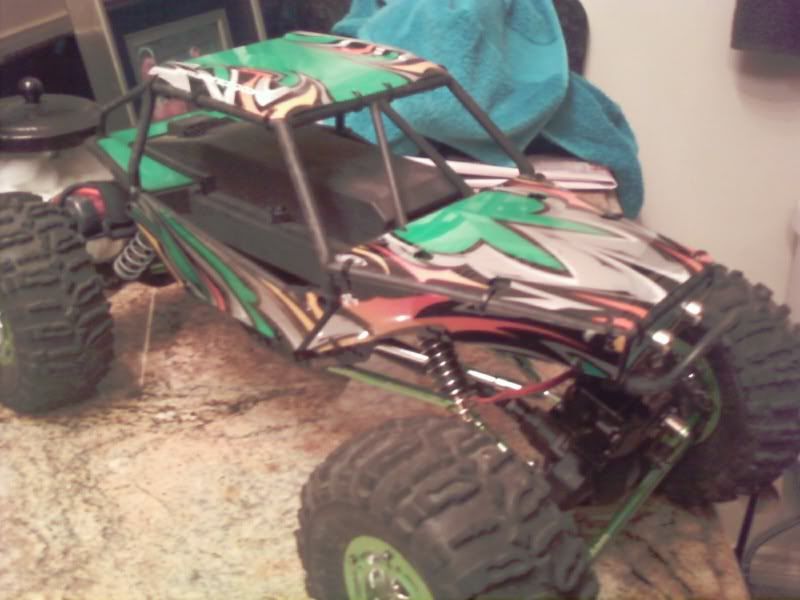 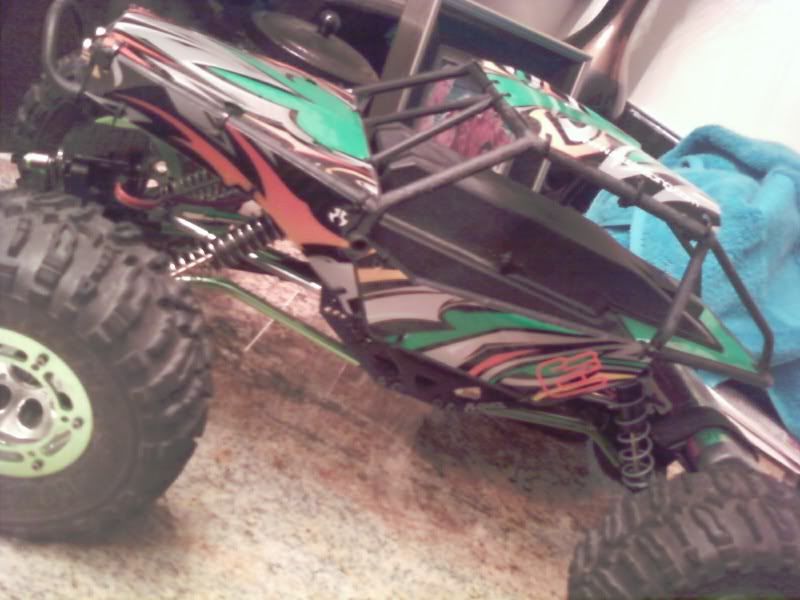 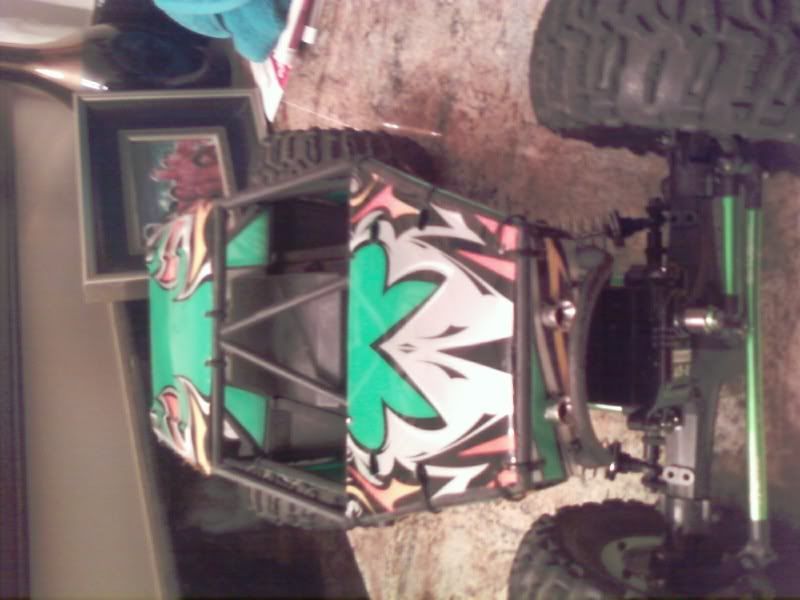 |
|
| |
|
12-26-2009, 12:28 PM
| #39 |
| Rock Stacker Join Date: Nov 2009 Location: Hawaii
Posts: 73
|
Sweet looking creeper Rockfrog. |
|
| |
|
12-29-2009, 01:36 AM
| #40 |
| Rock Crawler Join Date: Sep 2005 Location: Duncan, BC, Canada
Posts: 750
|
got another vid but as is classic ... the small arse memory card filled up before the fun stuff started. Carnage that ensued was a broken rear shaft (was using a temp plastic traxxas shaft) and lost a light off the light bar. Otherwise it was doing awesome, the climb was near vertical and I really didn't think she'd make it without a backflip. http://www.youtube.com/watch?v=13WdVMkNK44 |
|
| |
|
| |


 Linear Mode


