|
This article was written by ROKTOY (Jay Kopycinski), and was originally posted on his site Jay's RC CRAWLER PAGE. He has given us permission to host it here on our site, since a bunch of people from RCCrawler.com have shown interest in it. Note: Click on any of the pictures to see them in a larger size.
A lot of people have asked me about scale chassis construction. I thought I'd put together some basic info on the subject. My experience has been with mild steel and stainless steel tubing only. As such, I have no experience with brass or aluminum construction. |
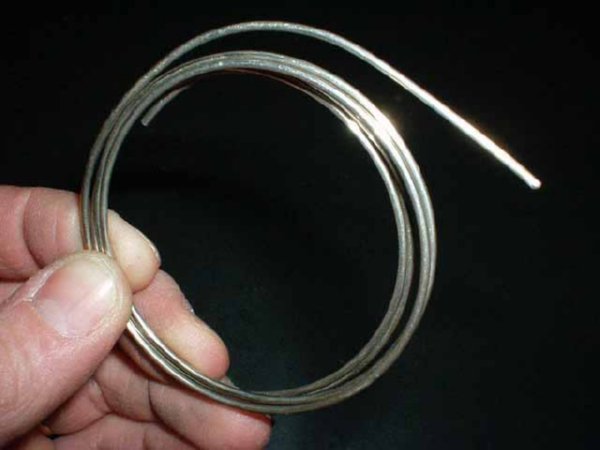
I have often used mild steel automotive brake line to fabricate tube chassis pieces. This works well and is easy to work with. I have found it does vary by manufacturer as far as stiffness and outer coating. You'll want to sand off the paint or coating on the ends prior to brazing it.
NOTE: Burning zinc galvanized coating can produce toxic fumes. Care should be taken to remove the coating or take care not to inhale any fumes. Stainless tubing is stronger than the brake line and has no coating issues to deal with.
|
|
| As a heat source I use a micro-torch fueled by oxy-acetylene. This provides more than enough heat to do brazing at the scale I work. I use 1/16" diameter Harris Safety-Silv 56 brazing rod. This rod melts at about 1200 deg F. It is a high silver content brazing rod that flows well on carbon and stainless steels. I buy it at my local welding shop for about $12 per one ounce canister. I use the matching white Harris flux with the brazing rod. (Note: Some people have had problems with hardened residual flux left on their tubing. Make sure you are using a flux that matches the brazing rod you are using and try to avoid overheating the joint.) |
|
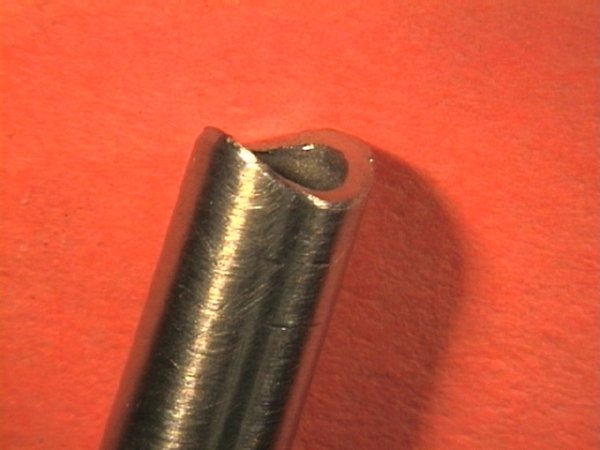
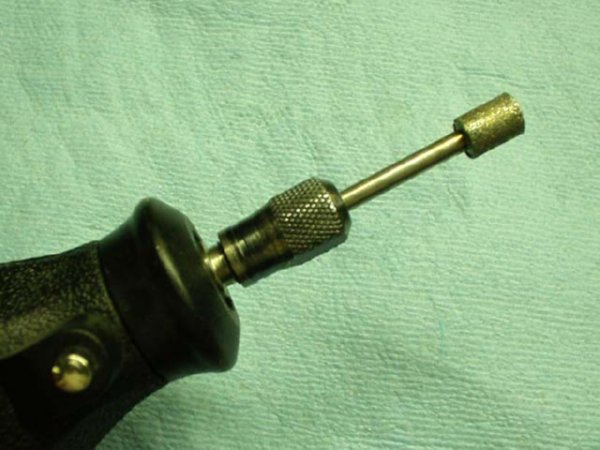
| A typical tubing cutter, as shown here, is the cleanest way to make most cuts. However, you can use a Dremel or die grinder with cut-off blade, hacksaw, etc. For mating tube joints, it is best to fish-mouth the tube so the two pieces mate very close. This will also provide the greatest strength at the joint. This take a little practice, especially when mating at an angle other than perpendicular. I have cut fish-mouths using a 1/4" rat tail file, Dremel tool, abrasive cut-off blade in a table saw, and with an end mill bit. |
|
| Bending steel tubing is fairly easy, it just takes a little practice and patience. I have several automotive hand tubing benders that work very well. Try a few bends and you'll get the hang of the bending dimensions. I also recommend bending hoops starting from the centerline and working each direction with the bends. You'll find that each bend will have a slight directionality and bending from the center out in each direction will keep the hoop more symmetric. I also occasionally hand bend tubing around solid round stock, as needed, for oddball shapes or radii. The form below is made from two pieces of aluminum rod and a piece of steel plate. I use it to bend stick pack cradles. |
|
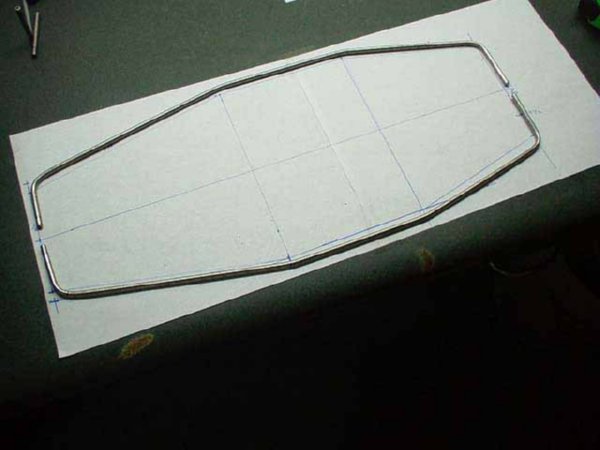
When starting a scratch chassis, I will often build the main horizonatal structure as shown here. In this case, I will build it in two halves and splice the two halves by splinting the tube with a piece of solid rod inside.
I usually plan my main horizontal structure on paper and use it as a guide when bending the initial pieces. From there I may work from other drawings, sketches, or may just design on-the-fly. |
|
| Holding pieces in place while brazing is one of the trickiest parts of building a chassis. I usually work on a piece of sheet steel and use various methods to hold the tube in place. I use scraps of steel plate, box tube, welding magnets, small c-clamps, and bailing wire as holding aids. Your ingenuity will help here as you try different configurations. |
| As I work and assemble each piece, I usually try to check dimensions with a tape measure or caliper and also eye-ball the chassis for straightness and symmetry. An angle finder can be useful as well. Checking often will help you discover an error before you add more tubing to the assembly. |
|
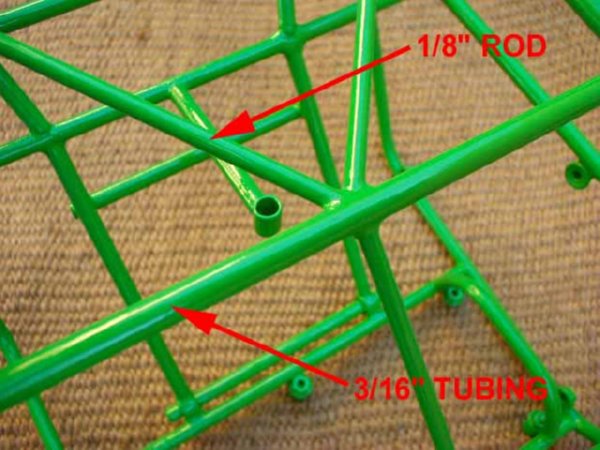
I typically use 3/16" size tubing, but have built with 1/4" tubing and one large chassis with 5/16" tubing. For small braces I sometimes use 1/8" solid steel rod. I fish-mouth all the tube, but find it unnecessary when using the smaller rod. I will grind it at an angle for a closer mating fit. Mounts can be added by brazing sheet steel to the chassis. I have also brazed small nuts on the tube for holding body panels and such.
Thanks for reading!
UPDATE 4/10/05
Q: What is the difference between using solid rod and tubing?
A: Solid steel rod is cheaper, but heavier than steel tubing. As a rule of thumb for the scale and size tube we're talking about, a tube chassis will be roughly half the weight of a solid rod chassis. The solid rod will only be a bit stronger than an identical tube chassis. For a performance chassis, tubing is the way to go.
Q: Why is it necessary to fishmouth the tube or rod when brazing?
A: Fishmouthing the rod or tube allows the joints to mate much better and strength will be improved. The brazing rod I use is not meant to bridge large gaps in the structure. (Some available alloys work better to bridge gaps if you have poor fitting joints.) Time spent fishmouthing will also make your joints look better. As I mentioned in the article, I don't bother to fishmouth 1/8 rod, but I will angle cut it if when needed for a better fit.
Q: What brazing compounds can I use?
A: There is a wide range available depending on what you're trying to work on. I have had good luck with Safety-Silv 56 and continue to use it. You can see info on other types here:
http://www.jwharris.com/welref/techguide/silver_braz/
Q: When brazing, is there a certain method which is better to use?
Is the method used as follows- clean joints (bare metal),flux, heat, apply brazing rod?
A: To get a good joint, you want the tubing to be very clean. When using brakeline that is galvanized, it is best to use sandpaper to remove the plating near the end of the tube. Oil and any other coatings should be removed using a residue free solvent. Apply a liberal coating of flux to the tube ends (maybe ¼ or so). Better to have more flux than not enough. The molten brazing material will flow well only where the flux has been applied. With the joints in place, start applying heat to the joint. Once the flux starts to turn clear and flow, apply the brazing rod to the joint and allow it to start melting onto the joint. As with electrical soldering, you want to apply the majority of the heat to the joint area instead of the brazing rod. The molten metal will generally flow and follow the direction of heat. Do not overheat the joint. You do not want the metal red hot. If you apply too much heat, you will burn the flux and the molten metal will not flow as smoothly. You can tell you burned the flux if it turns black and/or is very difficult to remove. You can often take a heated joint and douse it in water about 15 seconds later. Much of the flux will often wash right off fairly easily. If you are applying reasonable heat and the molten metal will not flow well to an area, it is most likely due to a dirty surface or lack of flux on the area.
Q: Do you heat up only one side of the joint? If so, does it matter which side?
A: I generally move the micro torch around the joint area across both (all) the pieces, taking care not to apply too much heat in an area where there may be other joints nearby. If one of the pieces is significantly larger than the other piece in the area of the weld, you will want to apply proportionately more heat to the larger piece so that both pieces heat fairly evenly, without getting the smaller one too hot. With practice you'll learn to steer the molten metal where you want it to flow using your torch and gravity.
Q: Is it better to apply the brazing rod to the top, which allows the rod to flow better around to the bottom?
A: I generally do apply the brazing rod to the top whenever possible. You always have gravity to pull the molten metal downward. If you apply too much metal and let it flow too hotly it can run and droop on the bottom of the joint. Fortunately, you can pickup the little chassis and turn it as needed, unless this is the first joint being soldered on the tube and it will not hold position. In such a case, I usually let the joint harden, weld the other end of the tube, and then return and remelt and flow the first joint when I'm able to turn the chassis freely.
Q: How do you build a tube chassis with a MIG welder?
A: I have never built a chassis using a MIG welder, but have stuck a few tubes together to see what it would be like. The one advantage I see to welding a chassis versus brazing is that you can hold two pieces in place and quickly tack them together. Strength can be good, but welding thin-wall tube without burn-through takes some practice and technique. I see three significant downsides to welding a scale chassis: (1) chassis revisions take more work to cut apart and clean up, (2) the little nooks and crannies are hard to access to weld with the relatively large welding nozzle, and (3) weld joints are over-scale large and may often require grinder cleanup to get a cleaner joint. If you want to build a chassis with a MIG I would just get some material and start practicing. |
Copyright (c) 2003 by Jay Kopycinski, All Rights Reserved.
|
|