Post all the pictures of your SCX10 III here!
-
Welcome to RCCrawler Forums.
It looks like you're enjoying RCCrawler's Forums but haven't created an account yet. Why not take a minute to register for your own free account now? As a member you get free access to all of our forums and posts plus the ability to post your own messages, communicate directly with other members, and much more. Register now!
Already a member? Login at the top of this page to stop seeing this message.
You are using an out of date browser. It may not display this or other websites correctly.
You should upgrade or use an alternative browser.
You should upgrade or use an alternative browser.
Axial SCX10 III Picture Archive (NO TALKING)
- Thread starter 1BadJeepBruiser
- Start date


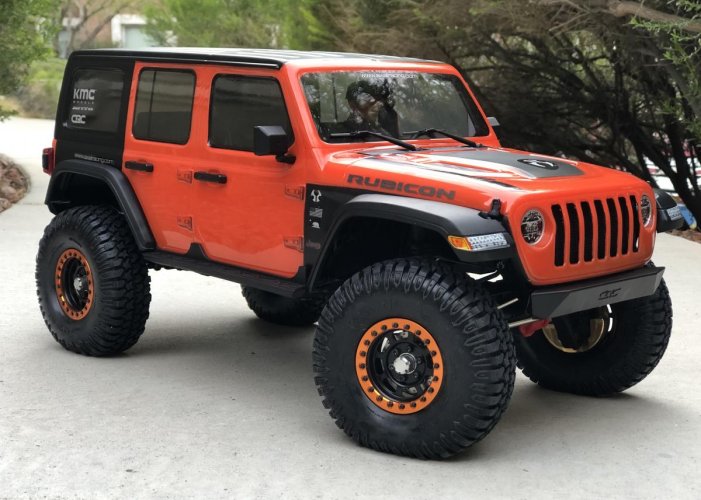
All done. I went with the basic Duratrax Racing Red like I do nearly every truck I paint.


I have never tried to mix up a flesh tone before. The tinted windows make my driver look a little less sickly than he did before, so I have that going for me. Which is nice.

I have never tried to mix up a flesh tone before. The tinted windows make my driver look a little less sickly than he did before, so I have that going for me. Which is nice.
Ambis
Pebble Pounder
This is painted with Tamiya PS-60 Mica Red with PS-5 black right after it.
Let me tell you: One 100ml Tamiya can is not enough There's a few spots where the black underneath shows through. It's luckily not that bad from a meter away. I wish I wasn't so impatient that I would've just order one more and waited a couple of days to get it and get a proper coverage
Still need to paint the driver, after that the interior is done and ready to bolt into the body.


Let me tell you: One 100ml Tamiya can is not enough
There's a few spots where the black underneath shows through. It's luckily not that bad from a meter away. I wish I wasn't so impatient that I would've just order one more and waited a couple of days to get it and get a proper coverage Still need to paint the driver, after that the interior is done and ready to bolt into the body.


Topher Builds
I wanna be Dave
^ I agree. 5 oz or 160ml cans would be nice. Looks good though.
Adding a few pics for good measure
Adding a few pics for good measure
Attachments


TunedUpDiesel
Newbie
<blockquote class="imgur-embed-pub" lang="en" data-id="a/PdqFb6F" data-context="false" ><a href="//imgur.com/a/PdqFb6F"></a></blockquote><script async src="//s.imgur.com/min/embed.js" charset="utf-8"></script>
<blockquote class="imgur-embed-pub" lang="en" data-id="a/NKpPV9z" data-context="false" ><a href="//imgur.com/a/NKpPV9z"></a></blockquote><script async src="//s.imgur.com/min/embed.js" charset="utf-8"></script>
<blockquote class="imgur-embed-pub" lang="en" data-id="a/NKpPV9z" data-context="false" ><a href="//imgur.com/a/NKpPV9z"></a></blockquote><script async src="//s.imgur.com/min/embed.js" charset="utf-8"></script>
Last edited:


Ambis
Pebble Pounder
Still need to paint the driver, after that the interior is done and ready to bolt into the body.
Driver painted. Adding a matt varnish to the topside of the interior removes the unnatural shine on everything (incl. the glossy stickers) and helps the acrylic paints to stick to the driver better.


Nappy
Pebble Pounder
JSterrett
Rock Crawler
Paint's done, now just needs the final details assembled, almost there...


Sent from my SM-G970U using Tapatalk
Sent from my SM-G970U using Tapatalk
JSterrett
Rock Crawler
Done (for now).


Sent from my SM-G970U using Tapatalk
Sent from my SM-G970U using Tapatalk

Toadady
Newbie


Last edited:
$uicide $hift
Quarry Creeper
Still working on the interior but I do love this new release from Axial! Two Thumps Up! "thumbsup""thumbsup"

Last edited:
2mtech
RCC Addict


$uicide $hift
Quarry Creeper
Finally got the interior done and the little dude all painted up


Last edited:
Similar threads
- Replies
- 76
- Views
- 12K